Loading ...
Loading ...
Loading ...
5
Checking for Gas Leaks
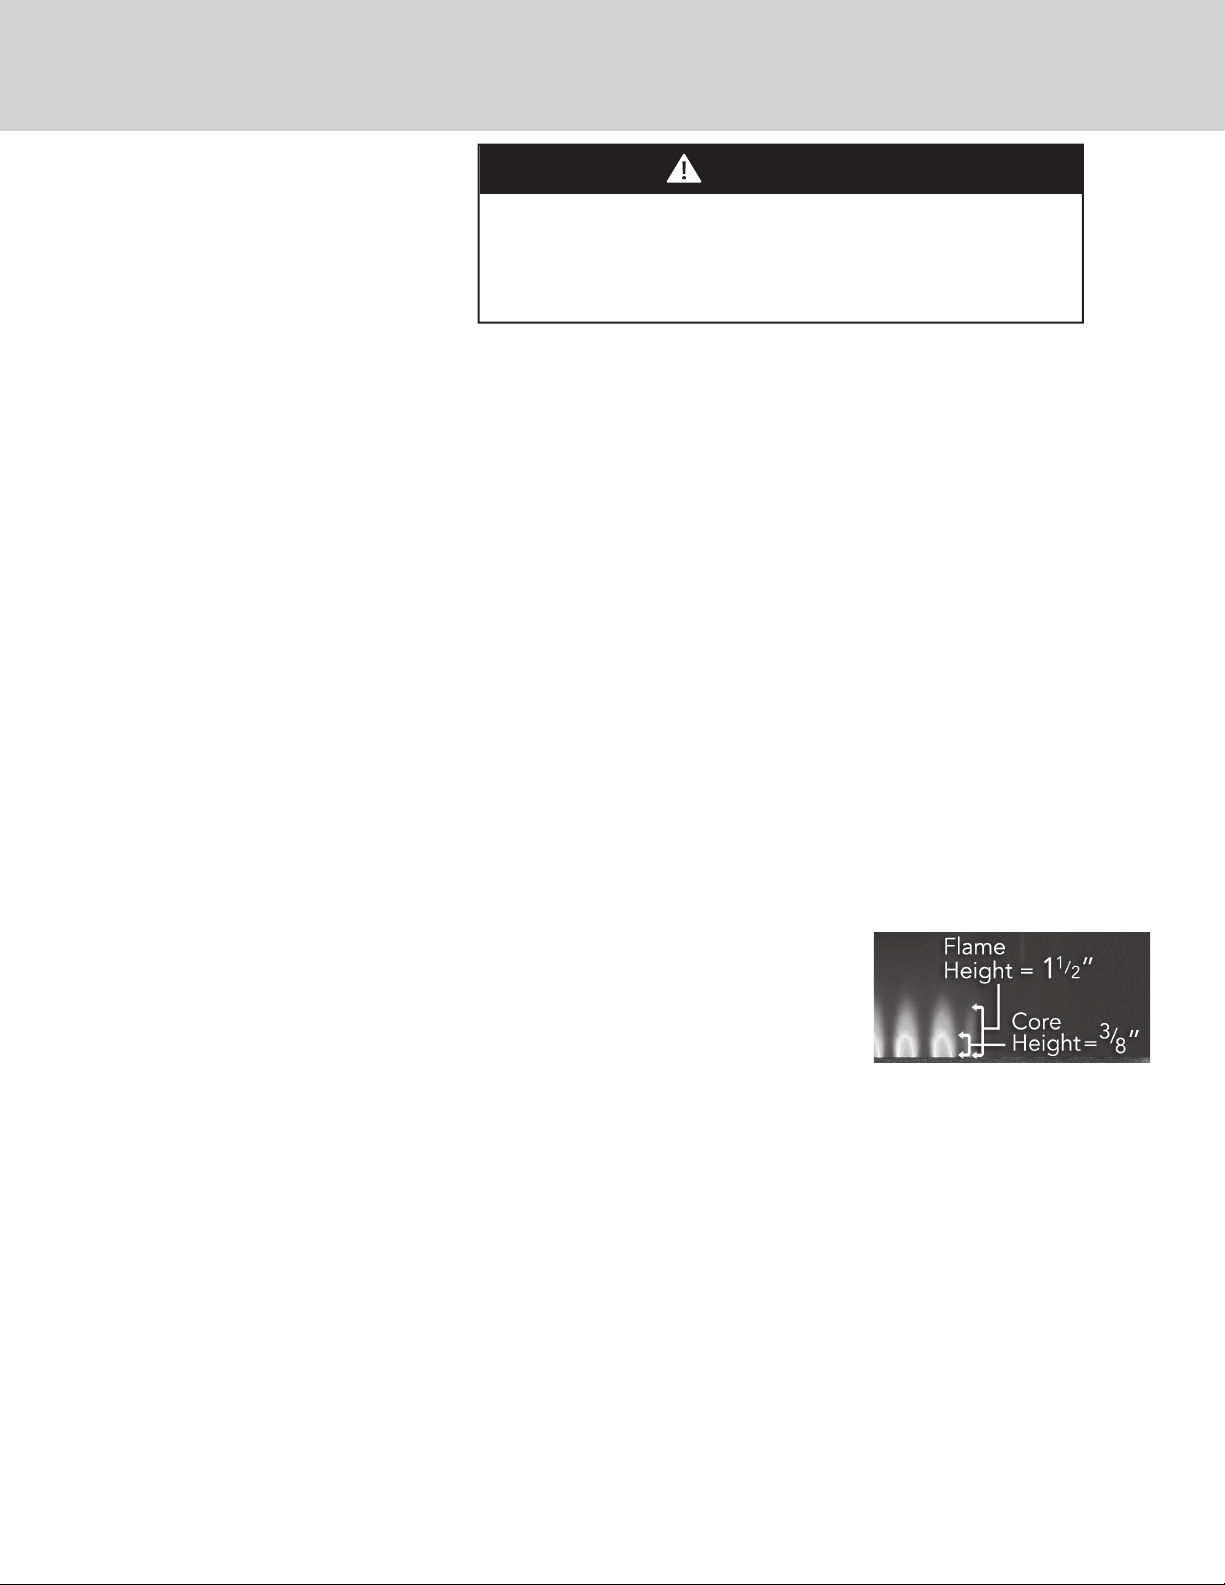
•ADJUSTING BURNER FLAME
• Replace the burners. Light the grill to check ame height. Adjust low ame height with the 3/32” slot blade screw driver.
• Turn the burner valve to the low position. Hold the valve stem in position by hand and insert the screwdriver into the hole in
the valve stem. Turn the screwdriver right or clockwise to reduce ame and left or counter
clockwise to increase ame height.
• Open and close each valve twice to insure the ame height did not change. Re-install all parts
and replace all panels removed
WARNING
To prevent re or explosion hazard, DO NOT smoke or allow
any potential source of ignition (sparks, electrical arcing, etc)
in the area while performing a leak test. Leak tests should be
conducted outdoors only. Never conduct a leak test using re or
ame.
Li
gh
tin
g
Your Gri
ll
For the Main Burner, ProSear™ /Trident Burner or Accessory Burners:
Push and hold the control knob in for 5-7 seconds, allowing the igniter to heat up. Then rotate the knob to “LITE”. After ignition, set
the knob to the desired heat setting.
For the Rotisserie Burner:
The rotisserie burner features a thermocouple sensor with a safety valve that automatically shuts o the ow of gas if the burner
goes out.
To light the rotisserie burner, push and hold the control knob in for 2 seconds and then turn the knob to the “LITE” position.
After ignition CONTINUE HOLDING THE CONTROL KNOB IN for 30 to 60 seconds. During this time the thermocouple will heat up
and the safety valve will remain open.
If you release the control knob before the thermocouple has heated up, the safety valve will shut o the ow of gas to the rotisserie
burner and you will have to re-light the burner.
Create a soapy solution of 1 part soap and 3 parts water.
• Con rm that all control knobs are in the o position.
• Turn on the fuel supply. For natural gas, turn the valve handle 1/4 turn to align with the gas ow.
• For L.P., turn the cylinder valve knob counter clockwise one full rotation.
• Apply the soap solution generously by paint brush or squirt bottle on all connections and ttings.
• If bubbles appear to “grow” on any of the connections, you have a gas leak. IMMEDIATELY turn o the gas supply.
Fixing a Gas Leak:
• Shut o the gas supply
• Turn all grill controls to the “ON” position to purge the grill of any gas build-up, then turn the controls back “OFF”.
• Wash o the soapy solution with cold water and dry.
• Tighten the loose joint, or replace the faulty part with manufacturer-recommended replacement parts.
• DO NOT attempt to repair the L.P. cylinder valve if it is damaged. The only way to safely resolve a damaged cylinder is to REPLACE IT.
• Repeat the leak test to ensure that no leaks are present.
Loading ...