Loading ...
Loading ...
Loading ...
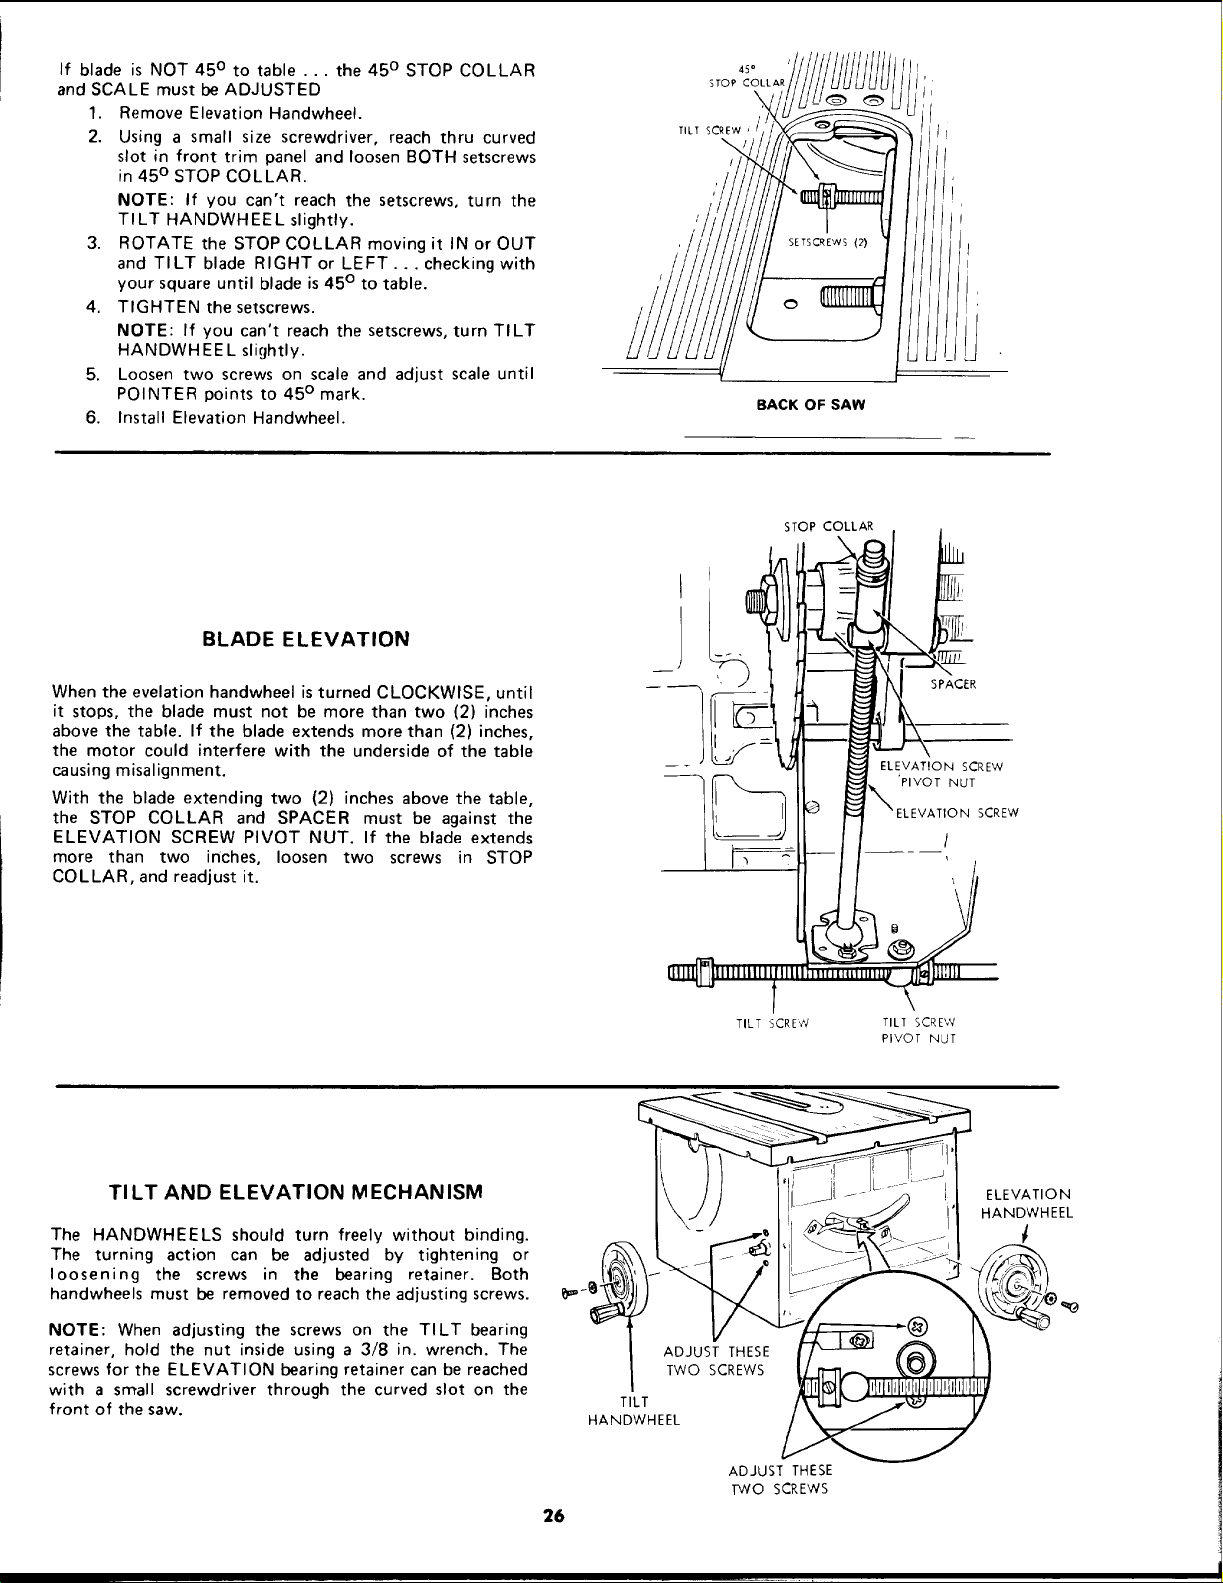
If blade is NOT 45 ° to table ... the 45 ° STOP COLLAR
and SCALE must be ADJUSTED
1. Remove Elevation Handwheel.
2. Using a small size screwdriver, reach thru curved
slot in front trim panel and loosen BOTH setscrews
in 45 ° STOP COLLAR.
NOTE: If you can't reach the setscrews, turn the
TILT HANDWHEEL slightly.
3. ROTATE the STOP COLLAR moving it IN or OUT
and TILT blade RIGHT or LEFT... checking with
your square until blade is 45 ° to table.
4. TIGHTEN the setscrews.
NOTE: If you can't reach the setscrews, turn TILT
HANDWHEEL slightly.
5. Loosen two screws on scale and adjust scale until
POINTER points to 45 ° mark.
6. Install Elevation Handwheel.
45°
STOP COLLAR
\
TILT SCREW '
BACK OF SAW
J
STOP COLLAR
BLADE ELEVATION
When the evelation handwheel is turned CLOCKWISE, until
it stops, the blade must not be more than two (2) inches
above the table. If the blade extends more than (2) inches,
the motor could interfere with the underside of the table
causing misalignment.
With the blade extending two (2) inches above the table,
the STOP COLLAR and SPACER must be against the
ELEVATION SCREW PIVOT NUT. If the blade extends
more than two inches, loosen two screws in STOP
COLLAR, and readjust it.
SPACER
ELEVATION SCREW
"PIVOT NUT
SCREW
TILT SCREvV
TILT SCREW
PIVOT NUT
TILT AND ELEVATION MECHANISM
The HANDWHEELS should turn freely without binding.
The turning action can be adjusted by tightening or
loosening the screws in the bearing retainer. Both
handwheels must be removed to reach the adjusting screws.
NOTE: When adjusting the screws on the TILT bearing
retainer, hold the nut inside using a 3/8 in. wrench. The
screws for the ELEVATION bearing retainer can be reached
with a small screwdriver through the curved slot on the
front of the saw.
ADJUST THESE
TWO SCREWS
TILT
HANDWHEEL
ELEVATION
HANDWHEEL
26
ADJUST THESE
1M/O SCREWS
Loading ...
Loading ...
Loading ...