2209477 www.kitchenaid.com
36
" (91.4 cm)
, 42
" (106.7 cm)
, 48
"
(121.9
cm
)
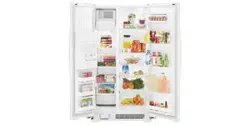
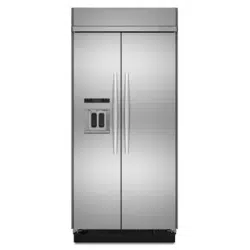
side-by-side
built-in refrigerators
with water filtration
For the way it’s made
®
®

2
A N
OTE TO
Y
OU
Thank you for buying a KitchenAid
®
appliance.
KitchenAid designs the best tools for the most important
room in your house.To ensure that you enjoy years of
trouble-free operation, we developed this Use and Care
Guide. It contains valuable information about how to
operate and maintain your appliance properly and safely.
Please read it carefully.
Also, please complete and mail the Product Registration
Card provided with your appliance.The card helps us
notify you about any new information for your appliance.
Record your model’s information.
Write down the following information about your refrigera-
tor to better help you obtain assistance or service if you
ever need it.You will need to know your complete model
number and serial number.You can find this information
on the model and serial number label/plate.
If you need assistance or service, first see the
“Troubleshooting” section of this book. After checking
“Troubleshooting,” additional help can be found by
checking the “Requesting Assistance or Service” section.
Dealer name
Address
Phone number
Model number
Serial number
Purchase date
(See the “Parts and Features” section for model and serial
number label/plate location.)
Keep this book and your sales slip
together for future reference.
Page
A Note to You.................................................................... 2
Refrigerator Safety......................................................... 3
Proper disposal of your old refrigerator....................... 3
Parts and Features......................................................... 4
Using Your Refrigerator.................................................. 5
Removing the upper ventilation panel......................... 5
Using the Power On/Off Switch................................... 5
ExtendFresh*
Temperature Management System............................. 6
Setting temperature controls....................................... 6
Refrigerator features................................................... 7
Utility compartment.............................................. 7
Door bins............................................................... 7
SpillClean* glass refrigerator shelves.................. 7
FreshChill* Meat Locker....................................... 8
Humidity-controlled
ClearVue* crispers................................................ 9
Covered egg container.........................................10
Wine rack.............................................................10
Freezer features..........................................................10
Freezer shelves....................................................10
Pull-out freezer baskets........................................10
Page
Automatic ice maker ......................................................11
Solving common ice maker problems.........................11
Removing the ice maker storage bin...........................12
Ice and cold water dispensers ....................................13
Water Filtration and Monitoring System ......................15
Base grille.....................................................................16
Defrost pan...................................................................17
Light bulbs...................................................................17
Understanding the sounds you may hear...................18
Saving energy.................................................................18
Caring for Your Refrigerator.............................................19
Cleaning your refrigerator...........................................19
Vacation and moving care............................................20
Power Interruptions.....................................................20
Food Storage Guide.......................................................21
Storing fresh food..........................................................21
Storing frozen food........................................................22
Troubleshooting Guide.......................................................23
Requesting Assistance or Service ...............................28
Warranty..........................................................................30
T
ABLE OF
C
ONTENTS
3
•
Plug into grounded 3 prong outlet.
•
Do not remove ground prong.
•
Do not use an adapter.
•
Do not use an extension cord.
•
Disconnect power before servicing.
•
Remove doors from your old refrigerator.
•
Use nonflammable cleaner only.
•
Do not install the refrigerator near an oven,
radiator, or other heat source.
•
Keep flammable materials and vapors, such as
gasoline, away from refrigerator.
•
Use two or more people to move or install
refrigerator.
•
Unplug refrigerator before installing ice maker.
•
Use a sturdy glass when dispensing ice or water
(on some models).
IMPORTANT SAFETY INSTRUCTIONS
You can be killed or seriously injured if you don’t follow
instructions.
DANGER
WARNING
Your safety and the safety of others is very important.
We have provided many important safety messages in this manual and on your appliance. Always read and obey all safety
messages.
This is the safety alert symbol. This symbol alerts you to potential hazards that can kill or hurt you and others. All safety
messages follow the safety alert symbol and either the word “DANGER” or “WARNING”. These words mean:
All safety messages will tell you what the potential hazard is, tell you how to reduce the chance of injury, and tell you what can
happen if the instructions are not followed.
You can be killed or seriously injured if you don’t
immediately
follow instructions.
R
EFRIGERATOR
S
AFETY
Suffocation Hazard
Remove doors from your old refrigerator.
Failure to do so can result in death or brain
damage.
Proper disposal of your old refrigerator
IMPORTANT: Child entrapment and suffocation are not
problems of the past. Junked or abandoned refrigerators
are still dangerous... even if they will sit for “just a few
days.” If you are getting rid of your old refrigerator, please
follow the instructions below to help prevent accidents.
BEFORE YOU THROW AWAY YOUR OLD
REFRIGERATOR OR FREEZER:
•
Take off the doors.
•
Leave the shelves in place so that children may not
easily climb inside.
WARNING
– SAVE THESE INSTRUCTIONS –
WARNING: To reduce the risk of fire, electric shock, or injury when using your refrigerator, follow these
basic precautions:
4
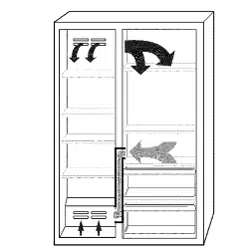
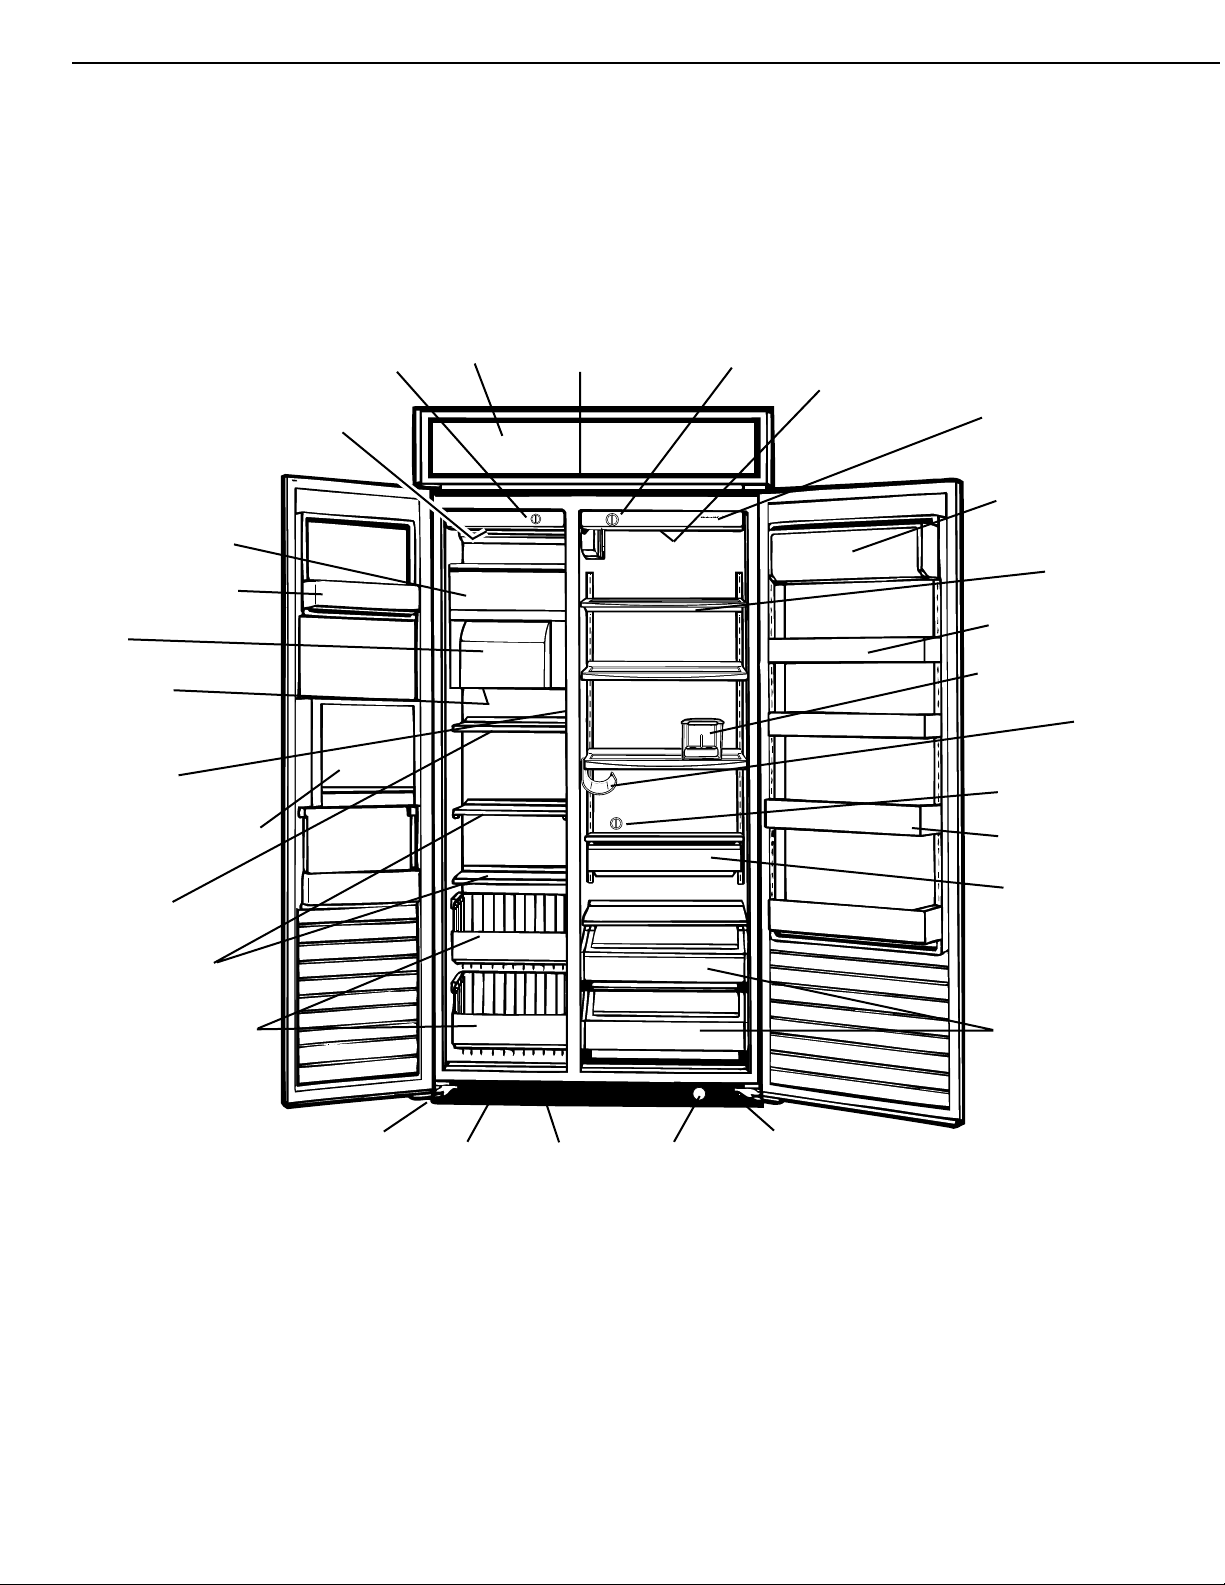
This section contains an illustration of your refrigerator.
Use it to become more familiar with the parts and features.
Page references are included for your convenience.
NOTE: This manual covers several different models.The
refrigerator you have purchased may have some or all of
the parts and features listed below.
24
51
Cold Colder
▲
Superba 48
24
51
Cold Colder
Off
▲
Cold Colder
FreshChill
Meat Locker
ExtendFresh
Temperature System
▲
Automatic ice maker
(p. 11)
Stationary door shelf
(not removable)
Ice bin
(p. 12)
Freezer light
(below ice bin)
(p. 17)
Model and serial
number label
(p. 2)
Water and ice dispenser
area (on some models)
(p. 13)
Adjustable
freezer shelf
(p. 10)
Stationary freezer
shelves
(p. 10)
Pull-out freezer baskets
(p. 10)
Utility compartment
(p. 7)
Adjustable SpillClean*
glass shelves
(p. 7)
Adjustable door bins
(p. 7)
Covered egg container
(p. 10)
Wine rack
(p. 10)
FreshChill* meat locker
temperature control
(p. 8)
Gallon door bin
(p. 7)
Roll-out adjustable
FreshChill* Meat Locker
(p. 8)
Roll-out humidity
controlled ClearVue*
crispers
(p. 9)
Freezer light
(behind control
panel)
(p. 17)
Freezer
control
(p. 6)
Upper
ventilation
panel
(p. 5)
Power on/off
switch (behind
upper ventilation
panel)
(p. 5)
Refrigerator
control
(p. 6)
Refrigerator
light (behind
control panel)
(p. 17)
Water filter
indicator light
(p. 15)
Water/electrical
dispenser
supply tube
(behind base
grille)
Defrost pan
(behind base
grille)
(p. 17)
Base grille
(p. 16)
Water valve
(behind base
grille)
P
ARTS AND
F
EATURES
Water
filtration
and
Monitoring
System
(p. 15)
5
Electrical Shock Hazard
Plug into a grounded 3 prong outlet.
Do not remove ground prong.
Do not use an adapter.
Do not use an extension cord.
Failure to follow these instructions can result in
death, fire, or electrical shock.
To obtain the best possible results from your refrigerator, it
is important that you operate it properly.This section tells
you how to set the controls, remove and adjust the
features in your refrigerator, and how to save energy.
Explosion Hazard
Keep flammable materials and vapors, such as
gasoline, away from refrigerator.
Failure to do so can result in death, explosion, or
fire.
WARNING
U
SING YOUR REFRIGERATOR
WARNING
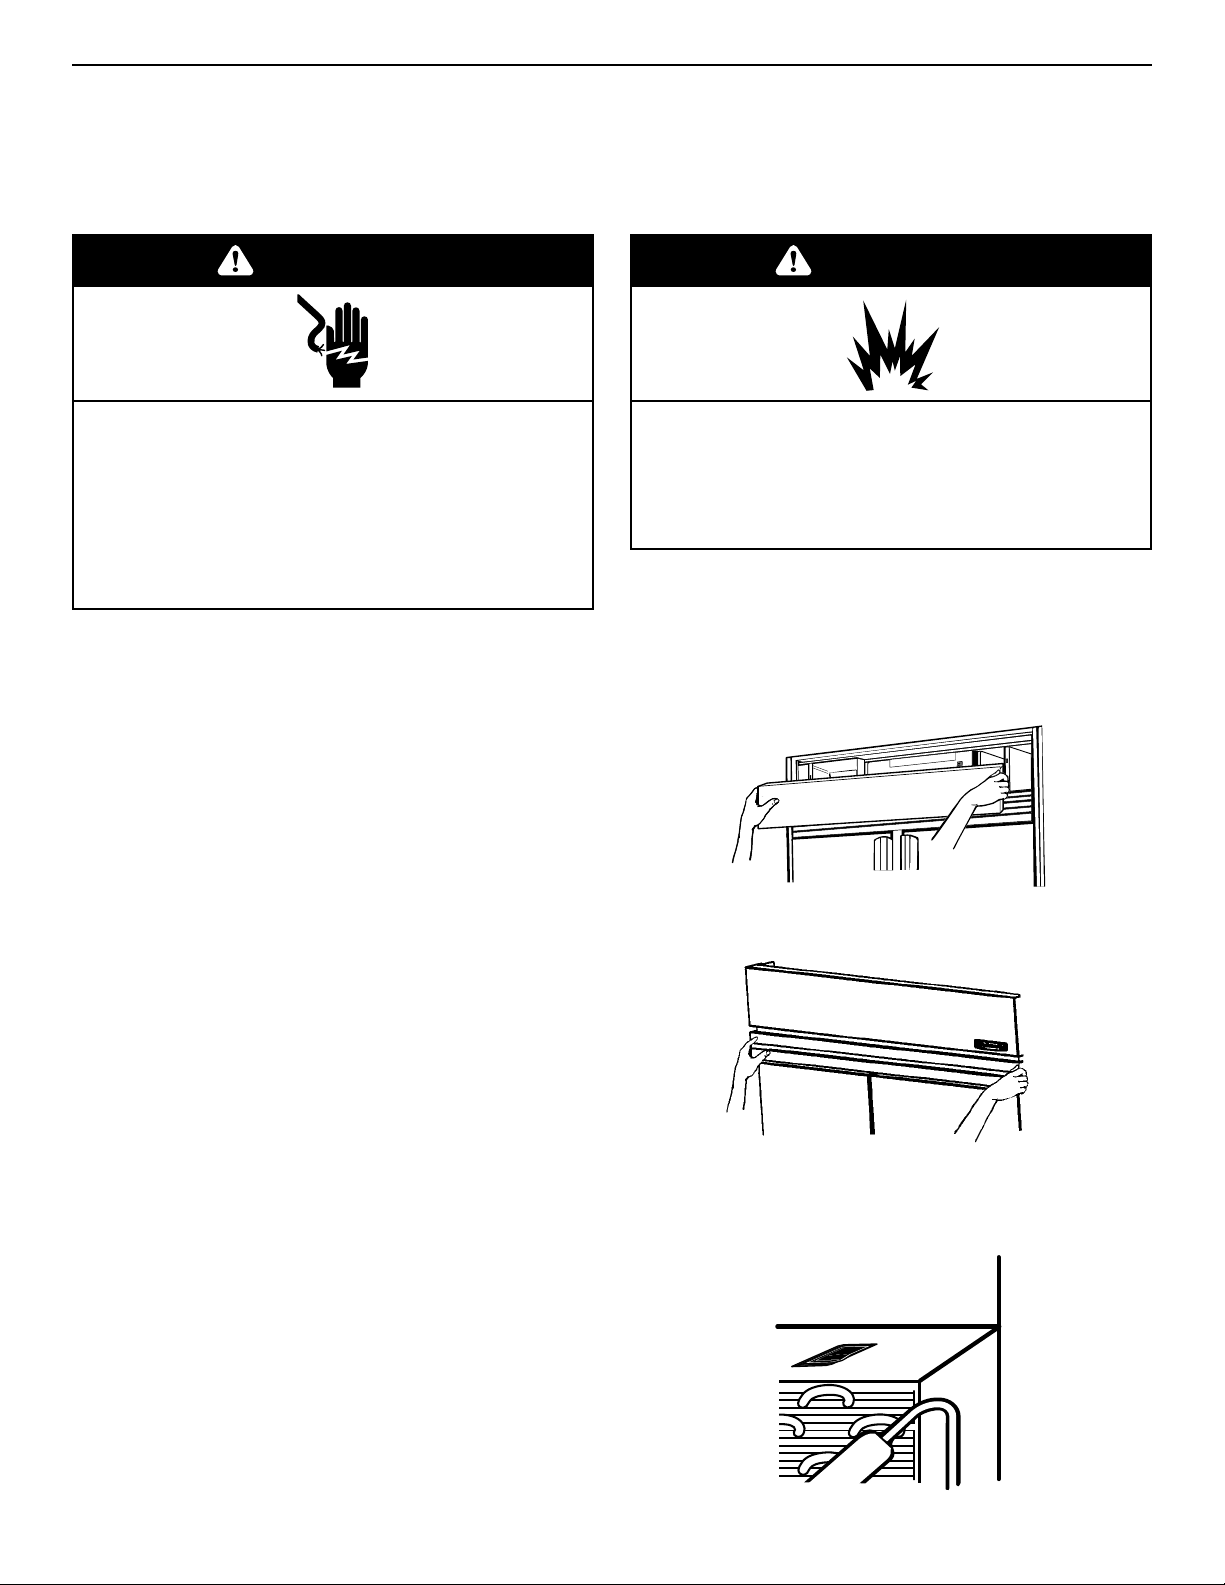
Panel models —
To remove:
1. Grasp both ends of the panel.
2. Push straight up, then pull straight out.
To replace:
1. Insert hooks (located on back of ventilation panel) into
bracket slots.
2. Pull panel down slightly to lock into place.
Wraparound metal door models —
KSSC36F, KSSC42F, KSSC48F
To remove:
1. Grasp both ends of the louver panel.
2. Push straight up, then pull straight out.
To replace:
1. Insert hooks (located on back of louver panel) into slots on
side trim.
2. Pull louver panel down slightly to lock into place.
Removing the upper ventilation panel
O
FF
O
N
Using the Power On/Off Switch
The Power On/Off Switch is located behind the upper
ventilation panel. It is used to turn the power to the
refrigerator off when cleaning it or changing light bulbs.
To turn power off:
1. Remove upper ventilation panel from panel models.
Remove lower panel from wrap- around stainless steel models.
2. Press Power On/Off Switch to “OFF” position.
To turn power on:
1. Press Power On/Off Switch to “ON” position.
2. Replace upper ventilation panel or lower panel.
IMPORTANT: Be sure the Power On/Off Switch is in the “ON”
position after cleaning refrigerator or changing light bulbs.
6
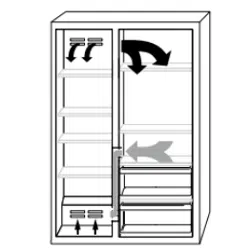
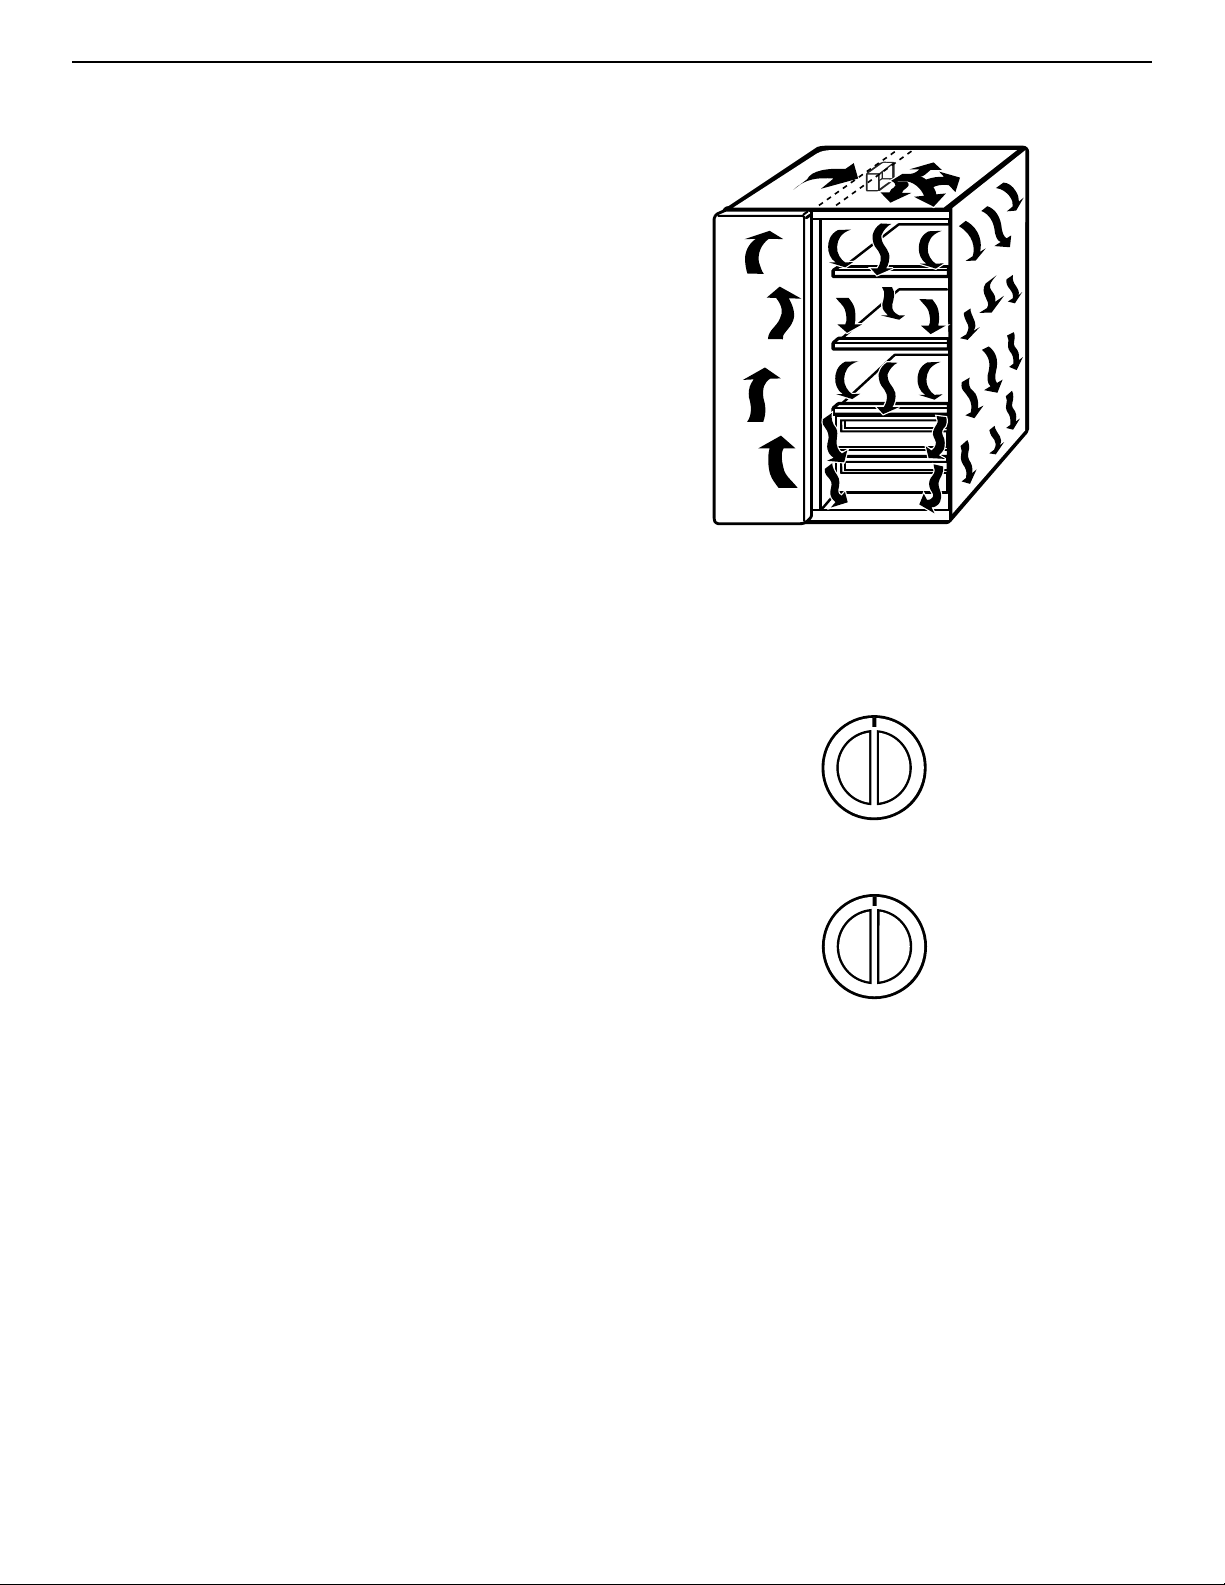
The ExtendFresh Temperature Management System
controls the temperature in both the refrigerator
compartment and the freezer compartment independently.
The system helps extend the freshness of the food in your
refrigerator by responding to temperature changes as
small as 1°F. Unlike most refrigerators on the market
today, the ExtendFresh System uses a Smart* Fan to
transfer cold air immediately from the freezer to the
refrigerator for faster response to temperature changes
without the need for the compressor to turn on. Also, the
system maintains consistent temperatures, which are less
affected by external temperature changes such as
seasonal changes and programmable home thermostats
or even the temperature of other compartments inside the
refrigerator.
EXTENDFRESH™ Temperature Management System
Setting temperature Controls
The Refrigerator and the Freezer Controls have been
preset at the factory. These settings should be correct for
normal household refrigerator use. Let the refrigerator
operate for 24 hours to cool both sections before
changing settings.
To change a temperature setting:
Adjust the Refrigerator and/or Freezer Control.
• To make the refrigerator or freezer colder, turn the
control knob clockwise.
• To make the refrigerator or freezer less cold, turn the
control knob counterclockwise.
IMPORTANT: The OFF setting on the Freezer Control
stops all cooling action in the refrigerator, but it does not
disconnect the refrigerator from the power supply.
If possible, wait to add food until after this 24-hour period.
Turning the controls to higher number settings will not
cool the sections faster. Adding foods before the
refrigerator has cooled completely could cause the
refrigerator to take longer to reach the desired
temperatures and cause some foods to spoil.
After 24 hours, adjust the controls, one number at a time
as desired. “1” is the warmest setting and “5” is the
coldest. Allow the refrigerator to operate for 24 hours after
each control change.
Cold Colder
Off
24
51
▲
Cold Colder
Off
24
51
▲
Refrigerator Control
Freezer Control
7
Refrigerator features
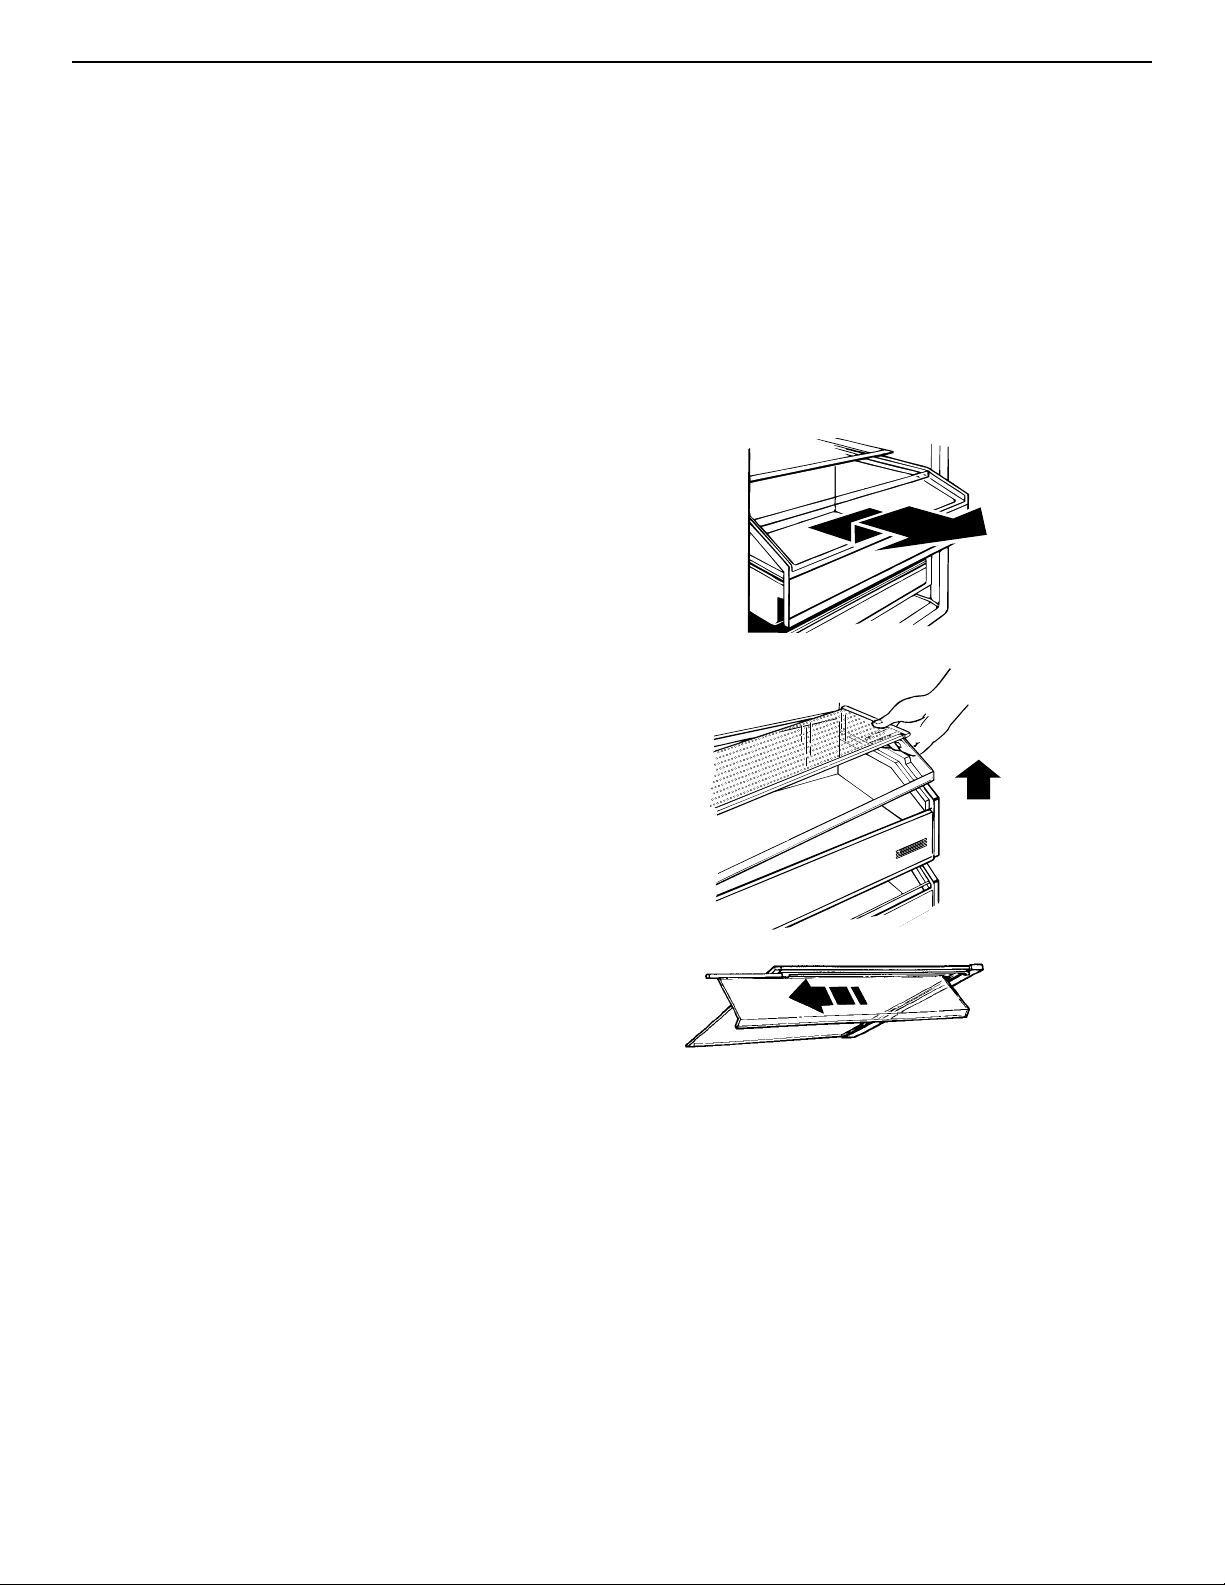
Utility compartment
The utility compartment can be placed in any position on the
refrigerator door.
To remove:
1. Grasp both ends of compartment.
2. Lift compartment up and pull out.
To replace:
1. Insert compartment hooks into ladder slots on both sides of
refrigerator door.
2. Push compartment down to lock into place.
Door bins
Door bins hold two-liter bottles and can be placed in any
position on the refrigerator door.
To remove:
1. Grasp door bin.
2. Lift door bin up and pull out.
To replace:
1. Insert door bin hooks into ladder slots on both sides of
refrigerator door.
2. Push door bin down to lock into place.
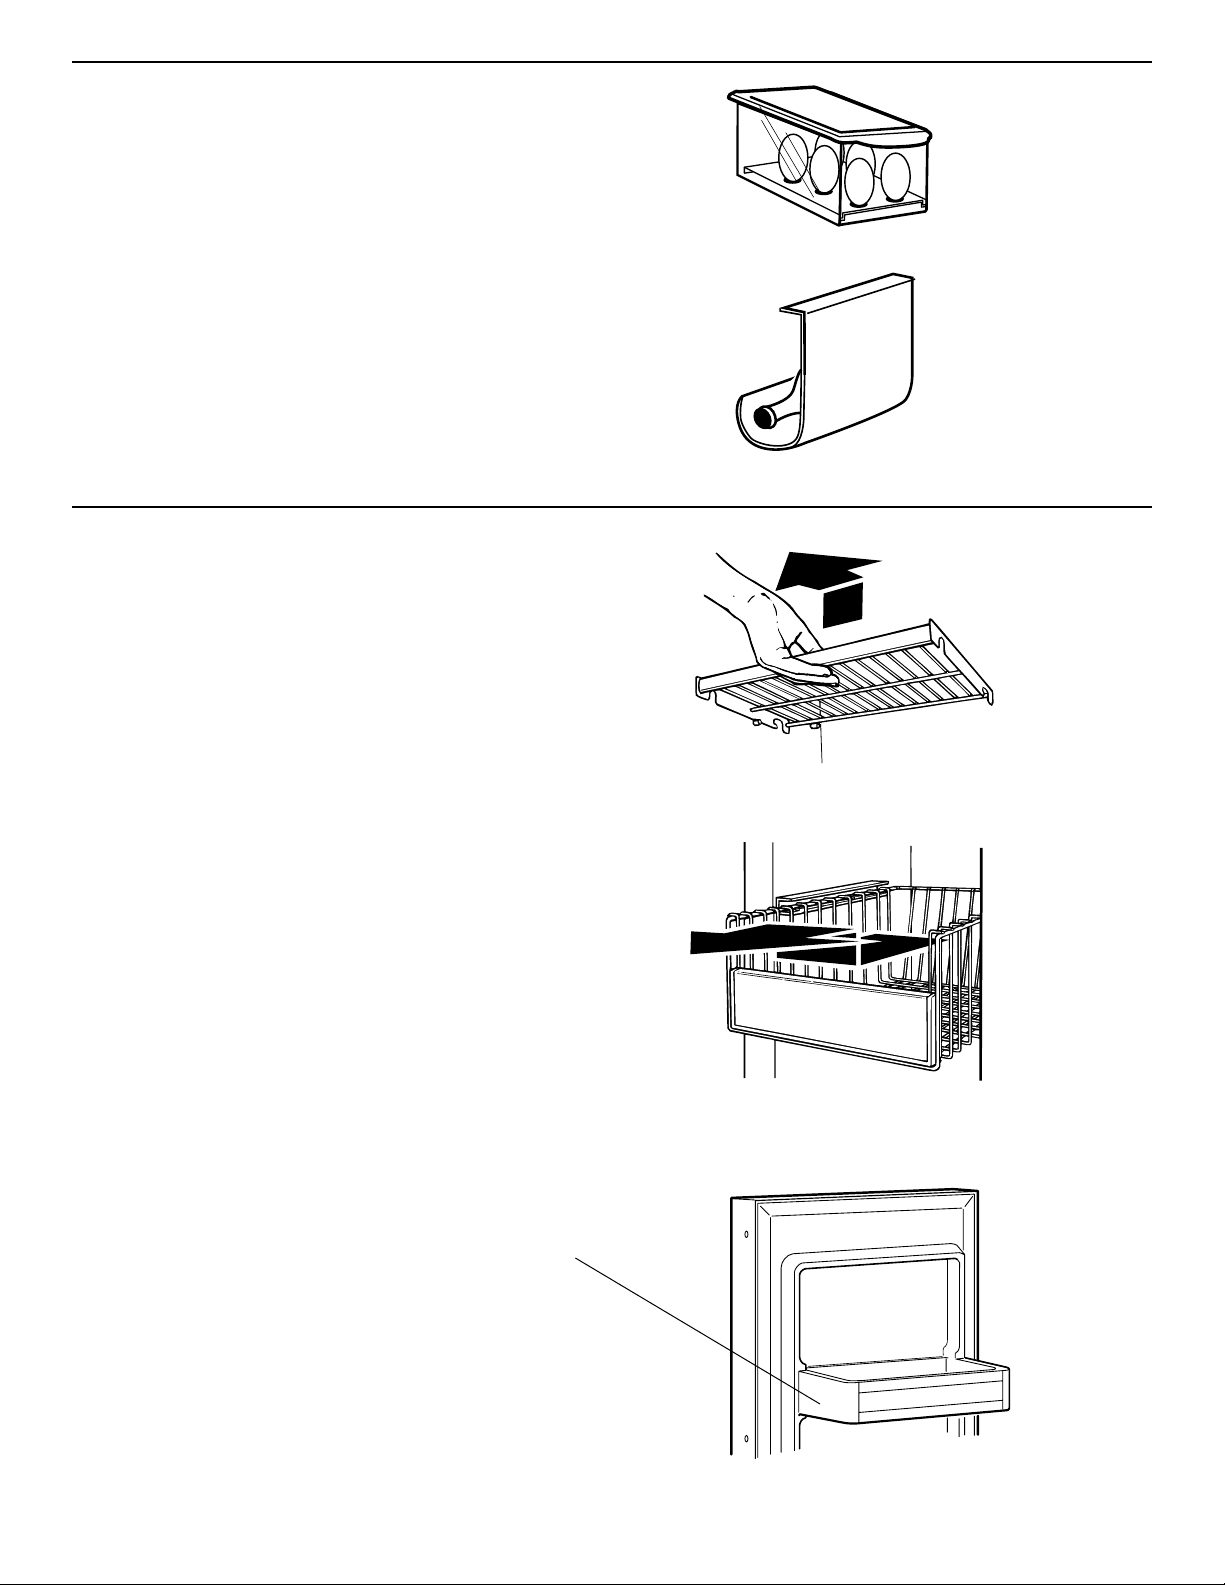
Gallon Door Bin
The gallon door bin holds several gallon-sized containers and
can be placed in any position on the refrigerator door.
Note: Positioning the gallon door bin directly across from an
interior shelf or covered storage bin will prevent the refrigerator
door from closing and could cause damage to bins and shelves.
To install:
1. Insert the attachment brackets into the adjustment slots on
the door.
2. Push down on the bin to secure tabs.
3. If necessary, adjust interior shelves to allow for milk jugs and
tall beverage containers stored in the gallon door bin.
SpillClean™
glass refrigerator shelves
Adjust the shelves to match the way you use your refrigerator.
IMPORTANT: Do not clean glass shelves with warm water
when they are cold. Shelves may break if exposed to sudden
temperature changes or impact. For your protection, tempered
glass is designed to shatter into many small pebble-sized
pieces.This is normal.
To remove:
1. Tilt shelf up at front and lift shelf up at back.
2. Pull shelf straight out.
IMPORTANT: Glass shelves are heavy. Handle them carefully.
To replace:
1. Guide the rear shelf hooks into slots in the shelf supports on
the back of the refrigerator wall.
2. Tilt shelf up at front until hooks drop into slots. Lower front of
shelf to level position.
3. Check the stability of the shelf to be sure hooks have been
inserted properly.
8
FreshChill™
Meat Locker
Setting the FreshChill™ Meat Locker
Temperature Control
The FreshChill Meat Locker Temperature Control allows
you to adjust the storage temperature of the FreshChill
meat locker.
Cold air flows into the meat locker through an air duct
between the freezer and the refrigerator. Setting the
control allows more or less cold air through the air duct.
Set the control to “Cold” to close the air duct.
IMPORTANT: If a food item freezes in the FreshChill Meat
Locker, utility drawer, or crisper, turn the FreshChill Meat
Locker Temperature Control to “Cold”. If the water
dispenser stops working, water in the line may have
frozen. If this happens, turn the FreshChill Meat Locker
Temperature Control to “Cold”.
The FreshChill Meat Locker is designed to provide colder
storage temperatures than the average refrigerator
temperature.The Meat Locker can be located in any set
of ladder slots. For temperature-controlled use,
however, the Meat Locker must be located in the
second to last (bottom) set of ladder slots. The
FreshChill Meat Locker can be removed for cleaning.
IMPORTANT: If the meat locker is placed in any set of
slots other than the second to last (bottom) set of ladder
slots, the air supply hole must be sealed. Use the plug
taped to the inside bottom of the meat locker to seal the
air supply hole.
The rubber air connector (located on back of meat locker)
directs air from the air supply hole into the meat locker. If
the air connector comes off, replace it by pushing it into
the square opening on back of meat locker.
To remove:
1. Roll meat locker out to the stop.
2. Lift front of meat locker slightly.
3. Pull meat locker out the rest of the way.
To replace:
1. Position meat locker rollers between front roller of track
and the track.
2. Push meat locker up and onto track.
3. Slide meat locker back until it stops.
M
E
A
T
L
O
C
K
E
R
9
Humidity-controlled
ClearVue™ crispers
The humidity-controlled crispers are designed to keep
fresh vegetables and fruits longer. The Crisper Controls
are located on the front of the crispers.The controls
adjust the humidity (moisture) in the drawers. Slide control
to “HIGH” for lettuce, cabbage and other produce that
have leaves. Slide control to “LOW” for apples, corn and
other produce that have skins.
The humidity-controlled crispers are interchangeable.The
ClearVue section allows you to see into the crisper
without opening them.
IMPORTANT: Occasionally, a food item may freeze in the
FreshChill* Meat Locker, utility drawer, or crisper. When
this occurs, turn the FreshChill Meat Locker Temperature
Control to “cold.”
To remove crispers:
1. Roll drawer out to the stop.
2. Lift front of drawer and pull out the rest of the way.
To replace crispers:
1. Position drawer rollers between front roller of track and
the track.
2. Push crisper up and onto track.
3. Slide crisper back until it stops.
To remove glass covers:
1. Lift right side of glass cover to free retainer and left
side of cover.
2. Carefully remove glass cover.
To replace glass covers:
1. Place retainer on right side of glass cover.
2. Insert left side of glass cover into groove on left side of
drawer.
3. Lower cover so that the retainer pins are in the guide
holes on right side of drawer.
To remove ClearVue section:
1. Remove glass cover.
2. Slide ClearVue section down track, away from the
retainer.
3. Replace in reverse order.
U
T
IL
IT
Y
L
O
W
H
I
G
H
1
2
3
4
5
H
um
id
ityC
o
n
tro
l
L
O
W
H
I
G
H
1
2
3
4
5
H
u
m
id
ity
C
o
n
tro
l
10
Covered Egg Container
The covered egg container with carrier provides extra
protection for storing eggs anywhere inside your
refrigerator section.The ClearVue* container allows you
to see how many eggs you have stored.
Wine rack
Insert the wine rack into position by sliding it between a
refrigerator shelf and the wall of the refrigerator
compartment.
Freezer features
Freezer shelves
To remove:
1. Lift shelf up.
2. Pull shelf straight out.
3. Replace in reverse order.
Pull-out freezer baskets
To remove:
1. Pull basket out to the stop.
2. Lift basket slightly and move it to the left.
3. Pull basket out the rest of the way.
To replace:
1. Place basket in shelf tracks and move basket to the
left.
2. Push basket in to the stop on the left side.
3. Lift left side of basket slightly to clear the stop.
4. Push basket in the rest of the way.
IMPORTANT: Be sure both sides of basket are in the
shelf tracks before filling with food.
Note: Stationary shelf on freezer door is not removable.
11
Automatic ice maker
To start ice maker:
• For dispenser models only: Pull ice maker cover
panel out from the bottom and slide it to the rear.
• Push ice maker wire arm down to the “ON” position.
The ice maker fills with water and begins forming ice.
Allow 24 hours to produce the first batch of ice. Ice maker
should then produce 7 to 9 batches of ice in a 24-hour
period under normal conditions. Discard the first three
batches of ice. After ice is formed, ice cubes drop into
storage bin.When ice bin is full, ice maker arm raises to
the “OFF” position (arm up).
To stop ice maker:
• Lift the ice maker wire arm until you feel it click into the
“OFF” position.
• Do not force arm up or down. Do not store anything on
top of ice maker or in ice bin.
Wire arm
On
Off
Solving common ice maker problems
POSSIBLE CAUSE/SOLUTION
This is normal.They break apart easily. Shake bin occasionally to keep cubes
separated.
ON/OFF wire arm is in the “OFF” (up) position. Lower wire arm to the “ON” (down)
position.
Freezer is not cold enough. Adjust temperature controls and wait 24 hours.
(See “Setting temperature controls” on page 6.)
Copper tubing is kinked. Check water tubing.
New plumbing connections can cause discolored or off-flavored ice. Discard the first
few batches of ice.
Cubes are stored too long.Throw them away and make a new supply.
Food is not wrapped properly. See page 20.
Freezer and ice bin need to be cleaned. See page 17.
Water may contain minerals (such as sulfur). A filter may be required to
remove them.
There is no water in the tank. Press the water dispenser lever and hold it in for
several minutes.When water dispenses, tank is full.
PROBLEM
Ice crescents attached at
corners
Ice maker will not operate
or ice is not made fast
enough
Off-taste or odor in ice
No ice produced
12
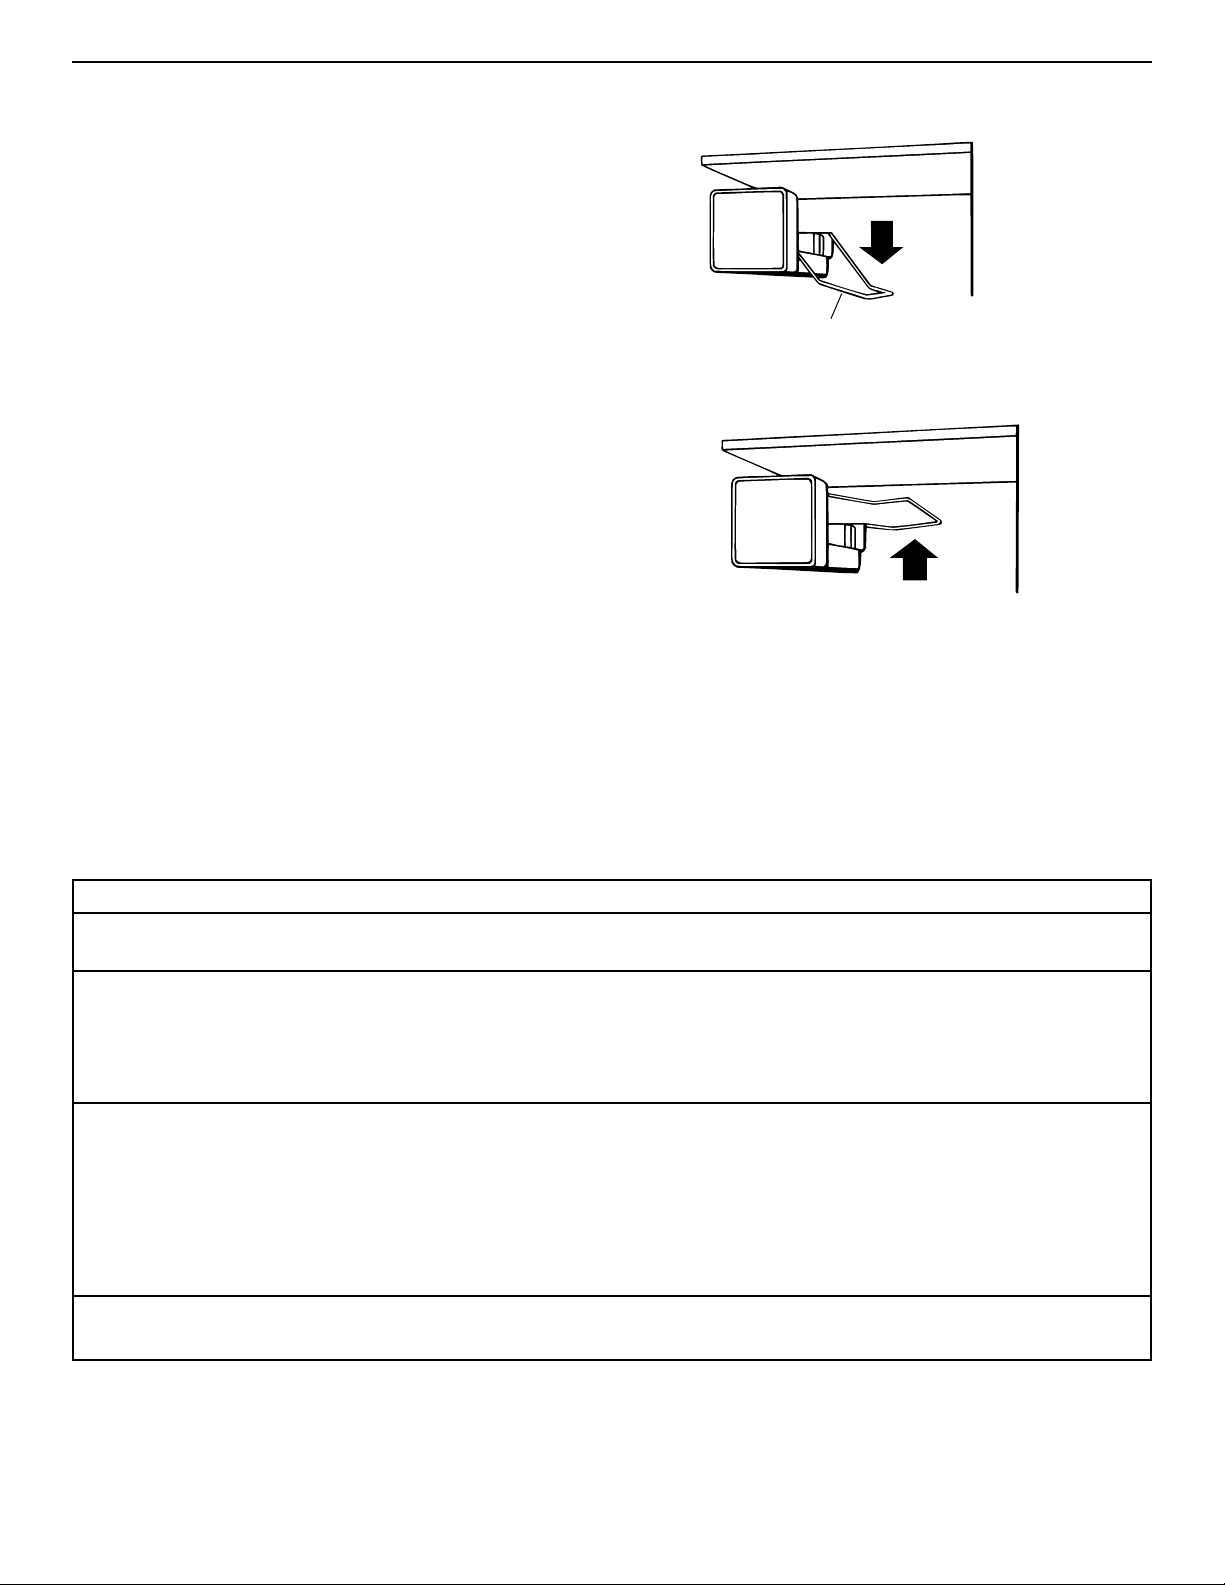
Removing the ice maker storage bin
Depending on the model, the ice maker storage bin holds
the following amounts of ice:
36" - 8.5 pounds (3.9 kg)
42" - 13.5 pounds (6.1 kg)
48" - 17.6 pounds (8.0 kg)
Remove and discard unused ice periodically to reduce the
potential for off-taste or odor buildup in ice.The storage
bin can be removed for cleaning or to dispense large
amounts of ice at one time.
Note: On models without ice and cold water dispenser,
the storage bin cannot be removed full of ice if the freezer
door stop is set to a 90° opening.
S
to
ra
g
e
B
in
Ice maker
cover panel
down
Ice maker
cover panel
up
To remove:
1. Pull the ice maker cover panel out from the bottom and
slide it to the rear.
2. Lift the ice maker wire arm until you feel it click into the
“OFF” position.
For dispenser models only: While the ice maker is
“OFF,” no more ice can be produced, but ice can still
be dispensed when the freezer door is closed.
3. Lift the front of the storage bin, then pull it out.
4. Empty the storage bin. Use hot or warm water to melt
ice if necessary. Never use anything sharp to break up
ice in the storage bin.This can damage the storage bin
and the dispenser mechanism.
To replace:
1. Push storage bin in all the way.
2. Lower the ice maker wire arm down to the “ON”
position to restart ice maker.
3. Lower the ice maker cover panel.
ICE
13
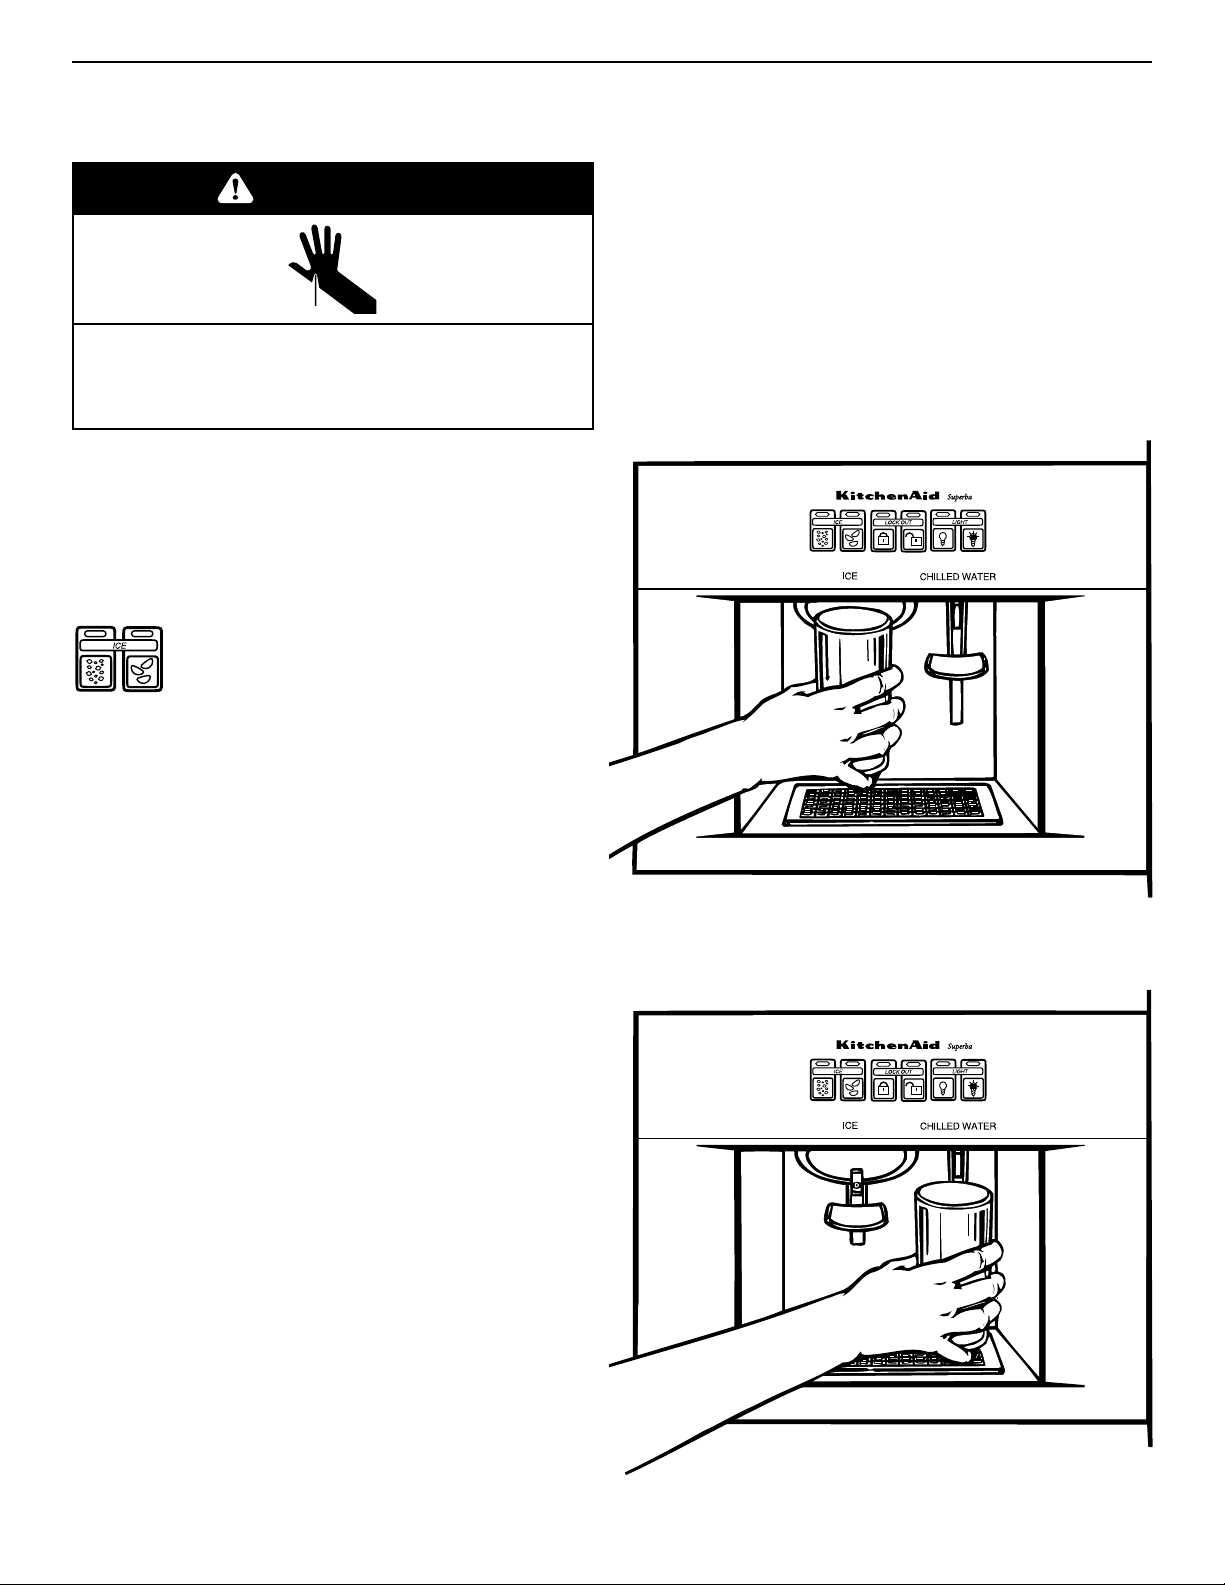
Ice and cold water dispensers
(models KSSP36Q, KSSP42Q, KSSP48Q,
KSSS36Q, KSSS42Q, KSSS48Q)
Ice dispenser
Ice dispenses from ice maker storage bin in the freezer.
When dispenser bar is pressed, a trap door opens in a
chute between the dispenser and ice bin. Ice moves from
the bin and falls through the chute.When dispenser bar is
released, a buzzing sound may be heard for a few
seconds.
Your refrigerator dispenses both cubed and
crushed ice. Before dispensing ice, select
which type of ice you prefer. For crushed ice,
press pad on left above “ICE”. For cubed ice,
press pad on right above “ICE”.
To dispense ice:
1. Press pad for desired type of ice.
2. Press a sturdy glass against the ice dispenser bar.
Hold glass close to dispenser opening so ice does not
fall outside of glass.
3. Remove the glass to stop dispensing.
Water dispenser
IMPORTANT: If the water dispenser stops working, water
may be frozen in the water line leading to the dispenser. If
this happens, turn the FreshChill* Meat Locker
Temperature Control toward “Cold.”
Chilled water comes from a reservoir behind the crispers.
Allow about 24 hours to chill the first reservoir full of
water.
When the refrigerator is first hooked up, press the
water dispenser bar until you draw and discard 2 to 3
quarts (1.9 to 2.9 L) of water.This removes air from the
system and rinses the water filter, reservoir, and pipes.
Ice maker will not produce ice without filling reservoir.
If the dispenser is not used regularly, dispense enough
water every week to freshen the supply. Allow two to three
hours for a new supply of water to chill.
IMPORTANT: The small tray under the dispenser is
designed to evaporate small spills.There is no drain in
the tray. Do not pour water into it.
To dispense water:
1. Press a sturdy glass against the water dispenser bar.
2. Remove glass to stop dispensing.
WARNING
Cut Hazard
Use a sturdy glass when dispensing ice or water.
Failure to do so can result in cuts.
ICE
ICE
CAUSE SOLUTION
Freezer door open Close the freezer door.
Ice bin not properly installed Make sure ice bin is pushed in all the way.
Wrong ice in bin Use only crescents from ice maker. Shake ice bin
occasionally to keep cubes separated and to obtain
increased storage capacity.
Dispenser not used for Dump old ice and make a new supply.
extended periods of time,
causing ice cubes to melt
together
Ice dispenser bar held Wait about three minutes for the dispenser motor to reset.
in too long Large amounts of ice should be taken from the bin,
not through the dispenser.
Lock Out has been chosen Turn Lock Out off.
Low water pressure Call local utility company.
Using a reverse osmosis Remove the refrigerator water filter. Replace filter cap
water filtering system in grille. See page 16.
Water filtration system Check Water Filtration Installation Instructions to see that
installed incorrectly or clogged filter was installed correctly and is not clogged.
Ice attracts airborne odors; Dump old ice and make a new supply; store excess
old ice ice in a covered container.
Water quality For best results, avoid connecting ice maker to a
softened water supply. If softened water supply cannot
be avoided, make sure the water softener is well
maintained and operating properly.
Foods not properly wrapped Wrap foods properly in airtight and moisture-proof
materials. See page 20.
Ice bin and freezer may need Clean freezer and ice bin. See “Cleaning the
cleaning refrigerator” on page 17 for instructions.
Plumbing to ice maker Follow Installation Instructions for proper ice maker
water supply hookup.
New ice maker The first few batches of ice from a new ice maker may
have an off-taste. Dump this ice and make a new supply.
14
Dispenser/ice maker operating tips
PROBLEM
Dispensers won’t work
Ice dispenser won’t work
Off-taste or odor in ice
15
Water Filtration and Monitoring
System
The water filter indicator light
The water filter indicator light will help you know when to
change your water filter cartridge. The light is located at
the top of the refrigerator compartment. The light will
change from green to yellow.This tells you that it is
almost time to change the water filter cartridge (90% of
the filter life has been used). It is recommended that you
replace the water filter cartridge when the water filter
indicator light changes to red OR water flow to your
water dispenser or ice maker decreases noticeably. (See
“Changing a water filter cartridge” below.
NOTE: Do not use with water that is microbiologically
unsafe or of unknown quality without adequate
disinfection before or after the system.
After changing the water filter cartridge, reset the water
filter indicator light by depressing the Light Switch button
5 times.The indicator light will change from red to green
when the system is reset.
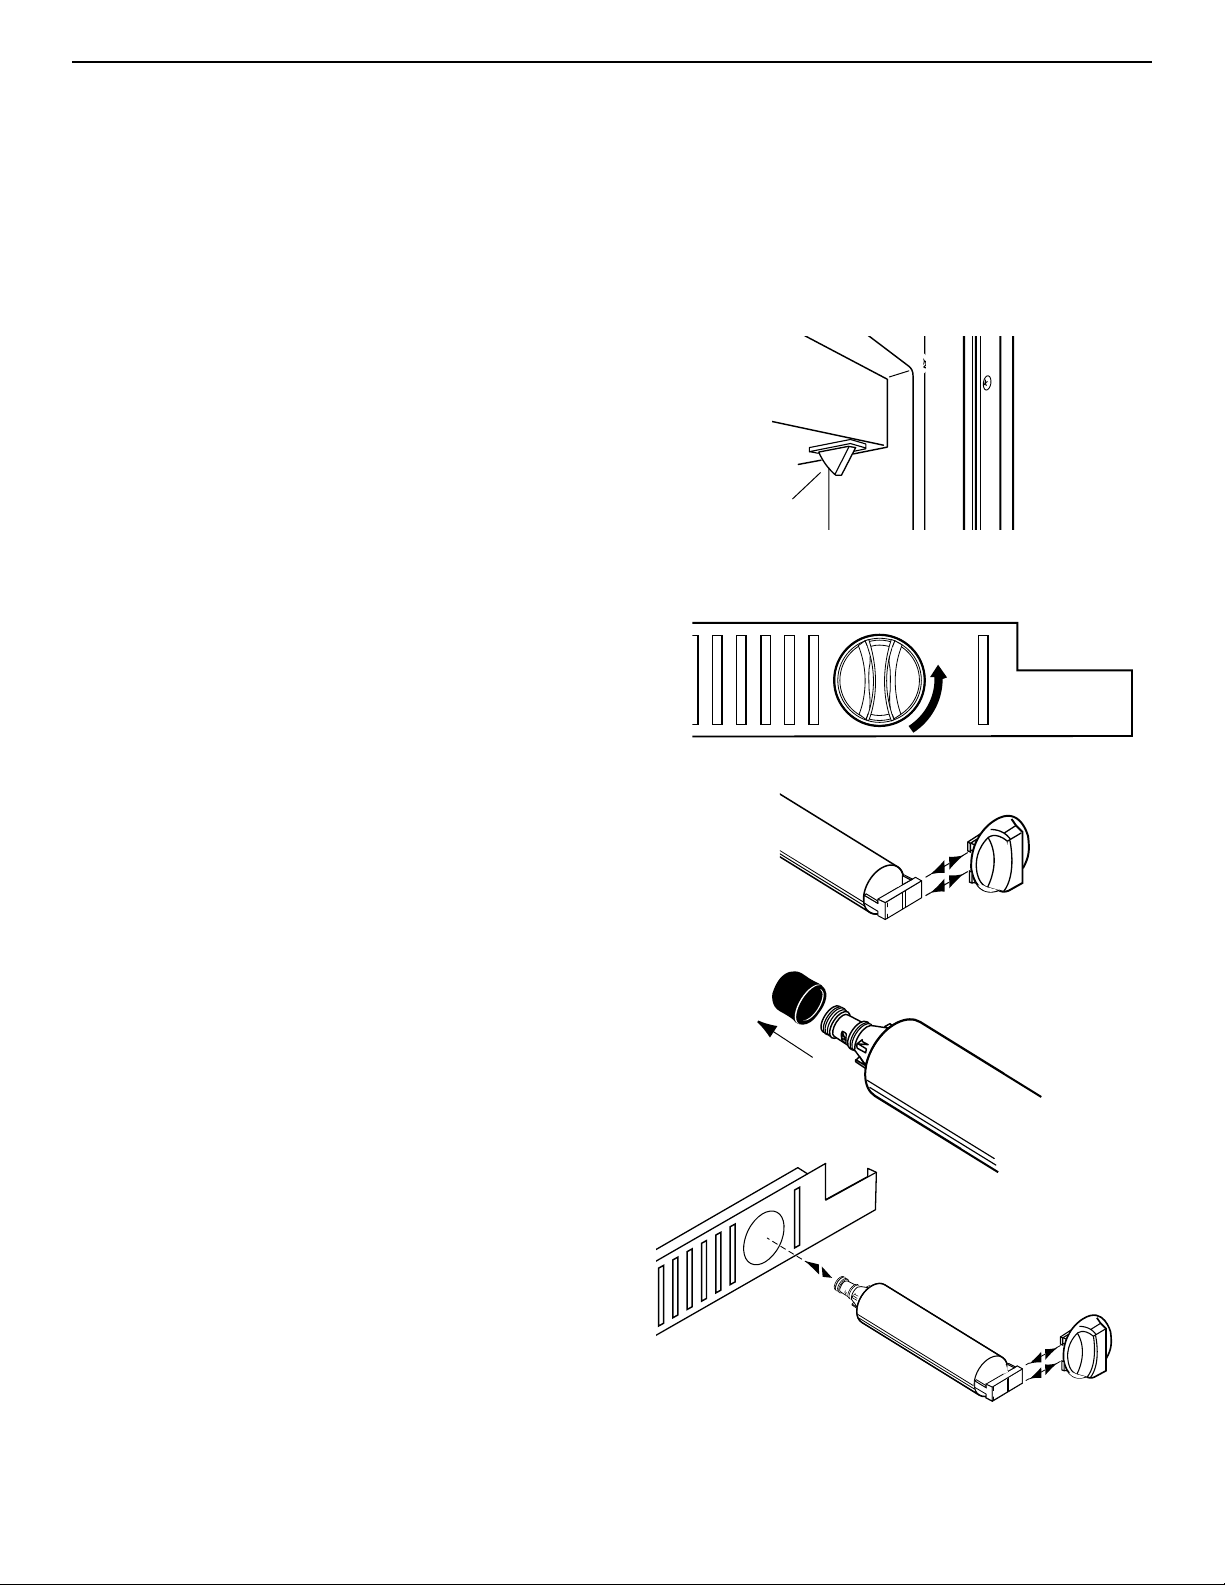
Changing a water filter cartridge
The water filter is located below the refrigerator
compartment door.
1. Locate the water filter cartridge cap in the front base
grille below the freezer compartment door. Rotate the
cap counterclockwise to a vertical position and pull
the cap and filter cartridge out through the base grille.
NOTE: There will be water in the cartridge. Some
spilling may occur.
2. Remove the cartridge cap by sliding it off the end of
the old cartridge.The cap will slide to the left or right.
DO NOT DISCARD THE CAP.
3. Take the new cartridge out of its packaging and
remove protective cover from o-rings.
4. Slide the cartridge cap onto the new cartridge as
shown.
1.
2.
3.
4.
light switch
16
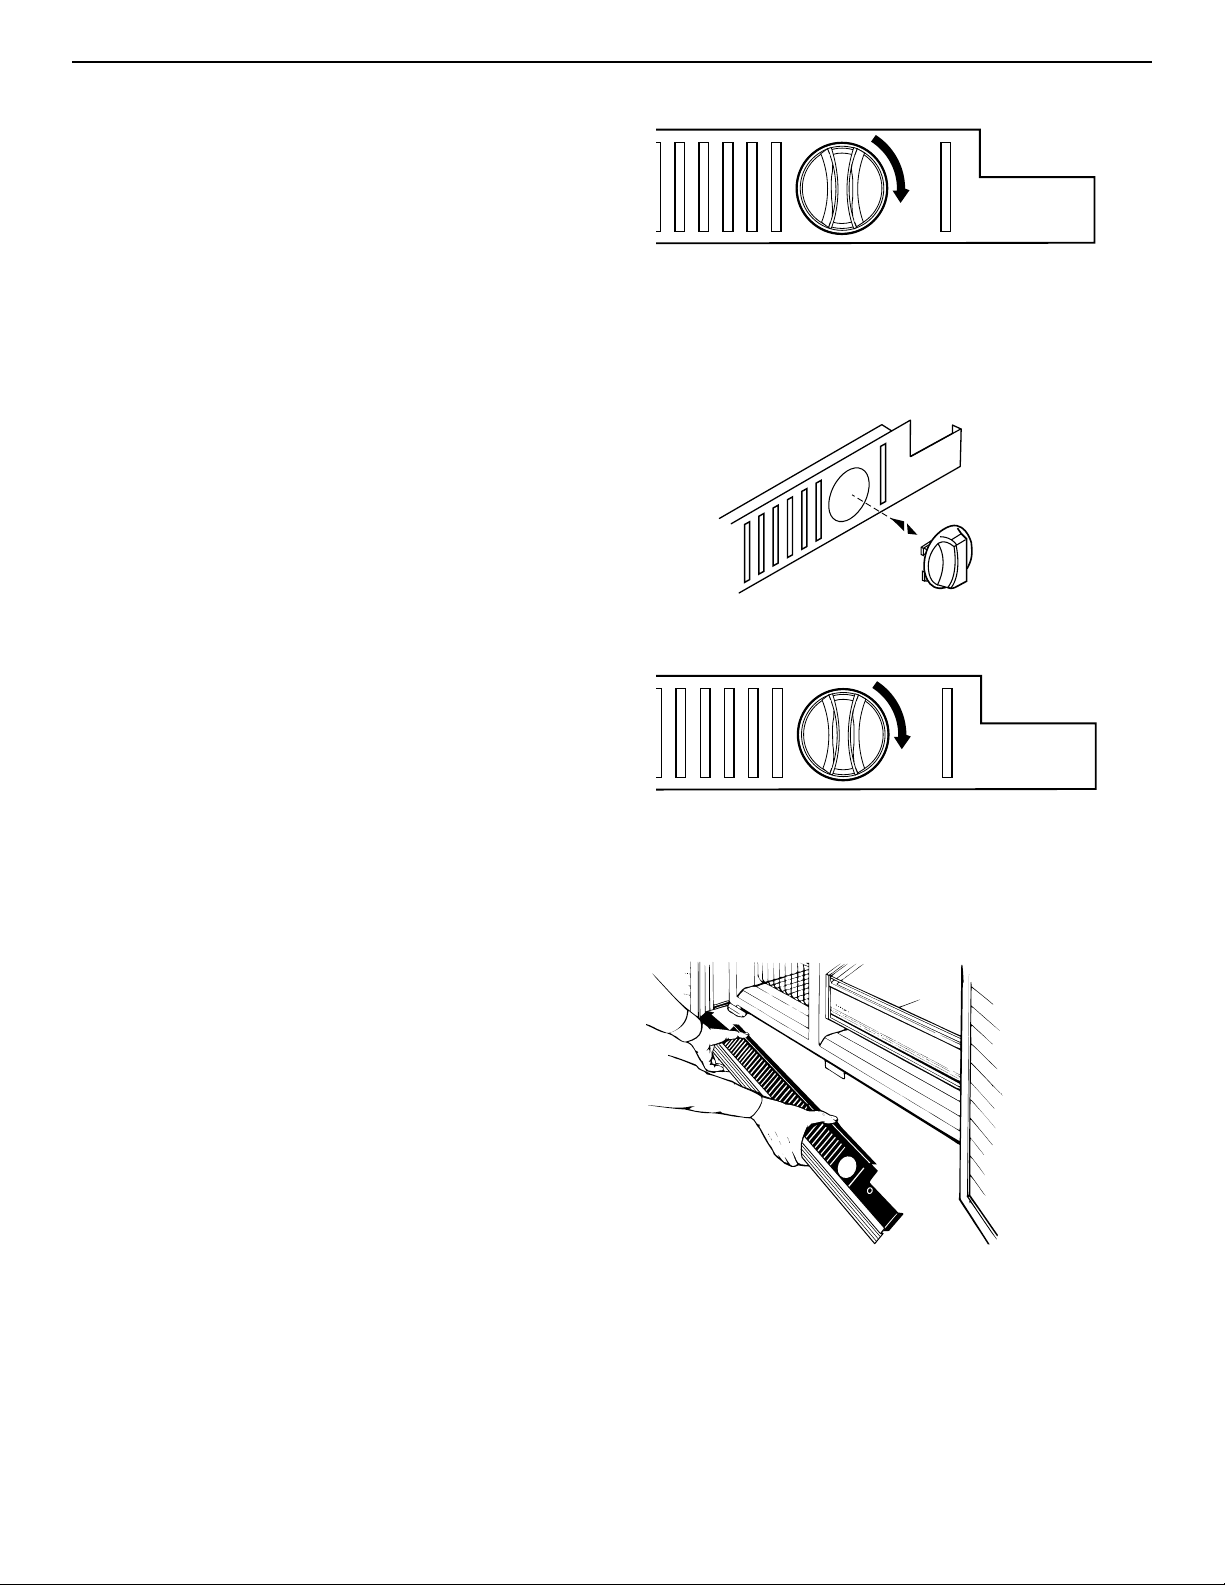
Base grille
To remove:
1. Remove one screw at each end of the base grille.
2. Remove base grille.
3. Replace in reverse order.
5. With cartridge cap in the vertical position, push the
new filter cartridge into the base grille until it stops.
Rotate the cartridge cap clockwise to a horizontal
position.
6. RUN WATER THROUGH THE DISPENSER UNTIL
THE WATER RUNS CLEAR (about 2-3 gallons or 6-7
minutes).This will clean the system and clear air from
the lines. Additional flushing may be required in some
households.
NOTE: As air is cleared from the system, water may
spurt out of the dispenser.
Using the dispenser
without a water filter
You can run the dispenser without a water filter cartridge.
Your water will not be filtered. If you run the dispenser
without a water filter cartridge, keep the cartridge cap
and replace it in the base grille for future use.
1. Remove the water filter cartridge (See “Changing a
water filter cartridge” earlier in this section.) Then
slide the cartridge cap off the end of the filter
cartridge. DO NOT DISCARD THE CAP.
2. With the cartridge cap in the vertical position, insert
the cap into the base grille until it stops.
3. Rotate the cartridge cap to a horizontal position.
NOTE: The cartridge cap may not be even with the
base grille.
Ordering replacement filters
To order more water filter cartridges, call 1-800-253-1301
and ask for accessory Part #4392857 or contact your
authorized KitchenAid dealer.
Water Filtration and Monitoring System (cont.)

17
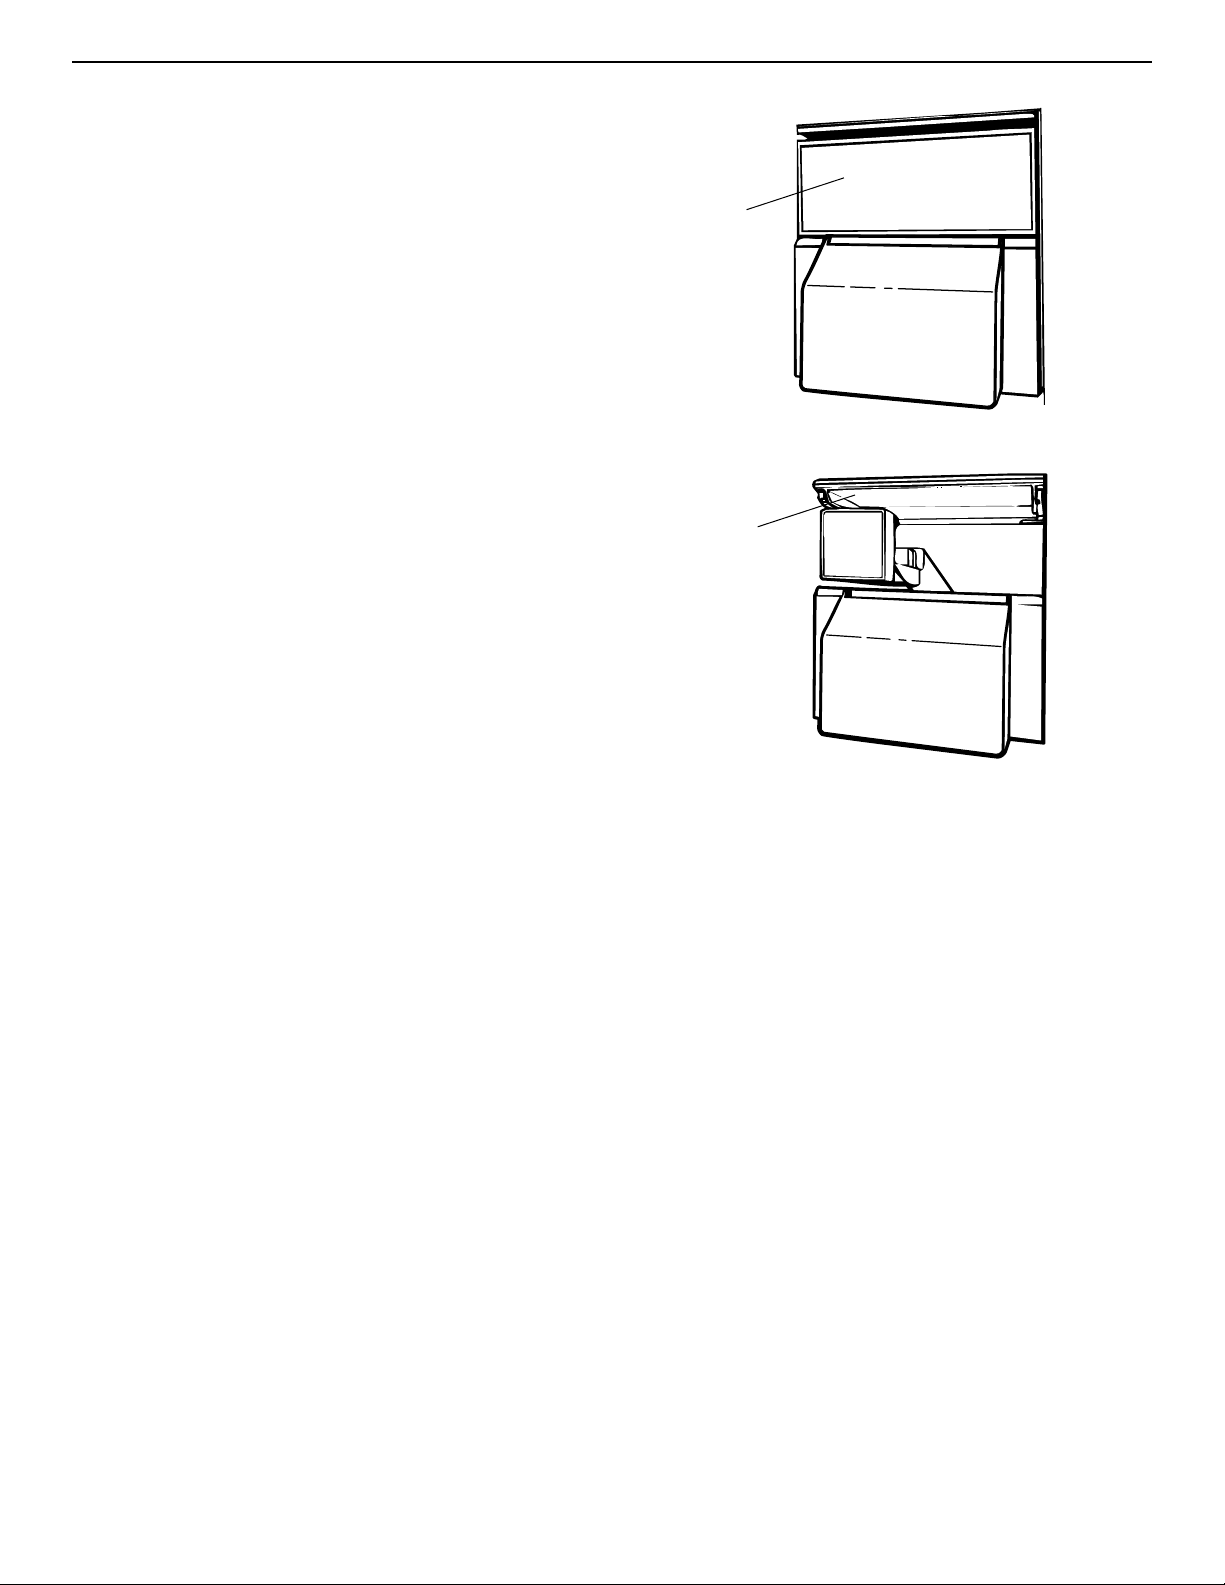
Defrost pan
The defrost pan is located behind the base grille, toward
the left side of the refrigerator.
To remove:
1. Press Power On/Off Switch to the “OFF” position.
(See page 5 for instructions).
2. Remove base grille.
3. Find retaining clip (A) under refrigerator.
4. Push up on the clip and, at the same time, slide the
pan forward and out.
5. Clean the pan. (See page 17 for instructions.)
To replace:
1. Position the edge of the defrost pan approximately
7 inches (17.8 cm) from the left side of the
refrigerator.
2. Lift defrost pan into guides and push back until you
hear the “click” or “snap” of the retaining clip moving
into place.
3. Replace the base grille.
4. Press Power On/Off Switch to the “ON” position.
Defrost pan
Retaining clip (A)
Light bulbs
Light bulbs are located behind the Refrigerator and
Freezer Controls:
1. Unplug refrigerator or disconnect power to refrigerator.
2. Reach behind control panel.
3. Unscrew bulb and replace it with a 40-watt,
incandescent, medium-base, tubular bulb.
4. Plug refrigerator power cord into outlet or reconnect
power to refrigerator.
Light bulb below ice storage bin:
1. Unplug refrigerator or disconnect power to refrigerator.
2. Remove light cover.
3. Unscrew bulb and replace it with a 40-watt,
incandescent, medium-base, tubular bulb.
4. Replace light cover.
5. Plug refrigerator power cord into outlet or reconnect
power to refrigerator.
Light bulb in dispenser area: (dispenser models)
1. Unplug refrigerator or disconnect power to refrigerator.
2. Unscrew the bulb from the top, inside of the dispenser
area.
3. Replace bulb with a heavy-duty, 10-watt bulb.
4. Plug refrigerator power cord into outlet or reconnect
power to refrigerator.
IMPORTANT: Be sure to press Power On/Off Switch to
the “ON” position after changing light bulb(s).
18
Saving Energy
You can help your refrigerator use less electricity.
• Clean the condenser coils regularly.
• Open the door as few times as possible.Think about
what you need before you open the door. Get
everything out at one time. Keep food organized so you
won’t have to search for what you want. Close door as
soon as food is removed.
• Fill up the refrigerator, but don’t overcrowd it so air
movement is blocked.
• It is a waste of electricity to set the refrigerator and
freezer to temperatures colder than they need to be. If
ice cream is firm in the freezer and drinks are as cold
as your family likes them, that’s cold enough.
CAUSES
The refrigerator’s fan motor and moving air.
The thermostat makes a definite click when the refrigerator stops running. It also
makes a sound when the refrigerator starts.
The defrost timer will click when the defrost cycle starts and stops.
You may hear buzzing (from the water valve), trickling water, and the clatter of ice
falling into the bin.
The high-efficiency compressor and motor will run longer than older designs.The
internal fan may occasionally run when the compressor is off.
During the defrost cycle, the refrigerator will not be running. The trickling water is the
frost accumulated on the freezer coil melting and running into the defrost pan.When
the refrigerator stops running, you will hear gurgling in the tubing for a few minutes.
You may feel air blowing from behind the upper ventilation panel and base grille when
the refrigerator is running. This is normal.
SOUNDS/OBSERVATIONS
Hum or hiss
Clicking or snapping
sounds
Ice maker sounds
• trickling water
• clatter of ice
Running sounds
Trickling water/
water sounds
Warm air from upper
ventilation panel/
base grille
Understanding the sounds you may hear
Your new refrigerator may make sounds that your old one
didn’t make. Because the sounds are new to you, you
might be concerned about them. Most of the new sounds
are normal. Hard surfaces like the floor, walls, and
cabinets can make the sounds seem louder than they
actually are. Due to new product designs, there may be
sounds that you are not familiar with.The following chart
describes the kinds of sounds that might be new to you
and what may be making them.
19
The refrigerator and freezer compartments
defrost automatically. However, clean both
once a month to prevent odors from building
up.Wipe up spills immediately.
Before cleaning, disconnect the refrigerator
from its power supply by pressing the Power On/Off
Switch to the “OFF” position.Then, take out all removable
parts and clean the refrigerator according to the directions
given below. Be sure to press the Power On/Off Switch to
the “ON” position when you are finished cleaning.
C
ARING
F
OR
Y
OUR
R
EFRIGERATOR
Explosion Hazard
Use nonflammable cleaner.
Failure to do so can result in death, explosion,
or fire.
Your refrigerator is built to give you many years of
dependable service. However, there are a few things
you can do to help extend its product life.This section tells
you how to clean your refrigerator and what to do when
going on vacation, moving, or during a power outage.
Cleaning your refrigerator
WHAT TO USE
Sponge or cloth with mild
detergent and warm water
Sponge, cloth, or paper
towel with mild detergent,
warm water, and a good
appliance wax (or good
auto paste wax)
Sponge, soft cloth, or paper
towel with baking soda or
mild detergent and warm
water
Sponge, soft cloth, or paper
towel with mild detergent
and warm water
Soft, clean sponge or soft,
clean cloth with mild
detergent and warm water
Sponge or cloth with mild
detergent and warm water
Stainless steel cleaner
PROBLEM
Removable parts
(shelves, crisper, etc.)
Outside
Inside walls
(allow freezer to warm up so
cloth won’t stick)
Door liners and gaskets
Plastic parts
(covers and panels)
Defrost pan
Stainless steel
doors and grille
HOW TO CLEAN
Hand wash and dry thoroughly.
Wash outside of cabinet. Do not use abrasive or harsh
cleaners.
Wipe and dry thoroughly.
Wax painted metal surfaces at least twice a year.
Apply wax with a clean, soft cloth. Waxing painted
metal surfaces provides rust protection.
Do not wax plastic parts.
Wash with mixture of warm water and:
• mild detergent, or
• baking soda (2 tbs to 1 qt [26 g to .95 L] of water).
Wipe and dry thoroughly.
Wipe and dry thoroughly.
DO NOT USE cleaning waxes, concentrated
detergents, bleaches, or cleaners containing
petroleum on plastic parts.
Wipe and dry thoroughly.
DO NOT USE paper towels, window sprays,
scouring cleansers, or flammable fluids.These can
scratch or damage material. See “Important Safety
Instructions” on page 3.
Press Power On/Off Switch to the “OFF” position.
Remove base grille. (See page 14.)
Reach into small opening at right edge and remove
the defrost pan. (See page 15.)
Wash, rinse, and dry thoroughly.
Replace defrost pan. Make sure to push it
completely into the opening.
Replace base grille.
Press Power On/Off Switch to the “ON” position.
Wipe with soft cloth.
WARNING

If the refrigerator must be moved, contact the dealer from
whom you purchased the unit or your local KitchenAid
authorized servicer.
If you will be gone for a month or more, follow these steps
to prepare your refrigerator.
1. Remove all food from the refrigerator.
2. If your refrigerator has an automatic ice maker:
•
Turn off the water supply to the ice maker at least one
day ahead of time.
•
When the last load of ice drops, turn off the ice maker.
Make sure all ice is dispensed out of the ice maker
mechanism.
3. Unplug the refrigerator.
4. Clean it, wipe it, and dry well.
5. Tape rubber or wood blocks to the tops of both doors
to prop them open far enough for air to get in. This
stops odor and mold from building up.
If electricity goes off, call the power company. Ask how
long power will be off.
1. If power will be interrupted 24 hours or less, keep both
doors closed.This helps food stay cold and frozen.
2. If service will be interrupted longer than 24 hours:
(a) Remove all frozen food and store in a frozen food
locker.
OR
(b) Place 2 lbs. (900g) of dry ice in freezer for every
cubic foot (28 liters) of freezer space.This will keep
food frozen for two to four days.Wear gloves to protect
your hands from dry ice burns.
OR
(c) If neither a food locker nor dry ice is available, use
or can perishable food at once.
20
Short vacations
If you will be away for less than four weeks, use these tips
to prepare your refrigerator before you leave.
1. Use up any perishables and freeze other items.
2. If your refrigerator has an automatic ice maker:
•
Raise wire arm to “OFF” (up) position.
•
Shut off water supply to the ice maker.
3. Empty the ice bin.
WHAT TO USE
Vacuum cleaner with
extended narrow attachment
Vacuum cleaner with brush
attachment
A professional stainless
steel cleaner.
PART
Condenser coils
Base grille
Stainless steel
HOW TO CLEAN
Remove upper ventilation panel to expose condenser
coils. (See page 5.)
Vacuum coils when dusty or dirty. Coils may need to
be cleaned as often as every other month.
Replace upper ventilation panel.
Vacuum base grille.
Follow directions included with cleaner.
Vacation and moving care
Long vacations
Moving
Power interruptions
Remember: A full freezer stays cold longer than a partly
filled one. A freezer full of meat stays cold longer than a
freezer full of baked goods. If food contains ice crystals,
it may be safely refrozen, although the quality and flavor
may be affected. If the condition of the food is poor, or if
you feel it is unsafe, dispose of it.
Questions?
Call our Consumer Assistance Center telephone number,
1-800-235-0665, from anywhere in the U.S.A. or Canada.
21
There is a correct way to package and store refrigerated
or frozen food.
To keep food fresher, longer, take the time to study these
recommended steps.
F
OOD
S
TORAGE
G
UIDE
Wrap or store food in the refrigerator in airtight and
moisture-proof material unless otherwise noted. This
prevents food odor and taste transfer throughout the
refrigerator. For dated products, check code date to
ensure freshness.
Butter or margarine
Keep opened butter in covered dish or closed
compartment. When storing an extra supply, wrap in
freezer packaging and freeze.
Cheese
Store in the original wrapping until you are ready to
use it. Once opened, rewrap tightly in plastic wrap
or aluminum foil.
Milk
Wipe milk cartons. For best storage, place milk on
interior shelf.
Eggs
Store in original carton on interior shelf. On some
models, an egg storage container is provided for your
convenience.
Fruit
Wash, let dry, and store in refrigerator in plastic bags
or crisper. Do not wash or hull berries until they are
ready to use. Sort and keep berries in original
container in a crisper, or store in a loosely closed
paper bag on a refrigerator shelf.
Leafy vegetables
Remove store wrapping and trim or tear off bruised
and discolored areas. Wash in cold water and drain.
Place in plastic bag or plastic container and store in
crisper.
Storing fresh food
Vegetables with skins
(carrots, peppers)
Place in plastic bags, or plastic container and store
in crisper.
Fish
Use fresh fish and shellfish the same day as
purchased.
Meat
Store most meat in original wrapping as long as it
is airtight and moisture-proof. Rewrap if necessary.
See the following for storage times. When storing
meat longer than the times given, freeze the meat.
Chicken ........................................................1-2 days
Bacon............................................................5-7 days
Ground beef ..................................................1-2 days
Cold cuts ......................................................3-5 days
Steaks/roasts ................................................3-5 days
Variety meats ................................................1-2 days
Cured meats................................................7-10 days
Leftovers
Cover leftovers with plastic wrap or aluminum foil.
Plastic containers with tight lids can also be used.
NOTE: Keep your refrigerator smelling fresh with an
open box of baking soda.
Storing fresh food (cont.)

22
The freezer section is designed for storing
commercially frozen food and for freezing food
at home.
NOTE: For further information about preparing food
for freezing or food storage times, check a freezer
guide or reliable cookbook.
Packaging
Successful freezing depends on the correct packaging.
When you close and seal the package you must not
allow air or moisture in or out. If you do, you could
have food odor and taste transfer throughout the
refrigerator, and also dry out frozen food.
Packaging recommendations:
•
Rigid plastic containers with tight-fitting lids
•
Straight-sided canning/freezing jars
•
Heavy-duty aluminum foil
•
Plastic-coated paper
•
Non-permeable plastic wraps (made from
saran film)
•
Specified freezer self-sealing plastic bags
Follow package or container instructions for proper
freezing methods.
Do not use:
•
Bread wrappers
•
Non-polyethylene plastic containers
•
Containers without tight lids
•
Wax paper or wax-coated freezer wrap
•
Thin, semi-permeable wrap
Freezing
Your freezer will not quick-freeze any large quantity of
food. Put no more unfrozen food into the freezer than
will freeze within 24 hours (about 2 to 3 lbs of food
per cubic foot [907-1,350 g per liter] of freezer space).
Leave enough space in the freezer for air to circulate
around packages. Also leave enough room at the front
so the door can close tightly.
Storage times vary according to the quality and
type of food, the type of packaging used (airtight
and moisture-proof), and the storage temperature.
Ice crystals inside a sealed package are normal.
It means that moisture in the food and air inside the
package have condensed, creating ice crystals.
Storing frozen food
NOTE: Allow hot foods to cool at room temperature for
30 minutes, then package and freeze. Cooling hot
foods before freezing saves energy.
23
There is water in the defrost drain pan
Check if ...
The refrigerator is defrosting.
It is more humid than normal.
Water in the defrost pan is overflowing.
Then ...
The water will evaporate. It is normal for water to drip into
the defrost pan.
Expect that the water in the defrost pan will take longer to
evaporate. This is normal when it is hot or humid.
Check to make sure your refrigerator is level. (See the
“Leveling” section.) If it is still overflowing, there is probably
something wrong with the refrigerator. Call the Consumer
Assistance Center.
T
ROUBLESHOOTING
G
UIDE
Check if ...
The power supply cord is unplugged.
A household fuse has blown or circuit breaker
has tripped.
The Refrigerator Control is turned to the
“OFF” position.
The refrigerator is defrosting.
Then ...
Firmly plug the cord into a live outlet with proper voltage.
Replace the fuse or reset the circuit.
Refer to the “Setting temperature controls” section.
Recheck to see if the refrigerator is operating in 30 minutes.
Your refrigerator will regularly run an automatic defrost cycle.
If it is still not running after checking the above items, call
the Consumer Assistance Center.
The lights do not work
Check if ...
The power supply cord is unplugged.
A household fuse or circuit breaker has tripped.
A light bulb is loose in the socket.
A light bulb has burned out.
Then ...
Firmly plug the cord into a live outlet with proper voltage.
Replace the fuse or reset the circuit.
Turn the Freezer Control to OFF. Disconnect the
refrigerator from the electrical supply. Gently remove the
bulb and reinsert. Then reconnect the refrigerator to the
electrical supply and reset the Freezer Control.
Replace with an appliance bulb of the same wattage, size,
and shape. See the “Changing the light bulbs” section.
Your refrigerator will not operate
You can solve many common refrigerator problems
easily, saving you the cost of a possible service call.
Try the suggestions below to see if you can solve your
problem without outside help. If the suggestions do not
work, please call the KitchenAid Consumer Assistance
Center.
24
The motor seems to run too much
Check if ...
The room temperature is hotter than normal.
A large amount of food has just been added to
the refrigerator.
The door is opened often.
The controls are not set correctly for the
surrounding conditions.
The doors are not closed completely.
The base grille is dirty or blocked.
The condenser coils are dirty.
The door gaskets are not sealed all the way around.
Then ...
Expect the motor to run longer under warm conditions. At
normal room temperatures, expect your motor to run about
40% to 80% of the time. Under warmer conditions, expect
it to run even more of the time.
Adding a large amount of food warms the refrigerator. It
is normal for the motor to run longer in order to cool the
refrigerator back down. See the “Food Storage Guide”
section.
Expect the motor to run longer when this occurs. In order
to conserve energy, try to get everything you need out of
the refrigerator at once, keep food organized so it is easy
to find, and close the door as soon as the food is removed.
Refer to the “Setting temperature controls” section.
Push the doors firmly shut. If they will not shut all the
way, see “The doors will not close completely,” later in
this section.
This prevents air circulation and makes the motor work
harder. Remove the grille and clean.
This prevents air transfer and makes the motor work harder.
Clean the condenser coils. Refer to the “Cleaning your
refrigerator” section.
Contact a qualified person or a technician.
If the problem is not due to any of the above, remember
that your new refrigerator will run longer than your old one
due to its high-efficiency motor.
The refrigerator seems to make too much noise
Check if ...
The sounds and noises are common for new
refrigerators.
Then ...
Refer to the “Understanding the sounds you may hear”
section.
Troubleshooting (cont.)
25
Off-taste or odor in the ice
Check if ...
The plumbing connections are new, causing
discolored or off-flavored ice.
The ice cubes have been stored for too long.
Food in the freezer has not been wrapped properly.
Freezer and ice bin need to be cleaned.
Water contains minerals (such as sulfur).
Then ...
Discard the first few batches of ice.
Throw old ice away and make a new supply.
Refer to the “Storing frozen food” section.
See the “Cleaning your refrigerator” section.
A filter may need to be installed to remove the minerals.
The ice maker is not producing ice
Check if ...
The freezer temperature is not cold enough to
produce ice.
The ice maker arm is in the “OFF” (arm up) position.
The water line shutoff valve to the refrigerator is
not turned on.
An ice cube is jammed in the ejector arm.
The ice maker mold has no water in it or no ice
has been produced.
Then ...
See the “Setting controls” section.
Lower arm to the “ON” (arm down) position. See the “Ice
maker operation” section.
Turn on the water valve.
Remove the ice from the ejector arm with a plastic utensil.
Refer to the “Ice maker operation” section.
Check to see if your refrigerator has been connected to
your home water supply and the supply shutoff valve is
turned on.
If not due to any of the above, there may be a problem with
the water line. Contact the Consumer Assistance Center.
The ice maker is producing too little ice
Check if ...
The ice maker has just been installed.
A large amount of ice has just been removed.
The controls are not set correctly.
The water shutoff valve is not turned completely on.
There is a water filter installed on the refrigerator.
This filter may be clogged or installed incorrectly.
Then ...
Wait 72 hours for full ice production to begin. Once your
refrigerator is cooled down, the ice maker should begin
producing 56-72 cubes every 24 hours.
Allow 24 hours for ice maker to produce more ice.
Refer to the “Setting temperature controls” section.
Turn valve on fully. Refer to the “Ice maker operation”
section.
First, check the filter installation instructions to ensure
that the filter was installed correctly and is not clogged.
If installation or clogging is not a problem, call a qualified
person or a technician.
26
The divider between the two compartments is warm
Check if ...
The condenser coils or base grille are dirty or clogged.
The motor has quit working.
Then ...
Clean according to the “Cleaning your refrigerator” section.
See “Your refrigerator will not operate” earlier in this section.
NOTE: The refrigerator temperature may turn from warm
to hot.
If not due to any of the above, the warmth is probably due
to normal operation of the automatic exterior moisture
control. If still concerned, call the Consumer Assistance
Center or an authorized KitchenAid service company.
Temperature is too warm
There is interior moisture build-up
Check if …
The door is opened often.
The room is humid.
Then ...
To avoid humidity build-up, try to get everything you need
out of the refrigerator at once, keep food organized so it is
easy to find, and close the door as soon as the food is
removed. (When the door is opened, humidity from the
room air enters the refrigerator. The more often the door is
opened, the faster humidity builds up, especially when the
room itself is very humid.)
It is normal for moisture to build up inside the refrigerator
when the room air is humid.
Check if ...
The door(s) are opened often.
A large amount of food has just been added to
the refrigerator or freezer.
The controls are not set correctly for the surrounding
conditions.
Then ...
Be aware that the refrigerator will warm when this occurs.
In order to keep the refrigerator cool, try to get everything
you need out of the refrigerator at once, keep food
organized so it is easy to find, and close the door as soon
as the food is removed.
Adding a large amount of food warms the refrigerator.
It can take several hours for the refrigerator to return to the
normal temperature.
Refer to the “How controls work” section.
27
The doors will not close completely
Check if ...
Food packages are blocking the door open.
The ice bin is out of position.
The pans, shelves, bins, or baskets are out
of position.
The gaskets are dirty.
The doors were removed during product installation
and not properly replaced.
Then ...
Rearrange containers so that they fit more tightly and take
up less space.
Push the ice bin in all the way.
Put all pans, shelves, bins, and baskets back into their
correct position.
Clean gaskets according to the directions in the “Caring for
Your Refrigerator” section.
The doors are difficult to open
Check if ...
The gaskets are dirty or sticky.
Then ...
Clean gaskets according to the directions in the “Caring
for Your Refrigerator” section.
There is interior moisture build-up (cont.)
Check if ...
The food is not packaged correctly.
The controls are not set correctly for the
surrounding conditions.
A self-defrost cycle was completed.
Then ...
Check that all food is securely wrapped. If necessary,
repackage food according to the guidelines in the “Food
Storage Guide” section. Wipe off damp food containers
before placing in the refrigerator.
Refer to the “Setting temperature controls” section.
It is normal for droplets to form on the back wall after the
refrigerator self-defrosts.
Remove and replace the doors or, contact a qualified
person.
28
Call the KitchenAid Customer Interaction
Center toll-free at 1-800-235-0665.
Our consultants are available to assist you.
When calling: Please know the purchase date, and the
complete model and serial number of
your appliance (see the “A Note to You”
section). This information will help us
better respond to your request.
Our consultants provide assistance with:
•
Features and specifications on our full line
of appliances
•
Installation information
If you need replacement parts
If you need to order replacement parts, we recommend
that you only use factory-authorized parts. These parts
will fit right and work right, because they are made to
the same exacting specifications used to build every
new KitchenAid
®
appliance.
To locate factory-authorized parts in your area, call our
Customer Interaction Center telephone number, your
nearest authorized service center, or KitchenAid
Factory Service at 1-800-442-1111.
Base grille water filter
cartridges:
Standard Cartridge - order part number 4392857 (L500)
Cyst Cartridge - order part number 4392922 (LC400)
For further assistance
If you need further assistance, you can write to
KitchenAid with any questions or concerns at:
KitchenAid Brand Home Appliances
Customer Interaction Center
c/o Correspondence Dept.
2000 North M-63
Benton Harbor, MI 49022-2692
Please include a daytime phone number in your
correspondence.
•
Use and maintenance procedures
•
Accessory and repair parts sales
•
Specialized customer assistance (Spanish speaking,
hearing impaired, limited vision, etc.)
•
Referrals to local dealers, service companies, and
repair parts distributors
KitchenAid designated service technicians are
trained to fulfill the product warranty and provide after-
warranty service, anywhere in the United States.
To locate the designated KitchenAid service company
in your area, you can also look in your telephone
directory Yellow Pages.
To avoid unnecessary service calls, please
check the “Troubleshooting Guide” section. It
may save you the cost of a service call. If you
still need help, follow the instructions below.
If you need assistance or service in U.S.A.
R
EQUESTING
A
SSISTANCE OR
S
ERVICE
29
R
EQUESTING
A
SSISTANCE OR
S
ERVICE
2. If you need service
✝
...
Contact your nearest KitchenAid Canada Appliance
Service branch or authorized servicing outlet to
service your appliance. (See list below.)
Make sure the service company you contact is
authorized to service your appliance during the
warranty period.
1. If the problem is not due to one of the items
listed in “Troubleshooting Guide”
✝
...
Contact the dealer from whom you
purchased your appliance, or call the
KitchenAid Canada Customer Interaction
Centre toll-free, 8:30 a.m. – 6 p.m. (EST),
at 1-800-235-0665.
KitchenAid Canada Appliance Service – Consumer Services
Direct service branches:
BRITISH COLUMBIA 1-800-665-6788
ALBERTA 1-800-661-6291
ONTARIO Ottawa area 1-800-267-3456
(except 807 area code) Outside the Ottawa area 1-800-807-6777
MANITOBA, SASKATCHEWAN 1-800-665-1683
and 807 area code in ONTARIO
QUEBEC Montreal (except South Shore) 1-800-361-3032
South Shore Montreal 1-800-361-0950
Quebec City 1-800-463-1523
Sherbrooke 1-800-567-6966
ATLANTIC PROVINCES 1-800-565-1598
For further assistance
If you need further assistance, you can write to
KitchenAid Canada with any questions or concerns at:
Consumer Relations Department
KitchenAid Canada
1901 Minnesota Court
Mississauga, Ontario L5N 3A7
Please include a daytime phone number in your
correspondence.
✝
When asking for assistance or service, please
provide a detailed description of the problem,
your appliance’s complete model and serial
numbers, and the purchase date. (See the “A
Note to You” section.) This information will help
us respond properly to your request.
Before calling for assistance or service, please
check the “Troubleshooting Guide” section. It may
save you the cost of a service call. If you still need
help, follow the instructions below.
If you need assistance or service in Canada
KITCHENAID AND KITCHENAID CANADA DO NOT ASSUME ANY RESPONSIBILITY FOR INCIDENTAL OR
CONSEQUENTIAL DAMAGES. Some states or provinces do not allow the exclusion or limitation of incidental or
consequential damages, so this exclusion or limitation may not apply to you.
This warranty gives you specific legal rights, and you may also have other rights which may vary from state to
state or province to province.
Outside the United States and Canada, a different warranty may apply. For details, please contact your
authorized KitchenAid dealer.
If you need service, first see the “Troubleshooting Guide” section of this book. After checking the “Troubleshooting
Guide,” additional help can be found by checking the “Requesting Assistance or Service” section or by calling our
Consumer Assistance Center, 1-800-235-0665 (toll-free), from anywhere in the U.S.A. or Canada.
LENGTH OF
WARRANTY:
ONE YEAR FULL
WARRANTY
FROM DATE OF
INSTALLATION
TWO YEAR FULL
WARRANTY
FROM DATE OF
INSTALLATION
KITCHENAID
WILL NOT PAY FOR:
A. Service calls to:
1. Correct the installation of the refrigerator.
2. Instruct you how to use the refrigerator.
3. Replace house fuses or correct house
wiring.
4. Replace house plumbing.
B. Repairs when refrigerator is used in other
than normal home use.
C. Damage resulting from accident, alteration,
misuse, abuse, improper installation, or
installation not in accordance with local
electrical codes or plumbing codes.
D. Any food loss due to product failure.
E. Any labor costs during the limited
warranty.
F. Replacement parts or repair labor costs for
units operated outside the United States or
Canada.
G. Repairs to parts or systems resulting from
unauthorized modifications made to the
appliance.
H. Removal and replacement of trim or
decorative panels that interfere with
servicing the product.
I. Labor or parts installed by any non-
designated service company during the
full warranty period, unless approved by
KitchenAid before service is performed.
J. Any medicine loss due to product failure.
KITCHENAID
WILL PAY FOR:
Replacement parts and labor costs to
correct defects in light bulbs. Service must
be provided by a designated KitchenAid
servicing outlet.
Replacement parts and repair labor costs
to correct defects in materials or workman-
ship. Service must be provided by a
designated KitchenAid servicing outlet.
Replacement parts and repair labor costs
to correct defects in materials or
workmanship in the sealed refrigeration
system.
These parts are:
1. Compressor; 2. Evaporator;
3. Condenser; 4. Drier;
5. Connecting Tubing.
Service must be provided by a designated
KitchenAid servicing outlet.
Replacement parts to correct defects in
materials or workmanship in the sealed
refrigeration system.
These parts are:
1. Compressor; 2. Evaporator;
3. Condenser; 4. Drier;
5. Connecting Tubing.
Replacement parts to correct defects in
materials of workmanship in the
refrigerator door bins.
11/99
Built-In Refrigerator Warranty
THIRD THROUGH
SIXTH YEAR FULL
WARRANTY
FROM DATE OF
INSTALLATION
SEVENTH THROUGH
TWELFTH YEAR
LIMITED
WARRANTY
FROM DATE OF
INSTALLATION
LIFETIME LIMITED
WARRANTY ON
REFRIGERATOR
DOOR BINS
®
30
31
WATER FILTER CERTIFICATES
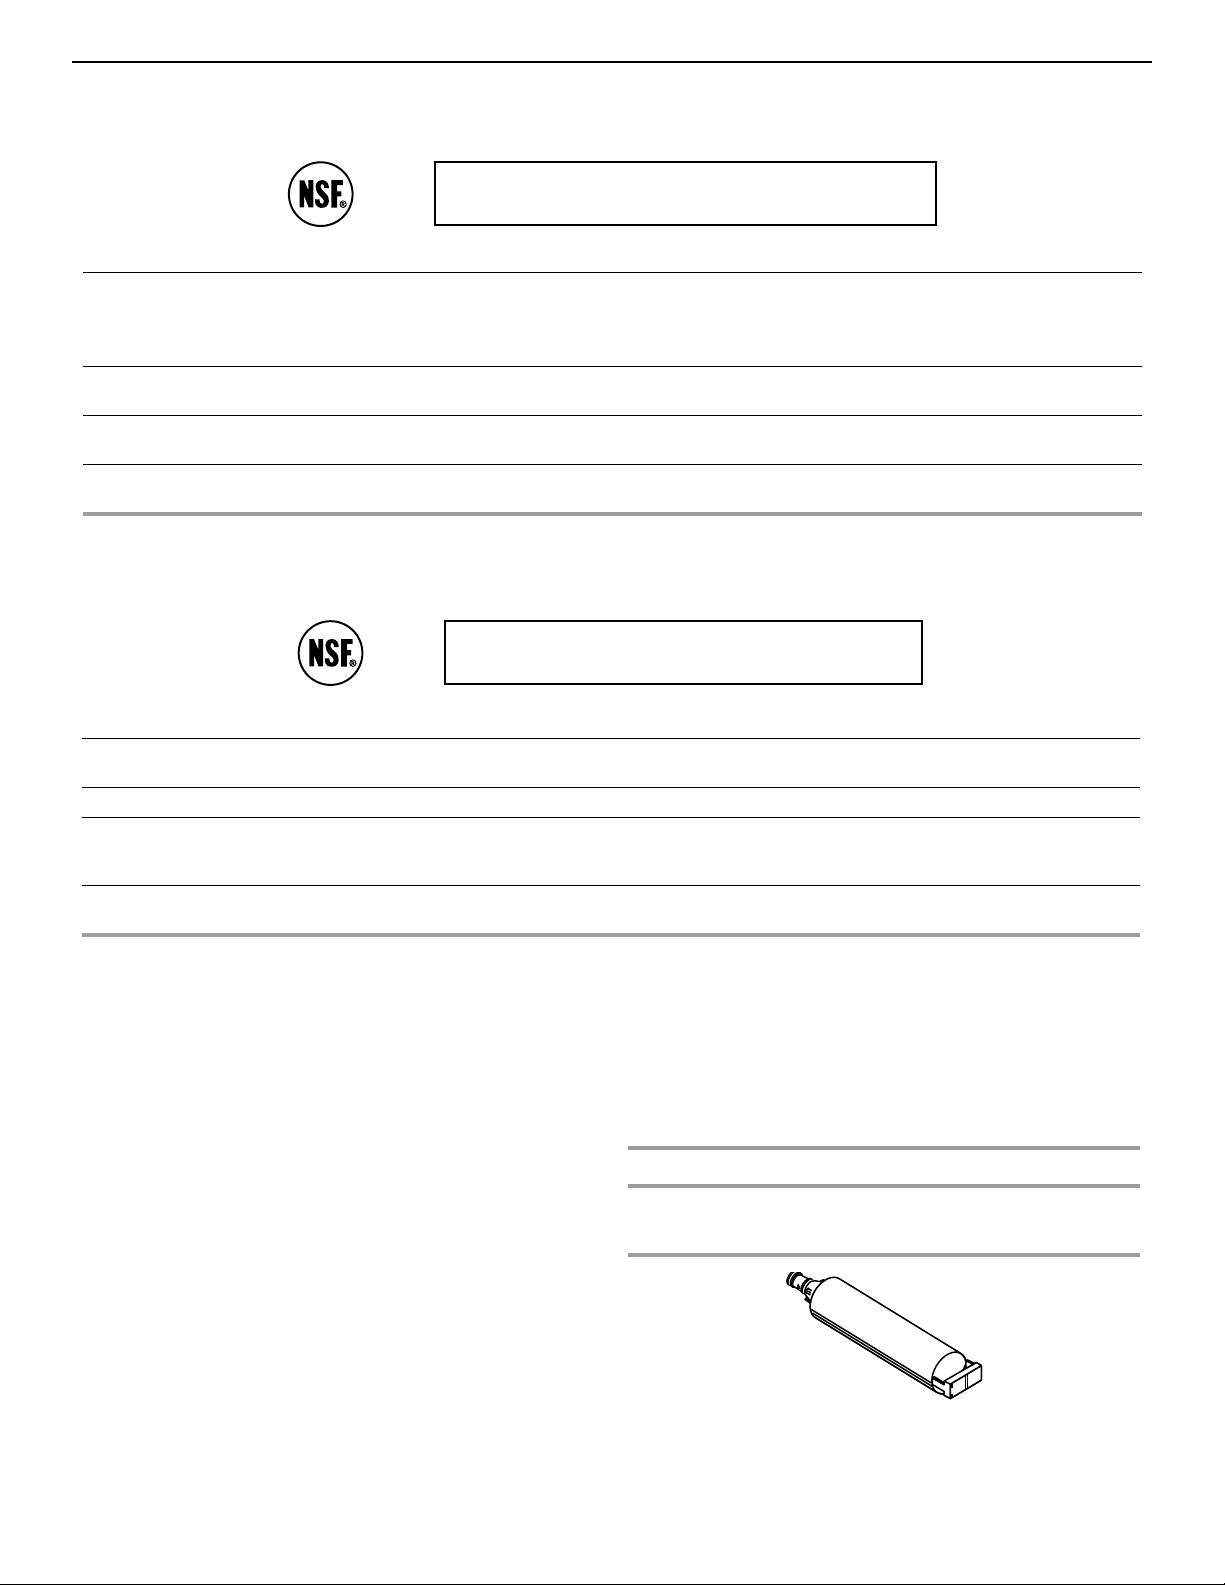
Base Grille Water Filtration System Model WF-L500/L500
Capacity:
500 Gallons (1893 Liters)
Service Flow Rate:
0.5 GPM (1.89 L/min.) @ 60 psi.
■
It is essential that operational, maintenance, and filter
replacement requirements be carried out for the product to
perform as advertised.
■
■
Model WF-NL500
The filter monitor system measures the
amount of water that passes through the filter and alerts you
to replace the filter. When 90% of the filter’s rated life is used,
the filter indicator light changes from green to yellow. When
100% of the filter’s rated life is used, the filter indicator light
changes from yellow to red, and it is recommended that you
replace the filter. Use replacement cartridge L500, part#
4392857. 2000 Suggested retail price of $29.95 U.S.A./
$39.95 Canada.
■
The product is for cold water use only.
■
Do not use with water that is microbiologically unsafe or of
unknown quality without adequate disinfection before or after
the system.
■
Refer to the “Assistance or Service” section for the
Manufacturer’s name, address and telephone number.
■
Refer to the “Warranty” section for the Manufacturer’s limited
warranty.
Application Guidelines/Water Supply Parameters
†
Te
*Test requirement is at least 100,000 particles/ml of AC Fine Test Dust. **Cyst performance is % reduction based on NSF Standard 53. ***Test
requirement is 0.15 mg/L ± 10%. These contaminants are not necessarily in your water supply. Performance may vary based on local water conditions.
st requirement is 0.15 mg/L ± 10%.
††
These contaminants are not necessarily in your water supply. Performance may vary based on local water conditions.
®
NSF is a registered trademark of NSF International.
Substance
Reduction
Average
Influent
Maximum
Effluent
Average
Effluent
Minimum %
Reduction
Average %
Reduction
NSF Test
Number
Chlorine, Taste/Odor 2.0 mg/L N/A 0.1 mg/L N/A 95% 981788
Contaminant
Reduction
Performance
††
U.S. EPA
MCL
Average
Influent
Maximum
Effluent
Average
Effluent
Minimum%
Reduction
Average%
Reduction
NSF Test
Number
Lead: @ pH 6.5
Lead: @ pH 8.5
0.015 mg/L
0.015 mg/L
0.16 mg/L
†
0.14 mg/L
†
0.007 mg/L
0.012 mg/L
0.005 mg/L
0.008 mg/L
95%
91%
97%
94%
976115
976116
Tested and certified by NSF International against ANSI/NSF
Standard 42 for the reduction of Chlorine (Class I) Taste and Odor
and against ANSI/NSF Standard 53 for the reduction of Lead.
Water Supply
Water Pressure
Water Temperature
City or Well
30 - 120 psi (207 - 827 kPa)
33° - 100°F (0.6° - 37.8° C)
Base Grille Water Filtration System Model WF-LC400/LC400
Capacity:
400 Gallons (1514 Liters)
Service Flow Rate:
0.5 GPM (1.89 L/min.) @ 60 psi.
Substance Reduction
Aesthetic Effects
Chlorine Taste/Odor
Particulate
U.S. EPA
MCL
N/A
N/A
Average
Influent
2.0 mg/L
610,000/mL*
Maximum
Effluent
N/A
N/A
Average
Effluent
0.04 mg/L
154/mL
Minimum %
Reduction
N/A
N/A
Average %
Reduction
98%
99%
NSF Test
Number
994707
994711
Contaminant
Reduction
U.S. EPA
MCL
Average
Influent
Maximum
Effluent
Average
Effluent
Minimum %
Reduction
Average %
Reduction
NSF Test
Number
Cyst
Turbidity
99.95%**
0.5 NTU
89,250/mL*
29 NTU
6/mL
0.12 NTU
2.3/mL
0.09 NTU
99.993%
99.59%
99.997%
99.69%
994710
994710
Lead
: @ pH 6.5
Lead
: @ pH 8.5
0.015 mg/L
0.015 mg/L
0.16 mg/L***
0.16 mg/L***
0.001mg/L
0.002 mg/L
0.001 mg/L
0.001 mg/L
99.4%
98.8%
99.4%
99.4%
994708
994709
Tested and certified by NSF International against ANSI/NSF Standard
42 for the reduction of Chlorine (Class I) Taste and Odor and against
ANSI/NSF Standard 53 for the reduction of Lead, Cysts and Turbidity.
Model WF-LC400
The filter monitor system measures the
amount of water that passes through the filter and alerts you
to replace the filter. When 90% of the filter’s rated life is used,
the filter indicator light changes from green to yellow. When
100% of the filter’s rated life is used, the filter indicator light
changes from yellow to red, and it is recommended that you
replace the filter. Use replacement cartridge LC400,
part# 9902. 2000 suggested retail price of $39.95 U.S.A./
$49.95 Canada.
PRODUCT DATA SHEETS
9/00
Printed in U.S.A.
PART NO. 2209477
© 2000 KitchenAid
® Registered trademark/
TM
trademark of KitchenAid, U.S.A., KitchenAid Canada licensee in Canada