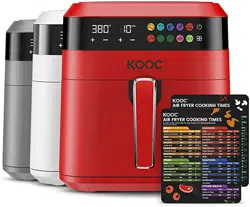
AIR FRYER
KAF650 Series
OWNER’S MANUAL
HOUSEHOLD USE ONLY
We can always be reached at
* All users should read and understand this instruction manual before operating or cleaning this appliance.

This appliance is not intended to be used in household and similar applications such as:
- staff kitchen areas in shops, offices and other working environments;
- farmhouses;
- by clients in hotels, motels and other residential type environments;
- bed and breakfast type environments.
Please read this manual carefully before you use the appliance and save it for future reference.
SAVE THESE INSTRUCTIONS
When using electrical appliances, basic safety precautions should always be followed including
the following:
1. Read all instructions.
2. Do not touch hot surfaces.
3. To protect against electric shock do not immerse cord, plugs, or base in water or other liquid.
4. WARNING: This electrical appliance contains a heating function. Surfaces, also different than
the functional surfaces, can develop high temperatures. Since temperatures are differently
perceived by different persons, this equipment shall be used with CAUTION. The equipment
shall be touch only at intended handles and gripping surfaces, and use heat protection like
gloves or similar. Surfaces other than intended gripping surfaces shall get sufficiently time to
the cool down before getting touched.
5. Unplug from outlet when not in use and before cleaning. Allow to cool before putting on or
taking off parts.
6. If the supply cord is damaged, it must be replaced by the manufacturer, its service
agent or similarly qualified persons in order to avoid a hazard.
7. The use of accessory attachments not recommended by the appliance manufacturer may
cause injuries.
8. Do not use outdoors.
9. Do not let cord hang over edge of table or counter, or touch hot surfaces.
IMPORTANT SAFEGUARDS

10. Do not place on or near a hot gas or electric burner, or in a heated oven.
11. Extreme caution must be used when moving an appliance containing hot oil or other hot
liquids.
12. Always attach plug to appliance first, then plug cord in the wall outlet. To disconnect, turn
any control to "off," then remove plug from wall outlet.
13. Do not use appliance for other than intended use.
14. This appliance can be used by children aged from 8 years and above and persons with
reduced physical, sensory or mental capabilities or lack of experience and knowledge if
they have been given supervision or instruction concerning use of the appliance in a safe
way and understand the hazards involved. Children shall not play with the appliance.
Cleaning and user maintenance shall not be made by children unless they are old than 8
and supervised.
15. Keep the appliance and its cord out of reach of children less than 8 years.
16. The appliances are not intended to be operated by means of an external timer or separate
remote-control system.
This all now Hot-air fryer provides an easy and healthy way of preparing your favorite
ingredients. By using hot rapid air circulation and a top grill, it is able to make numerous dishes.
The best part is that the Hot-air fryer heats food at all directions and most of the ingredients do
not need any oil.
----- Voltage:120V~60Hz
----- Wattage:1700 Watts
----- Capacity of basket:6.5 QT
----- Adjustable temperature:160℉—400℉
----- Timer (0-60 min)
INTRODUCTION
TECHNICAL DATA:
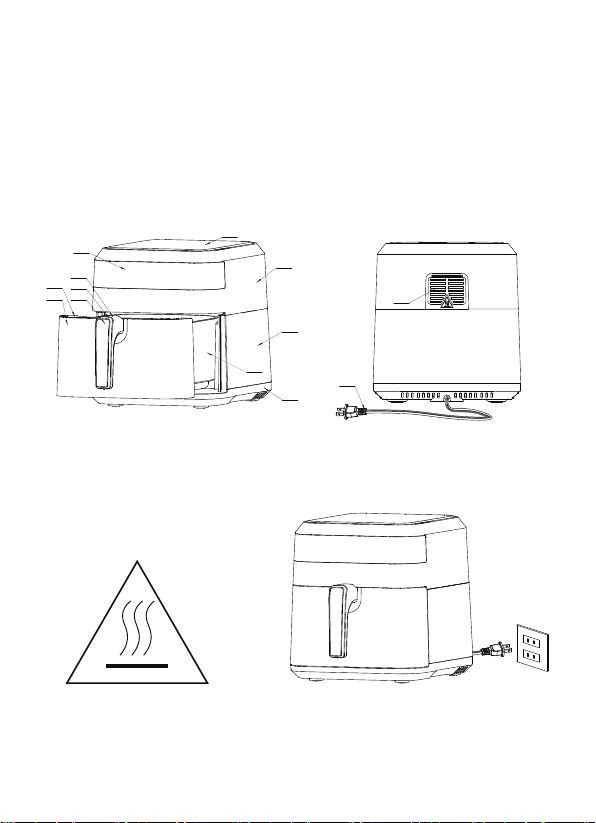
1. Top cover 2. Upper shell 3. Lower shell
4. Base 5. Single pot handle 6. Handle decoration ring
7. Handle cover 8. Drawer panel 9. Drawer movement
10. Control panel 11. Pot 12. Air outlet
13. Main cord(Electrical cord)
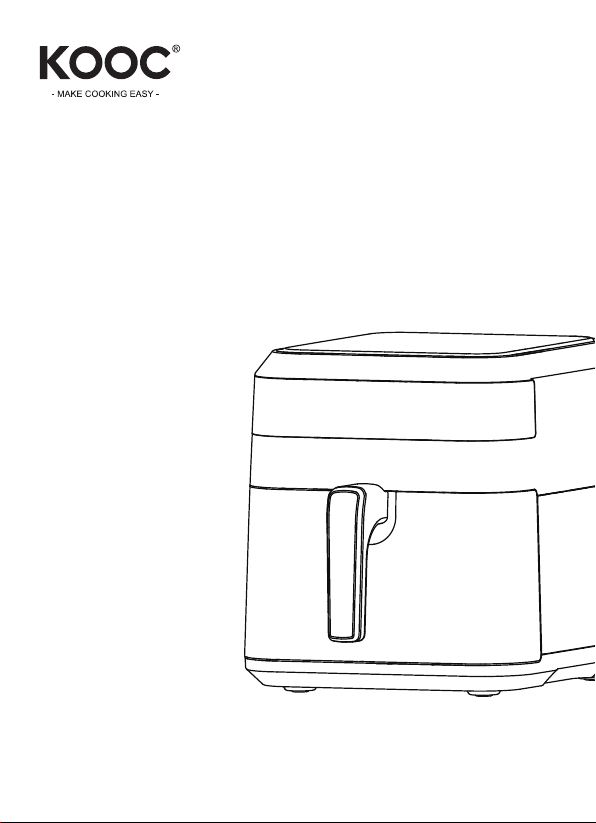
GENERAL DESCRIPTION (Fig.1)
Fig.1
Fig.3Fig.2
12
13
1
2
3
4
5
6
7
8
9
10
11
120V
1
2
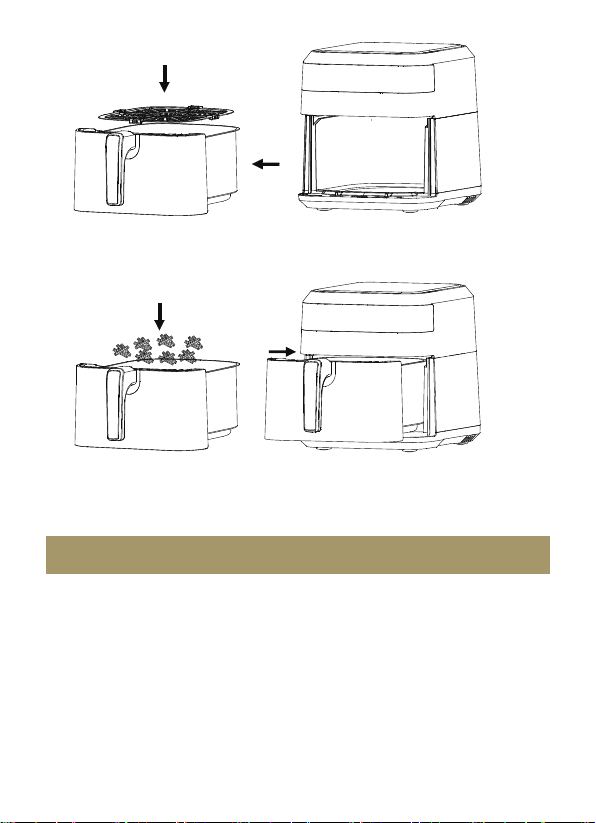
Fig.4Fig.5
3
4
Fig.7Fig.6
- This appliance can be used by children aged from 8 years and above and persons with
reduced physical, sensory or mental capabilities or lack of experience and knowledge if they
have been given supervision or instruction concerning use of the appliance in a safe way and
understand the hazards involved. Children shall not play with the appliance. Cleaning and user
maintenance shall not be made by children unless they are older than 8 and supervised.
- Keep the appliance and its cord out of reach of children less than 8 years.
IMPORTANT
DANGER

- Never immerse the housing, which contains electrical components and the heating elements,
in water nor rinse it under the tap.
- Do not let any water or other liquid enter the appliance to prevent electric shock.
- Always put the ingredients to be fried in the basket, to prevent it from coming into contact with
the heating elements.
- Do not cover the air inlet and the air outer openings while the appliance is operating.
- Do not fill the pot with oil as this may cause a fire hazard.
- Never touch the inside of the appliance while it is operating.
- The temperature of accessible surfaces may be high when the appliance is operating.
- Check if the voltage indicated on the appliance fits the local mains voltage.
- Do not use the appliance if there is any damage on plug, mains cord or other parts.
- Do not go to any unauthorized person to replace or fix damaged main cord.
- Keep the mains cord away from hot surfaces.
- Do not plug in the appliance or operate the control panel with wet hands.
- Do not place the appliance against a wall or against other appliances. Leave at least 6 inches
free space on the back and sides and 6 inches free space above the appliance.
Do not place anything on top of the appliance.
- Do not use the appliance for any other purpose than described in this manual.
- Do not let the appliance operate unattended.
- During hot air frying, hot steam is released through the air outlet openings, Keep your hands
and face at a safe distance from the steam and from the air outlet openings.
- Also be careful of hot steam and air when you remove the pot from the appliance.
- Any accessible surfaces may become hot during use (Fig.2)
- Immediately unplug the appliance if you see dark smoke coming out of the appliance. Wait for
the smoke emission to stop before you remove the pot from the appliance.
WARNING

- Ensure the appliance in placed on a horizontal, even and stable surface.
- This appliance is designed for household use only. It may not suitable to be safely used in
environments such as staff kitchens, farms, motels, and other non-residential environments.
Nor is it intended to be used by clients in hotels, motels, bed and breakfasts and other
residential environments.
- If the appliance is used improperly or for professional or semi-professional purposes or it is not
used according to the instructions in the user manual, the guarantee becomes invalid and we
could refuse any liability for damage caused.
- Always unplug the appliance while not using.
- The appliance needs approximately 30 minutes to cool down for handle or cleaning safely.
CAUTION
1. Remove all packaging materials.
2. Remove any stickers or labels from the appliance .
3. thoroughly clean the shelf and pot with hot water, some washing-up liquid and a non-abrasive
sponge.
4.Wipe inside and outside of the appliance with a moist cloth.
This is an oil-free fryer that works on hot air, Do not fill the pot with oil or frying fat directly.
Notice:
When your air fryer is heated for the first time, it may emit slight smoke or odor. This is
normal with many heating appliances. This does not affect the safety of your appliance.
BEFORE FIRST USE
1. Place the appliance on a stable, horizontal and even surface.
Do not place the appliance on non-heat-resistant surface.
2. Place the basket in the pot (Fig.3).
Do not fill the pot with oil or any other liquid.
Do not put anything on top of the appliance, the airflow will be disrupted and affects the hot
air frying result.
PREPARING FOR USE

The oil-free can prepare a large range of ingredients.
USING THE APPLIANCE
1. Connect the mains plug into an earthed wall socket.
2. Carefully pull the pot out of the Hot-air fryer (Fig.4)
3. Put the ingredients in the basket. (Fig.6)
4. Slide the pot back into the Hot-air fryer (Fig 7)
Noting to carefully align with the guides in the body of the fryer.
Never use the pot without the basket in it.
5. Determine the required preparation time for the ingredient (see section ‘Settings’ in this chapter).
6. Some ingredients require shaking halfway through the preparation time (see section
“Settings” in this chapter). To shake the ingredients, pull the pot out of the appliance by the
handle and shake it. Then slide the pot back into the air fryer
Tip: If you set the timer to half the preparation time, you hear the timer buzzer when you
have to shake the ingredients. However, this means that you have to set the timer again
to the remaining preparation time after shaking.
7. When you hear the timer buzzer, the set preparation time has elapsed. Pull the pot out of the appliance.
Note: You can also switch off the appliance manually.
Tip: You can adjust temperature or time according to your taste during use. Your settings
will be kept for about 10 mins after you pull the pot out of the body.
8. Check if the ingredients are ready.
If the ingredients are not ready yet, simply slide the pot back into the appliance and set the
timer to a few extra minutes.
9. To remove ingredients (e.g. fries), pull the pot out of the Hot-air fryer and place it on trial framework.
10. Use clips or tools to transfer food to a plate.
11. When a batch of ingredients is ready, the Hot-air fryer is instantly ready for preparing another batch.
CAUTION:
Do not touch the pot during and some time after use, as it gets very hot. Only
hold the pot by the handle.
Hot air frying
The oil-free can prepare a large range of ingredients.
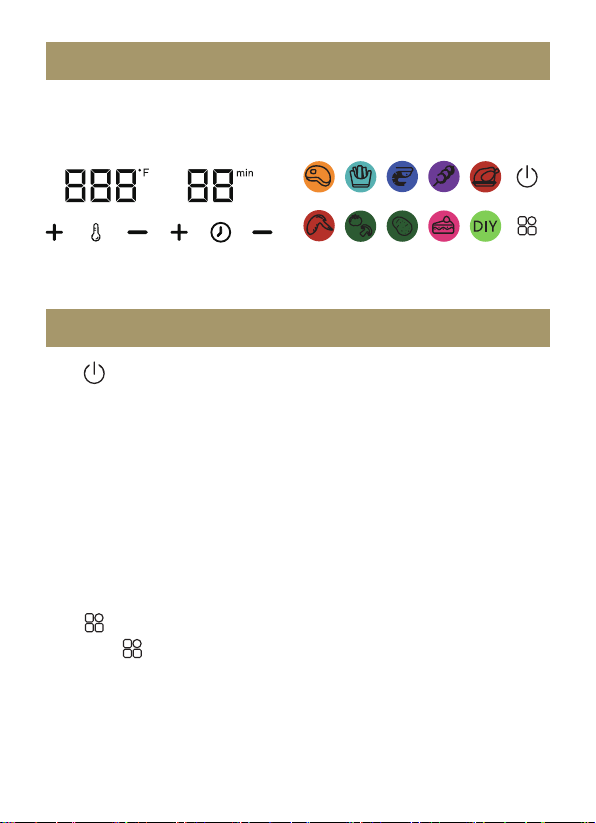
CONTROL PANEL INSTRUCTIONS
OPERATION INSTRUCTIONS
①⑮⑭⑬⑫⑪
②⑳⑲⑱⑰⑯⑥⑤④③
⑩
⑧
⑨
⑦
Key 1 – Power Key
Once the Basket and pot are properly placed in the main housing, the Power light will be
illuminated. Selecting the power key for 0.5 seconds will make the unit default temperature 400℉,
while the cooking time will be set to 15 minutes. Selecting the Power key a second time will start
the cooking process. Pressing the power key for 0.5 seconds to close the entire device during
cooking,synchronous stop of motor.
After pressing the power key for 0.5 seconds,If there is no operation,the entire device will turn off
in 1 minute and beep 5 times.Press the power button to enter the pause mode, if there is no
operation,the entire device will turn off in 1 minute and beep 5 times.
Note: During cooking, you can touch the keys to control the pause and start of cooking.
Key 2 – Preset Key
Selecting the “ ” Preset key enables you to scroll through the 9 popular food choices and
custom program. Once selected, the predetermined time and cooking temperature function
begins.

Key 3 & Key 4 – Temperature Control Keys
The Key 3 and Key 4 symbols enable you to add or decrease cooking temperature 10℉ at a
time. Keeping the Key held down will rapidly change the temperature. Temperature Control
range: 160℉—400℉.
Key 5 & Key 6 – Timer Control Keys
The Key 5 and Key 6 symbols enable you to add or decrease cooking time, one minute at a
time. Keeping the key held down will rapidly change the time.Temperature Control
range:1min-60min.
Indicator light “7 ” Temperature light
Indicator light “8 ” Timer light
Indicator light “9 ” Temperature display
Indicator light “ 10 ”Time display
Indicator light “ 11-19 ” Recipe indicator
Indicator light “ 20 ” custom program
When you select a custom program, the time and temperature can be adjusted according to
your own needs, and have memory function. When the next time you start to enter the custom
program, you do not need to reset the time and temperature.
Keep in mind that these settings are indications. As ingredients differ in origin, size, shape as
well as brand, we cannot guarantee the best setting for your ingredients.
Because the Rapid Air technology instantly reheats the air inside the appliance instantly
Pull the pot briefly out of the appliance during hot air frying barely disturbs the process.
NOTE:
SETTINGS

- Smaller ingredients usually require a slightly shorter preparation time than larger ingredients.
- A larger amount of ingredients only requires a slightly longer preparation time, a smaller
amount of ingredients only requires a slightly shorter preparation time.
- Shaking smaller ingredients halfway through the preparation time optimizes the end result and
can help prevent unevenly fried ingredients.
- Add some oil to fresh potatoes for a crispy result. Fry your ingredients in the Hot-air fryer
within a few minutes after you added the oil.
- Do not prepare extremely greasy ingredients such as sausages in the Hot-air fryer .
- Snacks that can be prepared in a oven can also be prepared in the Hot-air fryer
- The optimal amount for preparing crispy fries is 500 grams.
- Use pre-made dough to prepare filled snacks quickly and easily. Pre-made dough also
requires a shorter preparation time than home-made dough.
- Place a baking tin or oven dish in the Hot-air fryer basket if you want to bake a cake or quiche
or if you want to fry fragile ingredients or filled ingredients
- You can also use the Hot-air fryer to reheat ingredients. To reheat ingredients, set the
temperature to 300℉ for up to 10 minutes.
Note: Add 3 minutes to the preparation time when you start frying while the Hot-air fryer is still cold.
TIPS
Clean the appliance after every use.
Do not use metal kitchen utensils or abrasive cleaning materials to clean the pot and
shelf, as this may damage the non-stick coating.
CLEANING
1. Remove the mains plug from the wall socket and let the appliance cool down.
Note: Remove the pot to let the Hot-air fryer cool down more quickly.
2. Wipe the outside of the appliance with a moist cloth.
3. Clean the pot and basket with hot water, some washing-up liquid and a non-abrasive sponge.
You can use degreasing liquid to remove any remaining dirt.
Tip: If dirt is stuck to the Shelf or the bottom of the pot, fill the pot with hot water with some
washing-up liquid. Put the Shelf in the pot and let the pot and the Shelf soak for approximately
10 minutes.
4. Clean the inside of the appliance with hot water and non-abrasive sponge.
5. Clean the heating element with a cleaning brush to remove any food residues.
1. Unplug the appliance and let it cool down.
2. Make sure all parts are clean and dry.
STORAGE
Do not throw away the appliance with the normal household waste when it is exhausted,but
hand it in at an official collection point for recycling. By doing this, you help to preserve the
environment.
ENVIRONMENT
TROUBLESHOOTING
PROBLEM
The Hot-air fryer
does not work
The ingredients
fried with the air
fryer are not done.
The appliance is not
plugged in.
You have not set
the timer.
The amount of ingredients
in the basket is too big.
The set temperature is too
low.
The preparation time is too
short.
Put the mains plug in an earthed wall socket.
Set the timer key to the required preparation time to
switch on the appliance.
Put smaller batches of ingredients in the basket. Smaller
batches are fried more evenly.
Set the temperature key to the required temperature setting
(see section ‘settings’ in chapter ‘Using the appliance’).
The ingredients
are fried unevenly
in the air fryer.
Certain types of ingredients
need to be shaken halfway
through the preparation time.
Ingredients that lie on top of or across each other (e.g. fries)
need to be shaken halfway through the preparation time. See
section ‘Settings’ in chapter ‘Using the appliance’.
Fried snacks are
not crispy when
they come out of
the air fryer.
You used a type of snacks
meant to be prepared in a
traditional deep fryer.
Use oven snacks or lightly brush some oil onto the snacks for
a crispier result.
I cannot slide the
pan into the
appliance
properly.
There are too much
ingredients in the basket.
Do not fill the basket beyond the MAX indication.
The basket is not placed in
the pot correctly.
Push the basket down into the pot until you hear a click.
Set the timer to the required preparation time (see
section ‘Settings’ in chapter’ Using the appliance’).
POSSIBLE CAUSE SOLUTION
White smoke
comes out of the
appliance.
You are preparing greasy
ingredients.
When you fry greasy ingredients in the air fryer, a large
amount of oil will leak into the pot. The oil produces
white smoke and the pot may heat up more than usual.
This does not affect the appliance or the end result.
The pot still contains grease
residues from previous use.
White smoke is caused by grease heating up in the pan .
make sure you clean the pan properly after each use.
Fresh fries are
fried unevenly in
the air fryer.
You did not use the right
potato type.
You did not rinse the potato
sticks properly before you
fried them.
Use fresh potatoes and make sure they stay firm during
frying.
Rinse the potato sticks properly to remove starch from the
outside of the sticks.
Fried snacks are
not crispy when
they come out of
the air fryer.
The crispiness of the fries
depends on the amount of
oil and water in the fries.
Make sure you dry the potato sticks properly before you
add the oil.
Cut the potato sticks smaller for a crispier result.
Add slightly more oil for a crispier result.

1. Your small kitchen appliance is warranted to the original purchaser to be free from any manu-
facturing defects under normal use and conditions for one (1) year, cord excluded. This
Warranty applies only to the original purchaser of this product.
2. Retail stores/merchants selling this product do not have the right to alter, modify, or in any
way revise the terms and conditions of the warranty.
3. If you use your appliance for household use and according to instructions, it should give you
years of satisfactory service.
4. At its sole discretion, KOOC will either repair or replace the product found to be defective
during the warranty periods.
5. This limited warranty covers appliances purchased and used within USA and does NOT
cover normal wear of parts or:
- Damages caused by unreasonable use, neglect, normal wear and tear, commercial
use,improper assembly, or installation of product.
- Damages caused by replacement or resetting of house fuses or circuit breakers.
- Defects other than manufacturing defects.
- Breakage caused by misuse, abuse, accident, alteration, lack of proper care and maintenance,
or incorrect current or voltage.
- Lost or missing parts of the product. Parts will need to be purchased separately.
- Damages of parts that are not electrical; i.e., cracked, or broken plastic/glass, scratched/dented
inner pots.
- Damage from service or repair by unauthorized personnel.
- Extended warranties purchased via a separate company or reseller.
- Acts of nature such as fire, floods, hurricanes, tornadoes, etc.
WARRANTY IS ONLY VALID WITH A DATED PROOF OF PURCHASE
If you have any problems with this unit, email us at [email protected] for support.
Limited Warranty
LIMITED WARRANTY# ONE (1) YEAR

6. This warranty does not apply to re-manufactured merchandise.
KOOC shall not be liable for any incidental or consequential damages caused by the breach
of any express or implied warranty. Apart from the extent prohibited by applicable law, any
implied warranty of merchant-ability or fitness for a particular purpose is limited in time to the
duration of the warranty.
This warranty is effective only if the product is purchased and operated in the USA; product
usage which is in violation of the written instructions provided with the unit will void this warranty.
This warranty gives you special legal rights and you may also have other rights to which you are
entitled which may vary by state, province, and/or jurisdiction.
*Any instruction or policy included in this manual may be subject to change at any time.