Loading ...
Loading ...
Loading ...
INSTALLATIONINSTRUCTIONS
= installation clearances
The location must be largeenough to fully open
the washer door
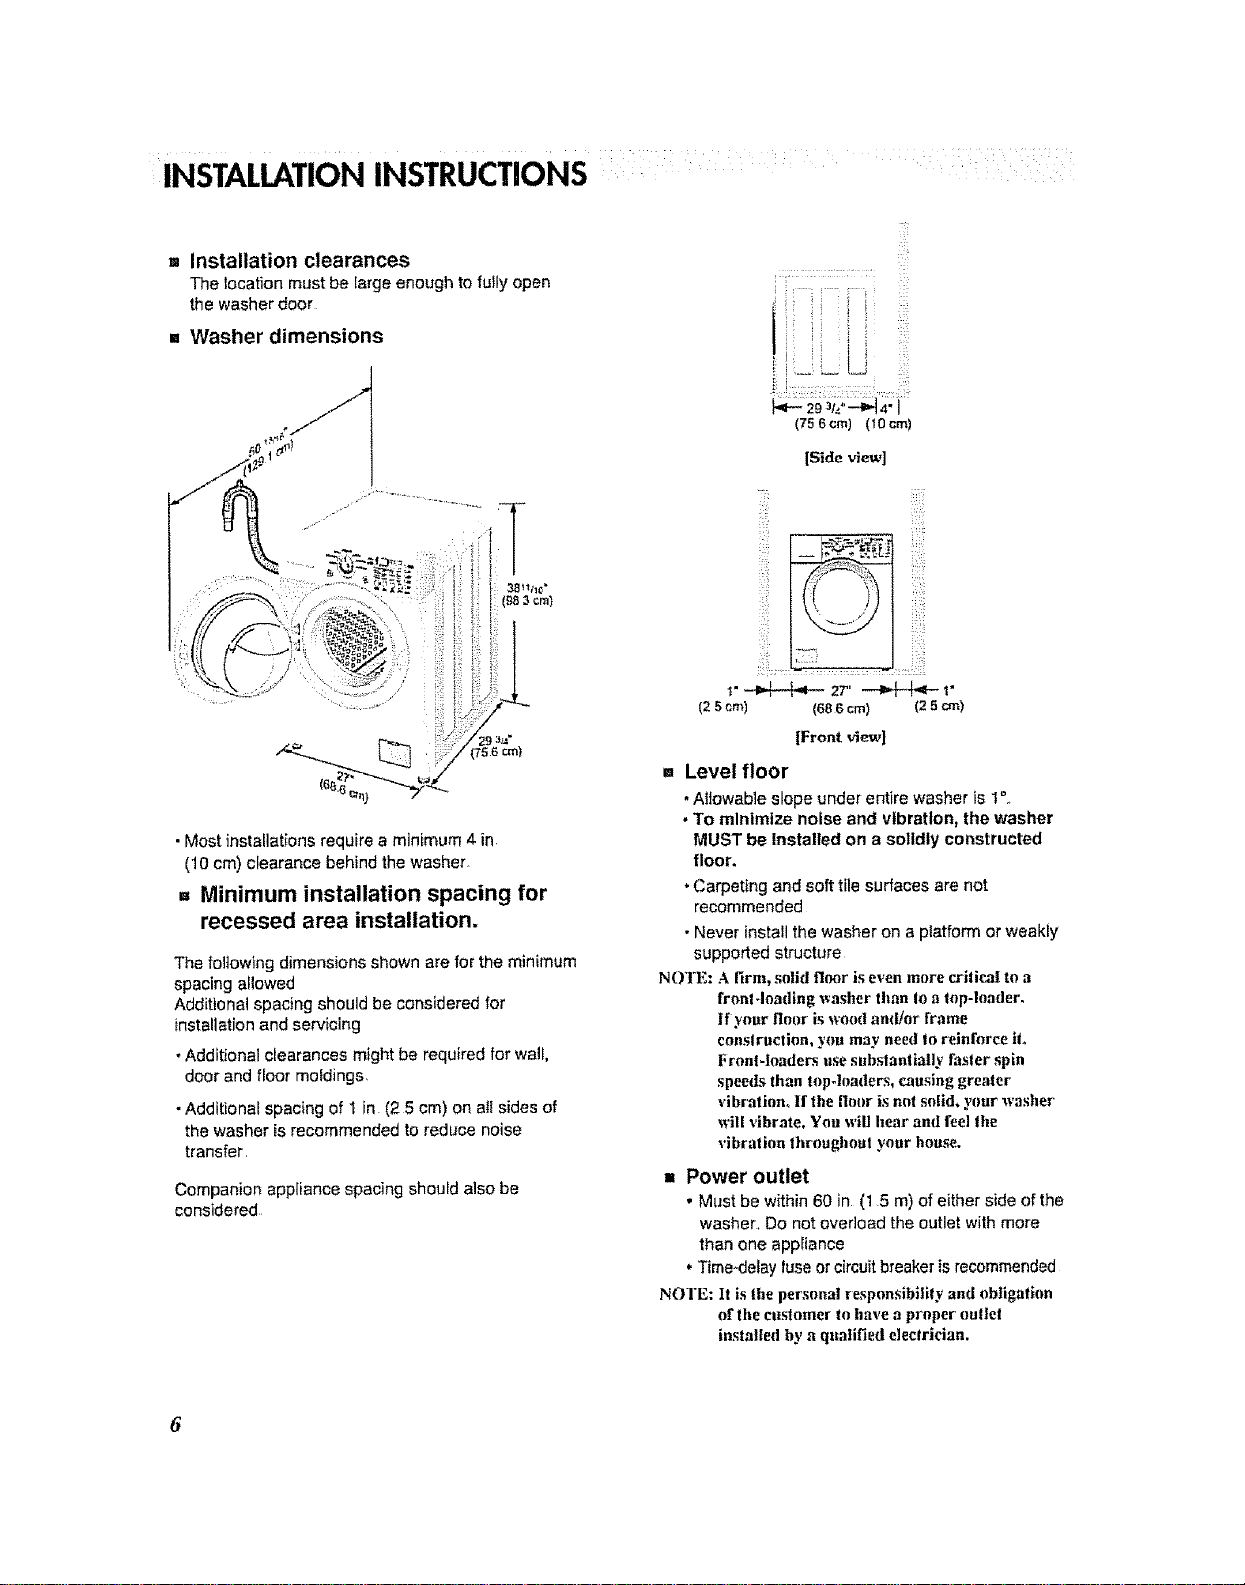
•' Washer dimensions
• Most installationsrequire a mimmum 4 in.
(10 cm) clearance behind the washer.
= Minimum installation spacing for
recessed area installation.
The following dimensions shown are for the minimum
spacing allowed
Additional spacing should be considered for
installation and servicing
•Additional clearances might be required for wall,
door and floor moldings.
-Additional spacing of 1 in (2 5 cm) on all sides of
the washer is recommended to reduce noise
transfer.
Companion appliance spacing should also be
considered
(75 6cm) (10cm)
[Side vi_]
::_ i:)i!:•
"=i _ _ _ :::
!" -_b-b-- =T' -_F+_- I"
(25cm) (686 cm) (25cm)
iFront view]
= Level floor
• Allowable slope under entire washer is 1°.,
. To mlnlmtze noise and vibration, the washer
MUST be Installed on a solidly constructed
floor.
. Carpeting and soft tile surfaces are not
recommended
• Never install the washer on a platform or weakly
supported structure
NOTE: A lirm, solid floor is even more crilical to a
front Joading _vasher than Io a top-loader.
If your floor is wo(_l aml!or frame
conslrnclion, y_m may need to reinforce iL
Front-loaders use substantially fas|er spin
speeds than top-loaders, causing greater
vibration, If the floor is md solid, your washer
will vibrate. Yon will hear and feel the
vibration lhroaghoul your Imuse.
•' Power outlet
• Must be within 60 in (1 5 m) of either side of the
washer, Do not overload the cutlet with more
than one appliance
• Time-delay fuseor circuit breaker is recommended
NOTE: It is the personal responsibility and obligation
of the customer to have a proper outtel
installed by a qualified eleelrician.
6
Loading ...
Loading ...
Loading ...