Loading ...
Loading ...
Loading ...
5
English
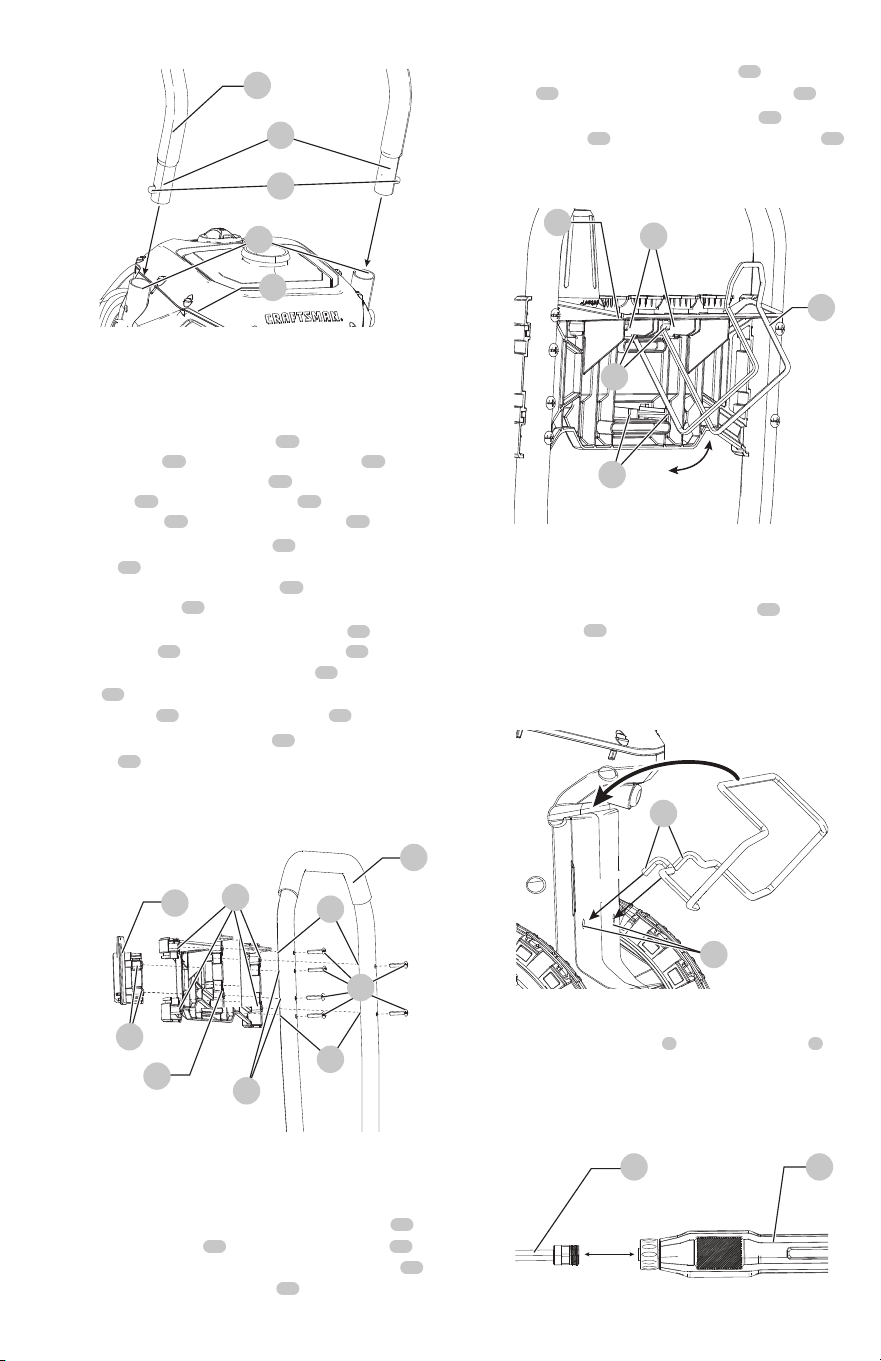
Fig.F
35
28
Power Cord Storage
(Fig. G)
Your pressure washer is not fully assembled in the carton.
1. Insert power cord storage retaining hooks
39
into two
retaining holes
40
as shown in Fig. G.
2. Rotate power cord storage upward and past the detent.
The power cord storage will click firmly into place.
Attaching Spray Wand (Fig. H)
1. To connect the spray wand
2
to the spray handle
3
,
insert the end of the spray wand inside the spray handle
and turn the spray wand clockwise until its firmly in
working position.
High Pressure Hose Storage Hook (Fig. F)
Your pressure washer is not fully assembled in the carton.
1. To assemble the high pressure hose storage hook
35
to the crossmember
28
, squeeze the detent end
36
of
the hook so it will slide between the retaining slots
37
on the rear of the crossmember
28
.
Fig.H
2 3
Assemble Crossmember and Spray Handle
Storage Hook (Fig. E)
Your pressure washer is not fully assembled in the carton.
1. To assemble the crossmember
28
to the
frame handle
24
, align the four screw tabs
29
on
the back of the crossmember
28
with the with the
four slots
30
in the frame handle
24
and place the
crossmember
28
onto the frame handle
24
.
2. Insert the four retaining screws
31
through the frame
handle
24
and use a screwdriver to fully tighten the
screws.
Ensure the crossmember
28
is fully secured to
the frame handle
24
.
3. To assemble the spray handle storage hook
32
to the
frame handle
24
, align the two screw tabs
33
on the
back of the spray handle storage hook
32
with the two
slots
34
in the frame handle and place the spray handle
storage hook
32
onto the frame handle
24
.
4. Insert the two retaining screws
31
through the frame
handle
24
and use a screwdriver to fully tighten the
screws.
Ensure the
spray handle storage hook
is fully
secured to the frame handle.
2. Release the pressure hose storage hook
35
allowing the
detents
36
to rest securely in the retaining slots
37
.
3. Press the high pressure hose storage hook
35
onto the
locking detents
38
on the rear of the crossmember
28
until it clicks into place.
Fig.D
25
27
26
7
24
Fig.G
39
40
37
36
38
Fig.E
24
32
33
29
30
30
31
34
28
Loading ...
Loading ...
Loading ...