Loading ...
Loading ...
Loading ...
English
4
RPM .................... revolutions per
minute
sfpm ................... surface feet per
minute
SPM .................... strokes per minute
OPM .................... oscillations per
minute
A ......................... amperes
W ........................watts
or AC ...........alternating current
or AC/DC .... alternating or
direct current
...................... Class II
Construction
(double insulated)
n
o
.......................no load speed
n .........................rated speed
......................earthing terminal
.....................safety alert symbol
.....................visible radiation
..................... avoid staring at
light
..................... wear respiratory
protection
..................... wear eye
protection
..................... wear hearing
protection
..................... read all
documentation
IPXX .................... IP symbol
ASSEMBLY AND ADJUSTMENTS
WARNING: To reduce the risk of serious personal
injury, turn unit off and disconnect it from
power source before making any adjustments or
removing/installing attachments or accessories.
An accidental start-up can causeinjury.
Intended Use
This pressure washer is intended for cleaning boats, cars,
decks, driveways, grills, house siding, motorcycles, patios,
and outdoorfurniture.
DO nOT let children come into contact with the tool.
Supervision is required when inexperienced operators use
thistool.
Motor
Be sure your power supply agrees with the nameplate
marking. Voltage decrease of more than 10% will cause loss
of power and overheating. These tools are factory tested; if
this tool does not operate, check power supply.
Specifications
Maximum Pounds per Square Inch 2,100
Rated Gallons per Minute* 1.2
Electrical Requirements 120V
AC
~60Hz, 13A
Electrical Cord 35 ft. (10.6 m)
High Pressure Hose 25 ft. (7.6 m)
Minimum Amp Source 15A
Pressure of Inlet Water* 20-100 PSI
Inlet Water Cold Tap
Soap Consumption Rate 10% MAX
*Water flow and maximum pressure ratings determined in accordance with
CETA CPC-100.
Assemble Frame Handle (Fig. D)
Your pressure washer is not fully assembled in the carton.
1. To assemble the frame handle
24
to the pressure
washer unit
7
, align the upper poles
25
with the lower
poles
26
so the detent pins
27
snap intoposition.
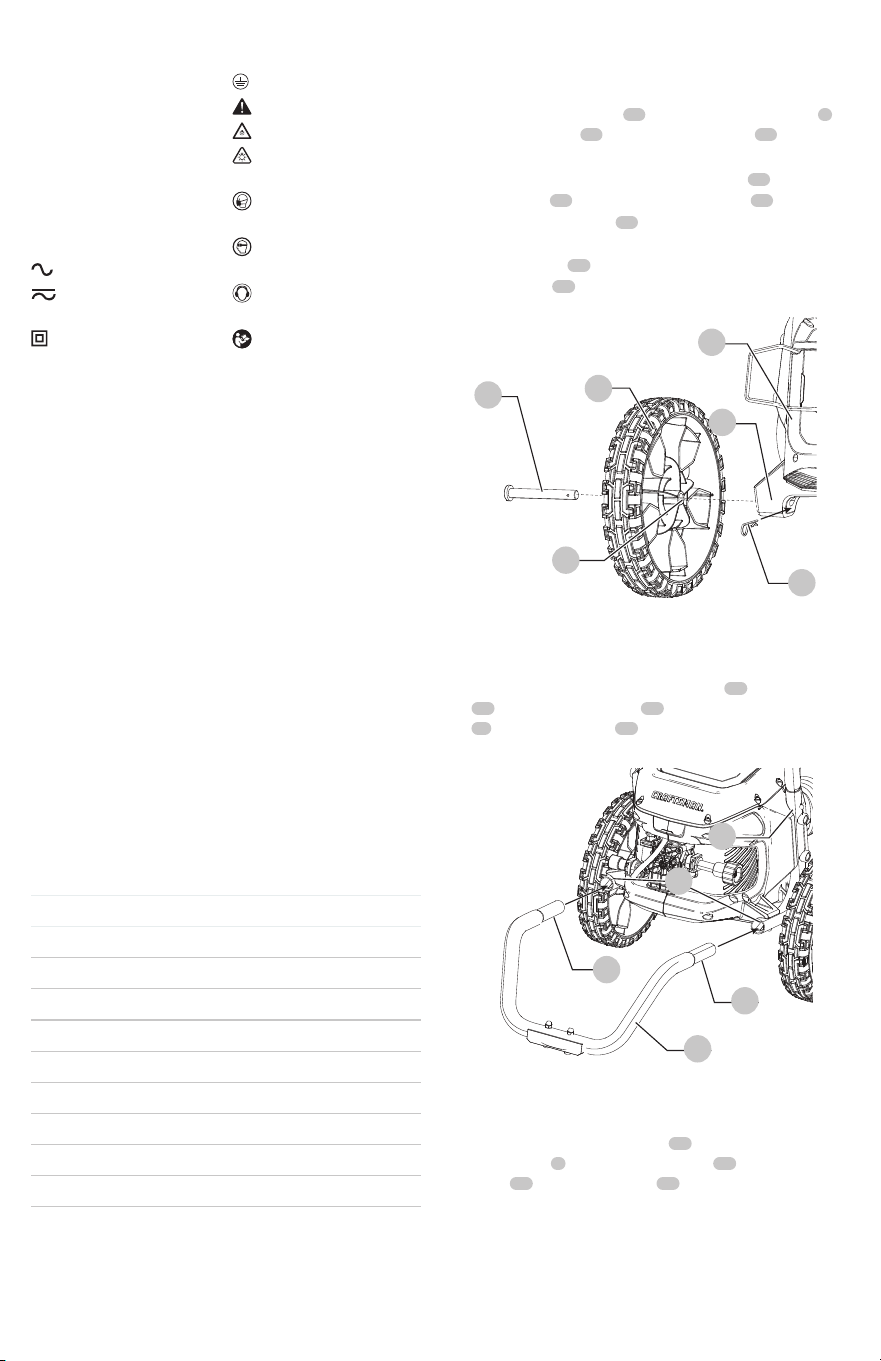
Assemble Lower Frame kickstand (Fig. C)
Your pressure washer is not fully assembled in the carton.
1. To assemble the lower frame kickstand
20
to the frame
21
, align the frame poles
22
with the kickstand poles
20
so the detent pins
23
snap intoposition.
Assemble Wheels (Fig. B)
Your pressure washer is not fully assembled in the carton.
1. To assemble the wheels
15
to the pressure washer unit
7
,
insert an axle pin
16
through the wheel hub
17
.
nOTE: Follow this process for left and right wheels.
2. With the wheel attached, insert the axle pin
16
into the
axle bracket
18
and install the retaining pin
19
as shown
in Fig. B to the axle pin
16
until it snaps into place.
nOTE: Follow this process for left and right wheels.
3. Ensure wheels
15
are fully secured to the
axle bracket
18
.
Fig.B
15
18
7
19
16
17
Fig.C
20
23
23
21
22
Loading ...
Loading ...
Loading ...