Loading ...
Loading ...

III / Assembly and Installation-
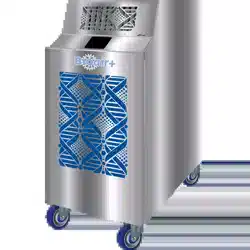
A. KBA600 and KBA1000Arrive from the factory ready to operate after it is removed from the
packing. Only attachment of the collar, optional ceiling kit or user supplied ducting is required.
B. KBA600P and KBA1000P users will need to remove one or both cover plateson the supply air
before operatingand/or install the duct collar to the top of the unit. See illustration. Remove the
front cover plate by extracting the 4screws on each corner of the front cover plate, replacing the
screws into the unit when the plate is removed. And/or removing the top cover plate by removing
the 6 screws attaching the plate. Install the included collar to the unit using the screws from the
top plate, if using the unit to produce negative air pressure. You may choose to operate the
system with one or both plates removed dependent on your application requirements. The front
plate removed will direct the air flow through the quad directional vents and the top plate removed
will direct the air flow through the top flange. When both plates are removed the supply air divides
the airflow through both openings.
C. Ceiling Kit- For all KBA& KBAP systems (Optional Accessory used to create a negative pressure
in your space). The ceiling kit is comprised of a flange with foam tape, fasteners, 1 eight foot
length of flexible duct, duct clamps, and one 24”X24” replacement ceiling tile.The tile is used in
drop ceiling grids but is not limited to only that use. It can be used through any opening that is
approved for the filtered air to pass such as a window or a vertical opening in a wall.
Follow these installation steps:
1. Align the holes of the flange to the holes located on the top of the unit on the outside
perimeter of the installed collar; there is no need to remove the factory installed collar. Attach
to the top of the KBA or KBAP unit using the factory supplied # 2 Phillips fasteners.
2. Attach the duct to the flange on the replacement ceiling panel; secure the duct to the flange
using the supplied clamp.
3. Install the panel in the ceiling grid or in your approved opening with the duct attached,
connect the open end of the duct to the flange on your KBA or KBAP and secure with
supplied clamp. Be sure the area where you are ducting is approved for the filtered air.
4. **For Ceiling Kit Users** - This kit is used to create a negative pressure in your space by
ducting the filtered air out to a different sealed area, this allows fresh air to be pulled into your
space. Be sure the filtered air is approved to enter another space before installation. The
ceiling kit is not limited to ceiling use and may be used on any vertical or horizontal surface
that it can be mounted to. If utilizing this Kit, the space above the ceiling must be an open
plenum or have a makeup air and a path for exhaust.
D. Freestanding Applications-For all KBA and KBAP systems. Use your KBA or KBAP to filter
and refresh air in yourspace by placing the system in the space you desire to operate in and turn the
system on to start the filtering process. The KBA and KBAP will work to improve the overall air quality by
re-circulating the air in the room through its filters and on KBAP systems filters and Ultra Violet lights.
E. Charcoal Filter- Optional Accessory. Order installed from the factory or later as a user installed
option. The charcoal filter helps to eliminate and reduce odors in your space. See Appendix C for
installation and set-up guide.
Loading ...
Loading ...
Loading ...
