V190108
Air conditioner must be upright for 24 hours prior to operating.
This ensures that the compressor will function as intended.
Model
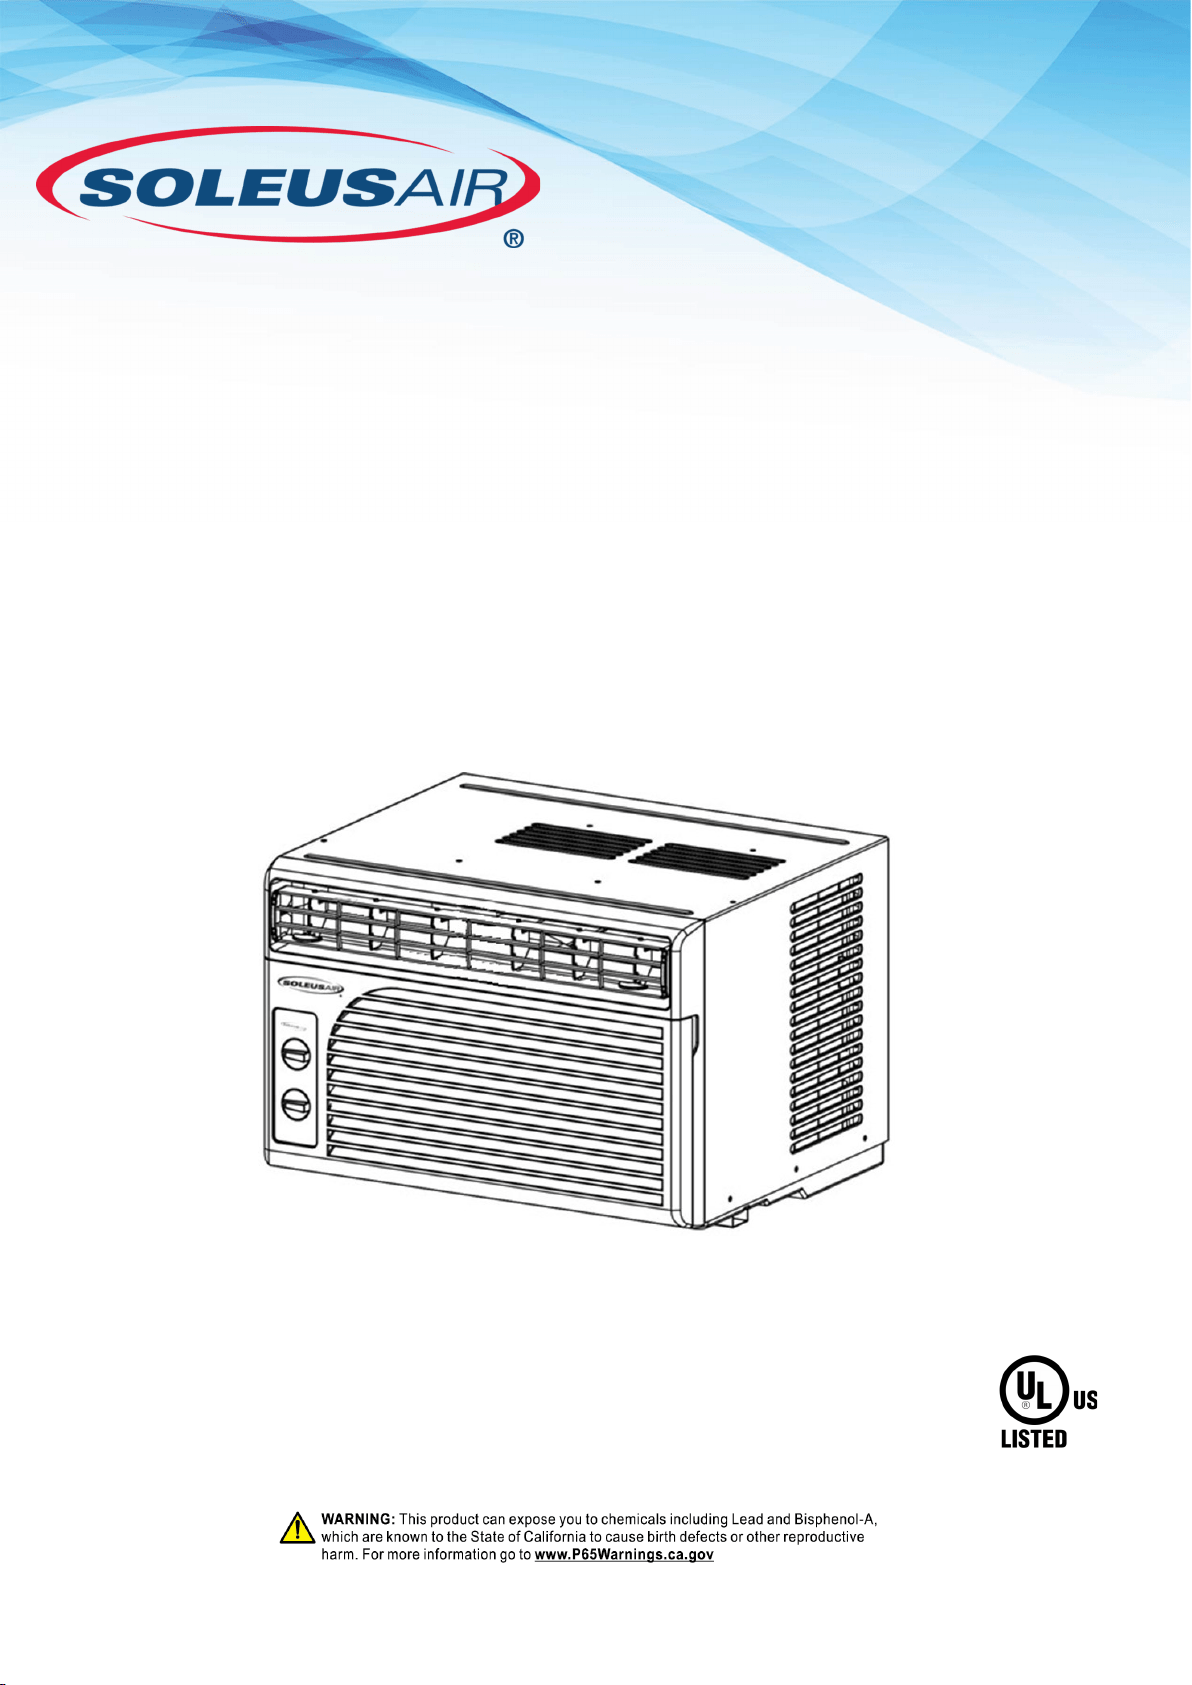
WS1-05M2-02
5,100 BTU
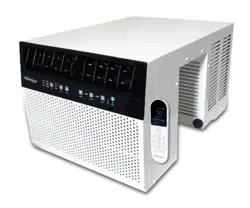
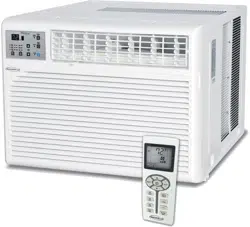
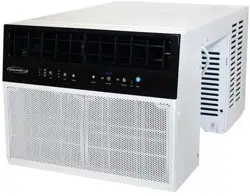
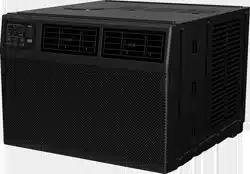
Window Air Conditioner
Operating Instructions
AIR CONDITIONER
2MF3
File No. SA 12793
Thank you for choosing a Soleus Air Window Air Conditioner. This Owner’s Manual will provide
you with valuable information necessary for the proper care and maintenance of your new product.
Please take a few moments to thoroughly read the instructions and familiarize yourself with all the
operational aspects of your new Soleus Air Window Air Conditioner.
For your own records, please attach a copy of your sales receipt to this manual. Also, write the
store name/location, date purchased, and serial number below:
Store Name: ____________________________________________________
Location: _____________________________________________________
Date Purchased: _________________________________________________
Serial Number (located on back of unit): ______________________________
IMPORTANT INSTRUCTIONS
PURCHASE INFORMATION
Before installing and using your air conditioner, please read this owner’s manual carefully. Store this manual in a
safe place for future reference. Your safety and the safety of others is very important to us. Please pay attention to
all safety messages outlined in this owner’s manual.
WARNING: To reduce the risk of fire, electrical shock or injury when using your air conditioner, follow these basic
precautions:
Plug into a grounded 3 prong outlet.
Do not remove the ground prong.
Do not use a plug adapter.
Do not use an extension cord.
Unplug the air conditioner before servicing.
Use two or more people to move and install the air
conditioner.
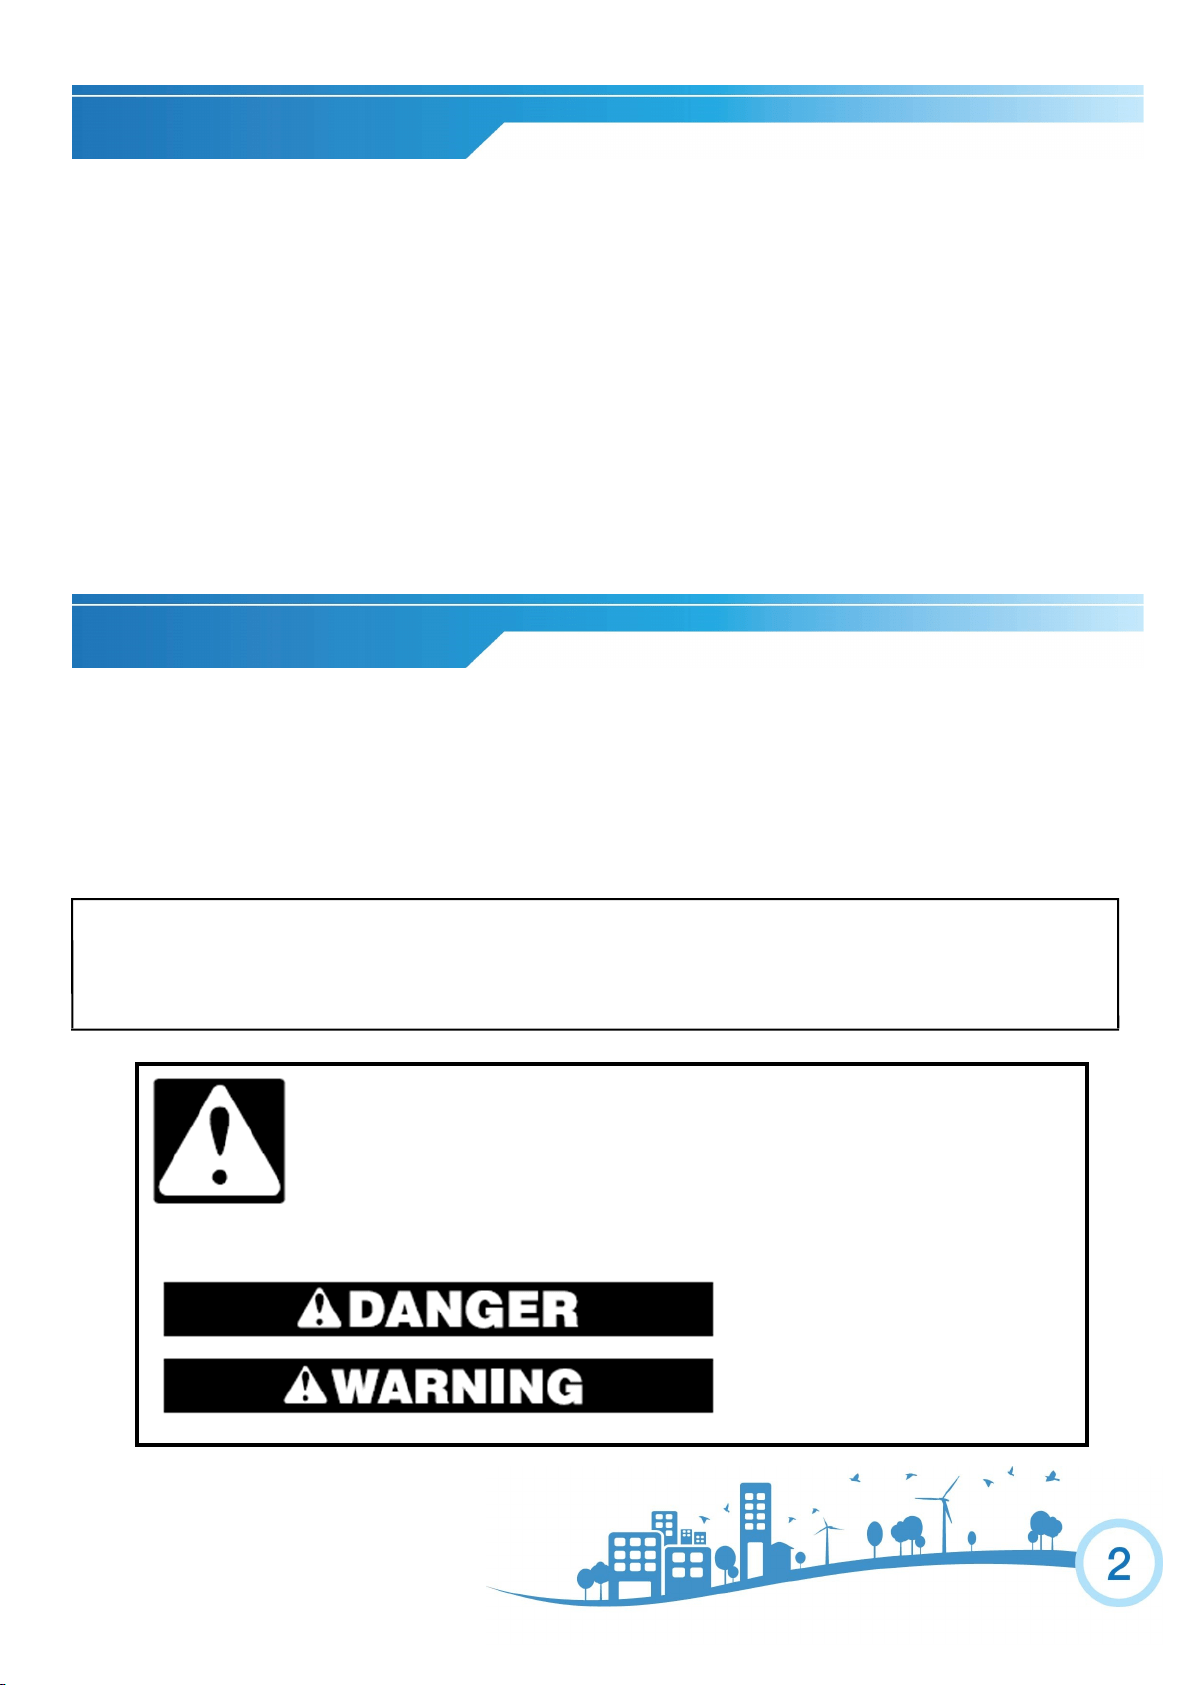
This is a safety alert symbol.
This symbol alerts you to potential hazards that can harm you or others or even cause death.
All safety messages will directly follow the safety alert symbol and/or the words “DANGER”
or “WARNING.”
All Safety messages alert you of potential hazards, how to reduce the chance of injury, and what
can happen if instructions are not followed correctly.
Failure to immediately follow these in-
structions may cause serious injury or
even death.
This air conditioner is equipped with an LCDI (Leakage Current Detection and Interruption) power cord
and plug as required by US National Electric Code 440.65. This cord consists of a length of shielded flexi-
ble cord with no termination on the load side and a LCDI attachment plug on the line side.
The LCDI power cord and plug will remove the supply source via electrical disconnect (circuit trip) if the
nominal current leakage between the cord shield and either load conductor exceeds a predetermined value.
The cord will remain de-energized until the device has been manually reset. This is intended to reduce the
risk of a fire in the power cord or combustible materials nearby. The cord shields are not grounded and they
must be considered a shock hazard if exposed. The cord shield must not be connected to ground or to any
exposed metal.
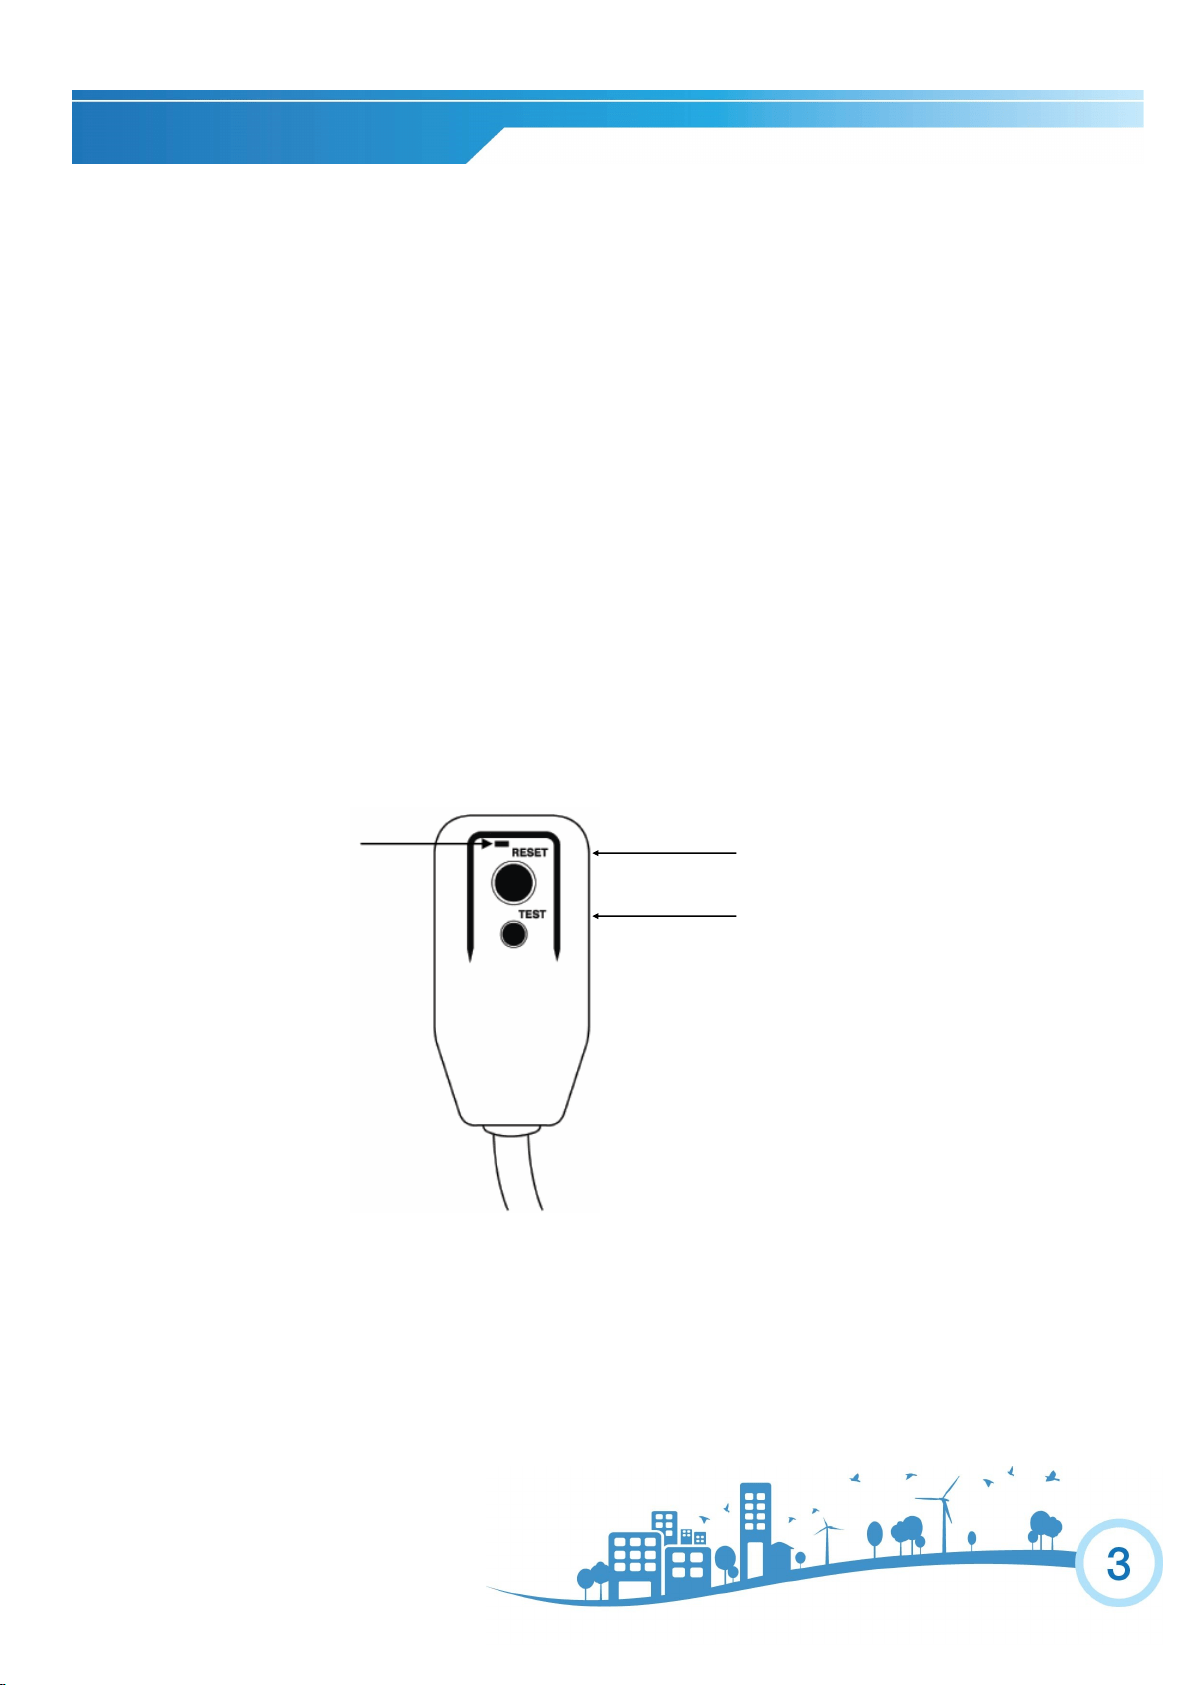
The test and reset buttons on the LCDI Plug are used to check if the plug is functioning properly.
To test:
1. Plug power cord into wall outlet, the LED light will turn on.
2. Press TEST Button, circuit should trip, cutting power to the air conditioner. When this occurs, the LED
light will turn off.
3. Press RESET button to restore power to the unit. Once power is restored, the LED light will turn on.
If test button is pressed and unit can still be turned on, current leakage has been detected. Do not use the air
conditioner or attempt to reset the LCDI Plug. Contact Customer Service for troubleshooting recommenda-
tions.
WARNING:
1. DO NOT press the TEST button while the air conditioner is operating.
2. The TEST and RESET buttons should not be used as “ON” and “OFF” switches.
3. The cord and plug are not intended to offer protection to externally connected loads or supply circuits.
4. The cord and plug are intended for indoor use only.
POWER CORD AND PLUG
RESET
TEST
LED LIGHT
Note: Your unit’s power cord may
differ from the one shown.
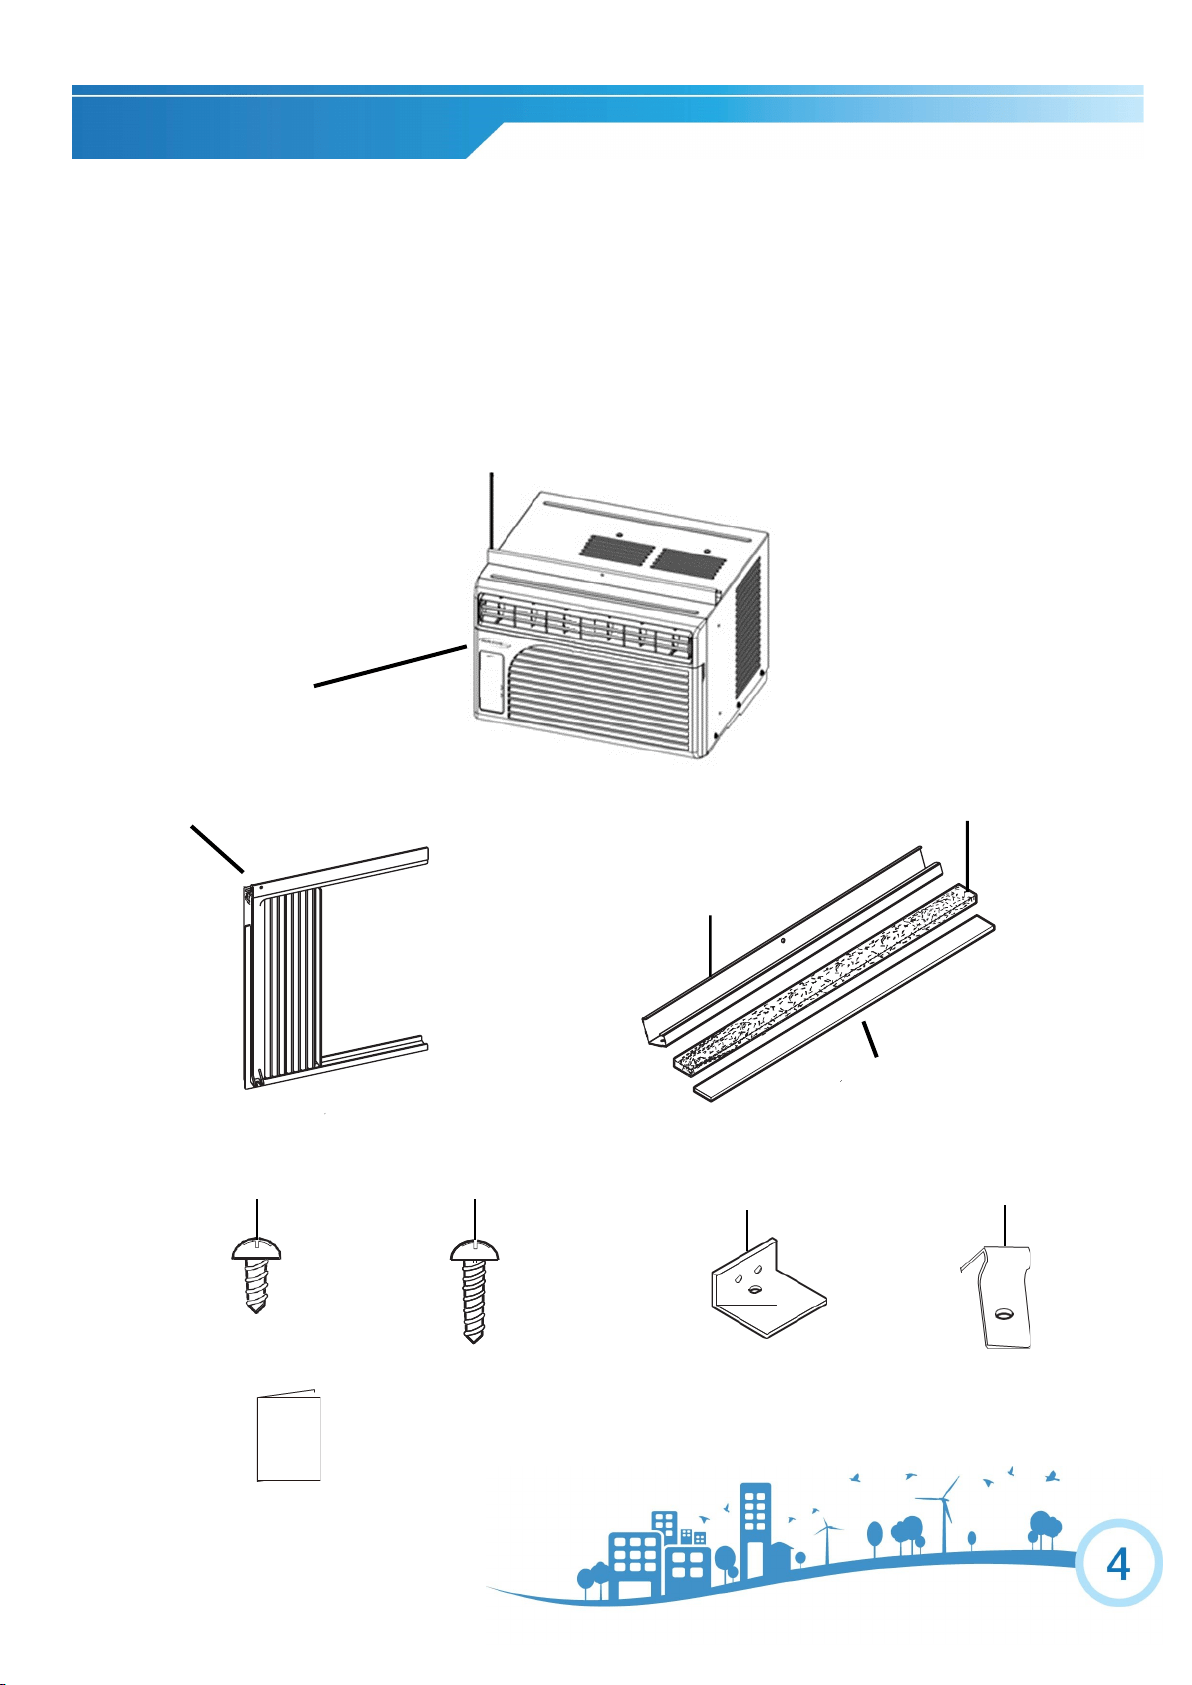
PACKAGE CONTENTS
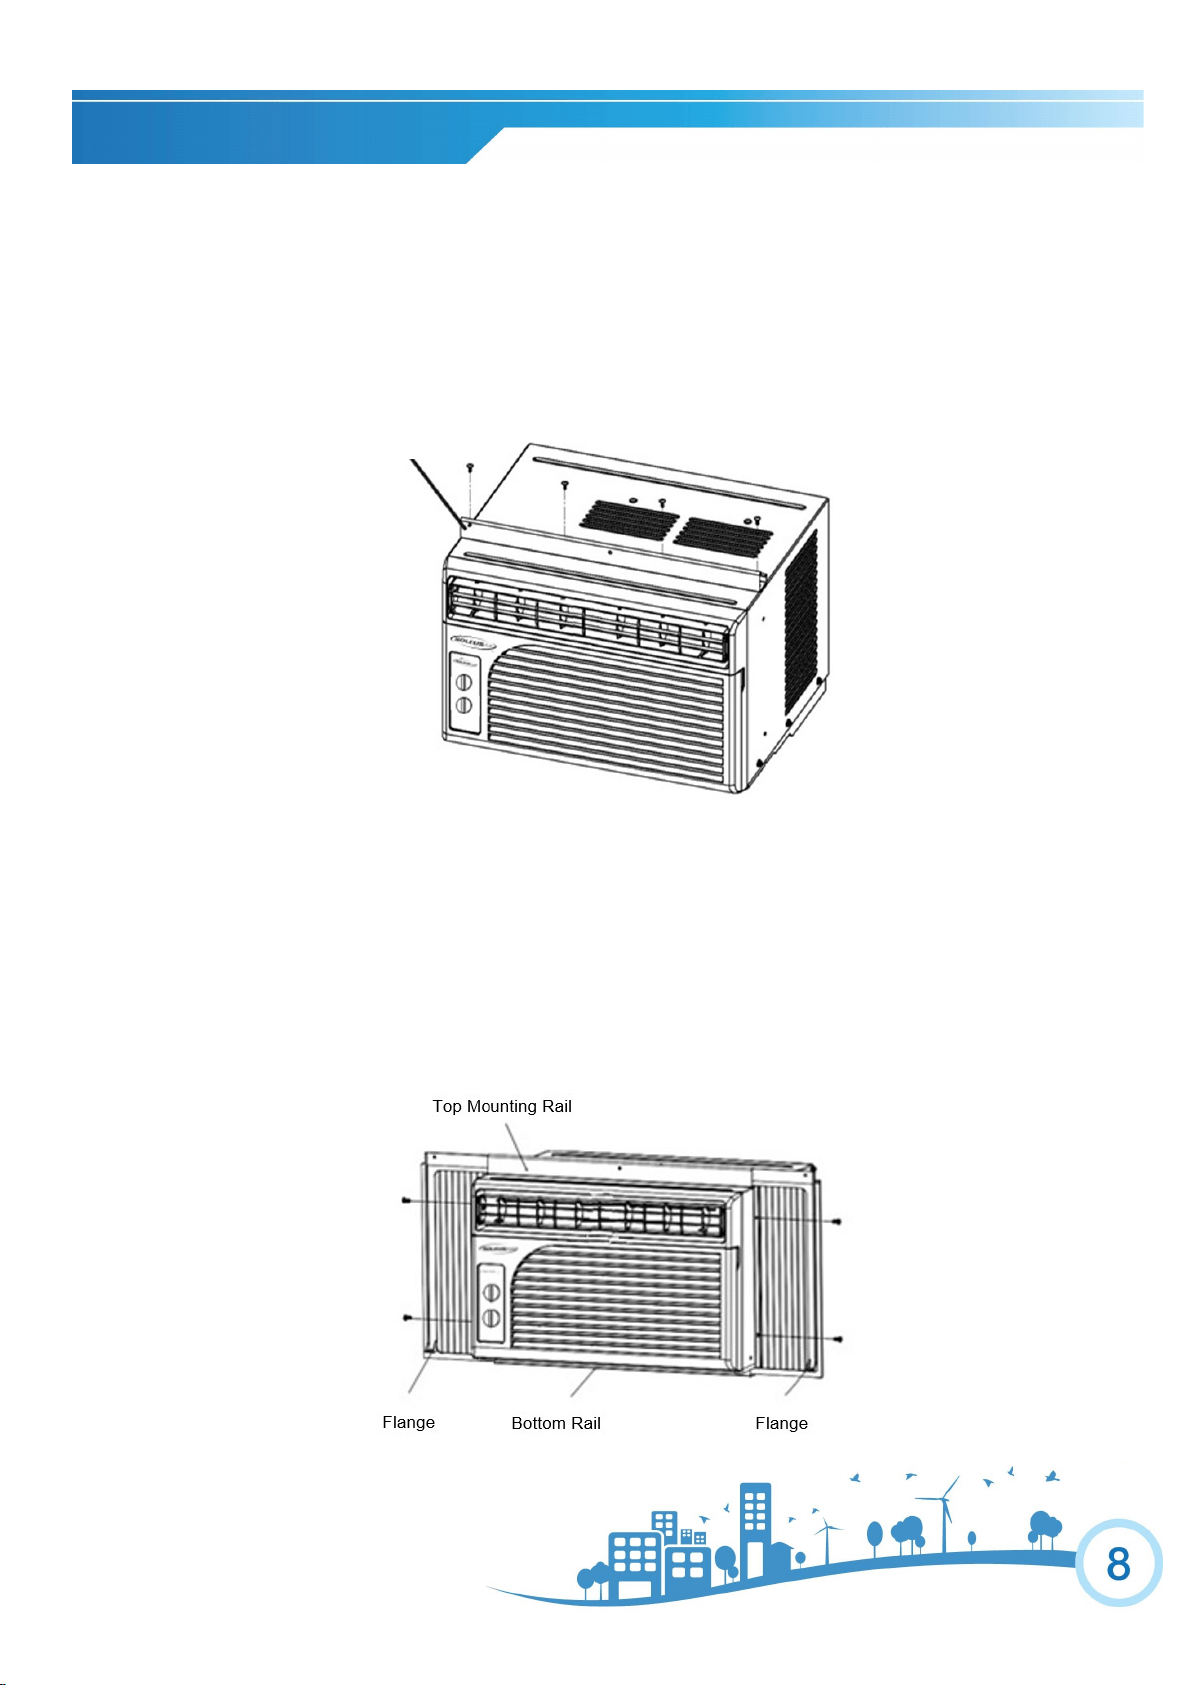
Top Mounting Rail
Air Conditioner
Side Curtain
Top Mounting Rail
Foam Seal
Insert Strip
Short Screw Long Screw
Sash Lock
Curtain Lock
Window Air Conditioner (1)
Top Mounting Rail (1)
Insert Strip (1)
Short Screw (8)
Long Screw for Locking Bracket & Curtains (12)
Side Curtain (2)
Sash Lock (2)
Foam Seal (1)
Curtain Lock (2)
Owner’s Manual
Owner’s
Manual
Model Number WS1-05M2-02
Power Supply (Ph/V/Hz) 1/115/60
Rated Cooling Capacity (BTU/h) 5,100
Cooling Power Input (Watts) 455
Rated Current Cooling (Amperage) 4
CEER 11.2
Noise Level dB(A) (L/H) 52/55
Airflow CFM (H/L) 145/120
Dehumidifying Capacity 21.6 Pints per day
Product Dimensions (W” x H” x D”) 16.125” x 11.75” x 15.125”
Package Dimensions (W” x H” x D”) 17.9” x 14.96” x 17.2”
Net/Gross Weight (Lbs.) 40.7/45.1
Refrigerant Type R-410A
Plug Type NEMA 5-15P
SPECIFICATIONS
Noise level is measured at a distance of 3.28 ft away from the front of the unit in cooling mode.
Power consumption is measured when the fan runs at the highest speed setting.
These specifications are for reference only. For actual data, please refer to the rating label on the back of the unit.

ELECTRICAL SAFETY
DISCLAIMER
ALL INFORMATION AND THE TECHNICAL SPECIFICATIONS PRESENTED IN THIS USER’S MANUAL ARE THE
PRESENATION OF THE MANUFACTURER. SOLEUS N.A. HAS NOT CONDUCTED AN INDEPENDENT TEST TO
VERIFY THE INFORMATION AND SPECIFICATIONS PRESENTED HEREWITHIN.
WARNING:
grounding prong!!
Power supply cord with 3-prong grounding
plug and current detection device
INSTALLATION
Model WS1-05M2-02
Unit Height 11 3/4"
Unit Width 16 1/8"
Min. Window Opening (See FIG 1)
12”
Min. Window Width 20 1/2"
Max Window Width 34"
Window Preparation
Please read all instructions prior to installing your air conditioner. Two people are recommended to install this product. If a new
electrical outlet is required, have the outlet installed by a qualified electrician before installing the unit.
Before installing the unit, check the dimensions of your window to make sure the air conditioner will fit. This unit is made to fit
inside a standard double-hung window. Make sure the window is in good shape and able to firmly hold the provided screws. If
not, make repairs prior to installing the unit.
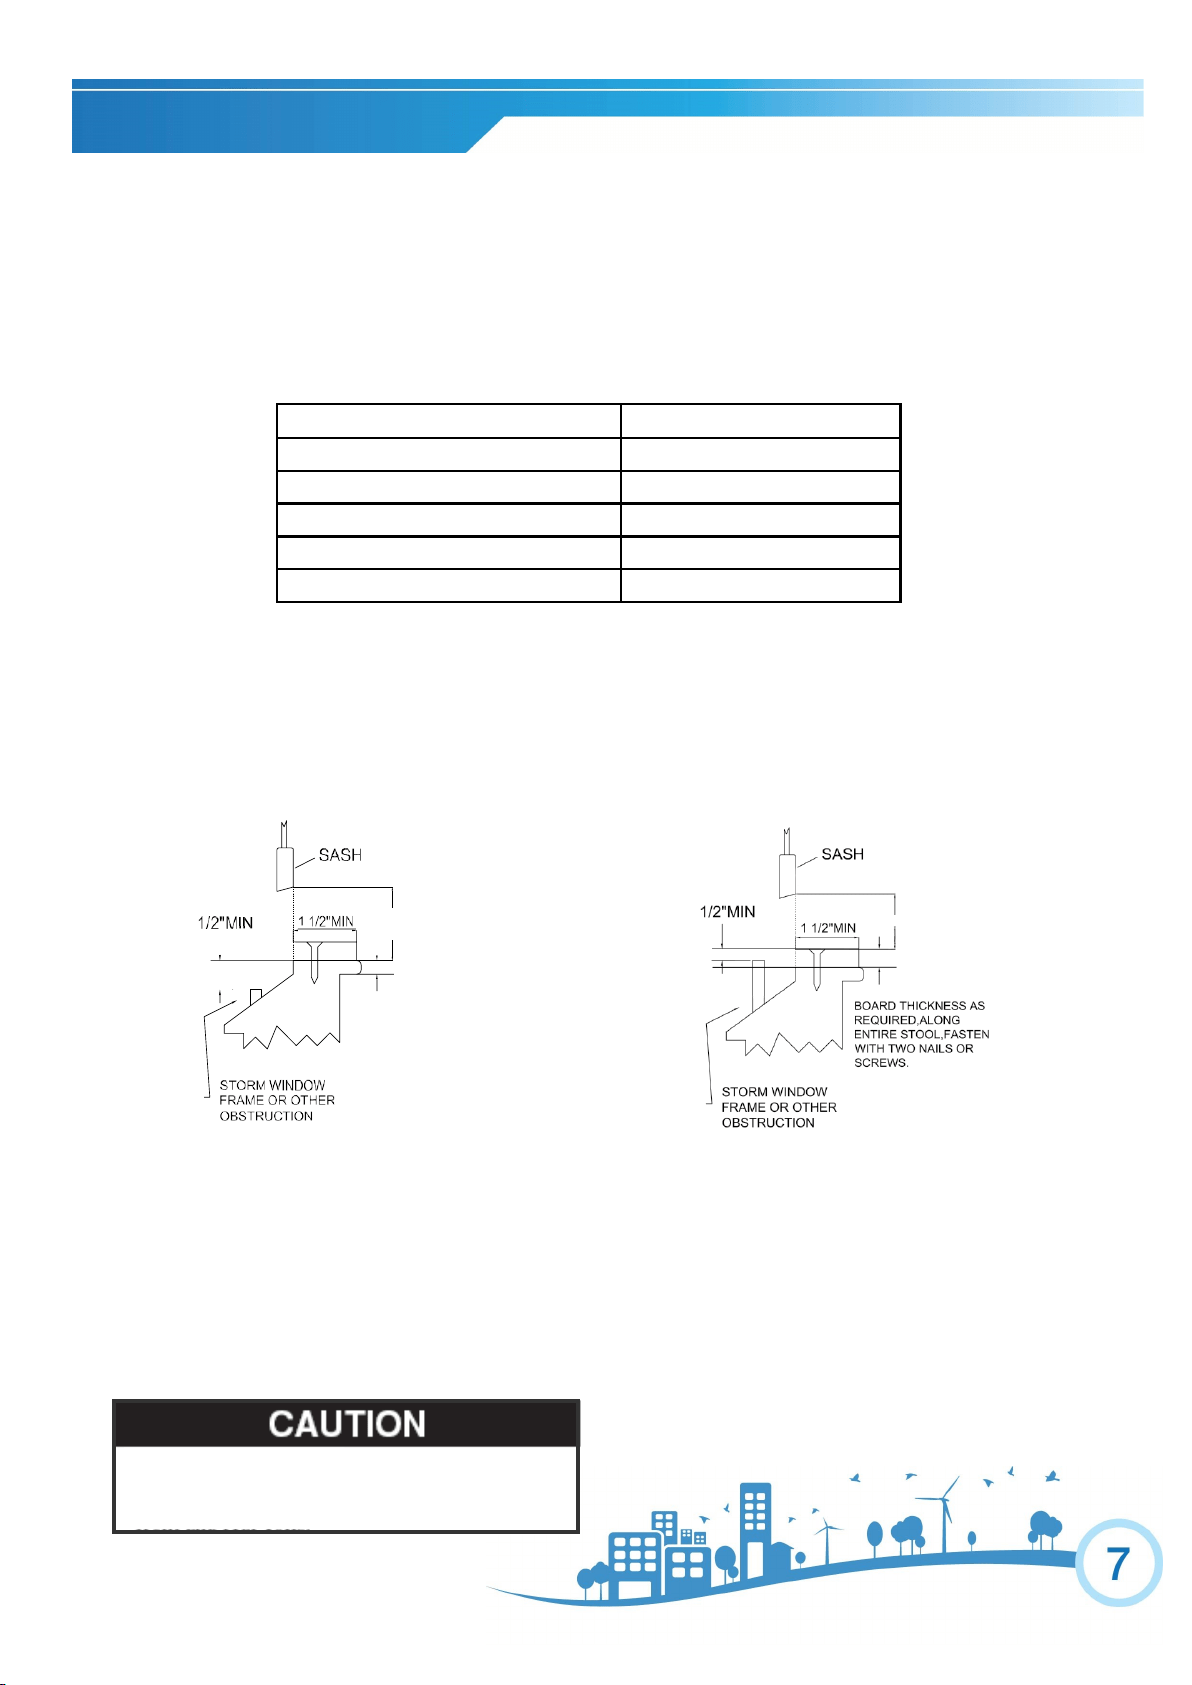
Storm Window Requirements
A storm window frame will not allow the air conditioner to tilt properly which will keep it from draining properly. To
adjust for this, attach a board or piece of wood to the sill. The board or wood piece should have a depth of at least 1 1/2”.
Make sure the board or piece of wood is approximately 1/2” higher than the storm window frame. This will allow the air
conditioner to tilt enough for proper drainage (See FIG. 2).
Prior to Installing the Air Conditioner
1. Check for anything that could block airflow. Check the area outside of the window for things such as shrubs, trees,
or awnings. Check the inside area to make sure curtains, drapes, or blinds will not prevent proper airflow.
2. Check the available electrical outlet. The power supply must be the same as shown on the unit serial nameplate
(located on the left side of the unit, near the front faceplate). Be sure the outlet is close enough for the power cord to
reach.
3. Carefully unpack the air conditioner. Remove all packing material and make sure the floor is protected when remov-
ing. Due to the large size of this air conditioner, two people should move the unit together.
When handling the unit, be careful to avoid cuts from the
sharp metal edges and aluminum fins on the front and rear
coils.
13 1/4" MIN
FIG .2
FIG .1
13 1/4" MIN
.
Top Rail Installation
NOTE: Top Rail and the Side Panels are offset to provide the proper pitch to the rear of (5/16”). This is necessary for
proper condensation utilization and drainage. If you are not using the side panels, the rear pitch must still be maintained.
1. Attach the top rail onto the top of the outer case using four short screws.
Curtain Installation
1. Insert the side curtains into the upper and lower rails of the air conditioner. Fasten the curtains to the unit with short screws
as shown below.
2. Slide the free end of the curtain into the side panel of the air conditioner. Do this for each side. The flange for securing the
curtain into the window sill will be facing the room side when installed.
3. Once properly sized, remove the backing to expose the adhesive tape.
INSTALLATION
Top mounting rail
INSTALLATION
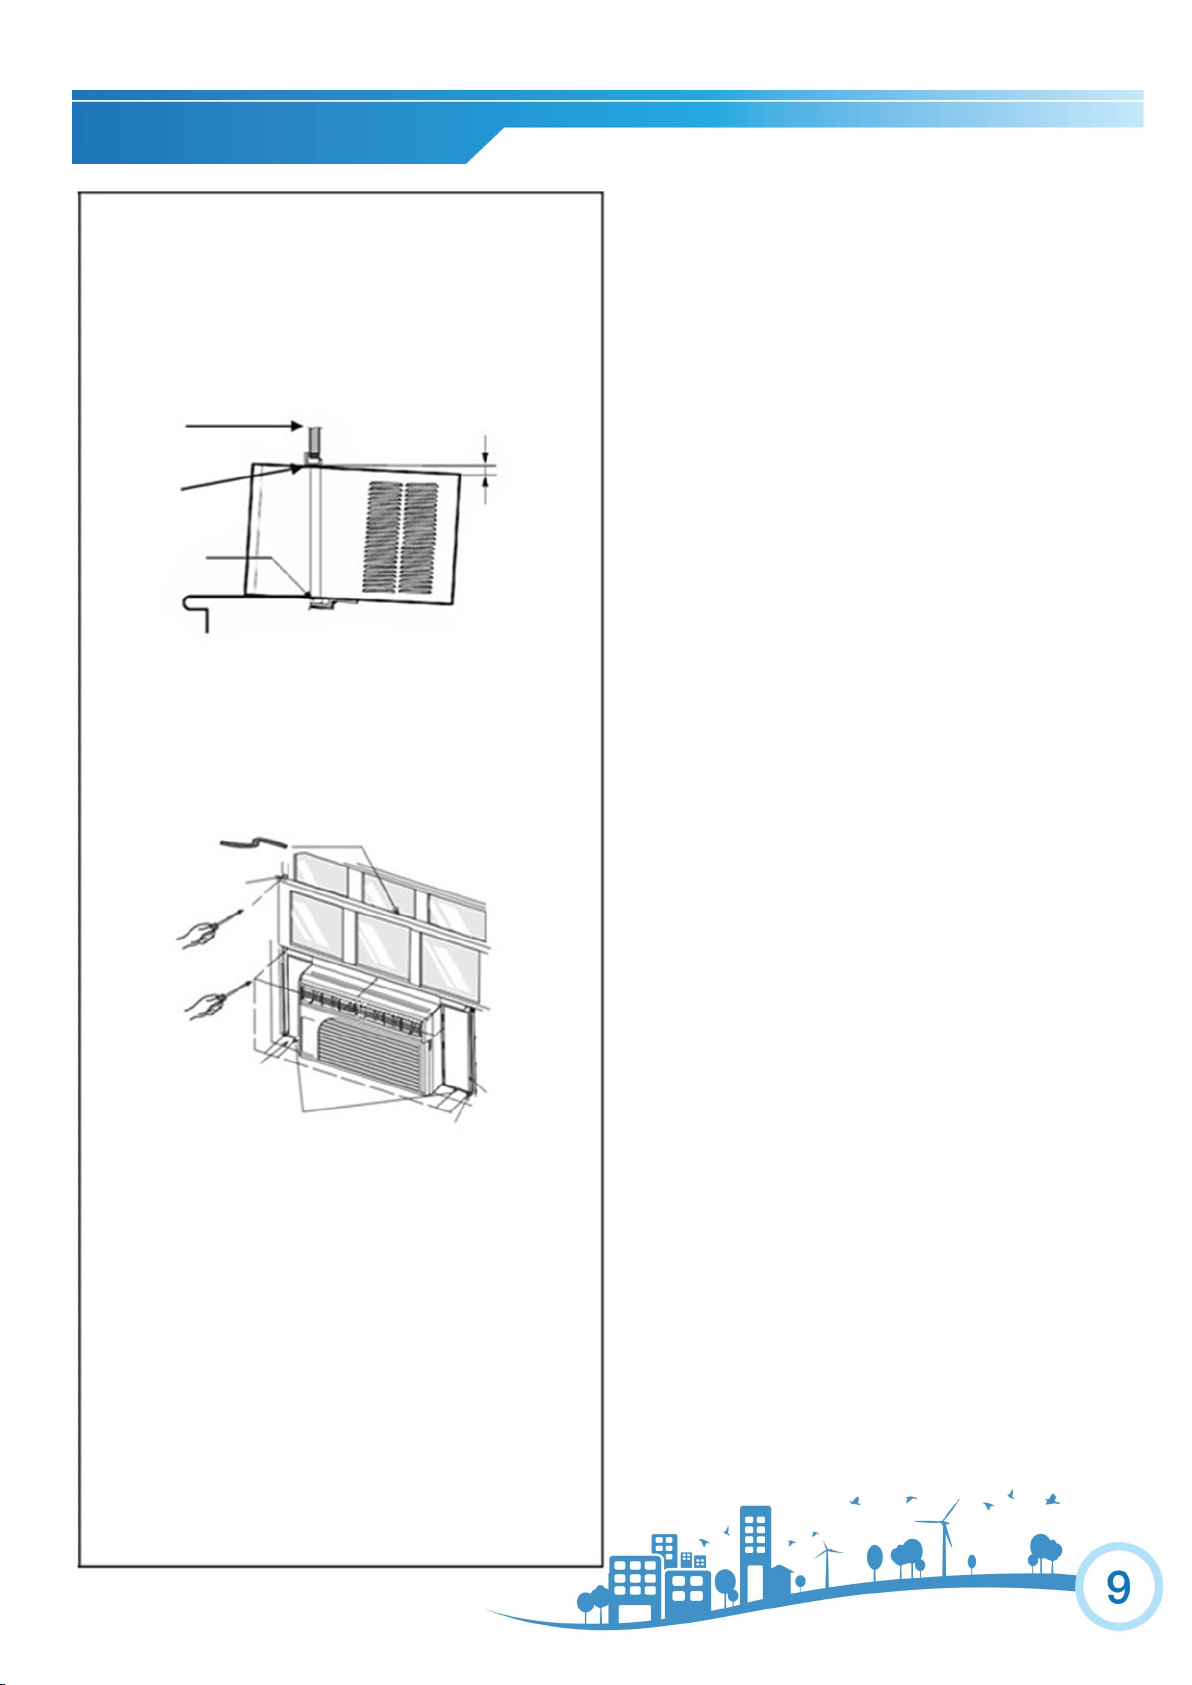
Placing the Unit Inside a Normal Window
3. Once the air conditioner is placed, extend the left and
right curtains to the width of the window.
4. Place the curtain lock between the curtain extensions and
the window sill, drive long screws through the lock and into
the sill as shown below:
5. Secure the left and right flanges with long screws on the
bottom sides of the curtain.
6. Drive long screws through upper frame holes into win-
dow sash.
7. Attach the sash lock to the place between the upper and
lower sashes and secure it with long screws. Each side uses
2 long screws.
8. Cut the foam seal to the window width and insert the sash
seal between the glass and the window to prevent air and
insects from getting into the room.
9. For added insulation, the insert strip can be installed
between the air conditioner and window sill. This is option-
al.
Foam Seal
Window Sill
Sash Lock
Curtain Locks
Flange
Curtain
Remove the Air Conditioner from the Window
(End of Season)
1. Turn the air conditioner off, and disconnect the
power cord.
2. Remove the sash seal from between win-
dows, and unscrew sash lock.
3. Remove the screws installed through the
frame and frame lock.
4. Close (slide) the side panels into frame.
5. Keeping a firm grip on air conditioner, raise the
sash and carefully “rock” air conditioner back-
ward to drain any condensation water in base of
unit. Be careful not to spill any remaining water
while lifting unit from window.
6. Store parts with the air conditioner in the box.
1. Set the unit in the window so that is centered. Place the
unit so that front edge of the bottom rail is against the back
edge of the sill.
2. Bring the window down so that the front edge of the top
rail is in front of the window. Be sure the unit is tilting
slightly to the outside.
Window
Frame
Top Rail
Bottom Rail
1/4”
.
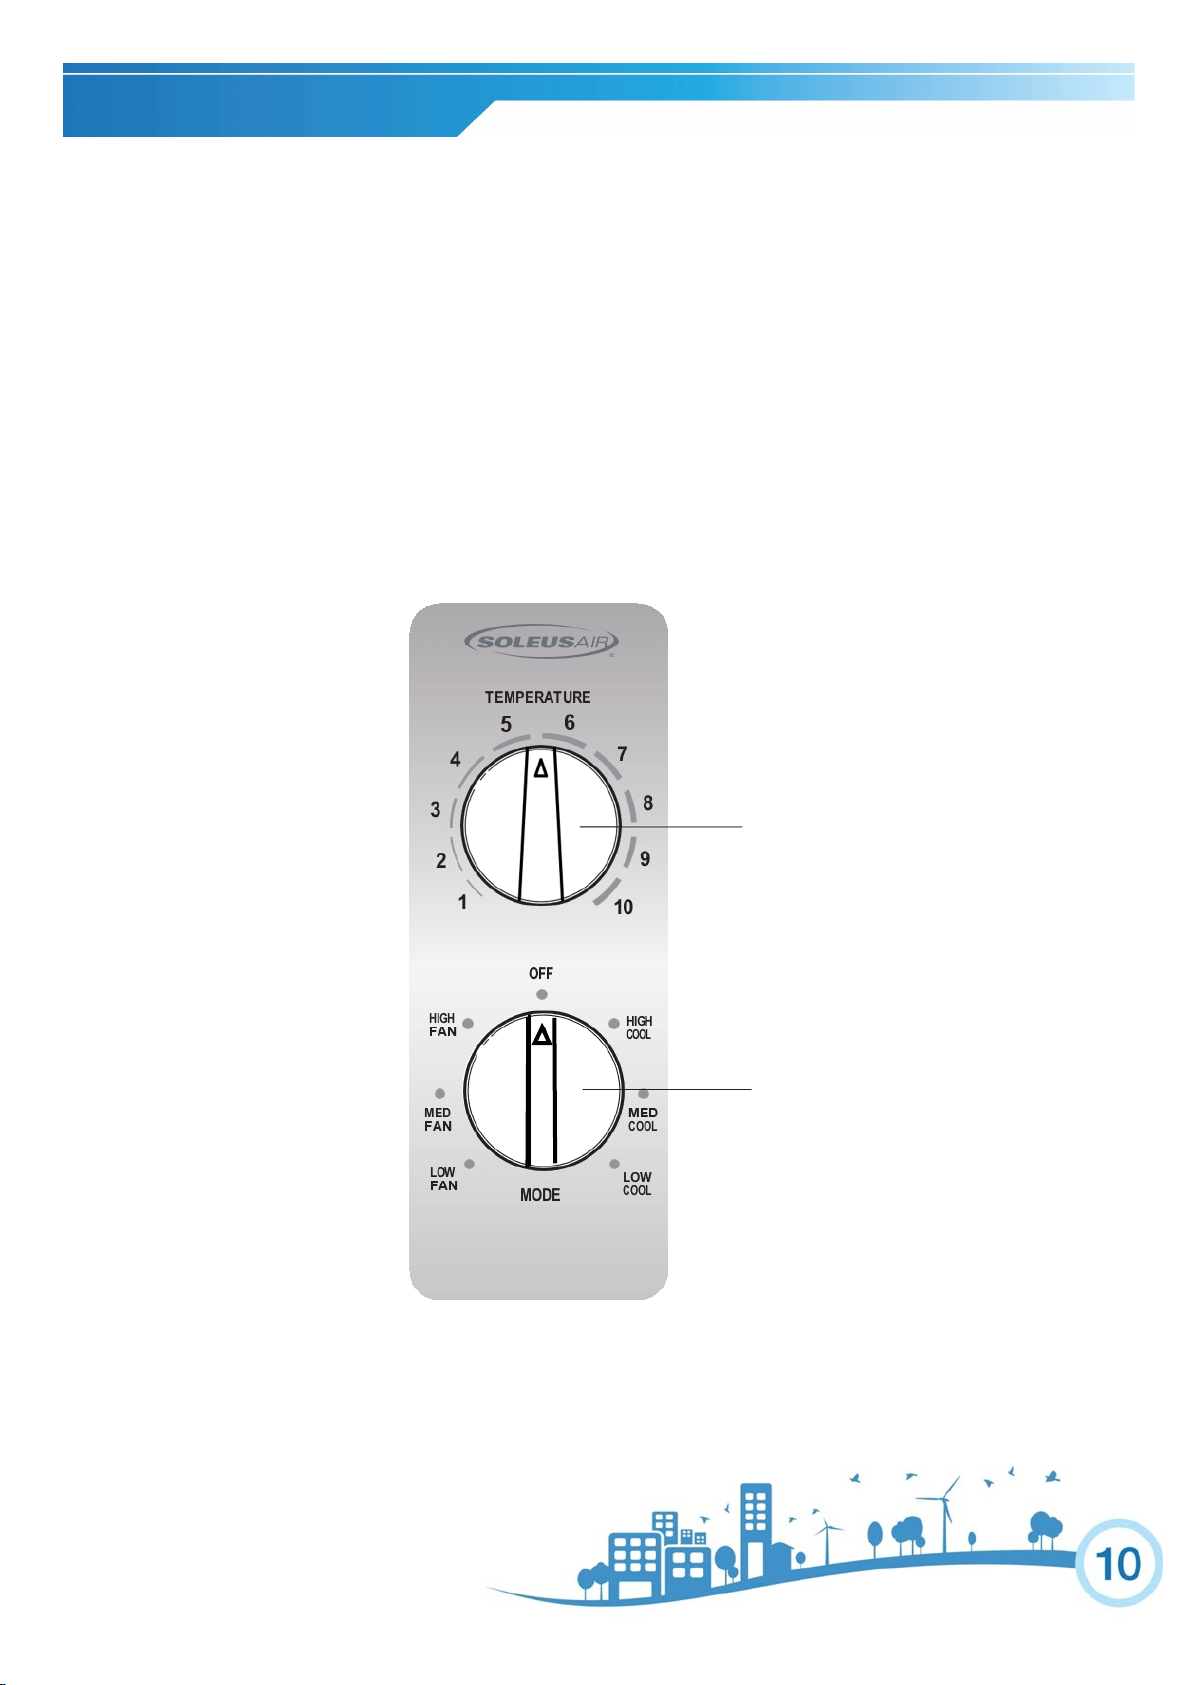
CONTROL PANEL
COOL MODE
Turn the MODE selector clockwise to select HIGH COOL, MED COOL or LOW COOL.
Turn the TEMPERATURE selector clockwise to select the higher cool settings or turn the selector
counter-clockwise to select the lower cool settings.
Turn the MODE selector to OFF to turn off the unit.
FAN MODE
Turn the MODE selector counter-clockwise to select HIGH FAN, MED FAN or LOW FAN.
Turn the MODE selector to OFF to turn off the unit.
Note: TEMPERATURE mode selector does not function on fan mode.
TEMPERATURE SELECTOR
MODE SELECTOR

.
OPERATION
FREEZING CONDITIONS: This is a cooling only air conditioner. It is not designed for freez-
ing outdoor conditions. It must not be used in freezing outdoor conditions.
LOSS OF POWER PROTECTION: If power to the air conditioner is lost or interrupted, the
air conditioner will automatically re-start in the setting last used prior to power loss.
AIR DIRECTION: Use the lever on the fr ont air vents to adjust the air flow direction. You can
direct the airflow to left or right. The lever is located on the lower left and right side of the air vent.
.
USE AND CARE
CARE AND CLEANING: Clean your air conditioner to keep it looking new and to minimize dust build up.
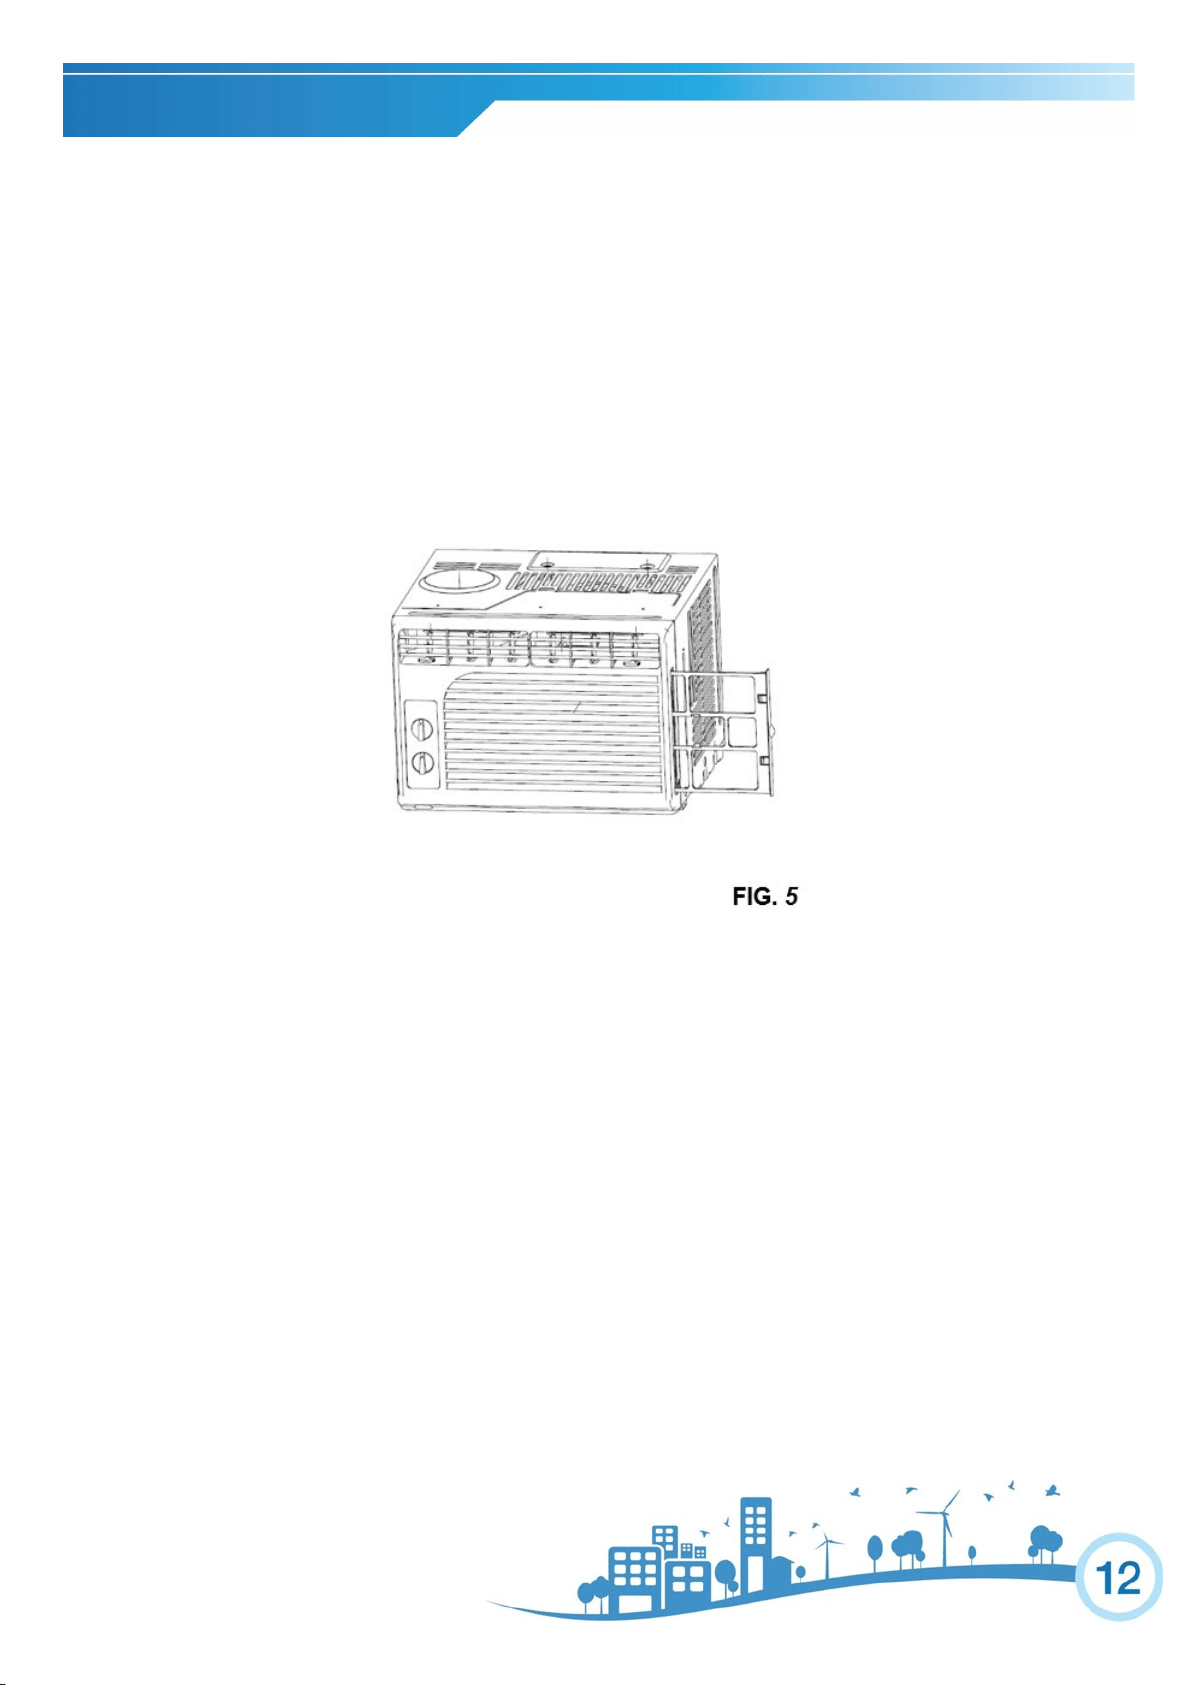
AIR FILTER CLEANING: The air filter should be checked at least once every month to see if it needs cleaning. Tr apped
particles and dust can build up in the filter and may decrease airflow as well as cause the cooling coils to accumulate frost. To
clean the air filter:
1. Remove the filter by sliding out from the front right side of the unit (See FIG. 5).
2. Wash the filter using liquid dish soap and warm water. Rinse the filter thoroughly. Gently shake the filter to remove excess wa-
ter.
3. Let the filter dry completely before placing it back into the air conditioner.
4. If you do not wish to wash the filter, you may vacuum the filter to remove the dust and other particles.
WEAR AND TEAR: To minimize wear and tear on the air conditioner , always wait at least 3 minutes befor e changing
modes. This will help prevent the compressor from overheating and the circuit breaker from tripping.
CABINET CLEANING
To clean the air conditioner cabinet:
Unplug the air conditioner to prevent shock or a fire hazard. The cabinet and front panel of the air conditioner may be dusted
with an oil-free cloth or washed with a cloth dampened in a solution of warm water and mild liquid soap. Rinse thoroughly
with a damp cloth and wipe dry.
Never use harsh cleaners, wax or polish on the cabinet front.
Be sure to wring excess water from the cloth before wiping around the controls. Excess water in or around the controls may
cause damage to the air conditioner.
WINTER STORAGE
To store the air conditioner when it is not in use for an extended period of time, remove it carefully from the window according to
the installation instructions and cover it with plastic or place it in the original box.
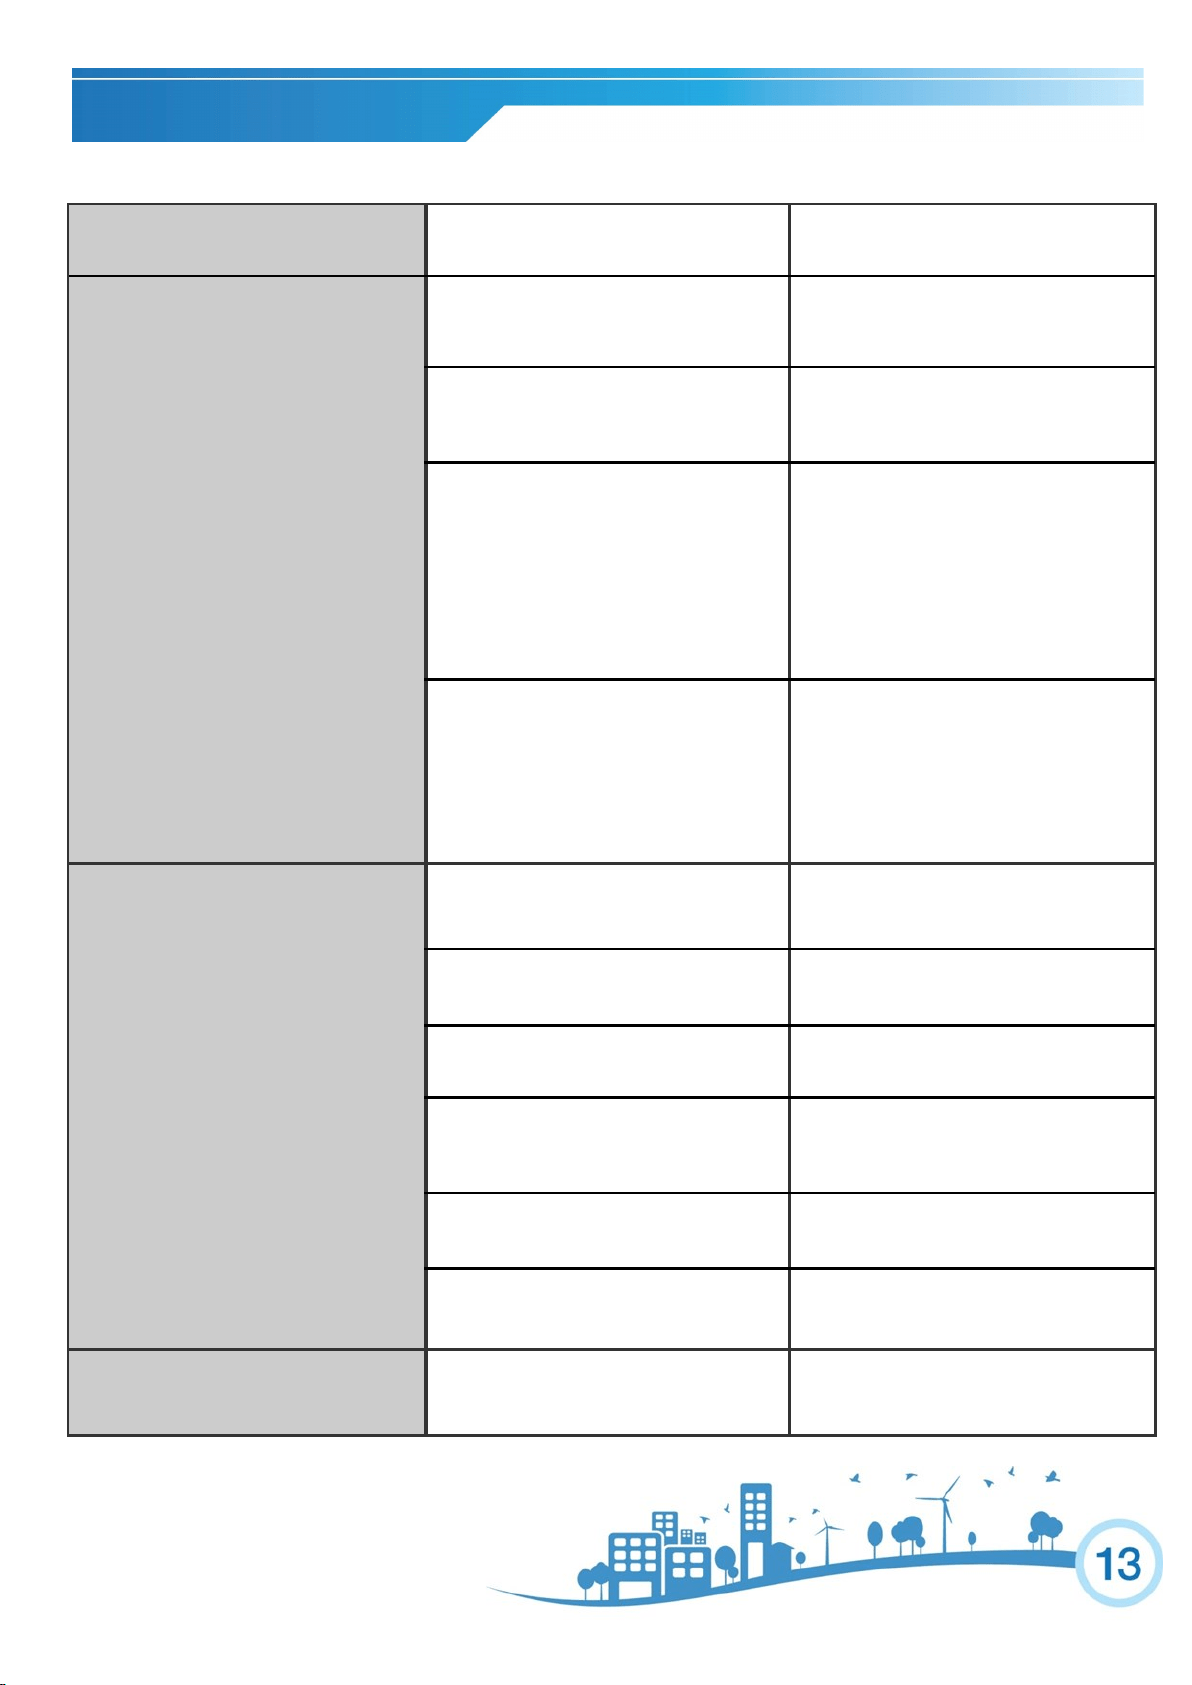
TROUBLESHOOTING
PROBLEM
POSSIBLE CAUSES
SOLUTIONS
The Air Conditioner will not start
The air conditioner is unplugged
Make sure the air conditioner
plug is pushed completely into
the outlet.
The fuse is blown/circuit breaker is
tripped.
Check the main fuse/circuit break-
er box and replace the fuse or
reset the breaker.
Power failure
The unit will automatically restart
when power is restored.
There is a protective time delay
(approx. 3 minutes) to prevent trip-
ping of the compressor overload.
For this reason, the unit may not
start normal cooling for 3 minutes
after it is turned back on.
The LCDI plug is tripped
Press the RESET button located
on the power cord plug.
If the RESET button will not stay
engaged, discontinue use of the
air conditioner and contact a
qualified service technician.
The Air Conditioner does not cool as
it should
Airflow is restricted
Make sure there are no curtains,
blinds, or furniture blocking the
front of the air conditioner.
The temperature control may not be
set correctly
Lower the set thermostat tempera-
ture.
The air filter is dirty
Clean the filter. See the Cleaning
and Care Section of the manual.
The room may be too warm
Please allow time for the room to
cool down after turning on the air
conditioner.
Cold air is escaping
Check for open furnace registers
and cold air returns.
The Cooling Coils are frozen
See “Air Conditioner Freezing Up”
below.
The Air Conditioner is freezing up
Ice blocks the air flow and stops the air
conditioner from cooling the room
Set the MODE dial to HIGH FAN
or HIGH COOL and set the ther-
mostat to a higher temperature.
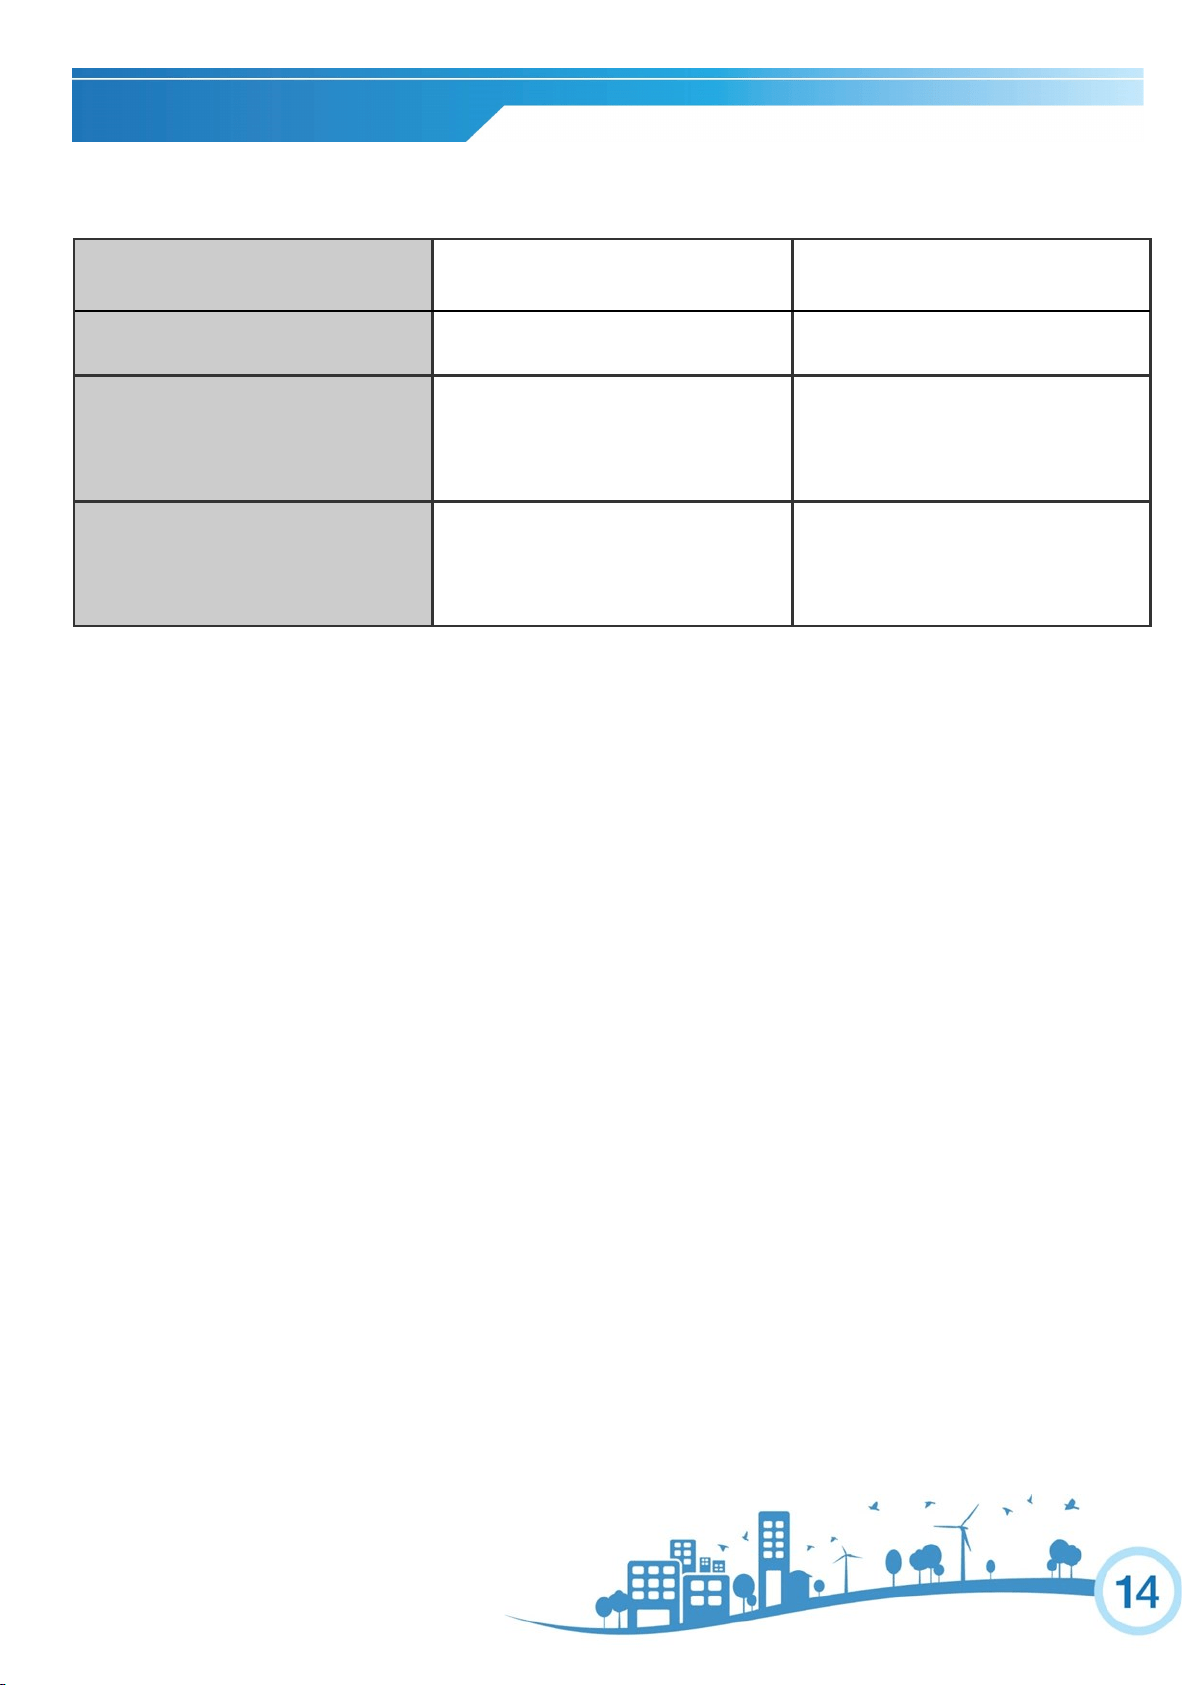
TROUBLESHOOTING
PROBLEM
POSSIBLE CAUSES
SOLUTIONS
Water is dripping outside
Hot and humid weather
This is normal
Water is dripping inside the room
The air conditioner is not correctly
tilted towards the outside
For proper water drainage, make
sure the air conditioner is slightly
tilted downward from the front of
the unit to the rear.
Water collects in the base pan
Moisture removed from the air is
draining into the base pan
This is normal for a short period in
areas with low humidity and nor-
mal for a longer period in areas
with high humidity.

LIMITED WARRANTY
Two Year Components Limited Warranty
Five Year Compressor Limited Warranty
Soleus N.A. warrants the accompanying Soleus Air Air Conditioner to be free of defects in material and workmanship for the appli-
cations specified in its operation instruction for a period of TWO (2) years for components and FIVE (5) years for the compressor
from the date of original retail purchase in the United States.
If the unit exhibits a defect in normal use, Soleus N.A. will, at its option, either repair or replace it, free of charge within a reasona-
ble time after the unit is returned during the warranty period.
As a condition to any warranty service obligation, the consumer must present this Warranty Certificate along with a copy of the
original purchase invoice.
THIS WARRANTY DOES NOT COVER:
Damage, accidental or otherwise, to the unit while in the possession of a consumer not caused by a defect in material or
workmanship.
Damage caused by consumer misuse, tampering, or failure to follow the care and special handling provisions in the in-
structions.
Damage to the finish of the case, or other appearance parts caused by wear.
Damage caused by repairs or alterations of the unit by anyone other than those authorized by Soleus N.A.
Freight and Insurance cost for the warranty service.
Filter and Accessories
ALL WARRANTIES, INCLUDING ANY IMPLIED WARRANTY OF MERCHANT ABILITY ARE LIMITED TO THE DU-
RATION OF THIS EXPRESS LIMITED WARRANTY. SOLEUS N.A. DISCLAIMS ANY LIABILITY FOR CONSEQUEN-
TIAL OR INCIDENTAL DAMAGES AND IN NO EVENT SHALL SOLEUS N.A.’S LIABILITY EXCEED THE RETAIL VAL-
UE OF THE UNIT FOR BREACH OF ANY WRITTEN OR IMPLIED WARRANTY WITH RESPECT TO THIS UNIT.
This warranty covers only new products purchased from our authorized dealers or retailers. It does not cover used, sal-
vaged, or refurbished products.
As some states do not allow the limitation or exclusion of incidental or consequential damages, or do not allow limitation on im-
plied warranties, the above limitations and exclusions may not apply to you. This warranty gives you specific legal rights, and you
may also have other rights that vary from state to state.
For Technical Support and Warranty Service
Please Call (877) 665-9765
www.soleusna.com