Loading ...
Loading ...
Loading ...
chemicals,wearapprovedsafety
equipment suchas dustmasksthat are
speciallydesignedtofilteroutmicroscopic
particles.
A WARNING: Thisproductcontains
chemicals,includinglead, knownto the
State of California to cause cancer, and
birth defects or other reproductive harm.
Wash hands after handling.
SAVE THESE INSTRUCTIONS
V,.E,."T:]_ _'d=]I_'j_=] L'_,.']
ASSEMBLY
A WARNING: Toavoid seriousinjury,
makesurethatthe toolisswitchedoff
and unpluggedbeforeassembly.
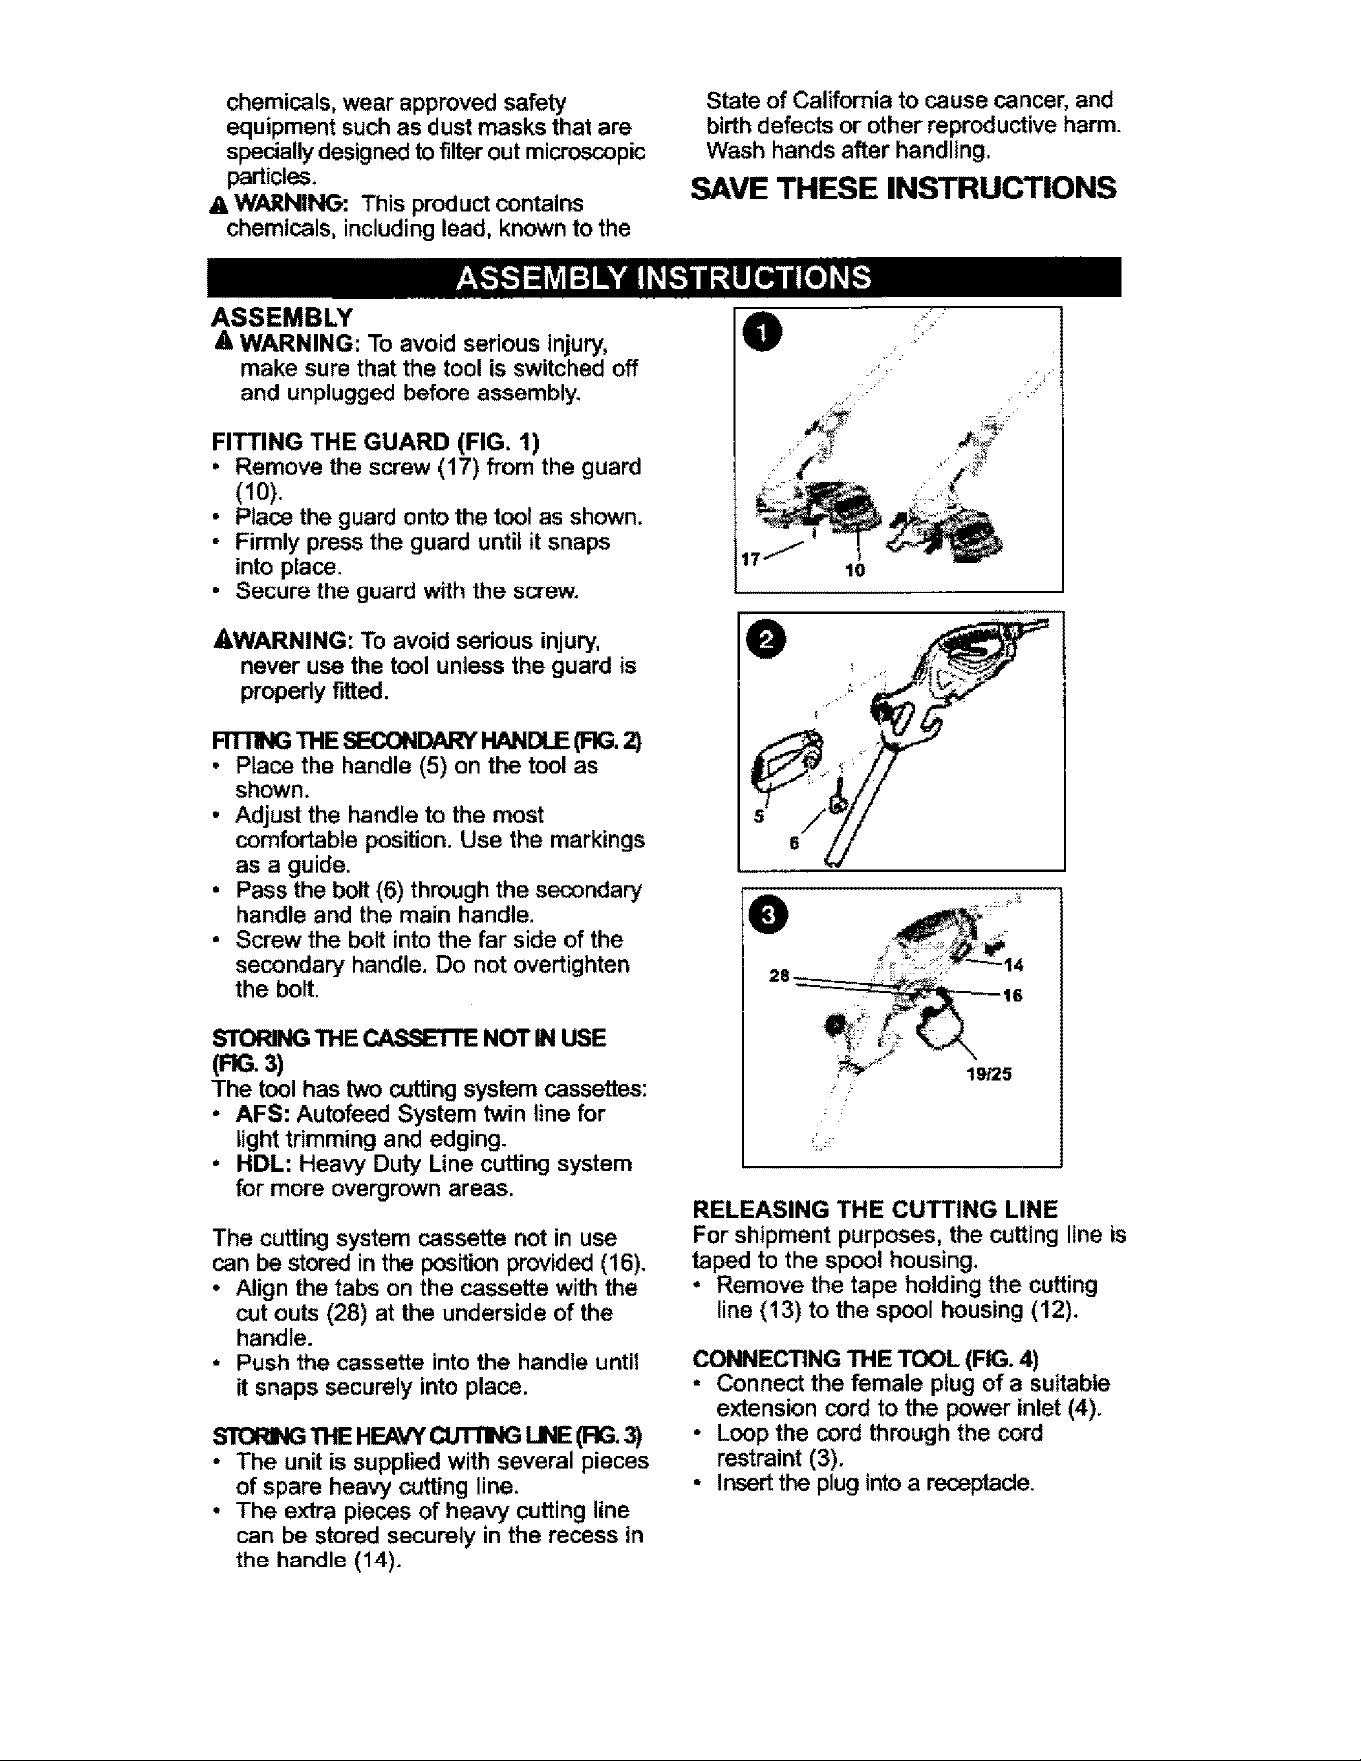
FITTING THE GUARD (FIG, 1)
• Remove the screw (17) from the guard
(10).
• Place the guard onto the tool as shown,
• Firmly press the guard until it snaps
into place.
• Secure the guard with the screw,
#,WARNING: Toavoidserious injury,
never usethe toolunless the guard is
properlyfitted.
FITTING THE SE,CONDARY HANDLE (FIG.2)
• Place the handle (5) on the tool as
shown.
• Adjust the handle to the most
comfortable position. Use the markings
as a guide.
• Pass the bolt (6) through the secondary
handle and the main handle.
• Screw the bolt into the far side of the
secondary handle, Do not overtighten
the bolt,
STORING THE CASSETFE NOT IN USE
(FIG.3)
The tool has two cutting system cassettes:
- AFS: Autofeed System twin line for
light trimming and edging.
• HDL: Heavy Duty Line cutting system
for more overgrown areas.
The cutting system cassette not in use
can be stored in the position provided (16),
• Align the tabs on the cassette with the
cut outs (28) at the underside of the
handle.
* Push the cassette into the handle until
it snaps securely into place.
StOm_ _mEHEAVY_ UNE(F_ 3)
* The unit is supplied with several pieces
of spare heavy cutting line.
- The extra pieces of heavy cutting line
can be stored securely in the recess in
the handle (14).
_o_i__ . ii_'
@
19/25
RELEASING THE CUTTING LINE
Forshipmentpurposes,the cuttinglineis
taped to the spoolhousing.
, Remove the tape holdingthe cutting
line (13) tothe spoolhousing(12).
CONNECTING THE TOOL (FIG. 4)
- Connect the female plug of a suitable
extension cord to the power inlet (4).
• Loop the cord through the cord
restraint (3).
• Insert the plug intoa receptacle,
Loading ...
Loading ...
Loading ...