Loading ...
Loading ...
Loading ...
SPARK ARRESTOR MAmNTENANCE
NOTE: The exhaust can onHyflow in one direction: AWAY
from the engine. Pay chose attention when
disassemMing the muffler so you can put it back
together correctHy. Failure to do so will damage
the unit and may cause serious personaH injury.
1. Remove air filter/muffler cover. Refer to Removing
the Air Filter/Muffler Cover.
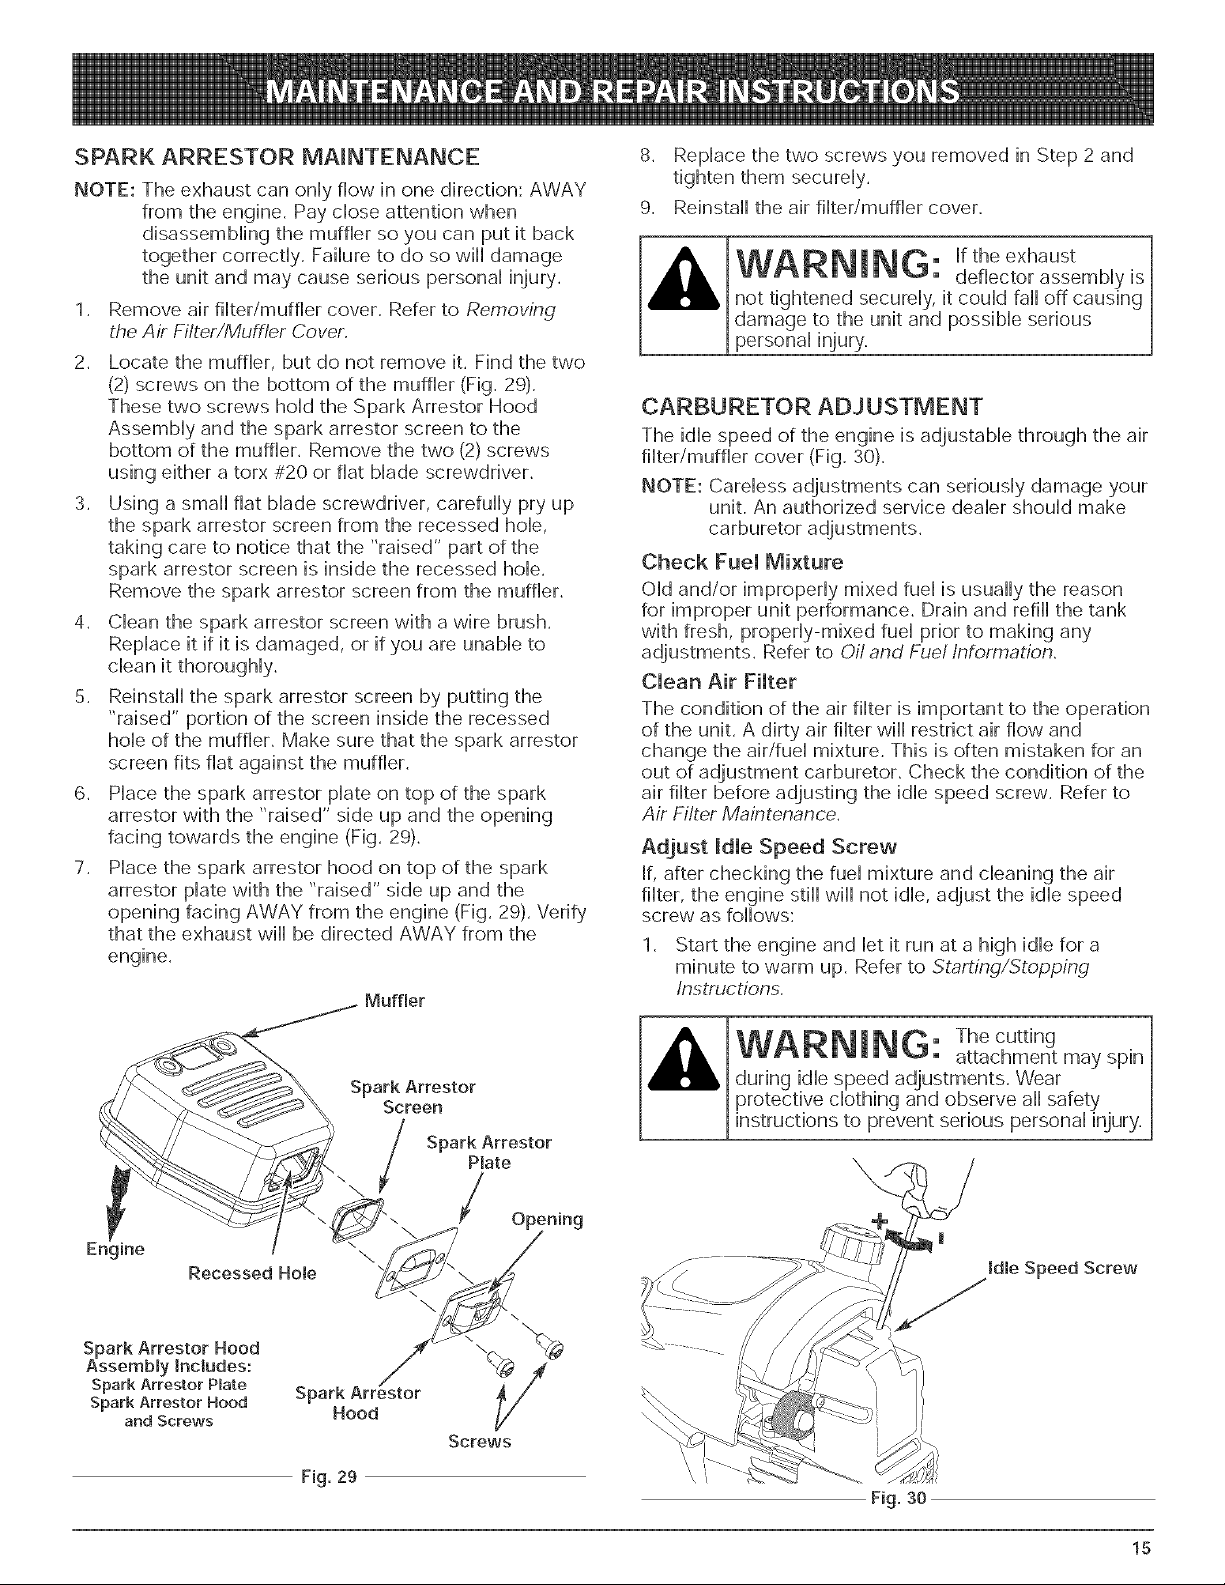
2. Locate the muffHer, but do not remove it. Find the two
(2) screws on the bottom of the muffler (Fig. 29).
These two screws hoHdthe Spark Arrestor Hood
AssemMy and the spark arrestor screen to the
bottom of the muffHer. Remove the two (2) screws
using either a torx #20 or flat Made screwdriver.
3. Using a small flat Made screwdriver, carefully pry up
the spark arrestor screen from the recessed hoHe,
taking care to notice that the "raised" part of the
spark arrestor screen is inside the recessed hoHe.
Remove the spark arrestor screen from the muffHer.
4. CHeanthe spark arrestor screen with a wire brush.
Replace it if it is damaged, or if you are unable to
clean it thoroughly.
5. Reinstall the spark arrestor screen by putting the
"raised" portion of the screen inside the recessed
hole of the muffler. Make sure that the spark arrestor
screen fits flat against the muffler.
6. Place the spark arrestor plate on top of the spark
arrestor with the "raised" side up and the opening
facing towards the engine (Fig. 29).
7. Place the spark arrestor hood on top of the spark
arrestor plate with the "raised" side up and the
opening facing AWAY from the engine (Fig. 29). Verify
that the exhaust will be directed AWAY from the
engine.
Engine
Recessed Hole
Spark Arrestor Hood
Assembmy Incgudes:
Spark Arrestor Pmate
Spark Arrestor Hood
and Screws
Spark Arrestor
Screen
/ Spark Arrestor
Plate
"\ / Opening
Spark
Hood
Fig. 29
\
Screws
8. Replace the two screws you removed in Step 2 and
tighten them securely.
9. Reinstall the air filter/muffler cover.
WARNmNG: ,ftheexhaust
deflector assembly is
not tightened securely, it could fall off causing
damage to the unit and possible serious
personal injury.
CARBURETOR ADJUSTMENT
The idle speed of the engine is adjustable through the air
filter/muffler cover (Fig. 30).
NOTE: Careless adjustments can seriously damage your
unit. An authorized service dealer should make
carburetor adjustments.
Check Fuel Mixture
Old and/or improperly mixed fuel is usually the reason
for improper unit performance. Drain and refill the tank
with fresh, properly-mixed fuel prior to making any
adjustments. Refer to Oil and Fuel Information.
Clean Air Filter
The condition of the air filter is important to the operation
of the unit. A dirty air filter will restrict air flow and
change the air/fuel mixture. This is often mistaken for an
out of adjustment carburetor. Check the condition of the
air filter before adjusting the idle speed screw. Refer to
Air Filter Maintenance.
Adjust Idle Speed Screw
If, after checking the fuel mixture and cleaning the air
filter, the engine still will not idle, adjust the idle speed
screw as follows:
1. Start the engine and let it run at a high idle for a
minute to warm up. Refer to Starting/Stopping
instructions.
WARNING: The cutting
attachment may spin
during idle speed adjustments. Wear
protective clothing and observe all safety
instructions to prevent serious personal injury.
\
Fig. 30
D
Idle Speed Screw
15
Loading ...
Loading ...
Loading ...