Loading ...
__..dm_ _ I,,m___ ® MODELS QP130BL,,QP130BLC*QP130SS*QP130SSC
QP130WW * QP130WWC * QP136BL * QP136SS * QP136WW
Page 2
CONTENTS OPERATION
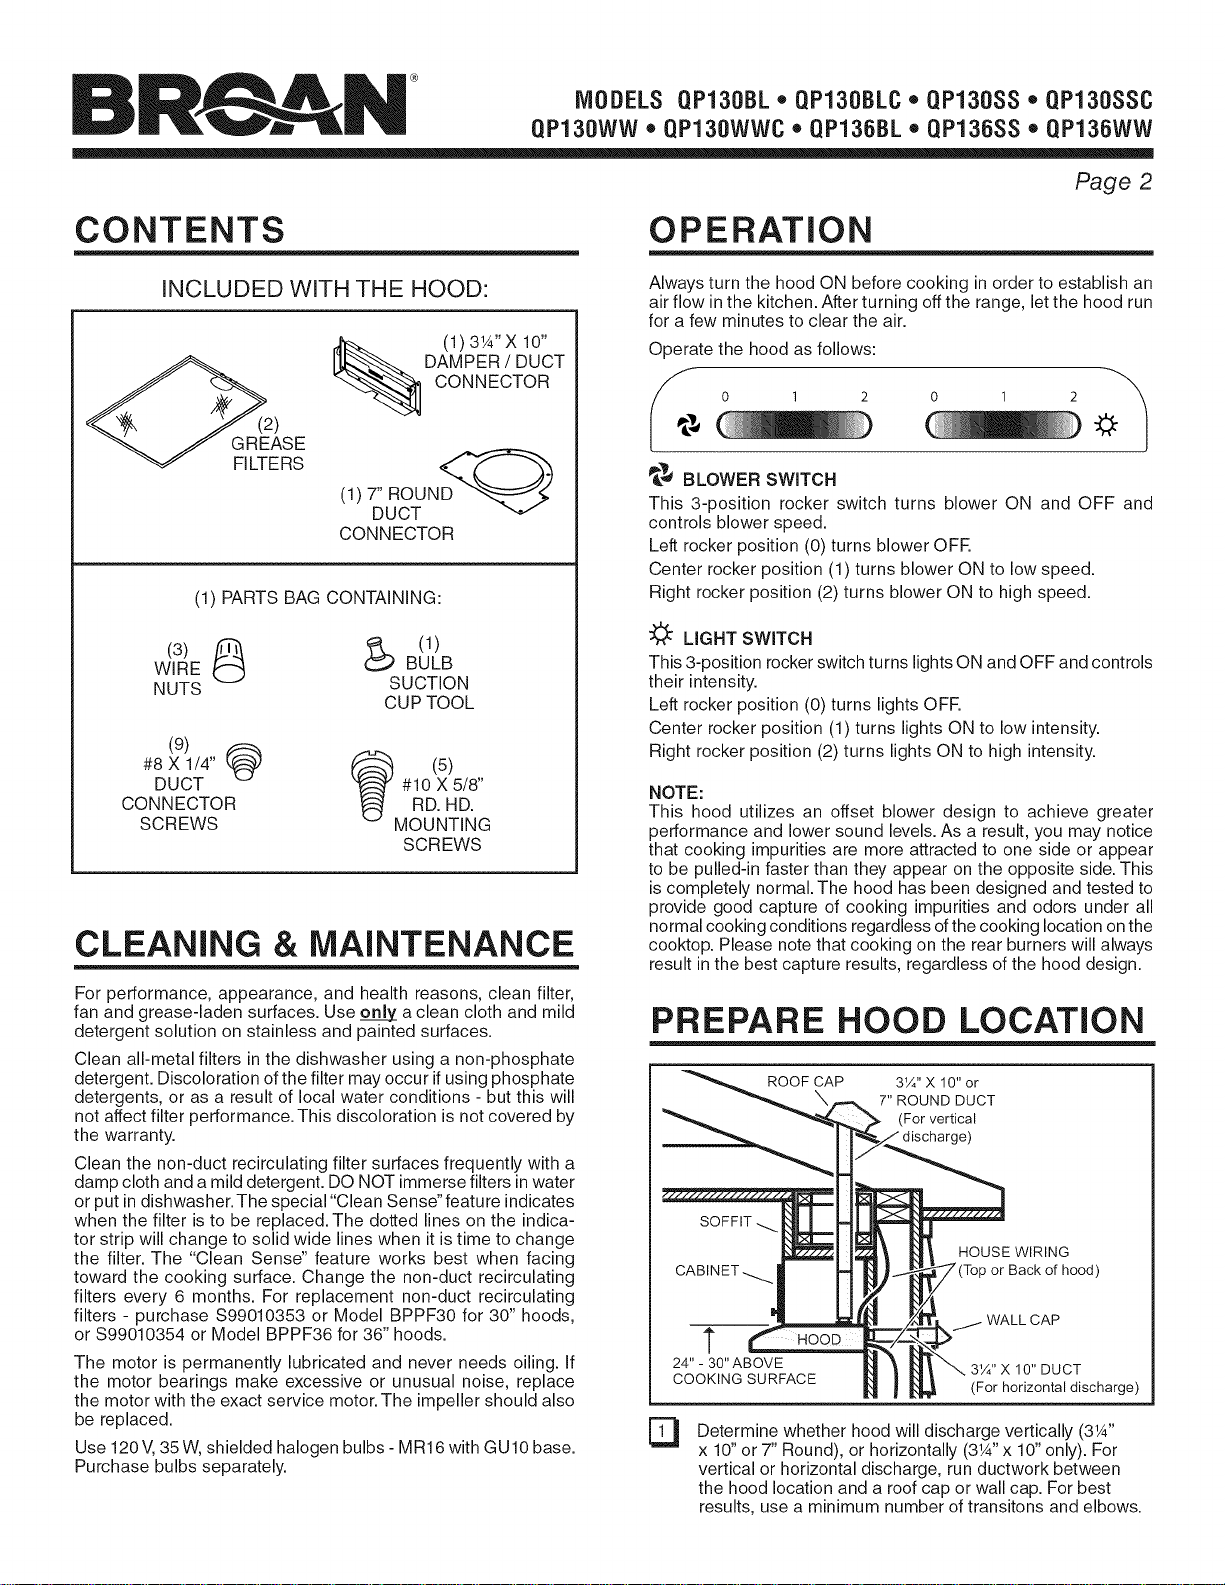
INCLUDED WITH THE HOOD:
(2)
GREASE
FILTERS
(1) 31A,,X 10,,
DAMPER / DUCT
CONNECTOR
(1) 7" ROUND__
DUCT
CONNECTOR
(1) PARTS BAG CONTAINING:
WIRE BULB
NUTS SUCTION
CUP TOOL
#8 X 1/4" (5)
DUCT #10 X 5/8"
CONNECTOR RD. HD.
SCREWS MOUNTING
SCREWS
CLEANING & MAINTENANCE
For performance, appearance, and health reasons, clean filter,
fan and grease-laden surfaces. Use only a clean cloth and mild
detergent solution on stainless and painted surfaces.
Clean all-metal filters in the dishwasher using a non-phosphate
detergent. Discoloration ofthe filter may occur if using phosphate
detergents, or as a result of local water conditions - but this will
not affect filter performance. This discoloration is not covered by
the warranty.
Clean the non-duct recirculating filter surfaces frequently with a
damp cloth and a mild detergent. DO NOT immerse filters in water
or put in dishwasher.The special "Clean Sense"feature indicates
when the filter is to be replaced. The dotted lines on the indica-
tor strip will change to solid wide lines when it is time to change
the filter. The "Clean Sense" feature works best when facing
toward the cooking surface. Change the non-duct recirculating
filters every 6 months. For replacement non-duct recirculating
filters - purchase S99010353 or Model BPPF30 for 30" hoods,
or S99010354 or Model BPPF36 for 36" hoods.
The motor is permanently lubricated and never needs oiling. If
the motor bearings make excessive or unusual noise, replace
the motor with the exact service motor. The impeller should also
be replaced.
Use 120V, 35W, shielded halogen bulbs - MR16 with GU10 base.
Purchase bulbs separately.
Always turn the hood ON before cooking in order to establish an
air flow in the kitchen. After turning off the range, let the hood run
for a few minutes to clear the air.
Operate the hood as follows:
_lf 0 1 2
BLOWER SWNTCH
This 3-position rocker switch turns blower ON and OFF and
controls blower speed.
Left rocker position (0) turns blower OFR
Center rocker position (1) turns blower ON to low speed.
Right rocker position (2) turns blower ON to high speed.
"_ LIGHT SWITCH
This 3-position rocker switch turns lights ON and OFF and controls
their intensity.
Left rocker position (0) turns lights OFF.
Center rocker position (1) turns lights ON to low intensity.
Right rocker position (2) turns lights ON to high intensity.
NOTE:
This hood utilizes an offset blower design to achieve greater
performance and lower sound levels. As a result, you may notice
that cooking impurities are more attracted to one side or appear
to be pulled-in faster than they appear on the opposite side. This
is completely normal. The hood has been designed and tested to
provide good capture of cooking impurities and odors under all
normal cooking conditions regardless ofthe cooking location on the
cooktop. Please note that cooking on the rear burners will always
result in the best capture results, regardless of the hood design.
PREPARE HOOD LOCATION
ROOF CAP
3'¼" X 10" or
7" ROUND DUCT
(For vertical
HOUSE WIRING
Jor Back of hood)
CAP
T )D
24" - 30" ABOVE 3'¼"X 10" DUCT
COOKING SURFACE
(For horizontal discharge)
El
Determine whether hood will discharge vertically (3W'
x 10" or 7" Round), or horizontally (3W'x 10" only). For
vertical or horizontal discharge, run ductwork between
the hood location and a roof cap or wall cap. For best
results, use a minimum number of transitons and elbows.
Loading ...
Loading ...
Loading ...