For your safety and continued enjoyment of this product, always read the instruction booklet carefully before using.
Instruction & Recipe Booklet
Vertical Waffle Maker – WAF-V100 Series

2
IMPORTANT
SAFEGUARDS
READ ALL INSTRUCTIONS
BEFORE USING
When using any electrical appliance, especially
when children are present, basic safety
precautions should always be taken to reduce
the risk of fire, electric shock and/or injury,
including the following:
• Never leave unattended while cooking to
avoid possibility of fire.
• This appliance is intended for
HOUSEHOLD USE ONLY and similar
applications such as:
- staff kitchen areas in shops, offices and
other working environments;
- farmhouses;
- clients in hotels, motels and other
residential type environments;
- bed and breakfast settings
• This appliance is not intended for use by
persons (including children) with reduced
physical, sensory, or mental capabilities, or
lack experience and knowledge unless,
they have been given instruction
concerning use of the appliance by a
person responsible for their safety.
• To ensure no possible accidental injury
occurs, when infirmed persons (including
children) are near the appliance, they must
be closely supervised.
• Children should always be supervised to
ensure they do not play with the appliance.
• Use only on an appropriate benchtop and
indoors only, sitting away from flammable
materials such as curtains, draperies and
walls of similar nature as a fire may occur if
comes in contact or becomes covered
during operation.
• Do not place on or near a hot gas, electric
burner, or in a heated oven.
• Do not use appliance for other than its
intended use.
• This appliance is under 220V~240V use
only. Check voltage to be sure the voltage
indicated on the nameplate agrees with
your voltage.
• To avoid the possibility of the unit being
accidentally pulled off the working area,
which could result in damage to the unit or
personal injury, do not let the cord hang
over the edge of a table or benchtop.
• To avoid damage to the cord and possible
fire or electrocution hazard, do not let cord
come into contact with any hot surfaces
including a stovetop.
• Do not operate this appliance if it has been
dropped or damaged (including the cord) in
any manner or is not operating correctly.
Return the appliance to the nearest Cuisinart
Repair Centre for examination, repair,
electrical or mechanical adjustment.
• Do not operate this appliance in an appliance
cabinet or under a wall cabinet. When
storing in an appliance cabinet, always
unplug the unit from the electrical outlet.
Not doing so could create a risk of fire,
especially if the unit is in contact with the
walls of any cabinetry or on closing the
cabinet door and touching the unit.
• Keep hands hair and clothing, as well as
spatulas and other utensils away during
operation to reduce the risk of injury and/or
damage to the appliance.
• Always unplug from the electrical outlet when
not in use before putting on or taking off
parts and before cleaning.
• The use of attachments not recommended
by Cuisinart may be hazardous.
• This appliance is not intended to be
operated by means of an external timer or
separate remote-control system.
• At no time, before or during cooking and
cleaning immerse unit, plug or cord in water,
or any other liquids similarly under running
water too – this is to protect against the
starting of a fire and electric shock that could
induce injury to persons. If the unit, plug or
cord should fall into water or other liquids,
unplug the cord from the electrical output
immediately. DO NOT reach into the water.
• Do not clean with metal scouring pads.
Pieces can break off the pad and touch
electrical parts, involving a risk of electric
shock.
• While cleaning do not try to dislodge any
food when unit is plugged in. Always unplug
the unit when cleaning.
3
• The temperature of accessible surfaces may
be high when the appliance is operating.
• Surfaces marked with this
symbol will be very hot to touch
during use – only use handles
and/or knobs. DO NOT TOUCH
until the unit has cooled down.
SPECIAL CORDSET
INSTRUCTIONS
• A short power supply cord is provided to
reduce the risks resulting from becoming
entangled in or tripping over a longer cord.
• Extension cords may be used if care is
exercised in their use. If an extension cord
is used, the marked electrical rating of the
extension cord must be at least as great as
the electrical rating of the appliance, and
the longer cord should be arranged so that
it will not drape over the countertop or
tabletop where it can be tripped over
unintentionally or pulled on by children.
UNPACKING
INSTRUCTIONS
1. Place the box on a large, sturdy, flat
surface.
2. Open the box and remove all literature.
3. Lift the packing materials, Vertical Waffle
Maker and accessories out of the box.
4. Remove all other parts packed in pulp mold
and remove packing materials surrounding
those parts. Be sure to check all packing
materials for all parts listed in the Parts &
Features section on page 4 before
discarding.
5. Remove any protective or promotional
labels from your Vertical Waffle Maker and
other parts.
SAVE THESE
INSTRUCTIONS
BEFORE THE FIRST USE
Before using your Vertical Waffle Maker for the
first time, remove any dust from shipping by
wiping the unit, dial and baking plates with a
damp cloth (see Cleaning & Maintenance
Instructions on page 7).
NOTE: The Vertical Waffle Maker has been
treated with a special nonstick coating. Should
you experience any sticking, slightly increase
temperature setting until the waffle releases,
then continue making waffles at desired setting.
Do not use on heat-sensitive surfaces or store
items on top of the Vertical Waffle Maker.
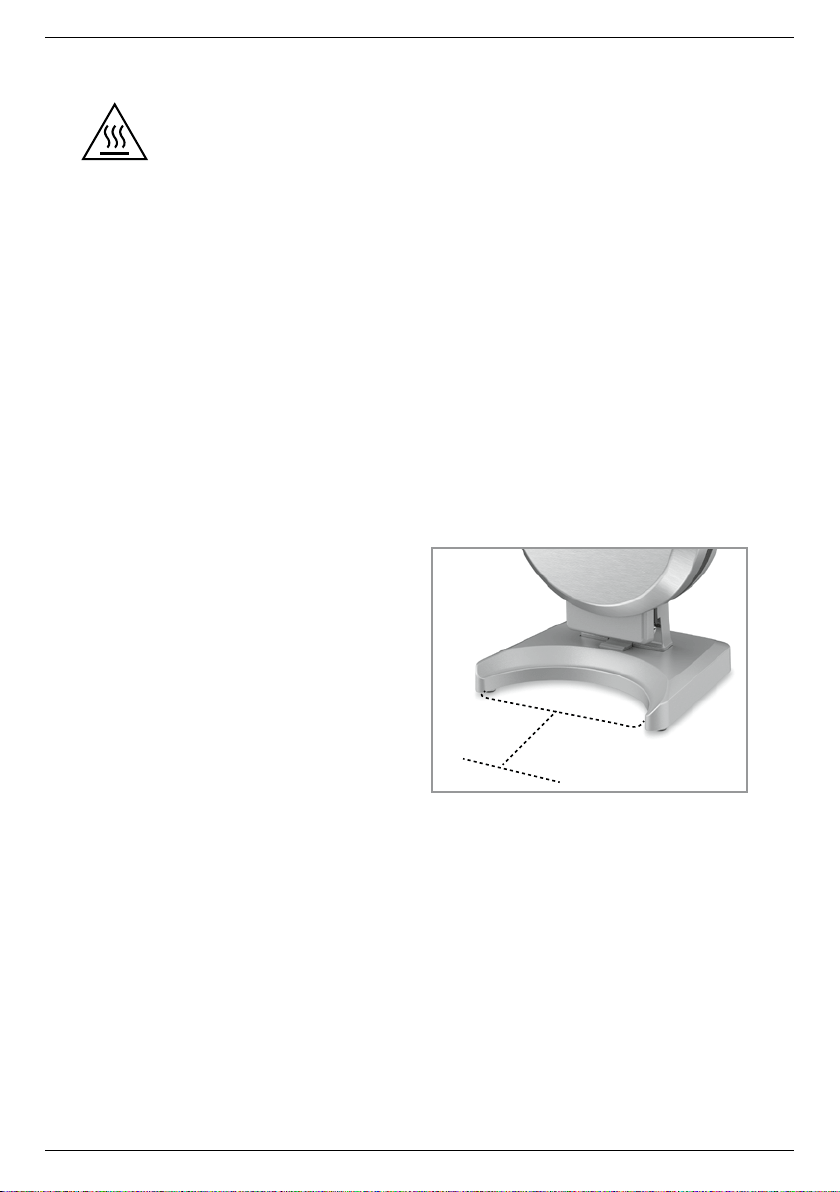
ENSURE THE EXTERIOR WALLS OF YOUR
Vertical Waffle Maker IS NOT WITHIN 15CM
CONTACT OF ANY OTHER PARAPHENALIA &
is sitting back at least 15cm from the edge of
the benchtop or table.
CONTENTS
Important Safeguards................... 2
Special Cordset ....................... 3
Before the first Use . . . . . . . . . . . . . . . . . . . . 3
Parts & Features ....................... 4
Quick Tips Guide . . . . . . . . . . . . . . . . . . . . . . 5
Operating Instructions .................. 6
Cleaning & Maintenance ................ 7
15CM
4
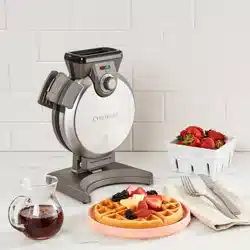
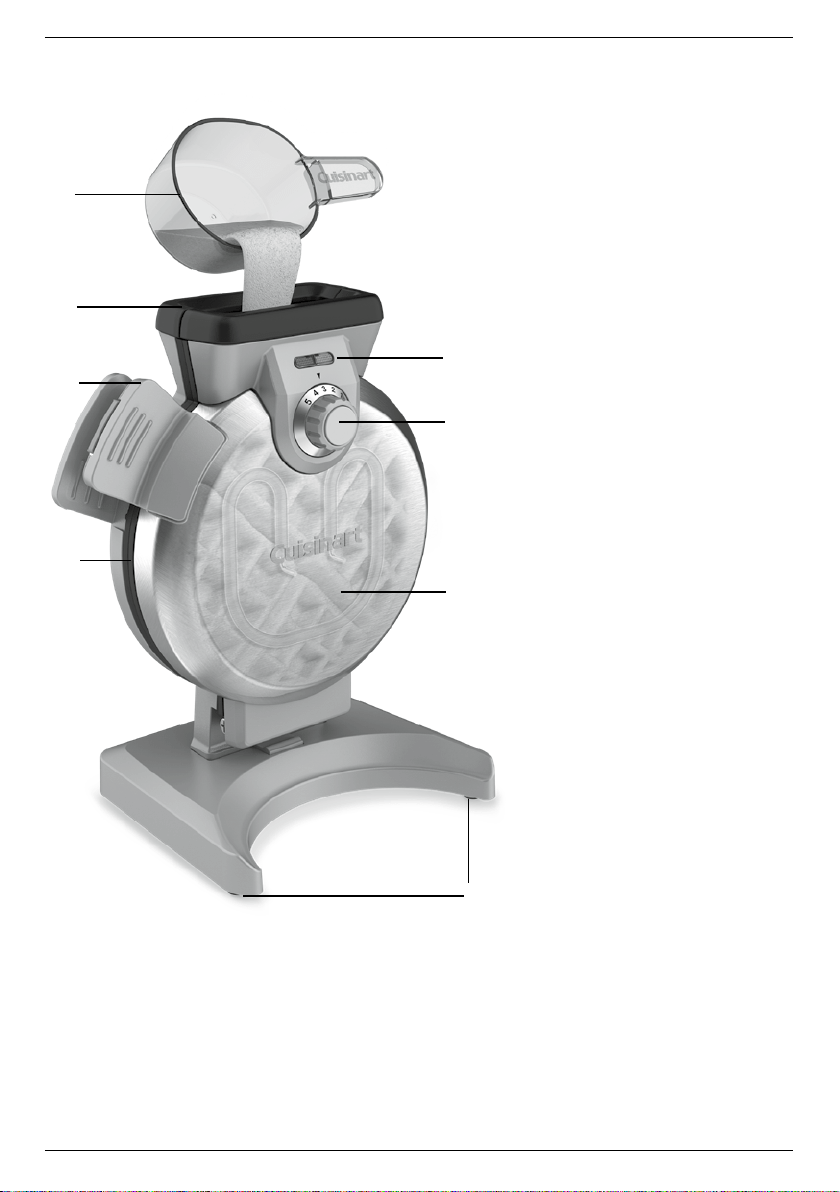
A. Measuring Cup (175ml)
Perfect measure for full Belgian-
style waffle cup. The cup rests
on the inside of a batter bowl.
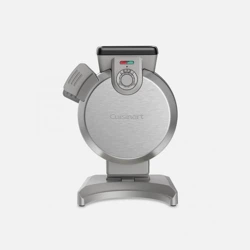
B. Fill Spout
To easily pour batter into, without
splattering.
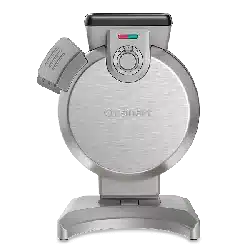
C. Indicator Lights
Red: Power ON Green:
Waffle maker is ready-to-bake &
ready-to-eat
D. Stay-Cool Latch
Locks to securely close unit
& releases front plate to remove
waffle.
E. Temperature/Browning Dial
Temperature control offers 5
shade levels.
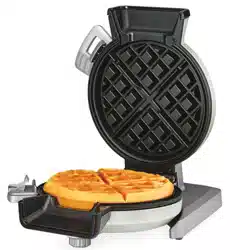
F. Nonstick Baking Plates
Die-cast aluminum plates bake
a standard round, four-sectioned,
deep-pocket Belgian waffle.
G. Housing
Brushed Stainless Steel
H. Rubber Feet
Non-slip to keep unit stable &
not mark countertop.
I. Audible Signal (not shown)
5 beeps sound when waffle
maker is ready to bake & when
waffle is fully cooked & ready to
eat.
J. Cord Storage (not shown)
Cord wraps around the base
stand of the unit. Closed waffle
maker stands upright for
compact storage.
K. BPA-FREE (not shown)
All materials that come in contact
with food or liquid are free of
BPA.
A
B
C
E
F
D
G
H
PARTS & FEATURES
5
QUICK TIPS GUIDE
Tips
Waffle Shade
• Setting #1 will produce the lightest in colour and fluffiest waffles, while setting
#5 will produce the darkest in colour and extra-crispy waffles. Experiment
to determine which setting produces the best waffle colour for you.
Note: A different recipe may need a different setting for your preferred waffle
shade.
Batter Thickness
• Depending on the thickness of the batter, you may only use ¾-1 cup (of the
measuring cup provided)/130ml-175ml of batter per waffle. Always err on less
rather than more, as batter tends to expand while cooking.
• Batters should be whisked well to be sure there are no lumps. If the batter is
not flowing easily through the spout, it is too thick. Either whisk to a smoother
batter, or add additional liquid e.g. extra buttermilk or milk (depending on
recipe), 1 tablespoon at a time.
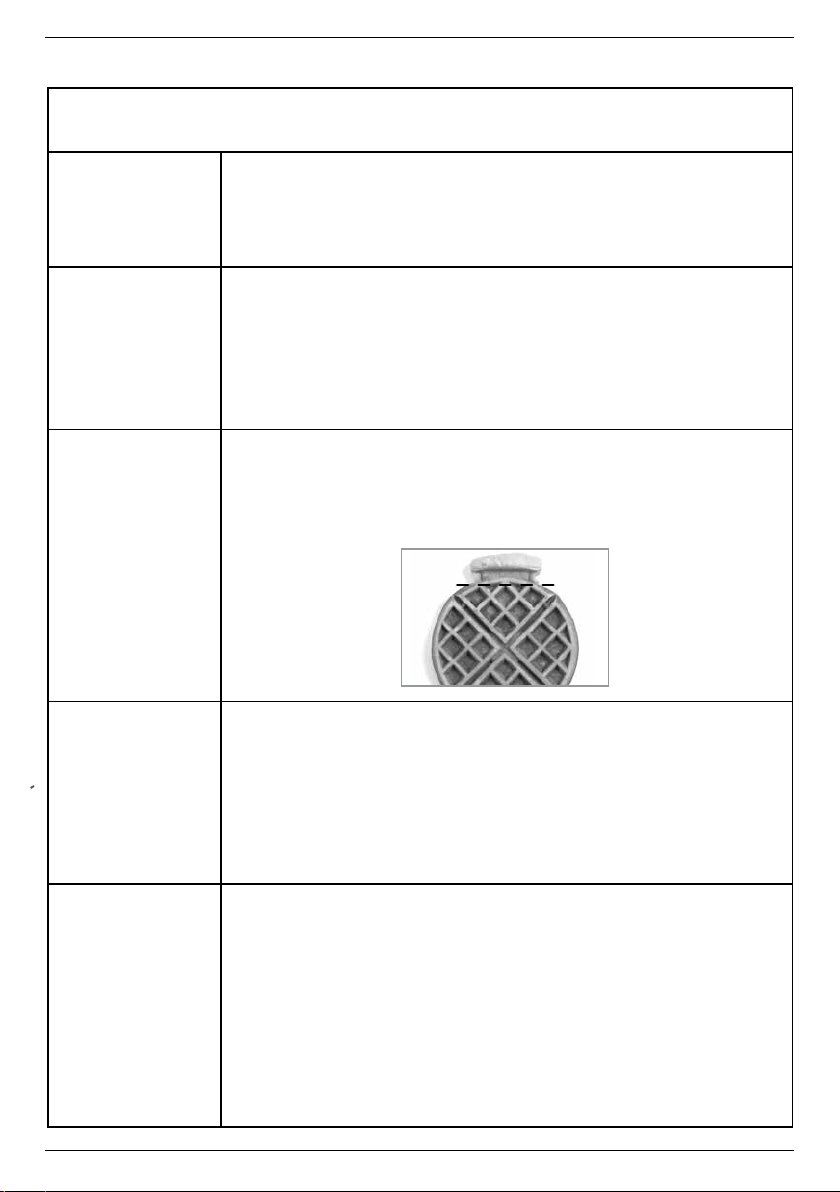
Evenly Round with
Perfect Pockets
• Do not overfill the waffle maker – it should not be filled to the top of the
waffle grid. Always use the provided measuring cup or 175ml as a guide.
• Most batters should be poured through the fill spout in a steady stream.
Thicker batters, however, should be added a bit more carefully, being sure
that the batter in the spout drips into the waffle grid before adding more.
Mixing-it-Up
• Mix up your favourite waffle flavours! - Substitute a small amount of the flour
for your favourite finely ground nuts (pecans, walnuts, almonds, etc.). Or if
you prefer berries? Swirl up to ¼ cup of a fruit jam into the prepared waffle
batter prior to cooking. Not only will the waffles taste delicious, but they will
also have a beautiful colour to them.
• Adding a little vanilla or a liqueur like amaretto adds just a hint of flavour &
sweetness to the mix. If your recipe doesn’t call for it, just add it to the egg
whites when you beat them.
Save for Later
• Waffles are best when made to order, but baked waffles may be kept warm in
a 90°C oven. Place them on a rack fitted into a baking pan or loosely cover in
foil while in the oven.
• Baked waffles may be frozen. Allow to cool completely, then wrap well in
plastic wrap & place in a plastic food storage bag. Use baking paper to keep
waffles separated & squeeze as much air from the bag as possible. When
you're ready to eat them, set out the preferred number of waffles & let them
defrost for about 10 minutes. Heat the waffles in your oven at 130°C for
about 5 minutes. Alternatively, if your waffles can fit in your toaster, reheat
in there or a toaster oven. Waffles can be stored in the freezer for up to 2
months.

6
OPERATING INSTRUCTIONS
1. Stand the closed waffle maker on a dry, level work
surface. NOTE: Be sure the front legs of the unit
are set back at least 15cm from the edge of the
benchtop or table.
2. Plug the power cord into a 240V~ suitable power
outlet. The red indicator light will turn on to signal
that the power is ON, and the unit will begin to
heat up. NOTE: The first time you use your waffle
maker, it may have a slight odour and may smoke
a bit. This is normal for appliances with nonstick
surfaces.
3. Adjust the temperature dial to the desired
browning setting – select #1 for the lightest shade
of waffle and #5 for the darkest shade.
4. Once the waffle maker has reached the desired
temperature, the green indicator light will turn on
and 5 beeps will sound.
5. Using the measuring cup provided, pour batter into
the fill spout on the top of the waffle maker. The
amount of batter will vary slightly depending on
the thickness of the batter. NOTE: During baking,
you may notice steam rising from the fill spout. This
is normal and is actually necessary to produce the
waffle’s crispy exterior and fluffy interior.
6. Baking time is determined by the browning level
that you chose in Step 3 e.g. baking time for shade
#3 is about 3 minutes, however depending on your
waffle recipe, this may vary. Lighter shades take a
little less time; darker shades a little more.
7. When the waffle is ready, the green light will turn
on and 5 beeps will sound. Open the waffle maker
by pressing the stay-cool latch on the side of the
unit then use the latch to carefully lower the front
plate. BE CAREFUL not to touch the hot surfaces.
8. Remove the waffle by gently loosening an edge
with a nonstick spatula or tongs. Never use metal
utensils which will damage the coating.
9.
Once cooked waffle is removed, carefully close the
unit by moving the stay-cool latch up to the top
plate. Ensure unit is properly latched; a “click” will
sound to let you know it is securely closed. Start
from step 3 to cook the next waffle.
10. When finished turn the temperature dial to the
shade #1 and unplug the cord from the power
outlet. Let the waffle maker cool completely
before handling.

7
CLEANING &
MAINTENANCE
• When not in use, leave unplugged.
• The waffle maker must be unplugged and
completely cool before cleaning or storing.
Leaving the front cover open will allow hot grids
to cool more quickly.
• To clean, simply brush crumbs from grooves or
wipe with a dry cloth or paper towel.
• You may also clean the grids by wiping with a
damp cloth to prevent staining and sticking from
batter or oil buildup.
• Be certain grids have cooled completely before
cleaning. If batter adheres to plates, simply pour
a little cooking oil onto the baked on batter and
let stand for about 5 minutes. This will soften the
batter for easy removal.
• The housing base may be wiped clean with
a sudsy, non-abrasive cloth or sponge. Be
sure to dry it thoroughly. NEVER IMMERSE
CORD, PLUG OR UNIT IN WATER OR OTHER
LIQUIDS.
• Any other servicing should be performed by an
authorised service representative.

www.cuisinart.com.au
IB-18/481B
©2020 Cuisinart
Suite 101 Ground Floor
18 Rodborough Rd
Frenchs Forest NSW, 2086
Australia
Visit our Website:
www.cuisinart.com.au
Printed in China
Trademarks or service marks of third parties referred
to herein are the trademarks or service marks of their
respective owners.