31-2000891 Rev. 0
Installation
Instructions
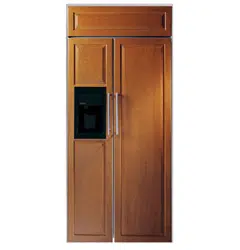
WARMING DRAWER CUSTOM
PANEL ACCESSORY KIT
ZXW900
For installation of 30” wide warming
drawer custom panel and custom handle.
BEFORE YOU BEGIN
Read these instructions completely and carefully.
ŶIMPORTANT – Save these instructions
for local in spec tor’s use.
ŶIMPORTANT – Observe all governing
codes and ordinances.
ŶNote to Installer – Be sure to leave these
instructions with the consumer.
ŶNote to Consumer – Keep these instructions for
future reference.
ŶSkill level – Installation of this custom panel kit
requires a qualified installer or service technician.
Ŷ3URSHULQVWDOODWLRQLVWKHUHVSRQVLELOLW\RIWKHLQVWDOOHU
Ŷ3URGXFWIDLOXUHGXHWRLPSURSHULQVWDOODWLRQLV127
covered under the warranty.
TOOL AND MATERIALS REQUIRED
Ŷ6DIHW\JODVVHV
Ŷ&XWUHVLVWDQWJORYHV
Ŷ3KLOOLSVVFUHZGULYHU
Ŷ'ULOODQGDSSURSULDWHELWV%UDGSRLQWUHFRPPHQGHG
for drilling through wood panels)
Ŷ&XVWRPSDQHO
Ŷ&XVWRPKDQGOHRSWLRQDO
Ŷ$GKHVLYHUHFRPPHQGHGIRUPHWDOWRZRRG
Ŷ$GKHVLYHUHFRPPHQGHGIRUSODVWLFWRZRRG
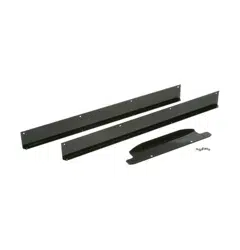
PARTS SUPPLIED
Ŷ/DPS-HZHO
Ŷ0HWDOPRXQWLQJSDQHO
Ŷ&XVWRPLQQHUSDQHOFRQWDLQVPRLVWXUHVOLGH
Ŷ%DJRIVL]HVFUHZV
7KLVNLWFRQWDLQVDPRXQWLQJSDQHOWRVXSSRUWDWULPOHVV
FXVWRPGUDZHUIURQWXSWR´WKLFN7KHWXEXODUKDQGOH
can be reinstalled onto the custom panel with longer
VFUHZVQRWSURYLGHG2UWKHRULJLQDOKDQGOHFDQEH
UHSODFHGZLWKDFXVWRPKDQGOHRI\RXUFKRLFH+DQGOH
LVQRWVXSSOLHG&KRRVHDFXVWRPKDQGOHWRPDWFKRU
complement cabinetry hardware.
IMPORTANT:7KHZDUPLQJGUDZHUVKRXOGEHLQVWDOOHG
according to the installation instructions packed with
WKHSURGXFW7KHRULJLQDOGUDZHUIURQWZLOOEHUHPRYHG
and replaced with a custom panel.
PARTS SUPPLIED (Cont.)
Ŷ&XWHGJHVRIWKHGUDZHUSDQHOZLOOEHVHHQDQGPXVW
be finished for best appearance.
Ŷ7KHFXVWRPGUDZHUIURQWSDQHOERWKUDLVHGDQGIODW
GHVLJQVKRXOGEHFRQVWUXFWHGLQWKHVDPHPDQQHU
as typical cabinet doors.
Ŷ2UGHUWKHFXVWRPGUDZHUSDQHOIURPWKHFDELQHW
manufacturer. Be sure to provide the exact
dimensions so that the panel is constructed
accurately.
Ŷ2UGHUWKHRSWLRQDOFXVWRPKDQGOHWRFRPSOHPHQWRU
match surrounding cabinetry handles.
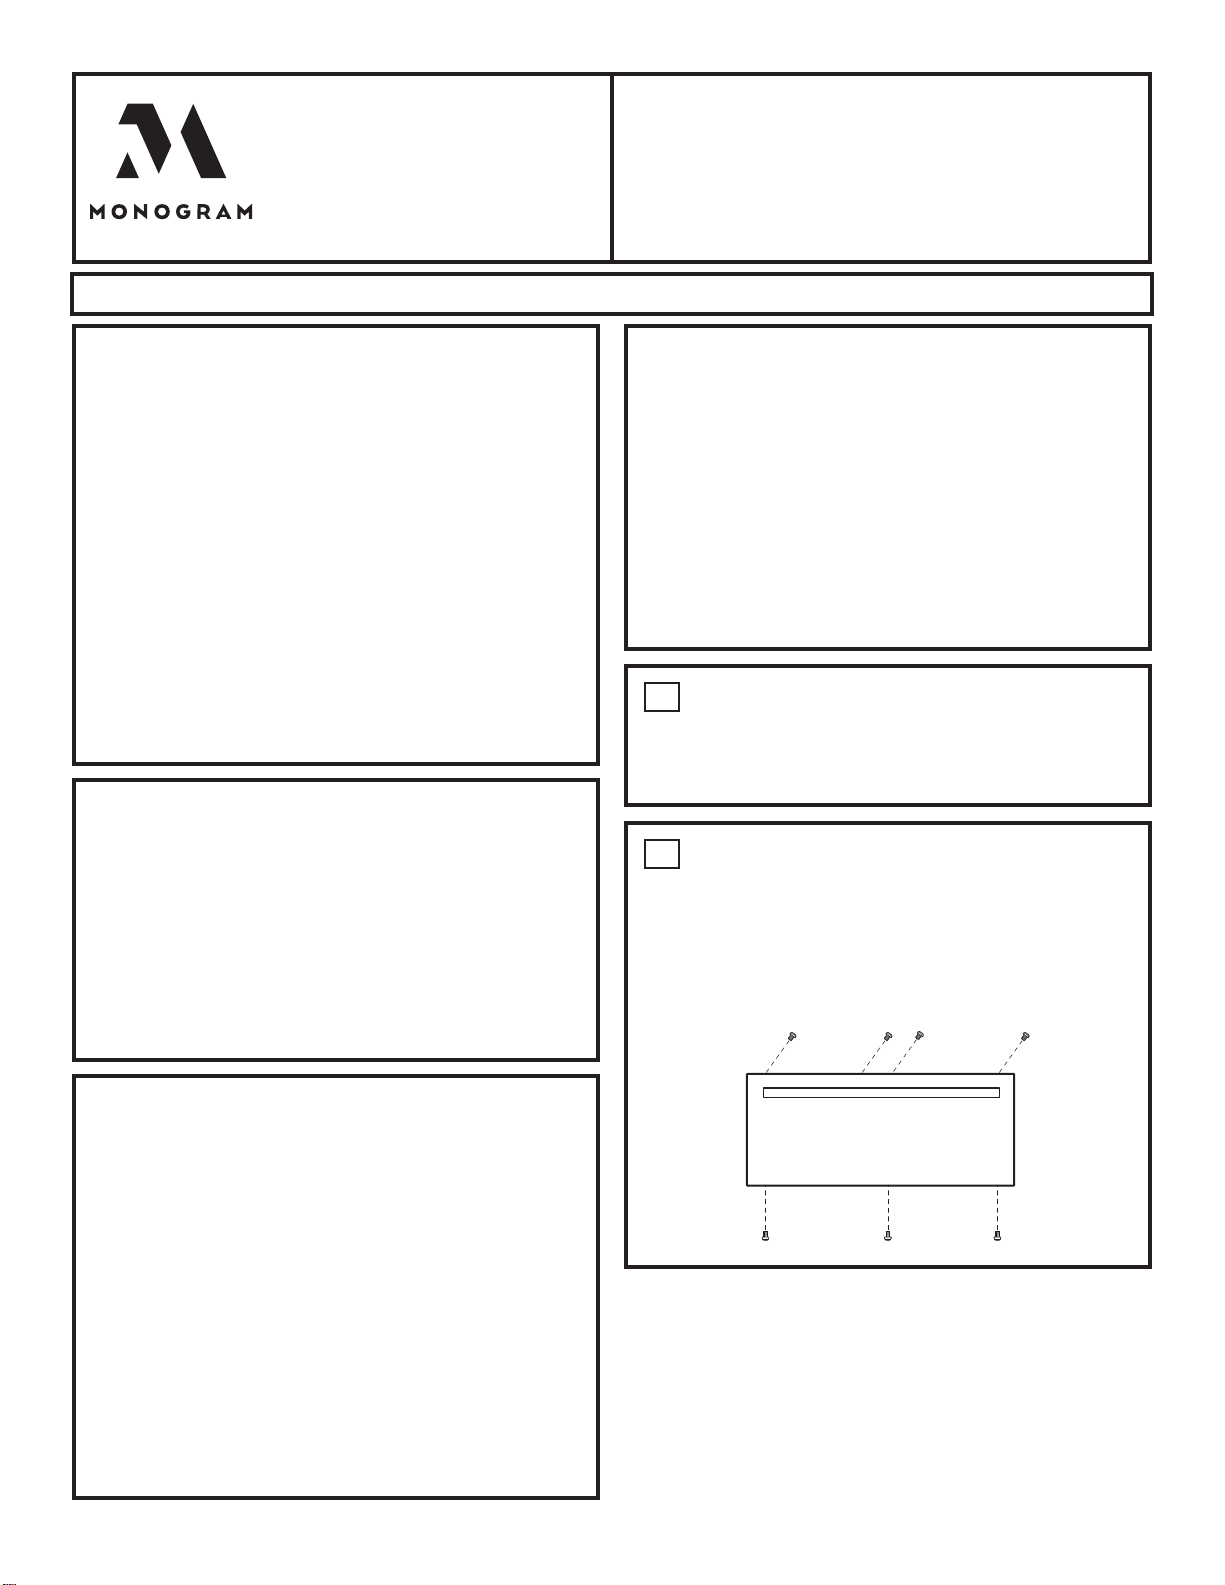
1
PREPARE DRAWER FOR PANEL
INSTALLATION
Ŷ2SHQWKHGUDZHUIXOO\
Ŷ7XUQWKHZDUPLQJGUDZHURII
2
REMOVE ORIGINAL DRAWER
FRONT
Ŷ5HPRYHVHYHQVFUHZV5HPRYHIRXUIURPWRS
inside and three from bottom. Set these screws
aside – they are no longer needed.
Ŷ6XSSRUWWKHGUDZHUIURQWDV\RXUHPRYHVFUHZVWR
prevent the possibility of falling.
4XHVWLRQV"3OHDVHYLVLWRXUZHEVLWHDWmonogram.com.
31-2000891 Rev. 1
Installation Instructions
Insert
Jewel
Appearance
Side
This Side
A
gainst
Wood
5
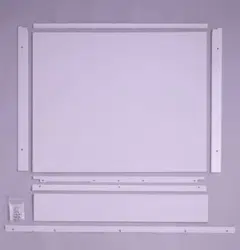
SECURE CUSTOM PANEL TO
METAL MOUNTING PANEL
Ŷ/D\WKHFXVWRPSDQHODSSHDUDQFHVLGHGRZQRQD
clean surface.
Ŷ5HPRYHDOOWDSHDQGSDFNLQJPDWHULDOIURPWKHPHWDO
panel.
Ŷ3ODFHWKHIODWVLGHRIWKHPHWDOSDQHORQWRWKHEDFN
VLGHRIWKHFXVWRPSDQHOZLWKWKHPRXQWLQJIODQJHV
facing up.
Ŷ$OLJQWKHODPSKROHLQWKHSDQHOZLWKWKHPRXQWLQJ
panel.
Ŷ&RQILUPVTXDUHQHVVDQGFRUUHFWSRVLWLRQRIWKHPHWDO
panel to the custom panel.
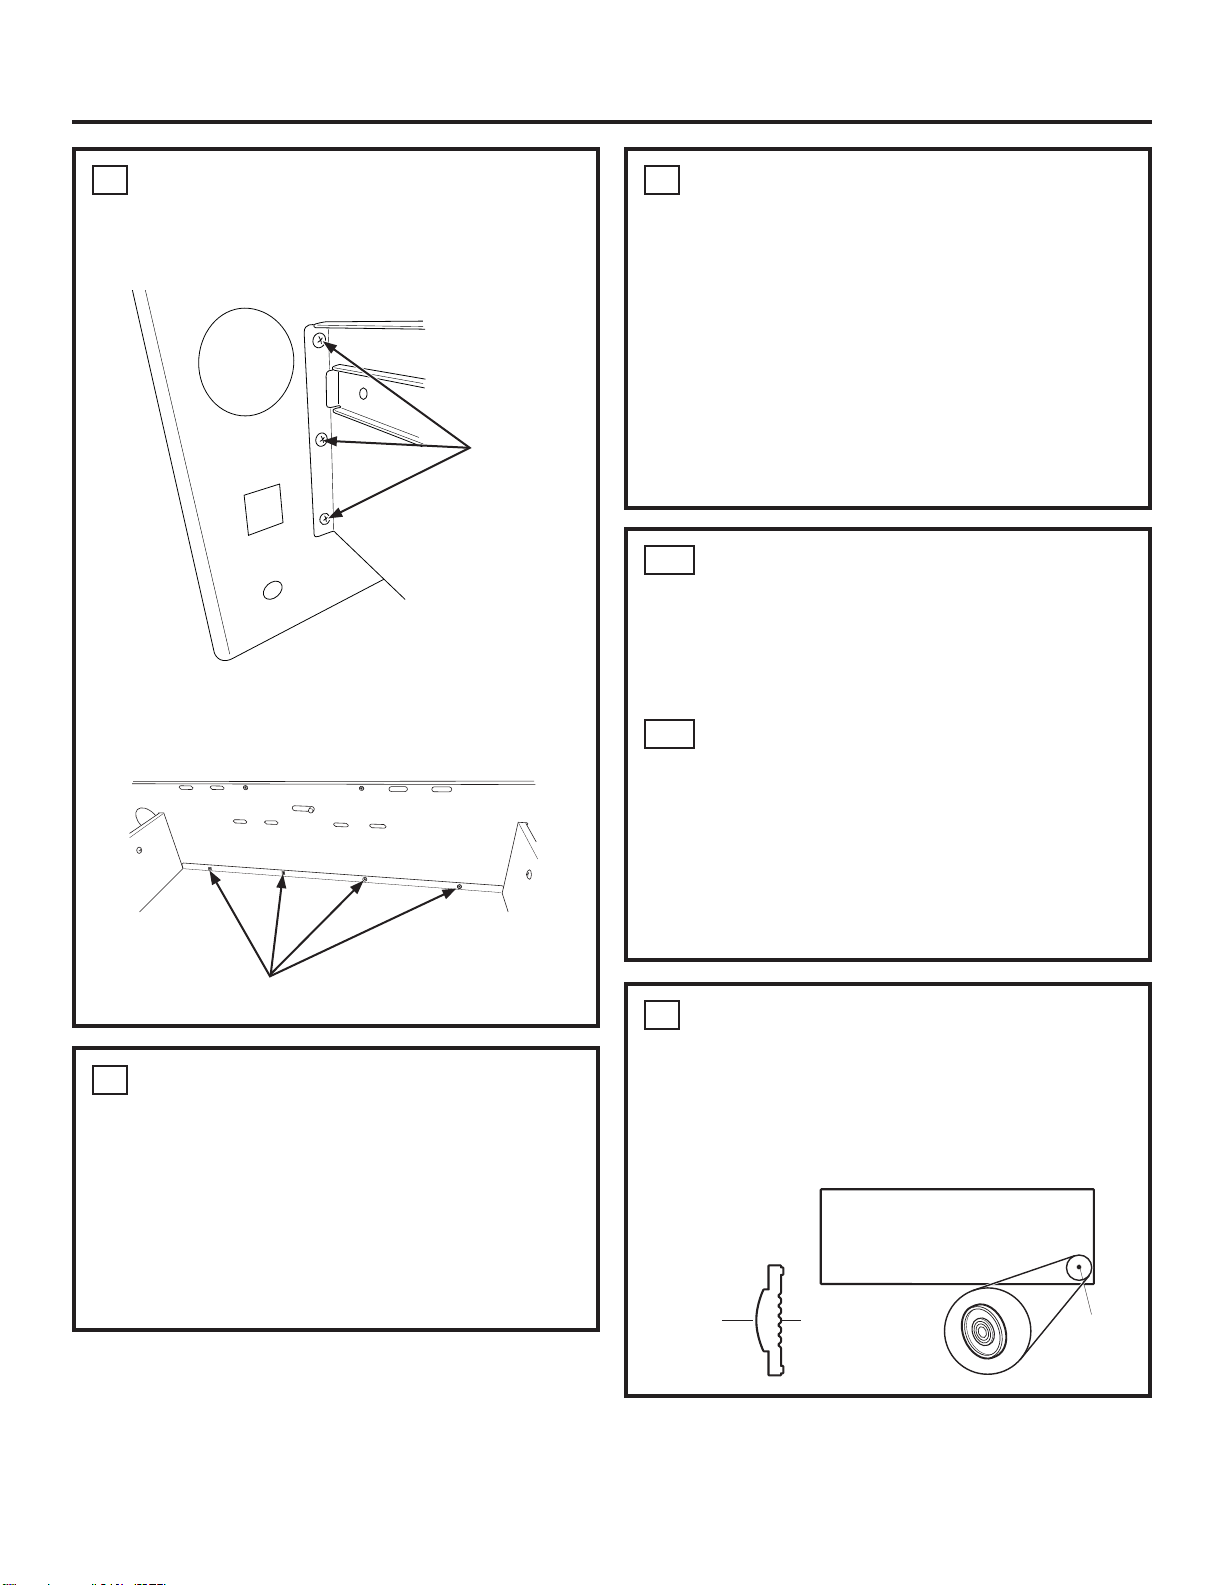
7
INSTALL LAMP JEWEL
Ŷ7XUQWKHDVVHPEO\DSSHDUDQFHVLGHXS
Ŷ8VHSODVWLFWRZRRGDGKHVLYHWRVHFXUHWKHODPS
jewel to the front of the wood panel. On the side with
WKHEXOJHVHHLOOXVWUDWLRQDSSO\DVPDOOEHDGRI
DGKHVLYHDURXQGWKHRXWVLGHHGJH3ODFHWKHMHZHO
into the drilled hole.
6A
FOR PANELS LESS THAN
3/4” THICK
Ŷ6HSDUDWHWKHFXVWRPSDQHODQGPHWDOSDQHO
Ŷ$SSO\DIHZKRUL]RQWDOEHDGVRIDGKHVLYHWRWKH
PHWDOSDQHO$YRLGDGKHVLYHZLWKLQ´RIODPSKROH
area and outer edges.
6B
FOR 3/4” (OR GREATER)
THICK PANELS
Ŷ6HSDUDWHWKHFXVWRPSDQHODQGPHWDOSDQHO
Ŷ8VHWKHPHWDOSDQHODVDWHPSODWH3RVLWLRQWKH
metal panel over the back side of the custom panel
DQGGULOOSLORWKROHV'ULOOSLORWKROHVVL]HGWRPDWFK
VFUHZVEHLQJXVHGVFUHZVQRWSURYLGHG
NOTE: Select screw length carefully to avoid
penetration of the finished side.
3
REMOVE ORIGINAL DRAWER
INNER PANEL
Ŷ5HPRYHVFUHZVKROGLQJLQQHUSDQHOWRGUDZHU
body on each side - keep these screws for later use.
Ŷ5HPRYHVFUHZVLQVLGHGUDZHUDWERWWRPRILQQHU
panel.- set these screws aside - they are no longer
needed.
4
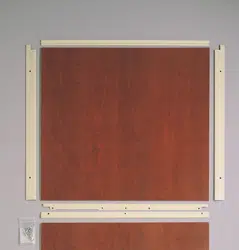
PREPARE CUSTOM PANEL
Ŷ7KHFXVWRPSDQHOVL]HLVGHWHUPLQHGE\WKH
cabinetry dimensions and spacings.
Ŷ2QFHWKHFXVWRPSDQHOVL]HLVGHWHUPLQHGSODFH
WKHPHWDOSDQHORQWKHFXVWRPSDQHOFKHFNWKH
VTXDUHQHVVDQGFRUUHFWSODFHPHQWRIWKHPHWDOSDQHO
DQGPDUNWKHKROHIRUWKHLQGLFDWRUOLJKW&RQILUPWKDW
the hole marking provides the indicator light to the
right side of the custom panel appearance side.
Ŷ'ULOOD´KROH$%UDGSRLQWGULOOELWLVUHFRPPHQGHG
Screws - keep
Screws - discard
31-2000891 Rev. 1
Installation Instructions
Custom Handle
or Original Handle
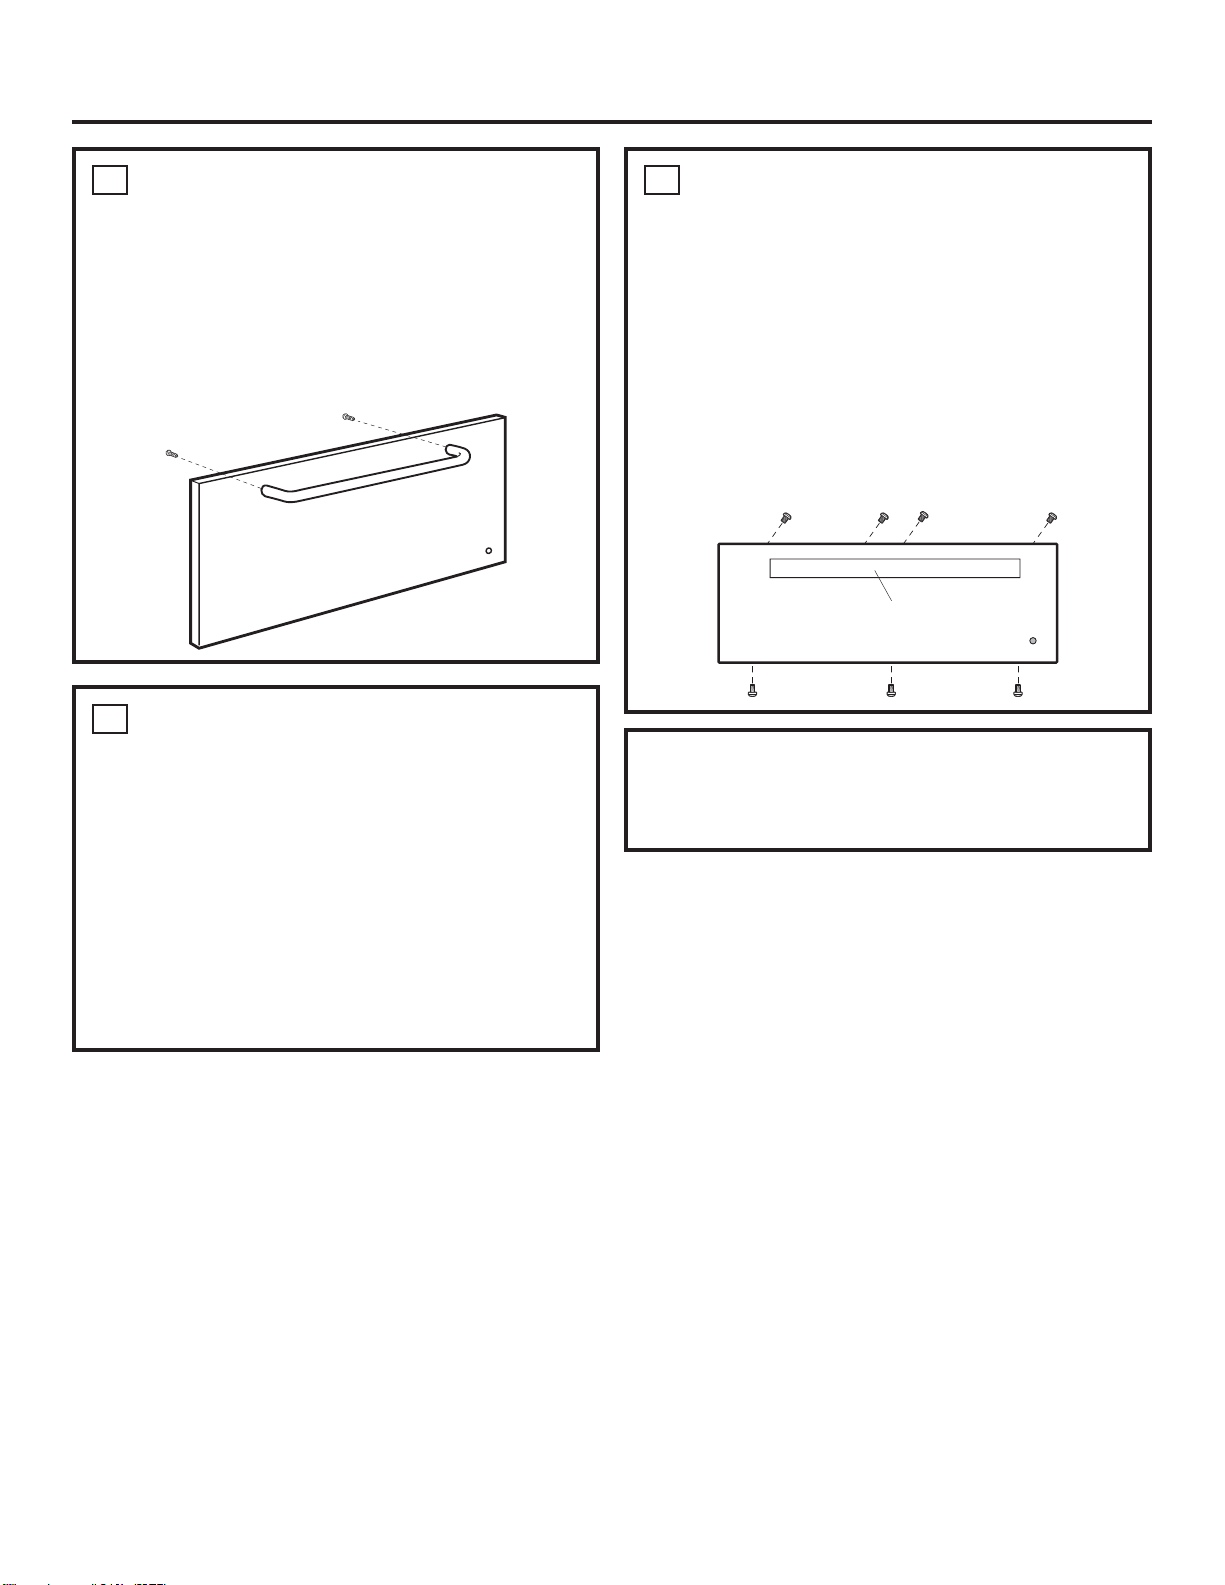
8
REINSTALL ORIGINAL HANDLE
OR OPTIONAL CUSTOM HANDLE
Ŷ$FXVWRPKDQGOHQRWVXSSOLHGPD\EHLQVWDOOHG
Ŷ'ULOOSLORWKROHVWKURXJKWKHIURQWRIWKHFXVWRPSDQHO
and through the metal panel to match the chosen
handle.
NOTE:7KHKDQGOHVFUHZVVKRXOGEHLQVWDOOHGWKURXJK
WKHPHWDOSDQHOWKHFXVWRPSDQHODQGLQWRWKHFXVWRP
or original handle.
9
INSTALL CUSTOM INNER PANEL
TO THE DRAWER
Ŷ/LQHXSWKHFXVWRPLQQHUSDQHOIURPWKHFXVWRP
panel kit with the screw holes in the drawer body
VLGHVDQGERWWRP7KHFXVWRPLQQHUSDQHOVKRXOG
have the moisture slide knob at the top with the knob
accessible from inside the drawer.
Ŷ$WWDFKWKHWRSOHIWDQGWRSULJKWVFUHZVNHSWIURP
UHPRYLQJWKHRULJLQDOLQQHUSDQHOWRKROGWKHSDUWVLQ
place.
Ŷ6HFXUHWKHFXVWRPLQQHUSDQHOWRWKHGUDZHUERG\
using the remaining 4 side screws and 4 inside
bottom screws from the kit.
10
INSTALL ASSEMBLED PANEL TO
THE DRAWER
Ŷ'HWHUPLQHZKLFKKROHVLQWKHPHWDOSDQHOOLQHXS
with the holes in the exposed drawer front and
marked the screw hole locations onto the custom
panel.
Ŷ'ULOO´GHHSKROHVLQWRWKHFXVWRPSDQHOIRU
FOHDUDQFHWRWKHVFUHZV7KHVFUHZVZLOO
extend into the custom panel slightly.
Ŷ8VLQJWKHVFUHZVVXSSOLHGLQWKHEDJLQVWDOOWKH
custom panel assembly to the exposed custom inner
panel with seven screws.
Ŷ7KHRULJLQDOVFUHZVDUHQRWQHHGHG
NOTE:3URGXFWLPSURYHPHQWLVDFRQWLQXLQJHQGHDYRU
DW0RQRJUDP$SSOLDQFHV7KHUHIRUHPDWHULDOV
appearance and specifications are subject to change
without notice.

31-2000891 Rev. 1
*($
3ULQWHGLQWKH&KLQD