Loading ...
Loading ...
Loading ...
15
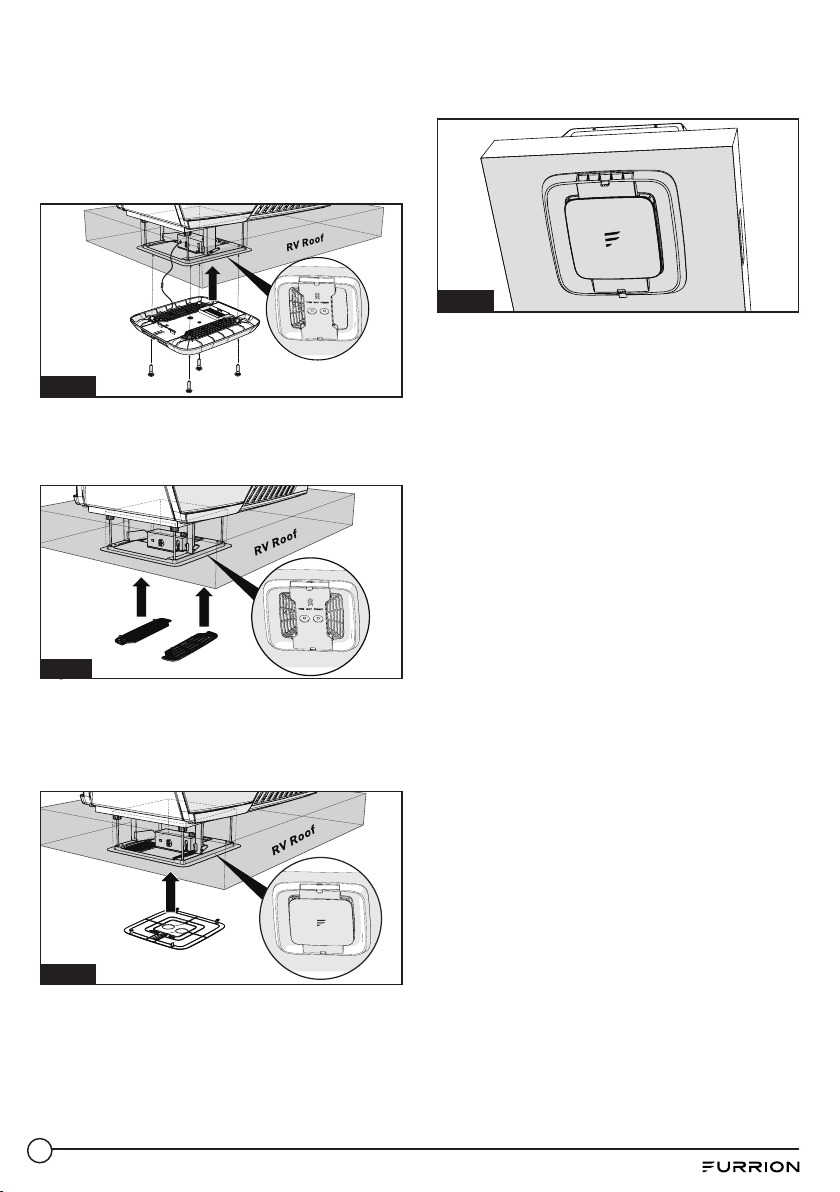
19. Install the Air Distribution Box (ADB)
shroud over the mounting frame and
fix with 4 self-tapping screws.
NOTE: Make sure the “THIS WAY
FRONT” mark is facing front (the
direction of the vehicle) while installing.
(Fig. 18)
Fig. 18
20. Align the filter tabs with mating
notches and push to snap the filters
into the ADB shroud. (Fig. 19)
Fig. 19
21. Align the decoration plate tabs
with the mating notches on the
ADB shroud and push to snap the
decoration plate into place. (Fig. 20)
Fig. 20
22. Your new rooftop air conditioner has
now been fully installed in the RV roof.
(Fig. 21)
Fig. 21
Based on the wall thermostat version you
selected. Please refer to the separate
instruction manual on how to operate
your RV air conditioning system.
Loading ...
Loading ...
Loading ...