Loading ...
2
INSTALLATION INSTRUCTIONS
1. Provide a suitable hole in the right side wall of the kitchen cabinet behind the partition angle 2 for the power
supply cord and plug. If you want to have a hole in the left wall of the cabinet, the hole should be provided
down the wall.
The electrical outlet must be readily accessible so that the unit can be unplugged easily in an emergency.
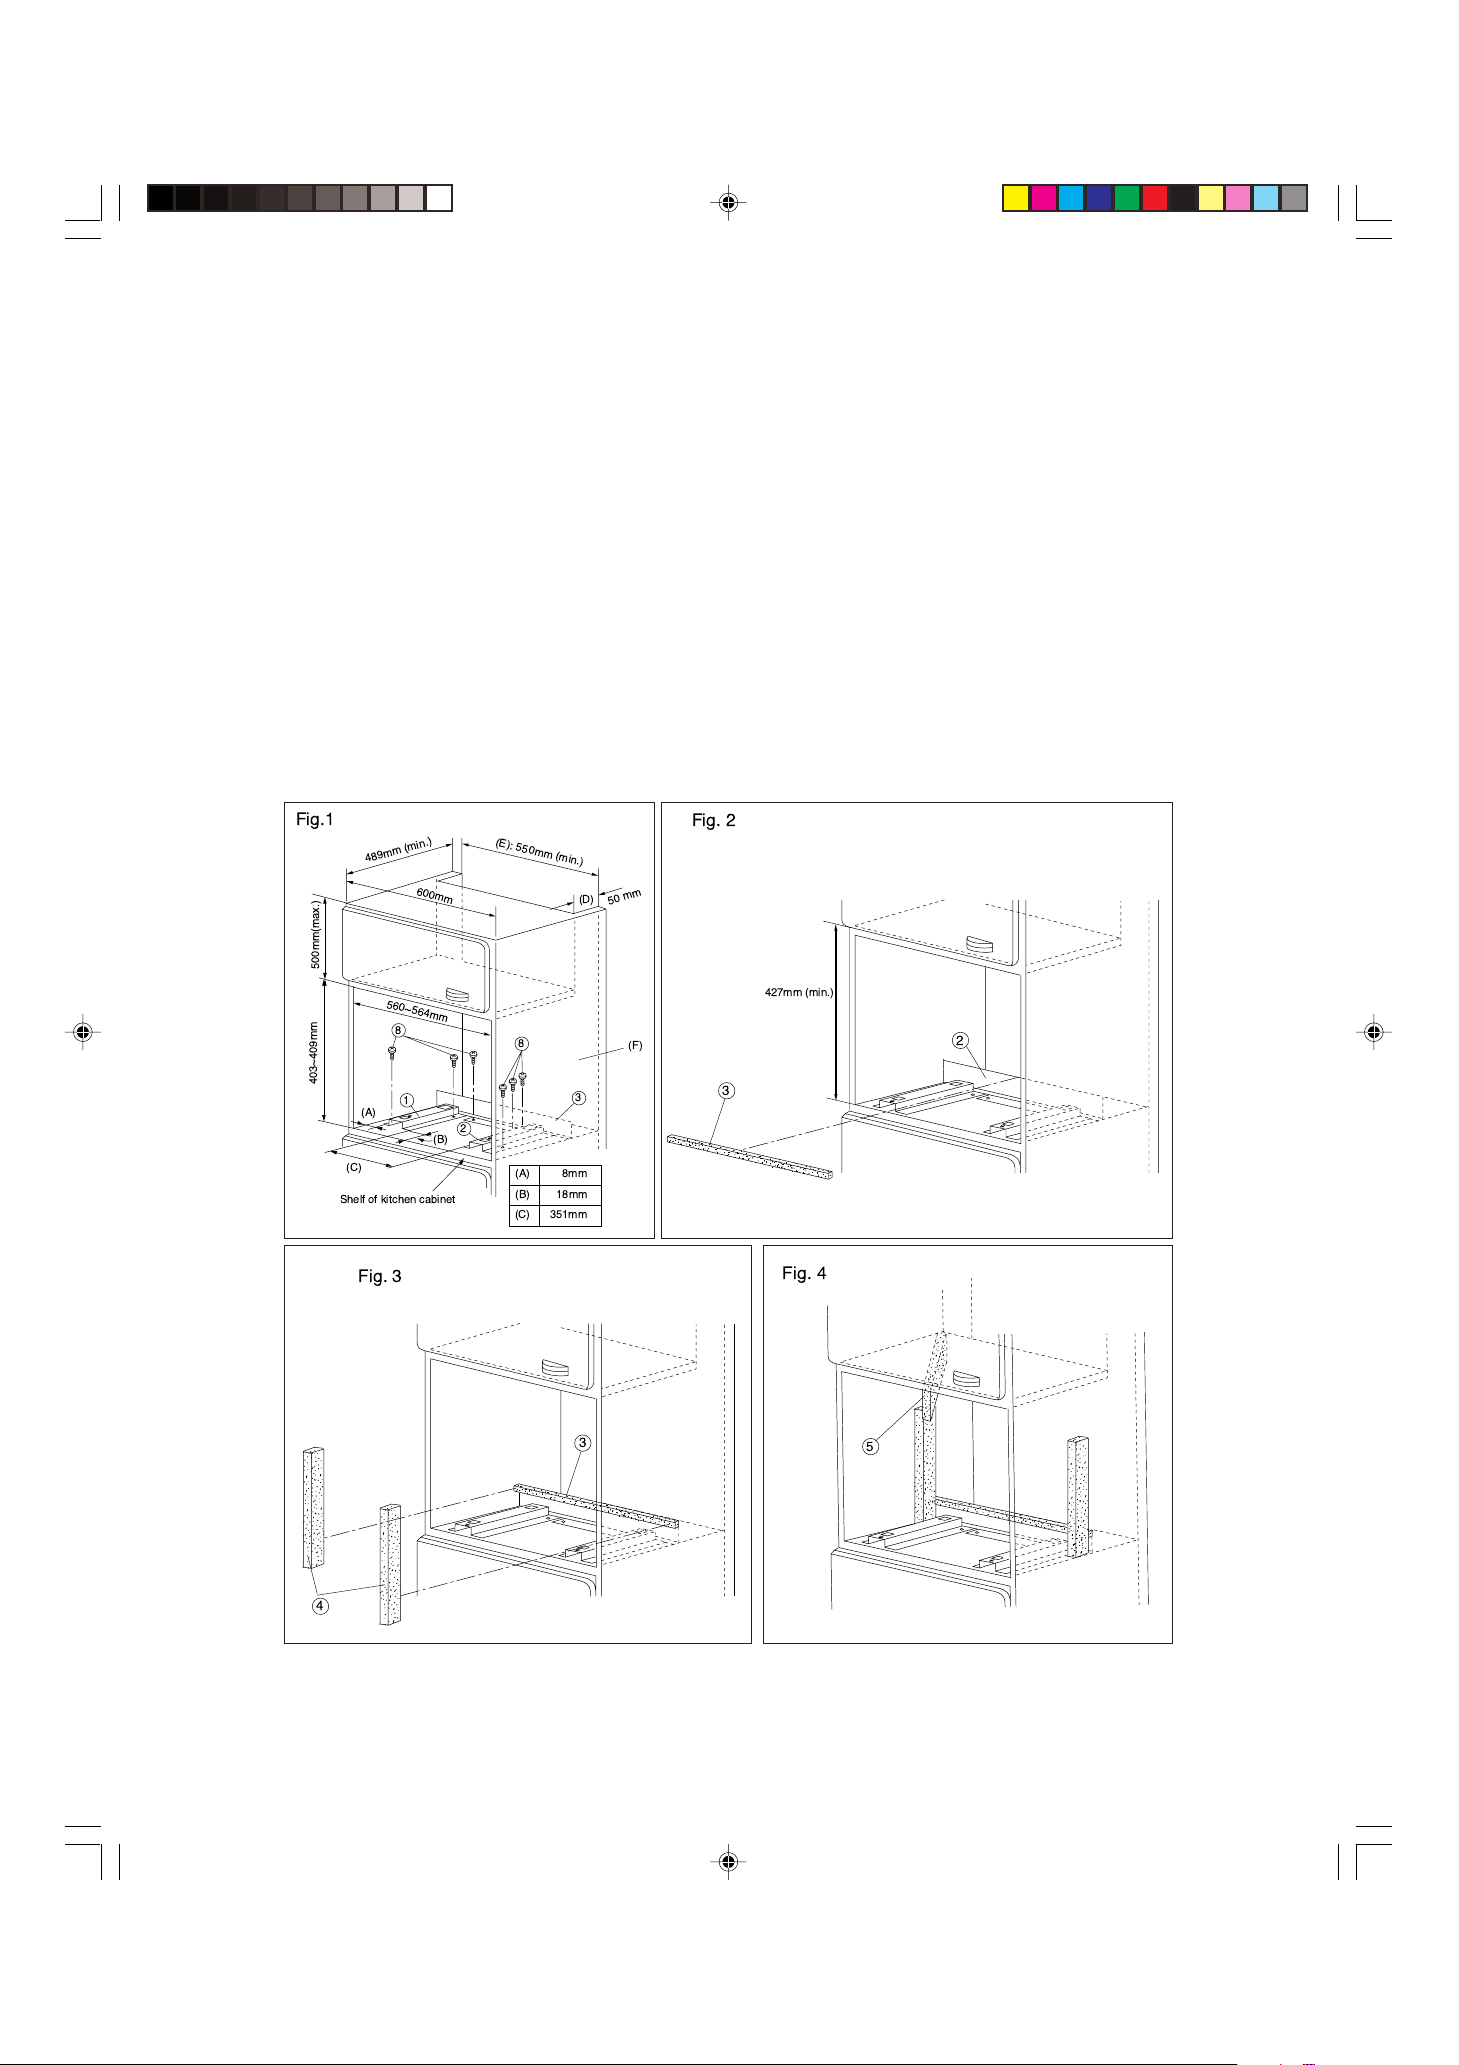
2. Set one spacing bracket 1 on the shelf keeping a distance (A) between the left wall of the kitchen cabinet and
the spacing bracket, and a distance (B) between the front end of the shelf and the spacing bracket as shown
in Fig. 1. Attach it with the two screws 8 as shown in Fig. 1. And then attach the other spacing bracket 1 on
the shelf keeping a distance (C) between the two spacing brackets, and a distance (B) between the front end
of the shelf and the spacing bracket with two screws 8 as shown in Fig. 1.
Caution: The arrow marks on each spacing bracket should be pointing towards you.
3. Place the partition angle 2 at the end of the spacing brackets 1 , and attach it with the two screws 8 as shown
in Fig. 1.
4. Remove the backing paper from the cushion 3. Attach the cushion 3 to the partition angle 2 as shown
in Fig. 2, Fig. 3 and Fig. 5.
5. Remove the backing papers from the two cushions 4 . Attach the cushions 4 along the side walls of the shelf
on the cushion 3 as shown in Fig. 3, Fig. 4 and Fig. 5.
6. Remove the backing paper from the cushion 5. Attach the cushion 5 to the ceiling of the kitchen cabinet from
the centre of the opening as shown in Fig. 4 and fig. 5.
(A) 8mm
(B)
18mm
(C) 351mm
Fig.1
Fig. 2
2
3
Fig. 3
4
3
5
Fig. 4
500mm(max.)
600mm
8
2
3
8
1
Shelf of kitchen cabinet
(A)
(C)
(B)
(F)
560~564mm
403~409mm
50 m
m
(E
): 550m
m
(m
in.)
489mm (min.)
(D)
427mm (min.)
Loading ...
Loading ...