Loading ...
Loading ...
Loading ...
Installation
*INSTALLATION*
113
Tip: We recommend providing a place
to sit the coffee machine which is the
same height as the building-in niche.
This will make it easier to connect the
machine to the electricity and water
supply.
Connecting the plumbed water and
electricity supplies
Observe the information under
“Plumbed water connection” and
“Electrical connection”.
Connect the coffee machine to the
plumbed water and electricity
supplies.
Pushing in and aligning the coffee
machine
When pushing the machine into the
niche, make sure that the electrical
and plumbed water connections do
not get trapped or damaged.
Push the coffee machine all the way
into the niche until you feel a
resistance.
Check the height of the coffee
machine to make sure that it is sitting
centrally in the niche and that it is
level. Align the machine.
Never align the coffee machine by
adjusting the door hinges. This will
prevent the milk flask from attaching
correctly and interfere with the milk
preparation process.
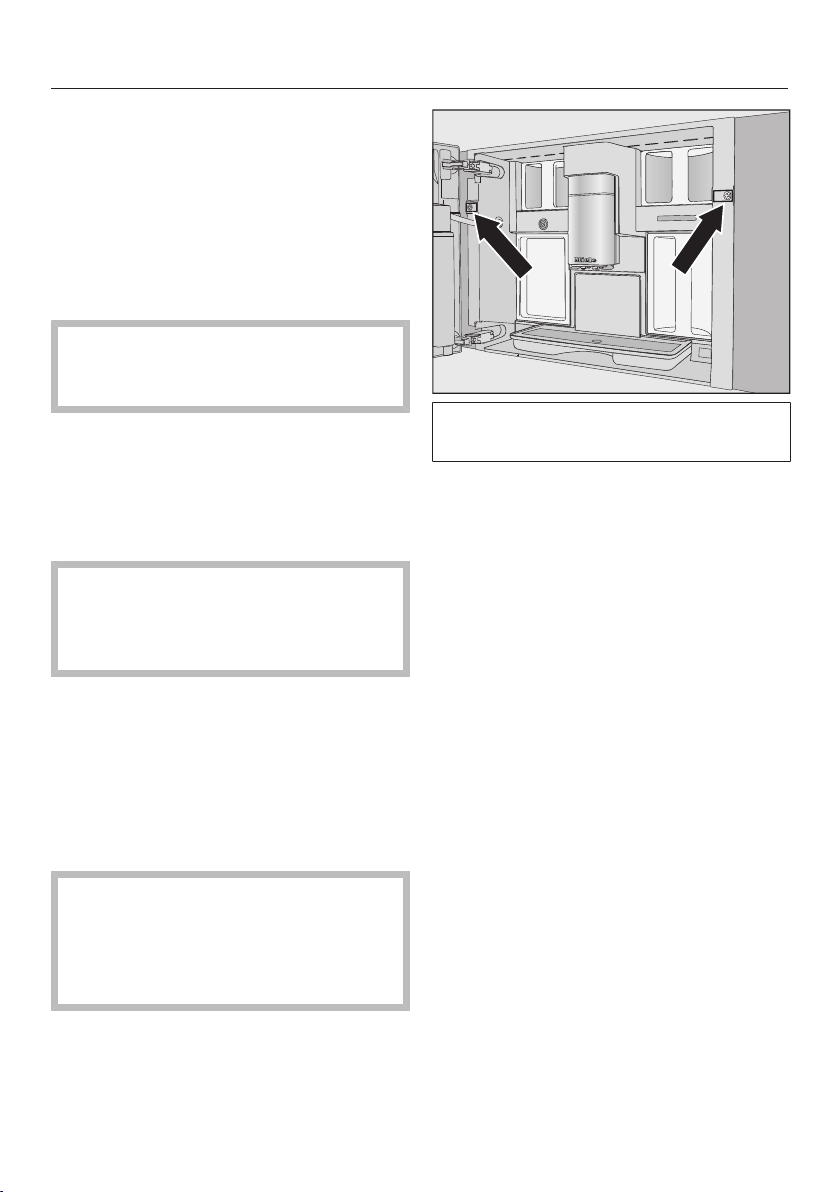
Now screw the coffee machine to the
cabinet.
Open the machine door.
TwoTX20 (25mm) screwsare
included with the machine.
Secure the coffee machine to the side
walls of the cabinet using the screws
supplied. Tighten both screws by
hand.
Tip: To make it easier to attach the
screw on the left, you can remove the
door opening limiters and increase the
door opening angle to approx.170°
(see “Door opening limiters”). Make
sure that there is sufficient space
available and that the machine door is
not going to hit an adjacent wall.
Carry out a functional check on the
coffee machine.
Door opening limiters
The coffee machine door hinges are
equipped with door opening limiters
that restrict the opening angle of the
machine door to approx.120°. This will
prevent the machine door from hitting
an adjacent wall and being damaged
when opened.
Loading ...
Loading ...
Loading ...