Loading ...
ONE YEAR LIMITED WARRANTY
The Chamberlain Group, Inc. warrants to the first consumer purchaser of
this product that it is free from defect in materials and/or workmanship
for a period of 1 year from the date of purchase.
REPLACEMENT PARTS
3V CR2032 Lithium battery . . . . . . . . . . . . . . . . . . . . . . . . . . . . . . 10A20
Visor Clip . . . . . . . . . . . . . . . . . . . . . . . . . . . . . . . . . . . . . . . . . . . 29B137
NOTICE: To comply with FCC and or Industry Canada rules (IC), adjustment or modifications of
this receiver and/or transmitter are prohibited, except for changing the code setting or replacing
the battery. THERE ARE NO OTHER USER SERVICEABLE PARTS.
Tested to Comply with FCC Standards FOR HOME OR OFFICE USE. Operation is subject to the
following two conditions: (1) this device may not cause harmful interference, and (2)this device
must accept any interference received, including interference that may cause undesired operation.
To prevent possible SERIOUS INJURY or DEATH:
• NEVER allow small children near batteries.
• If battery is swallowed, immediately notify doctor.
To reduce risk of fire, explosion or chemical burn:
• Replace ONLY with 3V CR2032 coin batteries.
• DO NOT recharge, disassemble, heat above 212° F (100° C) or
incinerate.
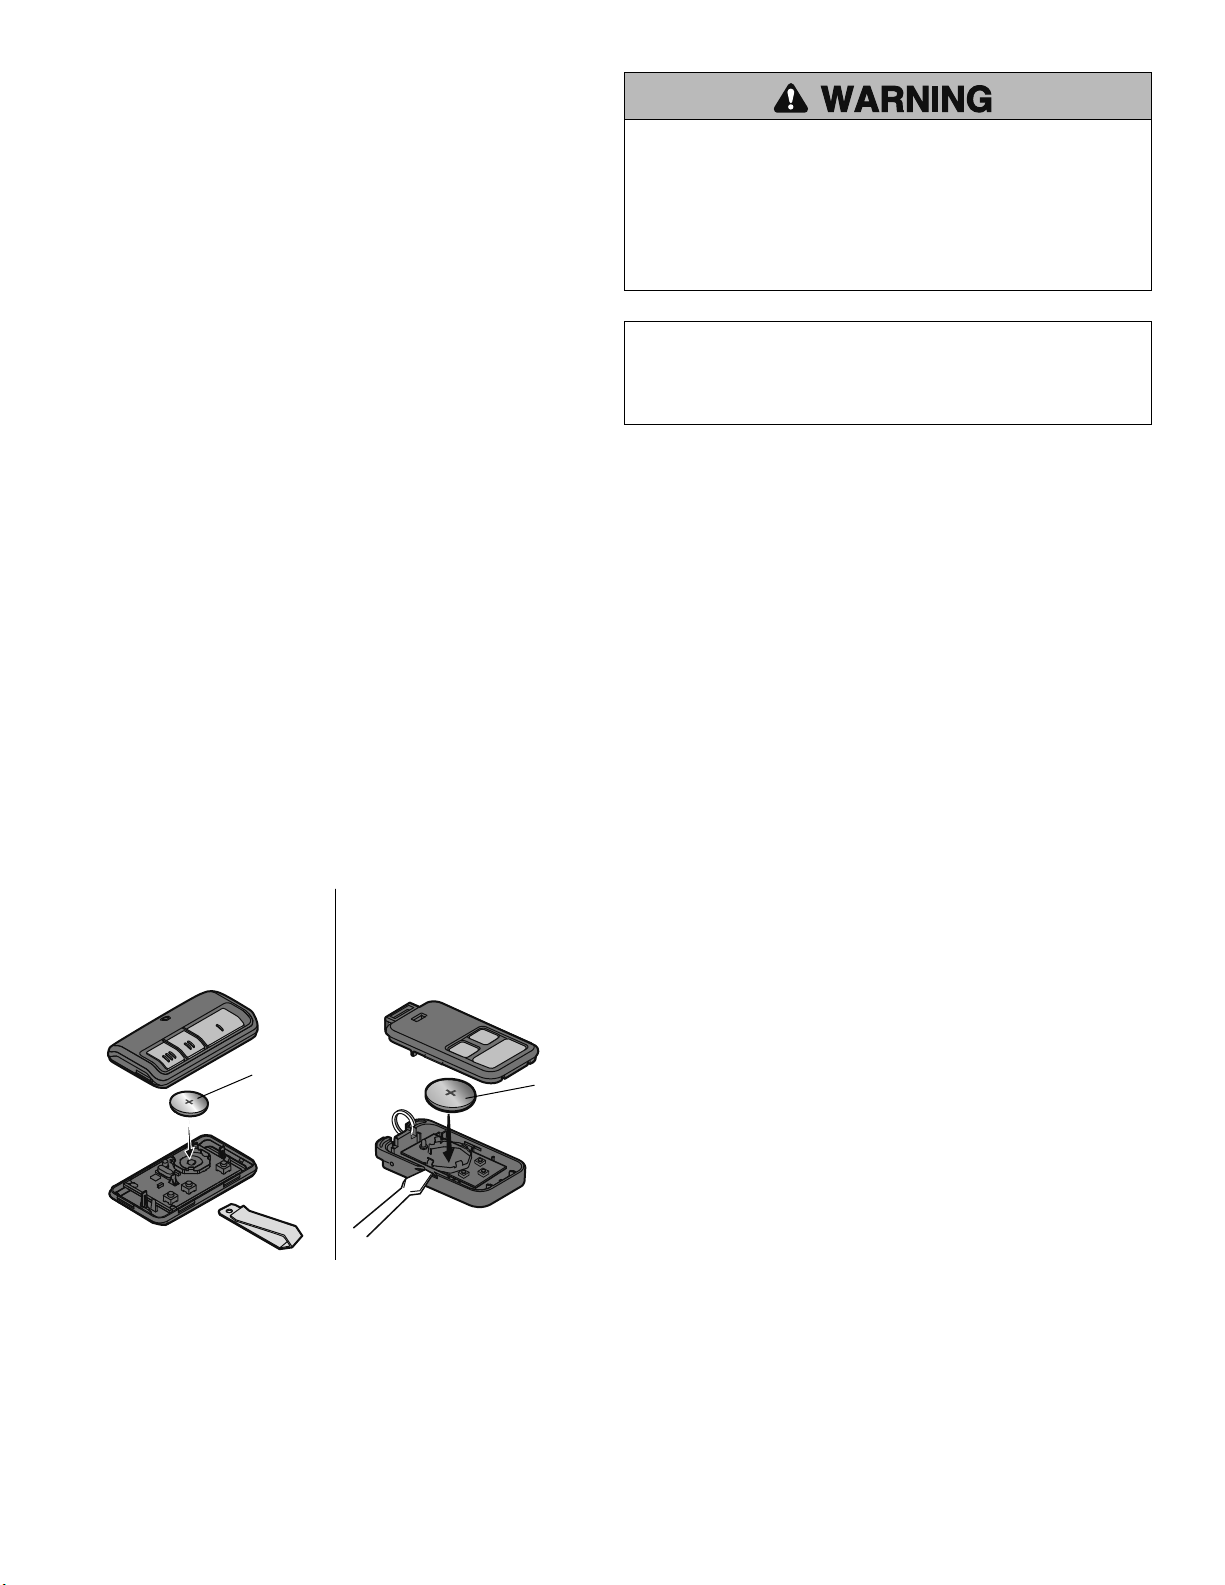
KEY CHAIN REMOTE
Pry open the case with a
screwdriver blade.
VISOR REMOTE
Pry open the case first in the
middle (1), then at each side
(2 and 3) with the visor clip.
1
2
3
Battery
Battery
PROGRAMMING (CONTINUED)
OPTION 3 – RE-PROGRAMMING FOR SECURITY+2.0
®
PRODUCTS
1. Locate the Program button on the remote control.
2. To enter the programming mode on the remote control, press the
program button until the LED on the front of the remote control turns
on.
3. Press and release the remote control button you wish to use:
• 1 time for SECURITY+2.0
®
product (Yellow LEARN button).
4. Exit programming mode by pressing any remote control button except
the button that was just programmed.
5. Press and release the yellow LEARN button on your product or the
PROGRAM button on the LCD. NOTE: The button color on commercial
products may vary.
6. Press andhold the remote control button you programmed in Step 3
untilyour product’s programming LED turns off orthe lights flash on
your product.
7. To test, press the programmed button on the remote control and the
product will activate.
HOW TO USE THE REMOTE CONTROL
Press and hold the button down until the door or gate starts to move.
For key chain remote controls with a proximity sensor, hold the remote
control 1-2" away from the reader face and wait for a confirmation beep
or LED from the reader. Operation of the proximity sensor varies
depending on the access control system. For additional information refer
to the owner’s manual for the access control system.
THE REMOTE CONTROL BATTERY
To replace battery, open the case as shown. Insert battery positive side
up (+). Replace the battery with only 3V CR2032 coin cell battery.
Dispose of old battery properly.
1-800-528-9131
LiftMaster.com
Loading ...
Loading ...
Loading ...