Loading ...
Loading ...
Loading ...
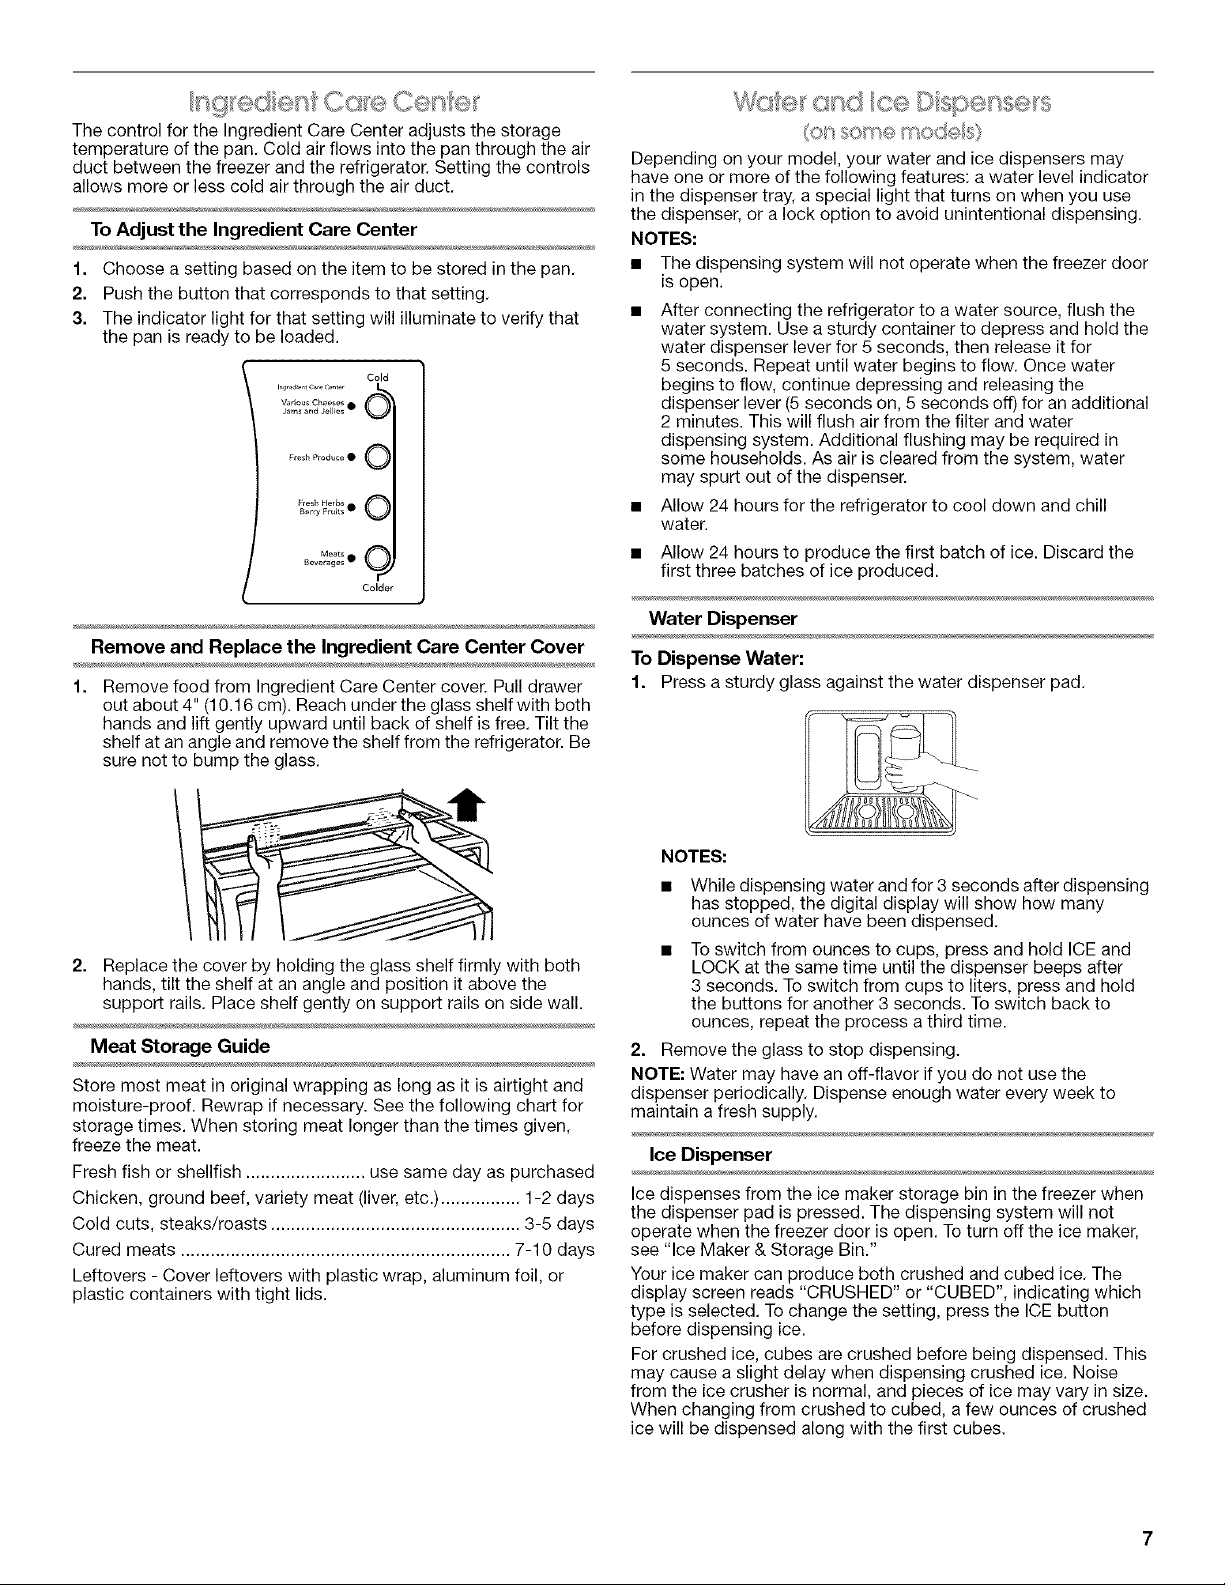
ThecontrolfortheIngredientCareCenteradjuststhestorage
temperatureofthepan.Coldairflowsintothepanthroughtheair
ductbetweenthefreezerandtherefrigerator.Settingthecontrols
allowsmoreorlesscoldairthroughtheairduct.
To Adjust the Ingredient Care Center
1. Choose a setting based on the item to be stored in the pan.
2. Push the button that corresponds to that setting.
3. The indicator light for that setting will illuminate to verify that
the pan is ready to be loaded.
Various Che_,ses @Jams and _ellies •
Fresh Produce • 0
F,esh Herbs
t_r_Y Fru_s • 0
Meats • _
Beverages
_ Colder
Remove and Replace the Ingredient Care Center Cover
1. Remove food from Ingredient Care Center cover. Pull drawer
out about 4" (10.16 cm). Reach under the glass shelf with both
hands and lift gently upward until back of shelf is free. Tilt the
shelf at an angle and remove the shelf from the refrigerator. Be
sure not to bump the glass.
2. Replace the cover by holding the glass shelf firmly with both
hands, tilt the shelf at an angle and position it above the
support rails. Place shelf gently on support rails on side wall.
Meat Storage Guide
Store most meat in original wrapping as long as it is airtight and
moisture-proof. Rewrap if necessary. See the following chart for
storage times. When storing meat longer than the times given,
freeze the meat.
Fresh fish or shellfish ........................ use same day as purchased
Chicken, ground beef, variety meat (liver, etc.) ................ 1-2 days
Cold cuts, steaks/roasts .................................................. 3-5 days
Cured meats .................................................................. 7-10 days
Leftovers - Cover leftovers with plastic wrap, aluminum foil, or
plastic containers with tight lids.
.... o+,_s;_'# i,,61117_,,l<_,i; I@_;1)+i@
(ot_ some r;-_od®ls)
Depending on your model, your water and ice dispensers may
have one or more of the following features: a water level indicator
in the dispenser tray, a special light that turns on when you use
the dispenser, or a lock option to avoid unintentional dispensing.
NOTES:
• The dispensing system will not operate when the freezer door
is open.
• After connecting the refrigerator to a water source, flush the
water system. Use a sturdy container to depress and hold the
water dispenser lever for 5 seconds, then release it for
5 seconds. Repeat until water begins to flow. Once water
begins to flow, continue depressing and releasing the
dispenser lever (5 seconds on, 5 seconds off) for an additional
2 minutes. This will flush air from the filter and water
dispensing system. Additional flushing may be required in
some households. As air is cleared from the system, water
may spurt out of the dispenser.
• Allow 24 hours for the refrigerator to cool down and chill
water.
• Allow 24 hours to produce the first batch of ice. Discard the
first three batches of ice produced.
Water Dispenser
To Dispense Water:
1. Press a sturdy glass against the water dispenser pad.
NOTES:
• While dispensing water and for 3 seconds after dispensing
has stopped, the digital display will show how many
ounces of water have been dispensed.
• To switch from ounces to cups, press and hold ICE and
LOCK at the same time until the dispenser beeps after
3 seconds. To switch from cups to liters, press and hold
the buttons for another 3 seconds. To switch back to
ounces, repeat the process a third time.
2. Remove the glass to stop dispensing.
NOTE: Water may have an off-flavor if you do not use the
dispenser periodically. Dispense enough water every week to
maintain a fresh supply.
Ice Dispenser
Ice dispenses from the ice maker storage bin in the freezer when
the dispenser pad is pressed. The dispensing system will not
operate when the freezer door is open. To turn off the ice maker,
see "Ice Maker & Storage Bin."
Your ice maker can produce both crushed and cubed ice. The
display screen reads "CRUSHED" or "CUBED", indicating which
type is selected. To change the setting, press the ICE button
before dispensing ice.
For crushed ice, cubes are crushed before being dispensed. This
may cause a slight delay when dispensing crushed ice. Noise
from the ice crusher is normal, and pieces of ice may vary in size.
When changing from crushed to cubed, a few ounces of crushed
ice will be dispensed along with the first cubes.
Loading ...
Loading ...
Loading ...