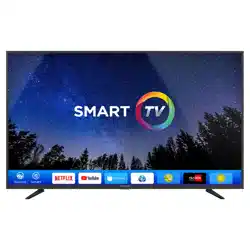
LED TV
SLE 42FS601TCS
USER’S MANUAL
EN


EN 1
EN
Revision 03/2021Copyright © 2021, Fast ČR, a. s.
Contents
PLEASE, READ THESE INSTRUCTIONS BEFORE STARTING TO OPERATE THE
TELEVISION. STORE IT FOR LATER REFERENCE. NOTE DOWN THE MODEL NUMBER
AND THE SERIAL NUMBER OF THE TV SET. LOOK AT THE LABEL ON THE BACK
COVER AND PASS THE INFORMATION PROVIDED THERE TO YOUR DEALER IN CASE
THAT YOU WOULD NEED SERVICING.
Contents
1. Important safety instructions ..................................................................................................................2
2. Assembling the stand .............................................................................................................................. 9
3. Device ......................................................................................................................................................... 10
3.1. Buttons on the TV .................................................................................................................................... 10
3.2. Connecting the TV connectors .............................................................................................................. 10
4. Remote controller ..................................................................................................................................... 11
5. Basic controls ........................................................................................................................................... 13
5.1. First start ..................................................................................................................................................... 13
5.2. Source selection (SOURCE) ................................................................................................................... 13
5.3. Channel List ............................................................................................................................................... 13
6. Menu ........................................................................................................................................................... 14
6.1. Fast options ................................................................................................................................................14
6.2. Picture ..........................................................................................................................................................14
6.3. Sound .......................................................................................................................................................... 15
6.4. Channel ....................................................................................................................................................... 15
6.5. Smart TV .....................................................................................................................................................17
6.6. Network ....................................................................................................................................................... 18
6.7. System ........................................................................................................................................................ 18
6.8. Support.........................................................................................................................................................21
7. Media ......................................................................................................................................................... 22
7.1. USB .............................................................................................................................................................22
7.2. Media Server .............................................................................................................................................22
8. EPG ............................................................................................................................................................ 23
9. PVR ............................................................................................................................................................ 24
10. Troubleshooting ....................................................................................................................................... 25
11. Technical specifications .........................................................................................................................28
11.1. Information sheet .................................................................................................................................... 30
2 EN
EN
Revision 03/2021
Copyright ©
2021, Fast ČR, a. s.
Important safety instructions
1. Important safety instructions
To be able to use this product properly, read this user's manual carefully and keep it
for future reference. If you plan to give (sell) this device to athird person, include all
documentation, including this manual, with the transaction.
The lightning symbol inside
a triangle indicates the
device has dangerous
voltage that may cause
electric shock.
The exclamation point
symbol inside an isosceles
triangle indicates important
operation and repair
instructions in the included
device documentation.
ATTENTION
RISK OF ELECTRIC SHOCK – DO
NOT OPEN!
TO REDUCE THE RISK OF ELECTRIC SHOCK,
DO NOT REMOVE THE COVER (OR BACK SIDE).
THERE ARE NO PARTS INSIDE WHICH COULD
BE REPAIRED BY THE USER. FOR REPAIRS AND
SERVICE, CONTACT AN AUTHORIZED SERVICE
CENTRE.
General safety instructions
• Please read this manual carefully before using the device. Follow this manual and
the instructions inside.
• Heed all warnings.
• Follow all instructions.
• Use only the attachments and accessories specified by the manufacturer.
• OPEN FLAMES, FOR EXAMPLE ABURNING CANDLE, SHALL NOT BE PLACED
ON THE DEVICE. DO NOT PLACE HOT OBJECTS OR OBJECTS WITH AN OPEN
FIRE ON THE DEVICE, FOR EXAMPLE CANDLES OR NIGHT LAMPS. HIGH
TEMPERATURES MAY MELT PLASTIC COMPONENTS AND CAUSE FIRE.
• Use the device in temperate climate.
• The manufacturer and vendor of the device are in not in any way liable for any direct
or indirect damages caused by not following the instructions for installation, setup,
operation, maintenance and cleaning of the device mentioned in this manual.
• Protect the device against impacts, falls, blows, shocks, vibration, moisture and dust.
• Prior to granting children consent to use the device, they shall become familiar with
the proper and safe use of the player, corresponding to their age. If the device has
aheadphone jack, do not use headphones set to maximum volume. Risk of hearing
damage or loss.
Installation, control
• Install the device according to the instructions in the manual.
• Leave free space around the device, it is necessary for proper air circulation. It helps
to dissipate the heat generated by the operation of the device. By covering the air
vents of the cabinet, you risk overheating and damage of the device. You must
ensure that the air circulation will not be prevented by covering the air vents with
e.g.newspaper, tablecloth, curtain, etc. Follow the installation instructions in the
manual.

EN 3
EN
Revision 03/2021Copyright © 2021, Fast ČR, a. s.
Important safety instructions
• This device shall not be kept in aclosed area, such as alibrary or shelf, provided
sufficient ventilation cannot be provided or the manufacturer's instructions cannot be
followed.
• Do not place any objects into the air vents or any other holes. Risk of touching
components with dangerous voltage or shorting parts that could cause fire or electric
shock. Do not pour any liquids into the device. Do not install the device in direct
sunlight, or close to heat sources, like radiators, heat exchangers, stoves or other
appliances (including amplifiers) producing heat. High temperatures shorten the life of
the electronic components of the device significantly. Do not use and do not leave the
device near an open fire.
• The device must not be exposed to dripping or running water and you must not place
upon it objects filled with liquid, e.g. vases. Protect the device against becoming wet,
sprayed on or poured on by any liquid, do not leave or install the device outdoors. Do
not use the device outdoors. You risk electric shock or fire by not adhering to these
instructions.
• Do not use the device close to water.
• Handle the glass panels and cover of the device with care. The glass screen can
break on impact and cause serious injury.
• Make sure the power cord is not stepped on or compressed, especially near the plug
and point leading from the device or adapter. The power plug (adapter) is used to
disconnect the system and must be easy to access.
• Do not use adevice with adamaged power cord or plug. If the power cord or plug is
damaged, turn off the device, disconnect it from the power supply and contact your
authorized repair shop. Only aprofessional can replace adamaged power cord or
plug. Under no circumstances should you attempt to replace the power cord or plug
yourself.
• Do not attempt to bypass the safety function of the polarized plug. If the plug cannot
be plugged into your socket, refer to an electrician to replace your obsolete socket.
Before plugging the device into the socket make sure the voltage in your socket
corresponds with the voltage on the label of the device or power adapter. If you are
not sure of the type of power source you have in your home, refer to your vendor or
local power company.
• Before switching, make sure that all network connections are made properly and in
accordance with the manufacturer's instructions. Switch the device off and unplug it
from the socket before plugging in or changing the connection of the device.
• Remember to always unplug the plug (adapter) from the socket before unplugging
the power cord.
• Plug the power cord into an independent socket. Do not overload wall sockets using
extension cords or unified sockets. Risk of electric shock.
• Hold the power cord by the plug and not by the cable when pulling out from the
socket.
4 EN
EN
Revision 03/2021
Copyright ©
2021, Fast ČR, a. s.
Important safety instructions
• Disconnect the power cord from the power outlet during thunderstorms, or when not
in use for alonger period of time. Avoid carrying the device from acool environment
into awarm environment or vice versa, or operating the device in amoist
environment. Air moisture may condense in some areas within the device case and
may cause the device to become temporarily inoperable.
• In this case, leave the device in awarm and well-ventilated area and leave for 1–2
hours until the moisture evaporates. The device can be normally used again. Be
especially cautious when using the device for the first time during acool season
immediately after purchasing. Do not place the device on an unstable cart, stand,
console or table. The device can fall and cause serious injury to children or adults or
seriously damage the device and other objects. Only carts, stands or tables defined
by the manufacturer or sold with the device shall be used. Any assembly work with
the device shall be carried out according to the manufacturer's instructions and shall
use assembly accessories recommended by the manufacturer.
• Do not lean against the device, do not lean over or use the device as astep. Avoid
quick movements. Make sure children do not play with the machine.
• Be careful when moving the device when placed on acart. Suddenly
stopping, using excessive force and uneven surfaces may cause the cart
holding the device to tip over.
• Under no circumstances are the manufacturer or vendor liable for any
direct or indirect damage caused by the failure to observe the instructions for
installation, configuration, operation, treatment and cleaning of this device included
within this manual.
• Protect the device against impacts, falls, blows, shocks, vibration, moisture and dust.
Do not expose the device to extreme temperatures or humidity.
Note:
If the device is powered by an adapter, only use the AC adapter and power cord
included with the device. Do not use defective sockets. Make sure the cord is properly
plugged into the socket. If the cord is loose, an electric arc can cause fire. Refer to
aqualified electrician to replace sockets.
Note:
Plug the device into aproperly grounded sockets with protective grounding pin only.
Note:
If you plan to mount the device to awall or ceiling, follow the instructions of the
manufacturer and the user's manual for the given system.

EN 5
EN
Revision 03/2021Copyright © 2021, Fast ČR, a. s.
Important safety instructions
Repairs and maintenance
• To avoid risks of electric shock or fire, do not remove the device from the case – the
case does not contain components that the user could repair or adjust without the
necessary equipment and qualification. Refer to aprofessional service centre if your
device requires service.
• In the event of any unusual occurrences during the use of the device, e.g. smelling
the characteristic smell of burning insulation or even seeing asmoke, turn the device
off immediately, disconnect the power supply and wait with continuing use of the
device until you learn the result of its inspection by the service personnel.
• Leave all service to qualified service personnel. Service is necessary when the device
is damaged in any way, for example in case of damage to the power cord, spilling
liquid on the device, intrusion of foreign objects into the device, when the device is
exposed to rain or moisture, if the device does not function in the usual manner or if
it fell.
• When repairing or replacing acomponent of the device, make sure the repair
technician used spare parts defined by the manufacturer to ensure the replaced
components have the same features as the original. Unauthorized replacements can
cause fire, electric shock or other risks.
• Prior to cleaning, moving or other maintenance work, unplug the cord (adapter) from
the socket.
• Clean the device with adry cloth only. Do not use gasoline, thinner or other solvents
or abrasives, scouring pads, or sponges with scouring pads to clean the device.
Note:
Do not throw the device into your common household waste. Respect laws and
regulations when disposing of the machine.
Remote controller and battery
• Do not expose the remote controller or battery to direct sunlight, or close to heat
sources, like radiators, heat exchangers, stoves or other appliances (including
amplifiers) producing heat. Do not use and do not leave the device near an open fire.
Make sure the sensor is not exposed to intense light (e.g. sunlight) or fluorescent tube
light, which could lower the efficiency and reliability of the remote controller.
• The remote controller or battery must not be exposed to dripping or running water
and objects filled with liquid, e.g. vases, shall not be placed on the device. Protect the
remote controller against becoming wet, sprayed or poured on by any liquid. Do not
use outdoors. Failure to respect these instructions can lead to the remote controller or
battery becoming damaged.
• Do not use the device close to water.
• The impact the battery disposal has on the environment shall be monitored carefully.
• Using the batteries incorrectly can result in leakage and corrosion. Follow the
following instructions to ensure proper remote control operation:
– Do not insert the batteries in the wrong direction.
– Do not charge, heat, open or short the batteries.
6 EN
EN
Revision 03/2021
Copyright ©
2021, Fast ČR, a. s.
Important safety instructions
– Do not throw batteries into afire.
– Do not leave dead batteries in the remote controller.
– Do not combine various types of batteries or old and new batteries.
– If you do not use the remote controller for alonger period of time, remove the
batteries to prevent damaging the remote controller by the batteries leaking out.
– If the remote controller does not work correctly or its range decreases, replace all
batteries with new ones.
– If there is an electrolyte leakage from the batteries, have the remote control
serviced by an authorized technician.
NOTICE:
To prevent risk of fire or electric shock, do not expose the device to rain or
moisture.
NOTICE:
The batteries must not be exposed to excessive heat, for example sunlight, fire, etc.
This symbol indicates the device has double insulation between dangerous
voltage from the network and user-accessible parts. Replace parts with identical
spare parts only.
EN 7
EN
Revision 03/2021Copyright © 2021, Fast ČR, a. s.
Important safety instructions
• Do not leave astatic image on the LCD panel for
more than 2 hours. This may result in adamaged
panel.
• This is typical for liquid crystal displays and
does not indicate any problems. LCD screens are
made using precision technology to provide even
the finest image details. Several defective pixels
can appear on the screen from time to time, indicated as red, blue, green or black
dots (up to 0.001% of the total pixel count of the screen). This does not affect the
characteristics and the effectiveness of your TV set.
Notes on the USB connector:
• USB memory devices require being connected directly into the device. To prevent
afailing or interrupting data transfer, do not use USB extension cable. Electrostatic
discharge can cause the device to not function. In this case, the user must restart the
device.
• Before using aUSB memory device, test that it communicates with the device and
its read and write speed.
• For maximum reading speed, we recommend to keep the disc space defragmented.
Use file system FAT32, single partition, no protection.
• If the reading/writing of the memory device is not smooth, it can lead to undesirable
effects, such as interruption of the image (blocky image) or failure of whole frames,
audio malfunctions, and in extreme cases, stopping of the operation. Unexpected
behaviour of the connected storage device, or the presence of viruses and other
malicious software can cause the device to stop the functioning with the need to
restart it.
• The USB connector is astandard type and cannot power aUSB device with ahigh
power consumption (e.g. hard drives). Use adevice with its own power and power
them with their own power supply.
• The device was designed with respect to maximum compatibility with memory
devices. Considering the variety of devices on the market, we cannot guarantee
compatibility with every USB device available. Should you run into any issues, try
formatting the memory device directly in the device. Should problems persist, use
another memory device.
Due to wide range of the USB devices on the market, it is not possible to ensure
compatibility of the device with all types of USB devices.

8 EN
EN
Revision 03/2021
Copyright ©
2021, Fast ČR, a. s.
Important safety instructions
Serial number
The device's serial number is aunique number that unambiguously identifies your device.
Mark down the serial number of your device below along with additional information
important for the unambiguous identification of your device.
Serial number:
_______________________________________________________
Date of purchase: _____________________________________________________
Notes:
1. The graphics in this manual is informative.
2. The menu on your TV screen may be slightly different from the illustrations in this
manual.
3. The information in the document are subject to change without notice. The
manufacturer accepts no liability for damages incurred directly or indirectly from
errors, incompleteness or discrepancies between the instruction manual and the
product described.

EN 9
EN
Revision 03/2021Copyright © 2021, Fast ČR, a. s.
Assembling the stand
2. Assembling the stand
Before attaching /removing the stand, make sure the TV is turned off and plug is
disconnected from the wall outlet.
Before performing the work, put underneath the LED TV set some soft material
(e.g.blanket). This will prevent damage to it. Ensure aproper attachment of the supports
so that the TV set is stable.
Place the assembled TV set on afirm and flat surface.
Instruction for assembling the stand

10 EN
EN
Revision 03/2021
Copyright ©
2021, Fast ČR, a. s.
Device
3. Device
3.1. Buttons on the TV
Note:
The location and names of the function buttons and power button on the TV may vary
according to TV model.
button
Turns the TV on or standby.
3.2. Connecting the TV connectors
1. USB: connection of
aUSB flash unit for
playing supported
multimedia content
2. RJ45: connect the
internet
3. OPTICAL: connect the
optical output
4./5. RF IN: connection to
the antenna or cable
television system
6. EARPHONE OUT:
earphone output
7. HDMI1: connection of device with aHDMI output to the HDMI1
connector
8. HDMI2: connection of device with aHDMI output to the HDMI2
connector
9. HDMI3: connection of device with aHDMI output to the HDMI3 connector
10. AV IN: AV input
11. Cl: Cl input
3
4
5
6
7
8
9
10
2
1
11
EN 11
EN
Revision 03/2021Copyright © 2021, Fast ČR, a. s.
Remote controller
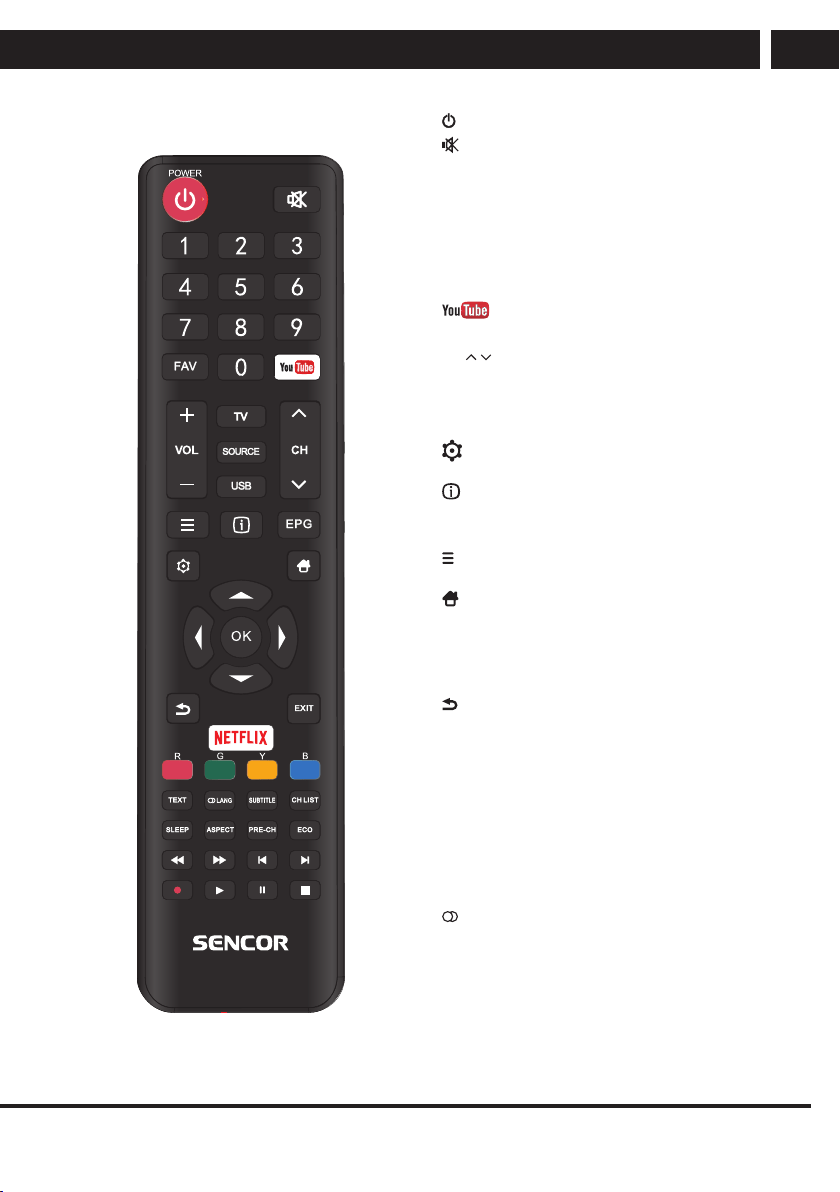
4. Remote controller
: Turns the TV on/off the standby mode.
: Press to mute the sound. To resume press
it again or press VOL +.
Number pad 0-9: Press button 0-9 directly to
select aTV channel when watching television.
Select the page number in the teletext mode,
etc.
FAV: In the TV mode you enter the Favourites
menu or you exit it.
: Enter YouTube
VOL+/-: Press to increase or lower the volume.
CH
/ : Press to switch to individual channels.
TV: Direct input selection of digital TV.
SOURCE: Press to select the required input.
USB: Press to enter the media playback mode.
: Displays the options menu of selected
functions (OPTIONS).
: Display of information button.
EPG: Press to display/hide the electronic
program guide.
: Displays the TV’s main menu in the TV
mode.
: TV home page, selection of inputs and
applications.
v/V/b/B/OK: Used for navigation in the
menu on the screen and set the TV set
according to your preferences.
: Return one step back.
EXIT: Function to exit menu or the screen.
NETFLIX: Enter the NETFLIX page.
Colour buttons: Match various functions in the
menu or in the teletext.
TEXT: Turn teletext on or off.
Note: the teletext function is optional and
the availability of buttons depends on the
model. Teletext information depends fully
on the channel provider.
LANG:
Selection of the accompanying audio, if
available.
Sound mode selection.
Left/Right channel selection

12 EN
EN
Revision 03/2021
Copyright ©
2021, Fast ČR, a. s.
Remote controller
SUBTITLE: Button to display/hide subtitles on the bottom part of the screen if available.
CH LIST: View the list of programs according to the set options.
SLEEP: Set time to automatically turn off the TV set.
ASPECT: Press to change the display size.
PRE-CH: Button to switch to the previously watched channel.
ECO: Power saving mode selection.
m: Fast rewinding.
M: Fast forwarding.
?b: Jump to previous track.
B?: Skip to next track.
•
: Press to record (only in the DTV mode).
B / X: Play/Pause or start recording with time shift in media mode.
x: Stop recording/play.
Note:
Remove the battery during storage or if you do not use the device for along time.
To control your device with aremote controller, point it at the device and then press
the desired function. The maximum range of the remote control is about 5 meters with
adeviation of up to +/- 30 degrees from the perpendicular direction to the receiving
remote sensor on the front of the device. The falling battery capacity decreases
gradually the range of the remote controller. When you use the remote controller,
there can not be any fixed obstacles between the remote controller and the device.
During astandard use, the battery life in the remote controller is about 1 year. If there
is asignificant reduction in the effective range of the remote controller, replace both
batteries in the controller. If you are not going to use the controller for along time, take
out both batteries – thus preventing apossible damage from battery leakage.
Prevent entry of strong light (e.g. sunlight or strong light from fluorescent or energy-
saving sources) that may limit the efficiency and reliability of infrared remote controller.
EN 13
EN
Revision 03/2021Copyright © 2021, Fast ČR, a. s.
Basic controls
5. Basic controls
5.1. First start
Guide
The first time you turn on the TV, the guide helps you with the setup.
With the guide, select the appropriate menu language, country, Internet connection, home
use (recommended) or demo mode and source selection. When you finish the guide and
select abroadcast source, you need to search the source for the available channels.
Note:
You can start the setup guide later in MENU/System/Initial setup/Installation guide.
5.2. Source selection (SOURCE)
Press SOURCE, find the required source by using v/V and press OK to select it.
Other selections
Selection NETFLIX/YouTube offers an access to installed apps. To use the YouTube
service it is advisable to log in, to use the NETFLIX service it is necessary to log in. You
can find the terms of use, account management and prices at the websites of these
services.
5.3. Channel List
Press OK to view the list of channels, which you previously saved. Move within the list
using the ▲/▼ buttons and press OK to select anew channel. Other important options
are available in the program list:
Red button – program list selection. Extensive lists (option All) can be limited to e.g. TV
programs (Digital, DTV), Radio, Free Favourites programs.
Note:
The last used list is always displayed when you press OK until you change it using the
red button. Likewise, the FAV button on the remote control can be used as ashortcut
to quickly restrict the list to favourite programs only. If you have not selected any
favourite programs and you have selected the Favourites list that is empty, change the
list display to e.g. All using the red button.
Green button – fast saving of the highlighted program to the list of Favourites (FAV) or
removal from this list. Status shows the heart symbol
Yellow button – active tuner selection, terrestrial Antenna, Cable, Satellite antenna.
14 EN
EN
Revision 03/2021
Copyright ©
2021, Fast ČR, a. s.
Menu
6. Menu
Moving and selection in the Menu
Press MENU and select the item you want to work with using the buttons v/V . Then
press OK.
Move within the item using the buttons v/V and confirm by pressing OK.
To go back to previous item press the button b.
To end the setup press the button MENU.
Note:
Depending on the current broadcast situation, on the connected devices and on the
selected source, some options may be inactive or not appearing at all.
6.1. Fast options
After pressing the button, some useful options are available (may vary, depending on
the software used):
WiFi display – wireless display when connected to amobile device
Music (Enjoy music) – turning off the screen for just listening to the audio
Sleep (Sleep timer) – TV sleep timer
World clock – displaying time in several time zones
HDMI CEC – adjusting sound for richer delivery via soundbar.
Sport – sports picture and sound mode for better experience
6.2. Picture
Select settings according to your taste, source, scene, ambient conditions.
Picture Mode
Select from available settings Dynamic/Standard/Film/Natural/Personal.
Personal mode allows to set customized values for Brightness, Contrast, Colour, Tint,
Sharpness, Backlight.
Aspect Ratio (Aspect Ratio)
Choose between Auto (depends on video), 16:9, 4:3, Zoom1, Zoom2.
If the selected aspect ratio differs from that originally recorded in the image, it will distort
the ratios of objects, such as faces. The correct Auto mode function depends on the
correct information provided by the author.
Advanced Settings
ECO (On/Off) – setting variable picture parameters for agreeable viewing in power saving
mode.
Colour Temp – select Normal, Cool or Warm colour presentation.
Dynamic Contrast – advanced evaluation of the displayed scene and adjustment of
contrast.
Noise Reduction – select noise limit in the picture between Off/Low/Medium/High.
EN 15
EN
Revision 03/2021Copyright © 2021, Fast ČR, a. s.
Menu
6.3. Sound
Choose according to your taste, sources, played sound, or ambient conditions of
aparticular setting.
Sound mode
Select from available modes: Standard/Music/Theatre/Sport/Personal
SPDIF Type – you can switch between linear PCM or Auto output when your connected
device has adecoder for the accompanying soundtrack.
SPDIF Delay – set in case of broken synchronization in SPDIF
Audio Delay – fine tuning of audio and picture time synchronization.
Auto Volume Control
Select On or Off – electronic equalization of different volume according to the program.
Advanced Settings
Equaliser – adjusting the sound in several frequency bands. Only for user audio mode.
Audio Description – When asound track with an audio description is broadcast in the
currently running program, you can turn it on or off to add it to normal sound.
AD Volume – when audio description is enabled, the volume of the description can be
adjusted against the normal sound.
6.4. Channel
This selection is used to set up the received channels, to scan the broadcasting bands,
and to save broadcast programs. Depending on the type of broadcast (air, cable, or
satellite), the content of the selection varies.
To receive broadcasts, you need to set each broadcast mode you want separately and
save its programs. Before setting each method it is important to select the correct source
SOURCE (DTV for digital DVB-T, ATV for analogue broadcasting). Select in the list of
programs using yellow button the required type of tuner: terrestrial antenna, cable,
satellite.
Tip:
We recommend checking the antenna and its quality, including the quality of the
power cable before starting the tuning. This is especially true for satellite dishes, where
we recommend that they be installed and inspected by an expert, e.a. for safety
reasons.
Note:
Find out the type and parameters of your antenna installation, what signals are present
in your subscriber drawer before setup and tuning.
16 EN
EN
Revision 03/2021
Copyright ©
2021, Fast ČR, a. s.
Menu
6.4.1. Channel Scan
Make sure that you selected the DTV source. Next, select the country to set the reception
systems.
Country – select from the available countries the one which best suits your location.
Tuner Mode – select terrestrial (Antenna) or cable (Cable) or satellite (Satellite) according
to your reception.
• Antenna/Cable
Automatic Search – select if should be tuned digital DTV, analogue ATV or both. OK
– starts searching the whole bandwidth and informs you of the found channels and
programs.
• Other selections are applicable only for cable reception:
Modulation – select Auto or Type QAM according to the operator information.
Frequency – select Auto or Manual according to the operator information.
Symbol rate – select Auto or Manual entry according to the operator information.
Manual, Analogue, Digital
Use buttons ◄/► Channel intended to search for aprogram. The demodulation stripe
indicator will let you know about the presence of abroadcast on this channel and how
to find programs on it. Press ▼ to go to Search and press OK. The found programs are
saved in your list, or the new search will overwrite those already present in your list.
Satellite reception (DVB-S/S2)
Make sure that you selected the reception source DVB-S (Tuner mode – Satellite).
Satellite setting
ALERT:
Have aprofessional install your satellite antenna to ensure you get quality and
uninterrupted reception. The professional will inform you about the technical
parameters (in particular DiSEqC), which he used during the installation process
and which shall be entered into the TV receiver for asuccessful tuning process.
• Auto Search
Depending on the set parameters press OK to scan.
• Antenna Setup
Select the type of antenna according to your installation LNB only (LNB Only) or
Universal.

EN 17
EN
Revision 03/2021Copyright © 2021, Fast ČR, a. s.
Menu
• Manual satellite tuning
Correctly determine the received satellites and assign them to DiSEqC. You can select
atransponder to control the received signal (e.g. Astra 3/23,5° E, 12070 GHz, horizontal,
27500 kSym/s). Also set the other satellite reception-specific parameters according to the
installation that the antenna installer tells you.
• Scan Mode
Select for search amode among Default/Network Scan/Blind Scan/Fastscan.
Note:
Depending on the model, design, and region, all options may not be available.
Programs List
Shows the same list as when pressing the CHLIST button on the remote control.
EPG
Shows programs and shows guide.
Channel organizer
Allows you to customize the channel list by functions:
• Skip aspecific program
• Sort – Replace always of two channel positions, Insert specific channel at
apreviously vacated channel.
• Edit name of the channel
• Remove from the list and vacate the position
Channel diagnostic
Displays digital modulation information and signal strength information and signal quality
of the selected program. For undisturbed reception, signal quality is particularly important,
reflecting signal damage by e.g. atmospheric phenomena. We recommend that you keep
your signal quality as close to 100% as possible by using agood quality antenna.
Teletext
Choose Teletext encoding for correct viewing - East, West, Russian, and so on.
Record list
Displays the list of previously recorded broadcasts.
6.5. Smart TV
Smart TV allows you to set up access to Netflix based on your own login data, wireless
Wi-Fi display, and network turn-on during standby.

18 EN
EN
Revision 03/2021
Copyright ©
2021, Fast ČR, a. s.
Menu
WiFi display
When you choose Wi-Fi display you switch the TV to reception from amobile phone or
atablet. Check, if your phone is equipped with remote screen technology or acompatible
one (e.g. Miracast). You can view the connection data directly on the main TV screen. On
your mobile phone, select the TV where your mobile phone will send the broadcast. To
end the connection press the button EXIT on your remote controller.
6.6. Network
Internet connection (On/Off)
Use smart apps and HbbTV to connect your TV to the internet.
Interface
Choose between awired or wireless WiFi connection.
Ethernet – only with Wired option (Wired)
Next select IP setting if your cable connection has automatic connecting available. In this
case keep the following selection DHCP on ON. Or you can set the connection method
manually for afixed address, in which case select DHCP to OFF. Next, you have to
enter the IP address, Netmask, Gateway and DNS according to your network operator
information.
WiFi – only with the Wireless option, then Wireless setting
TV searches wireless networks (option Scan). If your network is not listed (for example,
it is set as hidden), you must add it manually by selecting Manual. For this you will
need its SSID name and security. After selecting your network, enter the correct access
information, e.g. your password, according to the security method. IP Setting (IP Setting)
you can perform the same way as with the cable connection (see above), automatically
DHPC or manually.
Information
The TV will briefly check Internet access and report on the set parameters.
6.7. System
6.7.1. Language
Set the Menu language for the TV to communicate with you.
Select from the available Audio language, which you prefer. In case of dual selection,
the first search is performed for the language which you enter as your main language –
Primary, if not found, the searching is for the – Secondary language. If it is not found, the
language that is selected as the first to be broadcast is selected. The recognition function
depends on the number of broadcast languages and their exact identification in the
broadcast.
EN 19
EN
Revision 03/2021Copyright © 2021, Fast ČR, a. s.
Menu
6.7.2. Time
Time zone – if it is not broadcast at all or incorrectly, set the correct zone to preserve the
functionality of other time functions.
Clock
• Auto sync Auto Sync – turns on or off time synchronization according to digital
broadcast. We strongly recommend that you keep sync on, because many other
advanced digital broadcasting features synchronize with time.
• Date&Time – only in case the auto sync is off. Set correct date and time.
• Daylight savings – on/off. If it is not broadcast, set it correctly to preserve other time
functions.
Off Time
Set the desired shutdown time or limit the days when the TV turns off.
Sleep Timer
Set the time after which the TV turns off to Off (timer is not active) / 10 min / 20 min / 30
min / 50 min / 60 min / 90 min / 120 min.
Note:
By pressing SLEEP on the remote controller you can also cycle through the sleep
timer values.
Auto Standby
You can set the time after which the TV turns off, unless you press any button. The
options are: Off (TV will never turn off with this timer option) / 4 hrs / 6 hrs / 8 hrs.
6.7.3. Lock
You can limit some TV function and request apassword entry. To first activate the lock,
enter the factory password “1234”.
Activate the lock, position On, to display next settings.
Now you can change the factory password to your own in the item Set Password, where
you enter first the current password and then the new one, which you have to repeat to
exclude an error. Remember your new password!
Channel Lock – you can condition watching some channels by passwording them. Here
you can view the list of channels and lock the individual required channels (or unlock) by
pressing OK.
Parental Guidance – if the digital program is equipped with information about the desired
age for viewing (e.g. 9, 12, 15 or 18 years), you can condition it by entering the correct
password. The function depends on the broadcasted information about age. If broadcast,
the information about age is displayed with the description of the program, which you can
display by pressing . To activate, select the minimum age numerically.
20 EN
EN
Revision 03/2021
Copyright ©
2021, Fast ČR, a. s.
Menu
Note:
If watching is conditional upon entering apassword, you can enter it after pressing the
button OK.
HDMI CEC (HDMI CEC, ARC)
When you turn on the HDMI CEC function, only these HDMI and CEC devices will
communicate with each other when they are connected by HDMI cable if they are
equipped with HDMI CEC function.
ALERT:
HDMI CEC is adigital function. The number of available functions depends on
your connected device or the type of its input. The reliability of their application
can also be affected by poor quality or too long HDMI cable or proximity to the
sources of interference.
HbbTV
Turn on if you want to receive additional information via an Internet connection for some
programs. TV stations that broadcast this data will display their own reception alert in the
picture. Switch to this data using the Red button on the remote controller and continue
according to the instructions of that TV station.
Common interface
If you have aConditional Access Module (CAM) installed, you can access its menu and
modify it. Follow the module instructions.
Reset to default (Reset TV)
If the TV settings are changed in many places and are difficult to find them all, you can
restore the TV to the state it came from the factory. All your personal settings will be
deleted. You will be warned before doing this.
6.7.4. Subtitles
• Subtitle – if on (On), you can select the language of the subtitles for Normal the main
– primary and secondary used if available in the broadcast.
• Hearing impaired – displays descriptions of the program if available.
6.7.5. Advanced settings
• Initial Setup – the same guide as when you first turn it on.
• Location – Home for normal use, Shop without or including (Demo) function symbols.
• Shop Mode – mode sets ademonstration picture and displays adescription of the TV
features. This mode is not energy efficient and is not suitable for home viewing.
EN 21
EN
Revision 03/2021Copyright © 2021, Fast ČR, a. s.
Menu
6.8. Support
Software upgrade (USB/Network)
If the manufacturer releases new software for this TV in the future, it can be updated with
this option. When new software is released, adescription of the new features and how to
update will be released.
Browser Information, Terms of use and Privacy policy
You can display again the terms and conditions as they were displayed during the initial
setup.
ALERT:
Compare the version when upgrading over the network. Use only the software
released by the manufacturer for the USB upgrade and designed exclusively
for your TV model. An attempt to update to unauthorized software may cause
irreparable damage to the TV that the warranty does not cover.

22 EN
EN
Revision 03/2021
Copyright ©
2021, Fast ČR, a. s.
Media
7. Media
After you press USB, press ► and OK to go to Media. You can select the option of direct
playback of media connected to the TV USB port (option USB) and the option to play
media from the network server active in your home network (option Share & See)
7.1. USB
Press OK and open the memory previously inserted in the TV USB port.
Moving and selection in the Menu
Move in the items in the memory using the buttons ▲/▼/◄/► and continue to confirm
by pressing OK.
To return to the list above use the item Return. Play the required file by selecting it and
pressing OK.
Press ◄ repeatedly to reach the display filter setting on the left side of the screen. You
can limit the viewing of either all items, or only movies, music, or photos specified by file
extensions using the filter.
Movies
Use for playback controls the usual buttons on the remote controller for fast forward
M
and reverse
m
, skip to previous
.
and next
>
item of the list, pause Xand start
B. Similar buttons appear also when pressing the button OK.
You can also set adifferent aspect ratio, set the repeat of one, all or no file, view your
playlist, and view the available file information.
Music
To control the playback use the usual buttons on the remote controller for fast forward
M
and reverse
m
, pause Xand start B.
You can also set repeat of one or all files, random play.
Photos
Use for playback controls the usual buttons on the remote controller for skipping to the
next B? and previous ?b item of the list, pause Xand start Bof playback. Similar buttons
appear also when pressing the button OK, and by pressing again
they disappear again.
You can also set repeat of one or all files, random play. Photos can be rotated to the left
and right, you can display the list of files and information about the displayed file.
7.2. Media Server
Select this option. If your media server DLNA offers media to anetwork, you will see it
in the list of available servers. Select it by pressing OK and then follow according to the
content of your server and the options, which it offers the network.
EN 23
EN
Revision 03/2021Copyright © 2021, Fast ČR, a. s.
EPG
8. EPG
EPG is adigital service that is delivered (exclusively) in the digital broadcasting by the
program provider and offers information about the programs up to seven days in advance.
The program provider is responsible for the amount and accuracy of the information. Time
information about programs refers to asingle time, so it is necessary for the TV to set the
correct time incl. of the time zone, whether synchronized from the broadcast or manually
set.
EPG information is of two types. Press repeatedly
to access information about the
current and following program. This information disappears in awhile or you can suppress
it by pressing again EXIT. Another type of EPG is the table of programs, which you call
up by pressing EPG on the remote control.
Note:
The program data is broadcast for the entire multiplex (a set of programs broadcast at
the same frequency, e.g. 4–10 programs), cyclically, at several-minute intervals. TV
reads the data and continuously displays.them as soon as they are supplied. If the data
is not complete, select the program and then wait awhile until the data is fully loaded.
It depends on the provider how fast the data is broadcast, how detailed and how
accurate it is. Usually, it takes longer to transmit to you multiple data (longer texts).
Tip:
TV's internal clock synchronizes from the broadcast quite accurately. If the TV does
not receive for along time abroadcast with time, the internal clock can differ from real
time and affect the accuracy of long-term scheduled events. To synchronize the TV
clock switch on the TV set and wait awhile.
You can select from other options
Record – select to set the time for recording aprogram (Red button)
Reminder – select to set the time for reminding about aprogram (Blue button).
These options are also available from the remote control using the buttons listed in the
brackets above.
It is necessary to adjust each timer function (set times and channels) and then it is
necessary to save it in the schedule by pressing OK. In case of atime conflict between
two events the TV will alert you when saving it. The saved action has asmall icon of an
alarm clock at its name in the EPG list (for reminders) or camera (for recording), if there is
space for icons in the list.
A list of already scheduled events can be viewed (and possibly some deleted) by choosing
EPG/Schedule list (Yellow button).
24 EN
EN
Revision 03/2021
Copyright ©
2021, Fast ČR, a. s.
PVR
9. PVR
During reception of digital broadcast, part of the broadcast can be recorded for later use.
Records already made are available in MENU/Channel/Playlist.
Record – press the button REC to start recording. Press the button PLAY to view the
recording immediately and STOP to return to current broadcast. Press the button STOP,
the system will notify you about full stop of the recording. Confirm it by selecting Yes and
press bto end the recording.
Timeshift – it is the option to stop the current broadcast which is recorded in the
meantime on the connected memory device. After awhile, you can start the broadcast
again and move it back and forth. This way, only asmall portion of the broadcast can be
stored depending on your PVR settings.
Press PAUSE to pause. For fast forward or reverse through the recording press the
corresponding buttons
m
/
M
.
Recording, PVR
To ensure successful use of the PVR function, it is important for the combination of read
and write speed to be compatible with the current type of digital broadcasting and its
speed multiples. For maximum USB memory performance, we recommend formatting
your memory device in the TV. Allocating more space gives you more freedom in using
PVR functions, but it also slows down access to necessary data due to the bus speed on
the drive. Check your drive to see whether it supports PVR functions, the TV checks both
the file system and drive speed, which is essential for successful PVR operations. For
example, if your disk speed is not sufficient and you try to record ademanding program,
the TV will either display anote about insufficient disk speed (later playback problems) or
acomplete failure/stop of the recording, depending on the current broadcast speed. The
speed of the broadcast and of the disc is evaluated continually and amessage about the
speed can appear at any time (repeatedly) during recording. If the speed is insufficient,
use afaster disk.
ALERT:
When recording or timeshift viewing channels protected by conditional access,
your conditional access system can restrict processing according to your
conditional access rules. For example, recording programs to be viewed later is
different from viewing programs in real time and the stored time code can limit
or prohibit your actions. Do not violate copyright laws. The system can refuse
to record programs even considering the parameters of connected memory
or special protective broadcasting functions of both the entire program and
individual programs or program segments (for example due to age or regional
restrictions). Please contact your conditional access system provider for more
information.
EN 25
EN
Revision 03/2021Copyright © 2021, Fast ČR, a. s.
Troubleshooting
10. Troubleshooting
NOTICE:
Under no circumstances should you try to repair the appliance yourself, the
device does not contain parts that could be repaired by the user. Always take the
device to an authorized service center if arepair or adjustment are necessary
other than regular maintenance. Unauthorized interference with the device
is considered abreach and the loss of warranty claim. The importer, supplier,
distributor or vendor shall not be liable for any losses caused by aviolation of
regulations listed in this manual. Do not open the device, there is the danger
of electric shock. In the case of device failure, first check the following list of
problems and their solutions. If you fail to remove the defect according to the
following tips, contact your vendor.
Problems Possible solutions
The TV set has no power. Check the attached power cord and the functioning of
the electrical outlet.
Unplug the power cord, plug it in after 60 seconds
and turn the TV set on again.
No picture. Check the antenna connection.
There could have been problems at the broadcasting
station, try another station.
Adjust contrast and brightness.
Good picture, but no sound. Raise volume.
Check that the sound is not muted (Mute function).
Press MUTE on the remote controller. Check audio
settings.
If you use an external device, make sure that
itsvolume is not muted or the sound is not switched
off.
If you use the A/V or acomponent input, make sure
that the cables are correctly connected and are not
loose. If you use acable with DVI reduction on HDMI,
you need aseparate audio cable.
Make sure that the headphones jack is not occupied.
Good sound, but an unusually
colored picture or no picture.
Check the connection and the state of the antenna.
If you use acomponent input, check the connection.
Incorrect or loose connection can cause problems
with colors or empty screen.
26 EN
EN
Revision 03/2021
Copyright ©
2021, Fast ČR, a. s.
Troubleshooting
Problems Possible solutions
The TV set does not respond to
the remote controller.
The batteries in the remote controller might be
empty.
If it is necessary, replace them with new ones.
Clean the lens of the remote controller. The distance
between the LED TV set and the remote controller
should be no more than 8 m, in the recommended
operating angle and with no obstacles in the path
of the beam. Prevent the impact of strong light
(daylight, sunlight or fluorescent light lamps and
fluorescent tubes) on the TV and remote controller.
There are color points on the
screen.
Although the LED screen is made with high-precision
technology and 99.99% or more of the pixels are
operational, the screen can display permanently
unlit or lit points of light (red, blue or green). This is
aconstruction feature of the LED screen and is not
amalfunction.
The picture falls apart. Keep the TV set away from interfering sources of
electricity, such as cars, hair-dryers, welders and any
optional equipment.
The disintegration of image may be caused by
atmospheric phenomena, such as alocal or distant
thunderstorm.
When installing optional equipment, leave aspace
between the optional equipment and the TV set.
Check the antenna and the connection.
Keep the antenna away from the power or input/
output cables.
After automatic tuning only
some channels are available.
Check if your area is covered by digital TV
broadcasting. Try to retune or manually tune the
missing channels.
Check if you use the correct antenna type – see
page13 “Connecting the antenna”.
Cannot select achannel. Check if the channel is not blocked in the main menu
settings.
Cannot play from the USB
device.
Check the connecting channel between the USB and
power connection. The hard disc was not formatted.
Make sure that the USB flash unit is compatible and
contains supported formats of multimedia data.
EN 27
EN
Revision 03/2021Copyright © 2021, Fast ČR, a. s.
Troubleshooting
Problems Possible solutions
The picture is distorted,
contains macroblocks,
microblocks, points, large pixels,
etc.
Video compression can cause disruption, especially
during rapid movement, e.g. In sports programs and
action movies.
Speaker noise Check the cable connections, make sure that the
video cable is not connected to video input.
Sound distortion can be caused by alow level of the
signal.
The TV set turns off
automatically.
Make sure that the sleep timer or power save mode
timer are not on.
The TV set turns on
automatically.
Make sure that the timer to turn on is not on in the
settings menu (Settings).
The picture is not displayed on
the whole screen.
First make sure that the problem is not caused by the
input signal. Then try to adjust the item Zoom in the
Functions menu.
Picture defects and their causes
Snowy screen
Snowy screen is usually caused by aweak signal. Change the antenna setting or install
an antenna booster.
Double images or ghosting
Double image is usually caused by reflection from tall buildings. Adjust the antenna
orientation or place it higher.
Radio frequency interference
Waves are moving on the screen, which is usually caused by neighbouring radio
transmitters or shortwave receiver.
Interference by electrothermal devices with high temperature
Inclined or arrow shaped patterns appear on the screen or apart of the picture is missing.
This is probably caused by electrothermic devices with high temperatures in anearby
hospital.
28 EN
EN
Revision 03/2021
Copyright ©
2021, Fast ČR, a. s.
Technical specifications
11. Technical specifications
Model SLE 42FS601TCS
Panel size 42" (106 cm)
Standby consumption <0.5 W
Rated voltage AC 100–240 V ~ 50/60 Hz
Remote controller Yes
VESA wall mount 200 × 100
Dimensions with stand (w× h× d) 952 x 592 x 218 mm
Dimensions without stand (w× h× d) 952 x 539 x 89 mm
Net weight with stand 6,2 kg
Connection
RF IN 1
AV IN 1
HDMI 2 (1xARC)
Optical Output 1
USB 2
Supported USB formats HEVC, MKV, AVI, MP4, MPEG, FLV, MP3, WMA, JPEG,
JPG, PNG, BMP
CI slot 1
Headphones output 1
RJ45 (LAN) 1
Wi-Fi Yes (2.4GHz)
Other functions
Resolution 3840 × 2160
Brightness (cd/m2) 240
Response time (ms) 8
Viewing angle H: 178°, V: 178°
Embedded tuner DVB-T/T2, DVB-C, DVB-S2
Video system PAL/SECAM BG/DK/I
PVR recording to USB Yes
Progressive scan Yes
Timeshift No
EPG Yes
Comb filter Digital
OSD menu EN, CZE, POL, HUN, SVK, GER, FRE, ITA, SPA, GRC,
HRV, SRP, BUL, SLV, LIT, RUS, ROM
Zoom Yes
Noise reduction Yes
Timer OFF / ON / SLEEP Yes
Subtitles Yes
Audio language Yes
Channel list Yes
Favourites list Yes

EN 29
EN
Revision 03/2021Copyright © 2021, Fast ČR, a. s.
Technical specifications
Image freeze Yes
Radio Yes
Lock Yes
Parent lock Yes
Hotel mode Yes
Note:
Technical specifications may change without prior notice.
The original version is in Czech.
Manufacturer address: FAST ČR, a.s, Černokostelecká 1621, 251 01 Říčany, Czech Republic
30 EN
EN
Revision 03/2021
Copyright ©
2021, Fast ČR, a. s.
Technical specifications
Information sheet
Importer: FAST ČR, a.s., Černokostelecká 1621, 251 01 Říčany
Information Value Unit
Supplier name or trademark
SENCOR
Model identifier
SLE 42FS601TCS
Energy Efficiency Class for standard
Dynamic Range (SDR)
G
On mode power demand for Standard
Dynamic Range (SDR)
51 W
Energy Efficiency Class for standard
Dynamic Range (HDR)
On mode power demand in High Dynamic
Range (HDR) mode
W
Off mode, power demand 0 W
Standby mode power demand 0.5 W
Networked standby mode power demand 2 W
Electronic display category Television
Size ratio 16:9
Screen resolution (pixels) 1920 x 1080 pixels
Screen diagonal 106 cm
Screen diagonal 42 inches
Visible screen area 4682.7 cm
2
Panel technology used LED LCD
Automatic Brightness Control (ABC) available No
Voice recognition sensor available No
Room presence sensor available No
Image refresh frequency rate 60 Hz
Minimum guaranteed availability of software and
firmware updates (until)
Minimun guaranteed availability of spare parts
(until)
Minimum guaranteed product support (until)
Power supply type Internal
EN 31
EN
Revision 03/2021Copyright © 2021, Fast ČR, a. s.
INSTRUCTIONS AND INFORMATION REGARDING THE DISPOSAL OF USED PACKAGING
MATERIALS
Dispose of packaging material at a public waste disposal site.
DISPOSAL OF USED ELECTRICAL AND ELECTRONIC APPLIANCES
The meaning of the symbol on the product, its accessory or packaging indicates
that this product shall not be treated as household waste. Please, dispose of
this product at your applicable collection point for the recycling of electrical &
electronic equipment waste. Alternatively in some states of the European Union
or other European states you may return your products to your local retailer
when buying an equivalent new product.
The correct disposal of this product will help save valuable natural resources
and help in preventing the potential negative impact on the environment and
human health, which could be caused as a result of improper liquidation of
waste. Please ask your local authorities or the nearest waste collection centre
for further details. The improper disposal of this type of waste may fall subject to
national regulations for fines.
For business entities in the European Union
If you wish to dispose of an electrical or electronic device, request the necessary
information from your seller or supplier.
Disposal in other countries outside the European Union
If you wish to dispose of this product, request the necessary information about
the correct disposal method from local government departments or from your
seller.
Hereby, FAST ČR a.s. declares that the radio equipment type SLE 42FS601TCS
is in compliance with Directive2014/53/EU.
The full text of the EU declaration of conformity is available at the following
internet address: www.sencor.eu
Changes to the text, design and technical specifications may occur without prior notice
and we reserve the right to make these changes.

32 EN
EN
Revision 03/2021
Copyright ©
2021, Fast ČR, a. s.
EN
Warranty conditions
Warranty card is not a part of the device packaging.
This product is warranted for the period of 24 months from the date of purchase to the end-user. Warranty
is limited to the following conditions. Warranty is referred only to the customer goods using for common
domestic use. The claim for service can be applied either at dealer’s shop where the product was bought, or
at below mentioned authorized service shops. The end-user is obligated to set up a claim immediately when
the defects appeared but only till the end of warranty period. The end user is obligated to cooperate to certify
the claiming defects. Only completed and clean (according to hygienic standards) product will be accepted.
In case of eligible warranty claim the warranty period will be prolonged by the period from the date of claim
application till the date of taking over the product by end-user, or the date the end-user is obligated to take it
over. To obtain the service under this warranty, end-user is obligated to certify his claim with duly completed
following documents: receipt, certificate of warranty, certificate of installation.
This warranty is void especially if apply as follows:
•
Defects which were put on sale.
• Wear-out or damage caused by common use.
• The product was damaged by unprofessional or wrong installation, used in contrary to the applicable
instruction manual, used in contrary to legal enactment and common process of use or used for another
purpose which has been designed for.
• The product was damaged by uncared-for or insufficient maintenance.
• The product was damaged by dirt, accident of force majeure (natural disaster, fire, and flood).
• Defects on functionality caused by low duality of signal, electromagnetic field interference etc.
• The product was mechanically damaged (e.g. broken button, fall).
• Damage caused by use of unsuitable media, fillings, expendable supplies (batteries) or by unsuitable
working conditions (e.g. high temperatures, high humidity, quakes).
• Repair, modification or other failure action to the product by unauthorized person.
• End-user did not prove enough his right to claim (time and place of purchase).
• Data on presented documents differs from data on products.
• Cases when the claiming product cannot be indentified according to the presented documents (e.g. the
serial number or the warranty seal has been damaged).
Authorized service centers
Visit www.sencor.eu for detailed information about authorized service centers.