Loading ...
Loading ...
Loading ...
ThechimewillsounduntilthedoorisclosedorDoorAlarmis
turnedoff.
• PresstheDOORALARMtoturnthisfeatureONorOFEThe
indicatorlightwillbelitwhentheDoorAlarmfeatureison.
Max Cool
The Max Cool feature assists with periods of high refrigerator use,
full grocery loads, or temporarily warm room temperatures.
• Press MAX COOL to set the freezer and refrigerator to the
lowest temperature settings. Press MAX COOL again to return
to the normal refrigerator set point.
NOTE: The Max Cool feature will automatically shut off in
approximately 12 hours.
Filter Reset
The Filter Reset control allows you to restart the water filter status
tracking feature each time you replace your water filter. See
"Water Filtration System."
• Press and hold the FILTER RESET touch pad for 3 seconds,
until the Order or Replace light turns off.
ORDER REPLACE
PRESS3 SEC
User Preferences
The control center allows you to set user preferences, if desired.
Temperature Display (F C)
This preference allows you to change the temperature display.
F - Temperature in degrees Fahrenheit
C - Temperature in degrees Celsius
Alarm (AL)
This preference allows you to turn off the sound of all alarms.
ON - You will hear the alarm sound.
OFF - You will not hear the alarm sound.
To Access the User Preferences Menu:
1. Press and hold the DOOR ALARM touch pad for 3 seconds.
The preference name will appear in the Freezer display and
the preference status (F or C) or (ON or OFF) will appear in the
Refrigerator display.
2. Use the Freezer (+) or (-) touch pads to scroll through the
preference names. When the desired preference name is
displayed, press the Refrigerator (+) or (-) touch pads to
change the preference status.
3. Set your preferences by pressing and holding the DOOR
ALARM touch pad for 3 seconds, or by shutting the
refrigerator compartment door.
Cr sper Hum dity Control
You can control the amount of humidity in the moisture-sealed
crisper. Depending on your model, adjust the control to any
setting between FRUIT and VEGETABLES or LOW and HIGH.
FRUIT/LOW (open) for best storage of fruits and vegetables with
skins.
VEGETABLES/HIGH (closed) for best storage of fresh, leafy
vegetables.
Ice Maker
IMPORTANT: Flush the water system before turning on the ice
maker. See "Water Dispenser."
Turning the Ice Maker On/Off
To turn the ice maker ON, simply lower the wire shutoff arm.
To manually turn the ice maker OFF, lift the wire shutoff arm to the
OFF (arm up) position and listen for the click.
NOTE: Your ice maker has an automatic shutoff. As ice is made,
the ice cubes will fill the ice storage bin and the ice cubes will
raise the wire shutoff arm to the OFF (arm up) position. Do not
force the wire shutoff arm up or down.
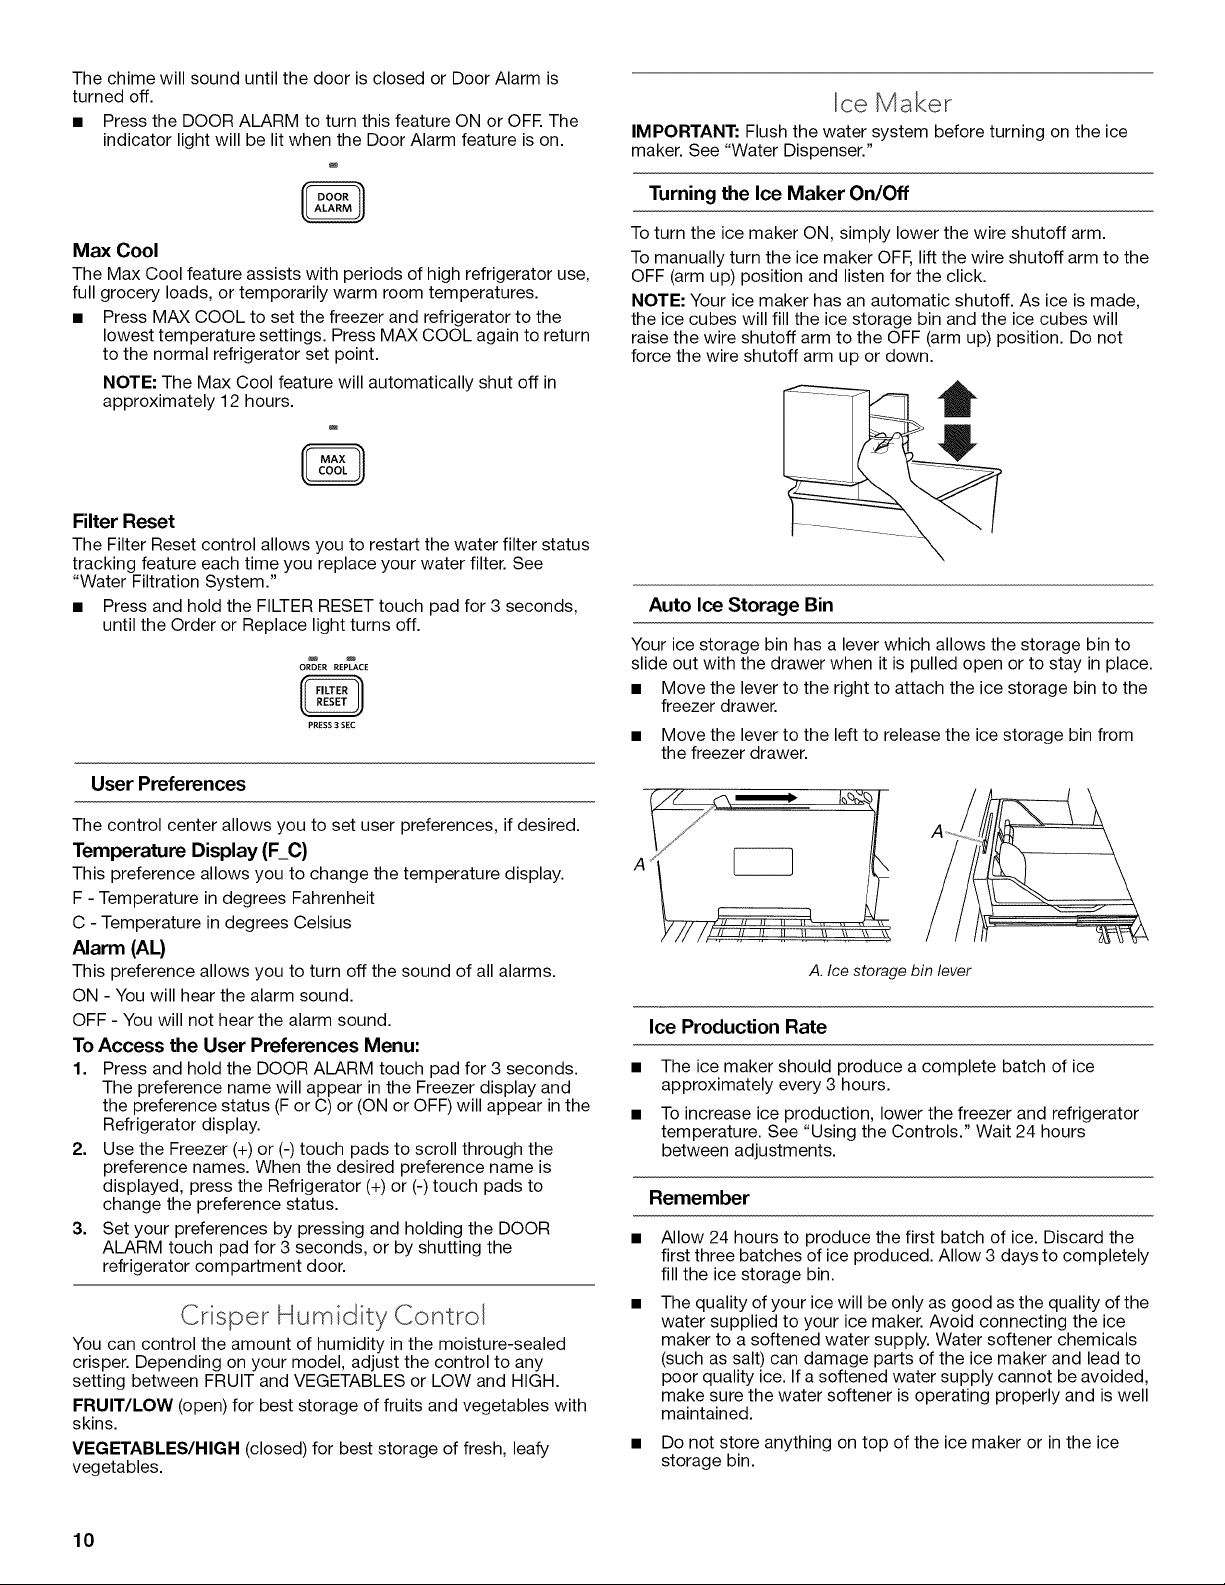
Auto Ice Storage Bin
Your ice storage bin has a lever which allows the storage bin to
slide out with the drawer when it is pulled open or to stay in place.
• Move the lever to the right to attach the ice storage bin to the
freezer drawer.
• Move the lever to the left to release the ice storage bin from
the freezer drawer.
A
A. Ice storage bin lever
Ice Production Rate
The ice maker should produce a complete batch of ice
approximately every 3 hours.
To increase ice production, lower the freezer and refrigerator
temperature. See "Using the Controls." Wait 24 hours
between adjustments.
Remember
Allow 24 hours to produce the first batch of ice. Discard the
first three batches of ice produced. Allow 3 days to completely
fill the ice storage bin.
The quality of your ice will be only as good as the quality of the
water supplied to your ice maker. Avoid connecting the ice
maker to a softened water supply. Water softener chemicals
(such as salt) can damage parts of the ice maker and lead to
poor quality ice. If a softened water supply cannot be avoided,
make sure the water softener is operating properly and is well
maintained.
Do not store anything on top of the ice maker or in the ice
storage bin.
10
Loading ...
Loading ...
Loading ...