
Frigo
Manuale utente
Fridge
User manual


www.fhiaba.com · [email protected] · Info Line +39 0434 420160
3
IT
1
1.1
1.2
1.3
1.4
1.5
1.6
INDICAZIONI IMPORTANTI PER LA SICUREZZA E PER L’AMBIENTE
Avvertenze di sicurezza e potenziale pericolo........................................................................................................
Nell’impiego quotidiano.................................................................................................................................................
Rispetto per l’ambiente.................................................................................................................................................
Pulizia, sanificazione e manutenzione distributore ghiaccio e/o acqua (se presente)..............................
Informazioni per gli enti di controllo.........................................................................................................................
Per risparmiare energia................................................................................................................................................
4
4
4
6
6
7
7
2
2.1
2.2
2.3
2.4
INSTALLAZIONE
Installazione......................................................................................................................................................................
Collegamento alla rete idrica.......................................................................................................................................
Collegamento alla rete elettrica..................................................................................................................................
Refrigerante......................................................................................................................................................................
8
8
8
9
9
3
3.1
3.2
3.3
3.4
3.5
3.6
3.7
3.8
PRIMA DI INIZIARE
Per conoscere bene il vostro Fhiaba..........................................................................................................................
Responsabilità del produttore.....................................................................................................................................
Servizio assistenza........................................................................................................................................................
Dati tecnici........................................................................................................................................................................
Targhetta di identificazione..........................................................................................................................................
Descrizione generale.....................................................................................................................................................
Controllo elettronico.......................................................................................................................................................
Pannello di controllo digitale (modelli 1T, 0T, 0F)..................................................................................................
7
8
8
10
10
11
12
12
13
4
4.1
4.2
4.3
ACCENSIONE DELL’APPARECCHIATURA
Accensione e spegnimento..........................................................................................................................................
Come regolare la temperatura dei vani....................................................................................................................
Segnali informativi e di anomalia sul display.........................................................................................................
14
14
16
16
5
5.1
5.2
PERSONALIZZAZIONE FUNZIONI E IMPOSTAZIONI
Personalizzazione funzioni..........................................................................................................................................
Personalizzazione Impostazioni.................................................................................................................................
17
18
26
6
6.1
ALLESTIMENTO INTERNO
Allestimento interno (posizionamento, regolazione, rimozione).......................................................................
32
32
7
7.1
7.2
7.3
ATTIVAZIONE ED UTILIZZO DELL’ICE MAKER
Attivazione ed utilizzo dell’Ice Maker.........................................................................................................................
Filtro Acqua (no su modelli 0F)...................................................................................................................................
Filtro dell’acqua per Ice Maker nelle colonne freezer..........................................................................................
33
33
34
24
8
8.1
ILLUMINAZIONE
Illuminazione....................................................................................................................................................................
35
35
9
9.1
9.2
9.3
CONSERVAZIONE DEI CIBI
Indicazioni generali.........................................................................................................................................................
Come mantenere la buona qualità del cibo da consumare.................................................................................
Consigli per la conservazione.....................................................................................................................................
35
35
36
37
10
10.1
10.2
10.3
CURA E PULIZIA
Cura e pulizia...................................................................................................................................................................
Pulizia griglia di ventilazione, filtro e condensatore........................................................................................
Pulizia interna.................................................................................................................................................................
40
40
40
41
11
11.1
11.2
GUIDA ALLA RISOLUZIONE DEI PROBLEMI
Guida alla risoluzione dei problemi........................................................................................................................
Indicazioni di anomalia che possono apparire sul display.............................................................................
42
42
44
INDICE

www.fhiaba.com · [email protected] · Info Line +39 0434 420160
4
1.1 Avvertenze di sicurezza
e potenziale pericolo
> Se questa apparecchiatura sostituisce un’altra già
esistente che deve essere messa da parte o smaltita,
assicurarsi che essa non diventi una pericolosa trap-
pola per i bambini.
> Questa apparecchiatura è progettata per rared-
dare bevande e cibi ed è destinata all’utilizzo dome-
stico.
> Questo apparecchio è destinato alla refrigerazione
e conservazione di alimenti freschi e surgelati in am-
biente domestico. Ogni altro uso è improprio.
> L’apparecchio non è concepito per funzionare con
temporizzatori esterni o con sistemi di comando a
distanza.
> L’apparecchiatura deve essere installata seguendo
le istruzioni riportate nella Guida all’installazione in
particolare vanno mantenute libere da ostruzioni
le aperture di ventilazione dell’apparecchiatura o
nella struttura ad incasso.
> L’apparecchiatura è dotata di un sistema di illumi-
nazione a luce concentrata con lampade Led. Non
guardare all’interno delle lampade quando sono ac-
cese per evitare possibili danni alla vista.
Questa avvertenza è riportata anche sull’etichetta
incollata all’interno della porta del frigorifero.
> Quando il freezer è in funzione non toccare le su-
perfici interne in acciaio con le mani umide o bagna-
te, in quanto la pelle potrebbe attaccarsi alle superfi-
ci particolarmente fredde.
> Non usare apparecchi elettrici di alcun tipo all’in-
terno degli scomparti per la conservazione dei cibi.
> Durante il riposizionamento dei ripiani non avvici-
nare le dita alla guida di scorrimento del ripiano.
> Non posizionare contenitori di liquidi infiammabili
nelle vicinanze dell’apparecchiatura.
> Non tentare mai di spegnere una fiamma/incendio
con acqua: spegnere l’apparecchio e coprire la fiam-
ma con una coperta ignifuga.
> Non toccare gli elementi riscaldanti all’esterno
dell’apparecchio.
> Spegnere completamente l’apparecchiatura stac-
candola dalla presa della corrente durante operazio-
ni di pulizia. Se la spina non è facilmente raggiungi-
bile è opportuno scollegare l’interruttore omnipolare
relativo alla presa cui l’apparecchiatura è collegata.
> I componenti dell’imballaggio possono essere pe-
ricolosi per i bambini: non permettere loro di giocare
con sacchetti, films plastici e polistirolo.
> Qualsiasi riparazione deve essere eettuata da un
tecnico qualificato.
> Questo apparecchio non è da intendersi adatto
all’uso da parte di persone (incluso bambini) con ri-
dotte capacità fisiche, sensoriali o mentali, o prive
di esperienza e conoscenza, a meno che siano state
supervisionate o istruite riguardo all’uso dell’appa-
recchio da una persona responsabile della loro si-
curezza. I bambini dovrebbero essere supervisionati
per assicurarsi che non giochino con l’apparecchio.
> Non danneggiare i tubi del circuito refrigerante
dell’apparecchio.
> Non introdurre nell’apparecchio bombolette spray
o recipienti che contengano propellenti o sostanze
infiammabili.
> La quantità di gas refrigerante contenuta nel vo-
stro apparecchio è indicata nella targhetta d’identi-
ficazione posta all’interno dell’apparecchio. Nel caso
in cui il cavo di collegamento elettrico dovesse subire
danni, è necessario sostituirlo, coinvolgere il servizio
assistenza clienti autorizzato o un elettricista qualifi-
cato ad eseguire questa operazione.
> Installazioni o riparazioni eseguite da personale
non autorizzato, possono potenzialmente creare pe-
ricolo per l’utente e danni all’apparecchio.
Le riparazioni vanno eseguite dal servizio assistenza
clienti autorizzato.
> È consentito usare solo parti di ricambio originali
del costruttore. Solo con l’impiego di detti compo-
nenti il costruttore garantisce che i requisiti di sicu-
rezza del prodotto siano rispettati.
> Le riparazioni devono essere eseguite solo dal
produttore, servizio assistenza autorizzato o altra
persona qualificata.
> Collegare l’apparecchio a una presa a 3 poli
collegato alla terra
> Non rimuovere il polo di messa a terra.
> Non utilizzare un adattatore.
> Non utilizzare una prolunga.
> Scollegare la fonte di alimentazione da tutti i
dispositivi prima dell’intervento.
> Se il CAVO DI ALIMENTAZIONE è danneggiato,
deve essere sostituito dal produttore, un servizio di
assistenza autorizzato o altra persona qualificata in
modo da evitare pericoli.
> I bambini devono essere sorvegliati per assicurarsi
che non giochino con l’apparecchio.
> Non modificare l’apparecchio.
> Non inserire oggetti metallici appuntiti (posate o
utensili) nelle feritoie.
> Non toccare (specialmente con le mani bagnate) o
mettere direttamente in bocca i cibi congelati.
> Non conservare sostanze infiammabili, esplosive
o che evaporano.
> Non conservare sostanze esplosive, come
bombolette spray con propellente infiammabile
all’interno dell’apparecchio.
> Le bottiglie con alta percentuale di alcol devono
1. INDICAZIONI IMPORTANTI PER LA SICUREZZA E PER L’AMBIENTE

www.fhiaba.com · [email protected] · Info Line +39 0434 420160
5
IT
essere ben chiuse e in posizione verticale.
> Le sostanze organiche, acide e gli oli eterei
possono corrodere le superfici in plastica e le
guarnizioni se a contatto per lungo tempo.
> Non tirare mai il cavo per staccare la spina.
1.2 Nell’impiego quotidiano
> Le operazioni di pulizia e manutenzione, destina-
te ad essere eettuate dall’utilizzatore, non devono
essere eettuate dai bambini senza sorveglianza.
> Non sbrinare o pulire mai l’apparecchio con una
pulitrice a vapore. Il vapore può raggiungere parti
elettriche e provocare un cortocircuito. Pericolo di
scarica elettrica!
> Non utilizzare oggetti appuntiti o alati per rimuo-
vere gli strati di brina o ghiaccio. E’ possibile danneg-
giare i raccordi del circuito refrigerante, che rende
inservibile l’apparecchio.
Il gas fuoriuscendo per eetto della pressione, può
provocare irritazioni agli occhi.
> Non usare impropriamente lo zoccolo, i casset-
ti estraibili, le porte ecc. quale punto di appoggio o
come sostegno.
> Controllare che non rimangano incastrati oggetti
nelle porte.
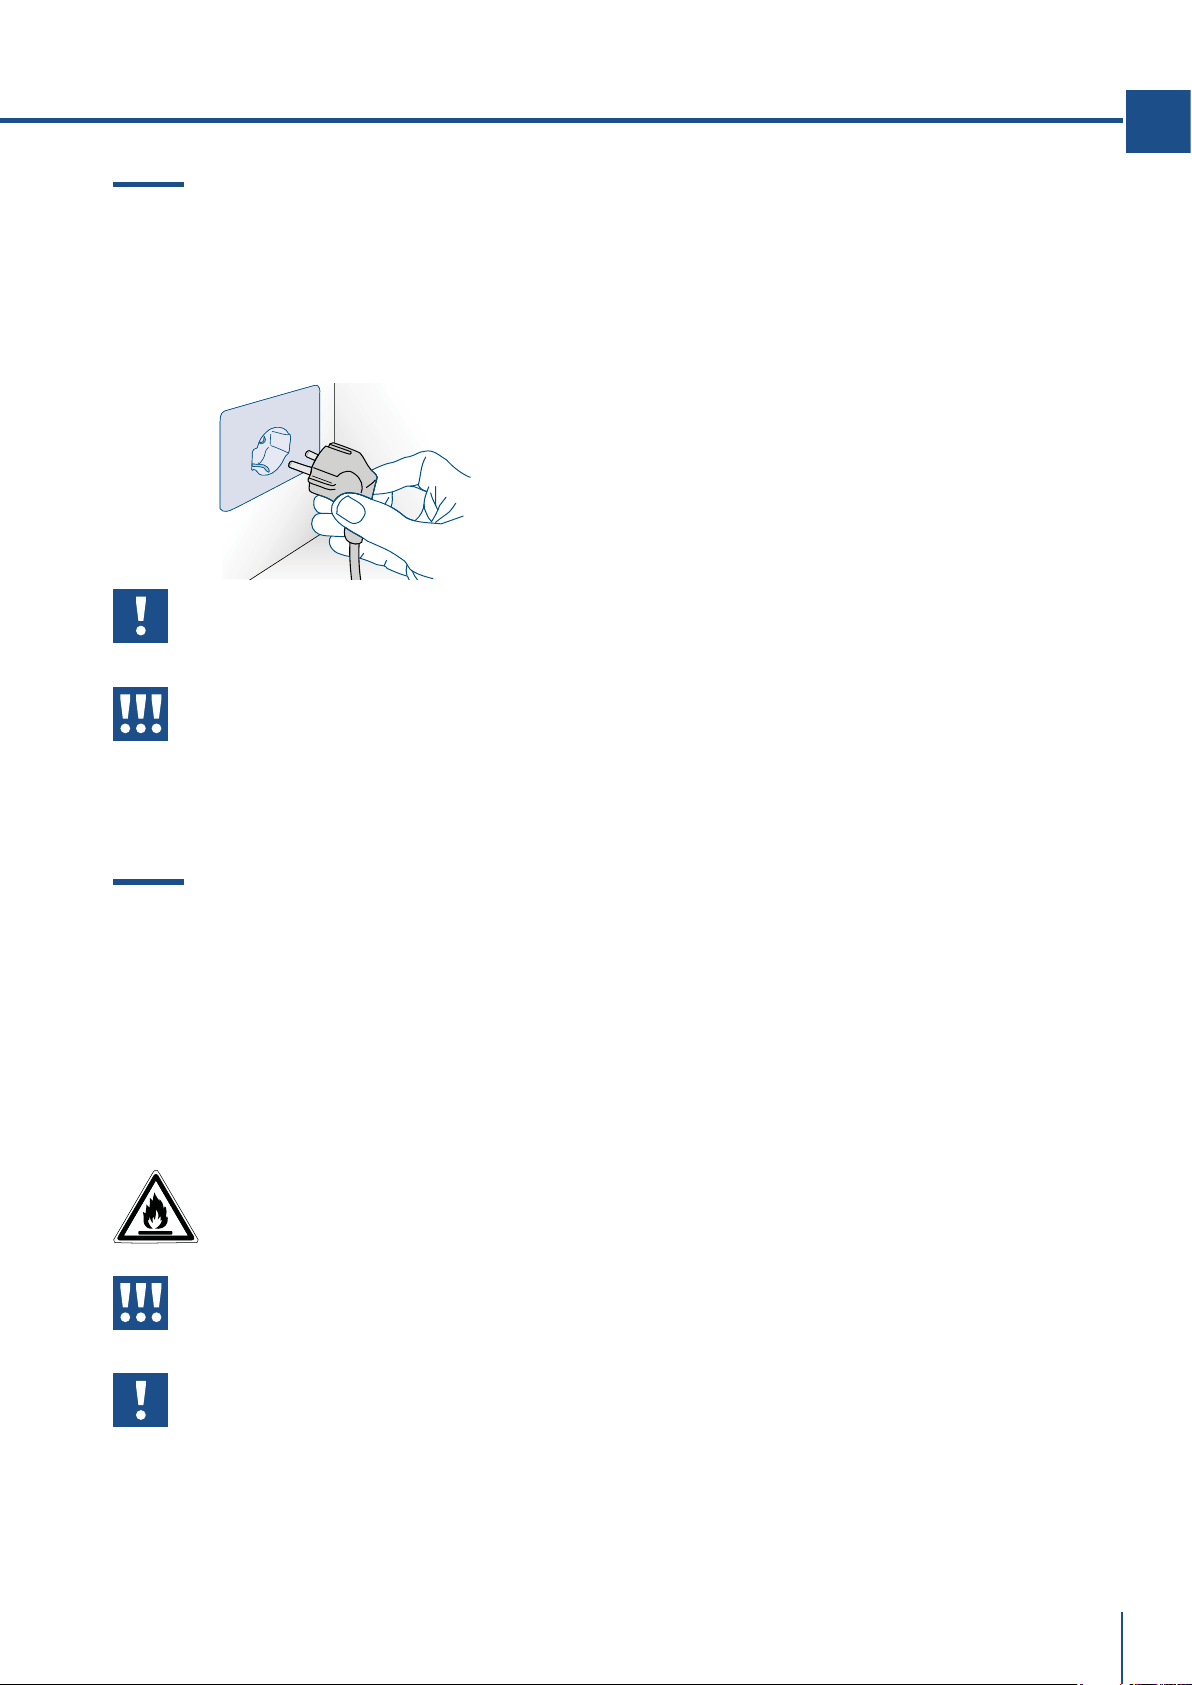
> Per la pulizia estrarre la spina d’alimentazione o
disinserire l’interruttore di sicurezza. Evitare di eser-
citare trazioni sul cordone elettrico, ma impugnare
correttamente la spina.
> Conservare alcool ad alta gradazione in un con-
tenitore ermeticamente chiuso, e posto in posizione
verticale.
> Evitare che olii o grassi imbrattino parti plastiche
o le guarnizioni delle porte. I grassi aggrediscono il
materiale plastico e la guarnizione della porta
diventano fragili e porose.
> Non ostruire le aperture di passaggio dell’aria di
aereazione dell’apparecchio.
> Permettere l’uso dell’apparecchio solo a bambini
in età di 8 anni o superiore. Sorvegliare i bambini du-
rante la pulizia e la manutenzione.
> In accordo alle attuali normative, i bambini tra i
3 e gli 8 anni possono prelevare o caricare gli ali-
menti dall’apparecchio, ma si sconsiglia altamente di
permettere ai bambini sotto agli 8 anni di eettuare
queste operazioni e in generale di utilizzare l’appa-
recchio.
> Tenere lontani i bambini inferiori agli 8 anni, se non
continuamente sorvegliati, e assicurarsi che non gio-
chino con l’apparecchio.
> Non utilizzare dispositivi meccanici, elettrici, chimi-
ci diversi da quelli raccomandati dal produttore per
accelerare il processo di sbrinamento.
> Non danneggiare il circuito di refrigerazione, (nel
caso possa essere accessibile).
> Non utilizzare apparecchi elettrici all’interno degli
scomparti per la conservazione dei cibi, se questi
non sono del tipo raccomandato dal costruttore.
> In caso di danneggiamento del circuito di refrige-
razione evitare l’utilizzo di fiamme libere ed aerare
opportunamente il locale.
> Non utilizzare l’apparecchio o parti di esso diver-
samente da quanto indicato nel presente manuale.
> L’apertura della porta per lunghi periodi può cau-
sare un notevole aumento della temperatura negli
scomparti dell’apparecchio.
> Pulire regolarmente le superfici che possono veni-
re a contatto con cibo e sistemi di drenaggio acces-
sibili.
> Conservare la carne cruda e il pesce in contenitori
adatti in frigorifero, in modo che non venga in contat-
to con altri alimenti o ci goccioli sopra.
> Se l’apparecchio viene lasciato vuoto per lunghi
periodi, spegnerlo, scongelarlo, pulirlo, asciugarlo
e lasciare la porta aperta per evitare lo sviluppo di
mua al suo interno.
> Durante l’uso non appoggiare sull’apparecchio og-
getti metallici appuntiti come coltelli, forchette cuc-
chiai e coperchi.
> Sulle parti in vetro non utilizzare detergenti abra-
sivi o corrosivi (es. prodotti in polvere, smacchiatori
e spugnette metalliche).
> Non sedersi sull’apparecchio.
> Non appoggiarsi o sedersi sulla porta o su even-
tuali
cassetti aperti.
> Non fare leva sulla porta o sulla maniglia per spo-
stare l’apparecchio.
> Non utilizzare apparecchi elettrici (ad es. phon per
i capelli...) o spray per lo sbrinamento che potrebbero
deformare le parti in plastica.
> Non usare in nessun caso l’apparecchio per rinfre-
scare l’ambiente.
> Staccare sempre dalla rete elettrica l’apparecchio
in caso di guasto, manutenzione o durante la pulizia.
> Non conservare nel congelatore liquidi in lattine o
contenitori di vetro.
> Non appoggiare oggetti pesanti sulla sommità
dell’apparecchio.

www.fhiaba.com · [email protected] · Info Line +39 0434 420160
6
1. INDICAZIONI IMPORTANTI PER LA SICUREZZA E PER L’AMBIENTE
Simbologia utilizzata nel manuale:
Nota
suggerimenti per un corretto utilizzo
dell’apparecchiatura
Importante
Indicazioni per evitare danni
all’apparecchiatura
Attenzione
indicazioni per evitare lesioni alla
persona
1.3 Rispetto per l’ambiente
> Questo apparecchio, conforme alla direttiva euro-
pea WEEE (2012/19/UE), deve essere smaltito sepa-
ratamente dagli altri rifiuti al termine del suo ciclo
di vita.
> Questo apparecchio non contiene sostanze in
quantità tali da essere ritenute pericolose per la
salute e l’ambiente, in conformità alle attuali diret-
tive europee.
> Prestare particolare attenzione alle corrette mo-
dalità di smaltimento di tutti i componenti dell’im-
ballo.
Tensione elettrica
Pericolo di folgorazione
Disattivare l’alimentazione elettrica
generale.
Staccare il cavo di alimentazione
elettrica dall’impianto elettrico.
> L’apparecchiatura non deve essere smaltita con i
rifiuti urbani. Informarsi presso i centri di raccolta
locali per lo smaltimento dei materiali riciclabili.
> In caso di smaltimento tagliare il cavo di alimen-
tazione e togliere la porta e/o cassetti di chiusura.
> Durante lo smaltimento, evitare danni al circuito
refrigerante.
> L’apparecchiatura non contiene, nel circuito refri-
gerante e nell’isolamento, sostanze nocive per lo
strato di ozono atmosferico.
> Si precisa che per l’imballaggio dell’apparecchio
vengono utilizzati materiali non inquinanti e ricicla-
bili.
> Conferire i materiali dell’imballaggio agli idonei
centri di raccolta dierenziata.
Imballi di plastica
Pericolo di soffocamento
Non lasciare incustodito l’imballaggio o
parti di esso.
Non permettere che bambini
giochino con i sacchetti di plastica
dell’imballaggio
1.4 Pulizia, sanificazione e manutenzione
distributore ghiaccio e/o acqua
(se presente)
La non osservazione delle indicazioni riportate
per la sanificazione può pregiudicare la sicurezza
igienica dell’acqua erogata.
> Al primo utilizzo dell’apparecchio e dopo ogni so-
stituzione del filtro si consiglia di far scorrere l’ac-
qua all’interno del circuito utilizzando la funzione
“Pulizia Manuale” e di eliminare il ghiaccio prodotto
nelle prime 24 ore. Vedi funzione 8 del paragrafo
5.1 pag 18.
> Dopo un periodo di non utilizzo del distributore
d’acqua superiore a 4/5 giorni, si consiglia di eet-
tuare un lavaggio del circuito eliminando il primo
litro d’acqua.
> Riposizionare l’erogatore estraibile dell’acqua (se
presente) solo con mani igienicamente pulite.
> Si consiglia per una pulizia periodica del conteni-
tore o cassetto cubetti di ghiaccio di utilizzare solo
acqua potabile.
> Il filtro deve essere sostituito obbligatoriamen-
te quando segnalato dal pannello comandi o dopo
un periodo di non utilizzo del sistema distribuzione
ghiaccio/acqua superiore a 30 giorni.
> Si raccomanda ad ogni sostituzione del filtro una
sanificazione del sistema di distribuzione ghiaccio
e/o acqua impiegando soluzioni disinfettanti idonee
per materiali a contatto con alimenti (a base di ipo-
clorito di sodio), che non alterino le caratteristiche
dei materiali. Sciacquare con almeno 2 litri d’acqua
prima dell’uso.
> La sostituzione delle parti del distributore di
ghiaccio ed acqua deve essere eettuata con com-
ponenti originari, forniti dal Costruttore.
> Gli interventi tecnici devono essere eettuati solo
da personale qualificato o dal Servizio Assistenza
Tecnica.

www.fhiaba.com · [email protected] · Info Line +39 0434 420160
7
IT
Attenzione
Per evitare la contaminazione del cibo, per
favore si rispetti le seguenti istruzioni:
> Aprire la porta per un lungo periodo può
causare un elevarsi della temperatura nei
compartimenti dell'apparecchiatura.
> Pulire regolarmente le superfici che pos-
sono entrare in contatto con cibo e accessi-
bili ai sistemi di drenaggio.
> Pulire la vaschetta d'acqua se non usa-
ta per 48h. Svuotare il sistema connesso
all'acqua. Cambiare acqua se non è stata
usata per 5 giorni.
> Conserva carne cruda e pesce in con-
tenitori adatti nel frigo così che non sia in
contatto, e che non coli su altro cibo.
> Compartimenti freezer a due stelle per
cibo congelato sono adatti per conservare
cibi pre-congelati o per conservare o fare
gelato e per fare cubetti di ghiaccio.
> I compartimenti freezer a una, due e tre
stelle non sono adatti per congelare cibo
fresco.
> Se il freezer rimane vuoto per lunghi
periodi, spegnere, scongelare, pulire,
aìsciugare e lasciare il cassetto aperta per
prevenire la formazione di mua all'interno
della macchina.
1.5 Informazioni per gli enti di controllo
> Per le verifiche EcoDesign, l’installazione e la pre-
parazione dell’apparecchio devono essere conformi
alla normativa EN 62552.
> I requisiti di ventilazione, dimensioni e spazio mi-
nimo dalla parete posteriore sono indicati nel capi-
tolo “Installazione” del presente manuale.
> Contattare il costruttore per ulteriori informazioni.
1.6 Per risparmiare energia
> L’uso adeguato dell’apparecchio, l’imballo corretto
degli alimenti, la temperatura costante e l’igiene de-
gli alimenti influisce sulla qualità di conservazione.
> Ridurre il tempo e il numero di aperture delle
porte per evitare un eccessivo riscaldamento delle
celle.
> Pulire periodicamente il condensatore per evitare
perdite di ecenza della macchina. (vedi cap. 10.3)
> Scongelare i surgelati nella cella frigorifera per
recuperare in essa il freddo accumulato dagli ali-
menti congelati.
www.fhiaba.com · [email protected] · Info Line +39 0434 420160
8
2.1 Installazione
Assicuratevi che l’installazione sia eettuata cor-
rettamenteda tecnici specializzati, rispettando tutte
le indicazioni riportate nella specifica guida di in-
stallazione fornita con l’apparecchiatura.
Attenzione
Eseguire l’allacciamento idraulico
assolutamente prima di quello elettrico.
> È obbligatorio il collegamento di terra secondo le
modalità previste dalle norme di sicurezza dell'im-
pianto elettrico.
> Posizionare l’apparecchio con l’aiuto di una se-
conda persona.
> Non usare la porta aperta come leva per posizio-
nare l’apparecchio.
> Non esercitare pressioni eccessive sulla porta
aperta.
> L’apparecchio non deve essere posizionato vicino
a fonti di calore. Se questo non è possibile, è neces-
sario utilizzare un adeguato pannello isolante.
> L’apparecchio non deve essere esposto all’irrag-
giamento solare.
> Non collocare l’apparecchio in ambienti esterni.
> Far eseguire l’installazione e gli interventi di as-
sistenza da personale qualificato nel rispetto delle
norme vigenti.
> Far eseguire il collegamento elettrico a personale
tecnico abilitato.
> Per evitare qualsiasi pericolo, se il cavo di alimen-
tazione elettrica è danneggiato, contattare subito
il servizio di assistenza tecnica che provvederà a
sostituire il cavo, in modo da prevenire ogni rischio.
> Prima di ogni intervento sull’apparecchio (instal-
lazione, manutenzione, posizionamento o sposta-
mento), munirsi sempre di dispositivi di protezione
individuale.
> Prima di ogni intervento sull’apparecchio, disatti-
vare l’alimentazione elettrica generale.
> Se installato vicino ad un altro frigorifero fare ri-
ferimento alla guida di installazione.
> Non tentare mai di riparare l’apparecchio da soli o
senza l’intervento di un tecnico qualificato.
> Non installare/utilizzare l’apparecchio all’aperto.
> ATTENZIONE: Durante il posizionamento
dell'elettrodomestico, accertarsi che il cavo di
alimentazione non sia impigliato o danneggiato.
> Per evitare instabilità dell’apparecchio, in-
stallarlo e fissarlo correttamenteome da istru-
zioni contenute nel manuale di installazione.
2. INSTALLAZIONE
> Questo apparecchio può essere utilizzato fino ad
un altezza massima di 2000 metri sopra il livello
del mare.
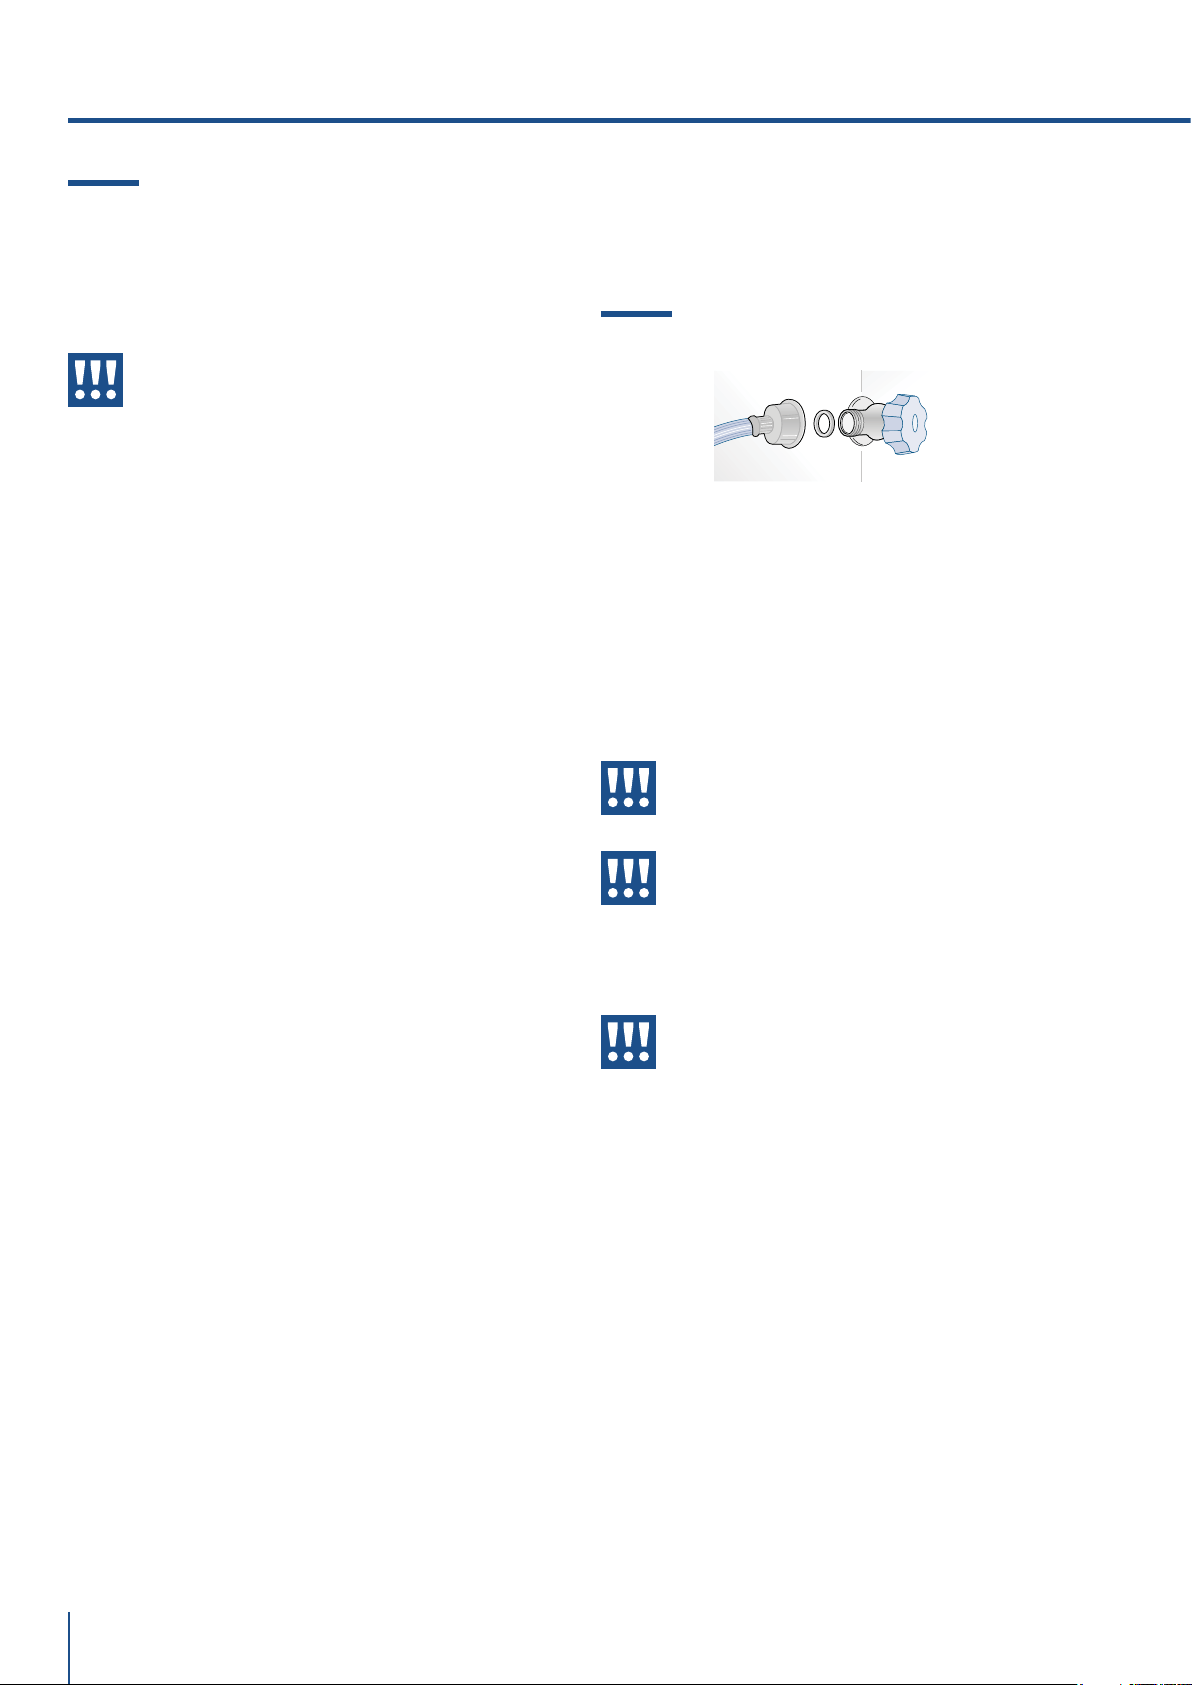
2.2 Collegamento alla rete idrica
I modelli dotati di dispositivo per la produzione di
cubetti di ghiaccio (Ice Maker) richiedono il collega-
mento alla rete idrica domestica.
Esso va realizzato utilizzando il nuovo tubo di carico
acqua con filetto da ¾” for nito in dotazione.
La pressione in rete deve essere compresa tra 0.05
MPa e 0.5 MPa (tra 0.5 bar e 5 bar).
Pressioni di esercizio diverse possono portare a
malfunzionamenti o a perdite nel circuito idraulico.
Attenzione
L’apparecchiatura va alimentata solo
con acqua potabile.
Attenzione
Assicuratevi che l’installazione sia effet-
tuata correttamente, rispettando tutte le
indicazioni riportate nello specifico ma-
nuale di installazione fornito con l’appa-
recchiatura.
Attenzione
Non tentare di utilizzare un adattatore
filettato da giardino o un tubo di alimen-
tazione intrecciato, esso rovina le filet-
tature della connessione acqua sull’ap-
parecchio.
www.fhiaba.com · [email protected] · Info Line +39 0434 420160
9
IT
2.3 Collegamento alla rete elettrica
L’apparecchiatura è dotata di una spina del tipo
Schuko da 16A e deve essere collegata alla rete elet-
trica attraverso una corrispondente presa Schuko.
Non utilizzare prolunghe e/o adattatori multipli per
il collegamento.
Importante
Non utilizzare prolunghe e/o adattatori
multipli per il collegamento.
Attenzione
In presenza di reti elettriche gestite con
energie alternative, è obbligatorio in-
stallare il Kit Energie Alternative per in-
tegrare l’apparecchiatura nella rete elet-
trica.
2.4 Refrigerante
Fare attenzione a non danneggiare il circuito refri-
gerante.
Esso contiene isobutano (R600a), un gas naturale
con un alto livello di compatibilità ambientale, tut-
tavia il gas è infiammabile.
> Nel caso di danno al circuito refrigerante, assicu-
rarsi che non si sviluppino fiamme libere e scintille
nel locale. Aerare bene l’ambiente.
ISO 7010 W021
Attenzione
Rischio di incendio / materiali
infiammabili.
Prestare attenzione durante il trasporto,
montaggio o pulizia di non danneggiare
il circuito di refrigerazione.

www.fhiaba.com · [email protected] · Info Line +39 0434 420160
10
3.1 Per conoscere bene il vostro Fhiaba
Congratulazioni per aver acquistato il vostro nuovo
Fhiaba: da oggi potrete utilizzare il nostro innovativo
sistema di conservazione, che vi permetterà di pre-
servare nel migliore dei modi gli alimenti che desi-
derate.
Questo Manuale Utente risponderà alla maggior par-
te delle vostre domande circa le caratteristiche del
prodotto e del suo funzionamento.
3.2 Responsabilità del produttore
Il costruttore declina ogni responsabilità per danni
subiti da persone e cose causati da:
> uso dell’apparecchio diverso da quello previsto;
> inosservanza delle prescrizioni del manuale d’uso;
> manomissione anche di una singola parte dell’ap-
parecchio;
> utilizzo di ricambi non originali.
3.3 Servizio assistenza
> In caso di guasto dell'apparecchio contattare il ser-
vizio di assistenza tecnica e far eseguire la riparazio-
ne solamente a personale qualificato.
> Assicurarsi di disporre del modello e del numero
di serie disponibili sulla targhetta di identificazione.
> Utilizzare solamente ricambi originali.
> Non tentare mai di riparare l’apparecchio da soli
o senza l’intervento di un tecnico qualificato: oltre a
conseguenze sulla sicurezza, potrebbe annullare la
garanzia.
> I ricambi originali rilevanti per il funzionamento
secondo il corrispondente regolamento Ecodesign
sono reperibili presso il nostro servizio di assistenza
clienti per un periodo di almeno 10 anni a partire dal-
la messa in circolazione dell'apparecchio all'interno
dello Spazio economico europeo.
> Informazioni dettagliate sulla durata della garan-
zia e sulle condizioni di garanzia in ciascun Paese
sono reperibili presso il nostro servizio di assistenza
clienti, presso il proprio rivenditore o sul nostro sito
Internet.
> Qualora abbiate bisogno di ulteriori informazioni
non esitate a contattare il Centro di Assistenza Tec-
nica al:
> nostro numero verde
800-344222 (800-FHIABA)
>
+39 0434 420160
> car[email protected]
> www.fhiaba.com
3. PRIMA DI INIZIARE
Importante
Prima di chiamare prendete nota del nume-
ro di serie dell’apparecchiatura, riportato
sul certificato di garanzia e sulla targa ma-
tricola che si trova all'interno del vano frigo
sul lato opposto all'apertura della porta.
3.4 Dati tecnici
Il refrigerante, il contenuto utile ed altri dati tecnici
sono indicati sulla targhetta identificativa.
Ulteriori informazioni sul modello scelto sono dispo-
nibili sul sito Internet https://www.fhiaba.com/
energylabel (solo per i Paesi dello Spazio economico
europeo). Questo link rimanda alla pagina uciale
del database europeo dei prodotti EPREL, il cui in-
dirizzo non era ancora stato pubblicato al momento
della stampa. Seguire le indicazioni relative alla ri-
cerca del modello. Si riconosce il modello dal segno
prima della barra del codice prodotto (E-Nr.) sulla
targhetta identificativa. In alternativa, l'indicazione
del modello si trova anche nella prima riga dell'eti-
chetta energetica UE.

www.fhiaba.com · [email protected] · Info Line +39 0434 420160
11
IT
F
RO
S
T
FR
E
E
R
EFRIGERA
T
O
R
Numero di serie .
Posizione della targa matricola all’interno del vano.
Modello .
Caratteristiche .
Type .
3.5 Targhetta di identificazione
La targhetta di identificazione riporta i dati tecnici,
il numero di matricola e il modello. La targhetta di
identificazione non deve mai essere rimossa.
Classe climatica di funzionamento
> SN (Subnormale) da + 10°C a + 32°C
> N (Normale) da + 16°C a + 32°C
> ST (Subtropicale) da + 18°C a + 38°C
> T (Tropicale) da + 18°C a + 43°C
La targhetta di identificazione è posizionata
sul lato opposto all'apertura della porta.
Gross capacity (l)
Net capacity Fridge (l)
Net capacity Fresco (l)
Net capacity Freezer(l)
Freezing Capacity (kg/12h)
Refrigerant Fridge/Fresco (gr)
Refrigerant Freezer (gr)
Refrigerant Type
Climatic Class
Defrost Heater (W)
Total Absorbed Current (A)
Voltage (V~)
Frequenzy (Hz)
Lighting Neon/Led (W)
Temperature Rise Time
MADE IN ITALY
582
425
131
5,5
48
60
R600a
SN/T
367
1.5
220-240 V
50-60 Hz
10
10
MODEL
TYPE
SERIAL NUMBER
XS8990TST6I
M899
F20200101000006
FROST FREE
REFIGERATOR
VARIABLE TEMP. COMP.
www.fhiaba.com · [email protected] · Info Line +39 0434 420160
12
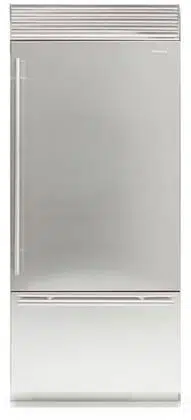
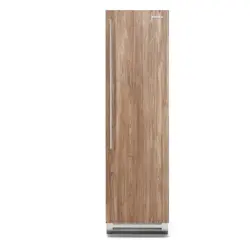
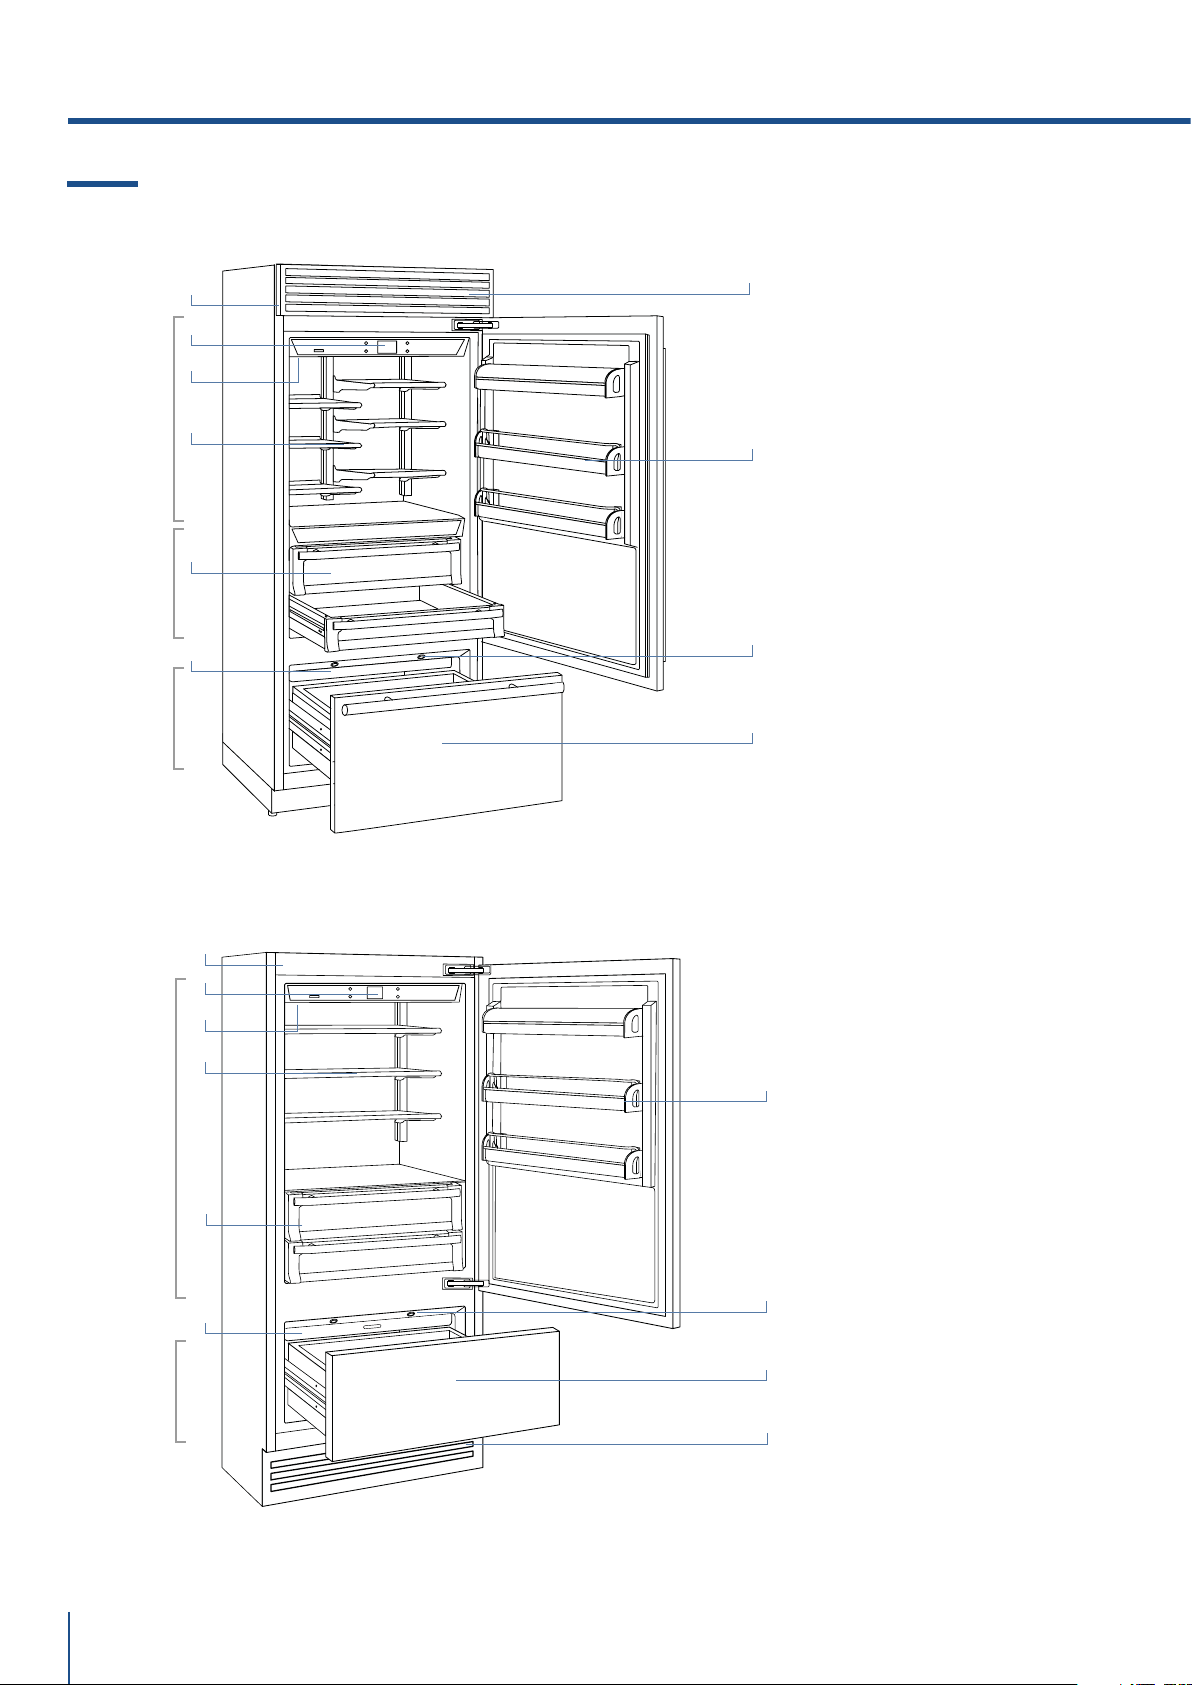
3.6 Descrizione Generale
1) Corpo macchina in
acciaio.
2) Pannello comandi
interattivo.
3) Filtro acqua (*).
4) Sistema riposizionamento
ripiani brevettato (Even Lift).
5) Cassetti vano fresco.
6) Cassetti vano frigo.
7) Vaschetta contenitore
ghiaccio (*).
8) Balconcini porta.
9) Illuminazione a led per il
cassettone vano freezer.
10) Cassettone vano freezer
trasformabile in vano
frigo o vano fresco
(funzionalità TriMode).
11) Griglia removibile
(condensatore).
(*) sui modelli con Ice Maker.
3. PRIMA DI INIZIARE
Fresco
+2°/-2°C
Frigo
+8°/+2°C
TriMode
-15°/-22°C
1
9
2
3
4
5
Modelli 1T
/Country
1
4
7
6
Modelli 0T
/ Brilliance
7
8
11
11
10
2
3
9
8
10
Frigo
+8°/+2°C
TriMode
-15°/-22°C
www.fhiaba.com · [email protected] · Info Line +39 0434 420160
13
IT
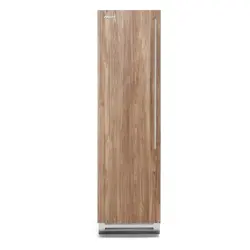
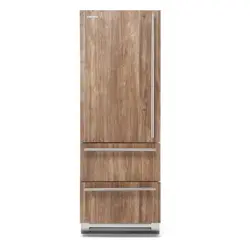
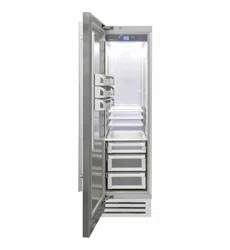
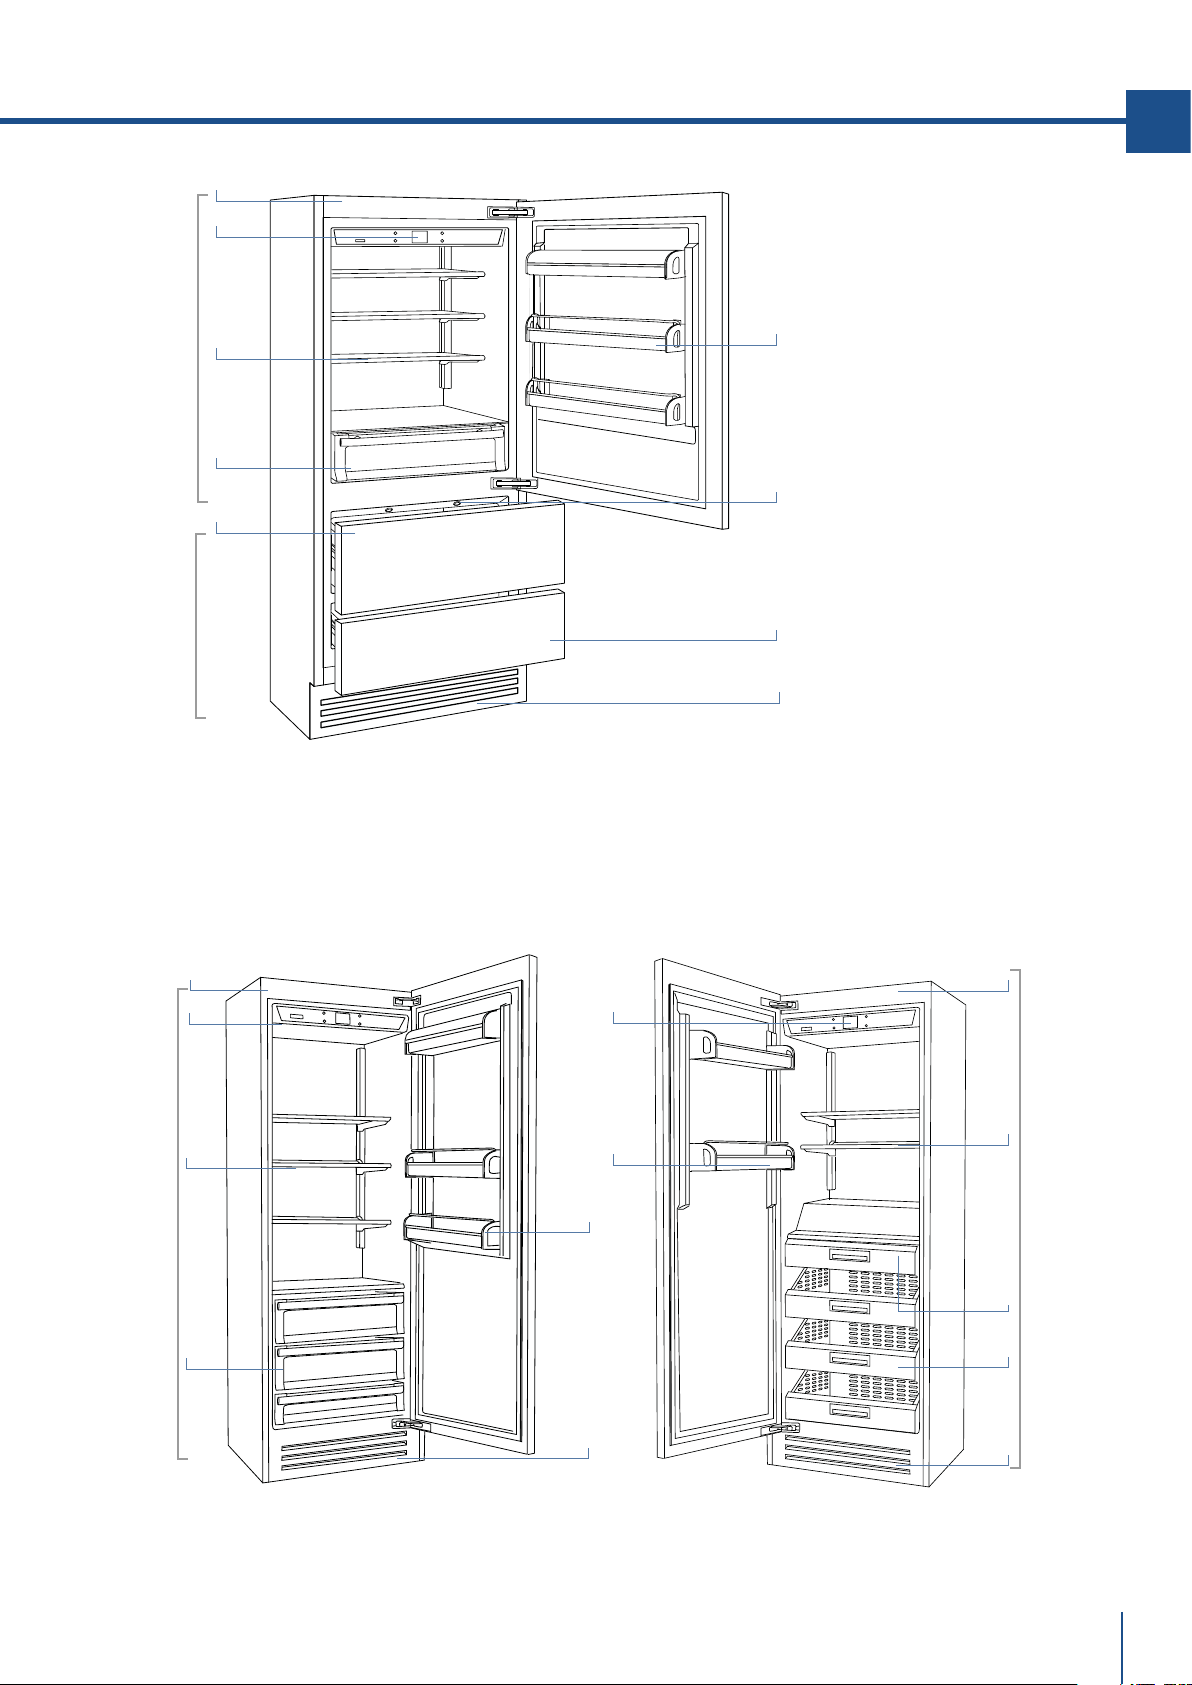
1) Corpo macchina in acciaio.
2) Pannello comandi interattivo.
3) Filtro acqua (*).
4) Sistema riposizionamento
ripiani brevettato (Even Lift).
5) Cassetti vano frigo.
6) Vaschetta contenitore
ghiaccio (*).
7) Balconcini porta.
8) Illuminazione a Led per i
cassettoni vano freezer.
9) Cassettoni vano freezer
trasformabili in vano
frigo o vano fresco
(funzionalità TriMode).
10) Cassetti in acciaio inox AISI
304.
11) Griglia removibile
(condensatore).
(*) sui modelli con Ice maker.
Modelli 0FR Frigo Modelli 0FZ Freezer
Frigo
+8°/+2°C
TriMode
-15°/-22°C
Frigo
+8°/+2°C
Freezer
-15°/-22°C
1
8
2
4
5
6
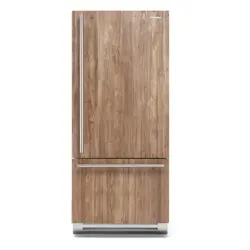
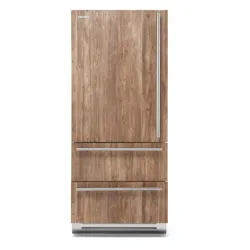
Modelli 0H
1
4
5
7
9
11
11
11
2
7
1
2
7
4
10
6
www.fhiaba.com · [email protected] · Info Line +39 0434 420160
14
3.7 Controllo elettronico
L’innovativo sistema di controllo elettronico messo a punto da Fhiaba mantiene costante la temperatura
dei tre vani e la visualizza sul display del pannello di controllo. Consente inoltre l’interazione dell’uten-
te con il sistema di controllo, tramite l’impostazione personalizzata delle diverse funzioni e l’invio di
messaggi sonori e/o visivi, qualora si verificassero anomalie nel funzionamento dell’apparecchiatura.
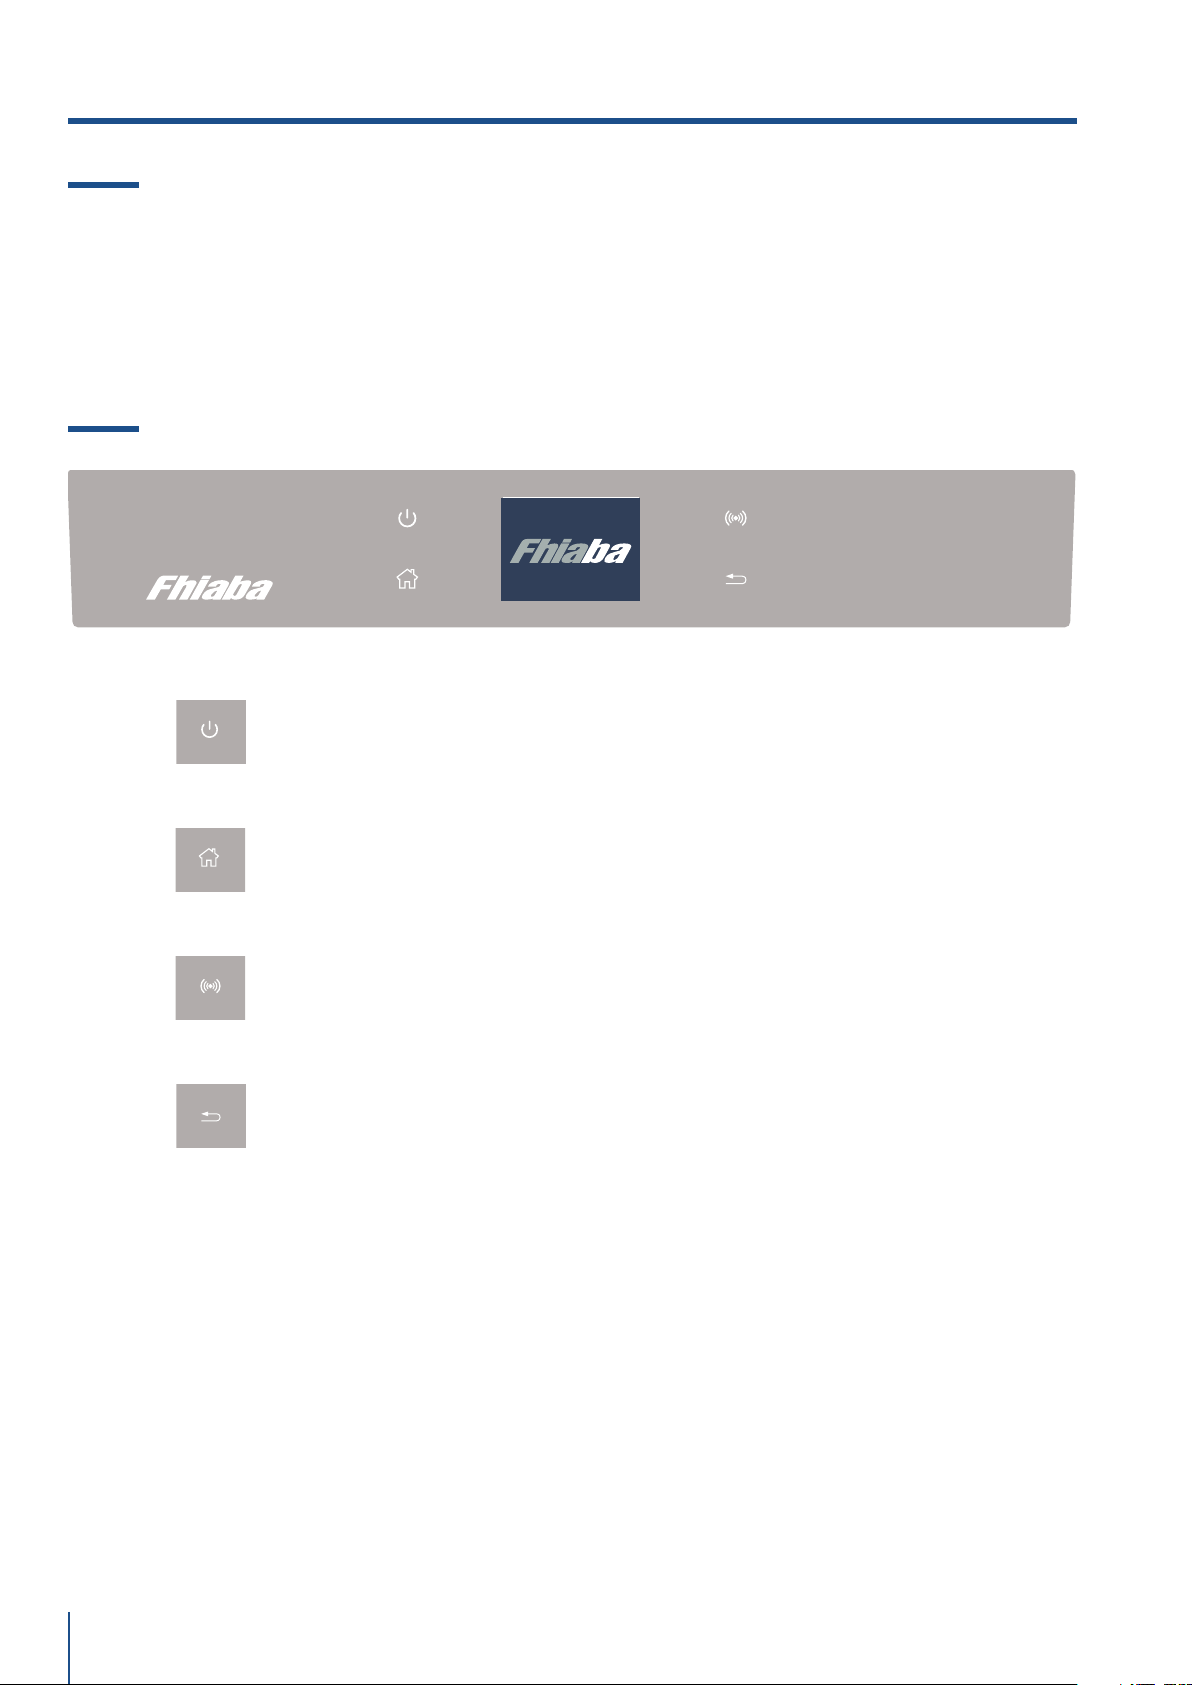
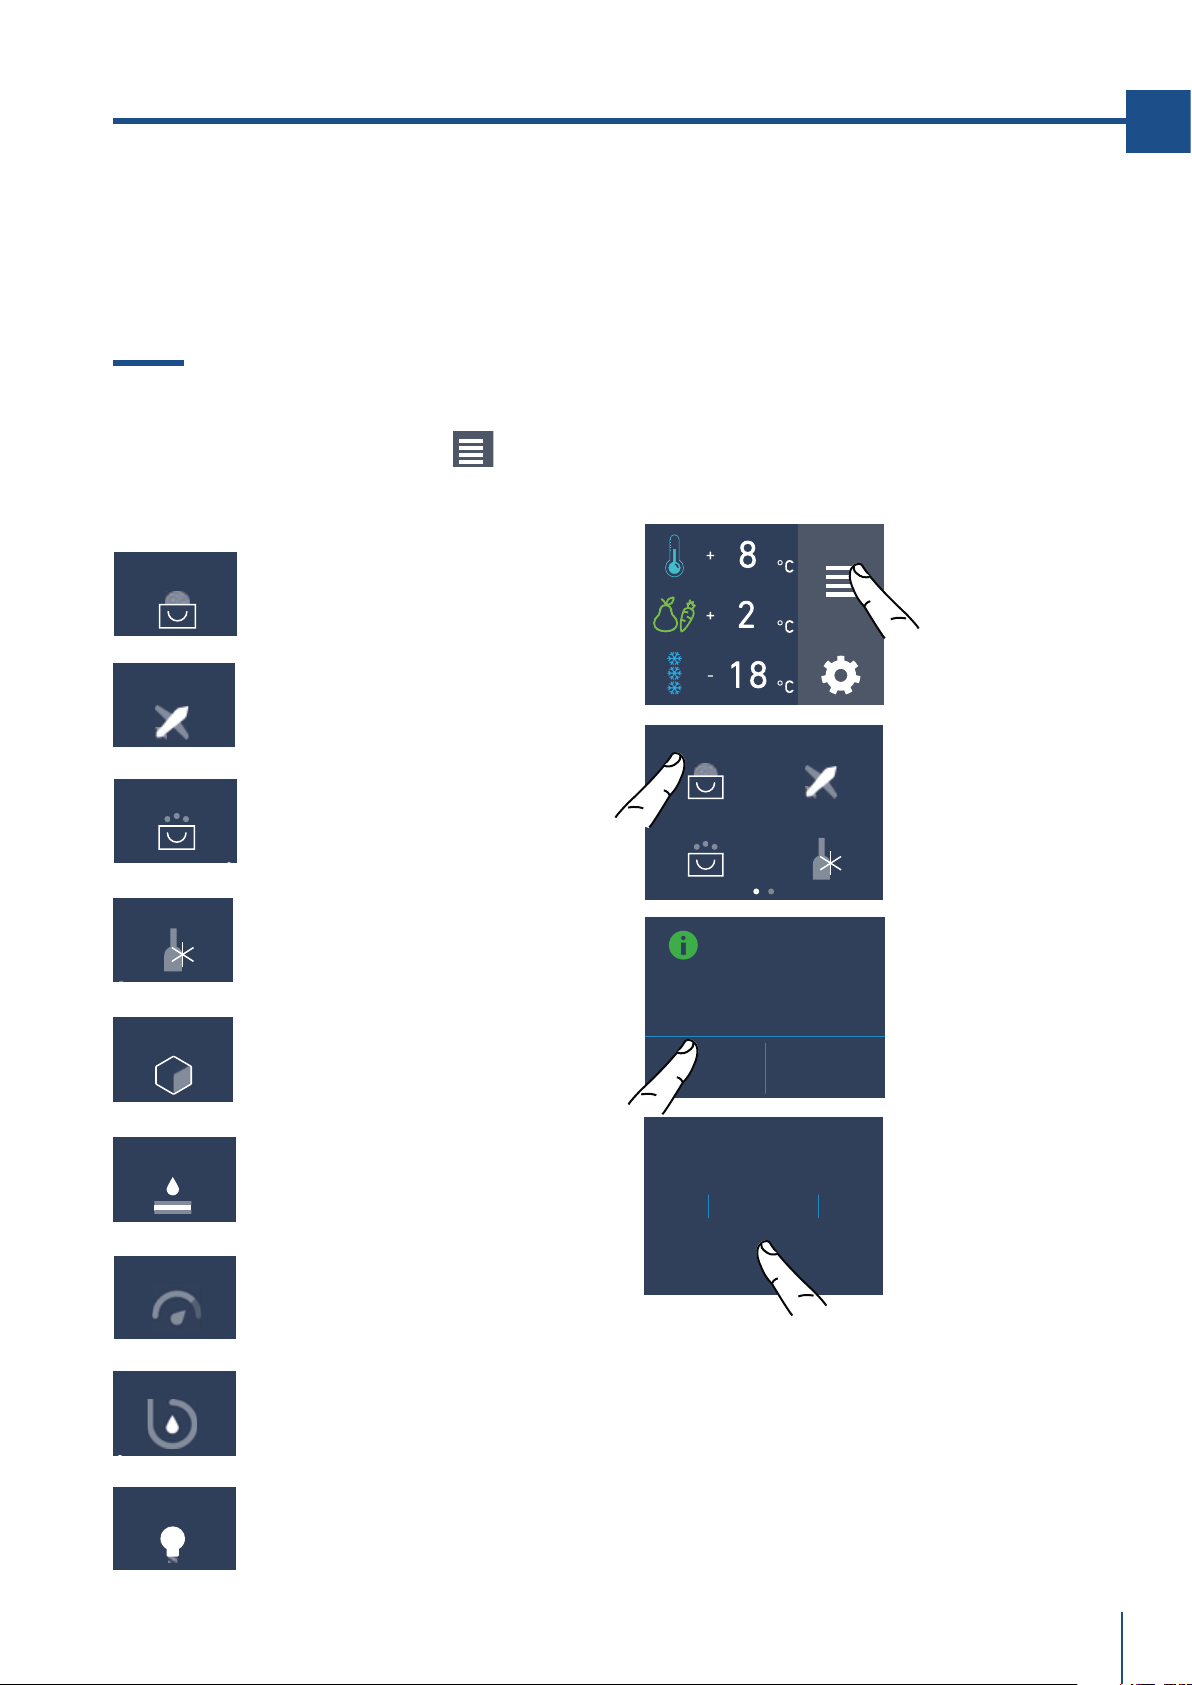
3.8 Pannello di controllo principale (modelli 1T, 0T, 0H, e 0F)
Accensione / Spegnimento: On/Off
Toccare l’icona per l’accensione o lo spegnimento dell’apparecchio.
Home
Toccare l’icona home per andare alla schermata principale del display.
Allarme
Toccare l’icona per visualizzare le funzioni di segnale acustico di allarme e per
disattivarle.
Indietro/ Back
Toccare l’icona della freccia per ritornare alla schermata precedente del display.
3. PRIMA DI INIZIARE
www.fhiaba.com · [email protected] · Info Line +39 0434 420160
15
IT
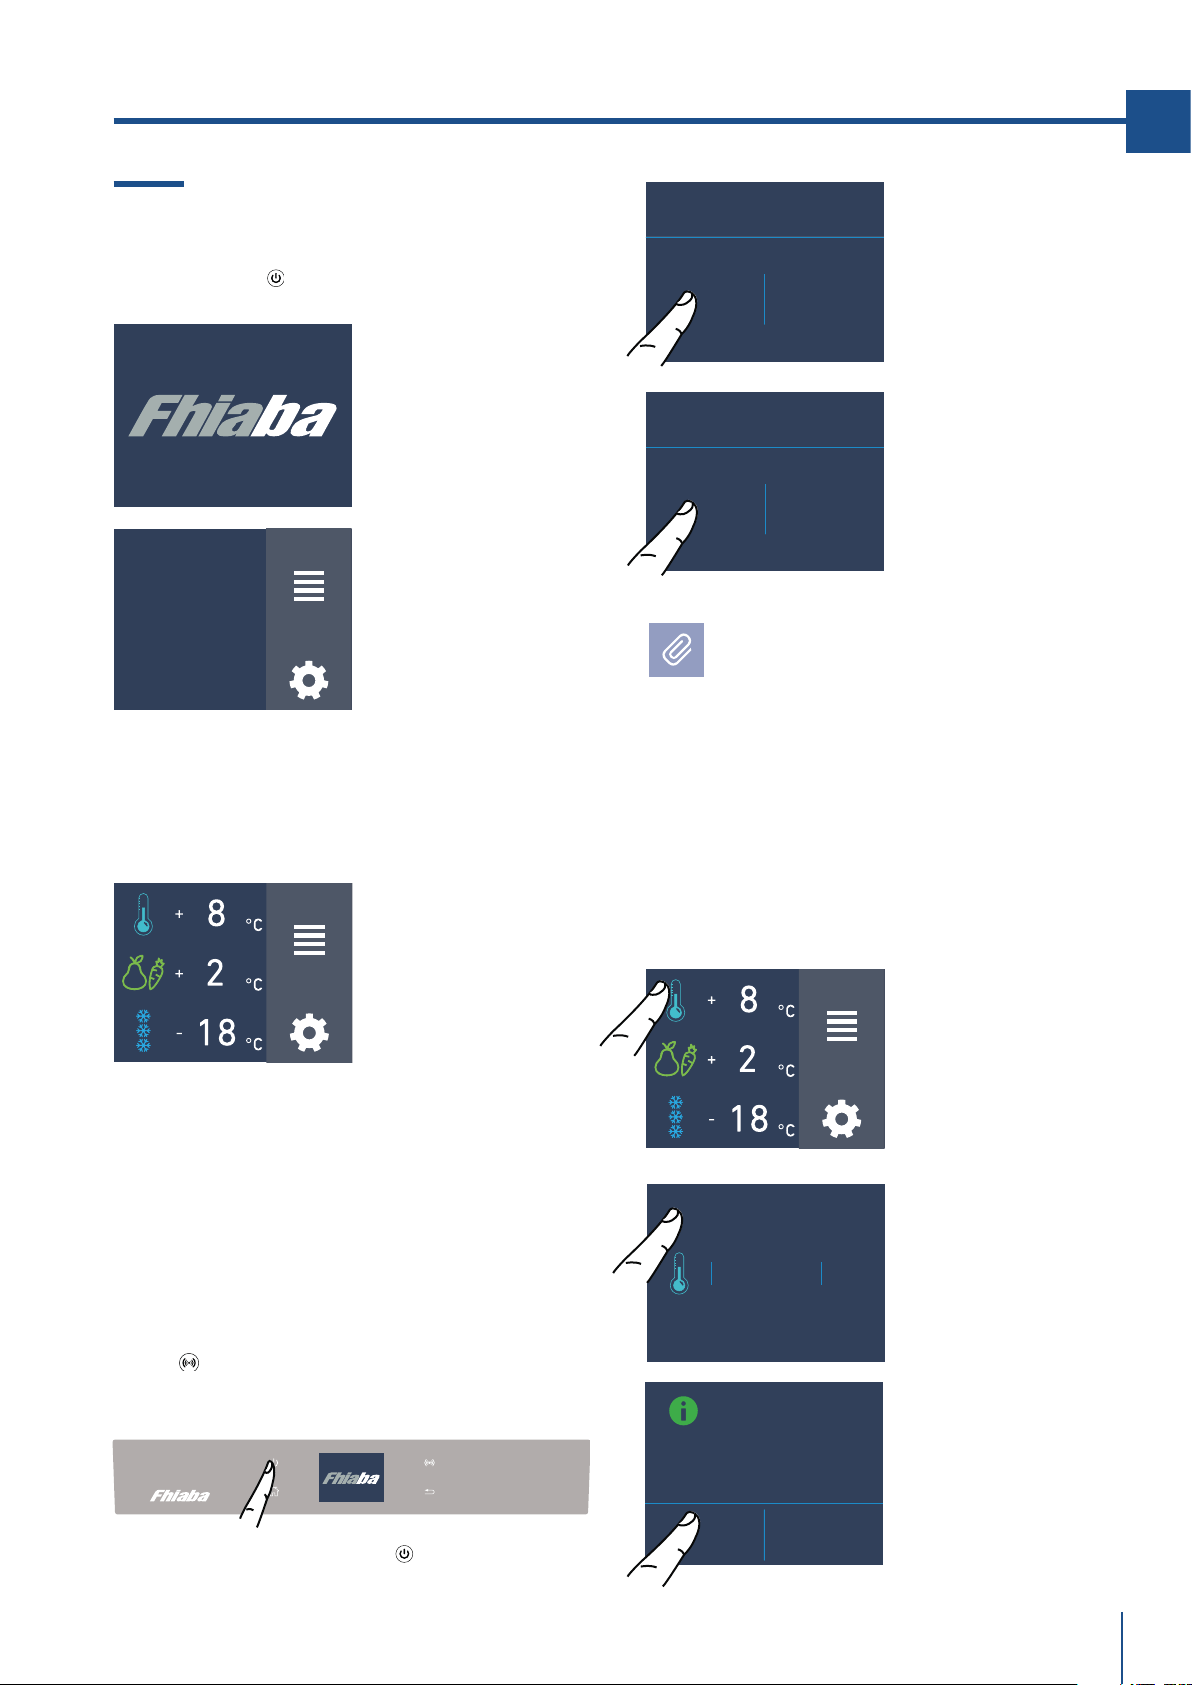
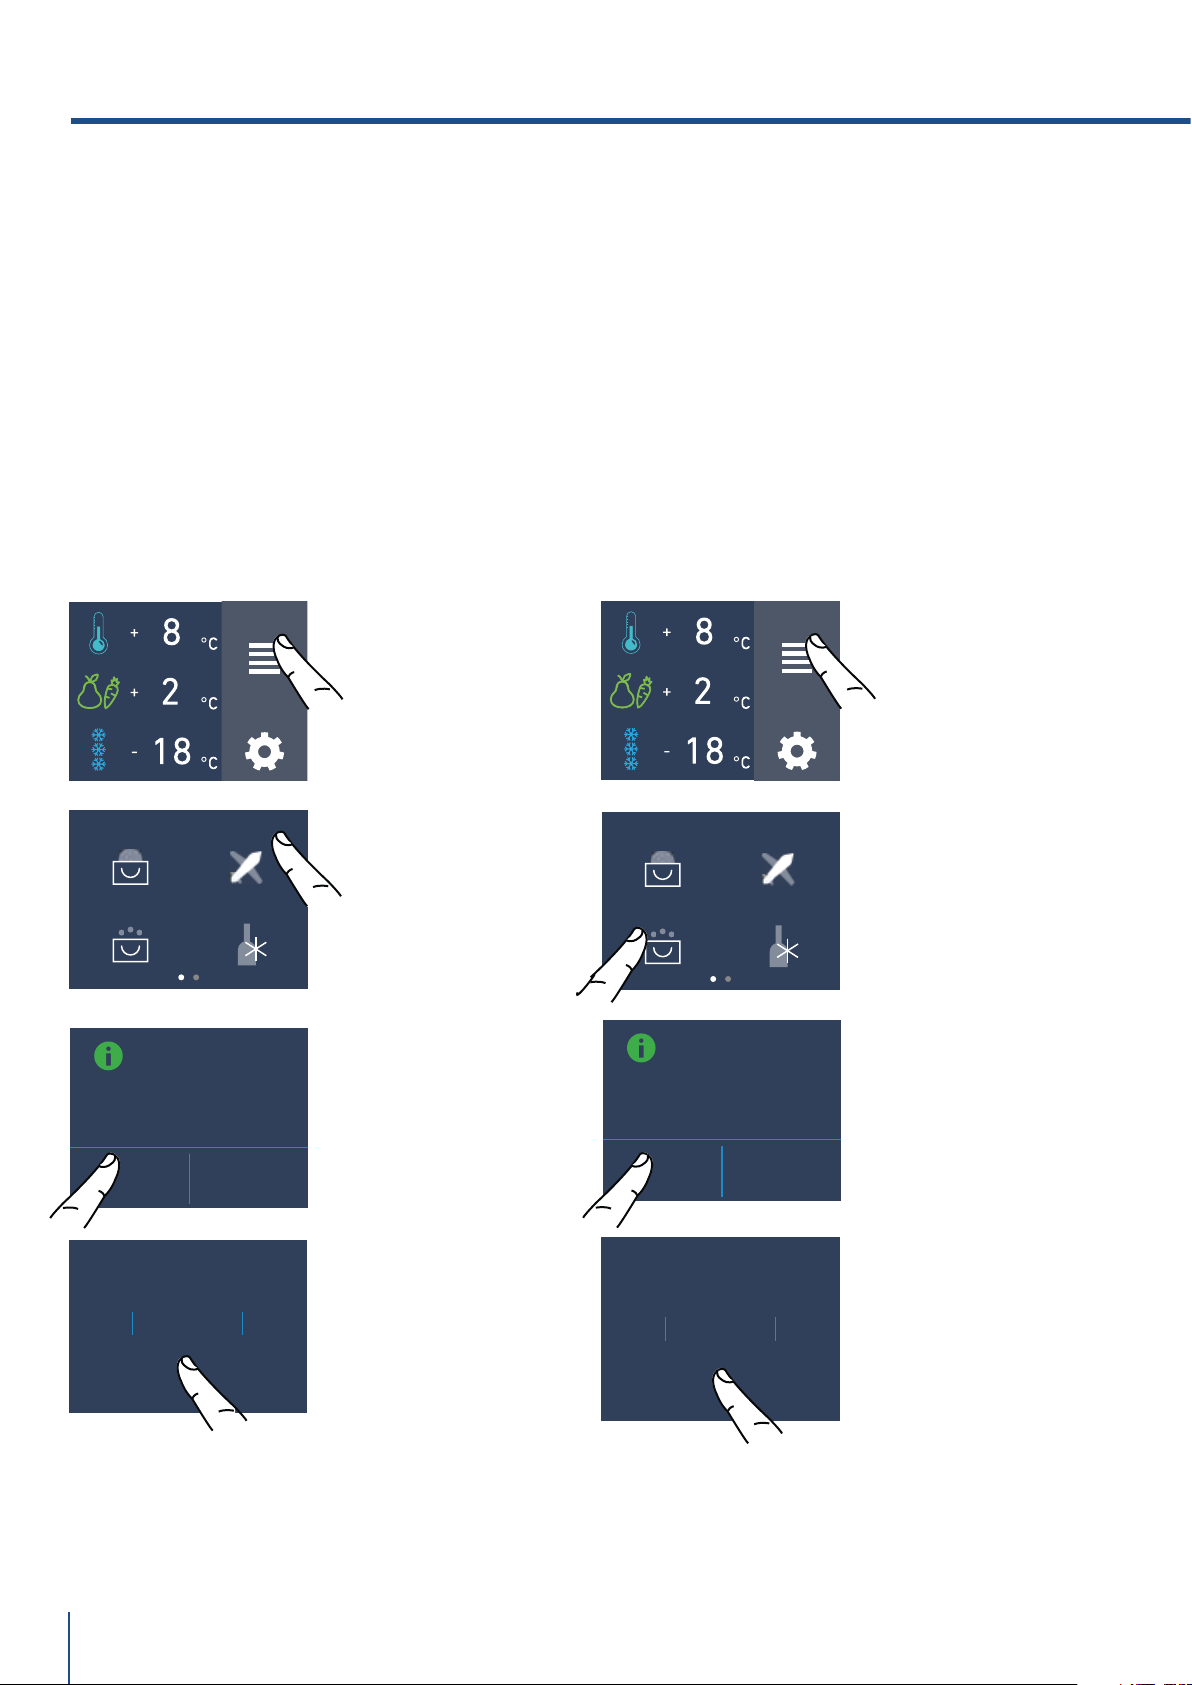
4.1 Accensione e spegnimento
Prima accensione
Toccare il tasto
. Il display visualizza le
seguenti schermate di avvio:
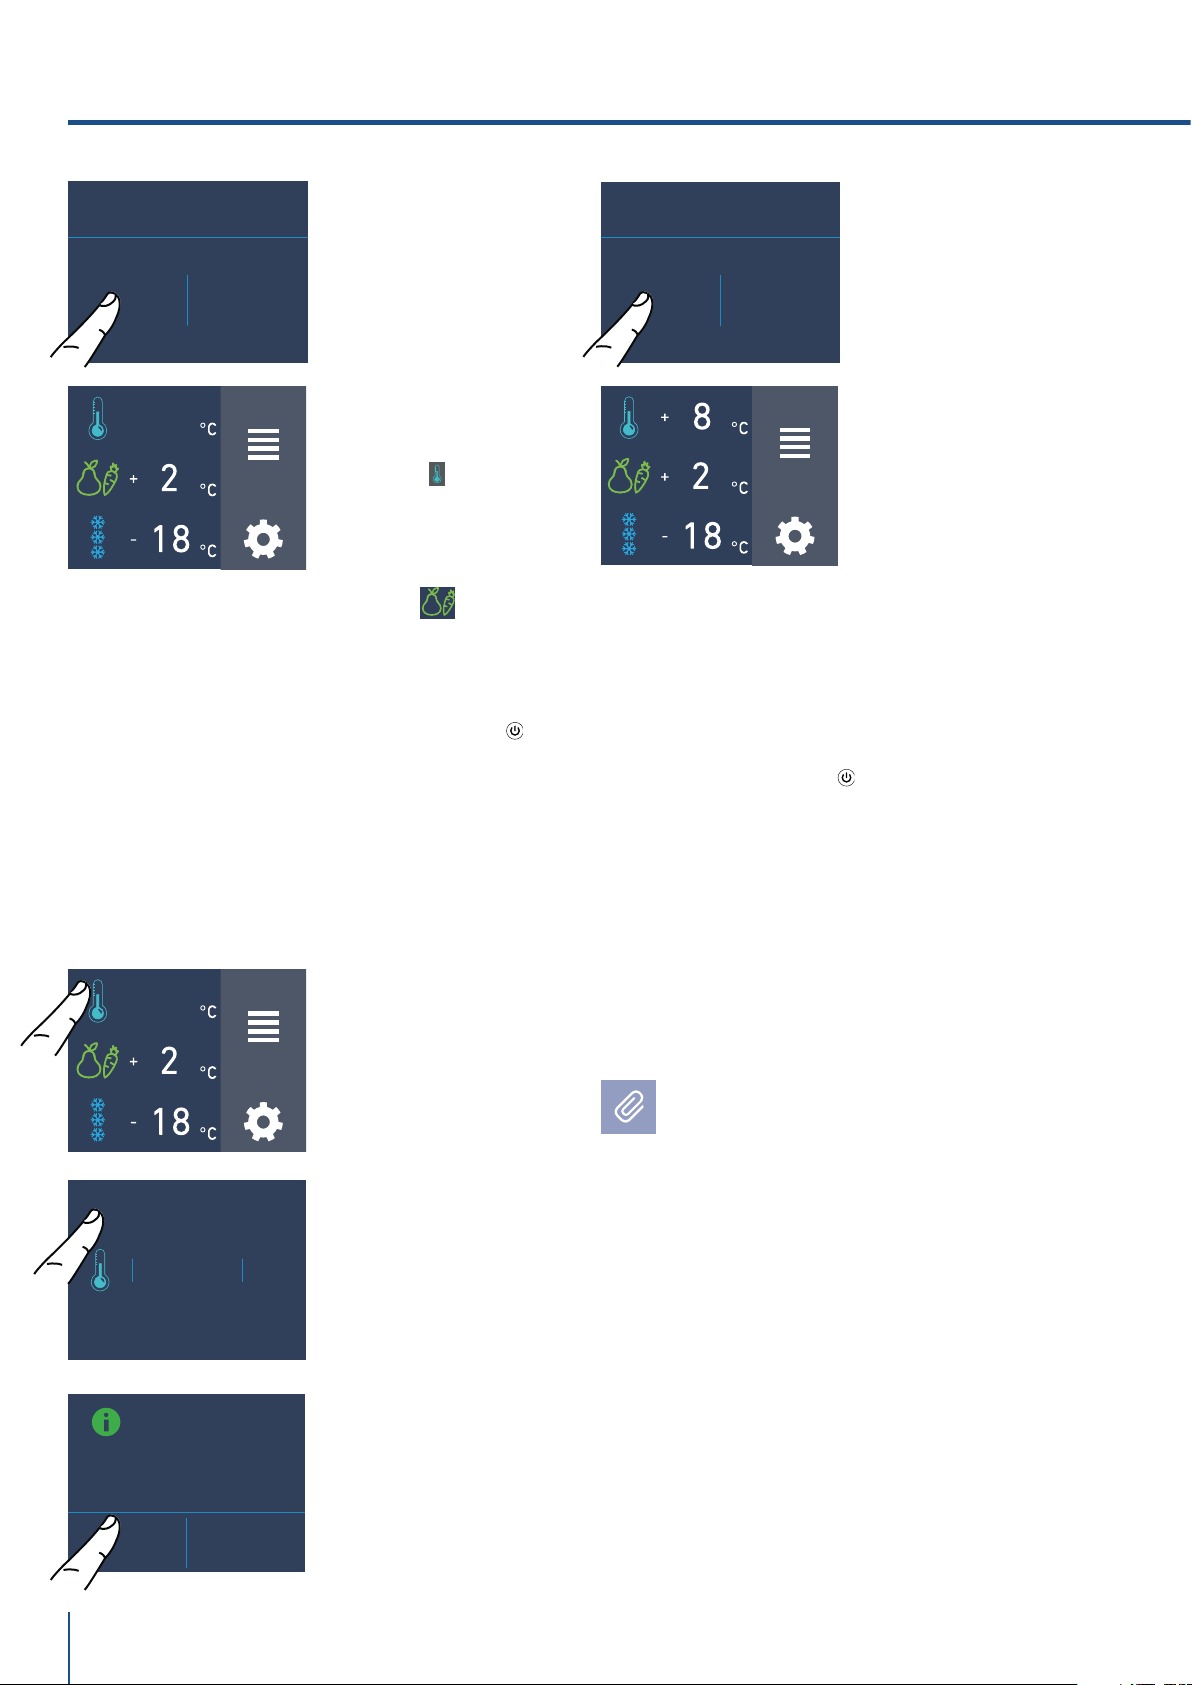
Spegnimento vani frigo e fresco.
(Modello 1T, OT e OH)
I vani frigo e fresco possono essere spenti
singolarmete mentre il cassettone TriMode,
non può essere spento se non attraverso lo
spegnimento completo dell’apparecchiatura.
Spegnimento.
4. ACCENSIONE DELL’ APPARECCHIATURA
FUNZIONI
IMPOSTAZIONI
FUNZIONI
IMPOSTAZIONI
FUNZIONI
IMPOSTAZIONI
INITIAL TEST...
VUOI DISATTIVARE
IL VANO?
ON OFF
(*) La schermata home varia a seconda del
modello; (vedi paragrafo 4.2 pag 13).
Il vano TriMode è predisposto nella funzionalità
freezer (-18°C). Per modificare questa
impostazione vedi funzione 5 pag. 21.
Dopo la prima accensione si raccomanda di
attendere almeno 12 ore prima di introdurre
alimenti. Durante tale periodo disattivare
eventuali messaggi sonori sfiorando il tasto
Alarm
.
4) Schermata home (*).
- vano frigo +5°C
- vano fresco +0°C
- vano TriMode -18°C
Con il frigo spento non vi sono spie che ne
attestino che è collegato a una presa elettrica.
3) Toccare l’icona
Sì per disattivare il
vano.
1) Schermata home.
2) Toccare l’icona
sì per spegnere.
1) Toccare il tasto
di spegnimento.
3) Confermare lo
spegnimento
toccando l’icona On.
1) Logo Fhiaba.
2) Test iniziale
(dura 3 minuti).
3) Il display visualizza la schermata principale
con le temperature ambiente rilevate dal frigo
all'interno dei vani. Automaticamente
l'apparecchio inizia a raffreddare, fino a
raggiungere le seguenti temperature ideali
preimpostate.
2) Toccare l’icona
off.
PROCEDERE CON LO
SPEGNIMENTO?
SÌ NO
VUOI PROCEDERE?
SÌ NO
+ 2 °C
+ 4
+ 3
0
+ 1
OK
OFF
www.fhiaba.com · [email protected] · Info Line +39 0434 420160
16
Se alla prima accensione non appare la scrit-
ta Fhiaba, ma appaiono altre scritte, significa
che l’apparecchiatura ha già iniziato la proce-
dura di rareddamento.
Durante la prima accensione non sarà possibi-
le utilizzare la schermata home per un’even-
tuale modifica delle preimpostazioni di fabbri-
ca, fino al raggiungimento della temperatura
preimpostata. È possibile tuttavia regolare da
subito l’ora e la data, parametri comunque ne-
cessari per attivare alcune funzioni speciali.
Ad ogni accensione l’apparecchiatura esegue
una procedura di autodiagnosi della durata di
3 minuti prima di avviarsi completamente.
Se si spegne solo il vano frigo o il vano fresco,
il relativo ventilatore continua a funzionare
autonomamente per prevenire la possibile
formazione di cattivi odori e mue.
Riattivare i vani.
Nel caso si desideri riaccende i vani frigo e fresco.
Spegnimento per lunghi periodi
Durante periodi di assenza molto lunghi è
consigliabile spegnere l’apparecchio toccando
l’icona del spegnimento
e staccare la spina, o
agire sull’interruttore omnipolare che lo
alimenta.
Svuotare l'apparecchio di tutto il suo contenuto,
pulirlo, asciugarlo e lasciare le porte ed i
cassetti parzialmente aperti affinchè non si
formino cattivi odori.
+ 2
°C
+ 4
+ 3
0
+ 1
OK
OFF
FUNZIONI
IMPOSTAZIONI
VUOI ATTIVARE IL
VANO?
ON OFF
Per lo spegnimento del vano fresco seguire
la stessa sequenza.
Riaccensione, vani frigo e fresco.
Per riaccende l'apparecchio premere il tasto
,
il display si accenderà e compariranno di nuovo
le schermate di avvio e la schermata home con
la temperatura rilevata dal frigo, all'interno dei
vani. Il frigo inizierà a raffreddare raggiungendo
le temperature preimpostate.
VUOI PROCEDERE?
SÌ NO
VUOI PROCEDERE?
SÌ NO
3) Toccare l’icona
Sì.
1)Schermata home.
Ad esempio per
riaccendere il vano
frigo, toccare
l’icona off.
5) Nella schermata
home appare
l'icona off, ad
indicare che il vano
frigo è spento.
5) Ora si riaccendono
il vano frigo. Si apre
la schermata home.
2) Toccare l’icona
on.
4) Toccare l’icona
Sì per confermare
la disattivazione.
4) Toccare l’icona
Sì per confermare
l’attivazione.
FUNZIONI
IMPOSTAZIONI
OFF
FUNZIONI
IMPOSTAZIONI
OFF
La stessa procedura è richieta qualora si voglia
riaccendere io vano fresco.
4. ACCENSIONE DELL’ APPARECCHIATURA
www.fhiaba.com · [email protected] · Info Line +39 0434 420160
17
IT
3) Toccare l’icona ok
per confermare la
temperatura
desiderata.
4.2 Come regolare la temperatura dei
vani.
Ogni modello è attentamente testato prima di la-
sciare la fabbrica, e regolato in modo tale da as-
sicurare alte prestazioni e consumi ottimali.
Di norma non è quindi necessario modificare le
impostazioni di fabbrica.
I
FUNZIONI
IMPOSTAZIONI
Vano frigo
Vano frigo
Vano frigo
Cassettone
freezer
(TriMode)
Vano freezer
(TriMode)
Vano freezer
(TriMode)
Vano Fresco
(modelli 1T).
Temperature
preimpostate
Temperature
preimpostate
Temperatura
preimpostata
Temperatura
preimpostata
Modificare la temperatura dei vani.
Esempio: Come modificare la temperatura vano
Frigo.
1) Schermata home.
Toccare l’icona
del
vano frigo.
2) Scorrere verso
l’alto/basso sulla
scheda per selezio-
nare la temperatura
desiderata.
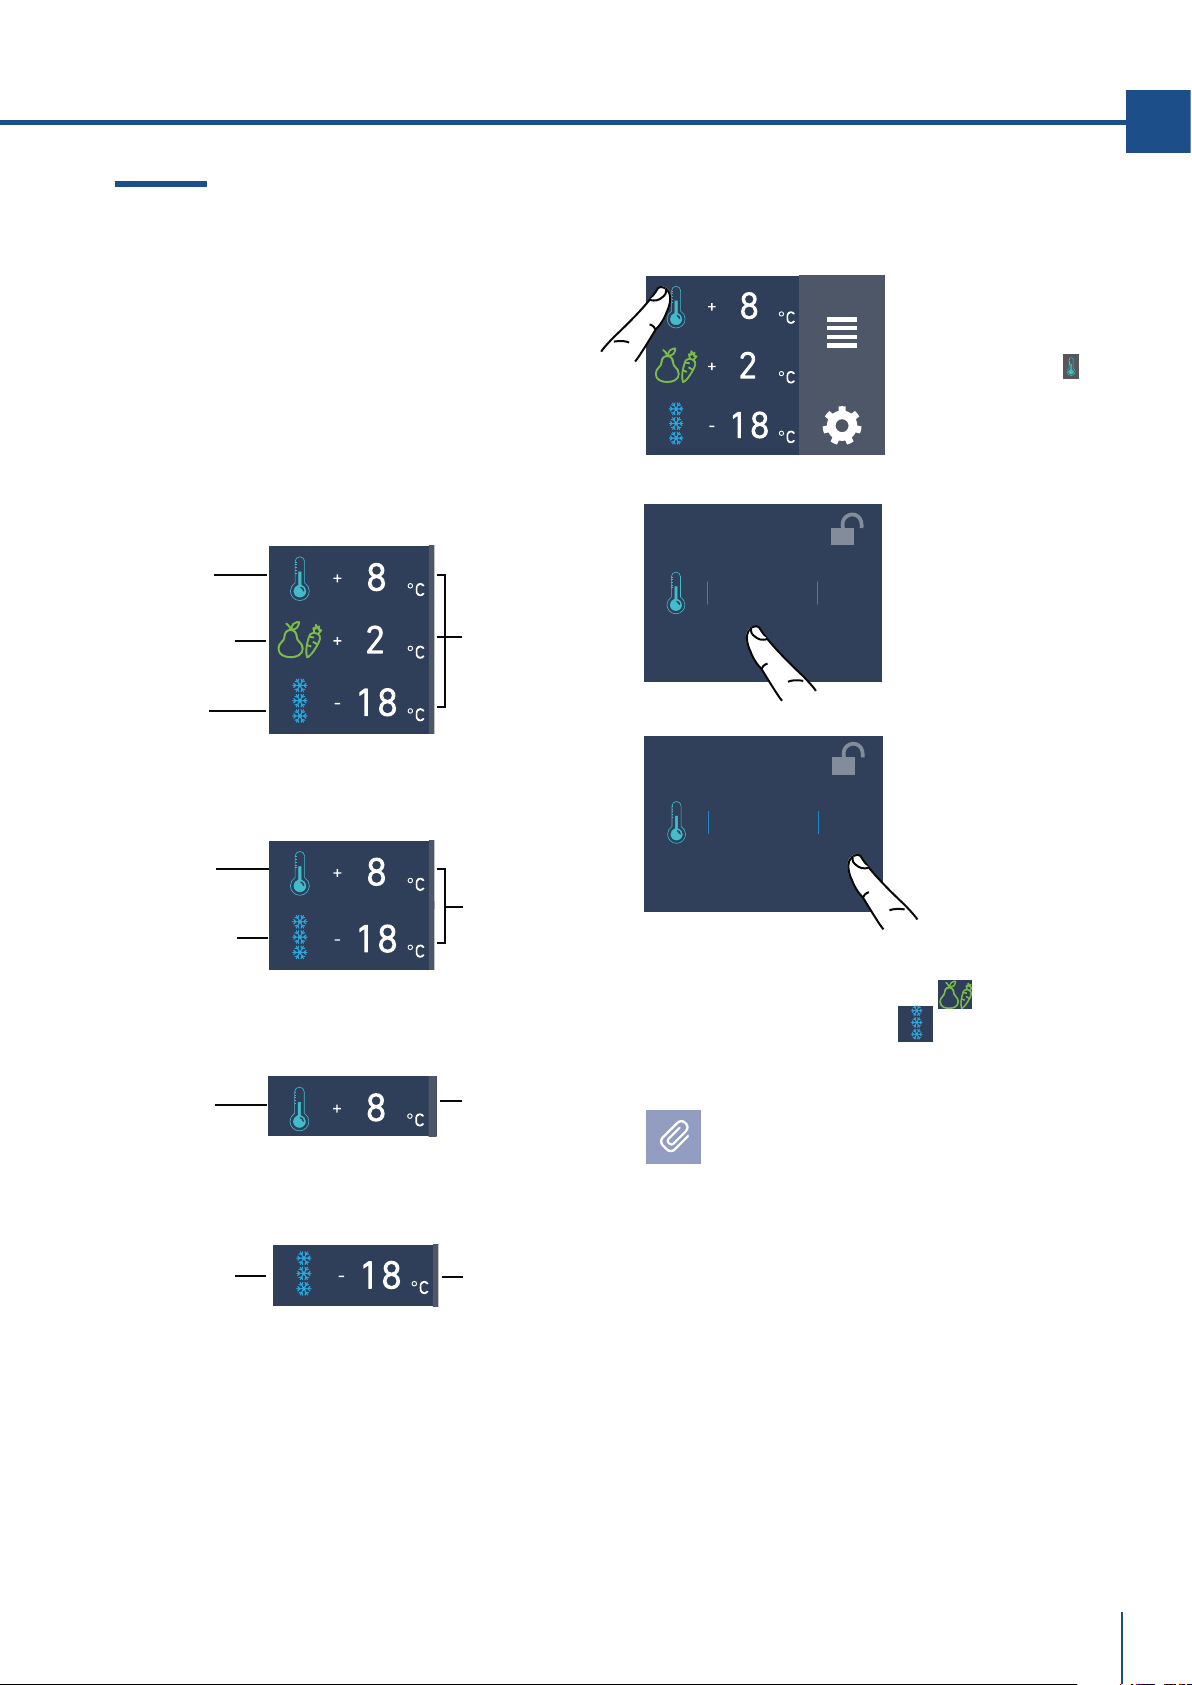
frigo da +2°C a +8°C
Modello 1T
Modello 0T/0H
Modello 0FR
Modello 0FZ
La stessa procedura è richiesta per impostare la
temperatura nel vano Fresco da -2°C a +2°C
e nel cassettone Trimode da -15°C a -22°C.
Come si presenta la schermata home nei vari
modelli:
La temperatura visualizzata può variare
leggermente rispetto a quella impostata in
seguito alla continua apertura delle porte,
o all’inserimento di alimenti a temperatura
ambiente o in grandi quantità.
Possono essere necessarie dalle 6 alle 12
ore per raggiungere la temperatura selezio-
nata.
+ 2 °C
+ 4
+ 3
0
+ 1
OK
ON
+ 2
°C
+ 4
+ 3
0
+ 1
OK
ON
www.fhiaba.com · [email protected] · Info Line +39 0434 420160
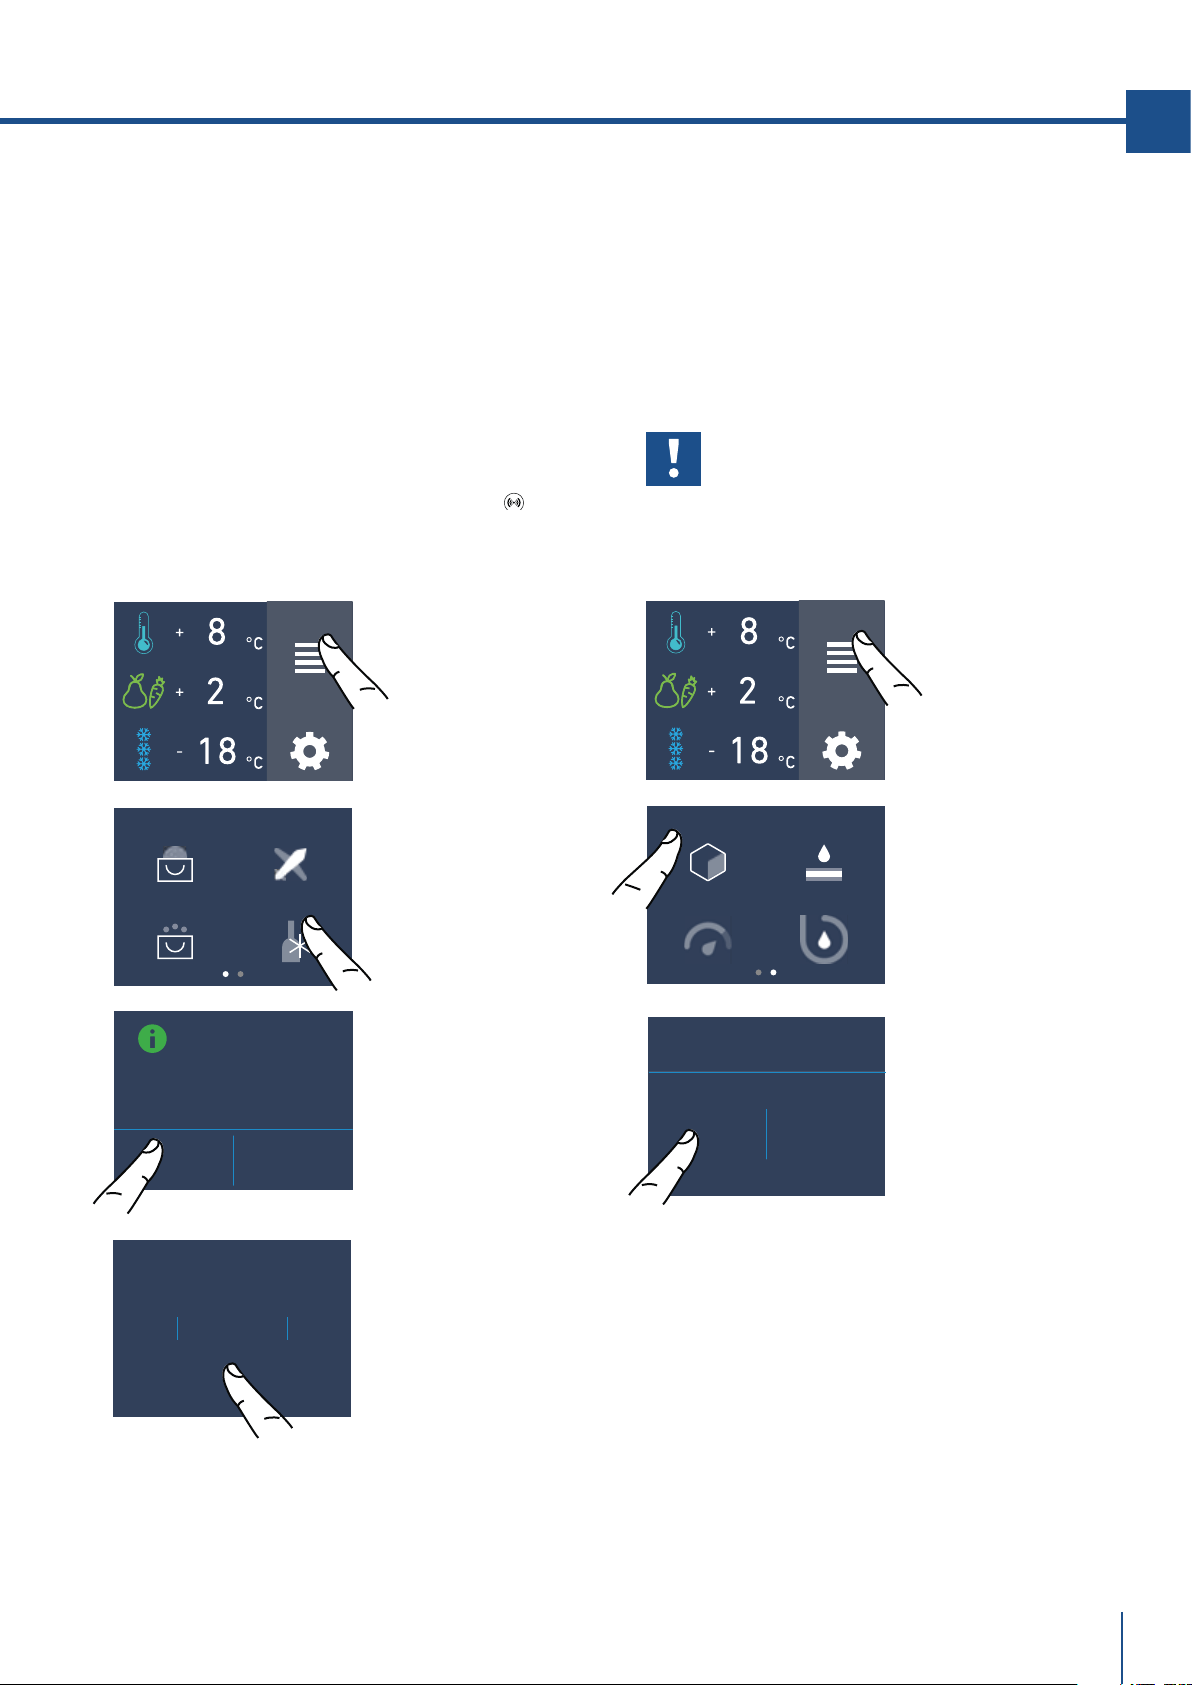
18
Un sistema di controllo integrato fornisce infor-
mazioni, attraverso segnali luminosi o messaggi
testuali visualizzati sul display.
Il segnale sonoro che accompagna alcuni dei
segnali di anomalia, può essere disattivato toc-
cando il tasto Alarm
sul pannello di controllo
principale.
L’elenco dei segnali di anomalia è riportato alla
fine di questo manuale (vedi paragrafo 12.2 pag
34).
4.3 Segnali informativi e di anomalia
sul display
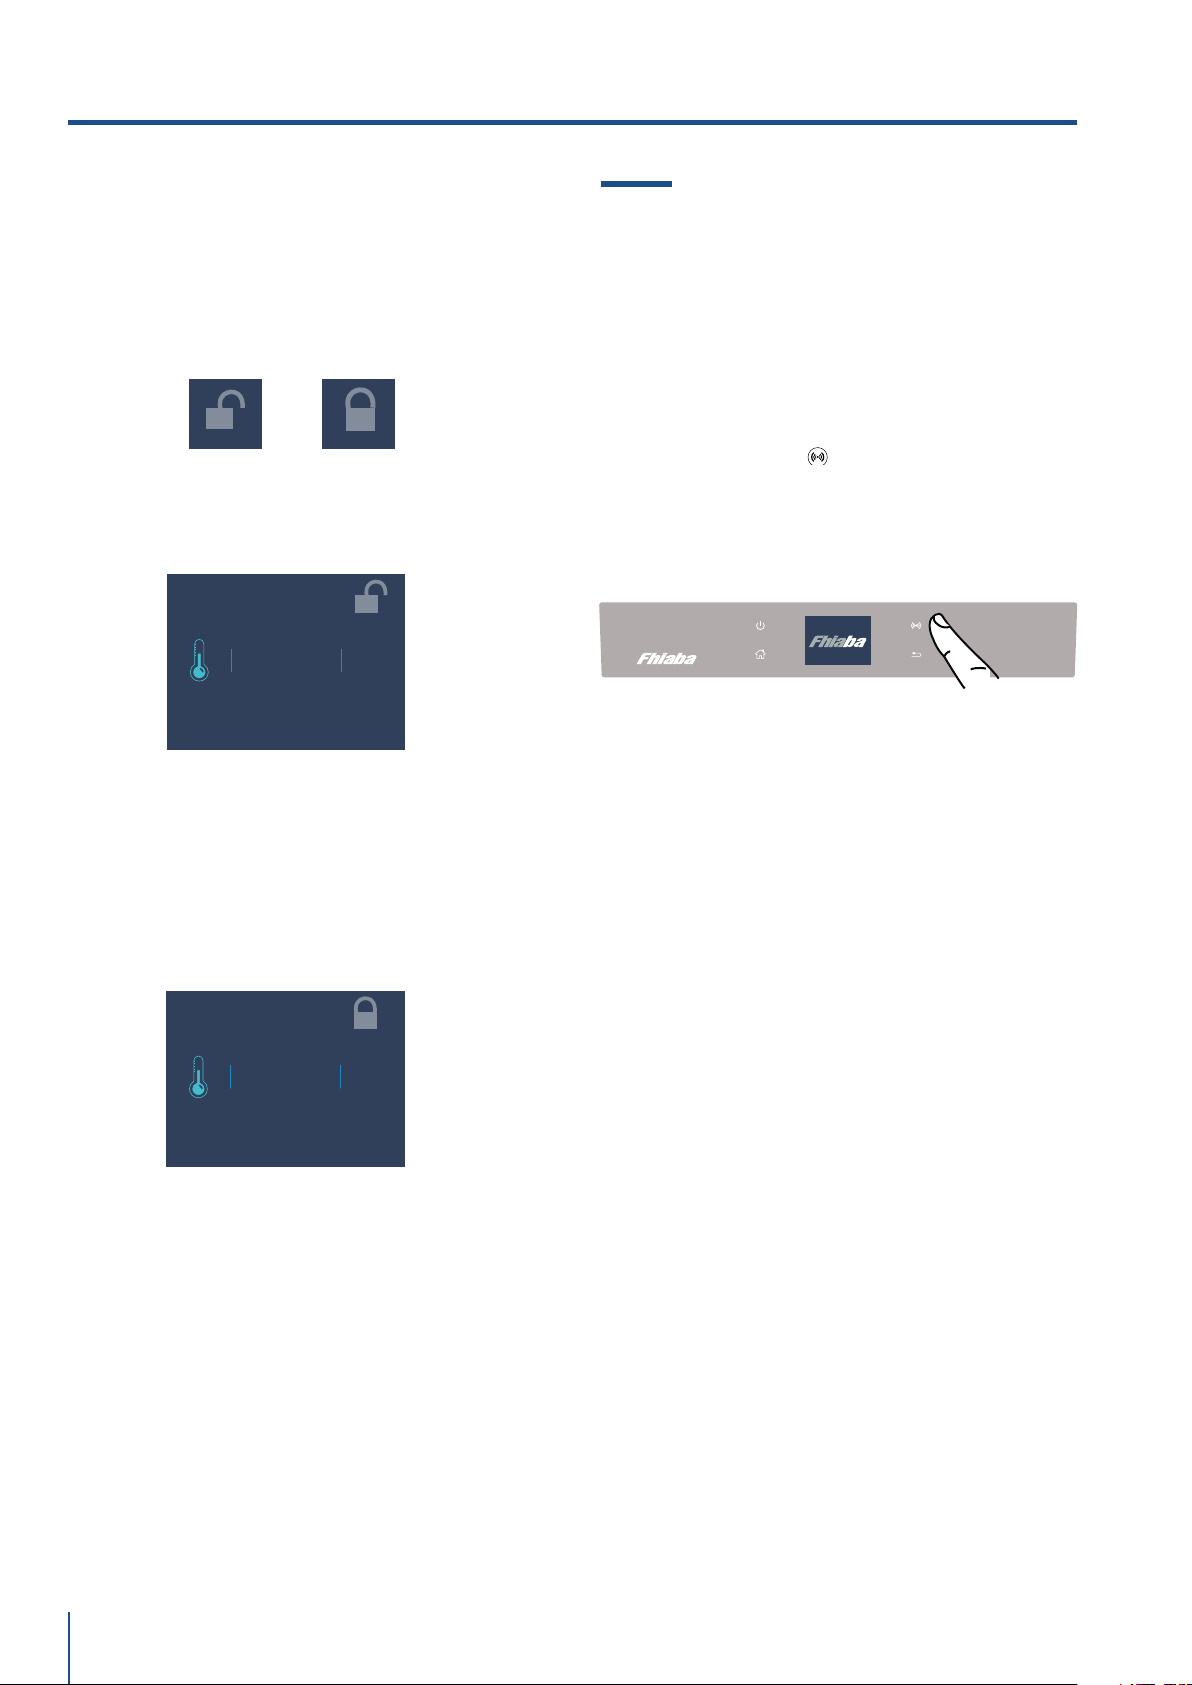
Icona del lucchetto.
L'icona del lucchetto viene visualizzata quando
si impostano le temperature.
Il lucchetto aperto/chiusto sta a indicare che è
possibile andare a modificare o meno le tempe-
ature dei vani.
Normalmente si può vedere un lucchetto giallo
aperto; in tal caso si può scorrere col dito sul
display verso alto/basso, selezionare la temper-
tura desiderata e premere OK per confermare.
Invece si potrà vedere il lucchetto giallo chiuso
se l'utente ha attivato alcune funzioni (descritte
nel paragrafo 5.1 pagina 15) che vanno a modifi-
care l'impostazione dei vani frigo, fresco e free-
zer (TriMode), pertanto l'utente in tale situazione
non potrà più modificare le temperature dei vani.
Quindi se vado a toccare l'icona funzioni e vado
a impostare una funzione specifica (ad esempio
vacanza, shopping trimode, shopping freezer
ecc...), andando ad attivare una di queste funzio-
ni vedrò il il lucchetto giallo chiuso e non sarà
più possibile modificare la temperatura dei vani
finchè la funzione non sarà completata oppure
se vado manualmente a disattivarla.
4. ACCENSIONE DELL’ APPARECCHIATURA
+ 2 °C
+ 4
+ 3
0
+ 1
OK
ON
+ 2 °C
+ 4
+ 3
0
+ 1
OK
ON
www.fhiaba.com · [email protected] · Info Line +39 0434 420160
19
IT
1) Shopping frigo
(Shopping freezer sui modelli
0FZ)
2) Vacanza.
3) Shopping Trimode.
(no su modelli 0FR).
4) Bottle Cooler.
(no su modelli 0FR).
5) Ice Maker.
(optional, no su modelli 0FR).
6) Filtro Acqua
(optional, no su modelli 0FR).
7) Water Dispenser
(optional solo per modelli 0FR).
8) Pulizia Circuito
(optional, no su modelli 0FR).
SHOPPING FRIGO
VACANZA
SHOPPING
TRIMODE
BOTTLE COOLER
5. PERSONALIZZARE FUNZIONI E IMPOSTAZIONI
INFORMAZIONI PER L’UTILIZZO DEL DISPLAY.
5.1 Funzioni.
È possibile personalizzare il funzionamento del
vostro apparecchio Fhiaba per adattarlo alle
diverse esigenze di utilizzo.
Dopo aver toccato l'icona funzioni nella
schermata home verranno visualizzate le icone
con le seguenti funzioni disponibili.
1) Shopping Frigo
(Shopping freezer sui modelli 0FZ).
La funzione abbassa la temperatura frigo a +2°C
(35,6°F) per 12 ore, per permettere un più veloce
raffrescamento degli alimenti appena acquistati
e riposti. Allo scadere delle 12 ore la funzione si
disattiva automaticamente, con il ripristino della
temperatura precedentemente impostata.
È possibile programmare in anticipo l’attivazione
della funzione. Dopo un’interruzione prolungata
di corrente è necessario riattivare la funzione.
MODALITÀ
SHOPPING FRIGO
ON OFF
FUNZIONI
IMPOSTAZIONI
SHOPPING FRIGO
SHOPPING
TRIMODE
BOTTLE COOLER
VACANZA
9
ORA
11
10
7
8
OK
C) Toccare l’icona
Sì per attivare la
funzione.
B) Toccare l’icona
Shopping frigo.
D) Scorrere verso
l’alto/basso, per
impostare il tempo
desiderato e pre-
mere ok.
ICE MAKER
WATER FILTER
EROGATORE ACQUA
SYSTEM CLEANING
A) Schermata home.
Toccare l’icona
funzioni.
9) Illuminazione 12h.
(optional, frighi con porta vetro).
LUCE 12H
È possibile programmare con anticipo tra 1 e 12
ore.
www.fhiaba.com · [email protected] · Info Line +39 0434 420160
9GIORNO
11
10
7
8
OK
MODALITÀ
VACANZA
ON OFF
MODALITÀ
SHOPPING
TRIMODE
ON OFF
20
3) Shopping TriMode
(no su modelli 0FR).
La funzione deve essere attivata almeno 24 ore
prima dell’inserimento nel cassettoneTriMode di
alimenti a temperatura ambiente, o qualche ora
prima dell’inserimento di alimenti già congelati
che hanno subito un moderato innalzamento
della temperatura.
La funzione si disattiva automaticamente allo
scadere del periodo di funzionamento program-
mato. È possibile programmare in anticipo l’atti-
vazione della funzione.
Dopo un’interruzione prolungata di corrente è
necessario riattivare la funzione. È possibile pro-
grammare con un anticipo tra 1 e 12 ore.
SHOPPING FRIGO
SHOPPING
TRIMODE
BOTTLE COOLER
VACANZA
9
ORA
11
10
7
8
OK
C) Toccare il tasto
Sì per attivare la
funzione.
B) Toccare l’icona
shopping TriMode.
D) Scorrere verso
l’alto/basso per
impostare il tempo
desiderato (in ore) e
premere ok.
2) Vacanza
La funzione raccomandata in caso di assenze
prolungate in quanto consente un sensibile
risparmio di energia, porta la temperatura del
cassettone TriMode a - 18°C (46.4°F) se il vano è
impostato come freezer e a +14°C (57.2°F) se il
vano è impostato come frigo.
La funzione non è attivabile se il vano è imposta-
to come fresco. La funzione resta attiva anche
se si presenta un lungo periodo di interruzione
della corrente.
È possibile programmare un periodo da 1 a 90
giorni.
SHOPPING FRIGO
SHOPPING
TRIMODE
BOTTLE COOLER
VACANZA
C) Toccare il tasto
Sì per attivare la
funzione.
B) Toccare l’icona
Vacanza.
D) Scorrere fino a
impostare il tempo
desiderato (in giorni)
e premere ok.
FUNZIONI
IMPOST
AZIONI
FUNZIONI
IMPOSTAZIONI
A) Schermata home.
Toccare l’icona
funzioni.
A) Schermata home.
Toccare l’icona
funzioni.
5. PERSONALIZZARE FUNZIONI E IMPOSTAZIONI
www.fhiaba.com · [email protected] · Info Line +39 0434 420160
21
IT
4) Cooler Bottiglie
(no su modelli 0FR).
La funzione può essere attivata ,quando si ha la
necessità di raffreddare bevande in tempo
breve, ponendole all’interno del cassettone
Freezer.
È possibile selezionare una durata del tempo di
raffreddamento tra 1 e 45 minuti. Un segnale
sonoro segnalerà il raggiungimento della
temperatura ottimale.
Dopo il prelievo delle bevande disattivare il
segnale sonoro sfiorando il tasto Alarm
.
SHOPPING FRIGO
SHOPPING
TRIMODE
BOTTLE COOLER
VACANZA
C) Toccare l’icona
Sì per attivare la
funzione.
B) Toccare l’icona
bottle cooler.
D) Scorrere fino a
impostare il tempo
desiderato (in
minuti) e premere
ok.
37
MIN
39
38
35
36
OK
FUNZIONI
IMPOST
AZIONI
5) Attivazione dell’Ice Maker
(optional, no su modelli 0FR).
Prima di attivare l’Ice Maker per la prima volta
assicurarsi che la cartuccia del filtro dell’ac-
qua sia stata installata, ed eseguire un lavaggio
iniziale del circuito idraulico (vedi pagagrafo 5.2
pag 18). Dopo qualche minuto l’Ice Maker può
essere attivato.
FUNZIONI
IMPOST
AZIONI
ICE MAKER
FILTRO ACQUA
PULIZIA CIRCUITOEROGATORE ACQUA
B) Scorrere verso
destra due volte e
toccare l’icona ice
maker.
C) Toccare l’icona
Sì per l’attivazione
del ice maker.
ICE MAKER
ON OFF
Importante
Non attivare l’Ice Maker se
l’apparecchiatura non è collegata alla
rete idrica.
A) Schermata home.
Toccare l’icona
funzioni.
A) Schermata home.
Toccare l’icona
funzioni.
MODALITÀ BOTTLE
COOLER
ON OFF
www.fhiaba.com · [email protected] · Info Line +39 0434 420160
22
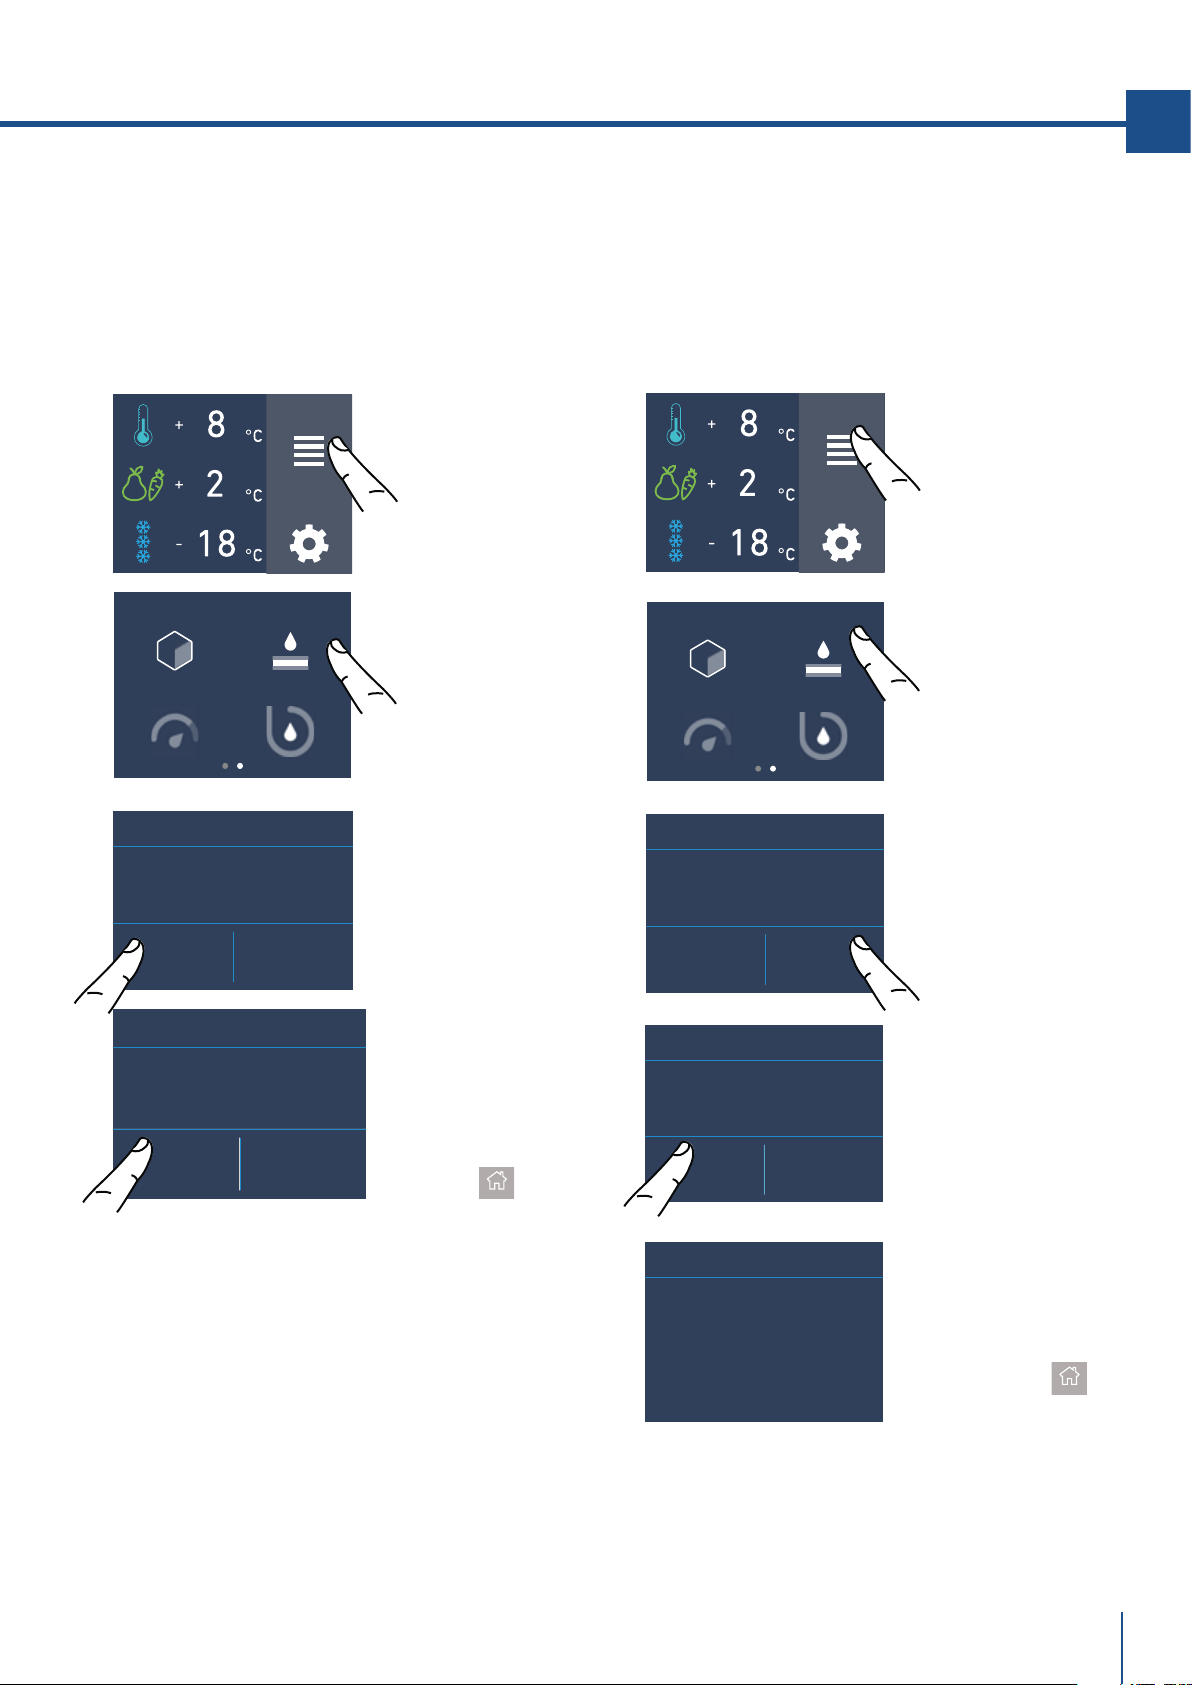
E) Vengono indicati i
giorni rimanenti pri-
ma della sostituzione
del filtro. Toccare il
tasto home.
C) Confermare la
funzione sfiorando
l’icona Sì.
ICE MAKER
FILTRO ACQUA
PULIZIA CIRCUITOEROGATORE ACQUA
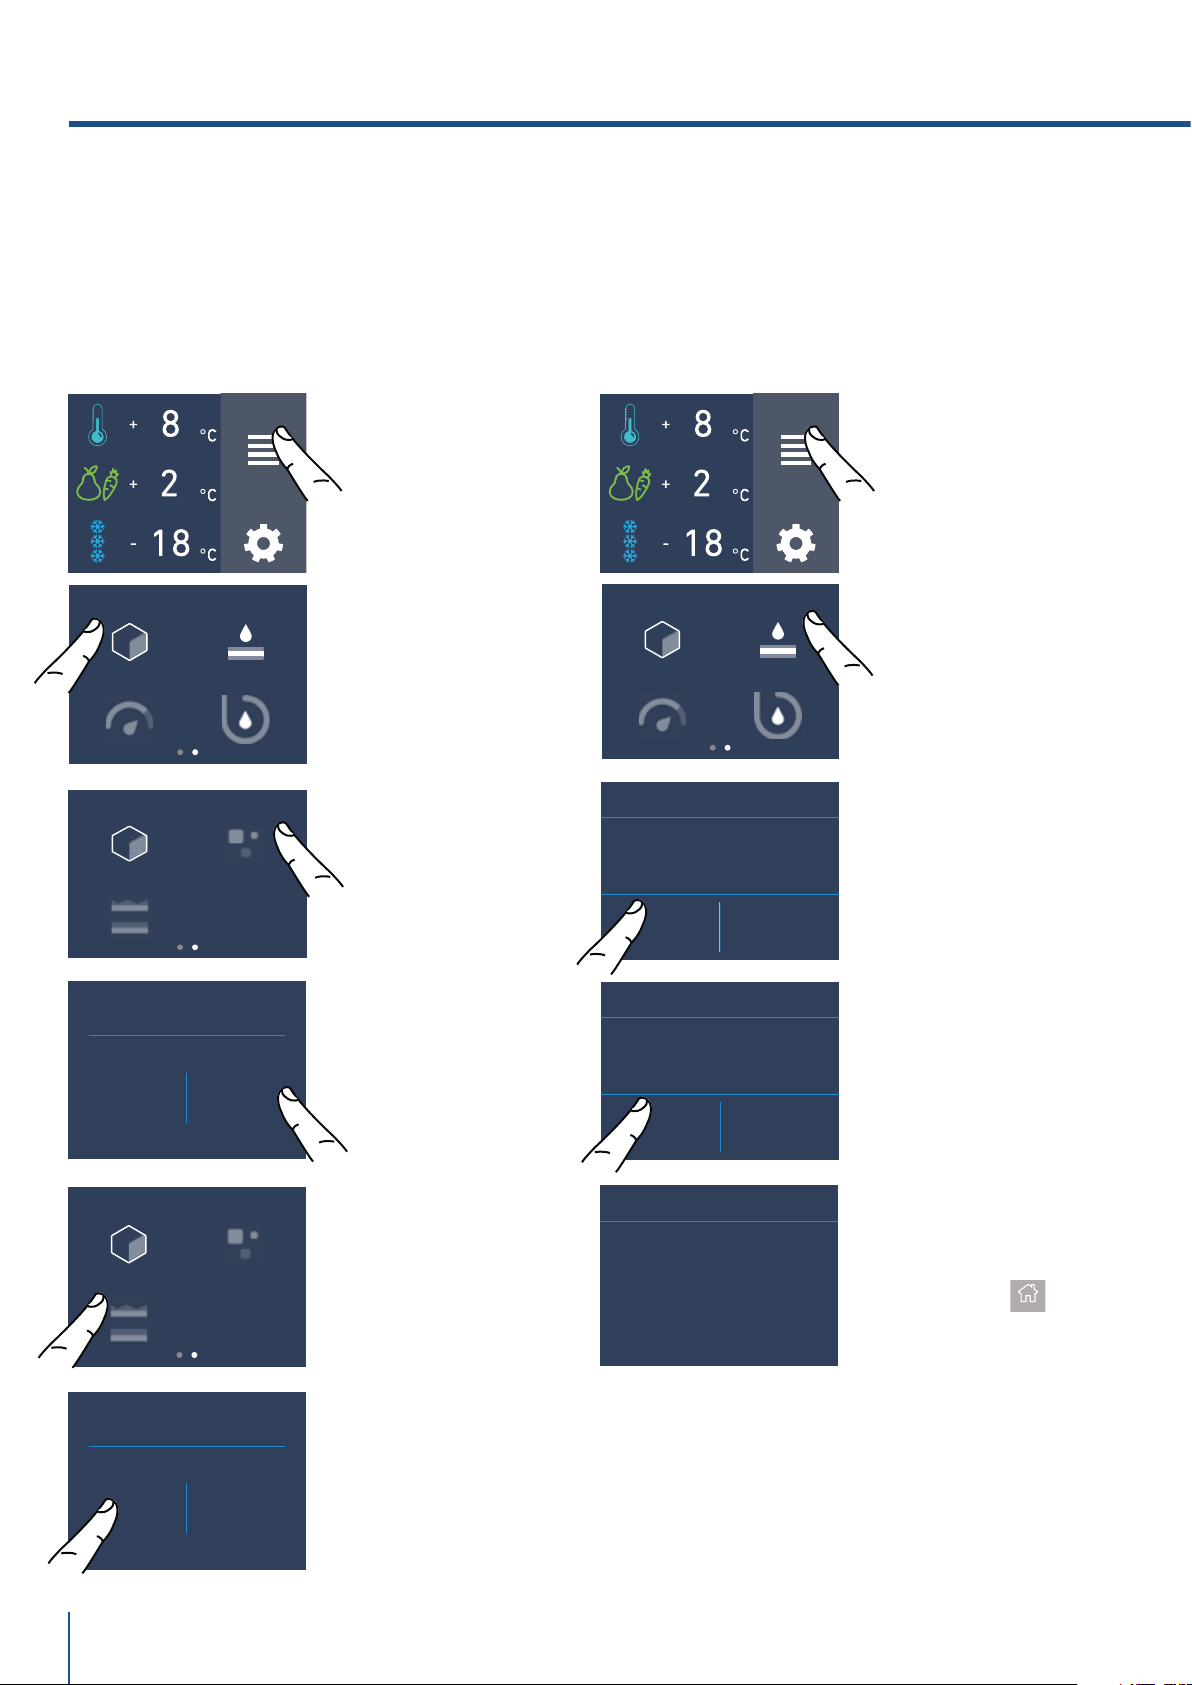
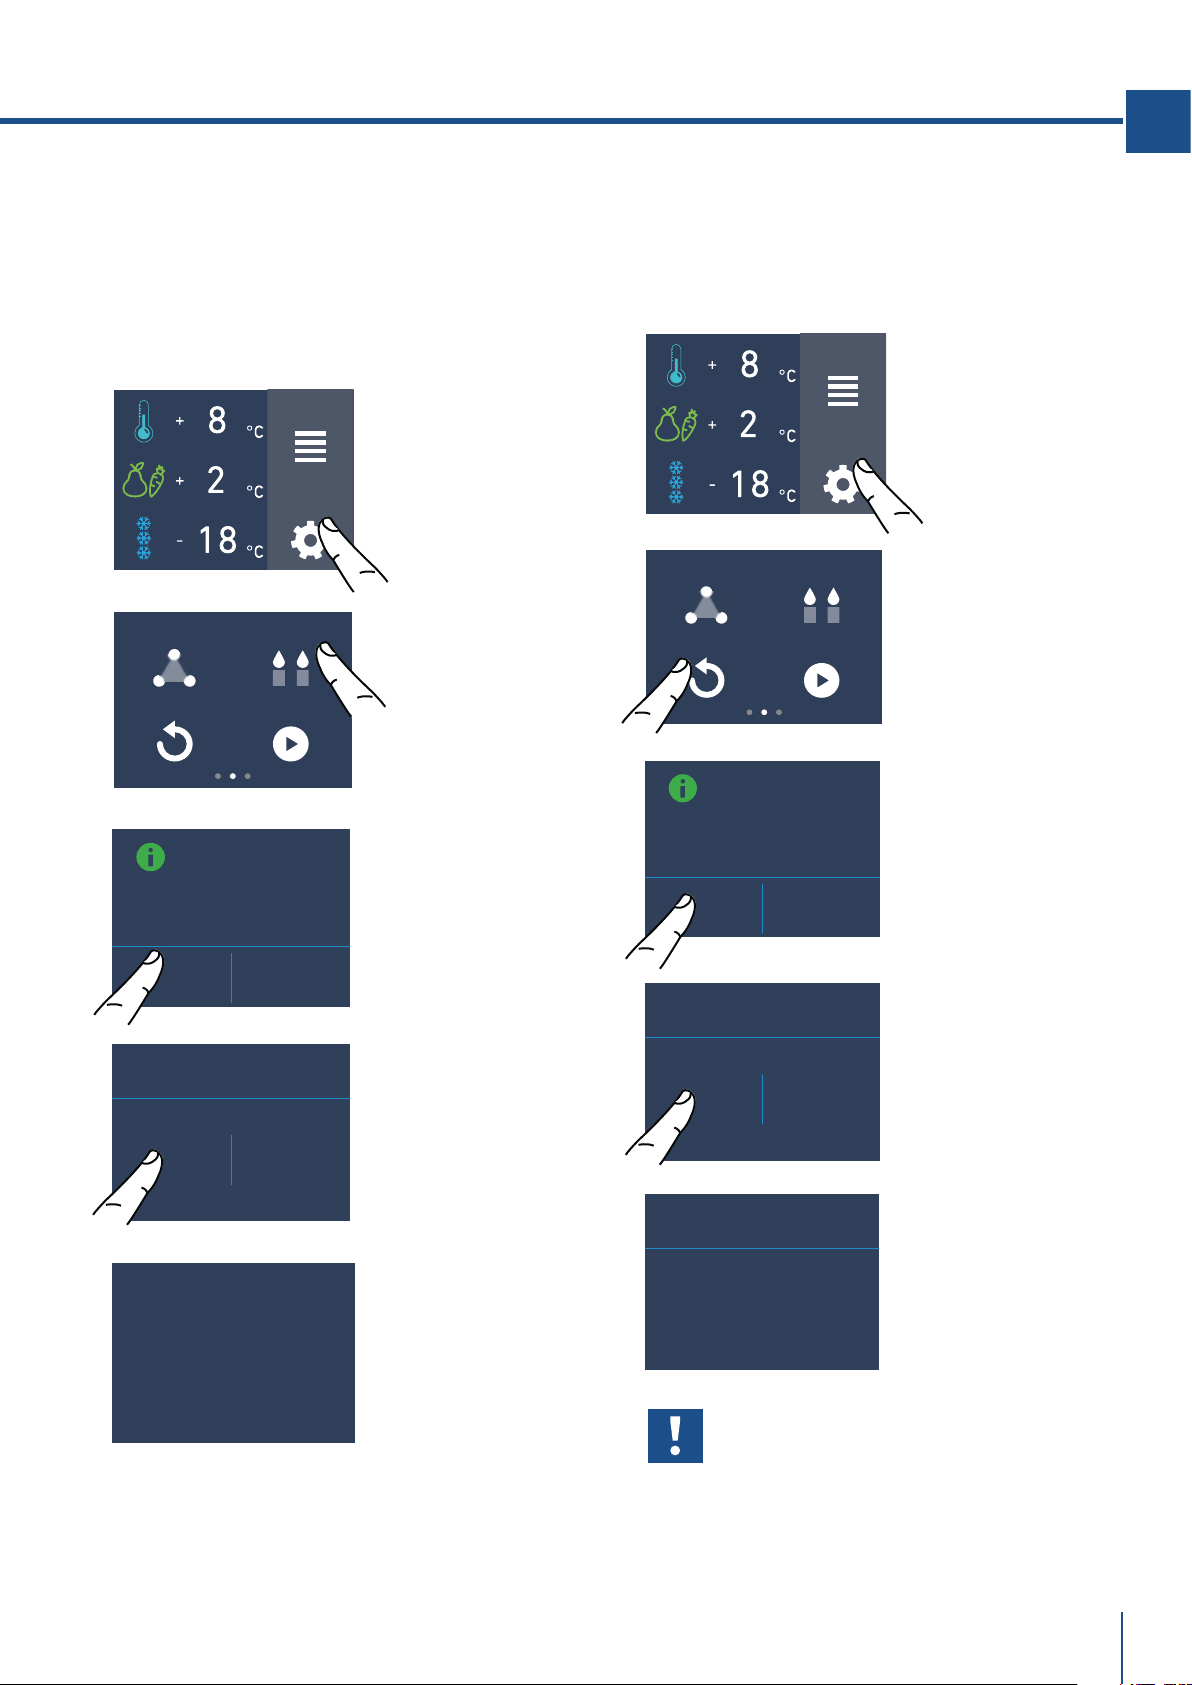
6) Filtro Acqua - attivazione
(optional, no su modelli 0FR)
Il filtro acqua è indispensabile per la depurazione
dell’acqua utilizzata per produrre ghiaccio, per
pulire il circuito o per essere erogata dal vano
frigo (water dispenser disponibile con il modello
OFR). Il display permette di visualizzare esatta-
mente tempo che resta prima dell’esaurimento
del filtro.
PROSSIMO AVVISO
MANCANO GIORNI...
120
FILTRO ACQUA
VUOI PROCEDERE?
SÌ NO
FILTRO ACQUA
Dimensione cubetti di ghiaccio Ice Maker
La funzione Ice Maker permette di selezionare la
dimensione dei cubetti di ghiaccio, scegliendo tra
grandi (impostazione base) e medi, e di attivare
la funzione superice, che aumenta la quantità di
ghiaccio prodotta.
La funzione SuperIce si disattiva automatica-
mente dopo 24 ore.
FUNZIONI
IMPOSTAZIONI
FUNZIONI
IMPOST
AZIONI
A) Schermata home.
Toccare l’icona
funzioni.
A) Schermata home.
Toccare l’icona
funzioni.
ICE MAKER
FILTRO ACQUA
PULIZIA CIRCUITOEROGATORE ACQUA
B) Scorrere verso
detra due volte per
arrivare all’icona
ice maker.
B) Scorrere col
dito due volte per
toccare l’icona
filtro acqua.
ICE MAKER ON/OFF
SET CUBE SIZE
SUPERICE
ICE MAKER ON/OFF
SET CUBE SIZE
SUPERICE
DIMENSIONE
CUBETTI
MEDI GRANDI
D) Toccare l’icona
medi/grandi per
scegliere la
dimensione cubetti
desiderata.
C) Toccare l’icona
dimensione
cubetti.
E) Se si desidera
aumentare la
quantità di ghiaccio
prodotta, toccare
l’icona superice per
far produrre al
freezer fino a 1,5 kg
di ghiaccio al giorno.
F) Confermare o
meno la funzione
toccando il tasto Si
o No.
D) Confermare la
funzione sfiorando
l’icona Sì.
ABILITARE AVVISO?
SÌ NO
FILTRO ACQUA
5. PERSONALIZZARE FUNZIONI E IMPOSTAZIONI
ATTIVAZIONE
SUPERICE
ON OFF
www.fhiaba.com · [email protected] · Info Line +39 0434 420160
23
IT
PROSSIMO AVVISO
MANCANO GIORNI...
120
FILTRO ACQUA
C) Toccare l’icona
reset.
D) Toccare il tasto
Sì per procedere.
ICE MAKER
FILTRO ACQUA
PULIZIA CIRCUITOEROGATORE ACQUA
PROSSIMO AVVISO
MANCANO GIORNI...
365
OFF RESET
FILTRO ACQUA
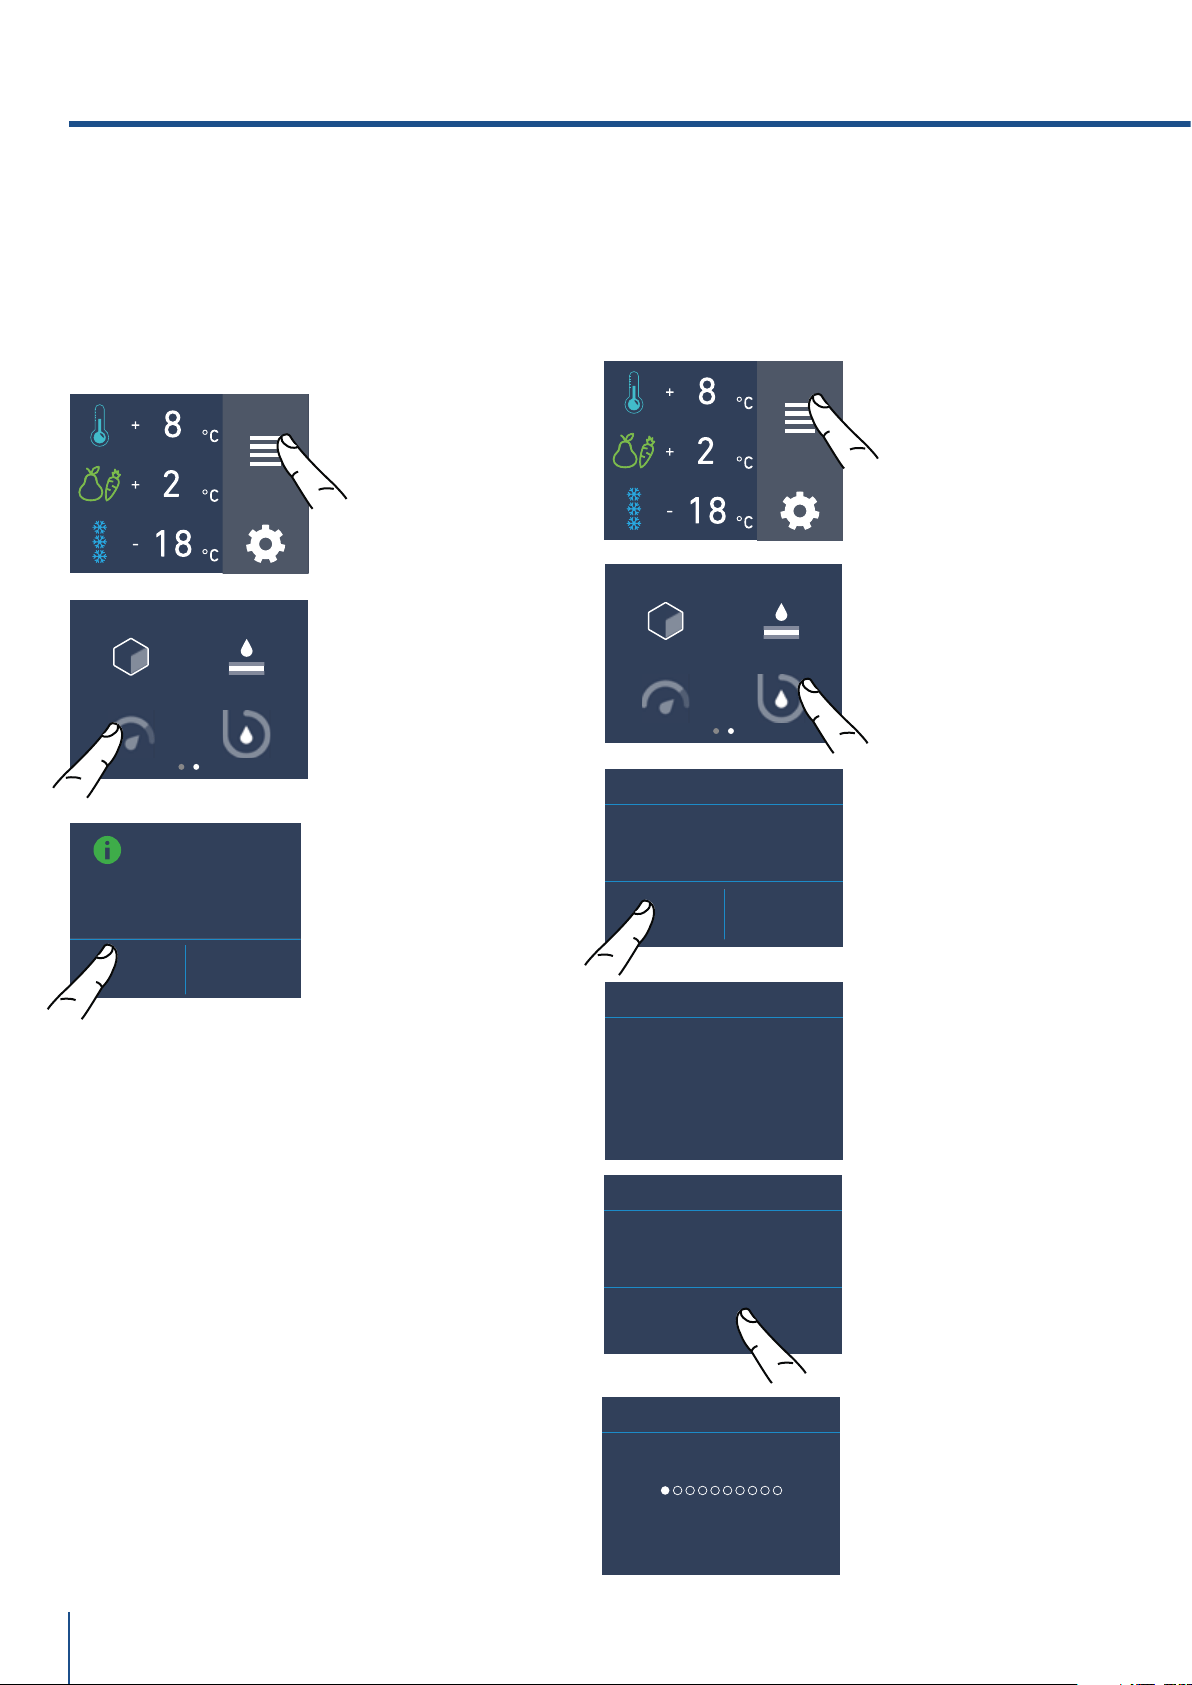
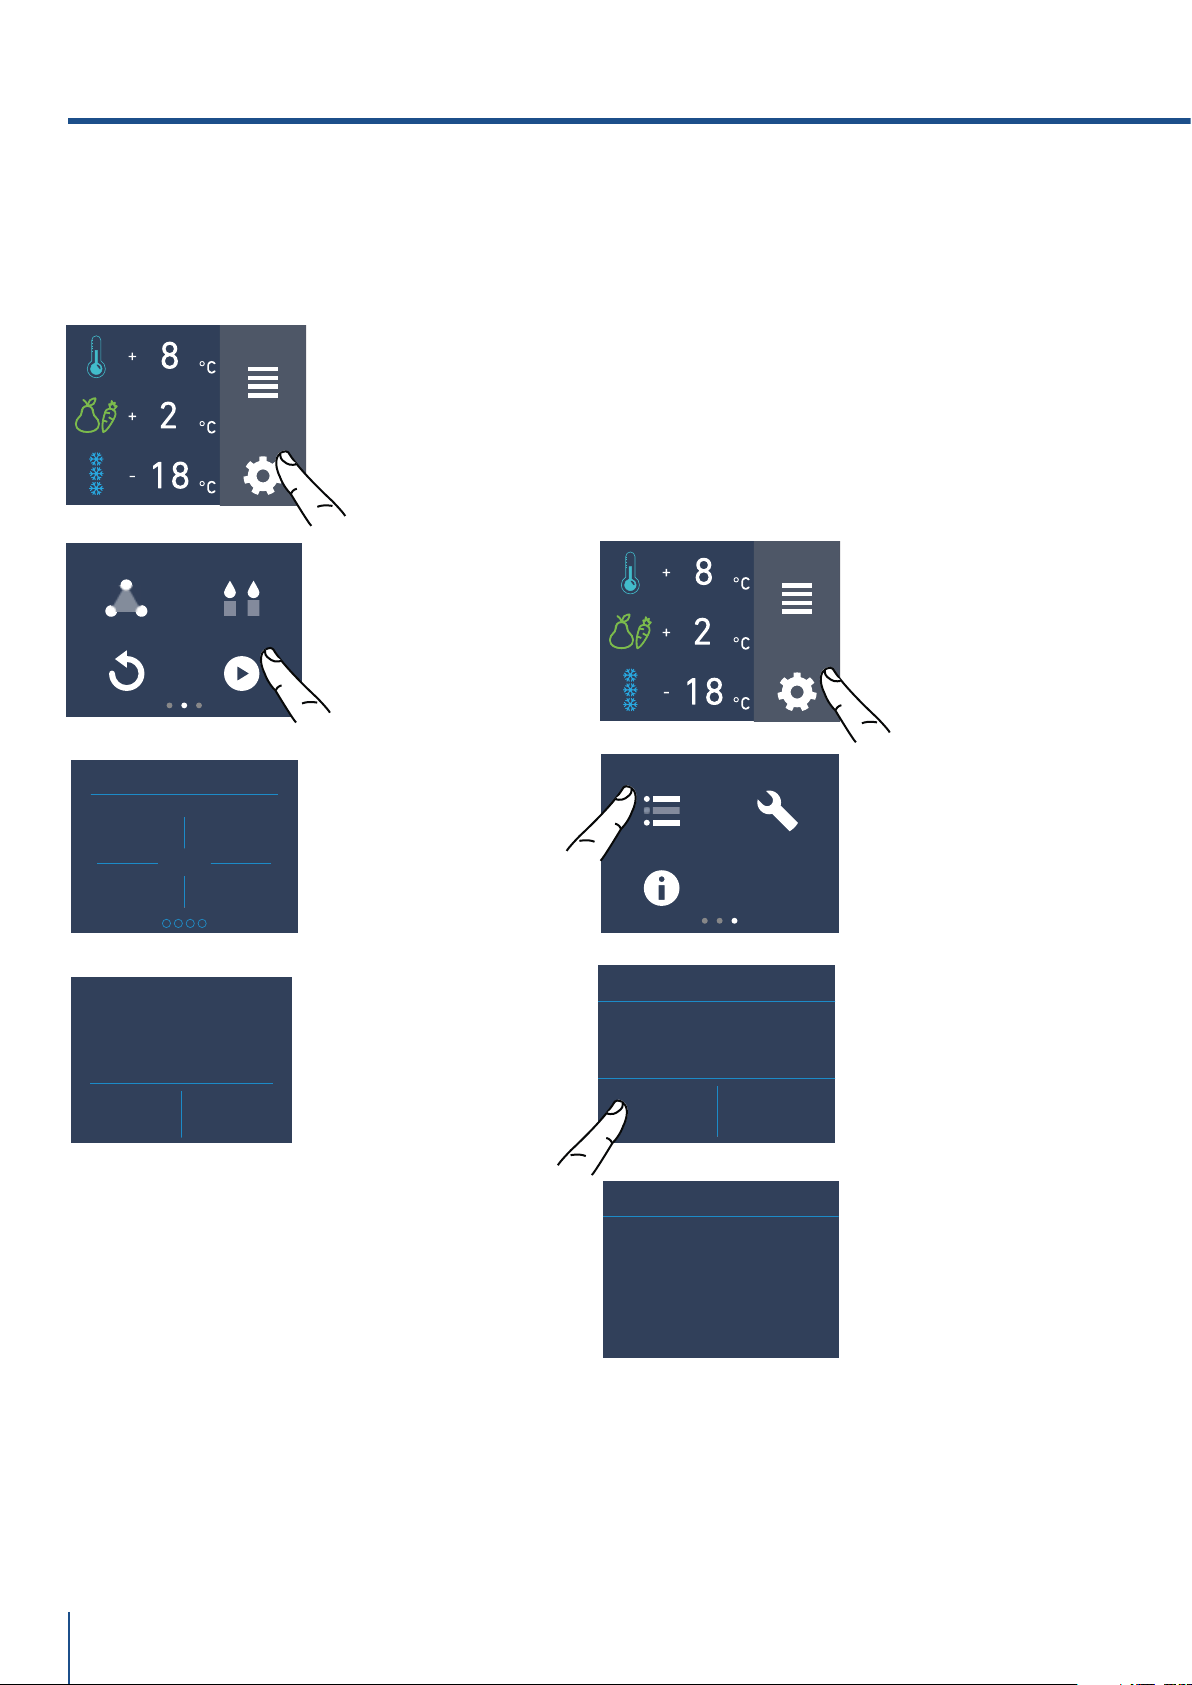
6a) Filtro Acqua - disattivazione
(optional, no su modelli 0FR)
Per disattivare l'avviso della scadenza del fltro
procedere come segue:
6b) Reset Filtro
La funzione Reset Filtro azzera il conteggio della
quantità di acqua filtrata e del tempo trascorso
dall’ultima sostituzione. È necessario azzerare il
conteggio ad ogni sostituzione della cartuccia.
RESET SCADENZA
AVVISO?
SÌ NO
FILTRO ACQUA
FUNZIONI
IMPOST
AZIONI
A) Schermata home.
Toccare l’icona
funzioni.
B) Scorrere verso
destra due volte
e toccare l’icona
filtro acqua.
ICE MAKER
FILTRO ACQUA
PULIZIA CIRCUITOEROGATORE ACQUA
DISABILITARE
AVVISO?
SÌ NO
FILTRO ACQUA
FUNZIONI
IMPOSTAZIONI
PROSSIMO AVVISO
MANCANO GIORNI...
365
OFF RESET
FILTRO ACQUA
D) Confermare la
funzione sfiorando
l’icona Sì.
Toccare il tasto
home.
C) Premere off per
attivare l'avviso di
scadenza del filtro
acqua.
B) Scorrere col
dito due volte per
toccare l’icona
filtro acqua.
A) Schermata
home. Toccare
l’icona funzioni.
E) Vengono indicati i
giorni rimanenti pri-
ma della sostituzione
del filtro. Toccare il
tasto home.
www.fhiaba.com · [email protected] · Info Line +39 0434 420160
5. PERSONALIZZARE FUNZIONI E IMPOSTAZIONI
SÌ NO
PULIZIA MANUALE
ATTENDERE...
PULIZIA MANUALE
ICE MAKER
WATER FILTER
SYSTEM CLEANINGEROGATORE ACQUA
ENTER
PULIZIA MANUALE
INIZIO LAVAGGIO
FUNZIONI
IMPOSTAZIONI
24
C) Toccare l’icona
sì per attivare la
pulizia.
D) Attendere….
B) Toccare l’icona
pulizia circuito.
D) Toccare l’icona
Enter per iniziare
il lavaggio.
E) Sto lavando…
8) Pulizia Manuale Circuito
(optional, no su modelli 0FR).
Se l’ice maker è stato disattivato o non è stato
utilizzato per un lungo periodo, si raccomanda di
eseguire una funzione di pulizia manuale.
Prima di procedere é importante spegnere l’ice
maker.
A) Schermata home.
Toccare l’icona
funzioni.
C) Toccare il
l’icona on per
confermare
l’attivazione.
ICE MAKER
WATER FILTER
SYSTEM CLEANINGEROGATORE ACQUA
7) Water dispenser
(optional solo per modelli 0FR).
La funzione water dispenser è disponibile nei
modelli colonne frigo OFR e consente l’erogazio-
ne dell’acqua fredda e batteriologicamente pura.
FUNZIONI
IMPOSTAZIONI
A) Schermata home.
Toccare l’icona
funzioni.
B) Scorrere col dito
due volte e toccare
il l’icona water di-
spenser.
MODALITÀ
EROGATORE ACQUA
ON OFF
STO LAVANDO
PULIZIA MANUALE

www.fhiaba.com · [email protected] · Info Line +39 0434 420160
FUNZIONI
IMPOST
AZIONI
25
IT
LUCE 12H
Bypass
Il sistema di filtraggio incluso può essere
bypassato quando dal sistema idrico domestico è
disponibile un'eccellente qualità dell'acqua.
È possibile semplicemente rimuovere il filtro
dell'acqua dall'adattatore e il sistema bypasserà
automaticamente la cartuccia.
Posizionare correttamente sotto l’Ice Maker
la vaschetta ghiaccio o un recipiente adegua-
to alla raccolta dell’acqua, quindi richiudere il
cassetto. Al termine lavare la vaschetta.
Ripetere l’operazione fino a quando l’acqua non
sarà pulita nella vaschetta per il vano ghiaccio.
9) Illuminazione 12 h
(optional, frighi con porta vetro).
La funzione consente di impostare l’orario di
l’illuminazione interna, e di rimanere accesa 12h
quando la porta della frigo è chiusa, anchè si
possa vedere l’interno illuminato, attraverso il
vetro.
A) Schermata home.
Toccare l’icona
impostazioni.
B) Scorrere fino
a toccare l’icona
luce 12h.
9
ORA
11
10
7
8
OK
C) Scorrere verso
l’alto/basso per
impostare tra
quante ore si
accenderà
l’illuminazione e
premere ok.
OK
FINE LAVAGGIO
SVUOTARE VASCHETTA
ATTENDERE...
PULIZIA COMPLETATA
F) Alla fine del
lavaggio premere
ok e svuotare la
vaschetta.
G) Attendere
qualche secondo
per tornare
alla schermata
principale
www.fhiaba.com · [email protected] · Info Line +39 0434 420160
5. PERSONALIZZARE FUNZIONI E IMPOSTAZIONI
TRIMODE
SABBATH MODE
RESET
DEMO MODE
MAINTENANCE
INFO SYSTEM
SERVICE
DATA
ORA
°C/°F
LINGUA
DATA ORA
LINGUA°C/°F
9
GIORNO
11
10
7
8
OK
9MESE
11
10
7
8
OK
2021YEAR
2023
2022
2019
2020
OK
FUNZIONI
IMPOSTAZIONI
26
È possibile personalizzare le impostazioni del
vostro frigo Fhiaba per adattarlo alle diverse
esigenze di utilizzo.
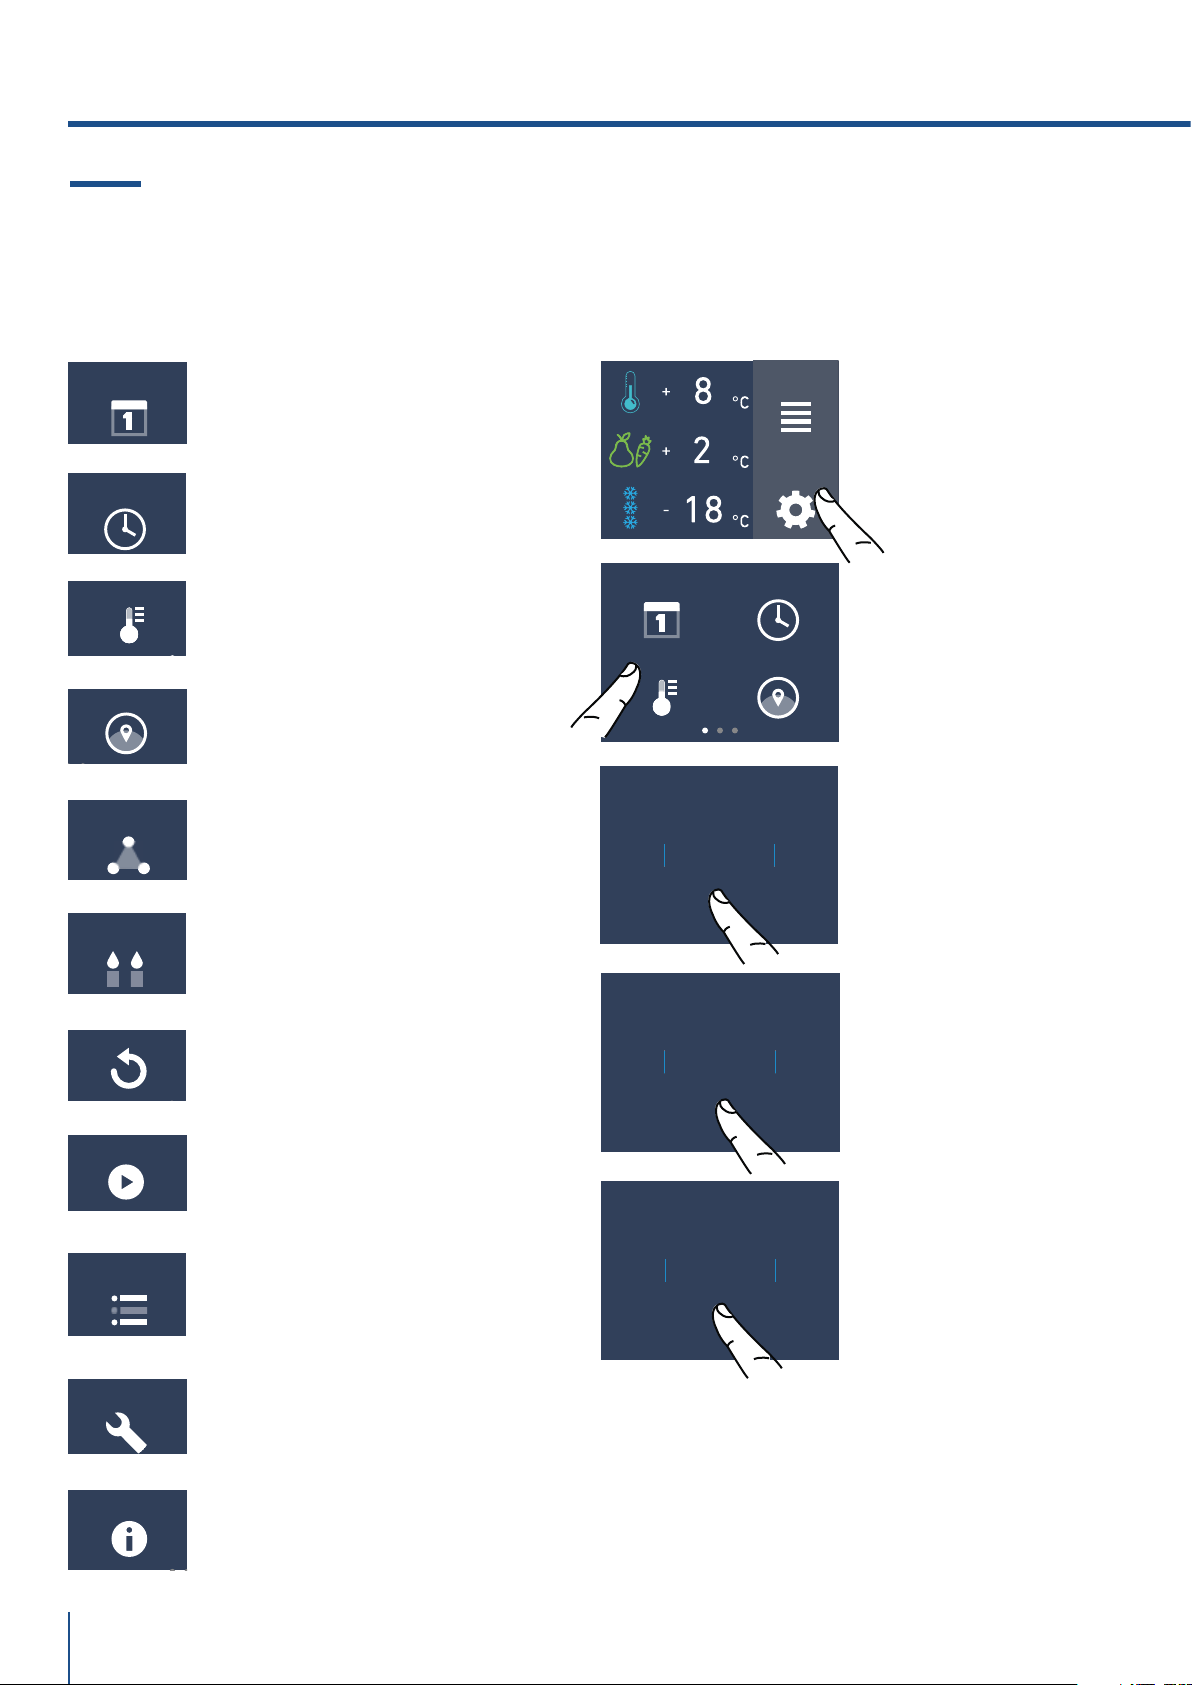
5.2 Impostazioni.
1) Data
Il display visualizzerà la data come
(giorno:mese:anno).
Toccando il display si può modificare l’impostazio-
ne.
C) Scorrere verso
alto/basso fino
a selezionare il
giorno desiderato
e toccare ok.
D) Scorrere verso
alto/basso fino
a selezionare il
mese desiderato e
e toccare ok.
E) Scorrere verso
alto/basso fino a
inserire l’anno e al
termine toccare ok.
B) Toccare l’icona
data.
A) Schermata home.
Toccare l'icona
impostazioni.
1) Data.
2) Ora.
3) Gradi celsius e fahrenheit.
4) Lingua.
5) Trimode.
6) Sabbath
7) Reset.
8) Demo Mode.
9) Manutenzioni.
10) Service.
11) Info System.
www.fhiaba.com · [email protected] · Info Line +39 0434 420160
OK
°C
°F
FUNZIONI
IMPOSTAZIONI
DATA ORA
LINGUA°C/°F
DATA ORA
LINGUA°C/°F
ORA?
12 24
FUNZIONI
IMPOSTAZIONI
9ORA
11
10
7
8
OK
37
MIN
39
38
35
36
OK
27
IT
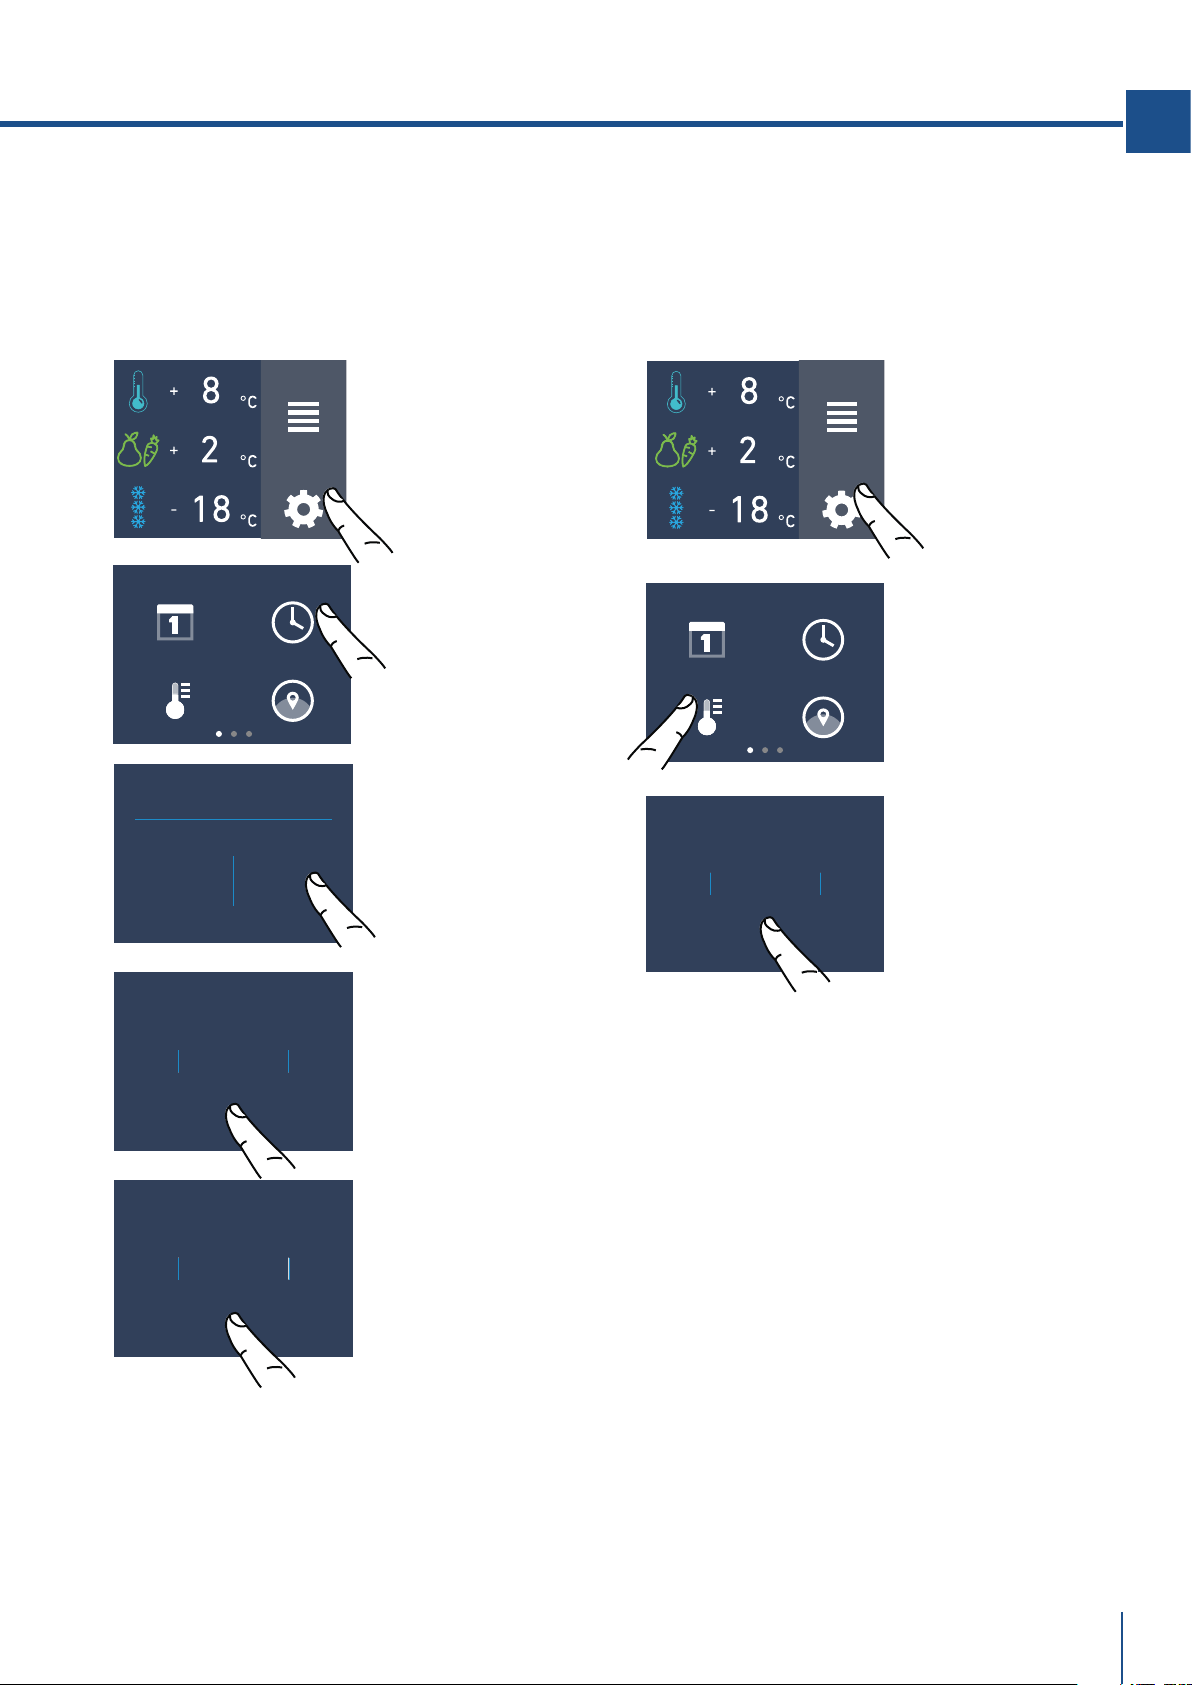
3) °C/°F
Questa funzione permette la visualizzazione della
temperatura in gradi centigradi o gradi fahrenheit.
Normalmente l’apparecchiatura è impostata per la
visualizzazione in gradi centigradi.
C) Scorrere verso
alto/basso fino a
selezionare i gradi
centigradi o
fahrenheit e
premere ok.
A) Schermata home.
Toccare l'icona
impostazioni.
B) Toccare l'icona
°C/°F.
2) Ora
Il display visualizzerà l’ora e i minuti come hh:mm.
L’ora può essere impostata e visualizzata in 12 o
24 ore.
C) Toccare in quale
modalità si vuole
visualizzare l’ora:
12 o 24 ore.
B) Toccare l’icona
ora.
A) Schermata home.
Toccare l’icona
impostazioni.
D) Scorrere verso
alto/basso fino a
selezionare l’ora e al
termine toccare ok.
E) Scorrere fino
a selezionare i
minuti e al termine
toccare ok.

www.fhiaba.com · [email protected] · Info Line +39 0434 420160
5. PERSONALIZZARE FUNZIONI E IMPOSTAZIONI
FUNZIONI
IMPOSTAZIONI
FRANÇAIS
ESPAÑOL
DEUTSCH
ITALIANO
ENGLISH
OK
DATA ORA
LINGUA°C/°F
FUNZIONI
IMPOSTAZIONI
TRIMODE
RESET
DEMO MODE
SABBATH MODE
VUOI ATTIVARE LA
MODALITÀ
FRESCO?
SÌ NO
FRESCO
FREEZER
FRIDGE
OK
28
A) Schermata home.
Toccare il tasto
impostazioni.
B) Toccare l’icona
lingua.
C) Scorrere verso
alto/basso fino
a selezionare la
lingua desiderata e
premere ok.
4) Lingua
Per impostare la lingua del frigo, basta toccare
sul display principale il tasto impostazioni.
5) TriMode
Il cassettone freezer può, all’occorrenza, esser
fatto funzionare come vano frigo o come vano
fresco.
B) Scorrere verso
destra due volte
e toccare il tasto
trimode.
C) Scorrendo verso
alto/basso e sele-
zionare una delle
tre funzioni.
D) Toccare Sì per
confermare la
funzione.
A) Schermata home.
Toccare l’icona
impostazioni.
www.fhiaba.com · [email protected] · Info Line +39 0434 420160
FUNZIONI
IMPOSTAZIONI
TRIMODE
RESET
DEMO MODE
SABBATH MODE
29
IT
FUNZIONI
IMPOSTAZIONI
7) Reset
Offre la possibilità di ripristinare le regolazioni
di base impostate in fabbrica annullando ogni
modifica effettuata successivamente.
Importante
Se si ripristinano le impostazioni di base
(“reset”), è necessario riattivare la scelta
di funzionamento del cassettone TriMode in
caso fossero precedentemente state impo-
state come frigo o fresco.
TRIMODE
RESET
DEMO MODE
SABBATH MODE
A) Schermata home.
Toccare il tasto
impostazioni.
B) Scorrere verso
destra due volte e
selezionare l’icona
reset.
A) Schermata home.
Toccare il tasto
impostazioni.
B) Scorrere verso
destra due volte
e toccare il tasto
sabbath.
6) Modo Sabbath (Optional)
La funzione consente di rispettare alcune os-
servanze religiose prescriventi che il funziona-
mento dell’apparecchiatura non venga influen-
zato dall’apertura delle porte (il funzionamento
termostatico, l’illuminazione interna e la fabbri-
cazione del ghiaccio sono disattivati).
MODALITÀ SABBATH
MODALITÁ
SABBATH
ON OFF
VUOI PROCEDERE?
SÌ NO
C) Toccare il tasto
Sì per attivare la
funzione.
D) Toccare il tasto
Sì.
E) Il frigo funzio-
nerà seguendo tale
configurazione.
VUOI REIMPOSTARE
I DATI DI
FABBRICA
SÌ NO
RESET
SÌ NO
RESET
RESET ESEGUITO
C) Toccare il tasto
Sì per resettare.
D) Toccare il tasto
Sì.
E) Il reset è stato
eseguito. Sono
state ripristinate
le impostazioni di
fabbrica del frigo.
www.fhiaba.com · [email protected] · Info Line +39 0434 420160
5. PERSONALIZZARE FUNZIONI E IMPOSTAZIONI
PULIZIA CONDENSATORE
PROSSIMO AVVISO.
MANCANO GIORNI...
365
30
FUNZIONI
IMPOSTAZIONI
8) Demo Mode
E’ possibile simulare il funzionamento del frigo,
in occasioni di fiere o di esposizioni in showroom.
TRIMODE
RESET
DEMO MODE
SABBATH MODE
9) Manutenzione (attraverso il segnale d'allarme).
L'apparecchio richiede, per un corretto funziona-
mento, la pulizia della griglia di ventilazione, del
filtro e del condensatore. Vedi le istruzioni al punto
11.2 e il video tutorial disponibile nella sezione sup-
porto del sito web Fhiaba
www. fhiaba.com/it/supporto
video "Bottom Condenser Cleaning".
La pulizia periodica ogni (6 mesi) viene ricordata
attraverso un segnale acustico e visivo sul display.
E' possibile disattivare il segnale di avviso e visua-
lizzare il tempo residuo per la prosssima pulizia.
Per i dettagli vedere le pagine 30 e 31.
MAINTENANCE SERVICE
INFO SYSTEM
FUNZIONI
IMPOSTAZIONI
B) Scorrere verso
destra tre volte
per arrivare a
questa schermata
e toccare l’icona
manutenzioni.
A) Schermata
home.
Toccare il tasto
impostazioni.
A) Schermata home.
Toccare il tasto
impostazioni.
B) Scorrere verso
destra due volte
e toccare il tasto
demo mode.
DEMO MODE
1
3
2
4
DEMO MODE
ON OFF
C) Inserire la
password necessa-
ria per l’attivazio-
ne da richiedere a
Fhiaba.
Default password
1-2-3-4
D) Toccare il tasto
On. o Off
E) Viene visualizzato
il tempo residuo per
la prossima pulizia.
SÌ NO
PULIZIA CONDENSATORE
ABILITARE AVVISO?
D) Per abilitarlo toc-
care l’icona Sì.
www.fhiaba.com · [email protected] · Info Line +39 0434 420160
SERVICE
SÌ NO
PULIZIA CONDENSATORE
DISABILITARE AVVISO?
OFF RESET
PULIZIA CONDENSATORE
PROSSIMO AVVISO.
MANCANO GIORNI...
365
31
IT
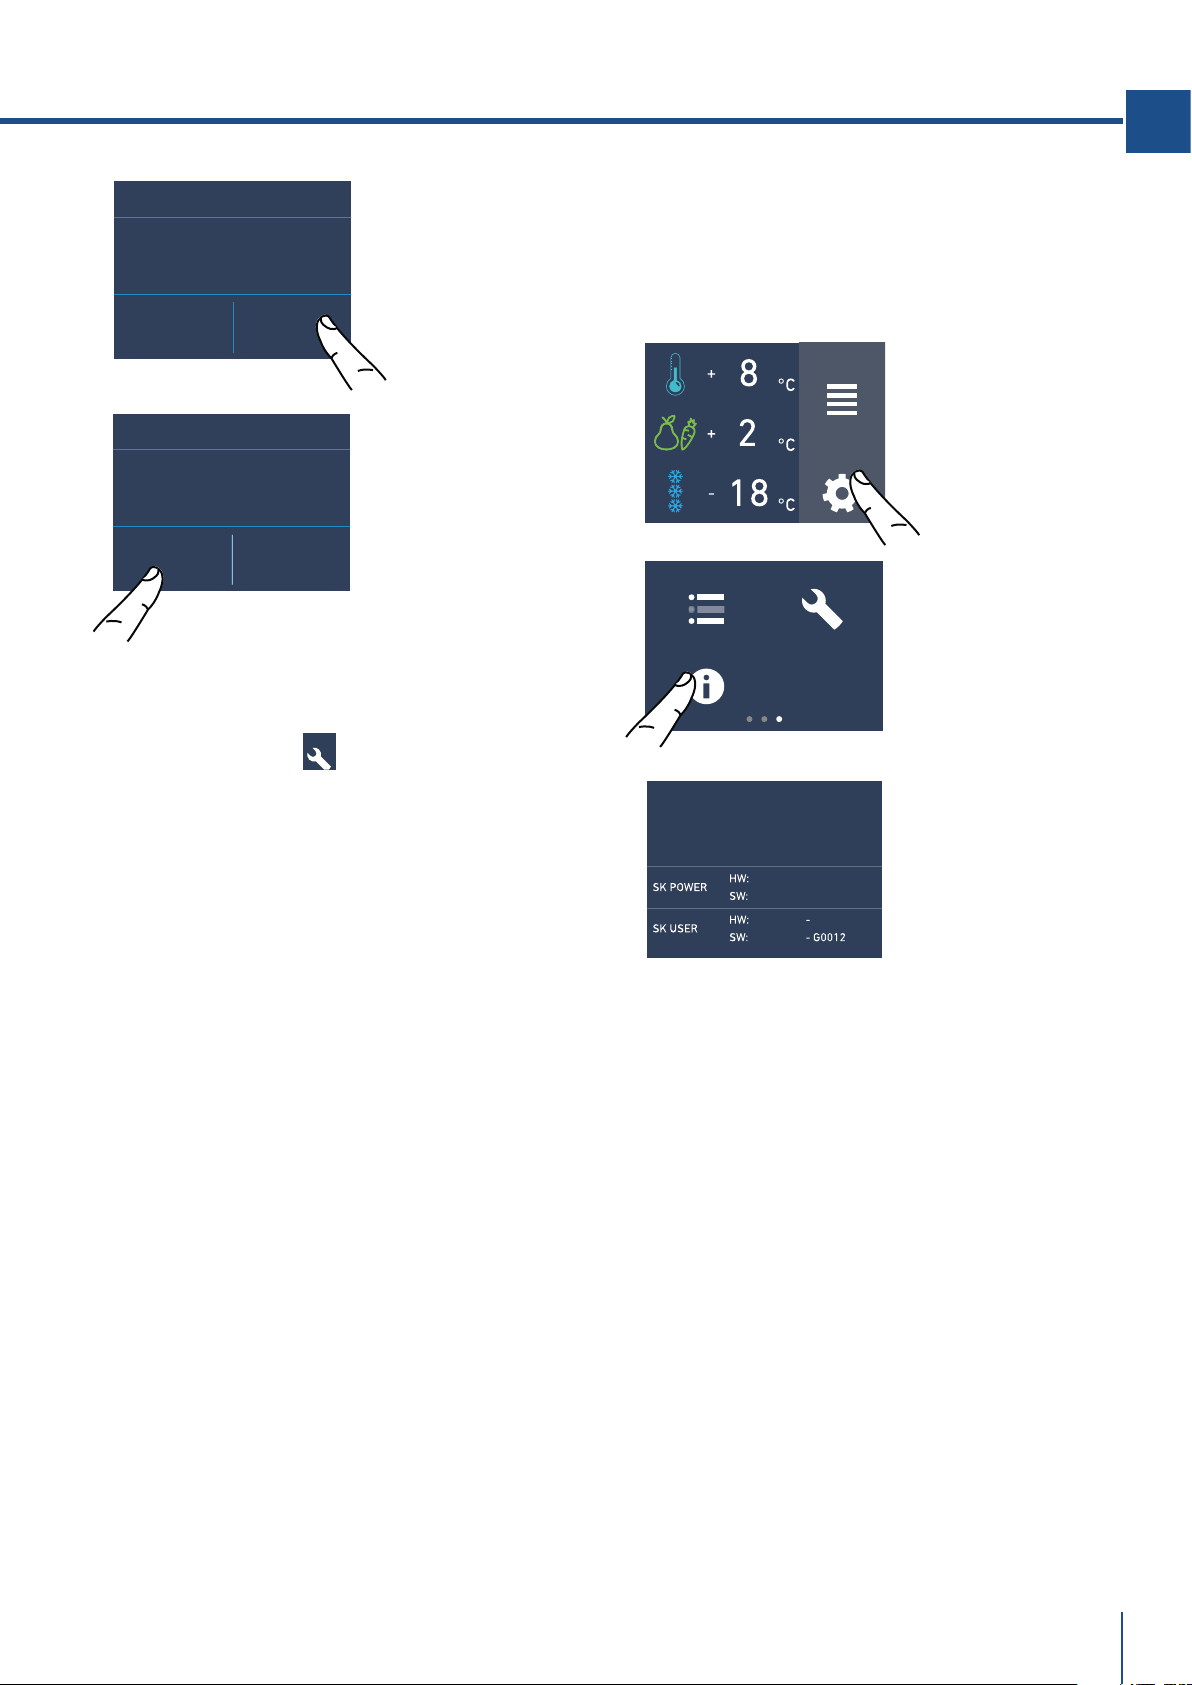
11) Info System
La funzione Info System serve per visualizzare i dati
del prodotto come il codice del softwar, il numero di
matricola e i codici di fabbrica del frigo.
MAINTENANCE SERVICE
INFO SYSTEM
B) Toccare l’icona
Info System.
C) Vengono
visualizzati i dati
dell'apparecchiatura
fhiaba.
FUNZIONI
IMPOSTAZIONI
A) Schermata home.
Toccare il tasto
impostazioni.
10) Service
La funzione service è riservata all’assistenza
Fhiaba.
F) Invece se si vuo-
le resettare l’avviso
precedentemente
impostato toccare
l'icona reset.
G) Per disabilitare
l’avviso sfiorare il
tasto sì.

www.fhiaba.com · [email protected] · Info Line +39 0434 420160
1
2
modelli 1T / 0T / 0H / 0F
32
6.1 Posizionamento, regolazione e
rimozione casetti interni.
Cassetto Fresco
modelli 1T / 0T / 0H
È posizionato sulle guide di scorrimento.
> per rimuovere il cassetto, estrarre completamen-
te e svitare i due pomelli di fissaggio laterali, solle-
varlo ed estrarlo.
Cassetto TriMode
modelli 1T / 0T / 0H
Il cassetto TriMode si rimuove con le stesse moda-
lità del cassetto Fresco dopo aver svitato due po-
melli di fissaggio laterali.
Quando si riposizionare i cassetti, accertarsi che
il retro dei cassetti sia bloccato sotto le clip sulle
guide di scorrimento.
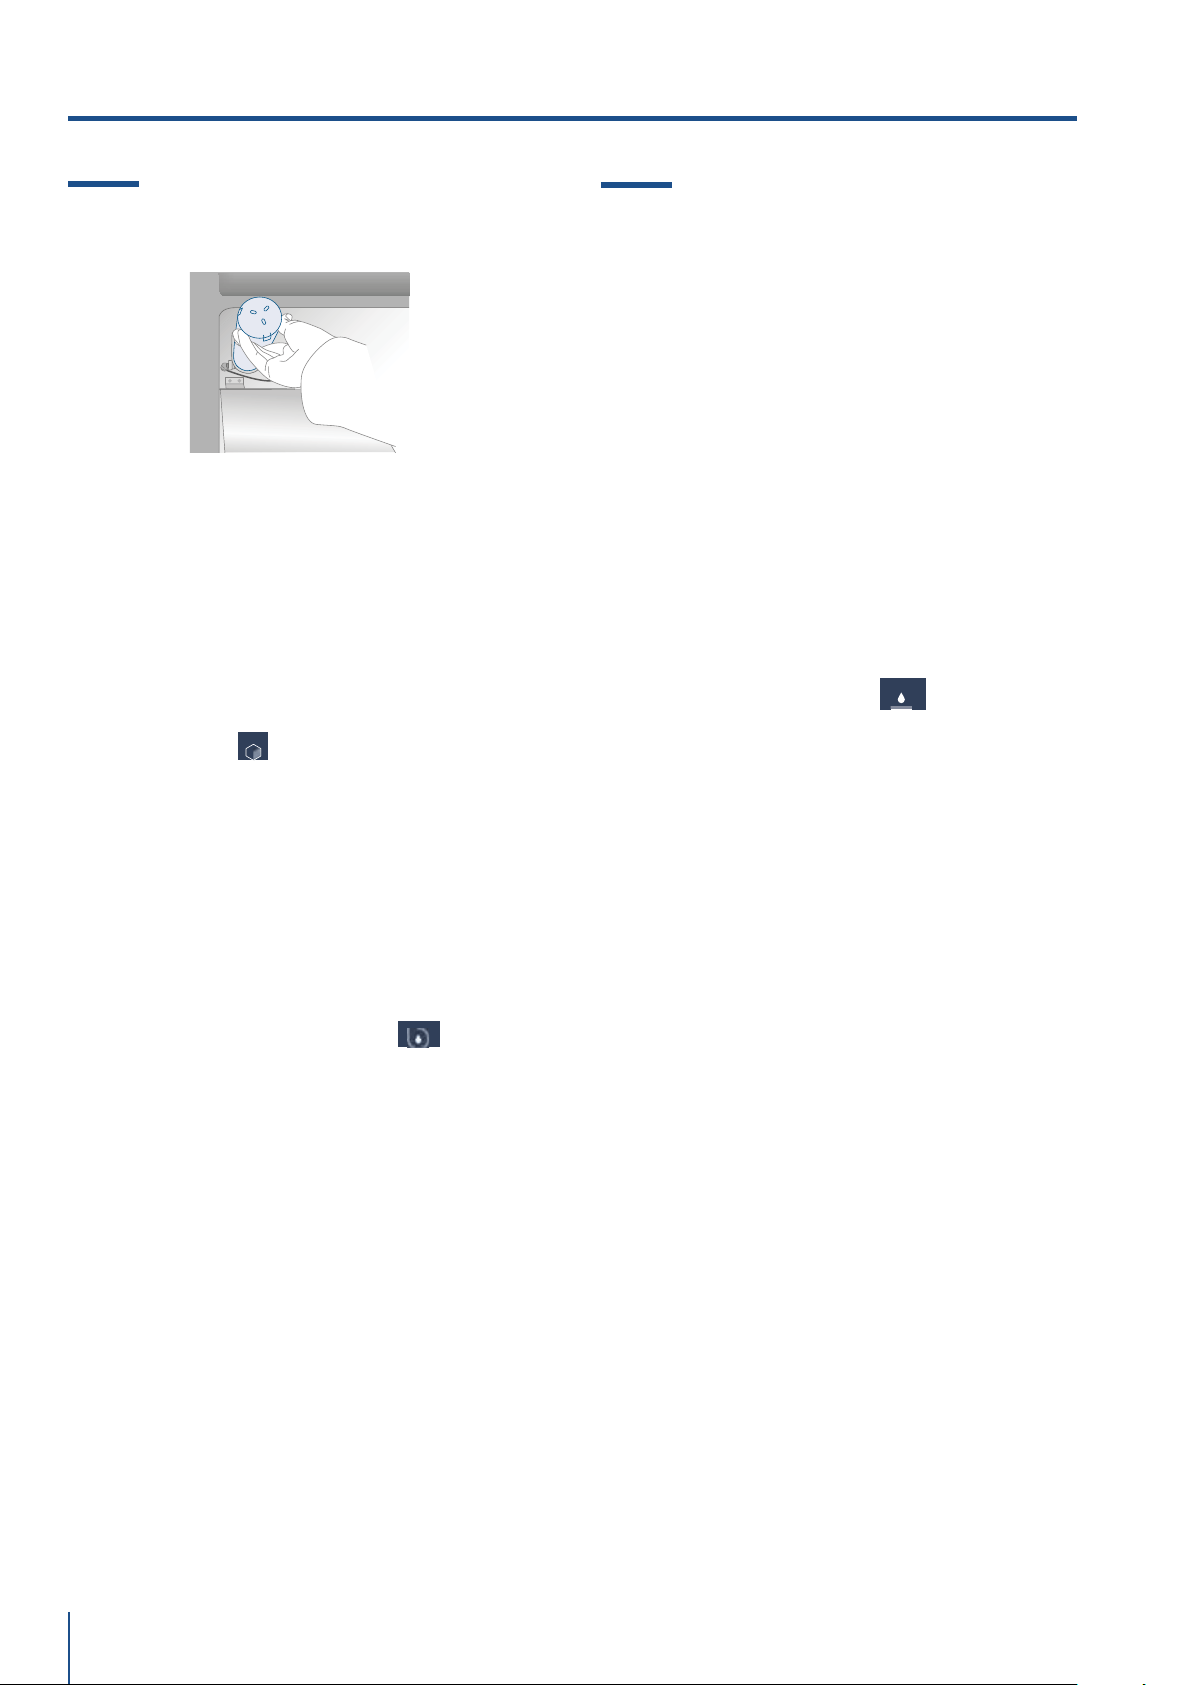
Vaschetta Ghiaccio
Posizionata nel cassetto superiore del vano freezer,
su alcuni modelli è fissato con dei pannelli di bloc-
caggio.
> dopo l’estrazione assicurarsi di riposizionarla
correttamente con il verso.
6. ALLESTIMENTO INTERNO
Attenzione
Non mettere mani o dita nelle prossimità
dell’Ice Maker quando è in funzione.
Ripiani interni in vetro.
I ripiani sono verticalmente scorrevoli e facilmente
riposizionabili dall’utente operando come segue:
> svitare leggermente il pomello di sicurezza po-
steriore.
> sollevare la parte frontale del ripiano ed inclinarlo
leggermente.
> per rimuovere un ripiano farlo scorrere verso l’al-
to e quindi estrarlo.
Balconcini Porta
modelli 1T / 0T / 0H / OF
Le mensole porta possono essere facilmente ri-
mosse per la pulizia.
> Aerrare la mensola ai lati e spingerla verso l’alto
fino a sganciarla dalla sede e quindi tirarla verso
l’esterno.
> Rimontarla operando in modo inverso.
www.fhiaba.com/it/supporto/
video "EvenLift".
E' disponibile un video tutorial:
www.fhiaba.com/it/supporto/
video "Care and cleaning".
www.fhiaba.com/it/supporto/
video "EvenLift".
www.fhiaba.com · [email protected] · Info Line +39 0434 420160
33
IT
Il ghiaccio emette un odore insolito?
Il ghiaccio è un materiale poroso in grado di assor-
bire gli odori del suo ambiente. I cubetti di ghiaccio
che sono rimasti a lungo nella vaschetta possono
assorbire questi odori, rimanere incollati gli uni agli
altri e gradualmente ridurre il loro volume.
Raccomandiamo di non utilizzare più tale ghiaccio.
Altri metodi per impedire lo sviluppo di odori:
> Pulire di tanto in tanto la vaschetta del ghiaccio
con acqua calda. Assicurarsi di spegnere il dispen-
ser del ghiaccio prima di pulire il serbatoio. Sciac-
quare bene e asciugare con un panno asciutto.
> Verificare se il congelatore contiene cibo avariato
o la cui data di conservazione è scaduta. Per evitare
l’accumulo di odori, gli alimenti che in natura emet-
tono odori devono essere conservati in confezioni
ermetiche.
> Sostituire periodicamente il filtro d’acqua.
> In alcuni casi la qualità della connessione
dell’acqua in casa dovrà essere controllata.
Rumori di funzionamento
> Ronzio: il gruppo frigorifero è in funzione. La ven-
tola del sistema del ricircolo d’aria funziona.
> Gorgoglio, scroscio e ronzio: derivano dal refrige-
rante, che scorre attraverso i tubi.
> Scatto: il motore si accende o si spegne. La val-
vola montata di connessione d’acqua si apre o si
chiude.
> Rumore lieve: i cubetti di ghiaccio sono caduti nel-
la vaschetta.
L’apparecchiatura è alimentata da due com-
pressori indipendenti. È quindi normale avere
sempre uno dei due compressori in funzione.
Attenzione
Non porre assolutamente bottiglie o ali-
menti nella vaschetta ghiaccio per rared-
darli velocemente, per bloccare o danneg-
giare l’Ice Maker.
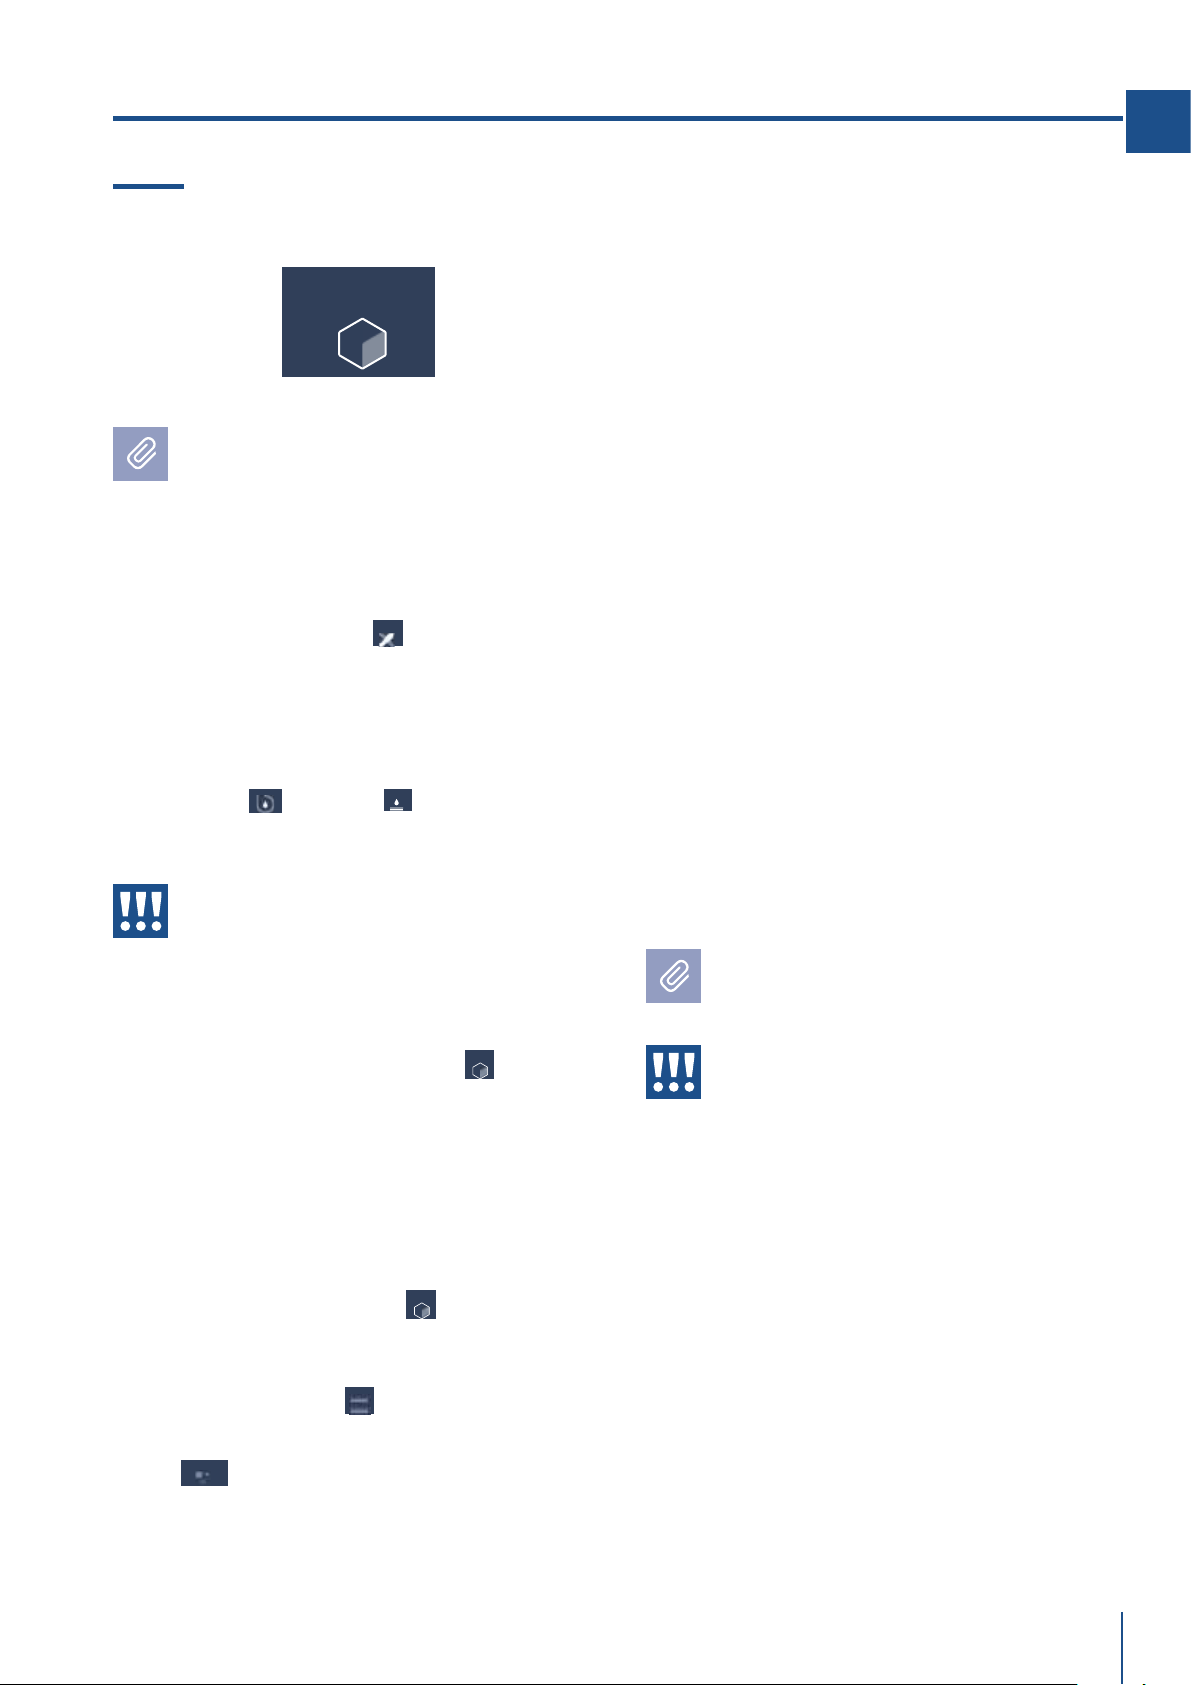
7.1 Attivazione ed utilizzo dell’Ice Maker
Note
> Se il ghiaccio non viene utilizzato di fre-
quente é consigliabile svuotare la vaschetta
del ghiaccio una volta ogni 8-10 giorni.
I vecchi cubetti perderanno limpidezza,
avranno un sapore particolare e si attacche-
ranno fra di loro.
> l’Ice Maker si disattiva automaticamente se
la funzione Vacanza viene attivata.
Quando l’Ice Maker viene messo in funzione
per la prima volta, si consiglia di svuotare il
primo ghiaccio della vaschetta al suo primo
riempimento.
> Se l’unità è rimasta spenta per un mese o
più, è consigliabile eettuare una pulizia del
circuito e del filtro acqua .
> L’IceMaker produce ghiaccio se il vano
TriMode è impostato in modalità Freezer.
Attenzione
L’Ice Maker continuerà a funzionare anche
quando la vaschetta del ghiaccio non è in
posizione.
Per attivare l’Ice Maker dopo l’installazione dell’ap-
parecchiatura toccare l'icona funzioni e successiva-
mente dalle funzioni l’icona ice maker .
Occorreranno dalle 12 alle 24 ore prima di avere la
produzione automatica di ghiaccio.
La produzione è di 10 cubetti per ciclo per 10 cicli
nelle 24 ore.
Il rendimento dell’apparato dipende dalla tempe-
ratura impostata nel freezer, dalla temperatura
ambiente e dalla frequenza di apertura delle porte.
Se il frigorifero viene fatto funzionare senza essere
collegato alla rete idrica, assicurarsi che l’Ice Maker
sia disattivato attraverso l’icona .
L’Ice Maker produce ghiaccio fino al completo riem-
pimento della vaschetta e si ferma automaticamen-
te al raggiungimento del livello massimo consentito.
Con la funzione SuperIce, è possibile aumentare
la quantità di ghiaccio prodotto in 24 ore (fino a 1,5
Kg al giorno) mentre con la funzione dimensione
cubetti si può scegliere la dimensione dei
cubetti prodotti.
ICE MAKER
VACANZA
ICE MAKER
ICE MAKER
SUPERICE
SET CUBE SIZE
W
ATER FILTER
YSTEM
CLEANIN
7. ATTIVAZIONE ED UTILIZZO DELL’ICE MAKER
www.fhiaba.com · [email protected] · Info Line +39 0434 420160
34
7.2 Filtro acqua (no Modelli 0F)
7.3 Filtro dell’acqua per Ice Maker
nelle colonne freezer
Le colonne freezer dotate di fabbricatori di ghiac-
cio automatiche includono un kit filtro dell’acqua da
montare esternamente.
Il collettore del filtro dell’acqua ed i collegamenti
idrici devono essere preparati prima del posiziona-
mento finale del frigorifero;
il collegamento idrico che collega il retro dell’ap-
parecchio al kit del filtro deve essere in posizione
prima di installare l’unità.
Il kit filtro deve essere installato in una posizione
accessibile (come un armadio adiacente o sotto lo
stesso) per consentire la sostituzione
della cartuccia del filtro dell’acqua ogni anno.
Se si sceglie di non utilizzare il filtro dell’acqua (ad
esempio collegando l’apparecchio a una fonte d’ac-
qua già filtrata),si consiglia di impostare la funzione
filtro acqua attraverso l'icona ,toccare il tasto
reset e disabilitare l'avviso per evitare di ricevere
promemoria per cambiare il filtro (che si non sta
usando).
Per ulteriori dettagli e come accedere a questa im-
postazione di funzione, seguire le istruzioni a pagi-
na 17 delle funzioni: “come resettare il filtro acqua”.
Il Filtro acqua assicura un’ottima qualità dell’acqua
per la produzione di cubetti di ghiaccio, per una
quantità fino a 3.000 litri e per un tempo massimo
di 12 mesi.
Sostituzione filtro
Il filtro si trova dietro al vetro smerigliato posto
nella parte superiore del frigorifero.
Prima di cambiare il filtro disattivare l’Ice Maker
premendo l'icona ice maker.
Tirare entrambe le levette poste nella parte fronta-
le del vetro per sganciare il meccanismo di chiusu-
ra e tirare verso il basso il vetro, infine ruotare con
attenzione la cartuccia filtro di un quarto di giro in
senso antiorario fino a sganciarla dalla sede.
È normale che fuoriesca una piccola quantità di
acqua.
Rimuovere il tappo alla nuova cartuccia ed inserir-
la nella sua sede ruotandola di un quarto di giro in
senso orario fino al blocco, senza forzare.
Quindi accedere al Menu a selezionare la funzione
"Pulizia Circuito" attraverso l'icona . Alla fine
del ciclo di lavaggio togliere l’acqua dalla vaschet-
ta ghiaccio ed asciugarlo.
E' disponibile un video tutorial:
www.fhiaba.com/it/supporto/
video "Water Filter Replacement".
ICE MAKER
YSTEM
CLEANING
W
ATER FILTER
7. ATTIVAZIONE ED UTILIZZO DELL’ICE MAKER
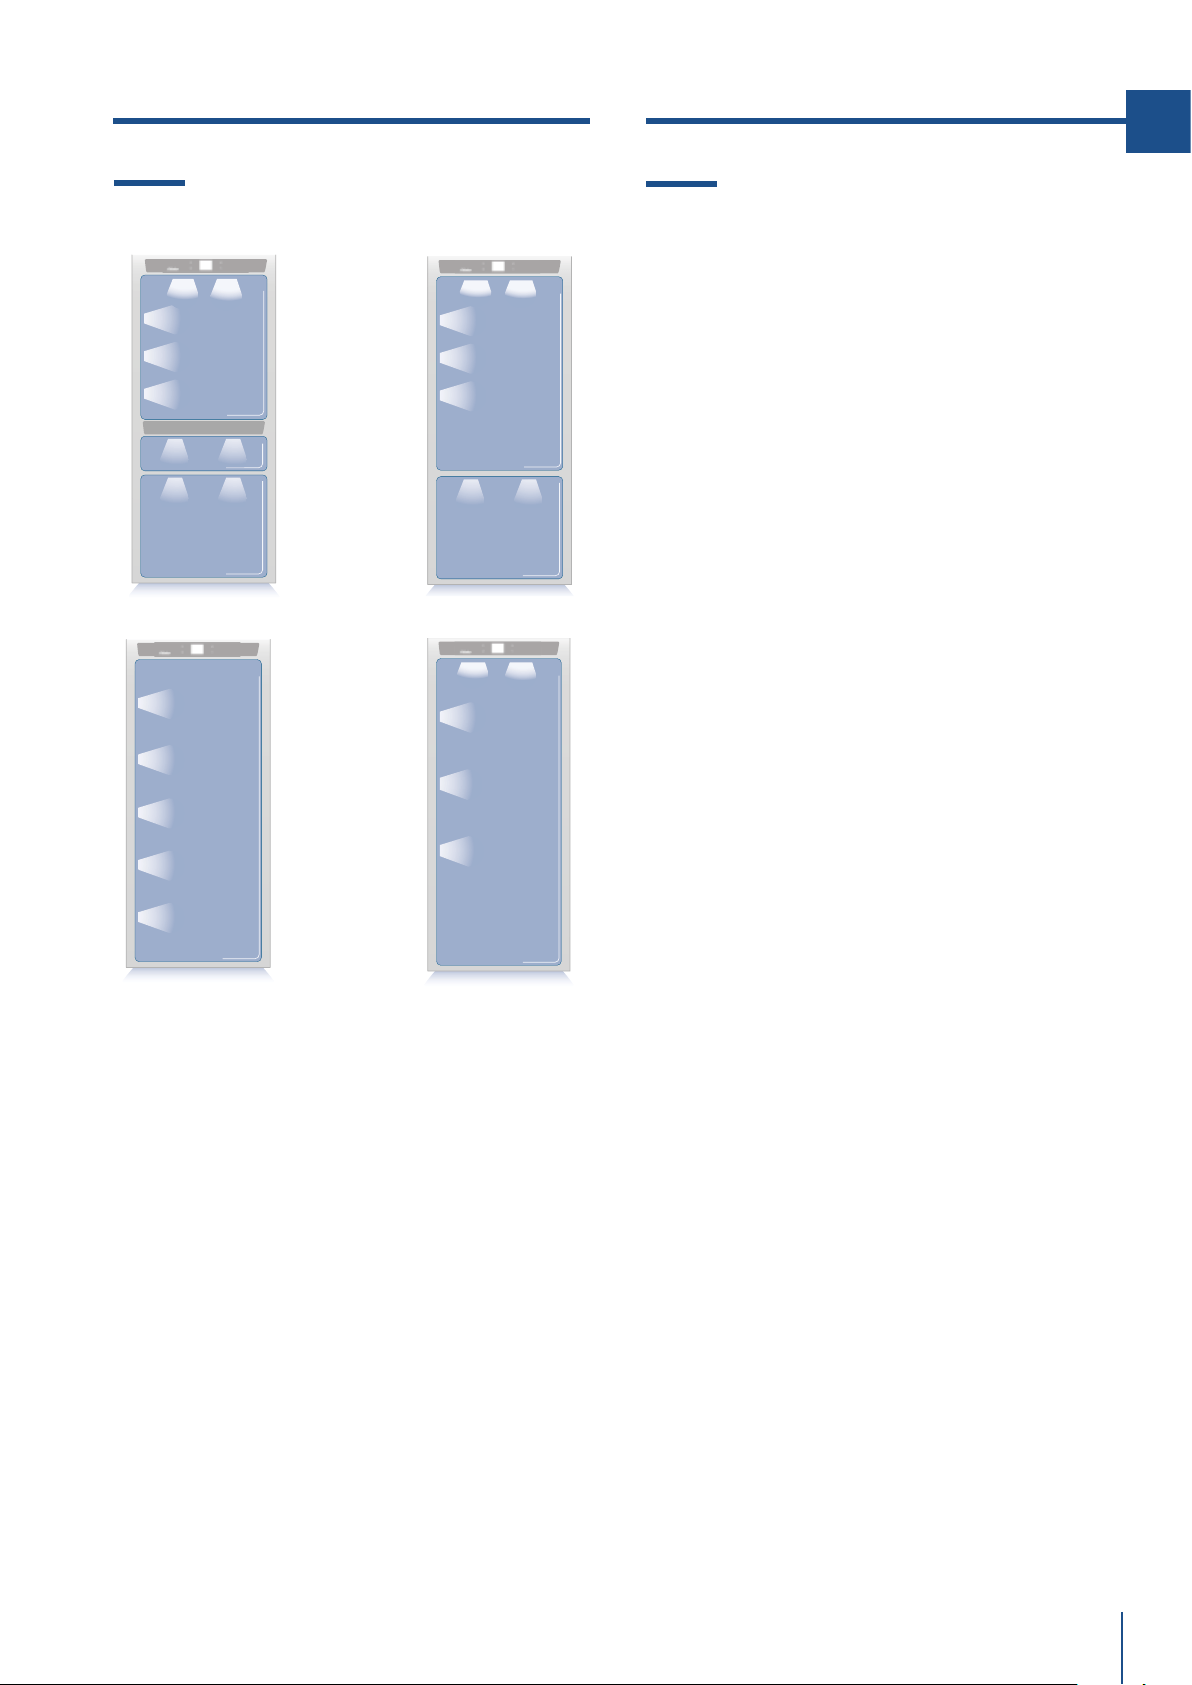
www.fhiaba.com · [email protected] · Info Line +39 0434 420160
1T
0T / 0H
0FZ
0FR
35
IT
8.1 Illuminazione vani
Per consentire una visione interna ottimale è previ-
sto un sistema a LED che illumina direttamente di-
verse zone del vano frigo, dei cassetti Crisper - Fre-
sco e del cassetto Freezer.
In caso di anomalie e/o guasti del sistema di illumi-
nazione è necessario rivolgersi esclusivamente al
servizio di assistenza Fhiaba.
9.1 Indicazioni generali
Il vostro Fhiaba è progettato per assicurare tem-
perature costanti ed appropriati livelli di umidità in
tutti gli scomparti. Inoltre, il doppio sistema di refri-
gerazione fa sì che i cibi surgelati o il ghiaccio non si
impregnino dell’odore dei cibi freschi e che l’umidità
presente nel frigorifero non si congeli formando
della brina.
Tuttavia, per conservare bene tutti i vostri alimenti,
non basta avere un ottimo frigorifero, è anche ne-
cessario conoscere le regole per la corretta conser-
vazione del cibo.
Va tenuto presente che tutti gli alimenti inevita-
bilmente modificano le loro caratteristiche con il
passare del tempo. Il loro cambiamento inizia molto
tempo prima del consumo, in quanto essi contengo-
no, al loro interno, dei microrganismi che moltipli-
candosi ne causano il deterioramento.
Questo è reso più rapido da manipolazioni, tem-
perature di conservazione e condizioni di umidità
inappropriate.
Vi raccomandiamo, quindi, di seguire le indicazioni
di seguito riportate che vi consentiranno di utilizza-
re nel modo più razionale e sicuro il vostro frigori-
fero congelatore e conservare a lungo e nel miglior
modo possibile tutti i vostri alimenti.
Tenete presente che la zona Crisper - Fresco o Low
Temp è quella che consente la miglior conservazio-
ne dei cibi freschi più deperibili, in quanto assicura il
mantenimento di una temperatura media più bassa
con un giusto grado di umidità.
Accertatevi periodicamente che tutti gli alimenti
siano in perfetto stato di conservazione. Quando un
alimento è deteriorato ammusce, prende un catti-
vo odore ed assume un aspetto sgradevole.
Tuttavia vi sono dei casi in cui tale condizione non è
così evidente.
Se pensate che un alimento sia stato conservato
troppo a lungo e che quindi possa essere avaria-
to, non consumatelo e nemmeno assaggiatelo, in
quanto i batteri che provocano il deterioramento del
cibo possono essere la causa di intossicazioni o di
malesseri. Nel dubbio gettate via l’alimento.
8. ILLUMINAZIONE 9. CONSERVAZIONE DEI CIBI

www.fhiaba.com · [email protected] · Info Line +39 0434 420160
36
9.2 Come mantenere la buona qualità
del cibo da consumare
Quando fate la spesa
Osservate sempre le seguenti precauzioni:
> Mettete i pacchetti contenenti carne cruda, pesce o
pollame in contenitori idonei alla conservazione del
cibo.
> Acquistate la carne, il pollame ed il pesce per ulti-
mi. Non lasciateli nella vostra auto calda dopo aver
fatto la spesa.
Tenete nella vostra auto una borsa termica e usatela
in caso di temperature molto elevate o di viaggi mol-
to lunghi.
> Controllate le date di produzione e di scadenza su-
gli alimenti per essere sicuri che siano freschi.
> Comprate cibi freschi, compratene solamente una
quantità da poter consumare in 1-2 giorni.
> Lasciate a temperatura ambiente i cibi caldi per
almeno due ore, prima di riporli nel frigorifero.
Quando riponete gli alimenti
Controllate le temperature di refrigerazione dei vari
vani attraverso il pannello di controllo:
> Seguite le raccomandazioni riguardanti i tempi e le
temperature di conservazione indicate nelle tabelle
più avanti riportate.
> Tenete la carne cruda, il pesce ed il pollame se-
parati da altri alimenti ed evitate ogni possibilità di
sgocciolio.
> Quando sistemate la vostra carne, pesce o polla-
me, lasciateli nei pacchetti originali, a meno che que-
sti non siano strappati e bucati.
Ripetute manipolazioni potrebbero introdurre batteri
in questi alimenti.
> Per conservare alimenti nel freezer è bene usare
gli appositi contenitori per freezer.
> Datate ed etichettate i pacchetti.
> Porre attenzione a disporre correttamente gli
alimenti sui ripiani in modo tale da non ostruire le
aperture previste per la circolazione dell’aria fredda
all’interno del vano.
Note
In alcuni casi di alta umidità ambientale o di
alta umidità presente nelle verdure o cibi inse-
riti nel vano fresco è possibile notare la pre-
senza di acqua nel fondo del vano oppure di
una leggera lastra di ghiaccio qualora la tem-
peratura del vano fresco sia settata tra 0 e -2.
Questa condizione è assolutamente normale
ed è generata dall’eetto alta umidità che i
cassetti fresco devono sempre mantenere per
garantire una prolungata durata dei vostri cibi.
L’acqua o il ghiaccio possono scomparire da
soli in caso di abbassamento della percen-
tuale di umidità nell’aria oppure è possibile
asciugare con un panno l’acqua residua o di-
versamente in presenza di ghiaccio aumenta-
re la temperatura fino a +2 e dopo una gior-
nata rimuovere l’acqua e se non suciente
spegnere il vano fresco per 12/24 ore e ri-
muovere l’acqua residua
Attenzione
Dopo un’interruzione prolungata di energia,
al ripristino della corrente elettrica, un se-
gnale sonoro indica che la temperatura del
frigorifero ha superato la soglia di corretta
temperatura di conservazione, mentre i di-
splay visualizzano per un minuto le tempe-
rature più alte rilevate all’interno dei vani,
ciò per permettere all’utente di decidere
come meglio utilizzare gli alimenti conser-
vati.
9. CONSERVAZIONE DEI CIBI

www.fhiaba.com · [email protected] · Info Line +39 0434 420160
37
IT
Cella congelatore: conservazione
> Gli alimenti devono essere conservati in recipien-
ti chiusi o imballati adeguatamente e non devono
emanare o assorbire odori e umidità.
> Seguire le raccomandazioni riguardanti i tempi e le
temperatura di conservazione riportate nella tabella
a seguito.
9.3 Consigli per la conservazione
Temperatura
L’apparecchio è impostato con le temperature consi-
gliate di +5°C per il frigorifero, di 0°C per il fresco e
di -18°C per il congelatore.
DISPOSIZIONE ALIMENTI
Porta cella frigorifera
> Nella parte superiore e centrale conservare uova,
burro, formaggio...
> Nella parte inferiore conservare bevande,
lattine, bottiglie...
Cella frigo
> Nella parte superiore conservare alimenti
conservati, vino, biscotti...
> Nella parte centrale conservare latticini, alimenti
già pronti, pasticceria, succhi di frutta, birra...
Cassetto superiore
> Conservare frutta fresca, frutta tropicale verdura,
carote, patate, cipolla...
Cassetto inferiore
> Conservare carne, salumi...
Cella congelatore: surgelazione
Si consiglia di utilizzare la parte posteriore del ce-
stello superiore per il congelamento rapido dei pro-
dotti con le seguenti indicazioni:
> Utilizzare confezioni piccole e se possibile
già fredde.
> La quantità di alimenti freschi che possono
essere congelati contemporaneamente è
descritta sulla targhetta caratteristica
posizionata nella cella frigorifera.
> Utilizzare appositi sacchetti per il
congelamento, fogli di alluminio, pellicole in
polietilene per uso alimentare e contenitori
per congelare.
> Non utilizzare sacchetti di carta, in
cellophan non per uso alimentare, sacchetti
per la spesa o per il congelamento già
utilizzati.
> Evitare che alimenti già congelati vengano
a contatto con alimenti freschi da
congelare.
www.fhiaba.com · [email protected] · Info Line +39 0434 420160
38
9. CONSERVAZIONE DEI CIBI
ALIMENTI FRESCHI ZONA DI CONSERVAZIONE TEMPI
Carni crude
Grosso taglio Vano Frigo - Fresco 4 giorni
Bistecche, pollame e selvaggina Vano Frigo - Fresco 3 giorni
Carne Macinata Vano Frigo - Fresco 1-2 giorni
Carpaccio Vano Frigo - Fresco subito
Carni cotte
Bolliti e arrosti Vano Frigorifero 2 giorni
Ragù di carne Vano Frigorifero 6 giorni
Pesce
Pesce crudo e cotto Vano Frigo - Fresco 2 giorni
Altro
Minestre, minestrone e brodo Vano Frigorifero 2 giorni
Paste Vano Frigorifero 2 giorni
Aettati aperti Vano Frigo - Fresco 3 giorni
Formaggi freschi Vano Frigo - Fresco 2-3 giorni
Formaggi stagionati ben protetti Vano Frigorifero alcuni mesi
Uova (fresche e non lavate) Vano Frigorifero 2 settimane
Scatolame aperto Vano Frigorifero 2-3 giorni
Verdure crude (in sacchetti forati) Vano Frigo - Fresco 1 settimana
ALIMENTI CONGELATI ZONA DI CONSERVAZIONE TEMPI
Carni di manzo, vitello, agnello e capretto Vano Freezer (bistecche) 6-12 mesi
Carni di manzo, vitello, agnello e capretto Vano Freezer (carni con osso) 4-6 mesi
Carne di manzo macinata Vano Freezer 1-2 mesi
Carni di maiale Vano Freezer (senza osso) 4-6 mesi
Carni di maiale Vano Freezer (con osso) 2-3 mesi
Carne di maiale macinata Vano Freezer 1-2 mesi
Avanzi di carne Vano Freezer 2-3 mesi

www.fhiaba.com · [email protected] · Info Line +39 0434 420160
39
IT
ALIMENTI CONGELATI ZONA DI CONSERVAZIONE TEMPI
Pollo e tacchino intero Vano Freezer 8-12 mesi
Oca, anatra e faraona Vano Freezer 4-8 mesi
Pesce Vano Freezer 1-2 mesi
Crostacei Vano Freezer 2-3 mesi
Cibi cotti Vano Freezer 1-2 mesi
Verdure Vano Freezer 8-12 mesi
Frutta Vano Freezer 6-12 mesi
Dolci e torte Vano Freezer 2-3 mesi
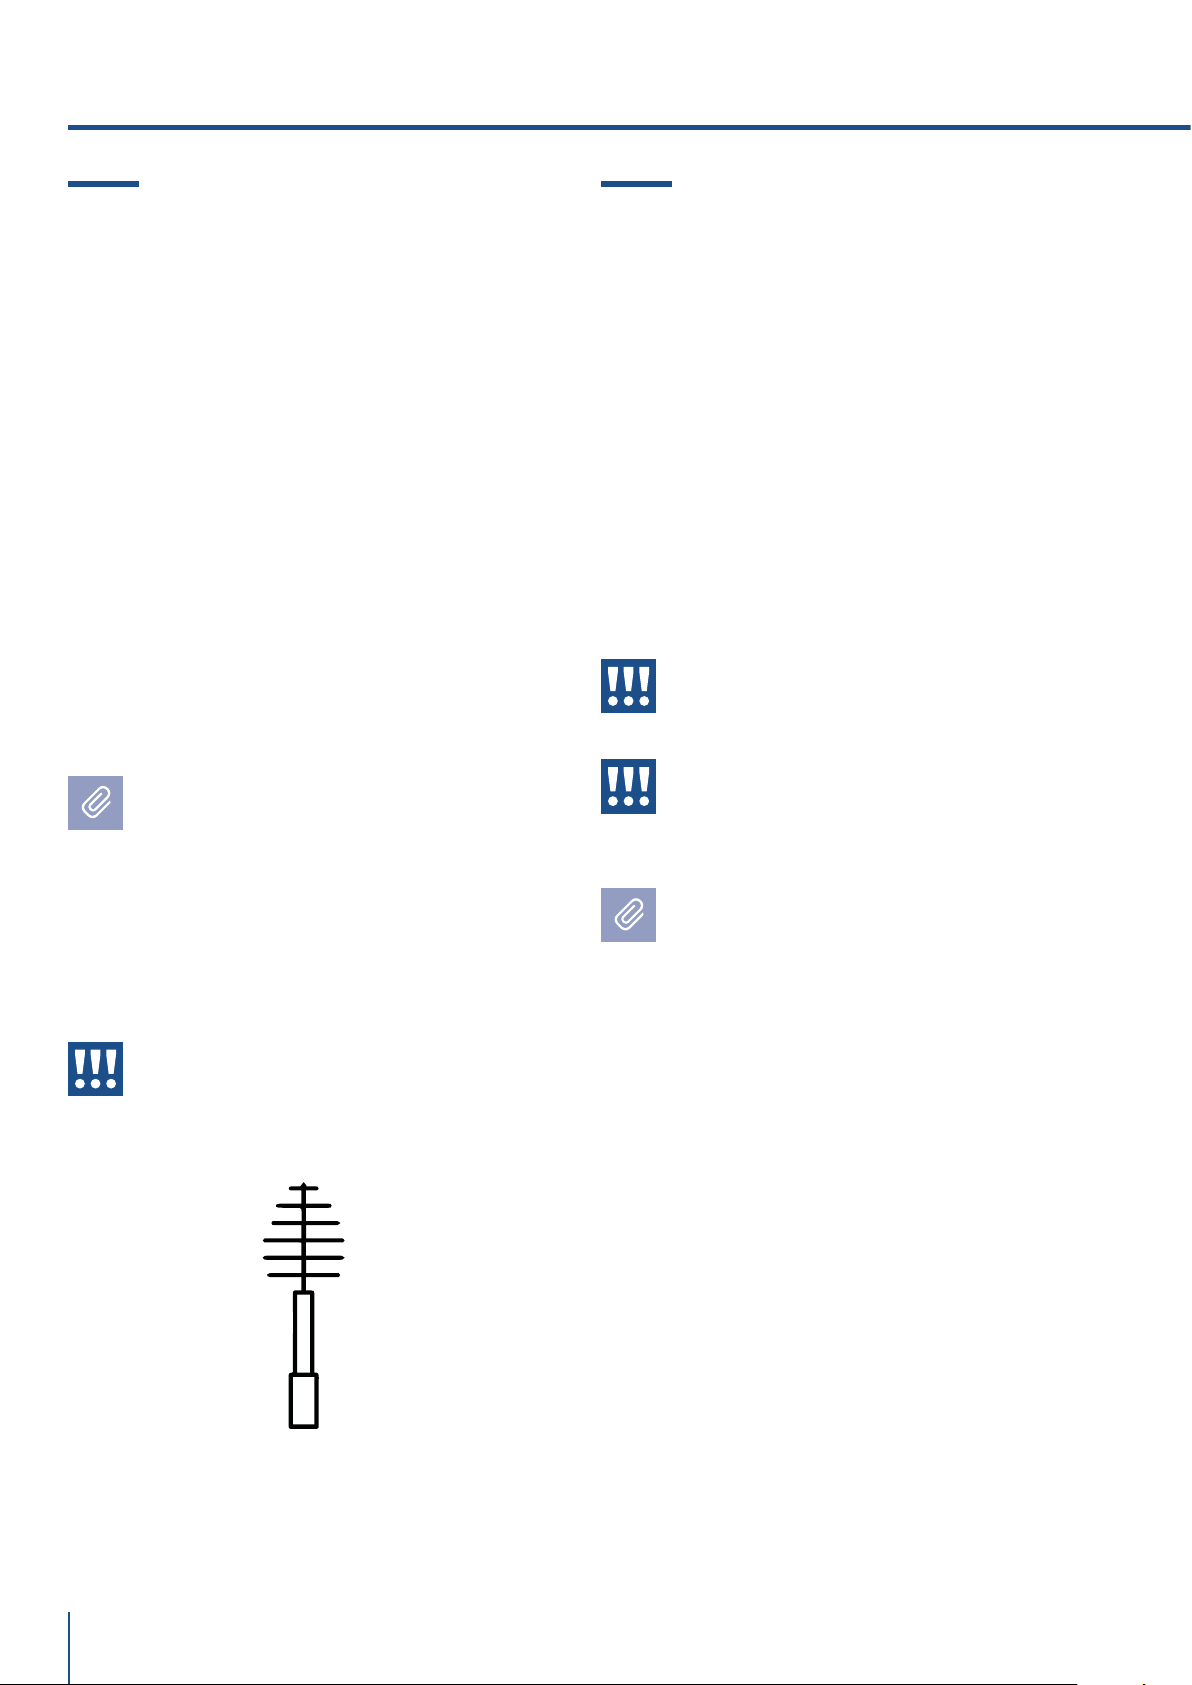
www.fhiaba.com · [email protected] · Info Line +39 0434 420160
40
10.1 Cura e pulizia
Per la pulizia delle parti in acciaio usare il panno in
microfibra e l’apposita spugnetta che si trovano nel
kit fornito in dotazione con l’apparecchiatura.
Nel passare il panno e la spugnetta seguire sempre
il verso della satinatura dell’acciaio.
Di tanto in tanto, per ripristinare la lucentezza
dell’acciaio, passare il panno in microfibra legger-
mente inumidito.
Non usare la spugnetta sui particolari in alluminio,
quali, ad esempio, le maniglie ed i profili dei ripia-
ni in vetro. In particolare vanno mantenute libere da
ostruzioni le aperture di ventilazione dell’apparec-
chiatura interne ed esterne.
Seguite scrupolosamente le istruzioni det-
tagliate che si trovano nel kit in dotazione e
in nessun caso utilizzare prodotti abrasivi o
metallici perché potrebbero rigare e danneg-
giare in modo permanente la finitura satinata
dell’apparecchiatura.
Prima di eseguire qualsiasi operazione di pu-
lizia disconnettere l’apparecchio dalla rete
elettrica. Porre attenzione a non danneggiare
in qualsiasi modo il circuito refrigerante.
Attenzione
Va evitato l’uso di detergenti a base di
cloro o simili che lo contenga (candeggi-
na, ipoclorito, che dir si voglia).
10.2 Pulizia interna
Pulire le parti interne e le parti asportabili lavandole
con una soluzione di acqua tiepida, pochissimo de-
tersivo per piatti.
Risciacquate ed asciugate subito.
Si raccomanda di non usare dispositivi meccanici o
altri mezzi per accelerare il processo di sbrinamen-
to.
Attenzione
Non usare acqua sulle parti elettriche, sulle
luci e sui pannelli di controllo.
Attenzione
Va evitato l’uso di detergenti a base di
cloro o simili che lo contenga (candeggi-
na, ipoclorito, che dir si voglia).
Non mettete a contatto con l’acqua bollente le
parti fredde in vetro.
Non lavate nessun particolare del frigorifero
in lavastoviglie in quanto potrebbe danneg-
giarsi o deformarsi irreparabilmente
Il video tutorial si trova sul sito:
www.fhiaba.com/it/supporto
video "Care and Cleaning".
Il video tutorial si trova sul sito:
www.fhiaba.com/it/supporto/
video "Care and Cleaning".
10. CURA E PULIZIA
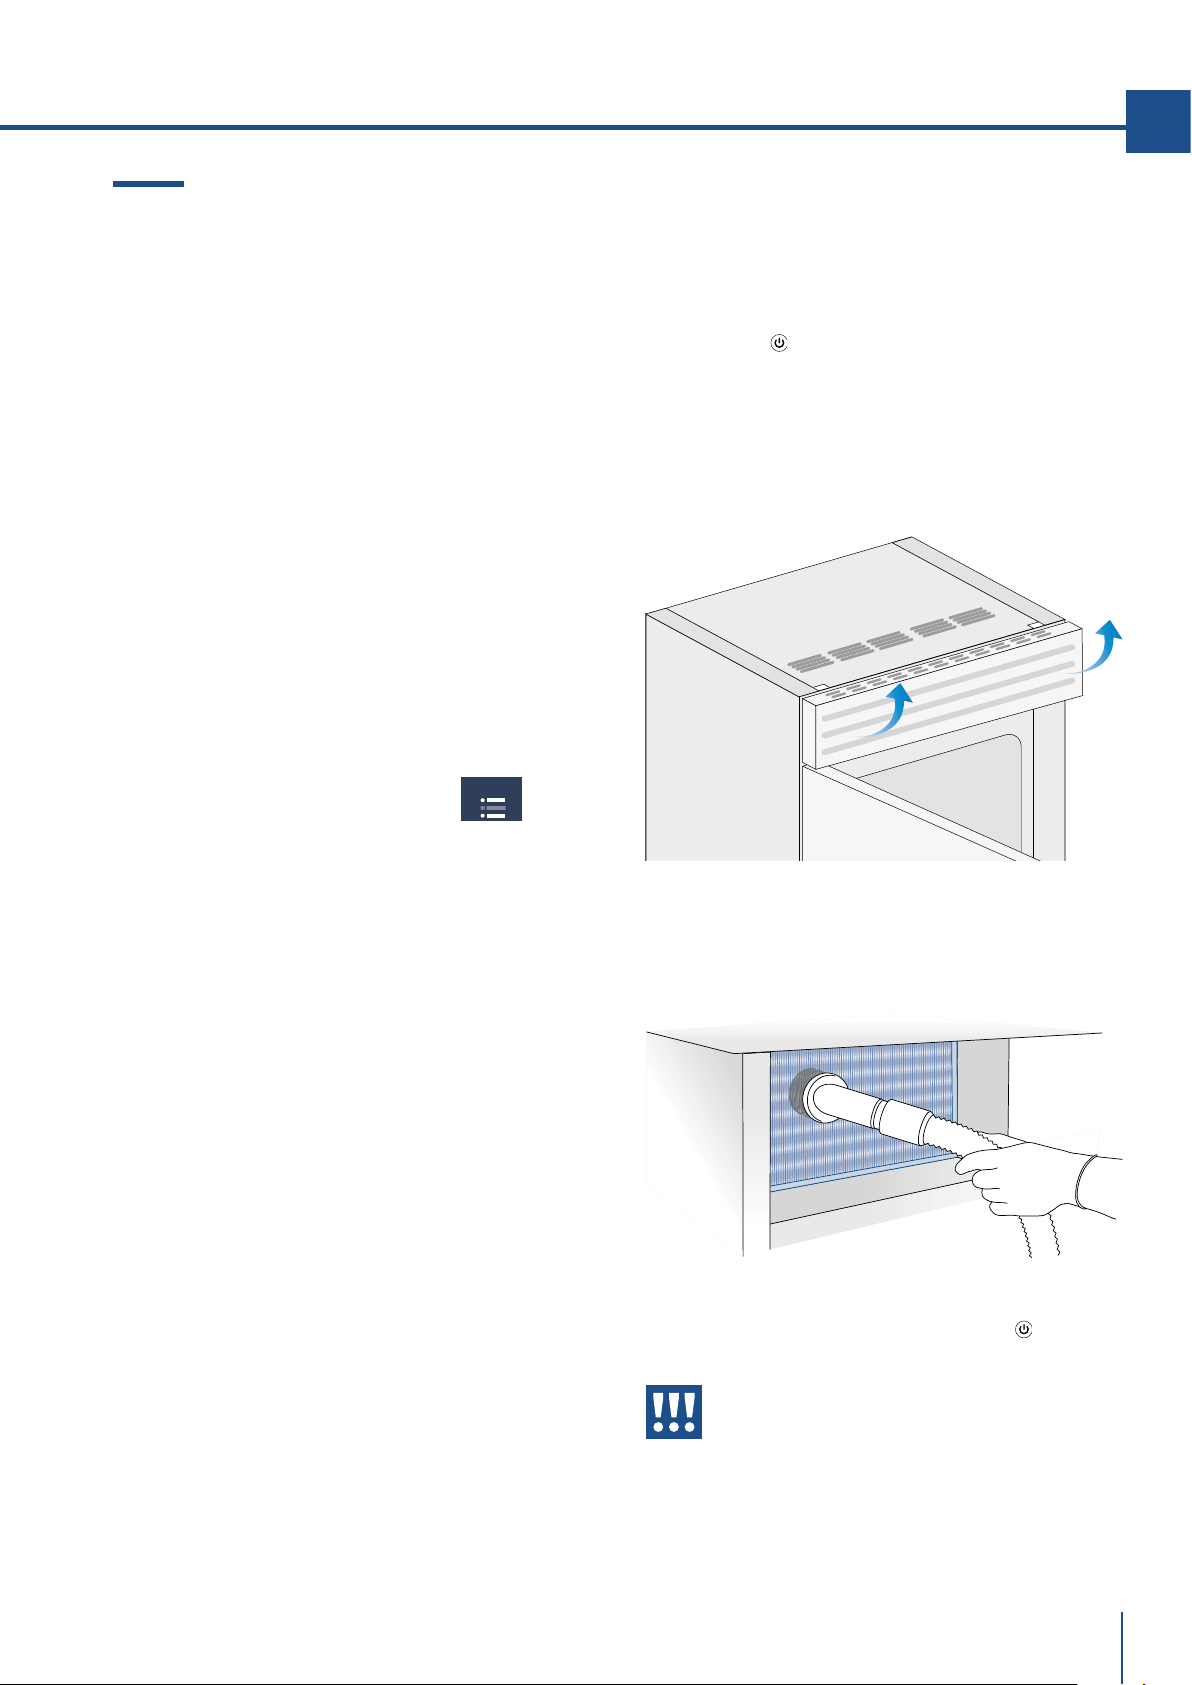
www.fhiaba.com · [email protected] · Info Line +39 0434 420160
MAINTENANCE
41
IT
10.3 Pulizia griglia di ventilazione, filtro
e condensatore
L'apparecchio richiede, per un corretto funziona-
mento, la pulizia della griglia di ventilazione, del
filtro e del condensatore.
La pulizia periodica (ogni 6 mesi) viene ricordata
attraverso un segnale acustico e visivo sul display.
E' possibile disattivare il segnale di avviso e visua-
lizzare il tempo residuo per la prossima pulizia.
Dietro la griglia di ventilazione frontale (posta nel-
la parte alta dell’apparecchiatura per la serie
StandPlus, Country e X-Pro, nella parte bassa per la
serie Integrated, Brilliance e Classic) si trova il con-
densatore. Vedi pag 7 paragrafo 3.2.
Per la pulizia usare un aspirapolvere con spazzola
morbida al massimo della potenza aspirante, pas-
sandolo sulle feritoie della griglia.
Nel caso di un significativo accumulo di polvere, la gri-
glia di ventilazione può essere rimossa per consen-
tire una pulizia più approfondita del condensatore.
Sulle impostazioni di manutenzioni, dopo
l'installazione dell'apparecchio e l'accensione si
può impostare l'avviso di pulizia del condensato-
re.
Nel caso l'avviso venga abilitato ci sarà un segnale
acustico di allarme ogni 6 mesi, che avvisa la ne-
cessaria pulizia del condensatore.
Dopo averlo pulito toccare l'icona reset per riabilita-
re l'avviso tra 6 mesi.
Nel caso non si voglia più avere l'avviso di allarme
di pulizia del condensatore toccare l'icona o.
Per l'utilizzo del dispay della manutenzione vedi pag
23.
Vedi le istruzioni del punto 11.2 attraverso il video
tutorial disponibile sul sito web Fhiaba.
www.fhiaba.com/it/supporto/
video "Bottom Condenser Cleaning".
Condensatore sopra.
Per pulire il condensatore nei modelli X-Pro,
StandPlus e Country operare nel modo seguente:
> Spegnere l’apparecchiatura premento il tasto
spegnimento
del pannello comandi principale per
3 secondi circa.
> Attendere circa 30 minuti anchè il condensatore
raggiunga la temperatura ambiente.
> Alzare verso l’alto la griglia removibile .
> Pulire il condensatore in modo approfondito da
ogni deposito di polvere come illustrato in figura
avendo cura di non danneggiarlo.
> Riavviare l’apparecchiatura agendo nuovamente
per 3 secondi circa sul tasto accensione
.
Attenzione
Le alette del condensatore sono taglienti,
utilizzate adeguate protezioni per le mani e
le braccia per pulire il condensatore in si-
curezza.
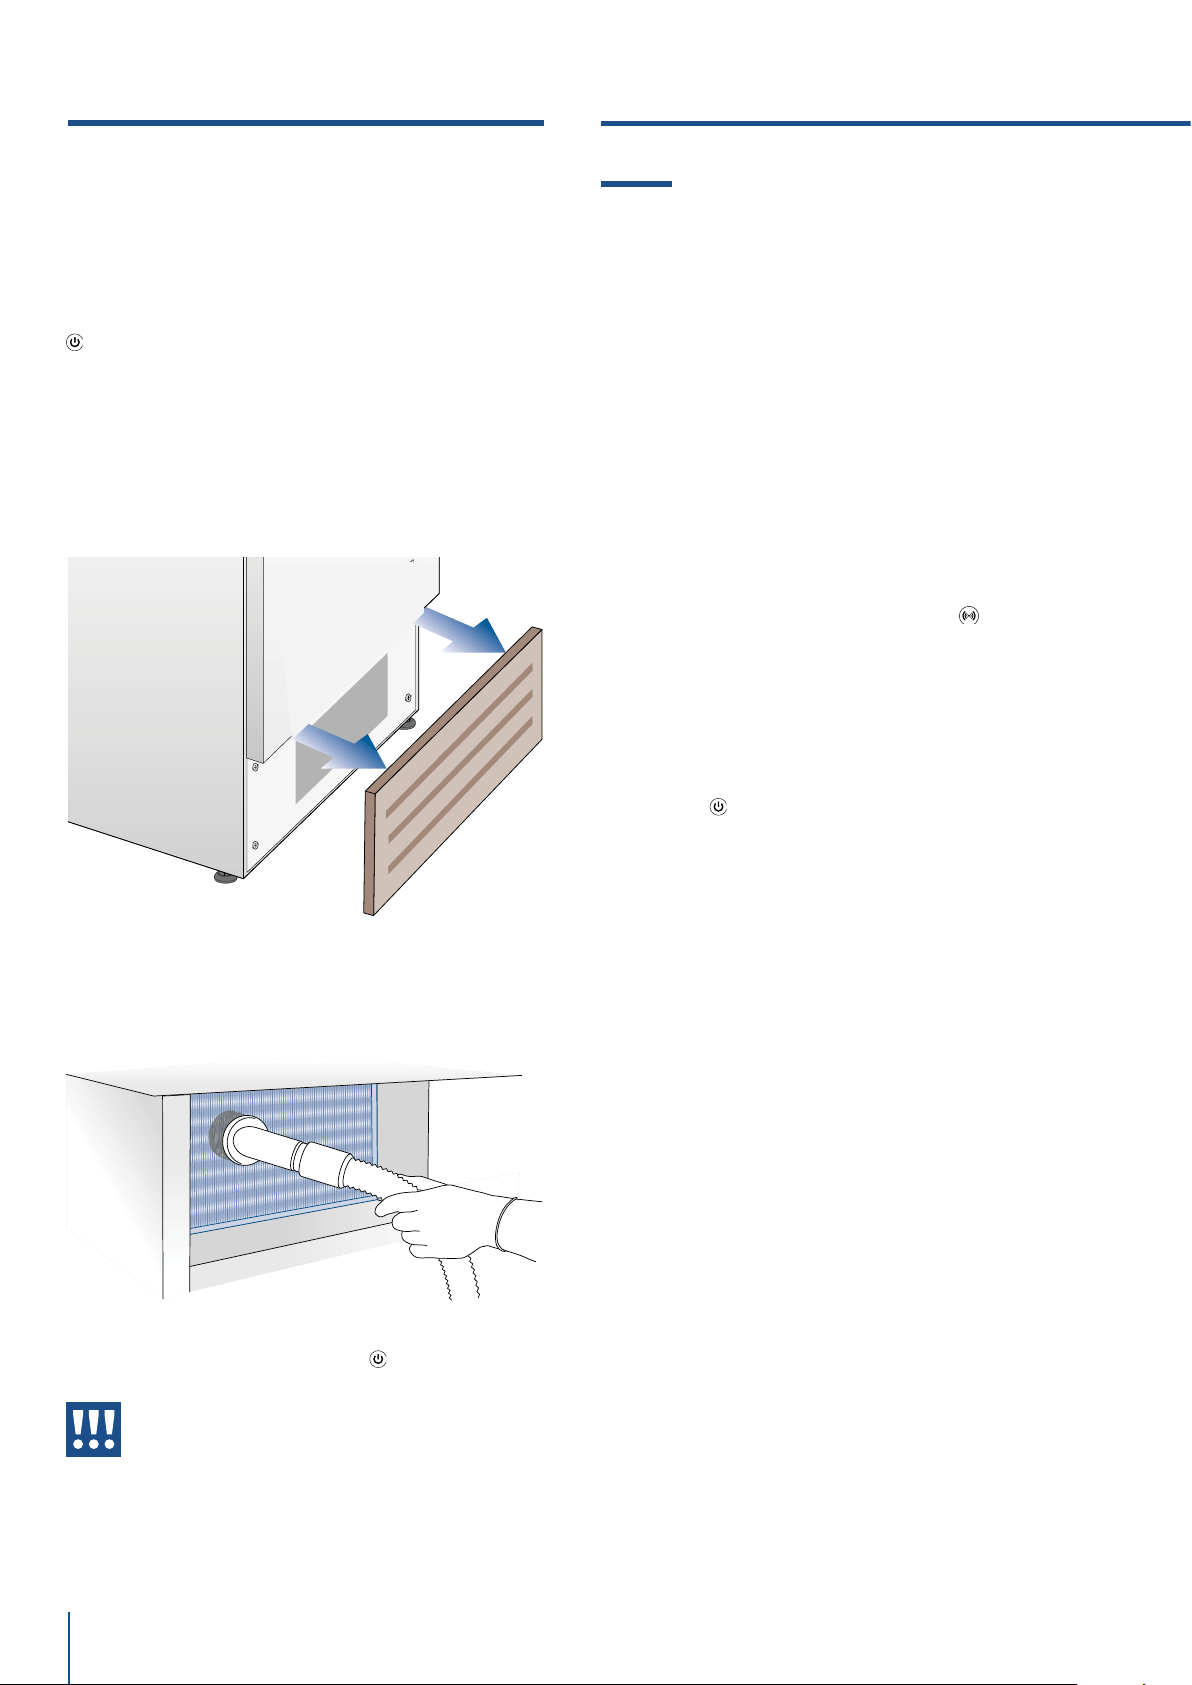
www.fhiaba.com · [email protected] · Info Line +39 0434 420160
42
11.1 Guida alla risoluzione dei problemi
Se notate anomalie nel funzionamento della vostra
apparecchiatura, utilizzate questa guida prima di
chiamare il servizio assistenza: vi potrà aiutare a ri-
solvere personalmente il problema o fornirà impor-
tanti informazioni da trasferire al servizio assistenza
per assicurare un servizio più rapido ed ecace.
Messaggio nel display e allarmi sonori
Un problema di funzionamento viene di norma indi-
cato dal display.
Problemi che non possono essere risolti dall’uten-
te, vengono segnalati attraverso un codice di guasto.
Tenere presente, tuttavia, che nei messaggi o allarmi
potrebbero apparire per particolari condizioni d’uso
o durante l’avviamento. In questi casi disattivare l’al-
larme sonoro premendo il tasto Alarm
e lasciare
l’apparecchiatura in funzione e limitare al massimo
l’apertura delle porte per circa 10-12 ore.
Il Frigo o il Freezer non funzionano
L’apparecchiatura è collegata alla rete di alimenta-
zione elettrica?
Arriva corrente alla presa di alimentazione?
il tasto Unit
è attivato?
L’unità è in modalità ‘Demo’?
Il Frigo o il Freezer è più caldo del normale
Il display vi segnala qualche codice di guasto?
La temperatura è regolata in modo corretto?
Le porte o i cassetti sono rimasti aperti per lungo
tempo?
Sono state recentemente inserite grosse quantità di
alimenti?
L’unità è in modalità ‘Demo’?
L’apparecchiatura rimane in funzione
per un lungo periodo di tempo
Tener presente che nelle giornate molto calde e con
temperature elevate nel locale è normale che il com-
pressore rimanga in funzione per periodi prolungati.
Le porte o i cassetti sono rimaste aperte per lungo
tempo?
Sono state recentemente inserite grosse quantità di
alimenti?
Verificate che le porte siano ben chiuse e che gli ali-
menti o i contenitori non impediscano la loro perfetta
chiusura.
È uno o più scomparti in modalità Shopping?
Si sentono rumori strani
È normale sentire rumori legati al funzionamento
dei ventilatori o dei compressori o durante la fase di
sbrinamento.
Condensatore sotto.
Per pulire il condensatore nei modelli Classic, In-
tegrated o Brilliance operare nel modo seguente:
> Spegnere l’apparecchiatura agendo sul tasto Unit
del pannello comandi principale per 3 secondi
circa.
> Attendere circa 30 minuti anchè il condensatore
raggiunga la temperatura ambiente.
> Rimuovere la griglia removibile sotto la porta
> Pulire il condensatore in modo approfondito da
ogni deposito di polvere come illustrato in figura
avendo cura di non danneggiarlo.
> Riavviare l’apparecchiatura agendo nuovamente
per 3 secondi circa sul tasto Unit
.
Attenzione
Le alette del condensatore sono taglienti,
utilizzate adeguate protezioni per le mani e
le braccia per pulire il condensatore in si-
curezza.
10. CURA E PULIZIA

www.fhiaba.com · [email protected] · Info Line +39 0434 420160
43
IT
La rumorosità può essere più accentuata anche in
funzione del posizionamento dell’apparecchiatura e
dell’ambiente circostante.
Formazione di condensa all’interno ed all’esterno
del Frigorifero
Se il clima è molto umido, la comparsa di un po’ di
condensa è normale. L’apertura della porta o dei
cassetti per periodi prolungati può contribuire alla
formazione di condensa.
Assicuratevi in ogni caso che le porte siano sempre
chiuse perfettamente.
Il Frigorifero o Freezer presenta brina o ghiaccio
Avete lasciato aperte le porte per un lungo periodo?
Le porte non chiudono perfettamente?
Se le porte non chiudono perfettamente contattate il
vostro installatore.
Nel caso di formazione di brina o di ghiaccio nel vano
Crisper - Fresco, dovuta ad aperture frequenti e pro-
lungate delle porte, disattivare per un certo tempo la
funzione Crisper - Fresco agendo sul relativo pulsan-
te del pannello di controllo. Attendere che la brina o
il ghiaccio si sciolgano, quindi estrarre il cassetto ed
asciugare le pareti ed il fondo del vano.
Notate odori sgradevoli all’interno
Pulite l’apparecchiatura completamente seguendo
le istruzioni.
Coprite ermeticamente tutti gli alimenti. Non conser-
vate cibo per periodi prolungati.
La porta si apre con dicoltà
L’apparecchiatura è stata progettata per permetter-
ne la chiusura ermetica. Quando la porta è chiusa si
può verificare una situazione di vuoto: in questo caso
è necessario attendere qualche secondo perché la
pressione si riequilibri, prima di aprire la porta.
L’apparecchiatura sta rareddando ma le luci e il
display non funzionano
Verificare se l’apparecchio è stato accidentalmente
messo in modalità Sabbath
Il fabbricatore di ghiaccio non funziona
Assicurarsi che al funzione l’Ice Maker sia accesa
(icona ).
Per accenderlo agire sulla funzione stessa.
Assicurarsi che l’apparecchiatura sia collegata
all’impianto idraulico.
Se il filtro non è stato sostituito da molto tempo si
può limitare il flusso d’acqua
Il fabbricatore di ghiaccio non produce grandi
quantità di ghiaccio
In media, la produzione di ghiaccio è di circa 10 cu-
betti ogni due ore.
Il ghiaccio si congela in blocco
Se il ghiaccio non viene utilizzato frequentemente,
è possibile che si congeli in blocchi. È consigliabile
rimuovere il blocco di cubetti e lasciare che la baci-
nella si riempia nuovamente.
Il ghiaccio ha un sapore o un colore insolito
Quando l’Ice Maker viene usato per la prima volta si
consiglia di svuotare il contenuto della bacinella al
suo primo riempimento.
Potrebbe essere necessario sostituire la cartuccia
filtro, soprattutto se il frigorifero è rimasto spento
per più di un mese o se la cartuccia non è stata cam-
biata per più di sei mesi.
Contattare eventualmente un idraulico o un esperto
di sistemi di trattamento acque, per verificare che il
problema non sia dovuto all’acqua di alimentazione.
Se l’apparecchio acquistato è stato utilizza-
to come modello di showroom può essere in
una speciale modalità di risparmio energetico
chiamata modalità Demo in cui l’apparecchio
risulta essere operativo (le luci funzionano e
vengono visualizzate false temperature), ma
nessun rareddamento avviene realmente.
Se si sospetta che il vostro apparecchio è in
modalità Demo si prega di contattare il riven-
ditore per l’assistenza con la disattivazione di
questa funzione.
ICE MAKER
11.GUIDA ALLA RISOLUZIONE DEI PROBLEMI

www.fhiaba.com · [email protected] · Info Line +39 0434 420160
44
> In caso di anomalia toccare il tasto Alarm e il display visualizzerà il messaggio di anomalia con il pro-
prio codice numerico di errore.
> Il messaggio rimane visualizzato per 3 secondi, successivamente ricomparirà la schermata home.
> Per bloccare il messaggio sulla schermata, premere sul display il tasto info ( ). Il messaggio rimarrà sul
sulla schermata per 30 secondi, poi ritornerà la schermata home.
> Nel caso compaiano più messaggi di errore. Il display visualizzerà in sequenza di tempo i vari messaggi
di anomalia.
11.2 Indicazioni di anomalia che possono apparire sul display
Messaggio sul display Descrizione Anomalia
Interr.Corrente
Interruzione prolungata dell’energia elettrica
l’apparecchiatura si riavvia automaticamente segnalando le temperature più
calde registrate
Premere il pulsante Alarm per disattivare l’allarme sonoro
Unità sup. aperta
Porta Frigo aperta
il messaggio appare dopo un minuto dall’apertura della porta
Unità inf. aperta
Porta Freezer aperta
il messaggio appare dopo un minuto dall’apertura della porta
Cambiare Filtro
Sostituzione Filtro Acqua
il messaggio appare quando resta il 20% dell’automonia del filtro
Unità sup. calda
Frigo troppo caldo
vedi guida alla risoluzione dei problemi
Unità sup. fredda
Frigo troppo freddo
attendere 12 ore: se l’anomalia persiste rivolgersi al servizio di Customer
Care
FrescoTroppoCald
Comparto Crisper - Fresco troppo caldo
vedi guida alla risoluzione dei problemi
FrescoTroppoFred
Comparto Crisper - Fresco troppo freddo
attendere 12 ore: se l’anomalia persiste rivolgersi al servizio di Customer
Care
Unità inf. calda
Freezer troppo caldo
vedi guida alla risoluzione dei problemi
Unità inf. fredda
Freezer troppo freddo
attendere 12 ore: se l’anomalia persiste rivolgersi al servizio di Customer
Care
Codice guasto...
Codice di guasto
rivolgersi al servizio di Customer Care. Verificare le condizioni d’uso (carichi
di alimenti elevati, frequenti aperture porte) Premere il pulsante Alarm per
disattivare l’allarme sonoro
Check condenser
Check Condenser
Ogni 6 mesi compare sul display il messaggio “Check Cond.”, pulire il conden-
satore e premere per 5 secondi il tasto Enter
per il reset.
11.GUIDA ALLA RISOLUZIONE DEI PROBLEMI


www.fhiaba.com · [email protected] · Info Line +39 0434 420160
47
EN
1
1.1
1.2
1.3
1.4
1.5
1.6
IMPORTANT DIRECTIONS OF SAFETY AND THE ENVIRONMENT
For your safety.................................................................................................................................................................
Important information when using the applance ...............................................................................................
Caring for the environment..........................................................................................................................................
Cleaning, sanitization and maintenance of the ice and/or water dispenser (if present)...........................
Informations for control bodies..................................................................................................................................
To save energy.................................................................................................................................................................
48
48
48
49
49
50
51
2
2.1
2.2
2.3
2.4
INSTALLATION
Installation.........................................................................................................................................................................
Connection to electrical power supply......................................................................................................................
Connection to the electrical power.............................................................................................................................
Refrigerant........................................................................................................................................................................
52
52
52
52
52
3
3.1
3.2
3.3
3.4-
BEFORE STARTING
Know your Fhiaba...........................................................................................................................................................
Main conmponents.........................................................................................................................................................
Electic Control..................................................................................................................................................................
Main control panel (models 1T, 0T, 0H and 0F)......................................................................................................
53
54
54
56
56
4
4.1
4.2
4.3
APPLIANCE SWITCHING ON AND OFF
Switching on and o......................................................................................................................................................
How to adjust the temperature for dierent requirements................................................................................
Information signals of anomaly on the display......................................................................................................
57
58
59
60
5
5.1
5.2
FUNCTIONS AND SETTINGS
Functions...........................................................................................................................................................................
Settings.............................................................................................................................................................................
63
63
70
6
6.1
INTERNAL LAYOUT
Internal layout (positioning, adjustment, removal)...............................................................................................
76
76
7
7.1
7.2
7.3
ACTIVATION AND USE OF THE ICE MAKER
Activation and use of the Ice Maker..........................................................................................................................
Water Filter (not 0F models)........................................................................................................................................
Water filter for freezer column Ice Maker................................................................................................................
77
77
78
78
8
8.1
LIGHTING
Lighting...............................................................................................................................................................................
79
79
9
9.1
9.2
FOOD PRESERVATION
General directions..........................................................................................................................................................
How to maintain good food quality............................................................................................................................
81
81
81
10
10.1
10.2
10.3
CARE AND CLEANING
Care and Cleaning...........................................................................................................................................................
Cleaning of the ventilation grill and condenser.....................................................................................................
Internal cleaning.............................................................................................................................................................
82
82
83
84
11
11.1
11.2
TROUBLESHOOTING GUIDE
Troubleshooting Guide...................................................................................................................................................
Malfunction messages appearing on the display..................................................................................
................
87
87
88
INDEX

www.fhiaba.com · [email protected] · Info Line +39 0434 420160
48
1.1 For your safety
> If this appliance is replacing an existing appliance
which must be removed or disposed of, make sure
that it does not become a dangerous trap for chil-
dren by cutting its power supply cable and render-
ing it impossible to close the door. Use the same
caution at the end of the lifespan of the new appli-
ance.
> The appliance is not designed to operate with ex-
ternal timers or with remote-control systems.
> This appliance is designed to refrigerate bever-
ages and foods and is intended for domestic use.
> This appliance is for refrigeration and conserva-
tion of fresh and frozen foods in the home. Every
other use is considered inappropriate.
> The appliance must be installed by following
the instructions in the Installation Guide, particu-
lar care should be taken not to obstruct the vent
openings of the appliance and of the built-in units.
> The appliance features a concentrated lighting
system with LED lamps. Do not stare into these
lamps when they are on to avoid possible eyesight
damage.
This warning is also contained on the label attached
to the inside of the refrigerator door.
> When the freezer is functioning do not touch the
inner surfaces in stainless steel with wet or damp
hands, since skin may stick to the very cold sur-
faces.
> Do not use any type of electrical equipment inside
of the food conservation compartments.
> When positioning the shelves, do not place fingers
in the shelf slide guides.
> Do not place flammable liquid containers nearby
the equipment.
> Never attempt to extinguish a flame/fire with wa-
ter: turn o the appliance and cover the flame with
a fireproof blanket.
> Do not position containers of flammable liquids
near the appliance.
> Completely switch o the appliance and unplug
the power supply cable during cleaning operations.
If the plug is not easily reached, it is a good idea to
turn o the breaker or remove the fuse that con-
trols the socket that the appliance is connected to.
> The packaging parts can be dangerous for chil-
dren: do not allow children to play with the plastic
bags, plastic film or Styrofoam.
> Any repairs must be performed by a qualified Fh-
iaba Service technician.
> This appliance is not intended for use by persons
(including children) with reduced physical, sensory
or lack of experience and knowledge unless they
have been given supervision or instruction con-
cerning use of the appliance by a person responsi-
ble for their safety. Children should be supervised
to ensure that they do not play with the appliance.
> Do not damage the appliance refrigerant circuit
pipes.
> Do not store explosive substances such as aerosol
cans with a flammable propellant in this appliance.
> If the power cord of this appliance is damaged,
it must be replaced by the manufacturer, customer
service or a similarly qualified person. Improper in-
stallations and repairs may put the user at consid-
erable risk.
> Repairs may be performed by the manufacturer,
customer service or a similarly qualified person
only.
> Plug into a grounded 3 prong outlet.
> Do not remove ground prong.
> Do not use an adapter.
> Do not use an extension cord.
> Disconnect power to all units before servicing.
> If the SUPPLY CORD is damaged, it must be repla-
ced by the manufacturer, its service agent or simi-
lar qualified person in order to avoid a hazard.
> Children should be supervised to ensure that they
do not play with the appliance.
children.
> Do not modify this appliance.
> Do not insert pointed metal objects (cutlery or
utensils) into the slots in the appliance.
> Do not touch (especially with wet hands) frozen
products or 22 - PRECAUTIONS 914779600/A put
them in your mouth directly.
> Do not store inflammable, explosive or volatile
substances.
> Do not keep explosive substances, such as spray
bottles with flammable propellants in the applian-
ce.
> Bottles containing strong alcoholic drinks must
be tightly closed and stored vertically.
> Organic compounds, acids and essential oils can
corrode the seals and plastic surfaces if
left in contact with them for extended periods.
> Turn o the appliance and unplug it from the
mains before cleaning or maintenance.
> Do not pull the cable to unplug the appliance.
1. IMPORTANT DIRECTIONS FOR SAFETY AND THE ENVIRONMENT

www.fhiaba.com · [email protected] · Info Line +39 0434 420160
49
EN
1.2 Important information when using
the appliance
> Cleaning and maintenance that should be per-
formed by the user must not be carried out by
unsupervised children.
> Never use electrical appliances inside the appli-
ance (e.g. heater, electric ice maker, etc.). Explosion
hazard!
> Never defrost or clean the appliance with a
steam cleaner! The steam may penetrate electri-
cal parts and cause a short-circuit. Risk of electric
shock!
> Do not use pointed and sharp-edged implements
to remove frost or layers of ice. You could dam-
age the refrigerant tubes. Leaking refrigerant may
cause eye injuries or ignite.
> Take care that no objects are stuck in the doors.
> Do not store products which contain flammable
propellants (e.g. spray cans) or explosive sub-
stances in the appliance.
Explosion hazard!
> Do not stand on or lean heavily against base of
appliance, drawers or doors, etc.
> Before cleaning the appliance, pull out the power
cord plug or switch o the fuse. Do not pull out the
power cord plug by tugging on the power cord.
> Store high-percentage alcohol tightly closed and
standing up.
> Keep plastic parts and the door seal free of oil
and grease. Otherwise, parts and door seal will
become porous.
> Never cover or block the ventilation openings for
the appliance.
injury
> According to current regulations, children betwe-
en 3 and 8 years of age can take or load food from
the appliance, but it is highly discouraged to allow
children under 8 years of age to perform these
operations and in general to use the appliance.
> Keep children under the age of eight at a safe di-
stance unless they are constantly supervised
and make sure that they do not play with the applian-
ce.
> Do not use mechanical, electrical, chemical de-
vices other than those recommended by the manu-
facturer to speed up the defrosting process.
> Do not damage the cooling circuit (if it can be ac-
cessed).
> Do not use electrical appliances inside food stor-
age compartments unless these are of the type
recommended by the manufacturer.
>In the event of damage to the cooling circuit, avoid
the use of naked flames and ventilate the area
properly.
> Do not use the appliance or parts of it in ways
other than those specified in this manual.
> Opening the door for long periods can cause the
temperature in the appliance compartments to rise
considerably.
>Clean surfaces that may comeinto contact with food
and accessible drainage systems regularly.
> Store raw meat and fish in suitable containers in
the refrigerator, so that it does not come into contact
with other food or drip on it.
> If the appliance is left empty for long periods of
time, switch it o, thaw it, clean it, dry it and leave the
door open to prevent the development of mould
inside.
> Never rest sharp metal objects such as knives, for-
ks, spoons and lids on the appliance during use.
> Do not use abrasive or corrosive detergents (e.g.
scouring powders, stain removers and metallic
sponges) on glass parts.
> Do not sit on the appliance.
> Do not sit or lean on the door or any open drawers.
>
Do not prize on the door or handle to move the ap-
pliance.
> Do not use electrical appliances (e.g. hair dryers) or
sprays for defrosting, the plastic parts could be da-
maged.
> Do not use the appliance to cool rooms for any re-
ason.
> Always unplug the appliance in the event of a fault
or when performing cleaning or maintenance.
> Do not keep liquids in tins or glass containers in
the freezer.
> Do not place heavy objects on the top of the ap-
pliance.
www.fhiaba.com · [email protected] · Info Line +39 0434 420160
50
Symbols used in the Guide:
Note
Recommendations for correct use of the
appliance
Important
Directions for avoiding appliance damage
Warning
Indications for avoiding injury to people
1.3 Caring for the environment
> This appliance conforms to the WEEE European di-
rective (2012/19/EU) and must be disposed of sepa-
rately from other waste at the end of its service life.
> The appliance does not contain substances in
quantities sucient to be considered hazardous to
health and the environment, in accordance with cur-
rent European directives.
> Pay special attention to correct disposal proce-
dure for all the packaging materials.
Power voltage
Danger of electrocution
Disconnect the mains power supply.
Unplug the appliance.
>
The appliance must not be disposed of with urban
waste. Contact local waste disposal centres for on
how to dispose of recyclable waste.
> To dispose of the appliance: Cut the power cable
and remove it.
> Prior to disposal, cut the power supply cord and
make it impossible to close the door.
> During disposal, avoid damage to the refrigera-
tion circuit.
> The appliance does not contain hazardous sub-
stances for the atmospheric ozone layer, neither in
the refrigeration circuit nor in the insulation.
> Our appliances are packaged in non-polluting
and recyclable materials.
> Deliver the packing materials to the appropriate
recycling centre.
Plastic packaging
Danger of suffocation
Do not leave the packaging or any part
of it unattended.
Do not let children play with the plastic
bags.
1.4 Cleaning, sanitization and mainte-
nance of the ice and/or water dispens-
er (if present)
Failure to follow the instructions regarding sanitiz-
ing can compromise the hygienic safety of the wa-
ter dispensed.
> When using the appliance for the first time and
every time the filter is changed, it is recommended
to let the water flow in the circuit using the “Manual
Cleaning” and discard the ice produced in the first
24 hours.
> If the water dispenser has not been used for more
than 4/5 days, it is advisable to clean the circuit and
run o the first litre of water.
> Reposition the removable water dispenser (if pre-
sent), ensuring your hands are hygienically clean.
> Clean the ice bucket or drawer regularly but using
only drinking water.
> The filter must be changed when indicated on the
control panel or when the ice/water dispenser has
not been used for more than 30 days.
> With each filter replacement, sanitise the ice and/
or water distribution system using a food grade
disinfectant (with sodium hypochlorite), which does
not alter the characteristics of the materials. Rinse
with at least 2 litres of water before use.
> Only original spare parts supplied by the manu-
facturer should be used when replacing compo-
nents in the ice and water dispenser.
> Any work on the appliance must be carried out
by a qualified technician or the After-sales Service.

www.fhiaba.com · [email protected] · Info Line +39 0434 420160
51
EN
Warning
To avoid contamination of food, please
respect the following instructions:
> Opening the door for long periods can
cause a significant increase of the tempe-
rature in the compartments of the applian-
ce.
> Clean regularly surfaces that can come in
contact with food and accessible drainage
systems.
> Clean water tanks if they have not been
used for 48 h; flush the water system con-
nected to a water supply if water has not
been drawn for 5 days.
> Store raw meat and fish in suitable con-
tainers in the refrigerator, so that it is not in
contact with or drip onto other food.
>Two-star frozen-food compartments are
suitable for storing pre-frozen food, storing
or making icecream and making ice cubes.
> One-, two- and three-star compartments
are not suitable for the freezing of fresh
food.
> If the refrigerating appliance is left empty
for long periods, switch o, defrost, clean,
dry, and leave the door open to prevent
mould developing within the appliance.
1.5 Informations for control bodies
> For EcoDesign checks, the installation and
preparation of the appliance must comply with EN
62552 standard.
> Ventilation requirements, dimensions and
minimum space from the rear wall are indicated in
the "Installation" chapter of this manual.
> Contact the manufacturer for more information.
1.6 To save energy
> Correct use of the appliance, correct
packaging of foodstus, a constant
temperature and food hygiene have eects
on the quality of storage.
> Reduce the number of times that the doors
are opened and the length of time they
remain open to prevent the compartments
from heating up excessively.
> Clean the condenser (if it can be accessed)
at the rear of the appliance periodically to
prevent the appliance from losing eciency.
> Defrost frozen food in the refrigerator
compartment in order to make use of the
cold stored in the frozen foods.
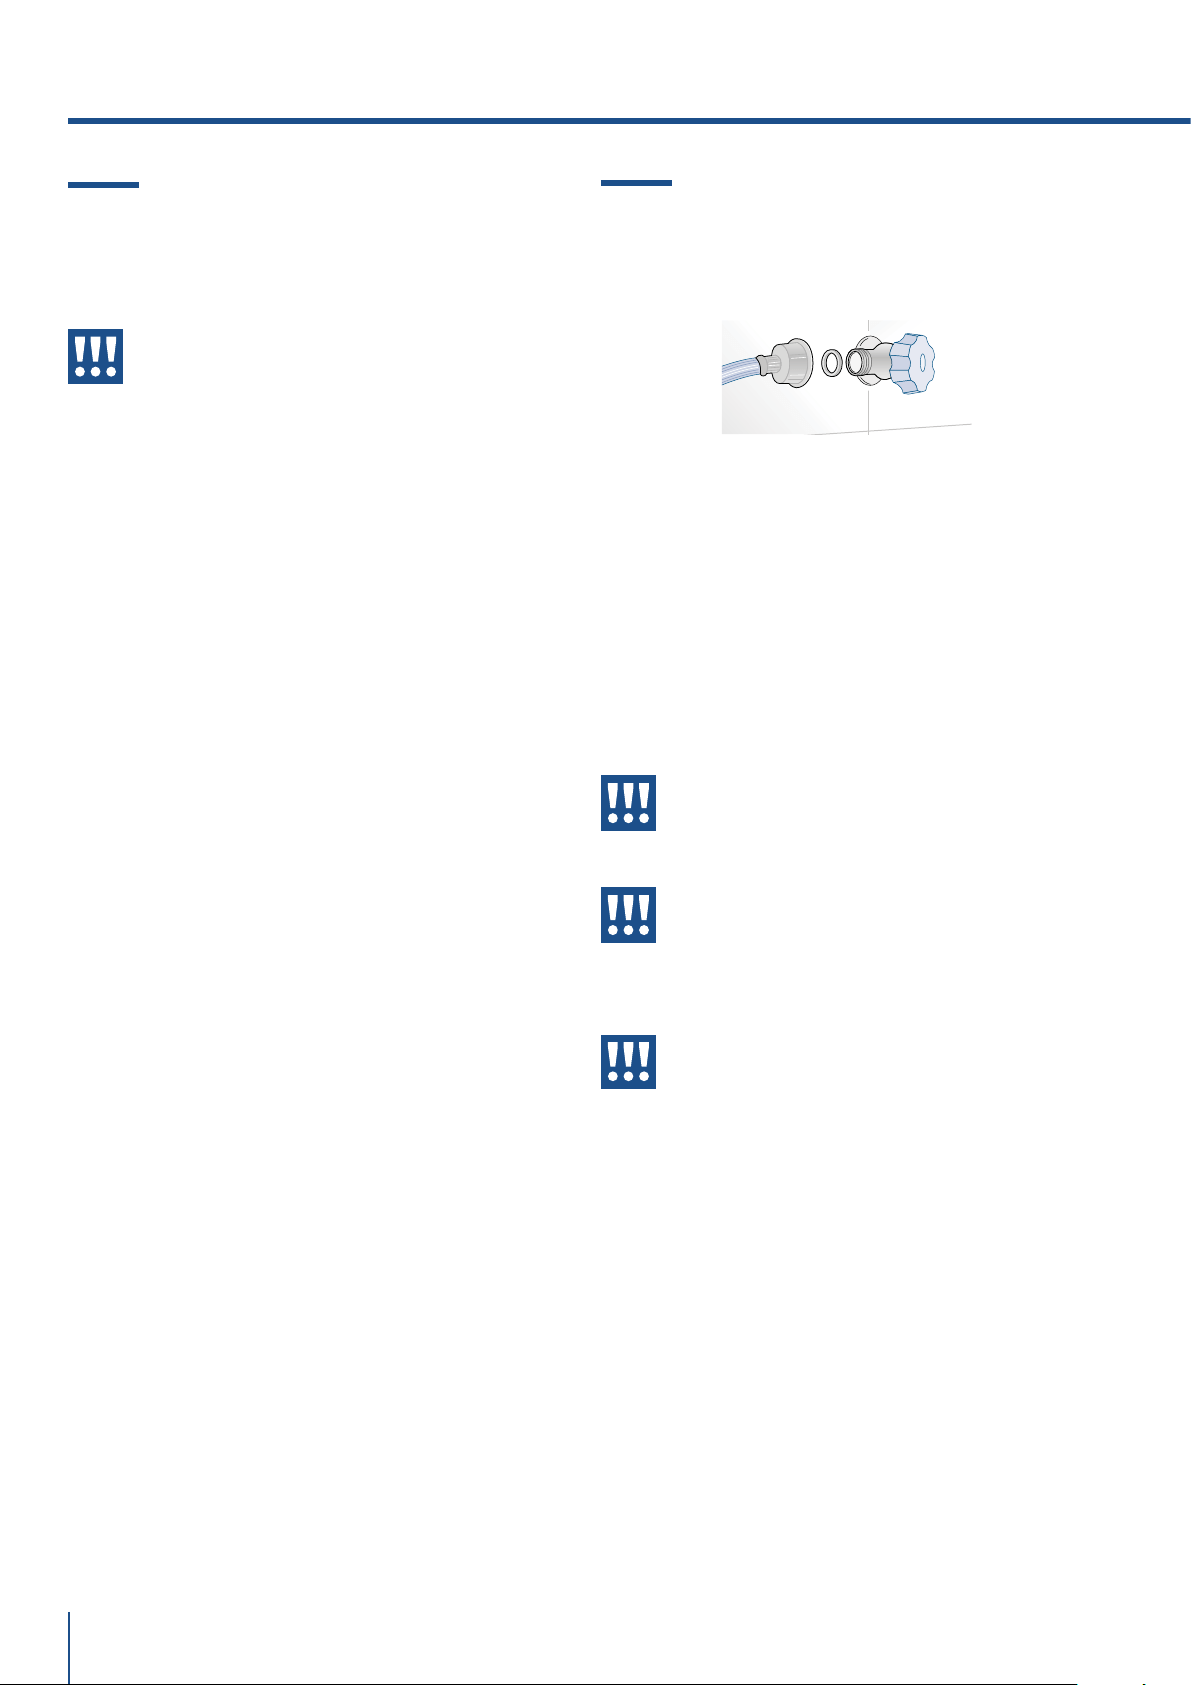
www.fhiaba.com · [email protected] · Info Line +39 0434 420160
52
2. INSTALLATION
2.2 Connection to the water system
The models provided with Ice Maker require a con-
nection to the domestic water supply system. This
can be executed only through the provided new wa-
ter hose with 3/4” threading.
The system pressure must be between 0.05 MPa
and 0.5 MPa (between 0.5 bar and 5 bar).
Dierents pressures can cause malfunctions or
leaks in the water system. The appliance should be
supplied only with drinkable water.
Warning
The appliance should be supplied only
with drinkable water.
Warning
Make sure that installation is performed
correctly, according to all of the direc-
tions in the specific installation manual
provided with the appliance.
Warning
Do not attempt to use a locally sourced
garden hose threaded adapter or braid-
ed supply line. It will strip the threads on
the appliance water connection solenoid.
2.1 Installation
Make sure that installation is performed correctly,
adhering to all directions in the specific installation
manual provided with the appliance.
Warning
Always connect the water before the
power.
The appliance must be connected to ground in
compliance with electrical system safety stand-
ards.
> Position the appliance with the aid of a second
person.
> Never use the open door tolever the appliance into
place when fitting.
> Avoid exerting too much pressure on the door
when open.
> The appliance must not be installed near heat
sources. If this is not possible, suitable insulation
must be used.
>The appliance must not be exposed to direct sun-
light.
> Do not use the appliance outdoors.
> Installation and servicing should be carried out
by qualified personnel in accordance with current
standards.
> Have the electrical connection performed by au-
thorised technical personnel.
> For avoiding dangers, if the power supply cable is
damaged, contact technical support immediately
and they will replace it, so as to prevent any risk.
> Always use any necessary/ required personal
protective equipment (PPE) before performing any
work on the appliance (installation, maintenance,
positioning or movement).
> Before performing any operation on the appli-
ance, switch o the power supply.
> This appliance can be used up to a maximum alti-
tude of 4,000 metres above sea level.
>If installed near another refrigerator or freezer,
keep it at a minimum distance of 2 cm.
>Do not try to repair the appliance yourself or with-
out the assistance of a qualified technician.
>Do not install/use the appliance outdoors.
>CAUTION: while positioning the appliance, make
sure that the power supply cable is not caught or
damaged.
>To prevent instability of the appliance, install and
secure it correctly as indicated in the instructions
provided in this manual.
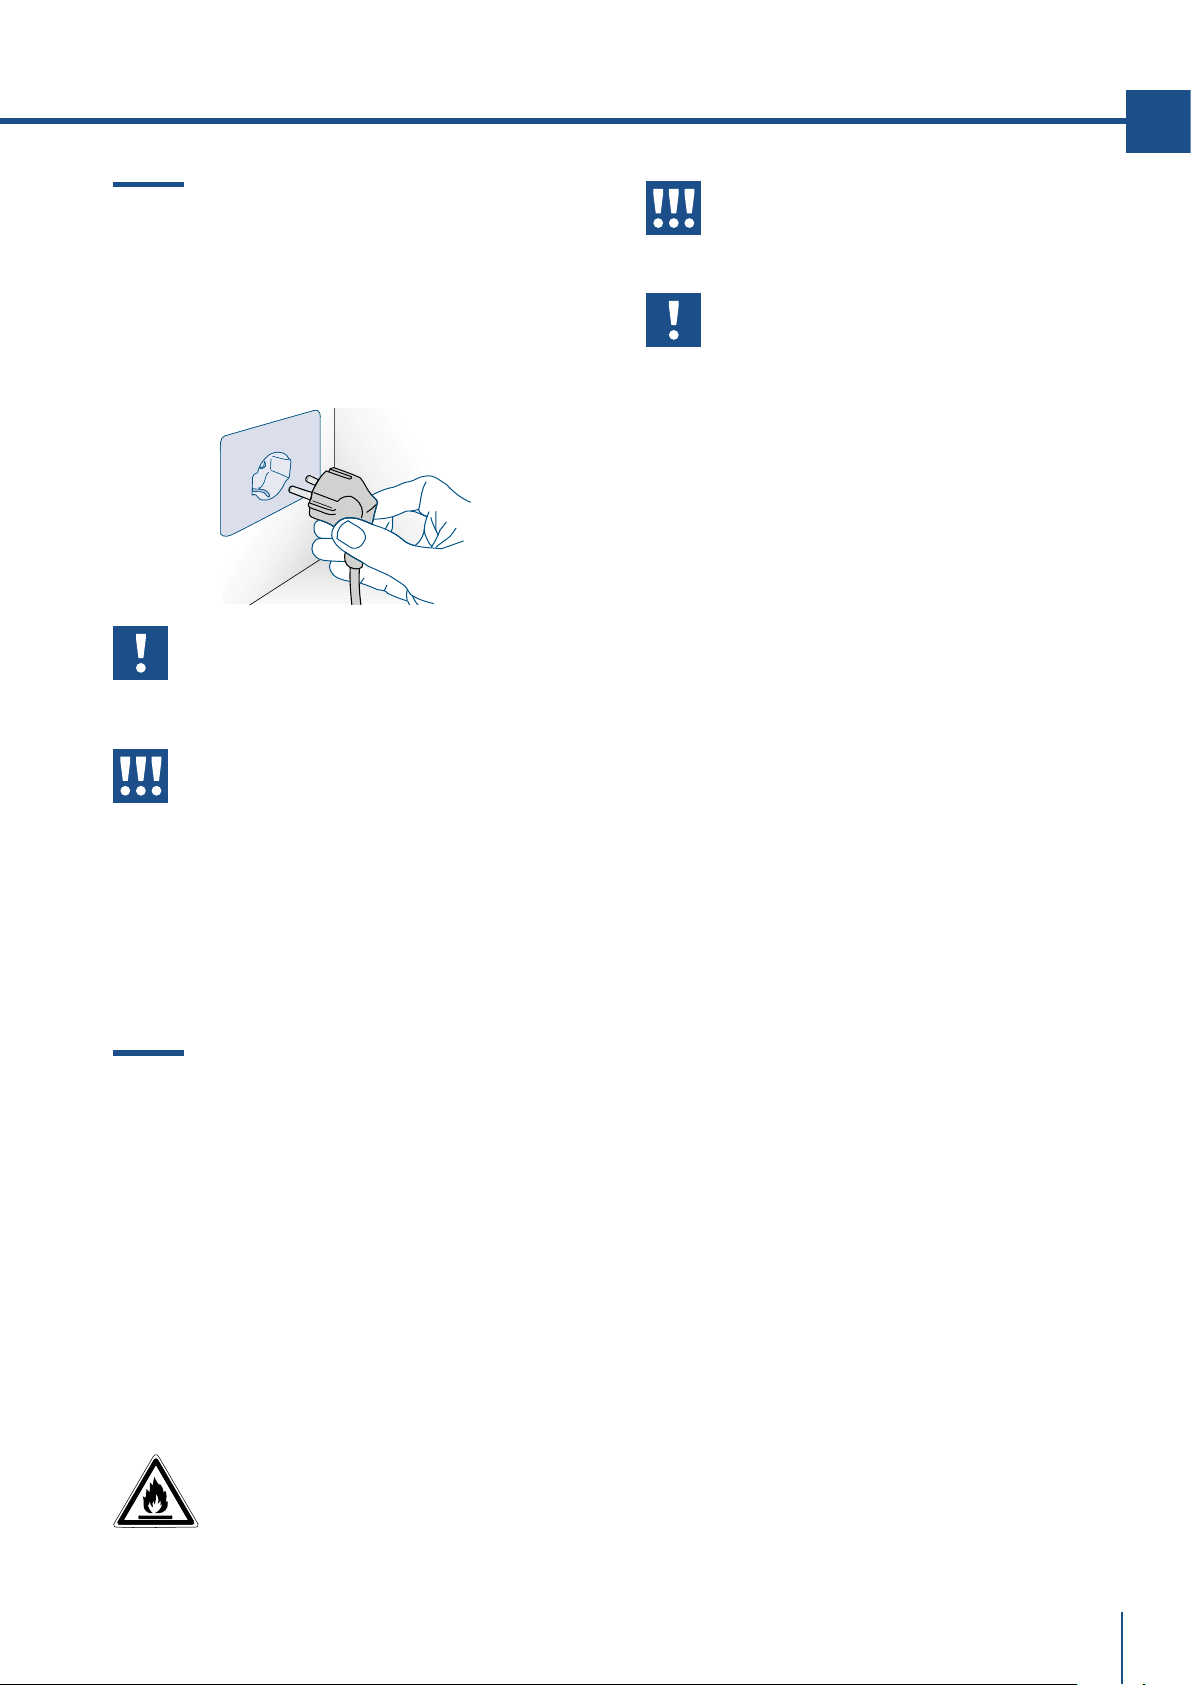
www.fhiaba.com · [email protected] · Info Line +39 0434 420160
2.4 Refrigerant
The refrigerant isobutane (R600a) is contained with-
in the refrigerant circuit of the appliance, a natural
gas with a high level of environmental compatibility,
which is nevertheless flammable.
> During transportation and installation of the ap-
pliance, be certain that none of the components of
the refrigerant circuit become damaged.
> If the refrigerant circuit should become damaged:
– avoid open flames and sources of ignition;
– thoroughly ventilate the room in which the appli-
ance is situated.
ISO 7010 W021
53
EN
2.3 Connection to the electrical power
supply
The appliance is equipped with a Schuko type 16A
plug and must be connected to the electrical power
supply through a corresponding Schuko socket.
Do not use extension cords and/or multiple adapt-
ers for the power supply connection.
Important
Do not use extension cords and/or mul-
tiple adapters for the power supply con-
nection.
Warning
If energy is supplied through an alter-
native energy power source (solar, geo-
thermal, etc..) or if home automation
systems are installed, it is necessary to
install the Alternative Energy Kit to inte-
grate the unit into the power grid.
Caution:
risk of fire / flammable materials.
Important
Carry out transportation, installation
and/or clearing with extra care so that
no damage occours to the refrigeration
circuit.

www.fhiaba.com · [email protected] · Info Line +39 0434 420160
54
3. BEFORE STARTING
3.1 Know your Fhiaba
Congratulations for having purchased your new Fh-
iaba: from now on you can use our innovative con-
servation system, which will allow you to keep all of
your food in the best way possible.
This manual will answer most of your questions
about the product’s features. Should you require
further information, please.
3.2 Manufacturer’s liability
The manufacturer declines all liability for
damage to persons or property caused by:
> use of the appliance other than that
specified;
> failure to comply with the instructions in the
user manual;
> tampering with any part of the appliance;
> use of non-original spare parts.
3.3 Technical support
> In the event of failure of the appliance, contact the
technical support and have the repair carried out by
qualified personnel only.
> make sure you have the model and serial number
available on the identification plate.
> Use original spare parts only.
>Do not try to repair the appliance yourself or
without the assistance of a qualified technician: this
aects safety and may void the warranty.
> Original spare parts remain available for 10 years
after the last production of the model.
> The following spare parts are available only for
authorized repair technicians: electronic boards,
thermostats, temperature sensors, hinges, lamps,
door handles.
> Our green number
800-344222 (800-FHIABA)
> call us: +39 0434 420160
> write us an e-mail at car[email protected]
> check our website www.fhiaba.com
Important
Before calling take note of the serial
number of the appliance, shown on the
warranty certificate and on the serial
number plate located inside the refrig-
erator compartment on the side opposite
the door opening.
3.4 Technical data
Refrigerant type, storage volume and other tech-
nical data can to be found on the product plate.
Further information on all available models can
be found at https://www.fhiaba.com/energy-
label website (Europe only). This link refers to
the official page of the European EPREL prod-
uct database, the address of which has not been
published at the time of printing. Follow the
guidelines to find the relevant model. Models
can be identified according to the sign placed
before the product code bar (E-Nr.) on the prod-
uct plate. The model can also be found in the
first line of the Energy Label.
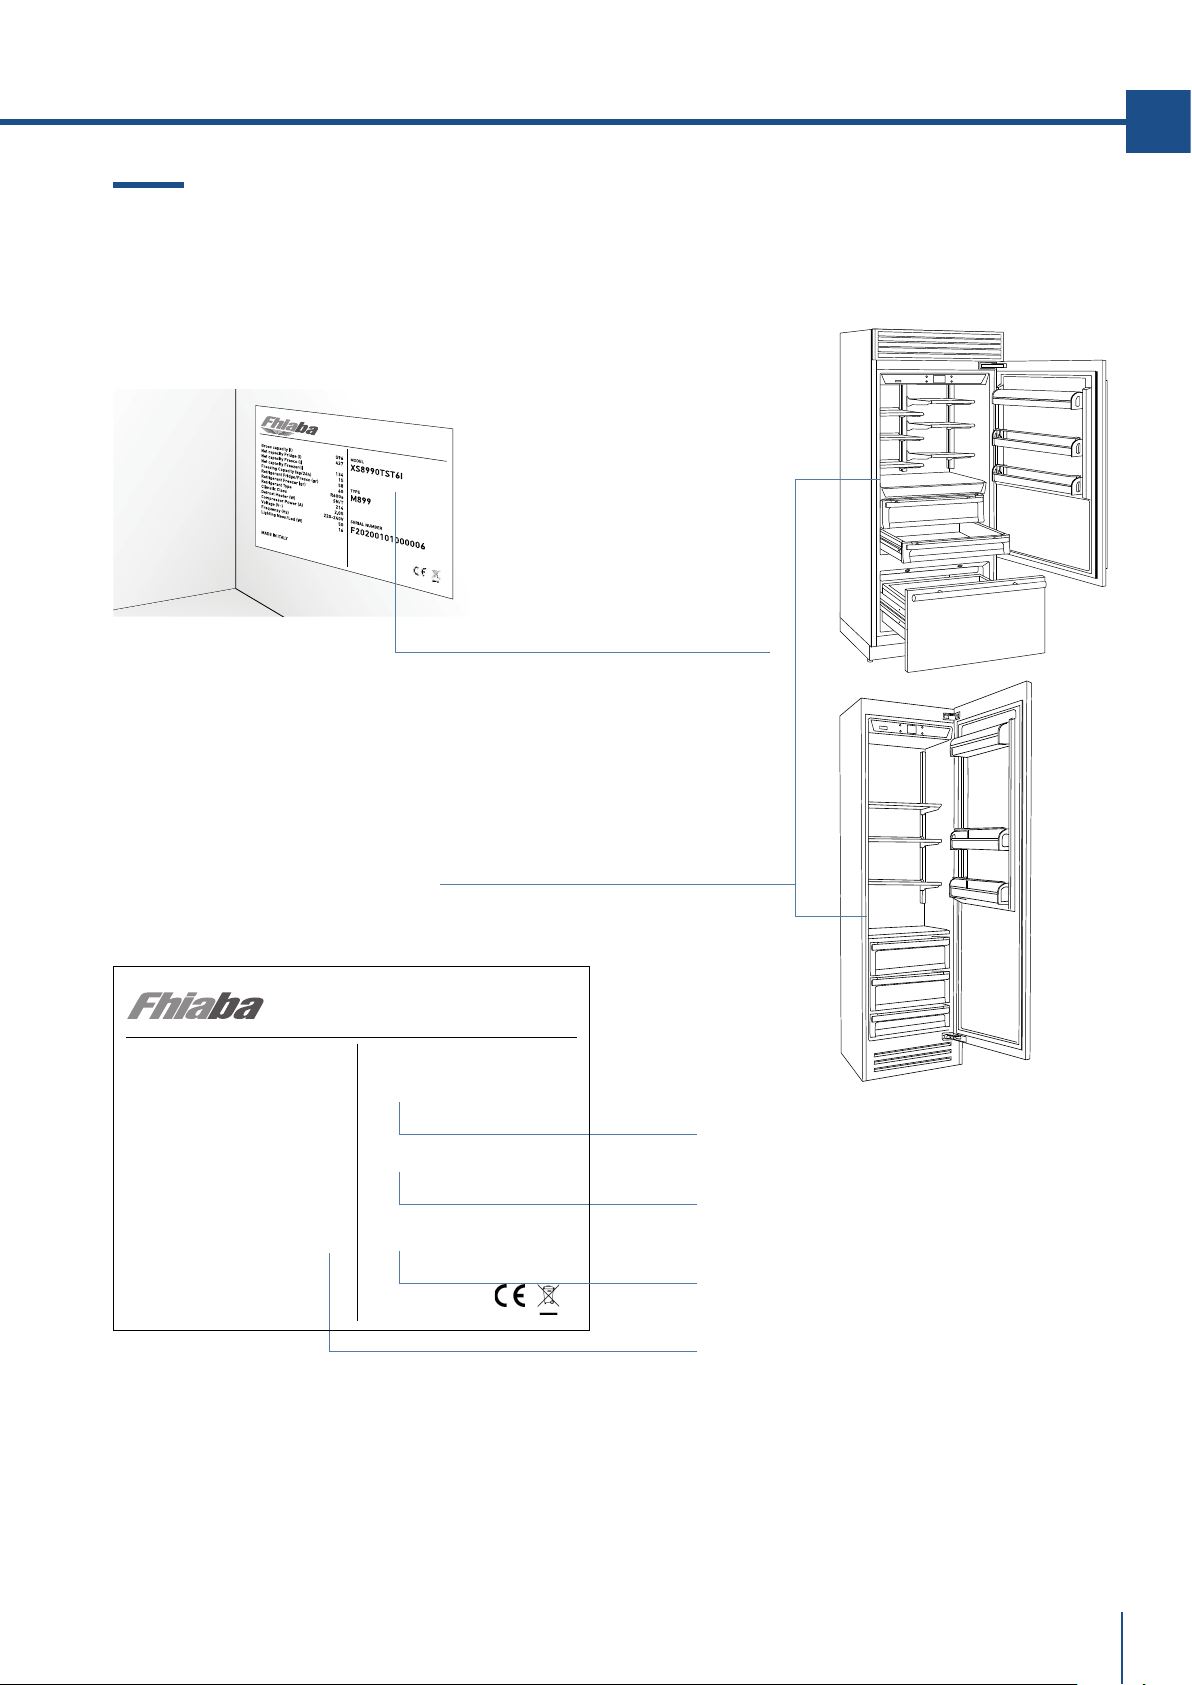
www.fhiaba.com · [email protected] · Info Line +39 0434 420160
F
R
O
S
T
FREE
R
EFRIGE
R
A
T
O
R
Serial Number .
The product plate is positioned on
the side opposite door opening.
Conservation Tips
> SN (Subnormal) from + 10°C to + 32°C
> N (Normal) from + 16°C to + 32°C
> ST (Subtropical) from + 18°C to + 38°C
> T (Tropical) from + 18°C to + 43°C
Gross capacity (l)
Net capacity Fridge (l)
Net capacity Fresco (l)
Net capacity Freezer(l)
Freezing Capacity (kg/12h)
Refrigerant Fridge/Fresco (gr)
Refrigerant Freezer (gr)
Refrigerant Type
Climatic Class
Defrost Heater (W)
Total Absorbed Current (A)
Voltage (V~)
Frequenzy (Hz)
Lighting Neon/Led (W)
Temperature Rise Time
MADE IN ITALY
582
425
131
5,5
48
60
R600a
SN/T
367
1.5
220-240 V
50-60 Hz
10
10
MODEL
TYPE
SERIAL NUMBER
XS8990TST6I
M899
F20200101000006
FROST FREE
REFIGERATOR
VARIABLE TEMP. COMP.
55
EN
Position of the serial number inside the compartment.
Model .
Features .
Type .
3.5 Product plate
The product plate shows the technical data, the
serial number and the model. The product plate
must never be removed.
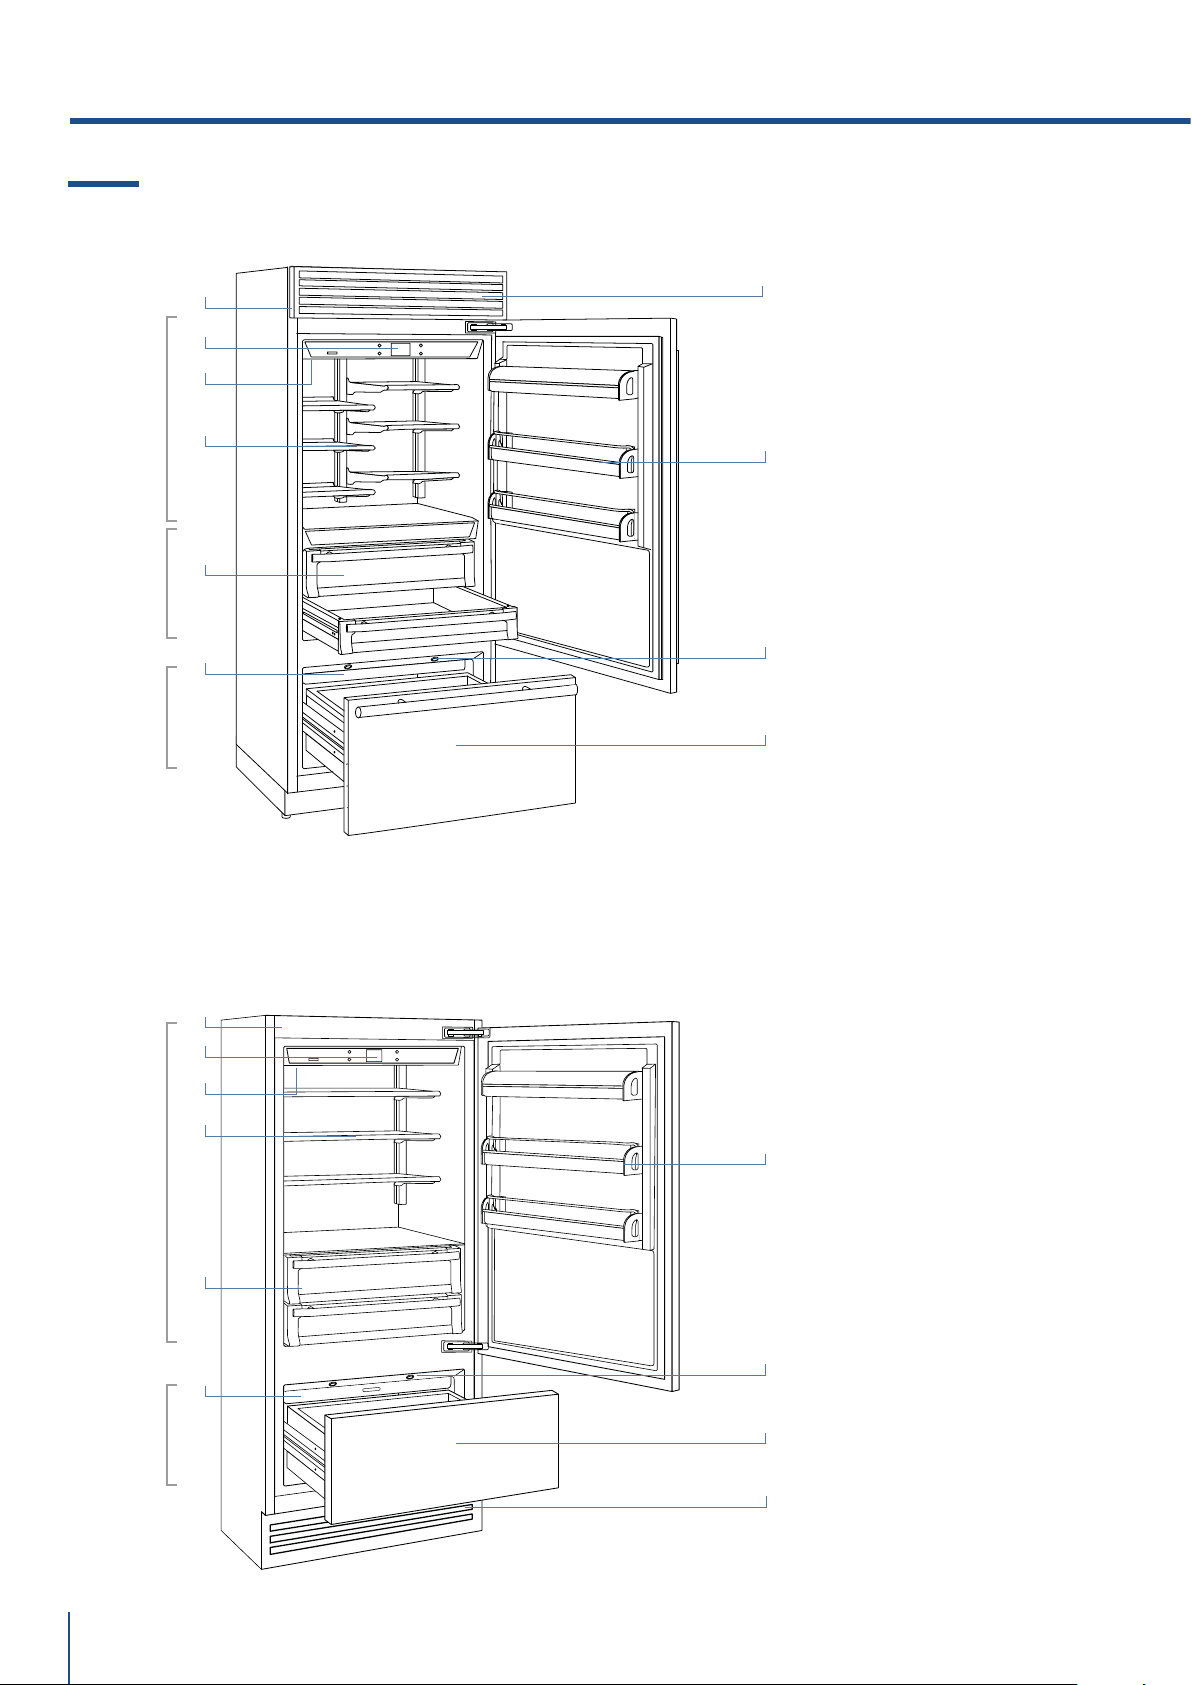
www.fhiaba.com · [email protected] · Info Line +39 0434 420160
Fresco
+2°/-2°C
Fridge
+8°/+2°C
TriMode
-15°/-22°C
Fridge
+8°/+2°C
TriMode
-15°/-22°C
56
Models 1T
/Country
Models 0T
/ Brilliance
1) Stainless steel body.
2) Interactive control panel.
3) Water filter (*).
4) Patented shelf positioning
system (Even Lift).
5) Drawers fresco
compartment.
6) Drawers fridge
compartment.
7) Ice maker countainer (*).
8) Door shelves.
9) LED illuminations for the
freezer compartment
bottom drawer.
10) Freezer bottom drawer
compartment convertible
into Fridge compartment
or Fresco compartment
(TriMode functionality).
11) Removable Grill
(capacitor).
(*) on models with Ice Maker.
3.6 Main components
3. BEFORE STARTING
1
9
2
3
4
5
1
4
7
6
7
8
11
11
10
2
3
9
8
10
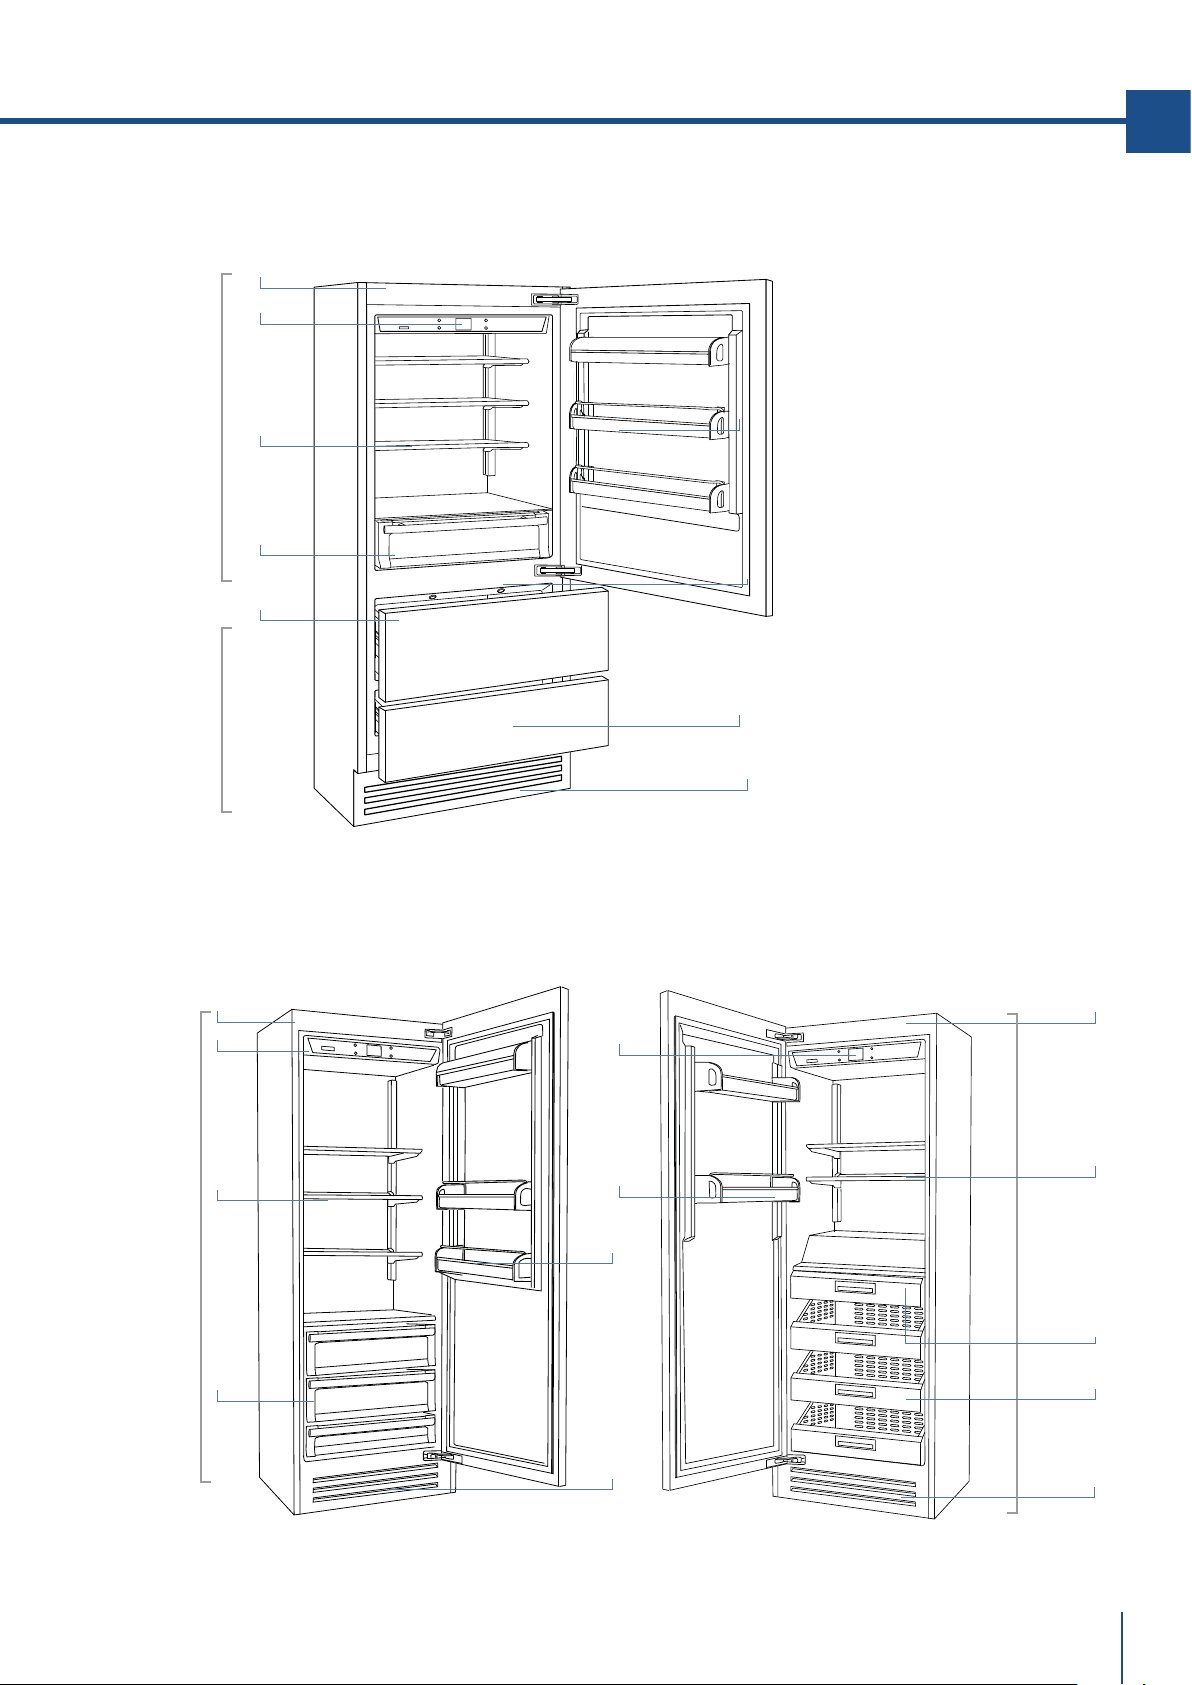
www.fhiaba.com · [email protected] · Info Line +39 0434 420160
Fridge
+8°/+2°C
TriMode
-15°/-22°C
Fridge
+8°/+2°C
Freezer
-15°/-22°C
57
EN
Models0FR Fridge Models 0FZ Freezer
Models 0H
1) Stainless steel body.
2) Interactive control panel.
3) Water filter (*).
4) Patented shelf positioning
system (Even Lift).
5) Drawers fridge
compartment.
6) Ice maker countainer (*).
7) Door shelves.
8) LED illuminations for the
freezer compartment
bottom drawer.
9) Freezer bottom drawer
compartment convertible
into Fridge compartment
or Fresco compartment
(TriMode functionality).
10) Stainless stell drawers AISI
304 satin scotch brite.
11) Removable Grill
(capacitor).
(*) on models with Ice Maker.
1
8
2
4
5
6
1
4
5
7
9
11
11
11
2
7
1
2
7
4
10
6
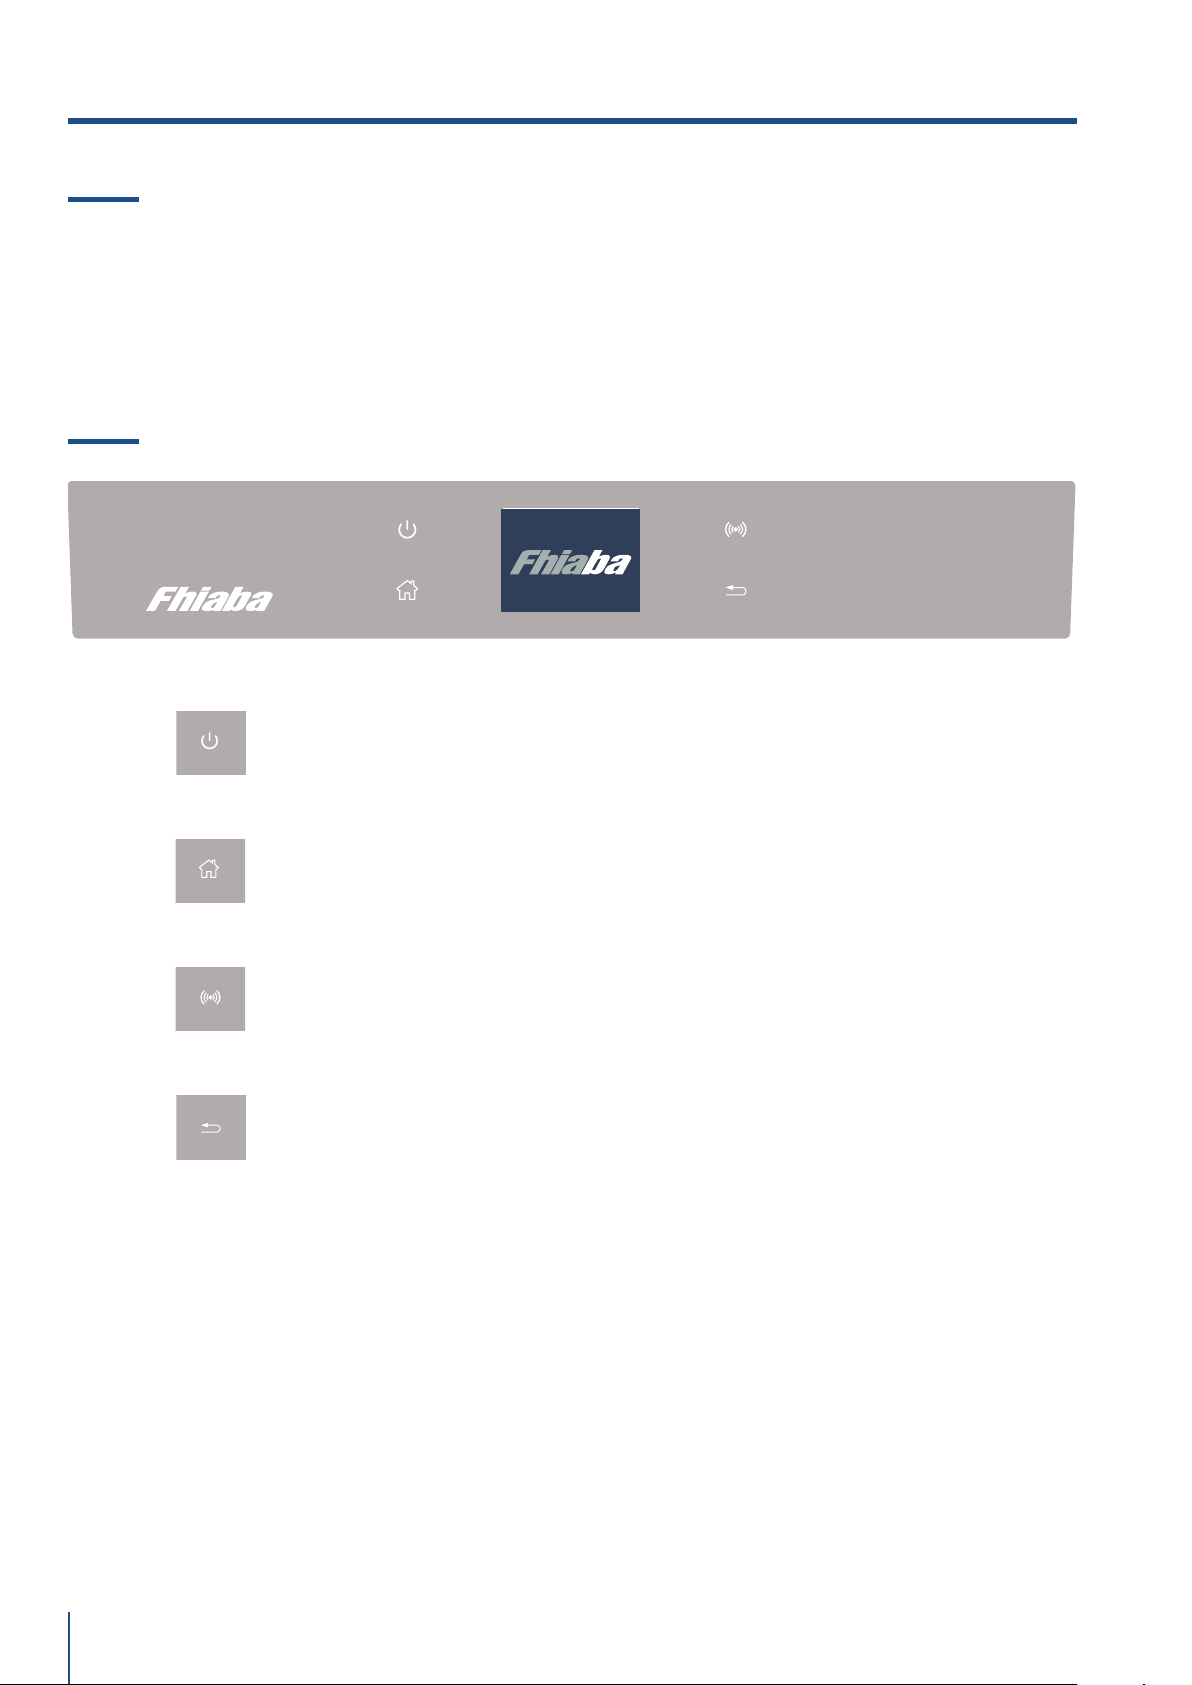
www.fhiaba.com · [email protected] · Info Line +39 0434 420160
58
3.8 Main control panel (models 1T, 0T, 0H and 0F).
3.7 Eletronic Control
The innovative electronic control system designed by Fhiaba maintains constant temperature on the
three compartments and visualizes it on the control panel display. It also allows user interaction mak-
ing it possible to personalize settings of the various functions and to receive sound and/or visual mes-
sages should any malfunction occur in the appliance.
Turning On/ Turning Off:
Touch the icon for turning on or off the unit.
Home
Touch the icon home for going back to the main display screen.
Allarm
Touch the icon to view the allarm tone functions and to deactivate them.
Back
Touch the arrow icon for going back to the previous display screen.
3. BEFORE STARTING
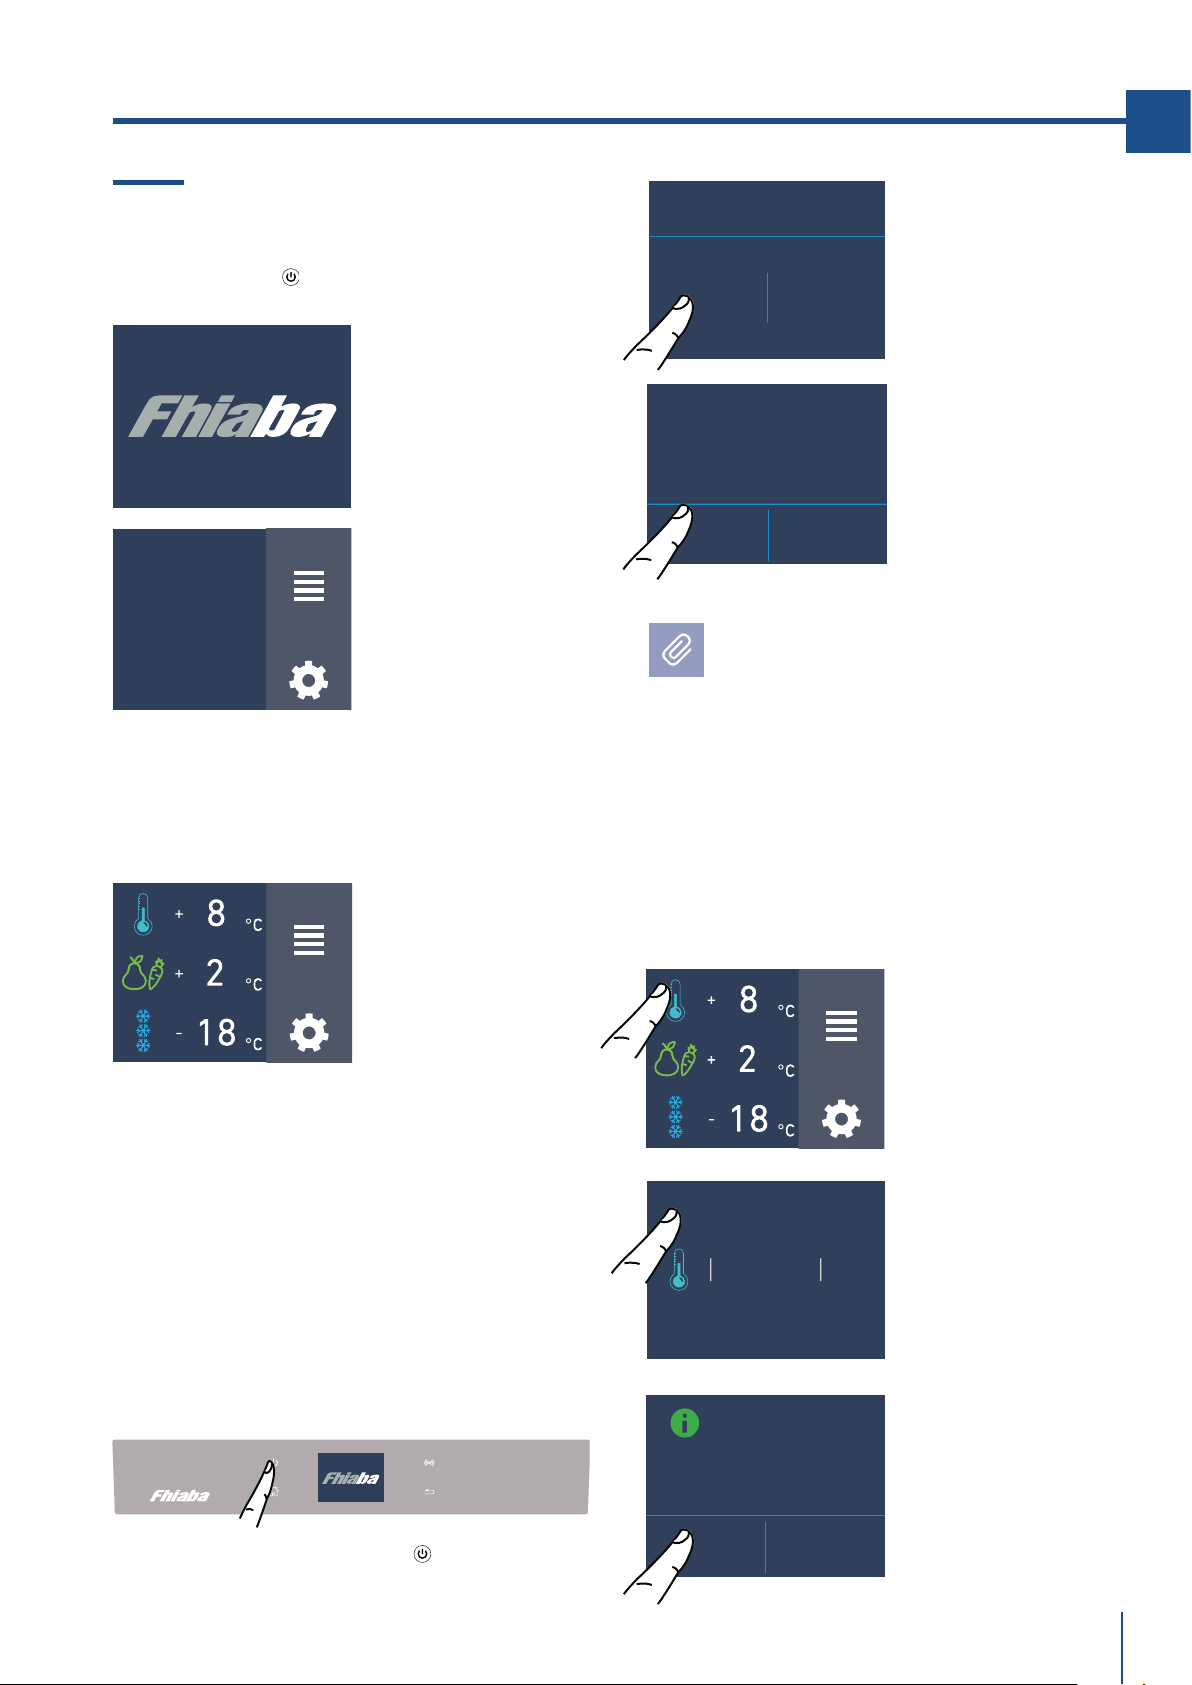
www.fhiaba.com · [email protected] · Info Line +39 0434 420160
FUNCTIONS
SETTINGS
FUNCTIONS
SETTINGS
FUNCTIONS
SETTINGS
INITIAL TEST...
ARE YOU SURE YOU WANT TO
POWER OFF THIS UNIT?
YES NO
ARE YOU SURE?
YES NO
TURN
COMPARTMENT
OFF?
ON OFF
+ 2 °C
+ 4
+ 3
0
+ 1
OK
OFF
59
EN
4.1 Switching on and o
First time starting the unit
Touch the button
. The display shows the
following launch screens:
4. APPLIANCE SWITCHING ON
Switching off Fridge and fresco compartment.
(Models 1T, OT e OH )
The fridge compartment and the fresco
compartment, can be shutdown individually
whereas the TriMode drawer can't be turned off
unless through the complete shutdown of the
unit
(*) The home screen varies depending on the
models ; (see paragraph 4.2 page 13).
The TriMode compartment is set in the freezer
mode [-18° (0°F)]. For changing this setting look
up the function 5 page 21.
When the appliance is first switched on is recco-
mended to wait at least 12 hours without open-
ing the doors and before placing any food inside
the unit.During such period deactivated any
error message by pressing the Alarm button.
When the fridge is o there are no warning
signs that prove that the fridge is plugged to
a socket.
1) Home screen.
2) Touch the icon
Yes to swich on
3) Conferm
shutdown by
touching the On
icon.
1) Fhiaba Logo.
2) Initial test
(lasts 3 minuts).
3) The display shows the main screen with the
envirorment temperature measured from the
fridge inside the compartments. Automatically
the unit start to cool down until reaching the set
temperatures.
2) Touch the icon
off.
Shutdown.
3) Touch the icon
Yes to turn
compartment off.
1) touch the bottom off.
4) Home screen (*).
- fridge compartment
+5°C
- fresco compartment
+0°C
- TriMode compartment
-18°C
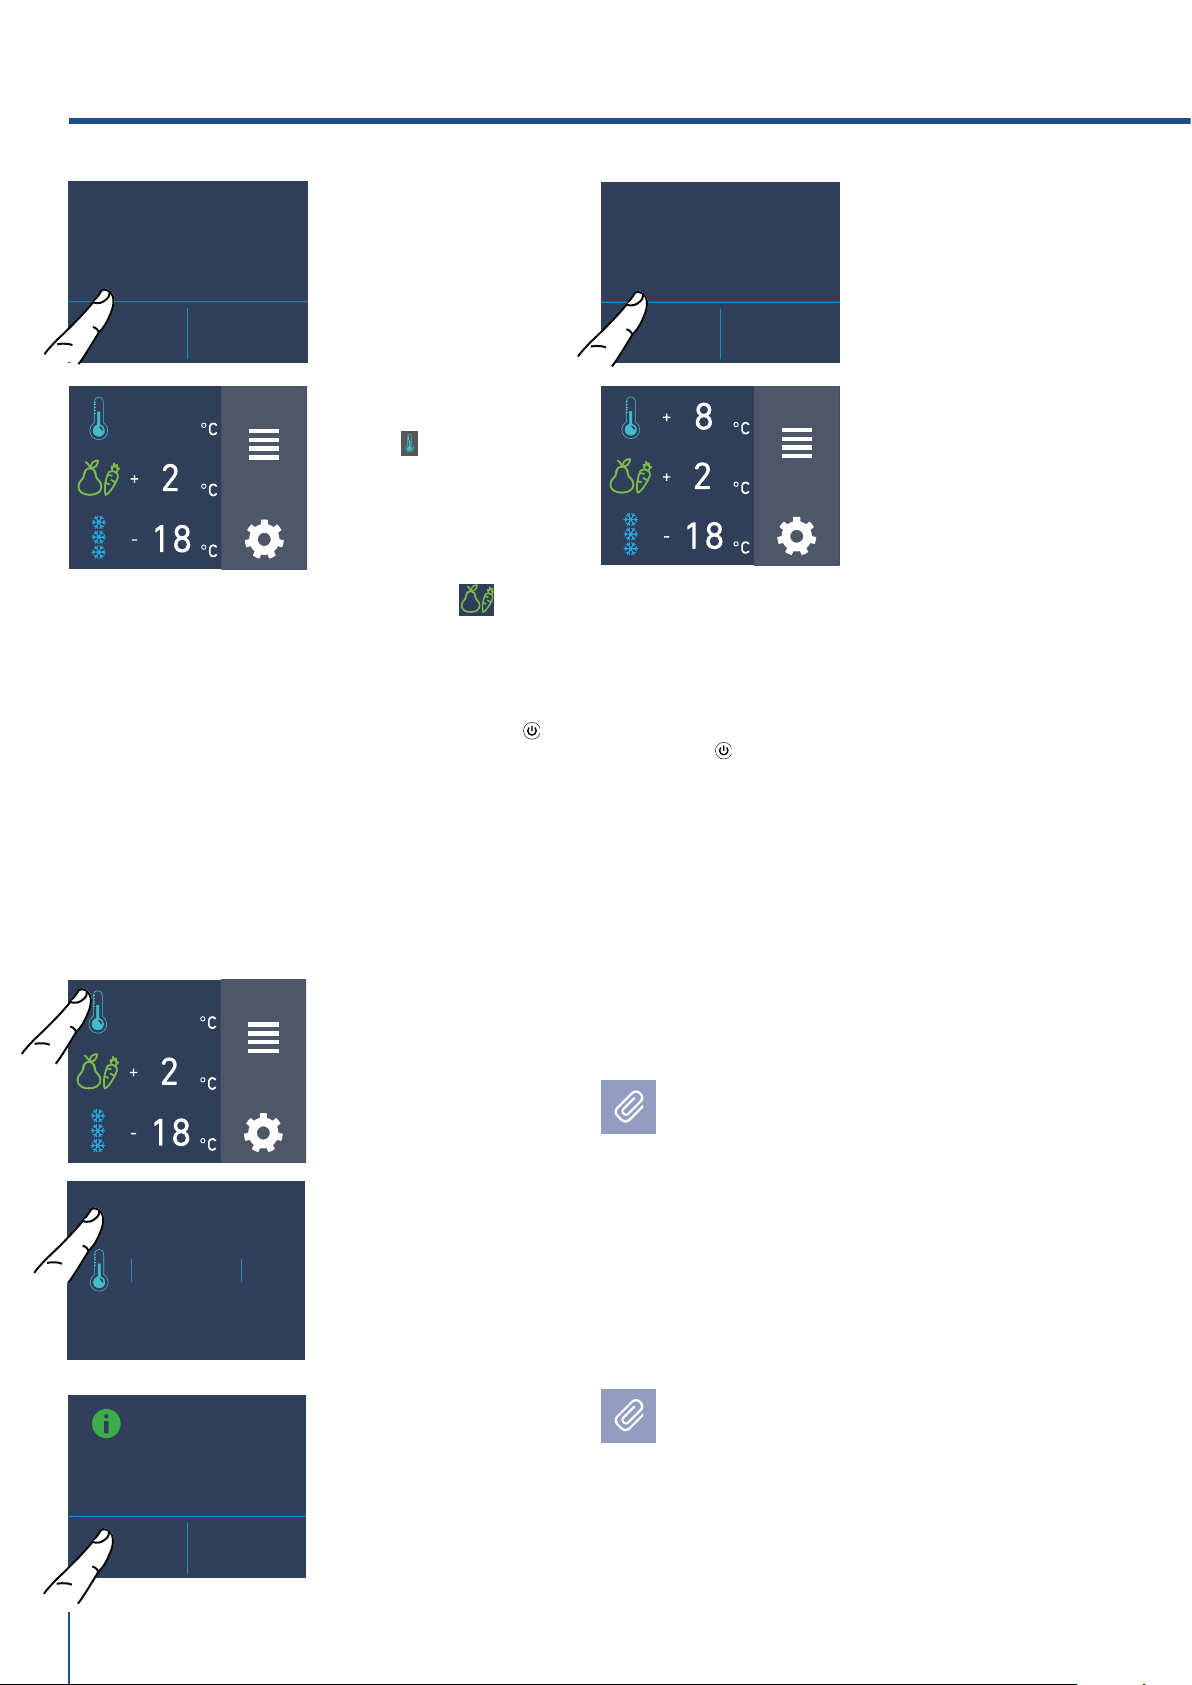
www.fhiaba.com · [email protected] · Info Line +39 0434 420160
+ 2
°C
+ 4
+ 3
0
+ 1
OK
OFF
ARE YOU SURE?
YES NO
ARE YOU SURE?
YES NO
TURN
COMPARTMENT
ON?
ON OFF
FUNCTIONS
SETTINGS
OFF
FUNCTIONS
SETTINGS
OFF
FUNCTIONS
SETTINGS
60
Turn back on the compartments.
In the case you wish to turn on again the fridge
and fresco compartments.
For turning off the fresco compartment
follow the same sequence.
Turning on the fridge and fresco compartment
again.
For turning on the unit again press the button,
the display will turn on; the starting screen and
the home screen, with the temperature measu-
red from the fridge inside the compartments,
will appear again. The fridge will start cooling
off until reaching the set temperatures.
1) Home screen.
For example, for
turning back on
the fridge
compartment,
touch the icon off.
5) On the screen
home appears the
icon off, which
indicates that the
fridge
compartment is
off.
2) Touch the icon
on.
4) Touch the icon
Yes for confirming
the disactivation.
Switching off for long periods
During long absence periods it is recommended
to switch off the refrigerator by pressing the
Unit button
for three seconds and disconnect-
ing the electrical plug or the breaker controlling
the socket.
Completely empty the refrigerator, clean and
dry it and leave the doors and drawers partially
open to prevent unpleasant odors.
5) Now the fridge
compartment will
turn back on. The
home screen will
appear again.
4) Touch the yes
icon to confirm
activation.
Follow the same procedure for turning back on
the fresco compartment.
If at the first startup the Standby message
does not appear, but another message ap-
pears, it means that the appliance has al-
ready started the cooling process.
During the first startup, it will not be possi-
ble to use the Menu to modify the factory set-
tings until the preset temperature has been
reached. During the first startup, it will not be
possible to use the Menu to modify the fac-
tory settings until the preset temperature has
been reached.
Each time the appliance is switched on it goes
through a self-diagnosis procedure lasting
three minutes before completely starting up.
If only the refrigerator compartment or the
Fresco compartment is switched o, the spe-
cific fan will continue to operate to prevent the
formation of unpleasant odours and mould.
3) Touch the icon
yes.
4. APPLIANCE SWITCHING ON
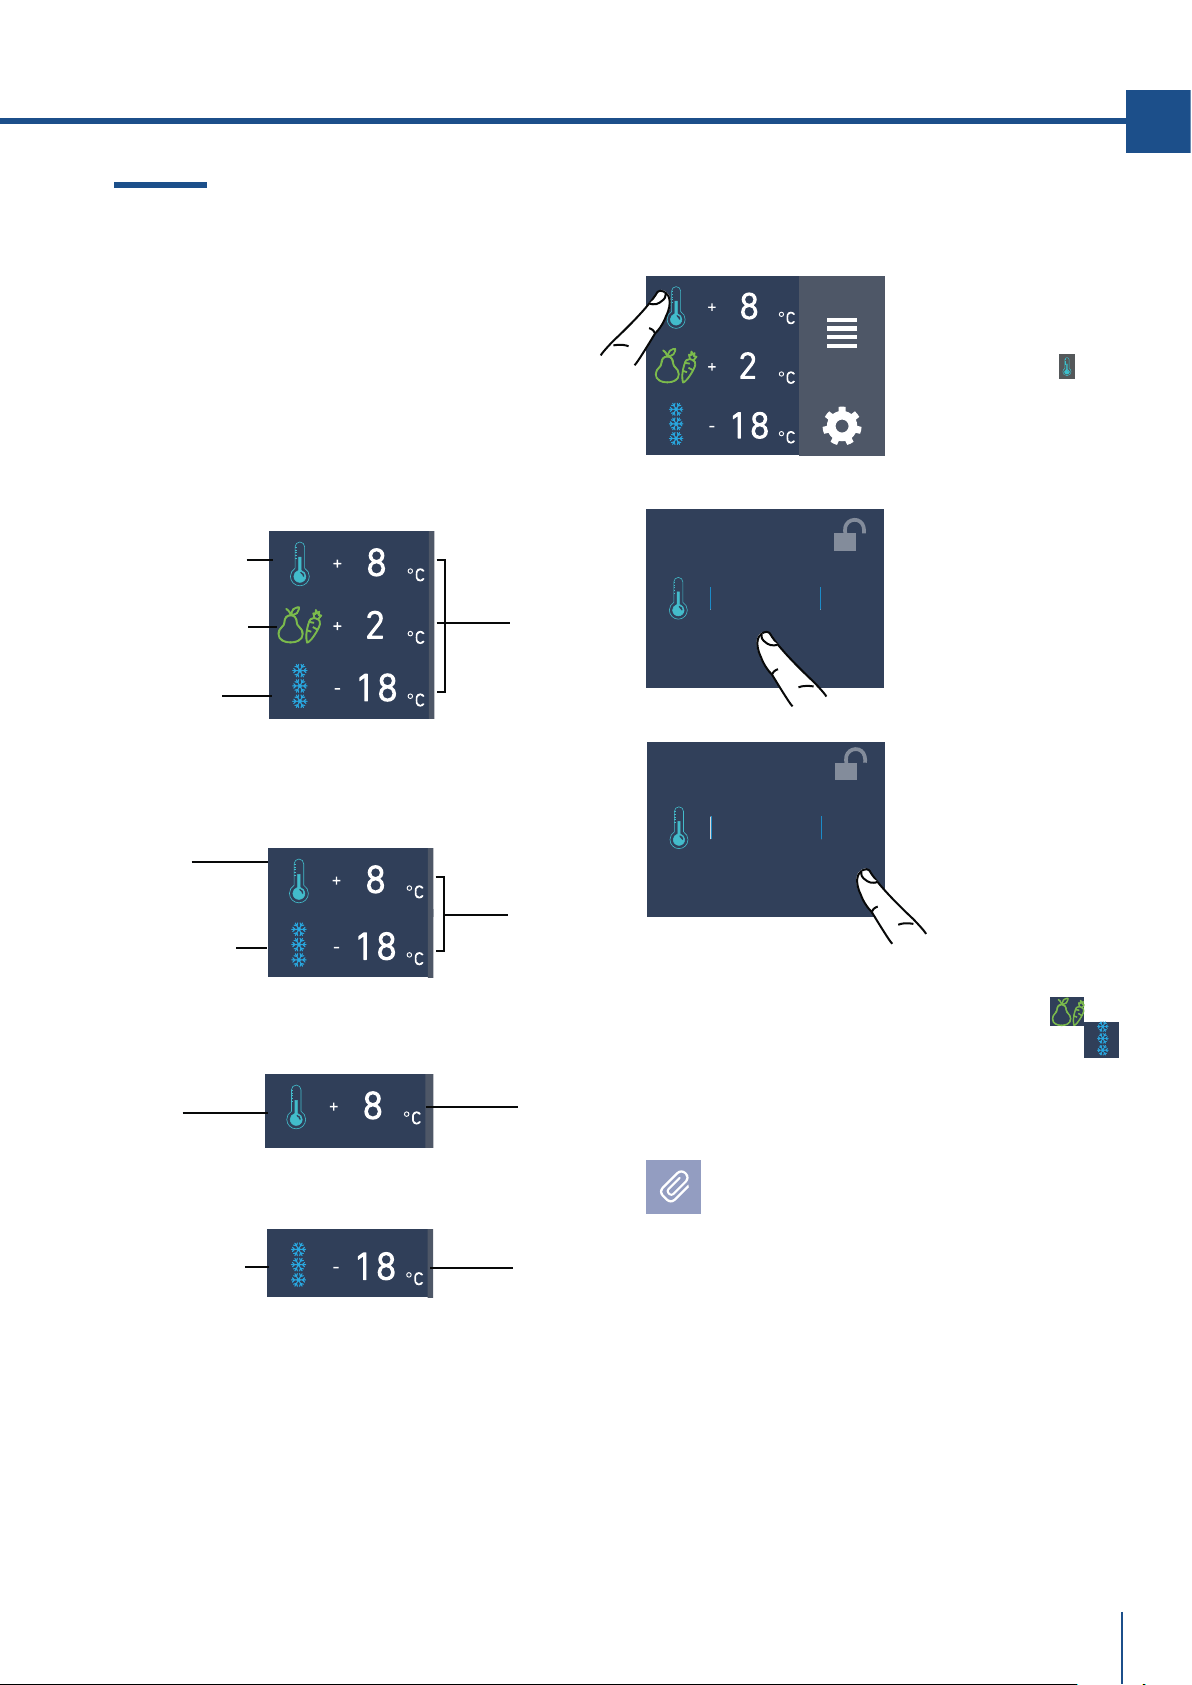
www.fhiaba.com · [email protected] · Info Line +39 0434 420160
+ 2 °C
+ 4
+ 3
0
+ 1
OK
ON
+ 2
°C
+ 4
+ 3
0
+ 1
OK
ON
FUNCTIONS
SETTINGS
61
EN
4.2 How to adjust the temperature for
dierent requirements.
Each model has been carefully tested before leaving
the factory and is adjusted in such a way to ensure
high performance and low consumption.
Usually, it is not necessary to modify the settings.
Fridge
Compartment
Drawer
freezer
(TriMode)
Preset
temperatures
Model 1T
How it looks to the home screen in the various
models:
Fresco
Compartment
(models 1T)
Fridge
compartment
Freezer
compartment
Freezer
compartment
(TriMode)
Preset
temperatures
Preset
temperature
Preset
temperature
Model 0T/0H
Model 0FR
Model 0FZ
Fridge
Compartment
3) Touch the icon ok
to confirm the desi-
der temperature.
Modify the temperatures compartment
Example: How to modify the Fridge compartment
temperature.
1) Home screen.
Touch the icon
of
fridge compartement.
The temperature shown can vary slightly in
respect to the set temperature following
frequent openings of the doors or insertion
of room temperature foods or large
quantities of foods.
6 to 12 hours are necessary to reach the
selected temperature.
The same procedure is required to set the
temperature in the Fresco compartment
from-2°C to +2°C and in the Trimode bottom
drawer from -15°C to -22°C.
2) Scoll up/down to
select the desided
temperature
fridge from +2°C
to +8°C
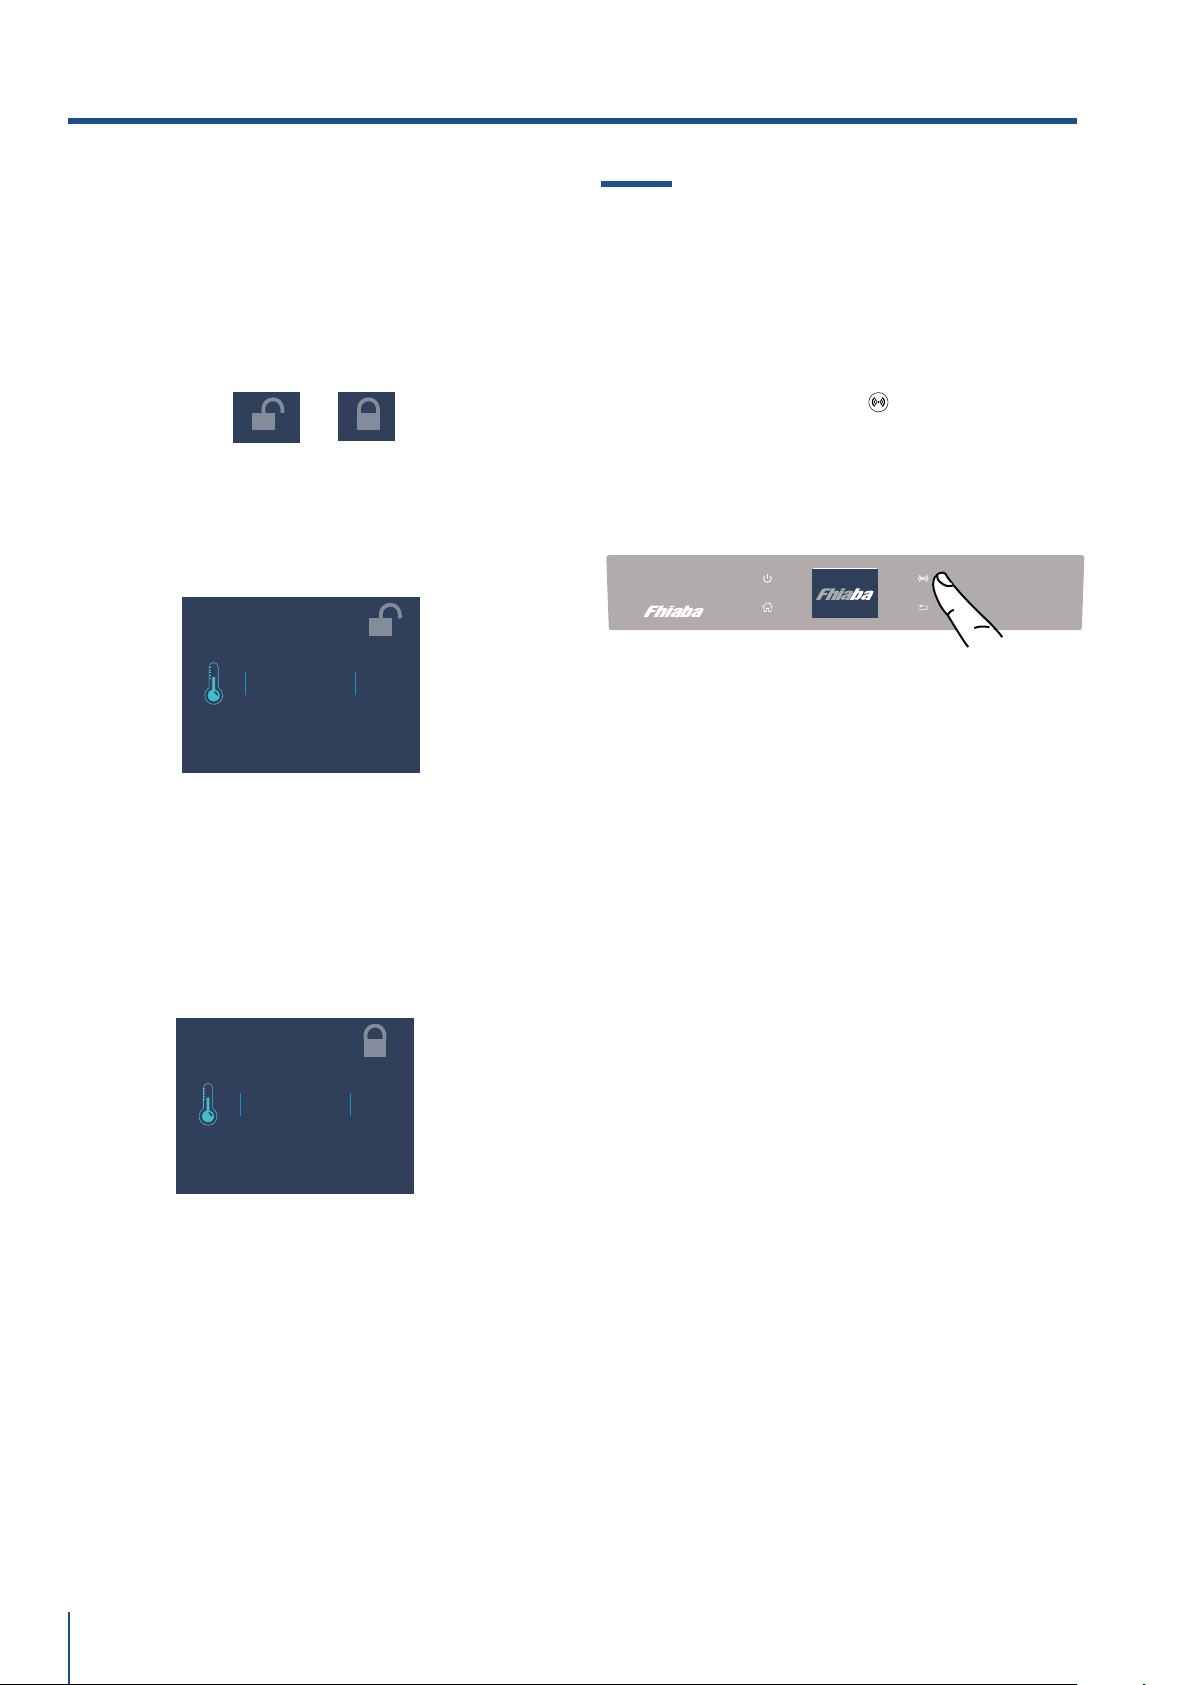
www.fhiaba.com · [email protected] · Info Line +39 0434 420160
+ 2 °C
+ 4
+ 3
0
+ 1
OK
ON
+ 2 °C
+ 4
+ 3
0
+ 1
OK
ON
62
Padlock icon.
The padlock icon shows up when the temperatu-
res are set up.
The padlock open/close shows that is or isn't
possible to modify the compartment's tempera-
tures anymore.
Usually an open yellow padlock can be seen
open; in that case you can scroll up or down with
a finger on the display, select the desired tempe-
rature and press OK for confirming.
Whereas a closed padlock can be seen if the
user has activated some functions (described
in the paragraph 5.1 page 15) that modify the
settings of the Frigo Compartment, Fresco
Compartment and Freezer Compartment the-
refore the user in that situation will not be able
anymore to change the temperature of the com-
partments.
If the icon function is touched and a specific
function is set (for example holiday, shopping
trimode, ect...), the yellow padlock will be seen
closed and it won't be possible to change the
temperature of the compartments as long as the
function won't be completed or if it is manually
deactivated.
4.3 Information signals of anomaly on
the display.
An integrated control system will give informa-
tion through bright texual signals messages you
can see on the display.
The voiced signal that goes along with some of
the anomalies signals and can be turned off by
touching the button allarm on the main
control panel.
You can find the list of the anomalies signals
at the end of this manual. (see paragraph 12.2
page 36).
4. APPLIANCE SWITCHING ON

www.fhiaba.com · [email protected] · Info Line +39 0434 420160
SHOPPING FRIDGE
MODE?
ON OFF
FUNCTIONS
SETTINGS
SHOPPING FRIDGE
SHOPPING TRIMODE
RAPID BOTTLE
COOLER
VACATION MODE
RAPID BOTTLE
COOLER
SHOPPING TRIMODE
VACATION MODE
SHOPPING FRIDGE
9
HOUR
11
10
7
8
OK
ICE MAKER
EROGATORE ACQUA
WATER FILTER
LUCE 12H
SYSTEM CLEANING
63
EN
It is possible to program in advance between 1
and 24 hours.
5. CUSTOMIZE FUNCTIONS AND SETTINGS.
INFORMATION FOR THE USE OF THE DISPLAY.
5.1 Functions.
It is possible to personalize the operation of your
Fhiaba unit in order to adapt it to the different
ways you might want to use it.
After touching the icon Function on the
home screen will be shown the icon of the fol-
lowing available functions.
1) Shopping Fridge
(Shopping freezer in 0FZ models).
The function lowers the refrigerator temperature
to +2°C (36°F) for 12 hours, permitting more rapid
cooling of food that has just been placed in. Once
the 12 hours have expired, the function deactivates
automatically, returning to the previously set tem-
perature. It is possible to program a timed activa-
tion of the function.
After a prolonged interruption of electrical current,
it is necessary to reactivate the function.
1) Shopping frigo
(Shopping freezer in 0FZ
models)
2) Vacation.
3) Shopping Trimode.
(no in 0FR models).
4) Bottle Cooler.
(no in 0FR models).
5) Ice Maker.
(optional, no in 0FR models).
6) Water filter
(optional, no in 0FR models).
7) Water Dispenser
(optional ,only in 0FR models ).
C) Touch the icon
On to activate the
function.
B) Touch the icon
Shopping Mode
Fridge.
D) Scroll up /
down to setting
the desired time
and then pres ok.
A) Home screen.
Touch the icon
functions.
8) Circuit cleaning
(optional, no in 0FR models).
9) Light 12h.
(optional, fridge with glass door).
EN
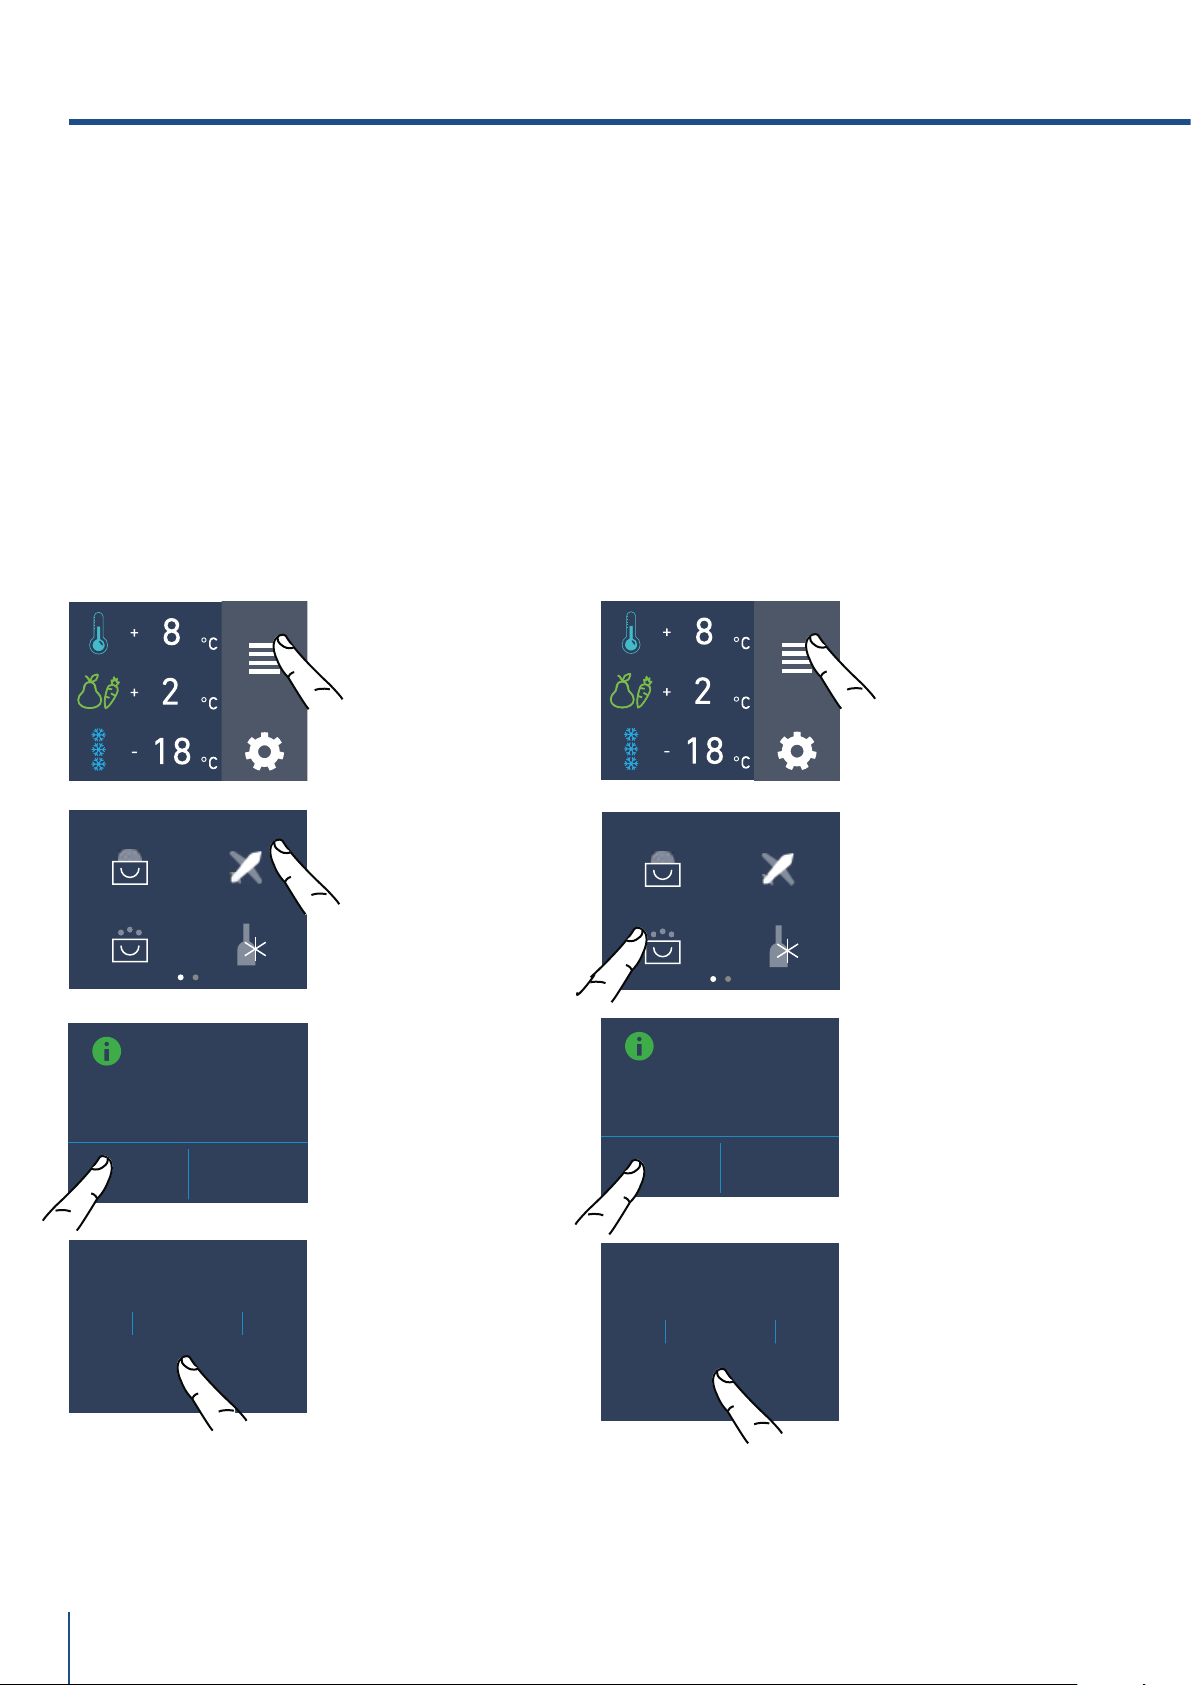
www.fhiaba.com · [email protected] · Info Line +39 0434 420160
9DAY
11
10
7
8
OK
SHOPPING FRIDGE
SHOPPING TRIMODE
RAPID BOTTLE
COOLER
VACATION MODE
SHOPPING FRIDGE
SHOPPING TRIMODE
RAPID BOTTLE
COOLER
VACATION MODE
FUNCTIONS
SETTINGS
FUNCTIONS
SETTINGS
9
HOUR
11
10
7
8
OK
VACATION MODE
ON OFF
SHOPPING
TRIMODE MODE
ON OFF
64
3) Shopping TriMode
(no in 0FR models).
This function must be activated at least 24 hours
before inserting room temperature items into the
freezer, or several hours before placing into the
freezer previously frozen items which have been
subject to a slight temperature rise.
This function is automatically deactivated when the
programmed time period expires. It is possible o
program timed activation of the function.
If interrupted by a prolonged interruption of the
electrical power, it is necessary to reactivate the
function.
2) Vacation
This function (recommended in case of prolonged
absences since it allows considerable energy
savings) brings the refrigerator compartment
temperature to +14°C (57.2°F)
It is possible to program the duration, or it can be
manually deactivated upon re-entry after a period
of absence. This function remains active even if
during the period of absence there is a prolonged
interruption of electrical power.
It is possible to program a period from 1 to 90 days.
C) Touch the button
On to activate the
function.
B) Touch the icon
Shopping Mode
TriMode.
D) Scroll up /
down to set the
desired time (in
hours) and then
pres ok.
It is possible to pro-
gram a period from
1 to 24 hours.
C) Touch the button
On to activate the
function.
B) Touch the icon
Vacation Mode.
D) Scroll up /
down to set the
desired time (in
days) and then
pres ok.
It is possible to pro-
gram a period from
1 to 90 days.
A) Home screen.
Touch the icon
functions.
A) Home screen.
Touch the icon
functions.
5. CUSTOMIZE FUNCTIONS AND SETTINGS.
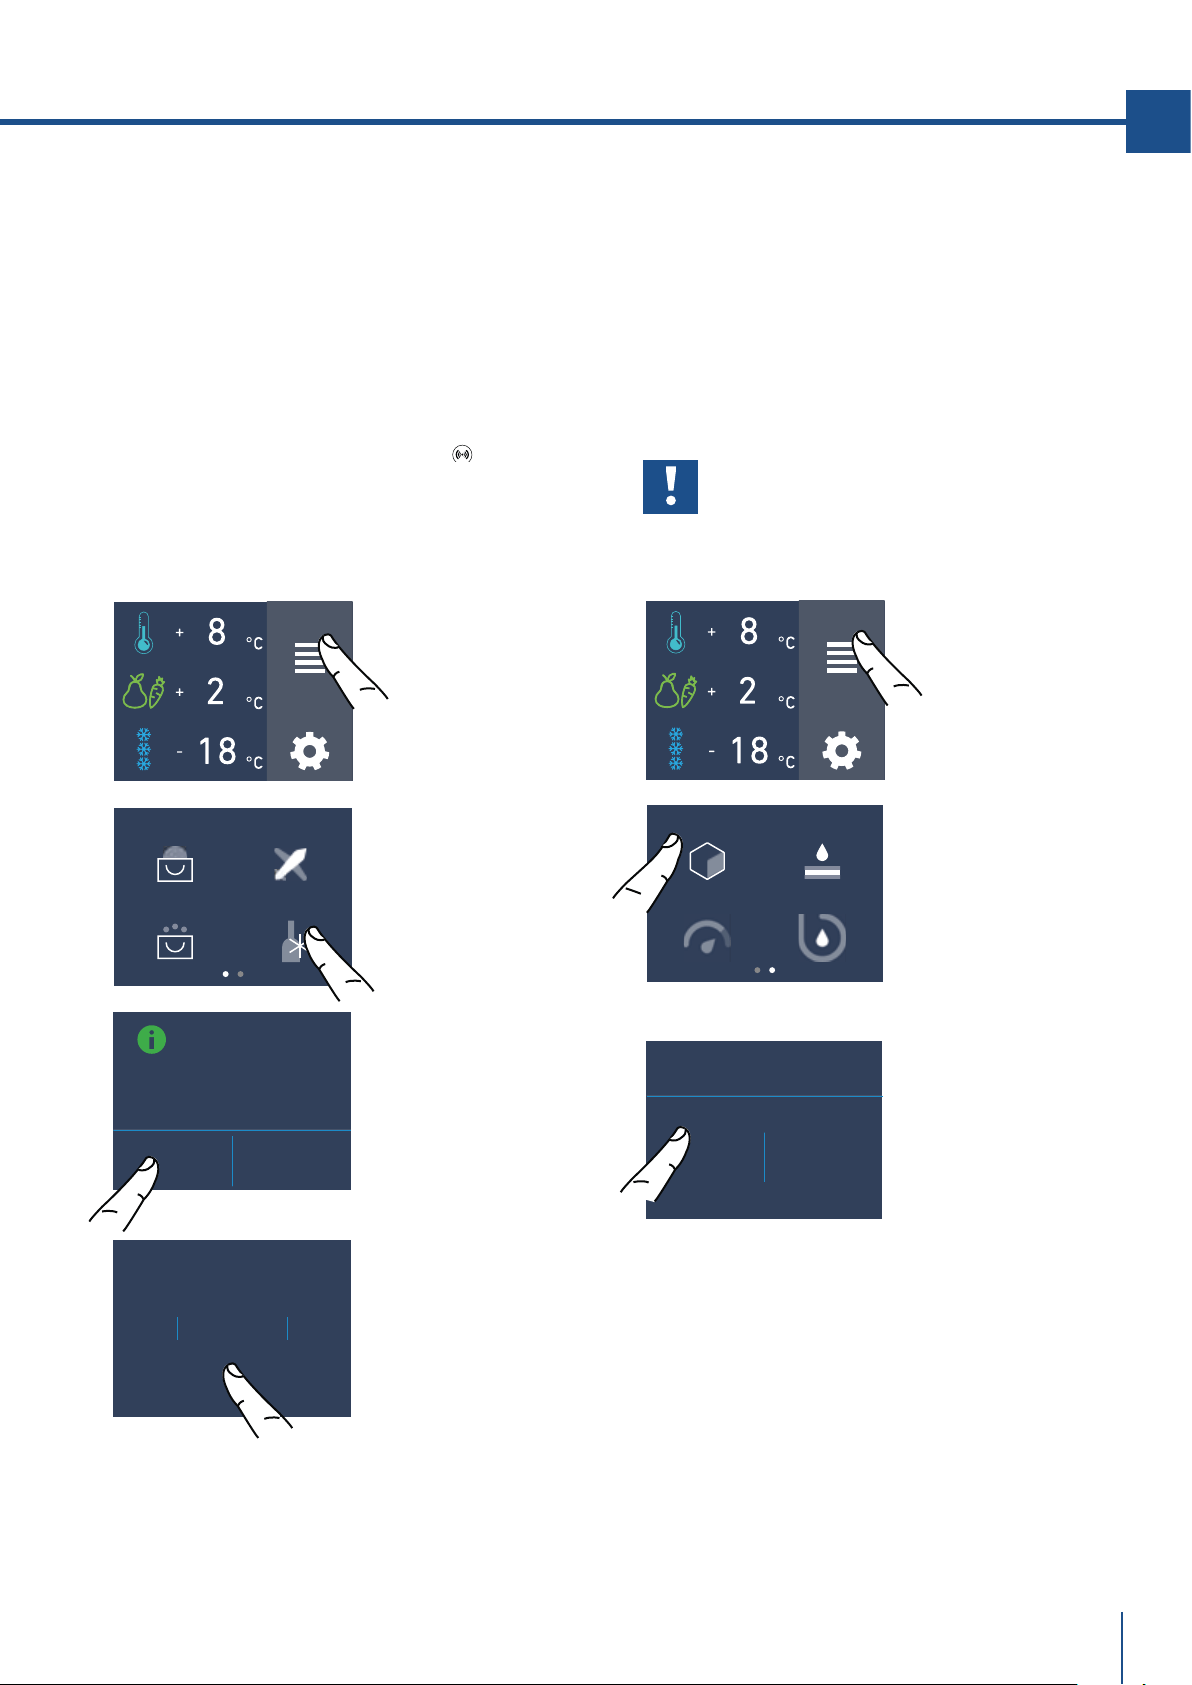
www.fhiaba.com · [email protected] · Info Line +39 0434 420160
SHOPPING FRIDGE
SHOPPING TRIMODE
RAPID BOTTLE
COOLER
VACATION MODE
37
MIN
39
38
35
36
OK
FUNCTIONS
SETTINGS
FUNCTIONS
SETTINGS
BOTTLE COOLER
MODE
ON OFF
ICE MAKER
ON OFF
ICE MAKER
WATER FILTER
SYSTEM CLEANINGEROGATORE ACQUA
65
EN
4) Rapid Bottle Cooler
(no in 0FR models).
This function can be activated when it is necessary
to cool o beverages quickly, by placing them inside
the freezer compartment.
It is possible to select a duration of 1 to 45 minutes.
A sound signal will indicated when the optimal tem-
perature has been reached.
After removing the beverages, deactivate the sound
signal by pressing the Alarm button
.
5) Ice Maker activation
(optional, no su modelli 0FR).
A prewash of the water circuit should be per-
formed before activating the Ice Maker for the first
time. After a few minutes the Ice Maker can be
activated. (See section 5.2 page 18). After a few
minutes the Ice Maker can be activated.
Important
Do not activate the Ice Maker unless
the appliance is connected to the water
mains.
C) Touch the button
On to activate the
function.
B) Touch the icon
Rapid Bottle
Cooler.
D) Scroll up /
down to set the
desired time (in
minutes) and then
pres ok.
B) Scroll twice right
and then touch the
icon ice maker.
C) Touch the button
On to activate the
ice maker.
A) Home screen.
Touch the icon
functions.
A) Home screen.
Touch the icon
functions.
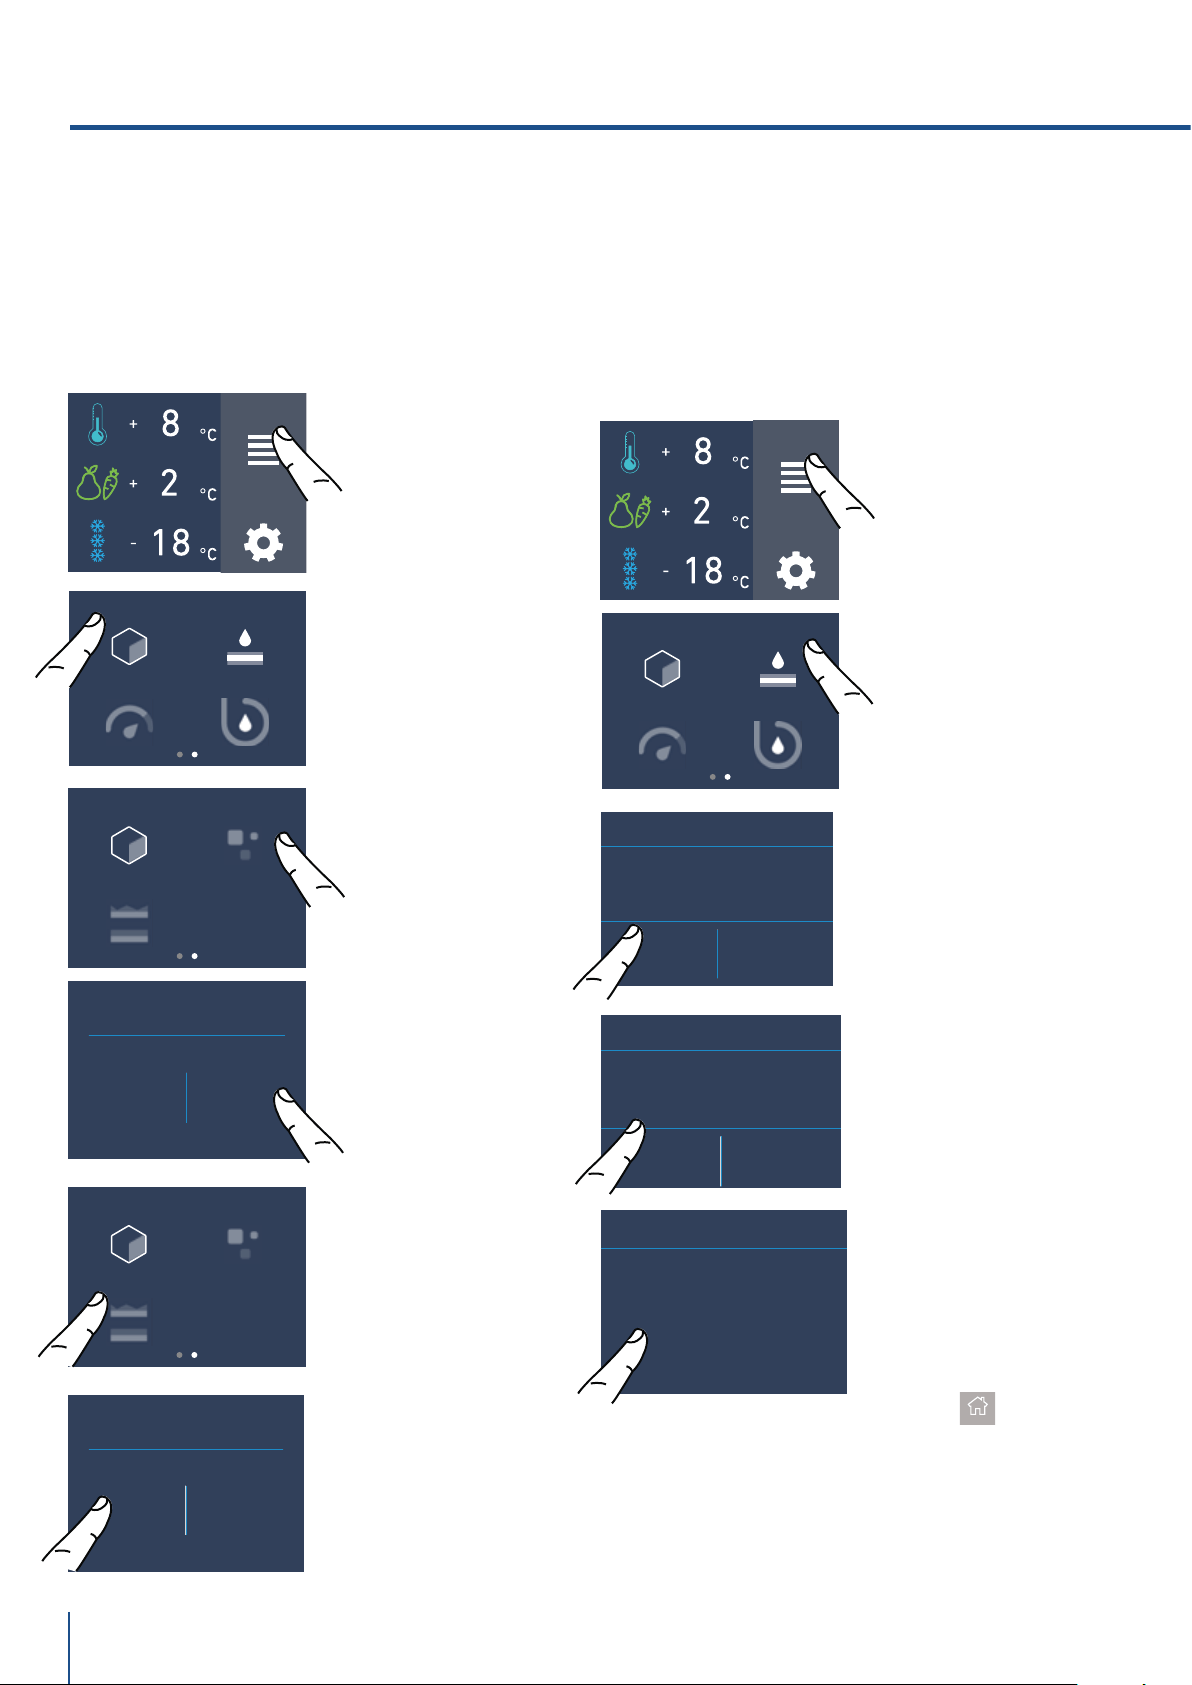
www.fhiaba.com · [email protected] · Info Line +39 0434 420160
FUNCTIONS
SETTINGS
FUNCTIONS
SETTINGS
ICE MAKER ON/OFF
SET CUBE SIZE
SUPERICE
ICE MAKER ON/OFF
SET CUBE SIZE
SUPERICE
SET CUBE SIZE
MEDIUM LARGE
SUPERICE MODE
(24 HRS)
ON OFF
ENABLE
REMINDER?
YES NO
WATER FILTER
ICE MAKER
WATER FILTER
SYSTEM CLEANINGEROGATORE ACQUA
ICE MAKER
WATER FILTER
SYSTEM CLEANINGEROGATORE ACQUA
66
C) Confirm the fun-
ction by touching
the on button.
ARE YOU SURE?
YES NO
WATER FILTER
NEXT REMINDER
LEFT DAYS...
365
WATER FILTER
6) Water Filter Activation
(optional, no in 0FR models)
The water filter is essential for the purification
of the water used for making ice, for cleaning
the circuit or for supplying water for the fridge
compartment (water dispenser available with
the models OFR). The display permits visualizing
the time left before the filter needs to be replaced.
The water filter Remider have to be activated by
the user.
5a) Set Ice cube Size - SuperIce
The IceMaker function permits selecting the size
of the ice cubes, by choosing between Large (base
setting) or Medium, and activation of the SuperIce
function, which increases the quantity of produced
ice.
The SuperIce function deactivates automatically
after 24 hours.
B) Scroll twice
right and then
touch the icon ice
maker.
B) Scroll ones
right and then
touch the icon
water filter.
D) Touch the icon
medium/large to
choose the desired
Set Cube Size.
C) Toch the icon
Set Cube Size. The
default cube size
is "medium".
E) If you would like
to increase the
production of ice,
touch the Superice
icon, this will ena-
ble the freezer to
produce more ice,
up to 1,5kg a day.
A) Home screen.
Touch the icon
functions.
A) Home screen.
Touch the icon
functions.
E) Here are indica-
ted the remaining
days before the
due date for the
substitution of the
filter.
Touch the home
button.
D) Confirm the fun-
ction by touching
the button Yes.
F) Confirm the
function or not by
touching the On or
Off button.
5. CUSTOMIZE FUNCTIONS AND SETTINGS.
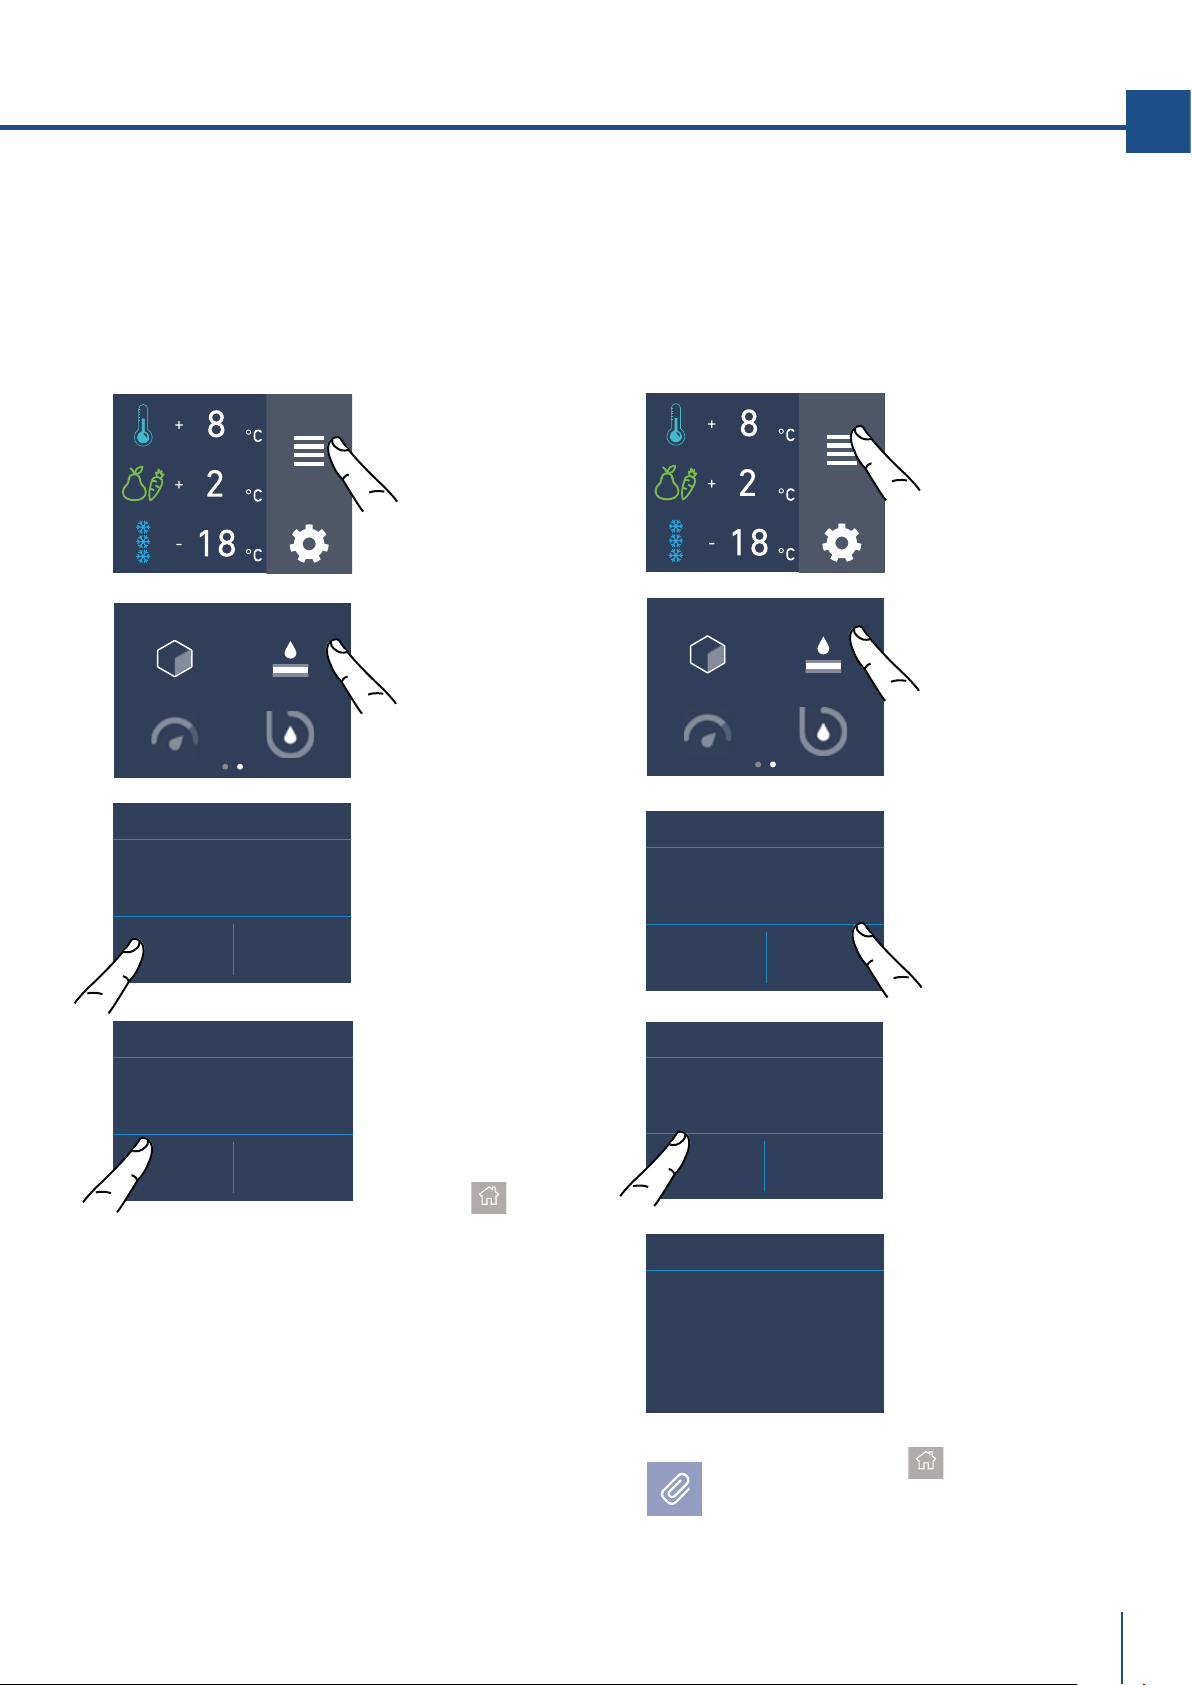
www.fhiaba.com · [email protected] · Info Line +39 0434 420160
ICE MAKER
WATER FILTER
SYSTEM CLEANINGEROGATORE ACQUA
FUNCTIONS
SETTINGS
ICE MAKER
WATER FILTER
SYSTEM CLEANINGEROGATORE ACQUA
FUNCTIONS
SETTINGS
RESET REMINDER
COUNTDOWN?
YES NO
WATER FILTER
NEXT REMINDER
LEFT DAYS...
365
WATER FILTER
DISABLE
REMINDER?
YES NO
WATER FILTER
NEXT REMINDER
LEFT DAYS...
365
OFF RESET
WATER FILTER
NEXT REMINDER
LEFT DAYS...
365
OFF RESET
WATER FILTER
67
EN
D) Confirm the
function by tou-
ching the Yes
button.
Touch the home
button.
C) Push off to the
activate Water
Filter Reminder.
B) Scroll ones
right and then
touch the icon
water filter.
A) Home screen.
Touch the icon
functions.
Push Home buttom
to go back to the
main screen or push "Yes" to deactivate
filter reminder.
C) Touch the button
reset.
D) Touch the Yes
button to proceed.
E) You will be
shown the full du-
ration of the Water
Filter Cartridge.
A) Home screen.
Touch the icon
functions.
B) Scroll once
right and then
touch the icon
Water filter.
6a) Water Filter Deactivation
(optional, no in 0FR models)
To deactivate an active filter reminder
countdown follow these steps:
6b) Reset Filter
The Reset Filter function sets to zero the time left
before the filter needs to be replaced. It is neces-
sary to set the meter to zero each time the car-
tridge is replaced.
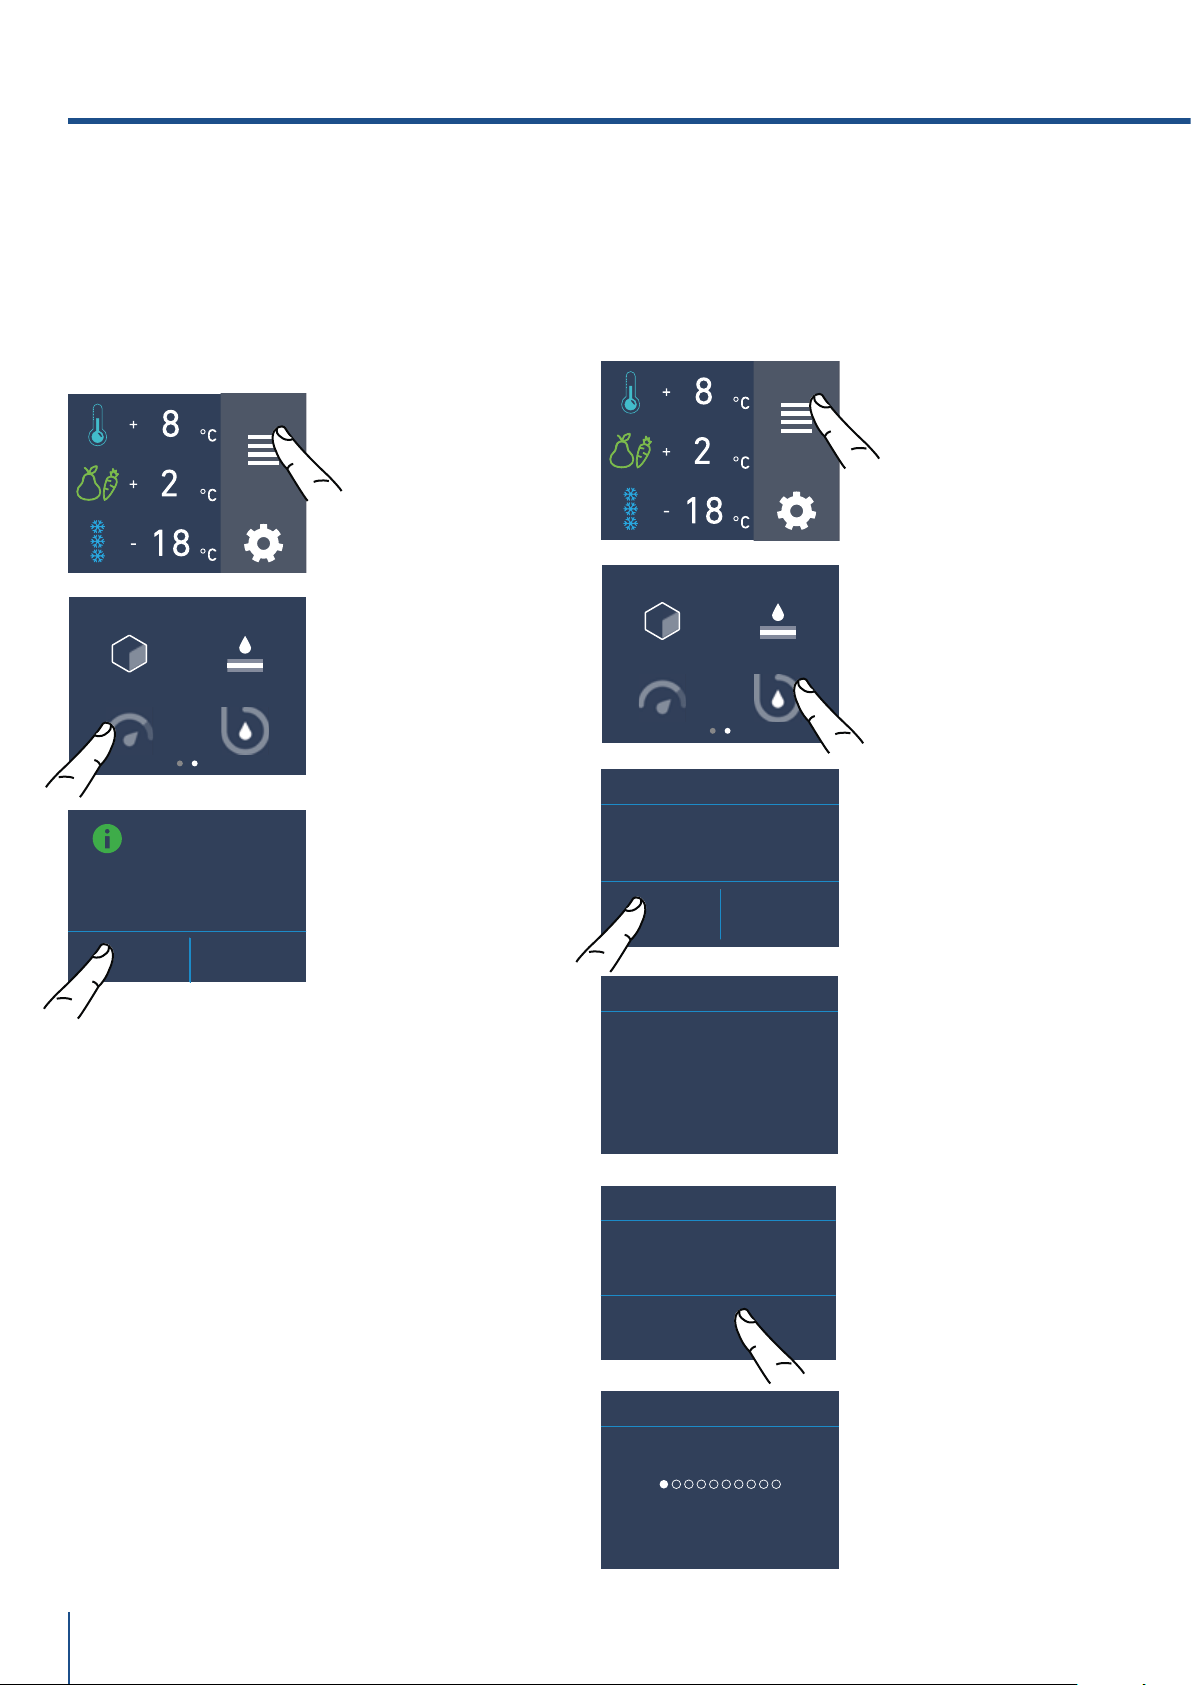
www.fhiaba.com · [email protected] · Info Line +39 0434 420160
YES NO
MANUAL CLEAN
FUNCTIONS
SETTINGS
FUNCTIONS
SETTINGS
WATER DISPENSER
ON OFF
ICE MAKER
WATER FILTER
SYSTEM CLEANINGEROGATORE ACQUA
ICE MAKER
WATER FILTER
SYSTEM CLEANINGEROGATORE ACQUA
ENTER
MANUAL CLEAN
START CLEANING
PLEASE WAIT...
MANUAL CLEAN
CLEANING RUNNING
MANUAL CLEAN
68
C) Touch the icon
On to confirm the
activation.
7) Water dispenser
(optional only for models 0FR).
The function water dispenser ia available in mo-
dels fridge column OFR and enables the supply
of cold pure water without bacterias.
A) Home screen.
Touch the icon
functions.
B) Scroll twice
right and then
touch the icon
Water dispenser.
C) Touch the icon
yes to activate the
manual cleaning.
B) Touch the icon
Water System
Purge.
E) Touch the icon
ok to start the
cleaning.
F) Cleaning run-
ning...
D) Please wait...
8) Manual Clean, Water Filter
(optional, no in 0FR models)
If ice production has been disabled or unused for a
long period it is recommended to perform a Manual
Clean function.
Before proceeding it is important to turn o the ice
maker.
A) Home screen.
Touch the icon
functions.
5. CUSTOMIZE FUNCTIONS AND SETTINGS.

www.fhiaba.com · [email protected] · Info Line +39 0434 420160
FUNCTIONS
SETTINGS
LIGHT 12H
OK
MANUAL CLEAN
EMPTY WATER FROM ICE BIN.
REPLACE ICE BIN
PLEASE WAIT...
CLEANING COMPLETED
LIGHT 12h MODE
ON OFF
69
EN
G) At the end of
the cleaning, press
ok and empty wa-
ter from ice bin.
H) Wait a few
seconds the main
menu screen will
appear.
Put correctly under the ice maker the ice tray
or a suitable bowl for gathering the water,
and then close the drawer. At the end, clean
the ice tray.
Repeat the cleaning until the water on the freezer
tray won't be clean.
9) Light 12 h
(optional, fridges with glass door).
The function enables to set the timing of inner
lighting, it can stay on for 1h to 12h when the wine
cellar door is closed, in order to see the inside
lighted up, through the glass.
B) Scroll right
until reaching the
12h light icon.
C) Push On if you
want to activate
12h light Mode.
A) Home screen.
Touch the icon
functions.
Bypass filter
The included filtration system can be bypassed
when excellent water qualty is available from the
home water system. You can simply remove the
water filter from the adapter and the system will
automatically bypass the cartridge.
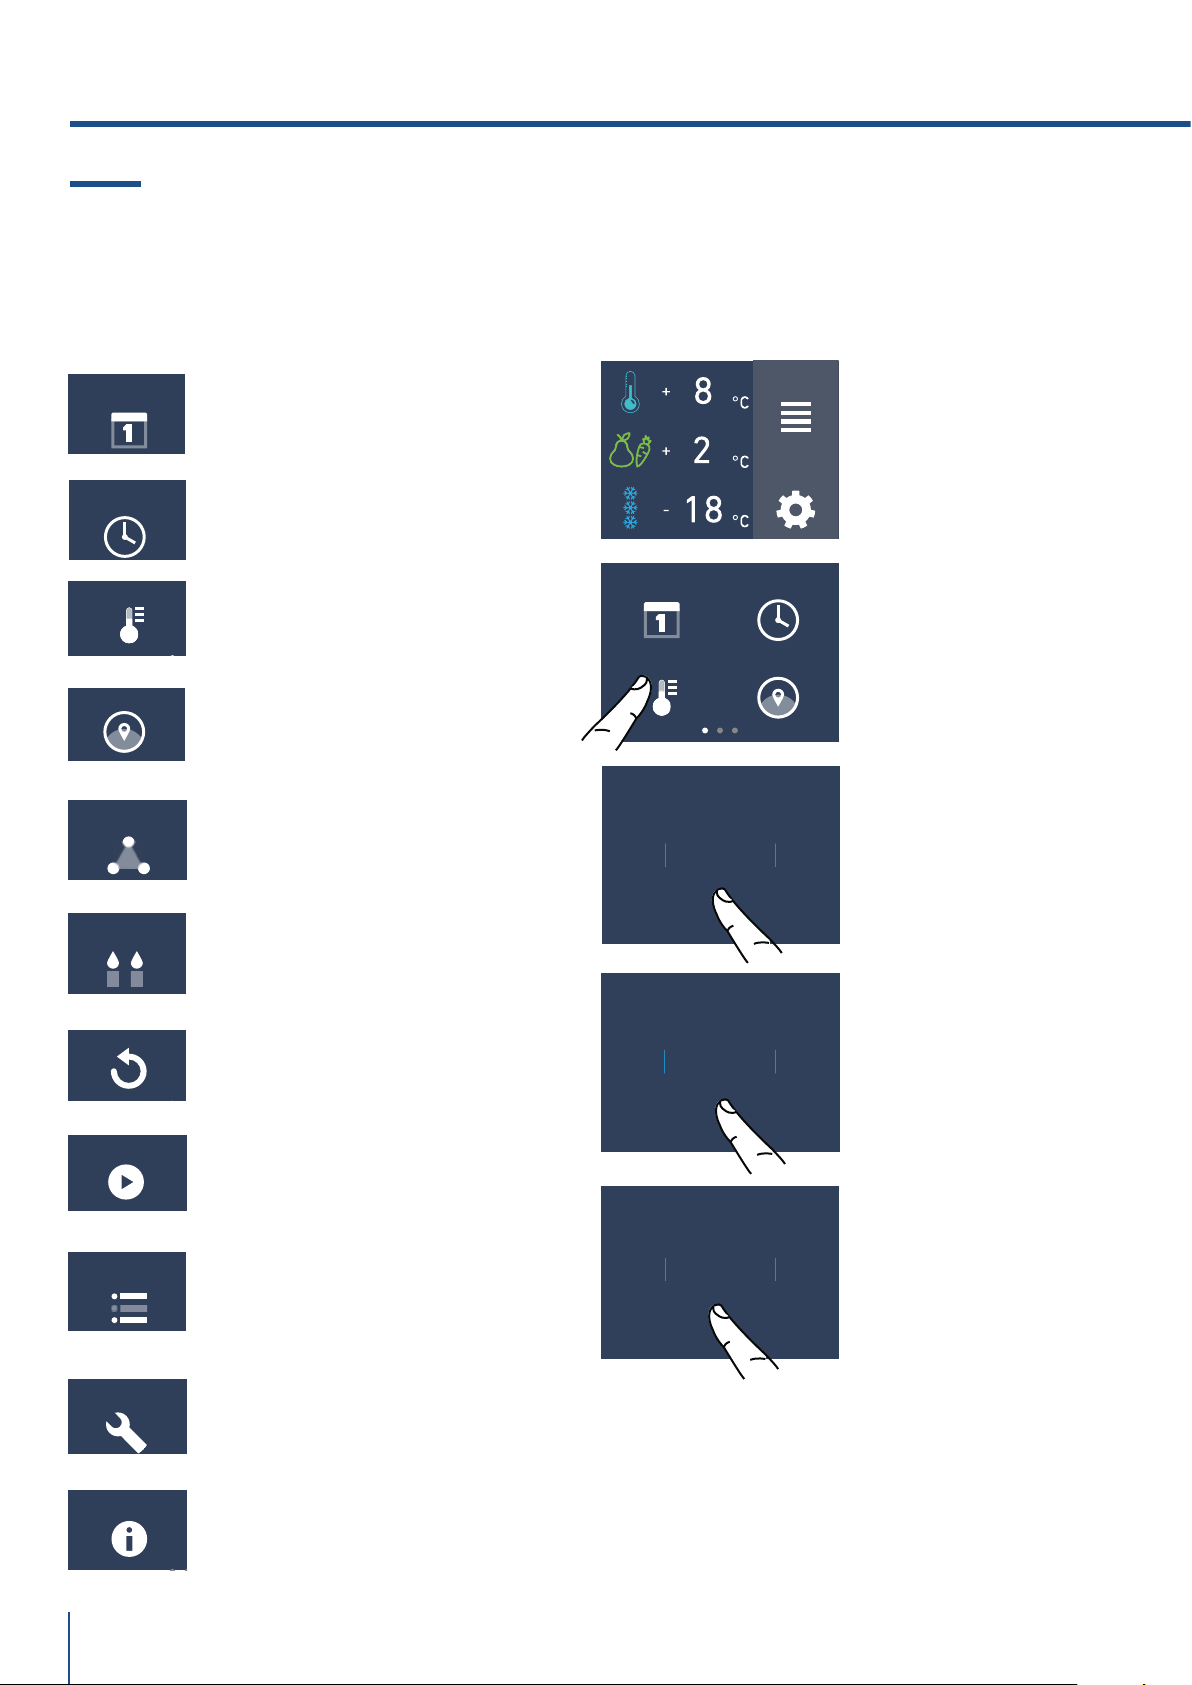
www.fhiaba.com · [email protected] · Info Line +39 0434 420160
TRIMODE
SABBATH MODE
RESET
DEMO MODE
INFO SYSTEM
SERVICE
°C/°F
DATE TIME
LANGUAGE°C/°F
9MONTH
11
10
7
8
OK
2021YEAR
2023
2022
2019
2020
OK
FUNCTIONS
SETTINGS
9DAY
11
10
7
8
OK
DATE
TIME
LANGUAGE
MAINTENANCE
70
It is possible to personalize the settings of your
Fhiaba fridge for adapting it to the different ways
you might want to use it.
5.2 Settings.
1) Date
The display will show the date in the format
(day:month:year).
By touching the display you can modify the settings.
C) Scroll up or
down until selec-
ting the desire day
and press ok.
D) Scroll up or
down until selec-
ting the desired
month and press
ok.
B) Touch the icon
date.
1) Date.
2) Time.
3) Celsius e fahrenheit degrees
4) Language.
5) Trimode.
6) Sabbath.
7) Reset.
8) Demo Mode.
9) Maintenance.
10) Service.
11) Info System.
A) Home screen.
Touch the icon
settings.
E) Scroll up or
down until selec-
ting the desired
year and them
press ok.
5. CUSTOMIZE FUNCTIONS AND SETTINGS.

www.fhiaba.com · [email protected] · Info Line +39 0434 420160
OK
°C
°F
FUNCTIONS
SETTINGS
CLOCK MODE?
12 24
FUNCTIONS
SETTINGS
37
MIN
39
38
35
36
OK
DATE TIME
LANGUAGE°C/°F
DATE TIME
LANGUAGE°C/°F
9
HOUR
11
10
7
8
OK
71
EN
C) Scroll up / down
to select either
centigrade or
fahrenhe it
degrees and press
ok.
B) Touch the icon
°C/°F.
C) Touch in which
way you want to
see the time: 12 or
24 hours.
B) Touch the icon
time.
2) Time
The display shows the hours and minutes in the
format hh:mm.
This function selects the display at 12 or 24 h.
3) SET °C/°F
This function permits visualizing the temperature
in Centigrade or Fahrenheit degrees. Normally,
the appliance is set for visualization in centigrade
degrees.
A) Home screen.
Touch the icon
settings.
A) Home screen.
Touch the icon
settings.
D) Scroll up /
down to set the
hours and then
press ok.
E) Scroll up / down
to set the minutes
and then press ok.
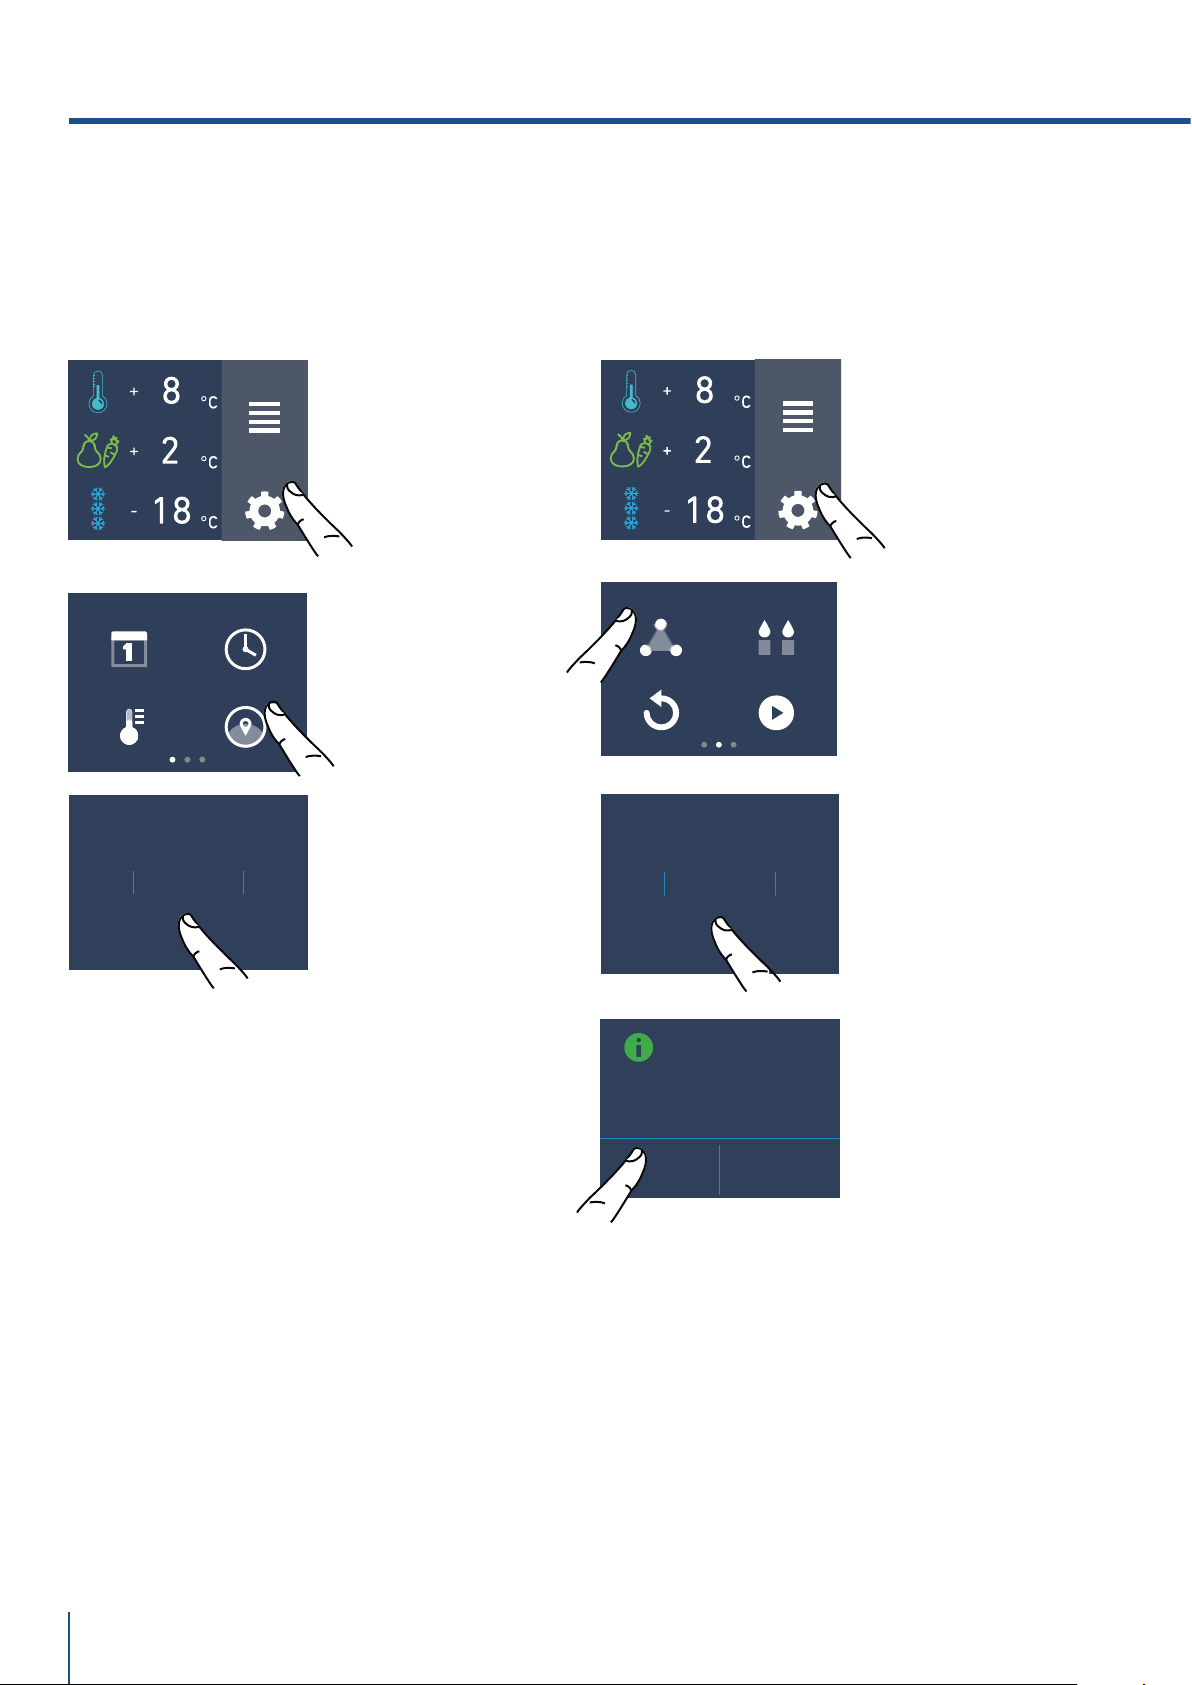
www.fhiaba.com · [email protected] · Info Line +39 0434 420160
FUNCTIONS
SETTINGS
FRANÇAIS
ESPAÑOL
DEUTSCH
ITALIANO
ENGLISH
OK
FUNCTIONS
SETTINGS
TRIMODE
RESET
DEMO MODE
SABBATH MODE
CONFIGURE
TRIMODE AS
FRESCO?
YES NO
FRESCO
FREEZER
FRIDGE
OK
DATE TIME
LANGUAGE°C/°F
72
B) Touch the icon
language.
C) Scroll up /
down to select the
desired language
and press ok.
4) Language
To set the language of the fridge, simply touch
the settings button on the display.
B) Scroll twice
right and touch the
trimode button.
C) Scroll up / down
and select one of
the three functions.
D) Touch yes to
confirm the
function.
5) TriMode
The freezer compartment can, if required, be
converted to the refrigeration o Fresco operating
mode.
A) Home screen.
Touch the icon
settings.
A) Home screen.
Touch the icon
settings.
5. CUSTOMIZE FUNCTIONS AND SETTINGS.
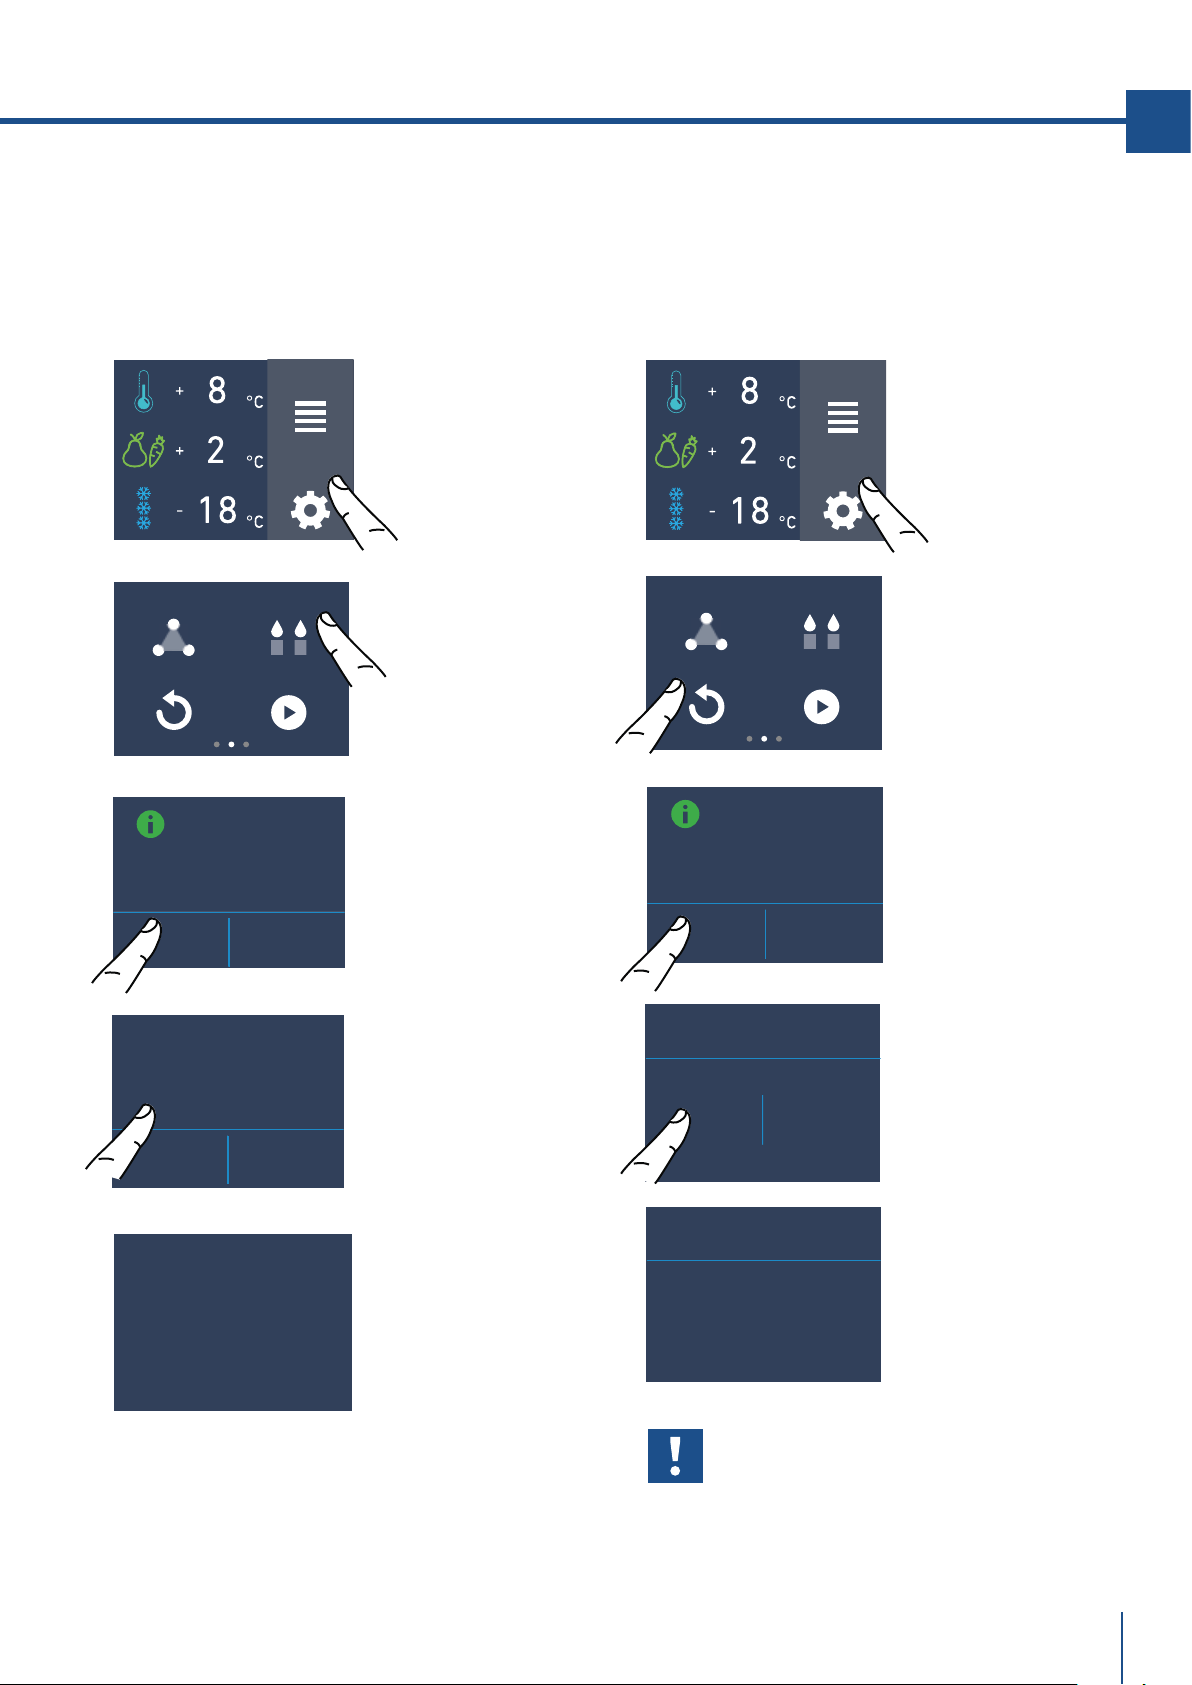
www.fhiaba.com · [email protected] · Info Line +39 0434 420160
FUNCTIONS
SETTINGS
TRIMODE
RESET
DEMO MODE
SABBATH MODE
SABBATH MODE
FUNCTIONS
SETTINGS
TRIMODE
RESET
DEMO MODE
SABBATH MODE
RESETTING TO
FACTORY DEFAULT
SETTING
YES NO
RESET
YES NO
RESET
RESET COMPLETE
SABBATH MODE
ON OFF
ARE YOU SURE?
YES NO
73
EN
7) Reset
It gives the possibility to restore the base settings
that were set in the factory, cancelling all the
changes that has been made from there onward.
6) Sabbath Mode (Optional)
The function makes it possible to comply to certain
religious observances requiring that the operation
of the appliance, is not aected by the opening or
closing of the doors (the thermostatic control, the
inner lighting and the ice maker are deactivated).
Important
If you restore the base settings (“reset”), it
is necessary to set again the choice of the
functioning of the trimode drawer that has
been made, in case they were set before as
fridge or fresco.
C) Touch the yes
button .
D) Touch the Yes
button.
E) The reset has
been performed.
The fridge's factory
settings have been
restored.
A) Home screen.
Touch the icon
settings.
B) Scroll right
twice and toch
icon reset.
A) Home screen.
Touch the icon
settings.
B) Scroll right
twice and touch
the icon sabbath.
C) Touch the Yes
button to activate
the function.
D) Touch the yes
button to activate
the function.
E) The fridge will
work accordingly to
this configuration.
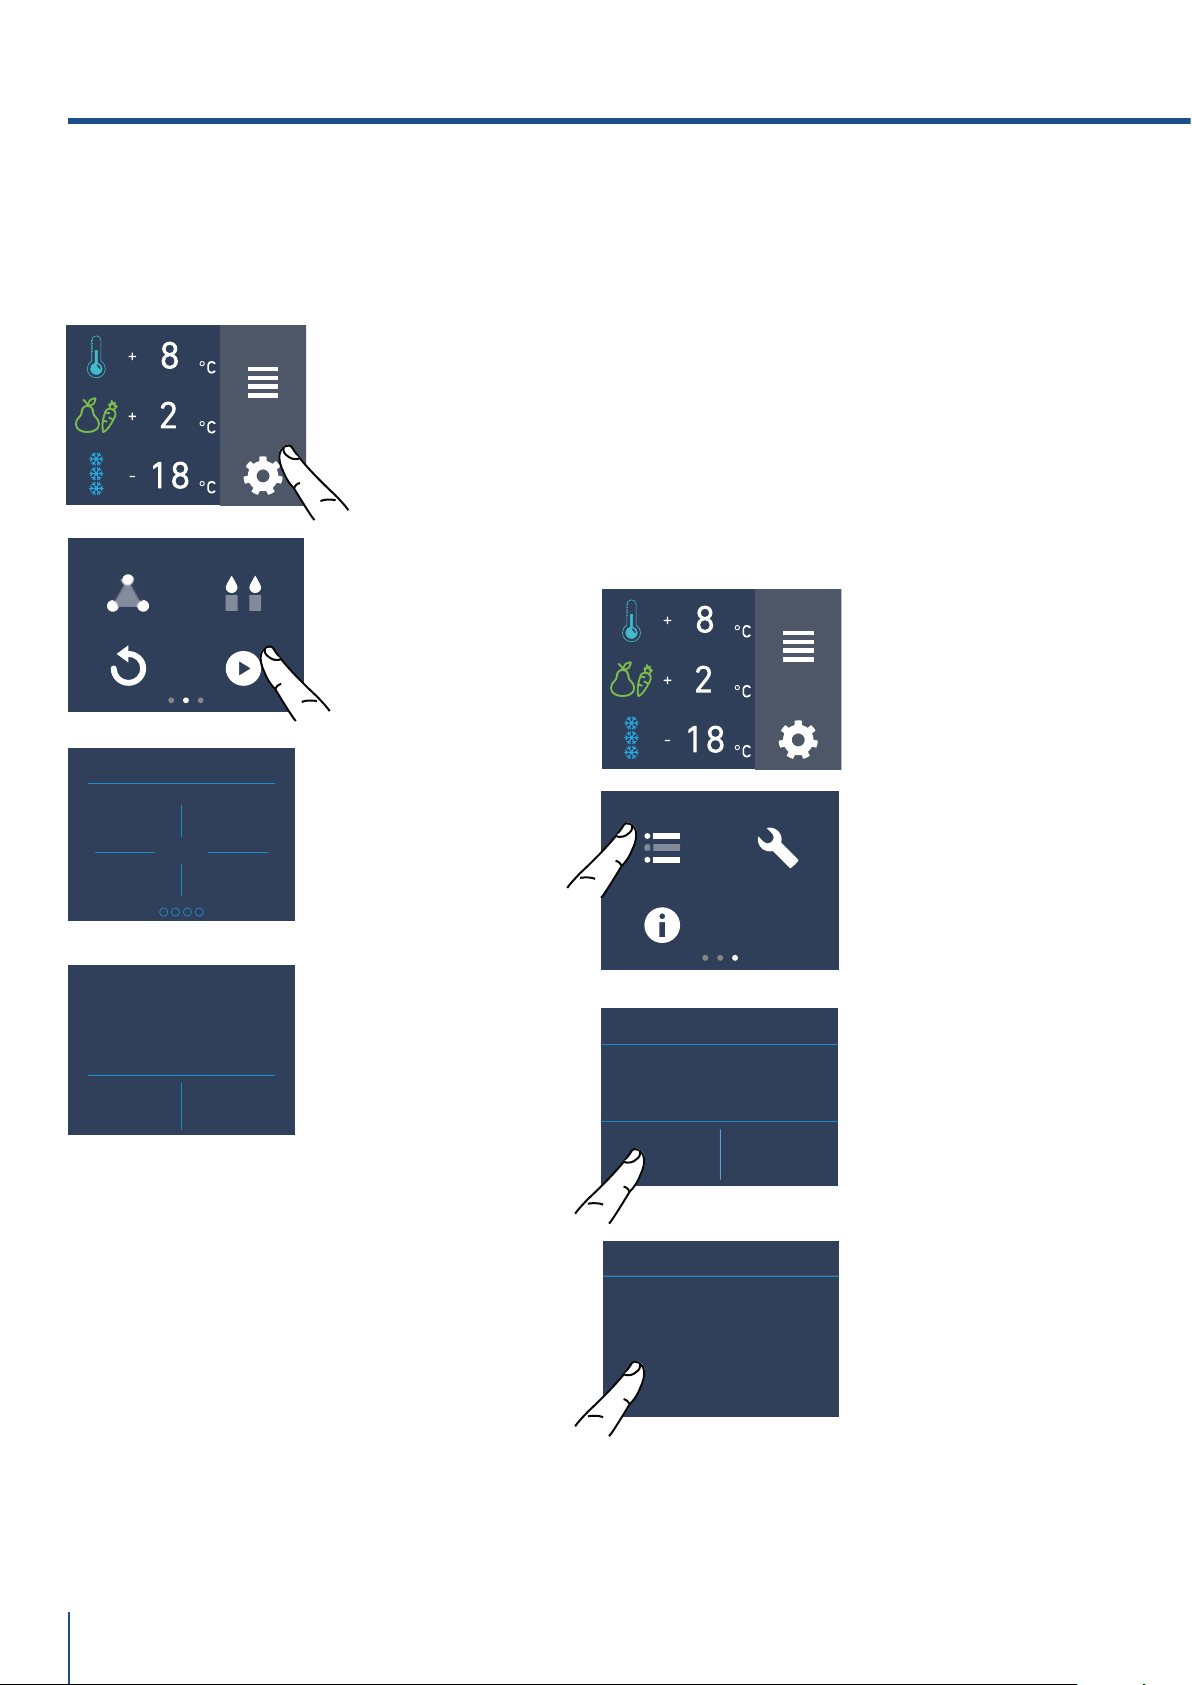
www.fhiaba.com · [email protected] · Info Line +39 0434 420160
FUNCTIONS
SETTINGS
TRIMODE
RESET
DEMO MODE
SABBATH MODE
DEMO MODE
1
3
2
4
MAINTENANCE SERVICE
INFO SYSTEM
FUNCTIONS
SETTINGS
YES NO
CLEAN CONDENSER
ENABLE REMINDER?
DEMO MODE
ON OFF
CLEAN CONDENSER
NEXT REMINDER
LEFT DAYS...
365
74
8) Demo Mode
It is possbile to simulate the functioning of the
fridge, for showroom display or for fairs.
9) Maintenance (through allarm sign).
Te units requires, for a correct operation, the cle-
aning of the ventilation grille, of the filter and the
condenser.
The default setting of the unit is"Warning disa-
bled".
See instruction 11.2 and the video tutorial available
in the support area in the fhiaba's website at
www.fhiaba.com/en/support/
video "Bottom Condenser Cleaning".
The recurring clenaning every 12 months is remin-
ded by an acoustic and optical signal on the display.
It is possible to disable the warning signal and see
the time left before the next cleaning that has to be
done. For details see pages 30 e 31.
C) Insert the
password for the
activation.
Default password
1-2-3-4
D) Push On or Off
Buttom
B) Scroll to the
right three times
and touch the icon
maintenance.
C) To enable it,
touch the Yes icon.
D) To enable it,
touch the Yes icon.
A) Home screen.
Touch the icon
settings.
A) Home screen.
Touch the icon
settings.
B) Scroll right
twice and toch
demo mode.
5. CUSTOMIZE FUNCTIONS AND SETTINGS.

www.fhiaba.com · [email protected] · Info Line +39 0434 420160
YES NO
CLEAN CONDENSER
DISABLE REMINDER?
FUNCTIONS
SETTINGS
MAINTENANCE SERVICE
INFO SYSTEM
OFF RESET
CLEAN CONDENSER
NEXT REMINDER
LEFT DAYS...
365
75
EN
11) Info System
The function Info System shows the data of the
products for example the software's code, serial
number amd the factory's codes of the fridge.
B) Touch the icon
Info System.
C) Here are shown
the data of the
fhiaba unit.
A) Home screen.
Touch the icon
settings
F) Instead, if you
want to disable the
warning previously
set, touch the icon
reset.
G) To disable the
warning, touch the
yes button.
10) Service
The service function is reserved for the Fhiaba
assistance.
SERVICE

www.fhiaba.com · [email protected] · Info Line +39 0434 420160
1
2
76
Warning
Do not place hands or fingers near the Ice-
maker when in function.
Shelves
The shelves are sliding and can be easily re-posi-
tioned by the user as follows:
> release the locking knob by turning i anti-clockwise
> lift or lower the shelf to the desired position
> re-tighten the locking knob. To remove a shelf it is
necessary to slide it up to the top
Door Shelves
1T / 0T / 0H models
The door shelves can be easily removed for cleaning
> Hold the door shelf at the sides and push it upwards
to release it from its seat, then pull it outwards.
> Reverse the procedure to reinstall.
6.1 Internal Layout (positioning, adjust-
ment, removal).
Fresco Drawer
1T / 0T / 0H models
Fixed to the slide guides with two thumbscrews.
> to remove the drawer, unscrew the thumbscrews
and remove the drawer.
TriMode Drawer
1T / 0T / 0H models
The upper TriMode can be removed using the same
method used for the Fresco drawer. To remove the
inner TriMode drawer unscrew the thumbscrews
When replacing the drawers, make certain the
back of the drawers engage under the clips on the
slide guides.
Ice Tray
Located in the upper drawer of the freezer compart-
ment on some models it is fixed with locking panels.
> after removal, make sure to reposition it correctly.
www.fhiaba.com/en/support/
video "EvenLift".
www.fhiaba.com/en/support/
video "Care and cleaning".
www.fhiaba.com/en/support/
video "EvenLift".
models 1T / 0T / 0H / 0F
6. INTERNAL LAYOUT

www.fhiaba.com · [email protected] · Info Line +39 0434 420160
ICE MAKER
77
EN
7. ACTIVATION AND USE OF THE ICE MAKER
7.1 Activation and use of the Ice Maker
Note
> If the ice is not used frequently is advisable
to empty the ice bin once every 8-10 days.
It is normal that some ice cubes stick to one
another. If the ice is not frequently used, the
older cubes can become opaque, and will
have a strange flavour and become smaller.
> The Icemaker automatically deactivates if
the Vacation function is activated.
When the Icemaker is started for the first
time, it is recommended to dispose of the first
full bin of ice.
> If the equipment has been switched o for
a month or more, it is recommended to per-
form a water and filter cleaning cycle.
> L’IceMaker produce ghiaccio se il vano
TriMode è impostato in modalità Freezer.
Warning
The ice maker will continue to operate
even when the ice bin is not in position
To activate the Ice Maker after installation of the ap-
pliance touch the function icon and then and then the
ice maker icon from the functions .
Please note that 12 to 24 hours are necessary be-
fore ice production may begin.
The production is of 10 cubes per cycle in approx-
imately 10 cycles in 24 hours.
The yield depends on the temperature set in the
freezer, the room temperature and the frequency of
door opening.
If the appliance is operating without being connected
to the water system, make sure that the Icemaker is
deactivated by toch the icon .
The Ice Maker produces ice until the ice tray is full
and will automatically stop once the maximum level
is reached.
With the SuperIce function, it is possible to
increase the quantity of ice produced a 24 hours,
while the Set Cube Size function permits se-
lection of the size of the produced ice cubes.
ICE MAKER
ICE MAKER
SUPERICE
SET CUBE SIZE
VACATION MODE
WATER FILTER
Y
STEM CLEANI
N
Do the ice cubes have an unusual odour?
Ice is a porous material which can absorb odours
from the environment. Ice cubes which have been in
the ice cube container for a long time may absorb
odours, stick together and slowly become smaller.
We recommend that old ice cubes not be used.
Other means of preventing odors:
> The ice cube container should be cleaned occa-
sionally with warm water. Make sure that you switch
o the ice maker before clearing the container. Rinse
out and wipe dry.
> Check the contents of the freezer for spoiled or out-
of-date food. All odorous foods should be wrapped
thoroughly or stored in airtight containers to prevent
the build-up of odors.
> The water filter may have to be replaced in some
models.
> In some cases the quality of the water connection
in the house should be checked.
Operating noises
Quite normal noises
> Grumbling: refrigerating unit is running. Fan in the
recirculating air system is running.
> Bubbling, humming or gurgling noises: refrigerant
is flowing through the tubes.
> Clicking: motor is switching on or o. Solenoid
valve on the water connection is opening/closing.
> Rumbling: ice cubes are falling into the ice cube
container.
the appliance is powered by two independent
compressors. It is therefore normal to always
have one of two compressors in operation.
Warning
Do not place any bottles or food for rapid
cooling in the ice cube container. The ice
maker may become blocked and be dam-
aged.
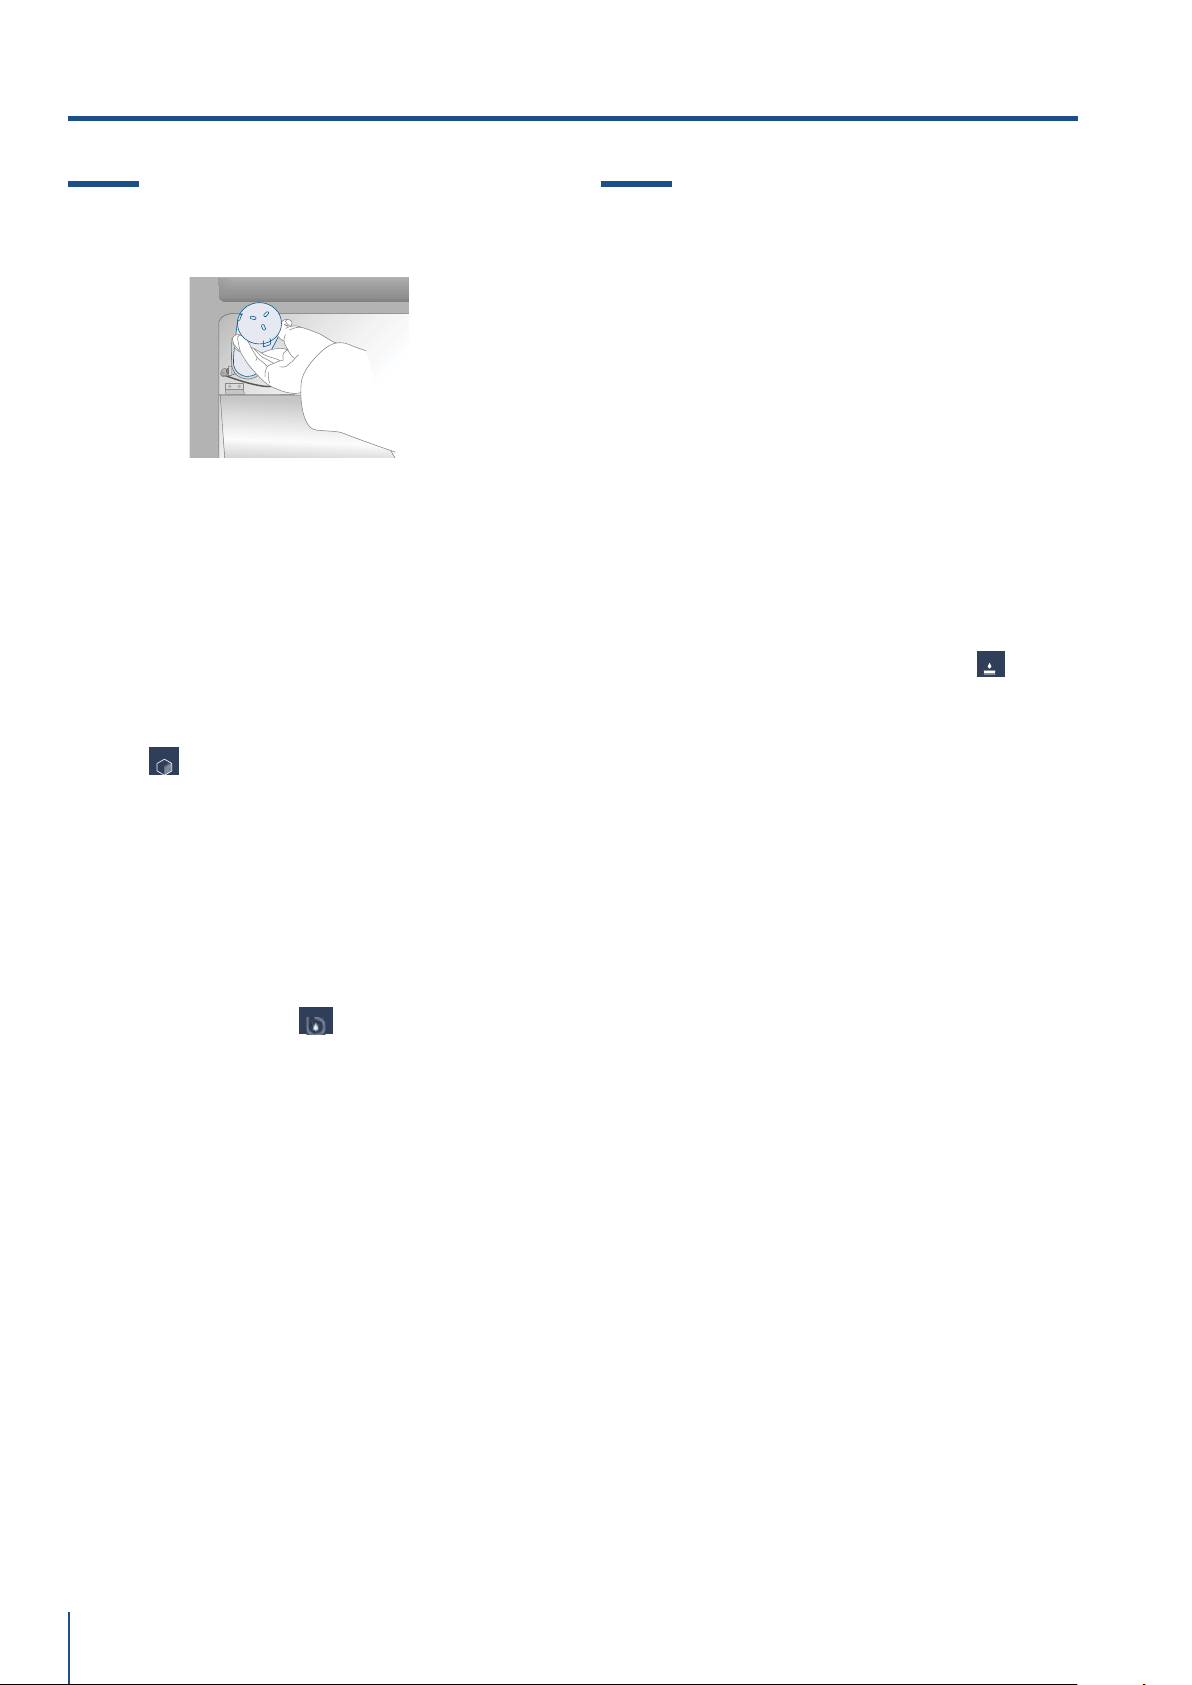
www.fhiaba.com · [email protected] · Info Line +39 0434 420160
78
7.2 Water Filter (not 0F models)
7.3 Water filter for freezer column
Ice Maker
Freezer columns equipped with automatic ice-mak-
ers include an externally mounted water filter kit.
The water filter manifold and waterline connections
must be installed in conjunction with the fridge as
the waterline connecting the back of the appliance
to the filter kit must be in place before installing the
unit.
The filter kit should be installed in an accessible
location (such as an adjacent cabinet) to allow for
the water filter cartridge to be changed annually.
If you choose not to use the water filter (such as
connecting the appliance to an already filtered
water source) then it is suggested to also set the
function Water Filter throught the icon ,touch
the icon reset e disable the warning to avoid
receiving reminders to change the filter (that you
are not using).
For more details and how to access this
function setting, follow instructions on page 17 of
the included instruction manual: “Reset Filter”.
The Water Filter makes available high-quality
water for the production of ice cubes. It provides
up to 3000 liters of water for a maximum time of
12 months.
Filter Replacement
The filter is located inside the refrigerator
compartment, above the top glass panel. Prior to
changing the filter, switch o the Ice Maker by toch
the icon ice maker.
Open the top glass panel and carefully rotate the
filter cartridge for a quarter rotation in a
counter clockwise direction until it detaches from
its housing. It is normal for a small quantity of
water to come out. Remove the cap of the new car-
tridge and insert it into the housing by gently rotat-
ing it for a quarter rotation in a clockwise direction
until it locks into place.
Then enter the Menu and set la funzione "manual
Clean" throught the icon . At the end of the
cleaning cycle remove the water from the ice tray
and wipe it dry.
A video tutorial is available:
www.fhiaba.com/en/support/
video "Water Filter Replacement".
ICE MAKER
Y
STEM CLEANI
N
WA
TER FILTER
7. ACTIVATION AND USE OF THE ICE MAKER

www.fhiaba.com · [email protected] · Info Line +39 0434 420160
1T
0T / 0H
0FZ
0FR
79
EN
8. LIGHTING 9. FOOD STORAGE
8.1 Lighting
To provide optimum interior lighting, LED strips il-
luminate the refrigerator compartment from the top
and sets of LED lights directly illuminate dierent ar-
eas of the refrigerator compartment, of the Crisper-
Fresco drawers and the freezer drawer.
In case of malfunction and/or wearing out of the
lighting system, the repair should be carried out by a
qualified Fhiaba Service technician.
9.1 General directions
Your Fhiaba is designed to ensure precise, constant
temperatures and appropriate humidity levels in all
compartments.
In addition, the double refrigeration ensures that fro-
zen foods and ice do not absorb the odor of fresh
foods and that the humidity in the refrigerator does
not freeze and build up frost.
Nevertheless, to properly preserve all of your foods,
it is not enough to have an excellent refrigerator. It
is also necessary to know the rules for correct food
preservation.
Do bear in mind that all foods will inevitably change
their characteristics over the passage of time. This
change begins long before the food is consumed,
since foods contain micro organisms which multi-
ply and can cause deterioration. This process occurs
more rapidly due to improper handling, preservation
temperatures and humidity levels.
It is therefore recommended to follow the directions
presented below which will permit using your refrig-
erator/freezer in the most eective and safe man-
ner to keep your foods in the best way for as long as
possible.
Bear in mind that the Crisper-Fresco area is the area
for preserving the most delicate fresh foods, since it
ensures constant average temperature near freez-
ing.
Periodically check that all foods are in a perfect
state of preservation. It is usually quite clear when
a food item is deteriorated, due to mold, unpleasant
odor and unpleasant aspect. Nevertheless, there are
cases in which these conditions are not so evident. If
you believe that a food item was kept for an exces-
sive period of time and may be deteriorated, do not
consume this item or even taste it, even if it seems to
still be healthy, since the bacteria that cause deterio-
ration of food can also cause poisoning and illness.
When in doubt, throw the food away.

www.fhiaba.com · [email protected] · Info Line +39 0434 420160
80
9.2 How to maintain good food quality
When buying groceries
Always take the following precautions:
> Place any packages of raw meat, fish or poultry in
plastic bags so that they do not drip on other foods.
> Purchase meat, poultry and fish last. Do not leave
your groceries in a warm car after shopping. Keep a
freezer bag in your car and use it in case of very high
temperatures or long trips.
> Check the production dates and “best before” times
on foods to be sure that they are fresh.
> Be very careful when buying fresh foods, and only
buy a quantity that can be consumed during your
planned preservation period.
> When possible, let warm foods adjust to room tem-
perature for at least two hours before placing them
in the refrigerator, unless you have activated the
Shopping function before.
When placing foods in
Check the refrigeration temperature of the various
compartments on the control panel:
> The refrigerator temperature must be 8°C (45°F)
or lower and the freezer temperature must be -18°C
(0°F)
> Follow the recommendations regarding the pres-
ervation times and temperatures indicated in the ta-
bles to follow.
> Keep raw meat, fish and poultry separate from oth-
er foods and avoid any possible drippings.
When placing foods in
> When placing in the refrigerator your meat, fish
or poultry, leave these in their original packaging,
unless the packaging is ripped or punctured. Re-
peated handling could introduce bacteria into these
foods.
> To keep food in the freezer is a good idea to use
freezer containers.
> Label and date the packages
> Be careful to correctly position the food items on
the shelves in a way that does not obstruct the air
circulation vents inside the compartment.
Notes
When a high level of humidity is present
either in the environment or in the foods
placed in the Fresco drawers, the bottom of
the Fresco compartment might be covered
with some water or ice (if the temperature is
set between 0°C and -2C°).
Such condition is normal and it is due
to the high humidity levels of the Fresco
compartment; high humidity together with
low temperatures is what guarantees a
longer preservation of foods.
Water or ice can disappear on its own if the
air humidity level should lower; it is also
possible to remove the water with a tow-
el. If a thin layer of ice has formed, set the
temperature of the Fresco compartment to
+2°C and after one day remove the water
with a towel.
If the layer of ice is thicker, it might be neces-
sary to shut o the Fresco compartment for
one day in order to melt it.
Warning
After a prolonged interruption of electri-
cal power, once the electrical power is re-
activated, an audible signal will indicate if
the temperature has raised above normal
levels. In addition to this the display will
show for one minute the highest temper-
ature detected inside the compartments,
to allow the user to decide how to better
use the food items.
After one minute the display will resume
normal operation, while the Alarm button
will continue to blink.
Press the Alarm button to display the
highest recorded temperatures.
9. FOOD STORAGE

www.fhiaba.com · [email protected] · Info Line +39 0434 420160
81
EN
9.3 Conservation Tips
Temperatures
The appliance working temperatures are set at the
recommended degrees of +5°C for the refrigerator,
0°C for Fresco drawers and -18°C for the freezer.
FOOD ARRANGEMENT
Refrigerator door.
Refrigerator compartment door
> Keep eggs, butter, cheese etc. in the upper and cen-
tral parts.
> Keep drinks, bottles, cans etc. in the lower part.
Refrigerator compartment
> Keep conserves, wine, biscuits etc. in the
upper part.
> Keep dairy products, ready meals, pastries,
fruit juices, beer etc. in the central part.
> Keep meats, cold cuts etc. in the lower part.
> Keep fresh and tropical fruit, vegetables, carrots, po-
tatoes, onions, etc. in the fruit and vegetable drawer.
Freezer compartment
>The type of food, quantity and date of freezing should
be marked on the container/packaging.
> Use small containers, if possible already cold.
>The quantity of fresh foods which can be frozen at
the same time is listed on the nameplate inside the
refrigerator compartment.
> Use suitable freezer bags, tinfoil, cling-film
for use with food, and freezer containers.
> Do not use paper bags, cellophane for nonfood use,
shopping bags or pre-used freezer bags.
> Avoid frozen food coming into contact with
fresh food to be frozen.
> Keep bagged frozen vegetables, ice, ice cream etc.
www.fhiaba.com · [email protected] · Info Line +39 0434 420160
9. FOOD STORAGE
FROZEN FOODS PRESERVATION AREA TIME
Beef, veal, lamb and goat meat Freezer Compartment (steaks) 6-12 months
Beef, veal, lamb and goat meat Freezer Compartment (Meat with bone) 4-6 months
Ground beef Freezer Compartment 1-2 months
Pork Freezer Compartment (Without bones) 4-6 months
Pork Freezer Compartment (With bones) 2-3 months
Ground pork Freezer Compartment 1-2 months
Meat leftovers Freezer Compartment 2-3 months
FRESH FOODS PRESERVATION AREA TIME
Raw meats
Large cuts Fresco Compartment 4 days
Beef steaks, poultry and wild game Fresco Compartment 3 days
Ground meat Fresco Compartment 1-2 days
Carpaccio Fresco Compartment Immediately
Cooked meat
Boiled meat and roasted meat Refrigerator Compartment 2 days
Meat sauce Refrigerator Compartment 6 days
Fish
Raw and cooked fish Fresco Compartment 2 days
Other
Soups and broths Refrigerator Compartment 2 days
Pasta Refrigerator Compartment 2 days
Opened cold cuts Fresco Compartment 3 days
Fresh cheeses Fresco Compartment 2-3 days
Well sealed aged cheeses Refrigerator Compartment
Several
months
Eggs (fresh and unwashed) Refrigerator Compartment 2 weeks
Opened cans Refrigerator Compartment 2-3 days
Raw vegetables (in perforated bags) Fresco Compartment 1 week
82

www.fhiaba.com · [email protected] · Info Line +39 0434 420160
FROZEN FOODS PRESERVATION AREA TIME
Whole chicken and turkey Freezer Compartment 8-12 months
Goose, duck and pheasant Freezer Compartment 4-8 months
Fish Freezer Compartment 1-2 months
Shellfish Freezer Compartment 2-3 months
Cooked food Freezer Compartment 1-2 months
Vegetables Freezer Compartment 8-12 months
Fruit Freezer Compartment 6-12 months
Desserts and cakes Freezer Compartment 2-3 months
83
EN
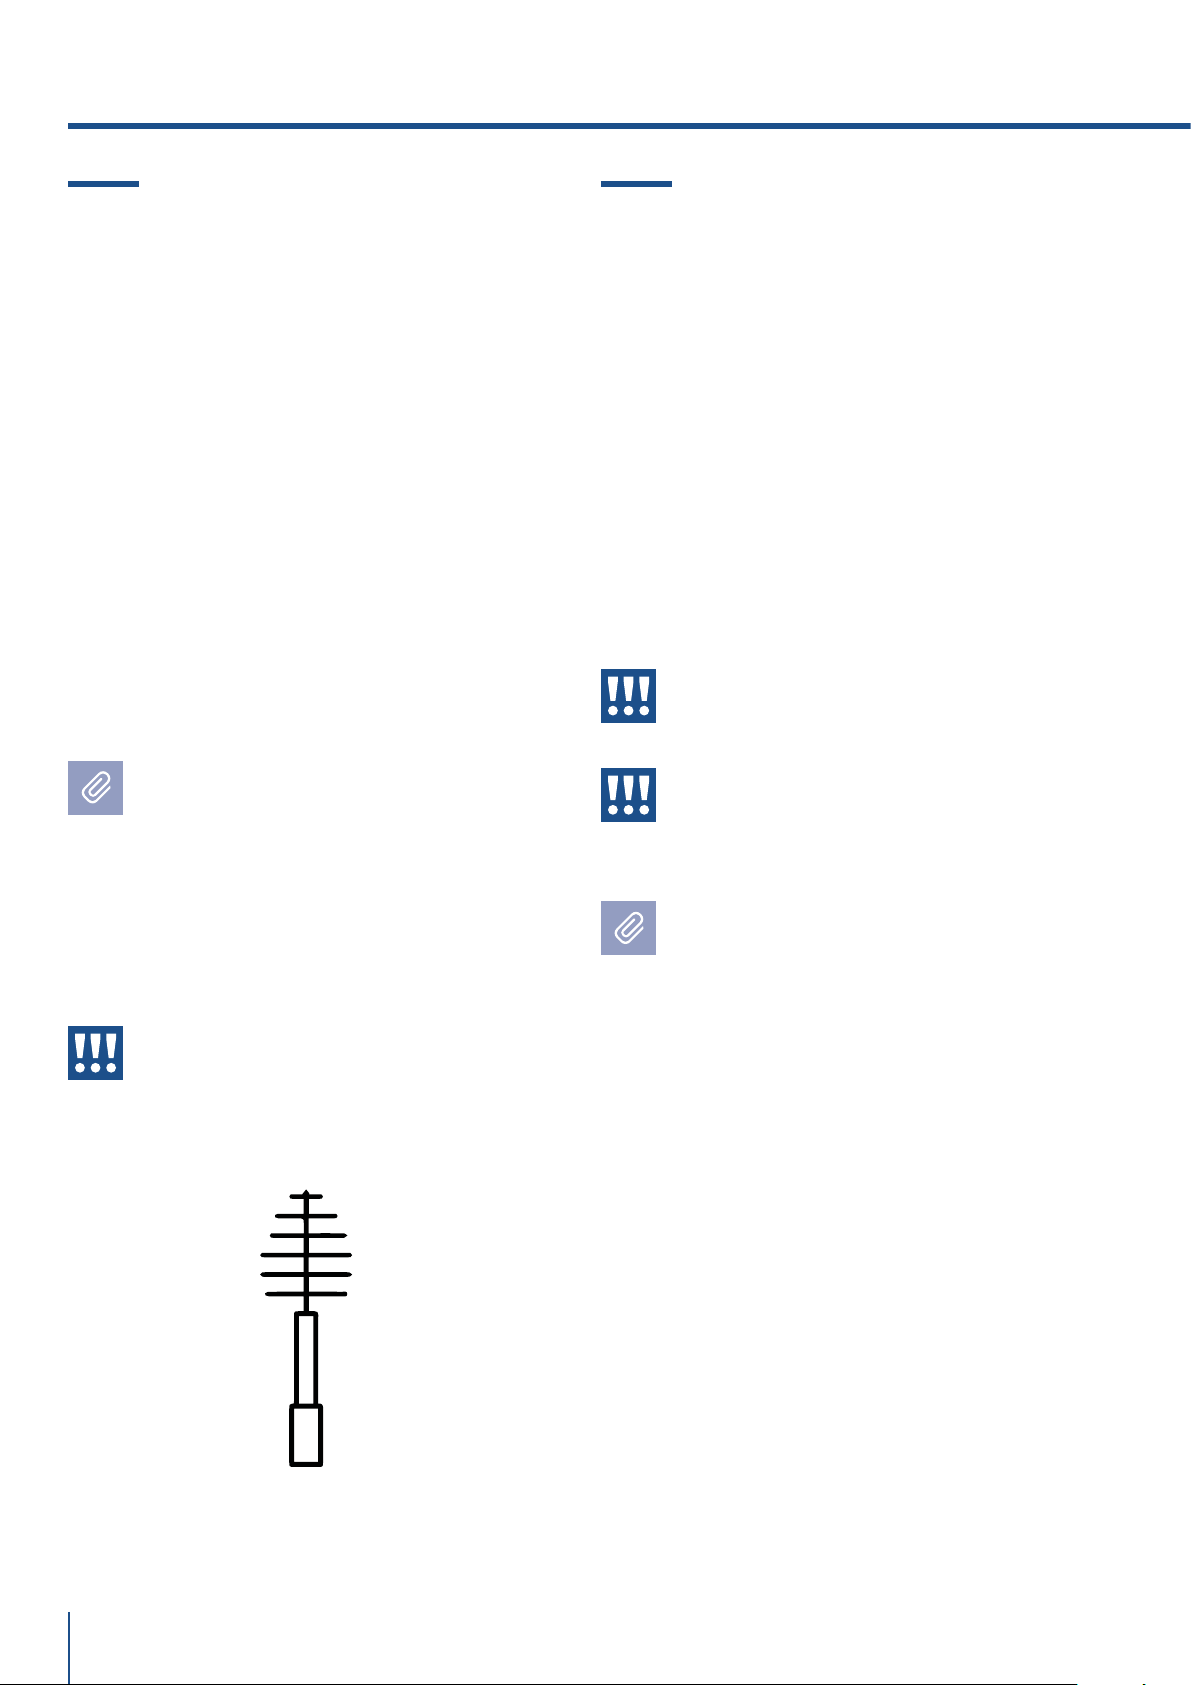
www.fhiaba.com · [email protected] · Info Line +39 0434 420160
84
10.1 Care and Cleaning
To clean the parts made of steel use a microfiber
cloth and the sponge provided in the kit with the
appliance. Always use the cloth and sponge in the
direction of the steel’s satin finish.
Every now and then, to polish the steel, wipe with a
slightly damp microfiber cloth.
Do not use the sponge on aluminium parts, such as
the handles and the profiles of the glass shelves.
You should use special care to keep the ventila-
tion openings in the appliance or in the cabinet that
houses it free of obstructions.
Scrupulously follow the detailed directions
that can be found in the provided kit and
never use abrasive or metallic products
which could scratch and damage the satin
finishing on the appliance permanently.
Before performing any sort of cleaning,
disconnect the appliance from the electrical
power supply.
Make sure you do not damage the refrigerant
circuit in any way.
Warning
The use of chlorine-based detergents or
similar that contains it should be avoided
(bleach, hypochlorite, etc).
10.2 Internal cleaning
Clean the internal and removable parts by washing
them with a solution of lukewarm water, a small
amount of dishwashing detergent.
Rinse and dry right away.
Do not use mechanical devices or other methods to
speed up defrosting.
Warning
Do not use water on the electrical parts,
lights and control panel.
Warning
The use of chlorine-based detergents or
similar that contains it should be avoided
(bleach, hypochlorite, etc).
Do not bring cold glass parts into contact with
boiling water.
Do not wash any parts of the refrigerator in a
dishwashing machine since this could dam-
age or irreparably deform the parts.
A video tutorial is available:
www.fhiaba.com/en/support/
video "Care and Cleaning".
A video tutorial is available:
www.fhiaba.com/it/support/
video "Care and Cleaning".
10. CARE AND CLEANING
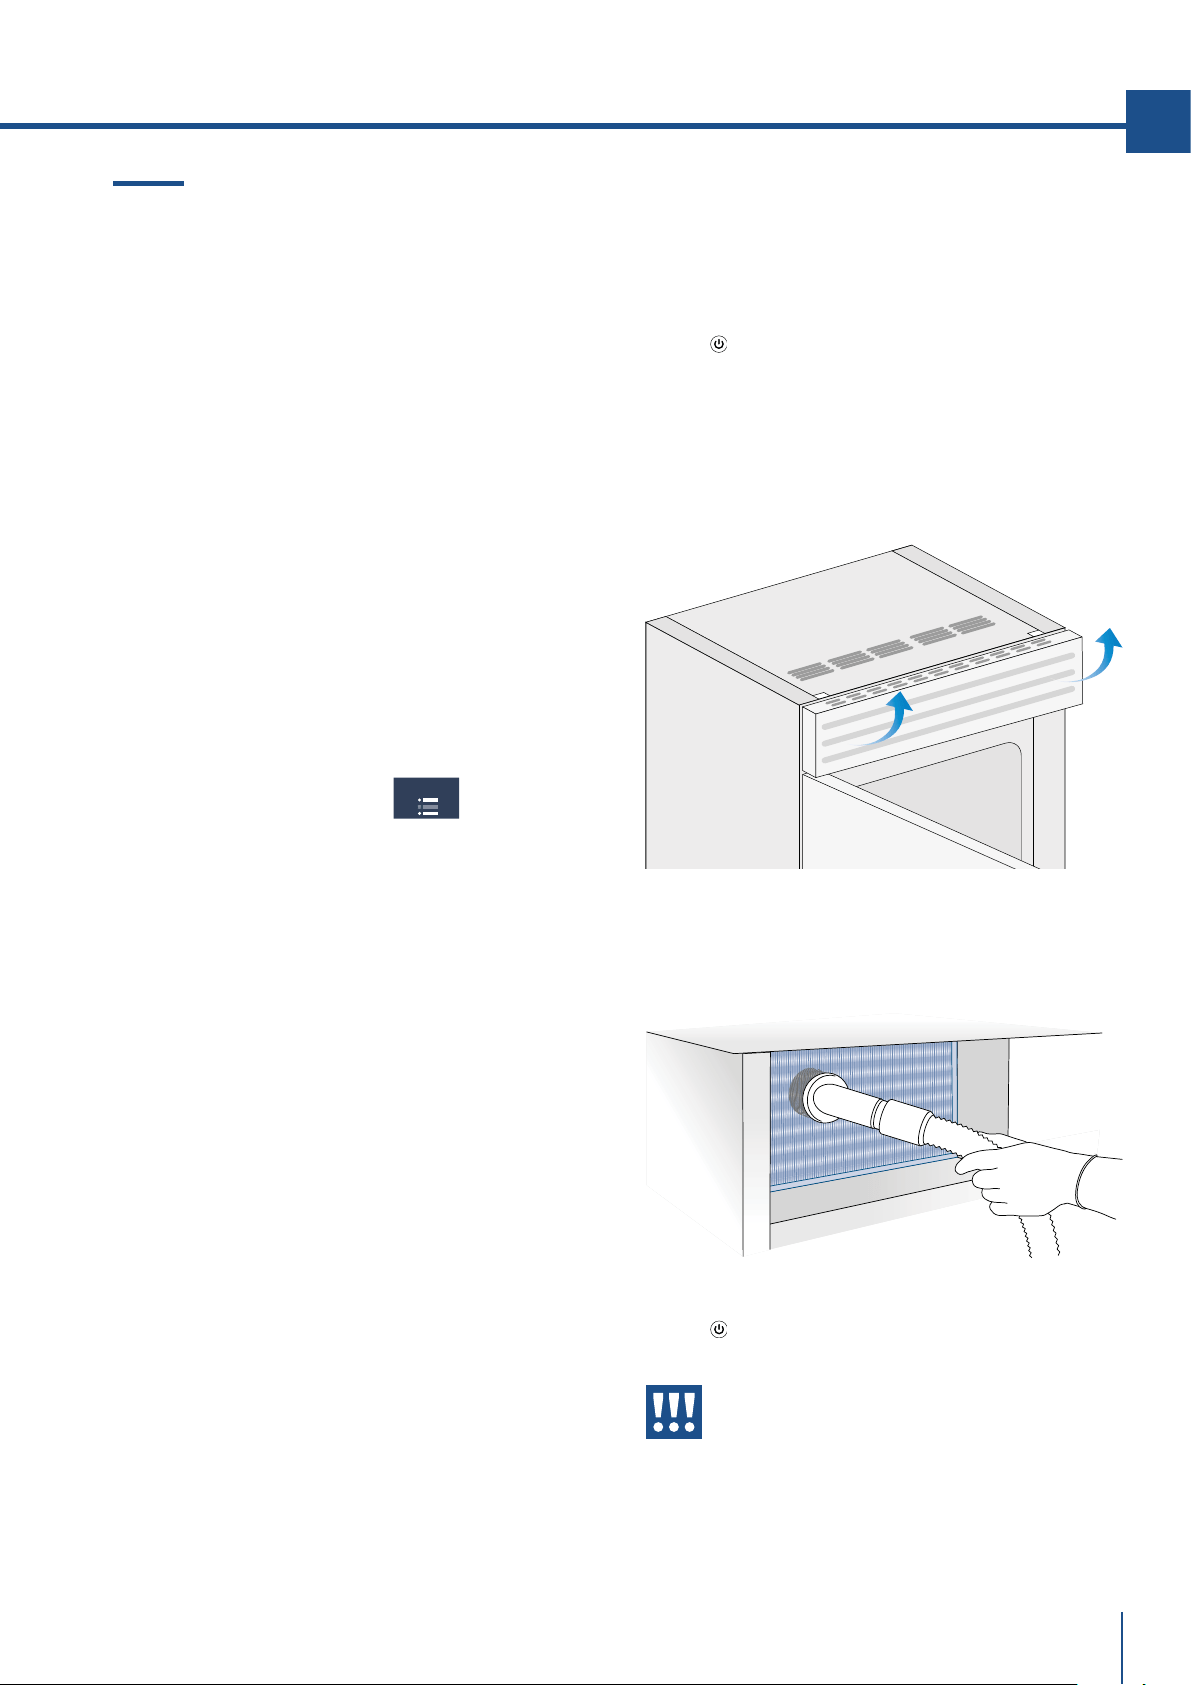
www.fhiaba.com · [email protected] · Info Line +39 0434 420160
85
EN
10.3 Cleaning of the ventilation grille,
filter and condenser.
The unit requires, for a correct operation, the
cleaning of the ventilation grille, filter and
condenser.
The recurring clenaning every 6 months is reminded
by an acoustic and optical signal on the dispaly. It is
possible to disable the warning signal and see the
time left before the next cleaning has to be done.
Behind the frontal ventilation grille (situated in the
upper part of the units in the series StandPlus,
Country e X-Pro, in the lower part of the units in the
series Integrated, Brilliance e Classic) there is the
condenser. See page 7 paragraph 3.2.
To clean it use a vacuum cleaner with a soft brush
attachment at maximum power, sweeping it along
the vent slits. In case of a significant dust build up,
the ventilation grille can be removed to allow a more
accurate cleaning of the filter.
On the mantenience settings, after the
installation of the unit and after it has been turned
on, you can set the condenser cleaning warning.
In the case the warning sign will be enable, there
will be an acoustic signal every 6 months, that
informs that is time to clean the condenser.
After cleaning it, touch the reset icon in order to
reactivate the warning signal in 6 months.
In the case you do not want the warning cleaning
signal of the condenser anymore, touch the o icon.
For knowing how to use the mainteniance display,
see page 23.
See instruction point 11.2 throught the video tutorial
available on the Fhiaba's website.
www.fhiaba.com/en/support/
video "Bottom Condenser Cleaning".
Upper condenser.
For cleaning the condenser in the models X-Pro,
StandPlus e Country follow the instructions:
> Switch o the appliance by pressing the Unit
button
on the main control panel for approx 3
seconds.
> Wait approx 30 minutes, until the finned condens-
er cools down to room temperature.
> Lifting up the removable grille.
MAINTENANCE
> Clean it thoroughly from any dust build up as
shown in the picture, taking care not to damage it.
> Restart the unit pressing for 3 seconds on the on
button
.
Warning
The edges of the condenser are sharp,
therefore use adequate protection for the
hands and arms when cleaning the con-
denser.
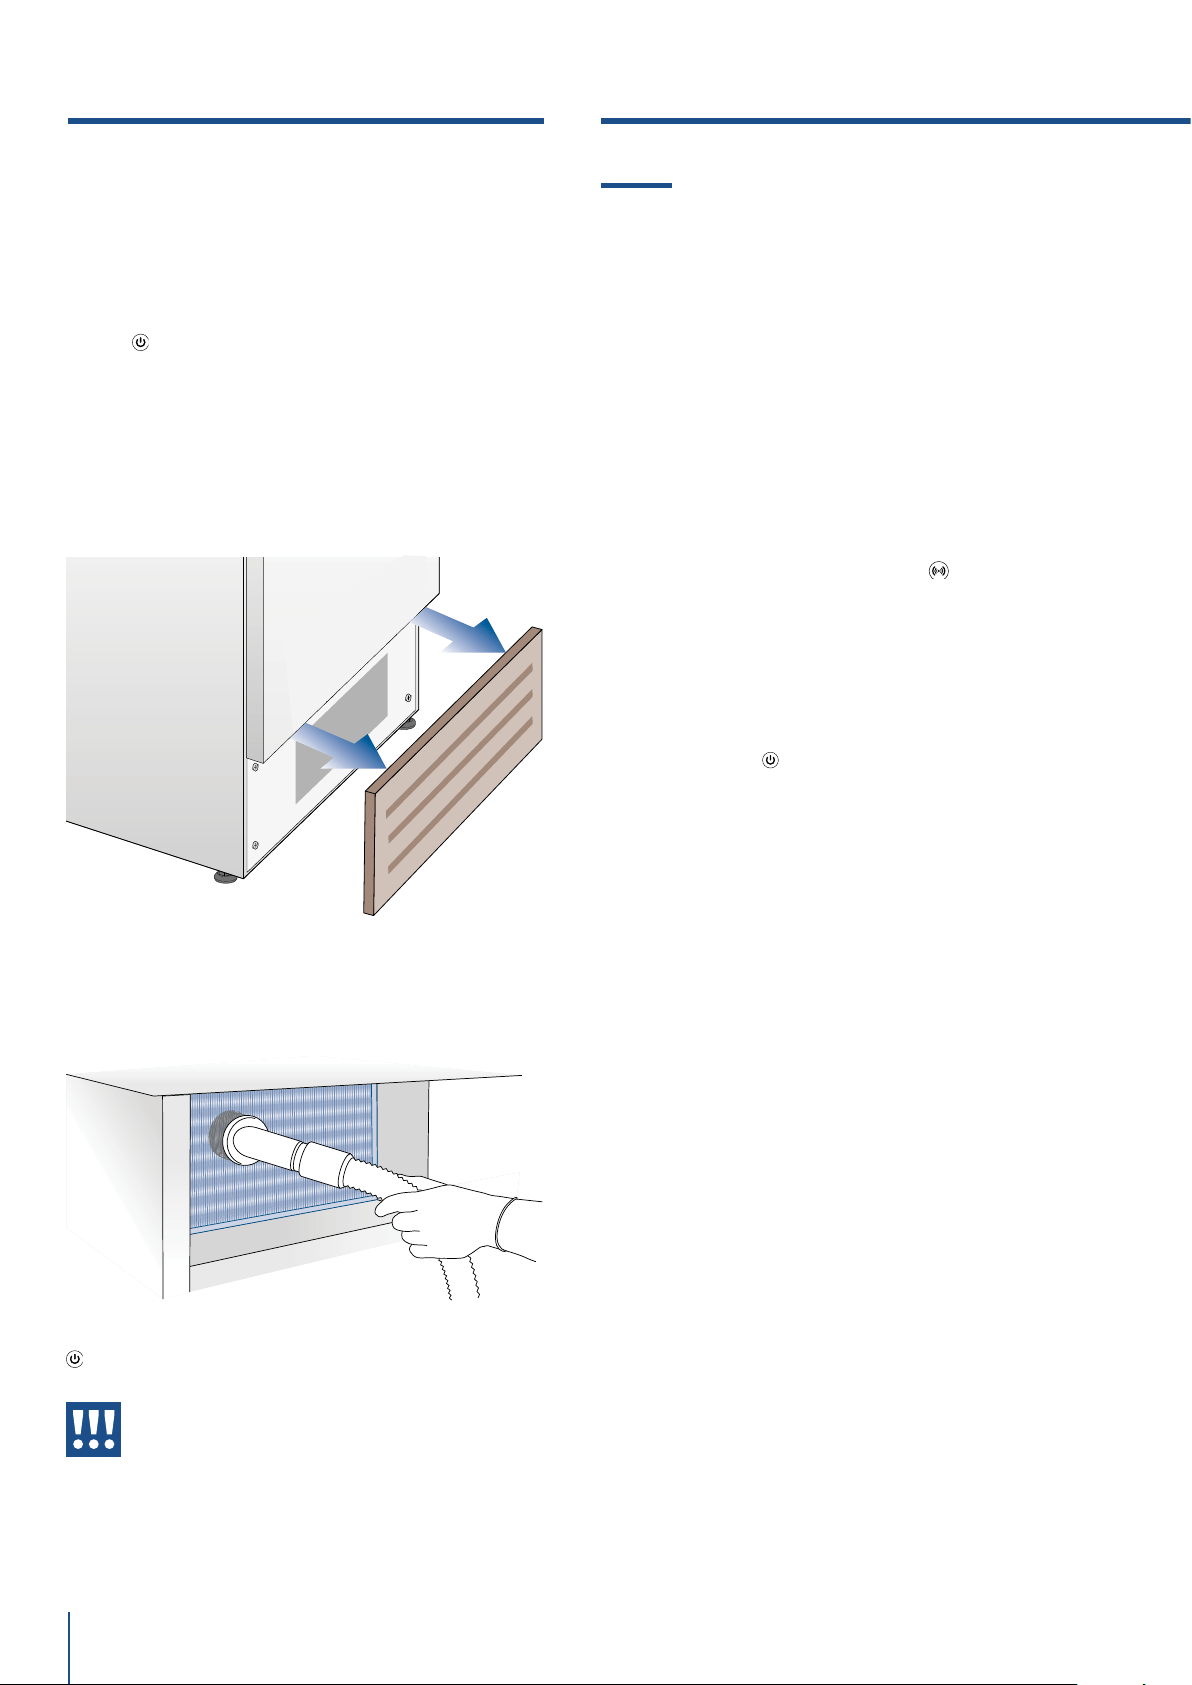
www.fhiaba.com · [email protected] · Info Line +39 0434 420160
86
11.1 Troubleshooting Guide
If you notice malfunctions in your appliance, use this
guide before calling for service: this guide can help
you personally resolve the problem or could provide
important information to be conveyed to the service
technician to ensure rapid and eective repair.
Display message and audible alarms.
A malfunction is usually indicated by the display.
Problems that cannot be solved by the user are
reported through a fault code. Keep in mind,
however, that in messages or alarms they may
appear for particular conditions of use or during
start-up. In these cases, deactivate the audible
alarm by pressing the Alarm button
and leave the
appliance running and limit the opening of the
doors to the maximum for about 10-12 hours.
The refrigerator or the freezer does not work.
Is the appliance connected to the electrical power
supply?
Is electrical power available at the electricity socket?
Is the Unit button
activated?
Is the unit in ‘Demo’ Mode?
The refrigerator or the freezer is warmer than
usual.
Does the display show a malfunction code?
Is the temperature adjusted correctly?
Were the doors or drawers open for a long period of
time?
Were large quantities of food recently inserted?
Is the unit in ‘Demo’ Mode?
The appliance remains in function for a long time
period.
Bear in mind that during very hot weather and with
very high temperatures in the room it is normal that
the compressor remains on for prolonged periods of
time.
Were the doors or drawers open for a long period of
time?
Were large quantities of food recently inserted?
Check that the doors are closed and that the food or
containers do not obstruct the perfect closure of the
door.
Is one or more compartments in Shopping Mode?
If you hear unusual noises.
It is normal to hear noises from the ventilators or
compressors during operation or during the defrost
phase.
Lower condenser.
For cleaning the condenser in the models Classic,
Integrated or Brilliance follow the instructions:
> Switch o the appliance by pressing the Unit
button
on the main control panel for approx 3
seconds.
> Wait approx 30 minutes, until the finned condens-
er cools down to room temperature.
> Remove the removable grille under the door.
11. TROUBLESHOOTING GUIDE
> Clean it thoroughly from any dust build up as
shown in the picture, taking care not to damage it.
> Restart the unit again, pressing on the unit bottom
. for three second.
Warning
The edges of the condenser are sharp,
therefore use adequate protection for
the hands and arms when cleaning the
condenser.
10. CARE AND CLEANING

www.fhiaba.com · [email protected] · Info Line +39 0434 420160
87
EN
Noise could be more marked depending on the
position of the appliance and the surrounding
environment.
Condensation inside and outside of the refrigerator.
If the climate is very humid, the formation of
condensation is normal.Opening the door or draw-
ers for prolonged periods of time can contribute to
the formation of condensation.
In any case, make sure that the doors are always
perfectly closed.
Ice or frost build up inside the refrigerator
or freezer.
Did you leave the doors open for a long period of
time?
Do the doors close perfectly?
If the doors do not close perfectly, contact your
installer.
In case of frost or ice build up in the Fresco com-
partment, due to frequent and prolonged
opening of the doors, deactivate the Crisper-Fresco
function via the button on the control panel. Wait
until the frost or ice melt, then remove the drawer
and dry the sides and bottom of the compartment.
Unpleasant odors inside the refrigerator.
Clean the appliance completely according to the
instructions.
Hermetically cover all the food. Do not conserve food
for prolonged periods of time.
The doors are dicult to open.
The appliance is designed to ensure a fully hermetic
closure. When the door is closed, a vacuum condition
can occur: in this case it is necessary to wait a few
seconds until the pressure balances before opening
the door.
Appliance is cooling but lights and display are not
working.
Check to see if the appliance was accidently placed
into Sabbath Mode
The Ice Maker does not work.
Make sure that the Ice Maker is on (icon ).
To switch on the Ice Maker press the button.
Make sure that the appliance is connected to the
water supply.
The Ice Maker does not produce sucient amounts
of ice.
On average, the Ice Maker produces approximately
10 cubes of ice every two and half hours.
The ice cubes freeze into one block.
If the ice is not used frequently, it is possible that
blocks of ice may form. It is recommended to remove
the block of ice cubes and then let the Ice Maker fill
the ice tray again.
The ice has an unusual flavour or colour.
When the Ice Maker is started for the first time, it
is recommended to empty the first full tray of ice
cubes.
If the refrigerator was switched o for more than
one month or if the cartridge was not changed for
more than six months, it could be necessary to
replace the filter cartridge.
Contact a plumber or a water treatment expert to
make sure that the problem is not due to the water
supply.
If the unit you purchased was used as a
showroom model it may be in a special en-
ergy-saving mode called Demo Mode where
the appliance appears to be operating (lights
work and false temperatures are displayed)
but no cooling actually takes place. If you sus-
pect your appliance is in Demo Mode please
contact your point of purchase for assistance
with disabling this feature.
ICE MAKER

www.fhiaba.com · [email protected] · Info Line +39 0434 420160
88
> In case of anomalities, touch the button Alarm and the display will show the anomaly message with its
error number code.
> The message will be shown for 3 seconds, then it will go back to the home screen.
> For blocking the message on the screen, press on the display, the button info ( ). The message will be on
the screen for 30 seconds, then it will go back to the home screen.
> In the case there is more than one error message, the dispay will show in time sequence the dierent
anomalies messages.
11.2 Malfunction messages appearing on the display
Display message Malfunction description
Power Failure!!
Prolonged interruption of electrical power
the appliance resumes work automatically, the display shows the warmest
temperatures achieved
Upper unit open
Fridge door open
the message appears after few minutes from the door opening
Lower unit open
Freezer door open
the message appears after few minutes from the door opening
Replace filter
Replace filter cartridge
message appears when only 30% of filter capacity is left
Upper unit too warm
Fridge too warm
see Troubleshooting Guide
Upper unit too cold
Fridge too cold
wait for 12 hours: if malfunction persists call Customer Care for advice
Fresco too warm
Fresco Compartment too warm
see Troubleshooting Guide
Fresco too cold
Fresco Compartment too cold
wait for 12 hours: if malfunction persists call Customer Care for advice
Lower unit too warm
Freezer too warm
see Troubleshooting Guide
Lower unit too cold
Freezer too cold
wait for 12 hours: if malfunction persists call Customer Care for advice
Error Code...
Functional problems
call Customer Care who may help you to salve the problem or put you in
contact with the nearest Service Agent
Check condenser
Check Condenser
Every 6 months the display shows the message “Check Cond”, clean the
condenser and press for 5 seconds the Enter
button to reset.
11. TROUBLESHOOTING GUIDE