OWNER'S MANUAL for Scotsman SCN60PA1SS
Table of Contents
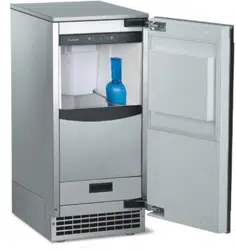
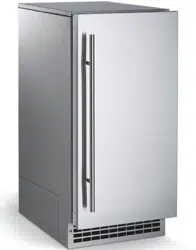
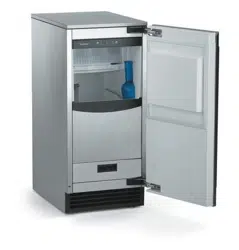
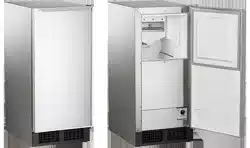
- Product Description
- Cabinet Dimensions
- Location Recommendations:
- Familiarization
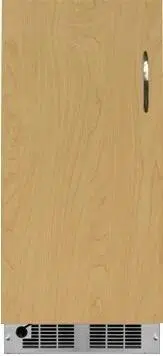
- Decorating Features:
- Door Panel Attachment
- Door Swing
- Plumbing - Pump Model
- Plumbing: Gravity Drain Model
- Electrical and Start Up
- Use
- Maintenance
- How to remove scale from the ice making system
Initial Start Up
1. Turn on the water supply and check for leaks.
2. Switch on the electrical power.
3. Push and release the On/Off switch to start the machine. The Ice Making light next to the On/Off switch will glow Green.
Warm air will flow out of the left front grill. It will take about 10 minutes for the ice machine to begin dropping nugget ice into the storage bin. It is normal for that ice to melt and ice will continue to melt, but at a slower rate. It will take about6-7 hours to fill up the ice storage bin. The bin holds about 20 lb of ice when full.
Ice level control
The ice level control for the SCN60 is an ultrasonic sensor, located above the ice storage area. It is automatic and there is no adjustment to make. When ice melts or is used, and the ice level drops below a preset distance the control turns the ice making system back on. It makes ice until the preset level is reached. Placing your hand in the unit to remove ice does not affect the ice level.
Use
No special instructions are needed for use. Just take as much ice as you need, the machine will replace it. A scoop is provided, and it can be stored in the machine using the loop of tubing on the right side as a holder.
The machine can be shut off anytime by just pushing and releasing the On/Off button.
What shouldn’t be done?
Never keep anything in the ice storage bin that is not ice. Objects like wine or beer bottles are not only unsanitary, but the labels can slip off and plug up the drain.
Never allow the machine to operate without regular cleaning. The machine will last longer if it is kept clean. Regular cleaning should happen at least once per year, and preferably twice. Some water conditions will dictate even more frequent cleaning of the ice making section, and some carpets or pets will dictate more frequent cleaning of the condenser.
Note: The Time to Clean light will switch ON after 6 months of use. It will remain ON until the ice making system is cleaned using the process on page 14.
Noise: The ice machine is designed for quiet operation, but will make some noise during the ice making cycle.
Ice Making
During ice making, nugget ice will drop into the bin at an irregular rate; sometimes there will be little ice falling while at other times a group of nuggets will fall. Some water drops may also come out with the ice. Both conditions are normal.
Maintenance
Scotsman strongly recommends regular maintenance of this ice machine. During normal operation mineral scale that is in the water supply will gradually build up on the ice making surfaces. That build up can cause excessive loading of the ice making system, which can cause premature failure. Regular removal of the mineral scale will lengthen the product’s life. Suggested maintenance schedule: every 6 months. Type of maintenance: Scale removal, water seal check, water reservoir check, bin drain check, air cooled condenser cleaning and storage bin sanitation.
Condenser cleaning
The condenser is like the radiator on a car, it has fins and tubes that can become clogged with dirt and lint. To clean:
1. Remove the kickplate and front service panel.
2. Locate the condenser surface.
3. Vacuum the surface, removing all dust and lint.
Caution: Do not dent the fins.
4. Return the kickplate and front service panel to their original positions. Fasten them to the cabinet using the original screws.
Winterizing
1. Clean the ice making system per the instructions in the Maintenance section.
2. Open the door and push and release the On/Off switch to turn the machine off.
3. Turn off the water supply.
4. Remove the back wall of the ice storage bin.
5. Remove drain plug and drain the water reservoir, return plug to its original position.
6. Drain pump models should have about 1/2 gallon of RV antifreeze (propylene glycol) poured into the ice storage bin drain.
Note: Automotive antifreeze must NOT be used.
7. Switch off and unplug the machine.
How to remove scale from the ice making system.
Cleaning this machine involves adding a solution of scale remover and water to the ice machine and continuing to add it as it makes ice. The scale remover must be diluted to the correct ratio. A squirt bottle will make adding the scale remover much easier when the unit is built in. If not built in, remove the top panel for reservoir access. Recommended tools: Rubber gloves, squirt bottle & scale remover. Pre-Mixed 16 oz squirt bottle of scale remover is part number 19-0664-01.
1. Scoop out and discard all of the ice.
2. Press and release the On/Off button.
3. Open door and locate screws at upper back wall of bin. Remove the two screws.
4. Remove the back wall of the bin by lowering it down past the scoop holder, feel free to rotate the scoop holder loop down to make more room.
5. Push tab on front edge of reservoir cover and remove the cover. Note: Adjacent wires are low voltage and are not hazardous.
6. Locate blue float valve on/off lever. Move lever up about half way to shut water off.
7. Locate drain plug and pull the drain plug out to drain the reservoir and evaporator. When draining is complete, return the plug to its original position.
8. Obtain pre-mixed Scotsman Clear 1 Scale remover solution (with squirt bottle) or mix a solution of Clear 1 with water: 2.5 ounces of Clear 1 with 1 quart (32 oz) of warm water.
WARNING : Ice machine scale remover contains acids. Acids can cause burns. If concentrated cleaner comes in contact with skin, flush with water. If swallowed, do NOT induce vomiting. Give large amounts of water or milk. Call Physician immediately. Keep out of the reach of children.
Note: Take care not to spill any scale remover on any nearby surface. Immediately wipe any spill with baking soda and water.
9. Fill the 16 oz squirt bottle with the diluted scale remover.
10. Fill the reservoir with the scale remover solution using squirt bottle or other container. That will be about 8 ounces or half a squirt bottle.
11. Press and HOLD both the Clean-Reset and On/Off buttons for 5 seconds. The Time to Clean light will blink on and off.
12. The auger motor alone will be operating for 10 minutes, after that the compressor will start and in about 5-8 minutes the machine will start to make ice. The Time to Clean light will now glow steady until the clean cycle is complete.
Caution: Keep fingers away from moving parts. After ice making starts, continuously add scale remover solution to the reservoir to keep it about half full. When all 16 oz of the the solution is used, move the float valve lever down to the On position. After 40 minutes the ice machine and all the control panel lights will shut off.
13. Pull the drain plug again to drain the system, then replace it.
14. Return the reservoir cover to its original position.
15. Return the upper back wall of the bin to its original position and secure it with the original screws. Push in at bottom to snap it into place.
16. Pour a gallon of hot (95o F. – 115o F.) water into the bin to flush out the drain and melt all ice that was made during the cleaning process. Be sure all ice is melted.
17. Clean the bin liner of mineral scale by using any left over scale remover solution to scrub the scale off of the liner. If none is left over, mix a solution of 2.5 ounces of Clear 1 Scale Remover and 1 quart of water.
18. Rinse the liner with hot water.
19. Sanitize the bin interior.
20. Push and release the On/Off button to restart ice making. The ice scoop should be washed regularly, wash it just like any other food container.
Other Maintenance
While cleaning the system with scale remover, check for water leaks at the bottom of the evaporator. If any are found, call for service.
Note: It is normal for some lime scale to form on the gear reducer cover. Wipe up any loose scale.
Check the top bearing. The top bearing is non-metallic and requires no lubrication. However, it should be checked for wear occasionally. The top panel must be removed to access the bearing.