Loading ...
Loading ...
Loading ...
4
ACCESSORIES AND PREPARATION
You will need the following tools to install the
washer:
• Wrench
• Pliers
• Screwdriver
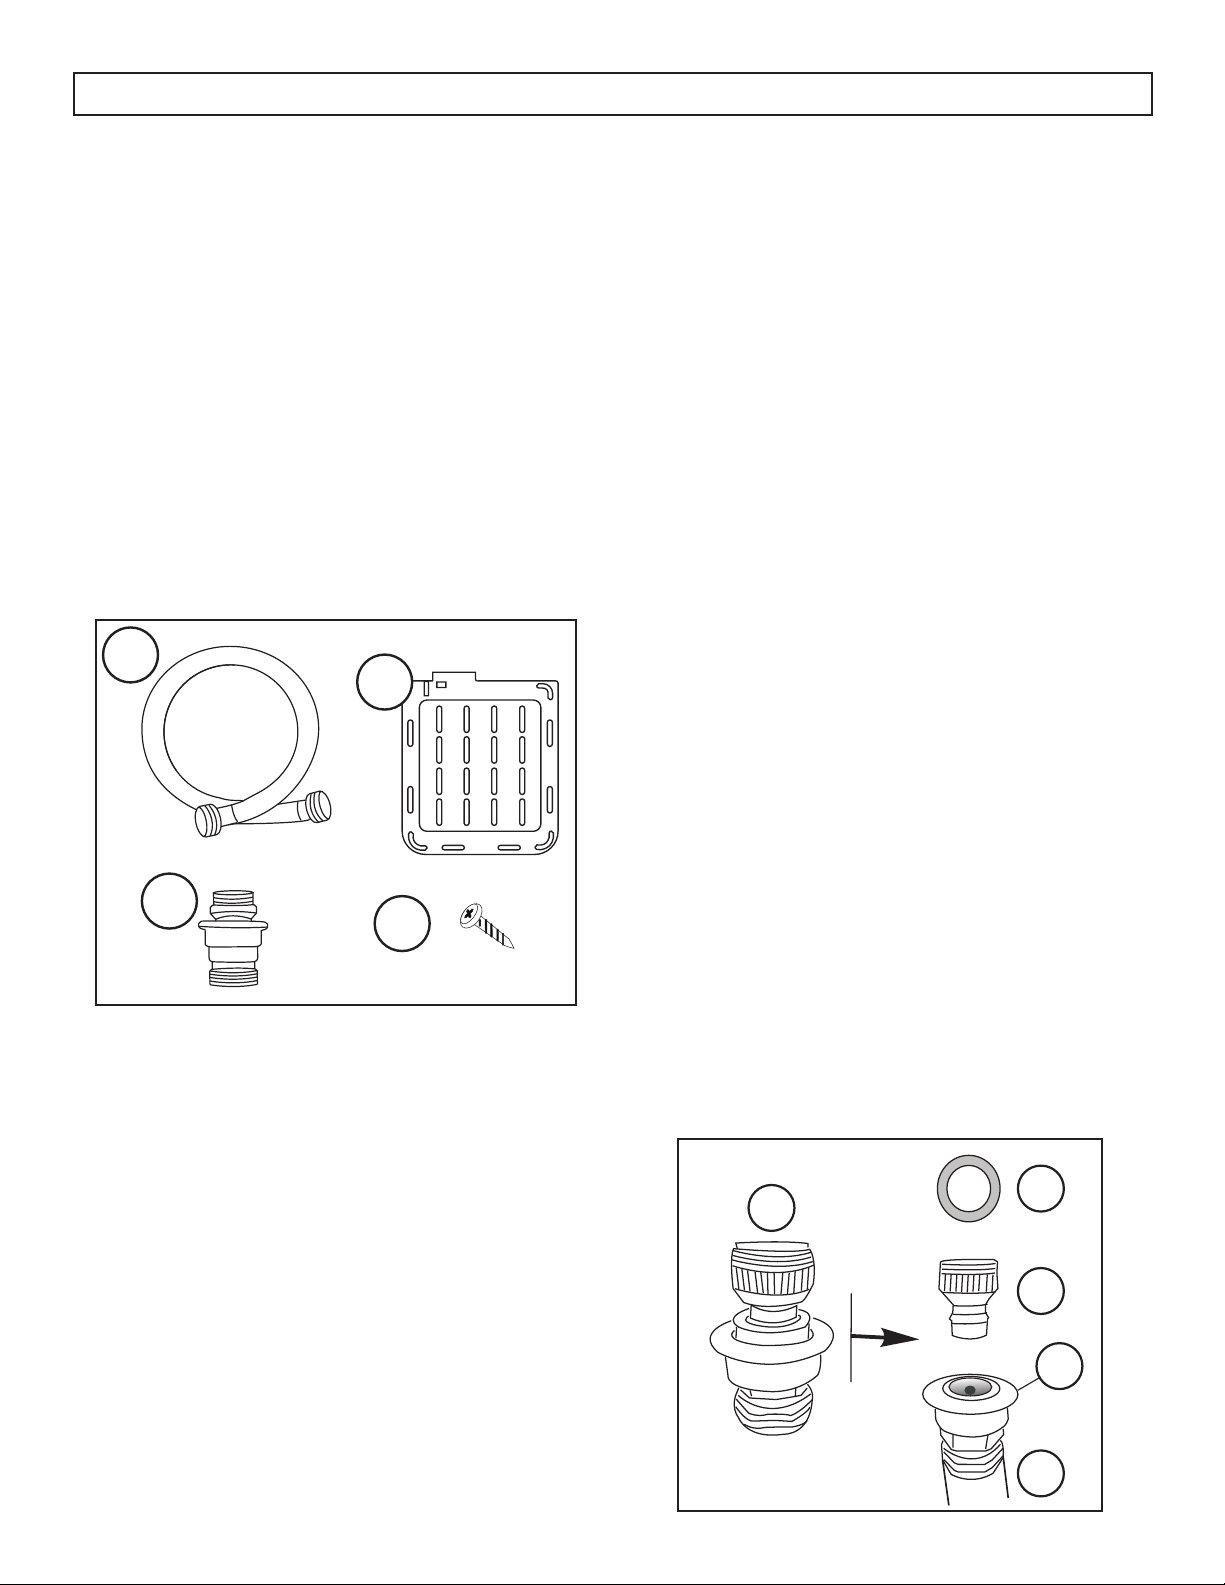
Ensure that all provided accessories are present
and accounted for:
1. One water supply hose
2. One quick connect adapter
3. One noise proof plate
4. One screw
NOISE PROOF PLATE INSTALLATION
The noise proof plate will help to muffl e excessive
noise from the appliance during agitation. Follow
the steps below to install the noise proof plate.
1. Remove the noise proof plate from the
packaging. It will be shipped on top of the
appliance at the top of the box.
2. Slide the noise proof plate into the channel in
the base of the appliance and secure with the
provided screw.
1
2
3
4
INSTALLATION INSTRUCTIONS
WATER SUPPLY
The water supply faucet must fi t standard 3/4”
(19.05 mm) female garden hose couplings. Do not
use slip-on or clamp-on connections as the water
pressure may cause them to leak.
Tighten all connections by hand until they are snug
and then tighten them another quarter turn with a
wrench to ensure they are secure.
Check all connections for leaks before using
the appliance. If leaks are detected, it may be
necessary to add a rubber washer or Tefl on tape to
the connection.
The water inlet hose should always be connected to
a cold water supply.
Using the quick connect assembly
The quick connect assembly can be used to connect
the appliance to a kitchen or bathroom faucet to
provide water to the appliance.
A breakdown of the quick connect assembly is
below.
1. Quick connect assembly
2. Rubber washer
3. Faucet adapter
4. White locking collar
5. Water inlet hose
1
2
3
4
5
Loading ...
Loading ...
Loading ...