Loading ...
Loading ...
Loading ...
INSTALLATION INSTRUCTIONS
3
LOCATION
• Two people should be used when moving the
appliance.
• Remove interior and exterior packaging prior to
installation. Ensure that you do not discard the
noise proof plate that is packaged on top of the
appliance.
• Wipe the outside of the appliance with a soft,
dry cloth and the inside with a lukewarm wet
cloth. Do not spray the appliance with water.
• Place the appliance on a level fl oor that is strong
enough to support it when it is fully loaded,
in a room that has convenient access to a
water supply and drain, has low moisture and
humidity and does not freeze in winter.
• Do not place the appliance on carpeted fl ooring
as this can block the lower ventilation openings.
• Keep the appliance away from heat sources and
out of direct sunlight. Excessive heat or sunlight
can deform or discolour the appliance.
• This appliance is intended for household use
only. It is not designed for outside installation,
including anywhere that is not temperature
controlled such as garages, porches, vehicles,
etc, because water lines may freeze.
• This appliance is intended for free-standing
installation only and is not intended to be
built into a cabinet or counter. Building in this
appliance can cause it to malfunction.
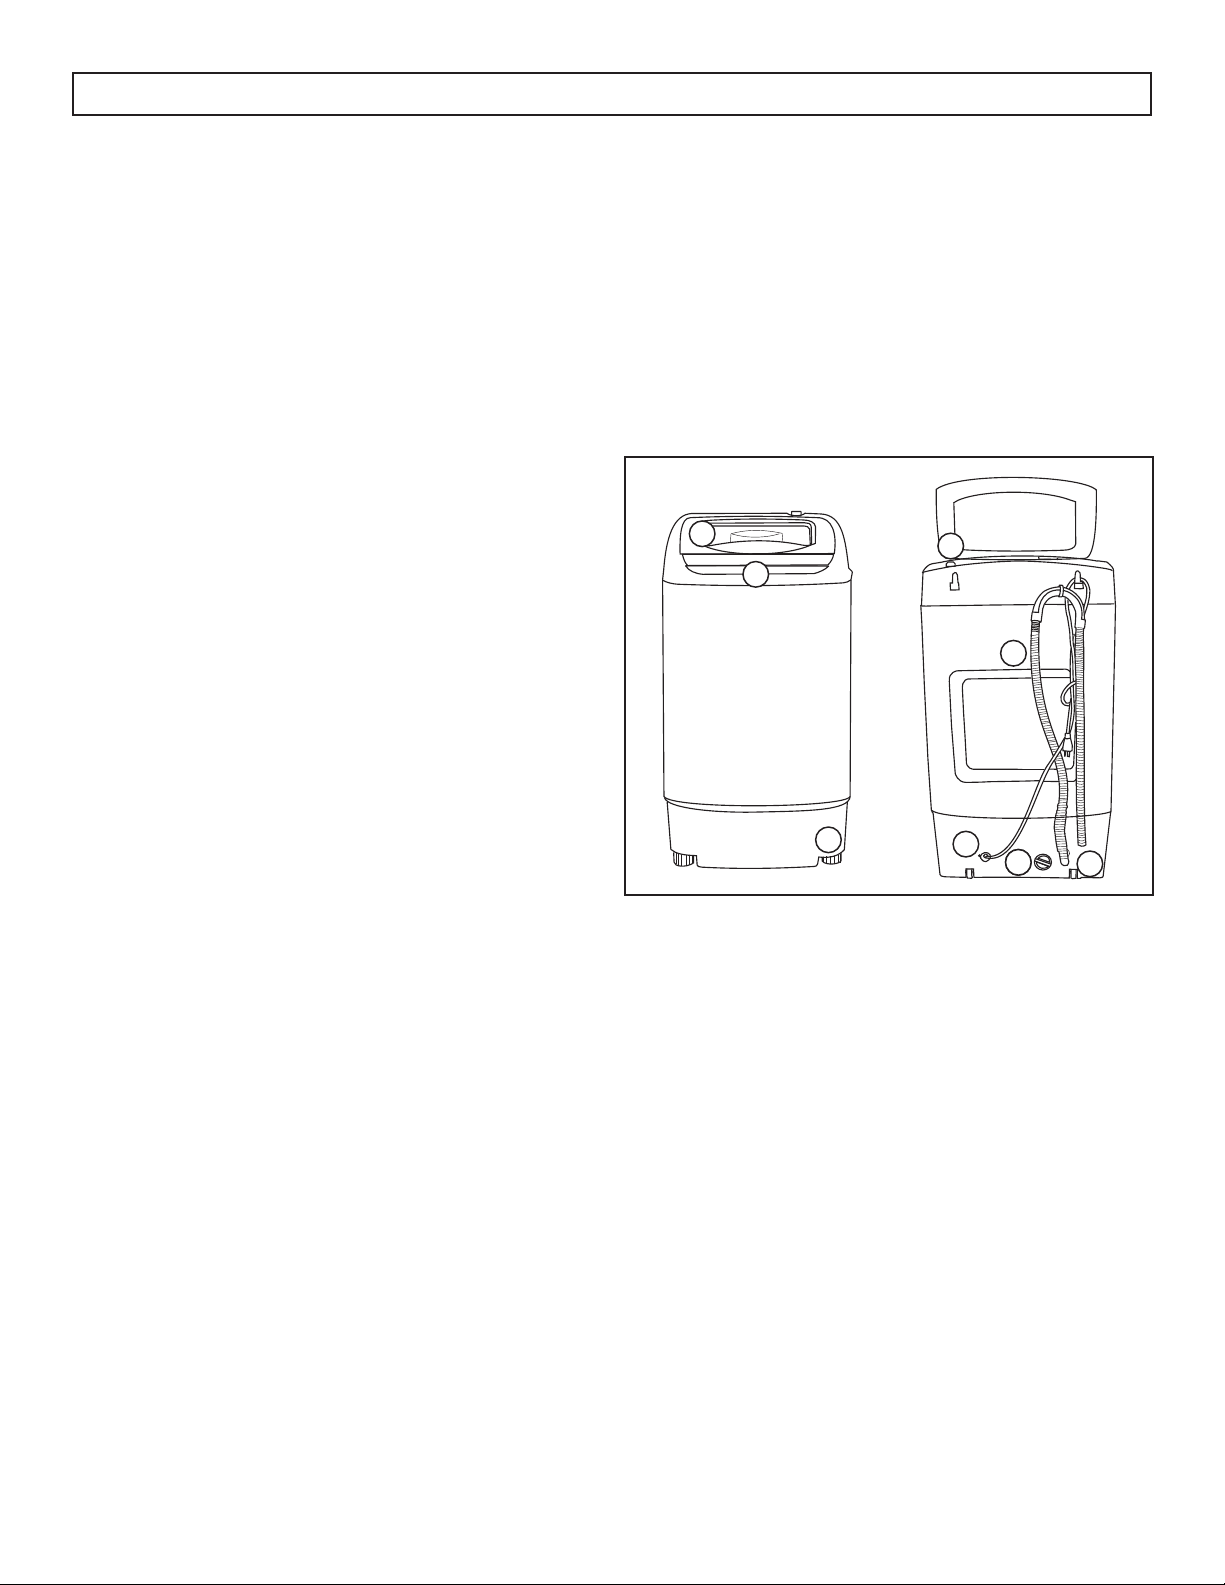
FEATURES
1. Lid
2. Control panel
3. Adjustable foot
4. Water inlet
5. Drain hose
6. Power cord
7. Water pump fi lter
8. Rollers
LEVELING INSTRUCTIONS
It is important that the appliance is level to help
avoid unbalanced loads and excessive noise.
The leveling foot is located on the front right side of
the appliance. There is a solid foot on the front left
side of the appliance and there are two rollers on
the back.
1. Turn the leveling foot counter-clockwise until
the top of the foot is touching the bottom of the
cabinet.
2. Slowly turn the leveling foot clockwise until the
appliance is level.
7
1
2
3
4
5
6
7
8
Loading ...
Loading ...
Loading ...