Loading ...
Loading ...
Loading ...
7. Connect BLACK grounding cable to
negative (-) battery terminal with
remaining hex bolt and keps nut.
Tighten securely
8. Close terminal access doors.
9. Close hood.
HexBolt
KepsNut
AdjustmentBolt Spring
Terminal
Access ..' ,..
Door _
Positive
":" Cable
Terminal
Guard (Black)
Cable
TO REPLACE HEADLIGHT BULB
1. Raise hood.
2. Pull bulb holder out of the hole in the
backside of the gd]l.
3. Replace bulb in holder and push bulb
holdersecurely back into the hole in
the backside of the grill.
4. Close hood.
INTERLOCKS AND RELAYS
Loose or damaged wiring may cause
your tractor to run poorly,stop running, or
prevent itfrom starting.
• Check wiring. See electrical wiring
diagram in the Repair Parts section.
TO REPLACE FUSE
Replace with 30 amp automotive-type
plug-infuse. The fuse holder islocated
behind the dash.
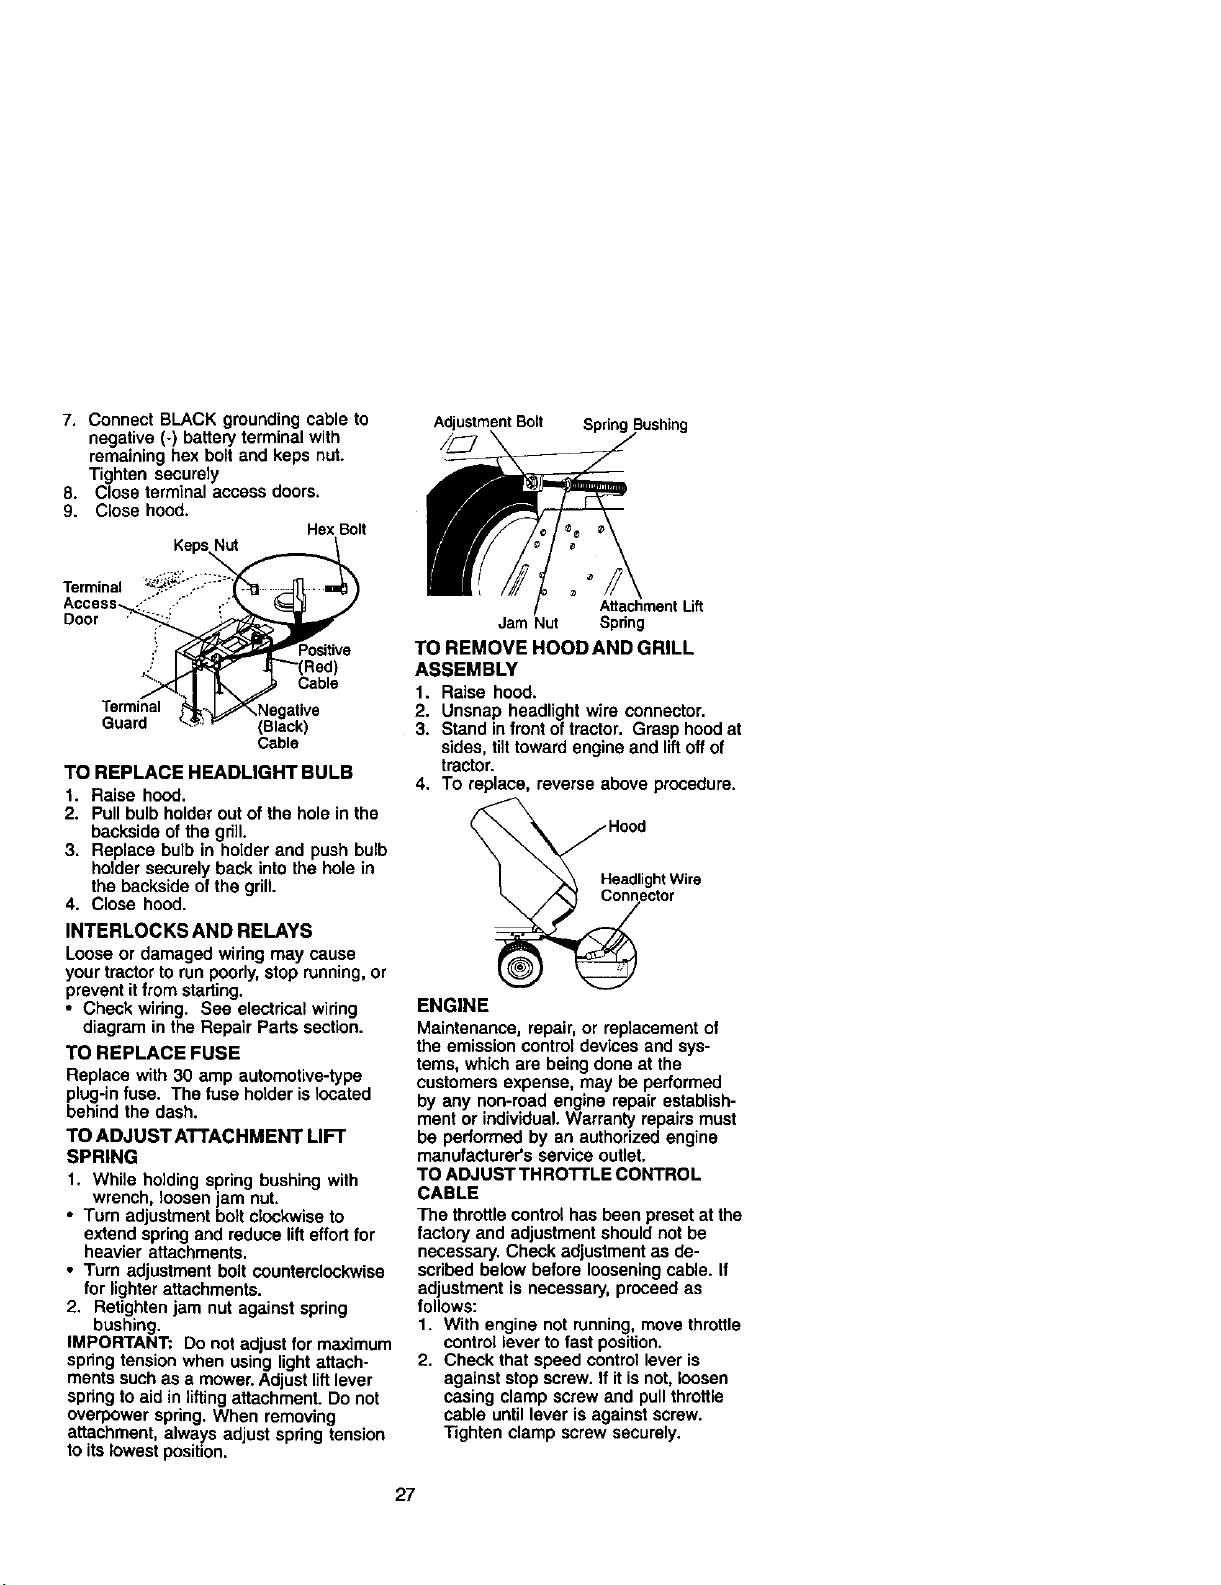
TO ADJUST ATTACHMENT LIFT
SPRING
1. While holding spring bushing with
wrench, loosen jam nut.
• Turn adjustment boltclockwise to
extend spring and reduce lifteffort for
heavier attachments.
• Turn adjustment bolt counterclockwise
for lighter attachments.
2. Retighten jam nut against spring
bushing.
IMPORTANT: Do not adjust for maximum
spring tension when using light attach-
ments such as a mower. Adjust liftlever
spnng to aid in liftingattachment. Do not
overpower spring. When removing
attachment, always adjust spring tension
to its lowest position.
//\
AttachmentLift
Jam Nut Spring
TO REMOVE HOOD AND GRILL
ASSEMBLY
1. Raise hoed.
2. Unsnap headlight wire connector.
3. Stand infront of tractor. Grasp hood at
sides, tilt toward engine and liftoff of
tractor.
4. To replace, reverse above procedure.
i nector
ENGINE
Maintenance, repair, or replacement of
the emission control devices and sys-
tems, which are being done at the
customers expense, may be performed
by any non-road engine repair establish-
ment or individual. Warranty repairs must
be performed by an authorized engine
manufacturer's service outlet.
TO ADJUST THRO'I-rLE CONTROL
CABLE
The throttlecontrol has been preset at the
factory and adjustment should not be
necessary. Check adjustment as de-
scribed below before loosening cable. If
adjustment is necessary, proceed as
follows:
1. With engine not running, move throttle
control lever to fast position.
2. Check that speed control lever is
against stop screw. If it is not, loosen
casing clamp screw and pull throttle
cable untillever is against screw.
Tighten clamp screw securely.
27
Loading ...
Loading ...
Loading ...