Loading ...
Loading ...
Loading ...
-9-
Canadian installations require that the heater must be connected
to a 3 or 4 inch, factory-built chimney conforming to CAN/
ULC-S627-00 REV1. See the installation illustrations in this manual
for minimum height above the roof. The chimney installation must
allow for removal in case of mobile home transportation, especially
outside connections. You may contact your local building authority
or person having jurisdiction on height restrictions.
In order for this unit to be installed in a mobile home the following
criteria must be met:
• The unit must be secured to the oor using lag bolts in the holes
provided in the pedestal base.
• Ensure that the unit is permanently electrically grounded to the
chassis of your home with 18 gauge copper wire.
• All exhaust systems must have a spark arrestor.
IT IS MANDATORY TO TAKE THE COMBUSTION AIR FROM THE OUTSIDE
WHEN INSTALLING THIS UNIT IN AIR TIGHT OR MANUFACTURED/
MOBILE HOMES.
CAUTION: The structural integrity of the manufactured home
oor, wall, and ceiling/roof must be maintained. Make sure to
maintain an effective vapor barrier by sealing with silicone where
the chimney or other components penetrate to the exterior of
the structure. Refer to and follow the chimney manufacturer’s
installation instructions.
WARNING: Do not install in sleeping room.
NOTE: Only the free standing model is
approved for installation into a mobile
home.
HEARTH PAD
FLOORING
GROUND WIRE, DIRECTLY
TO METAL CHASSIS
STEEL FRAME
1/4” LAG BOLTS,
SECURELY FASTENED
Mobile Home Installation
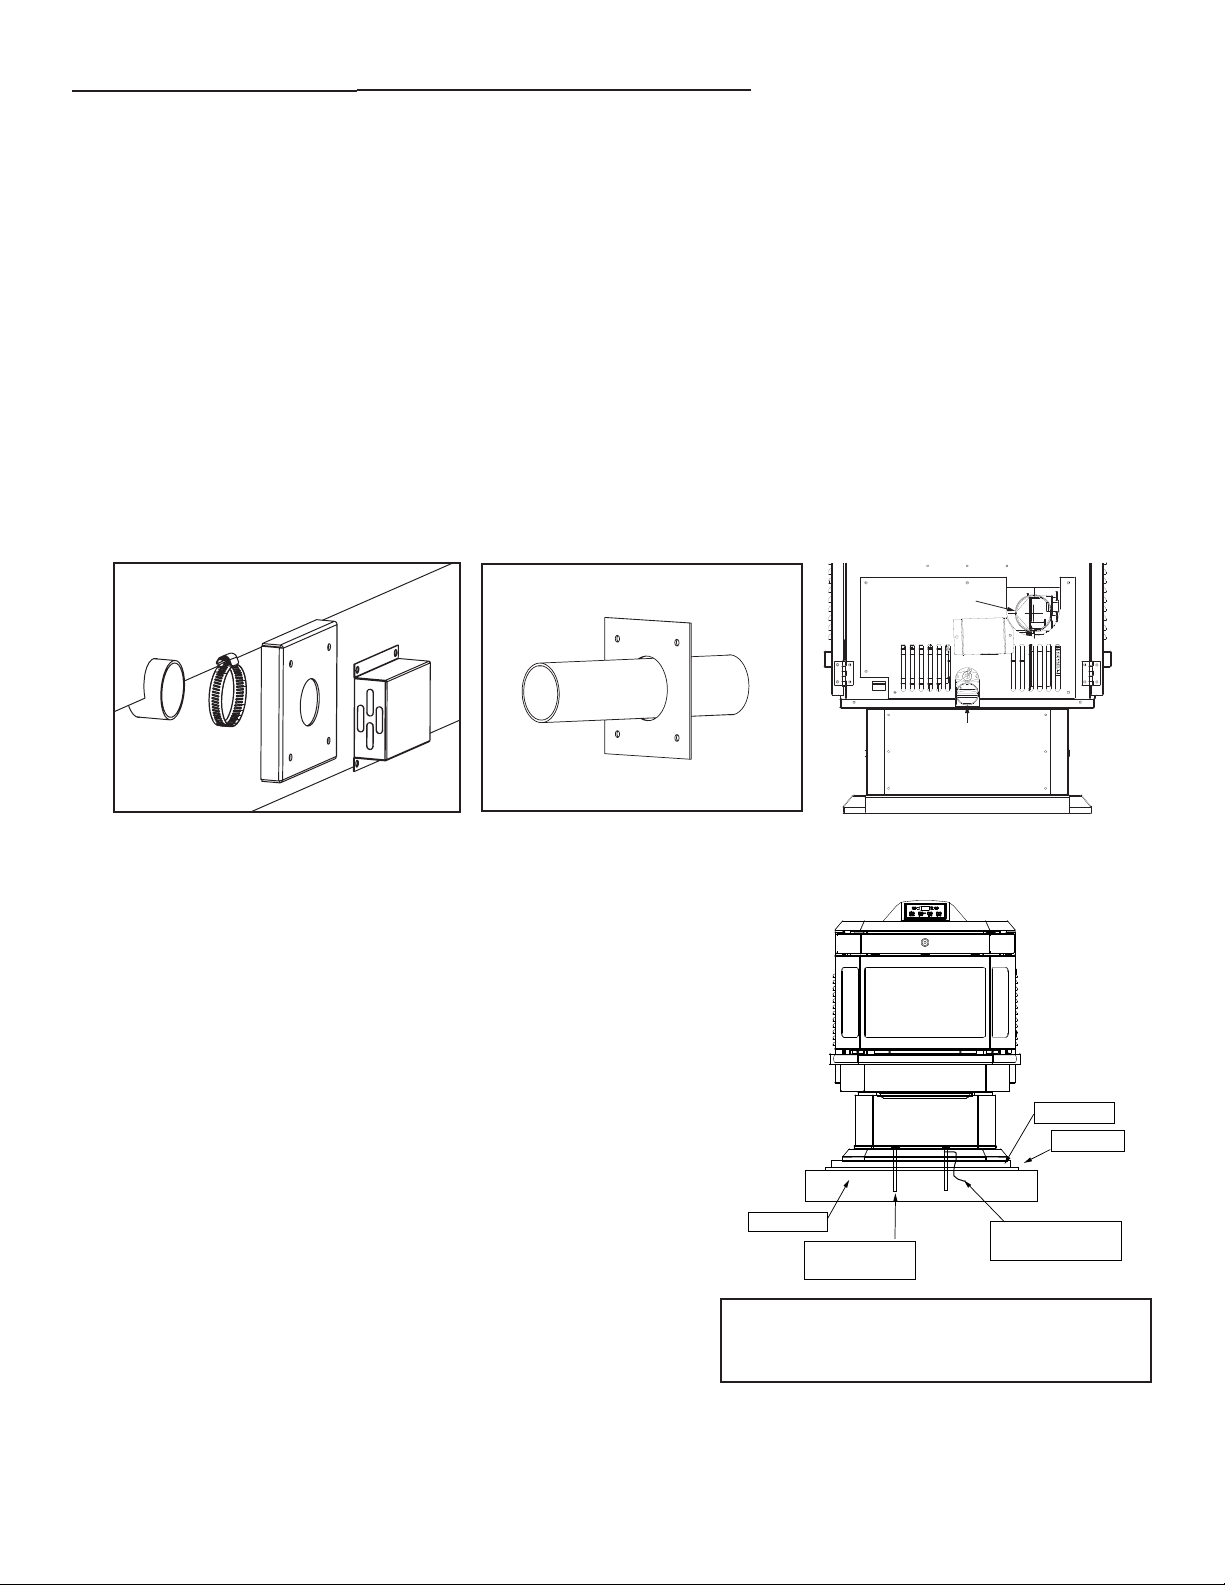
69FAK OUTSIDE AIR SUPPLY (OPTIONAL, UNLESS INSTALLING IN A MOBILE HOME)
Depending on your location and home construction, outside air may be necessary for optimal performance.
1. With the stove in the operating position, mark and drill a hole to accommodate the 2” exible hose.
2. Insert the hose through the wall and attach the Outside Cover with one of the 2” hose clamps provided.
3. Then attach the Outside Cover to the outside wall.
4. Next, attach the Rodent Cover to the Outside Cover using four (4) of the #10 x 3/4 screws supplied.
5. On the inside of the home, slide the Inside Plate over the tube then attach to the wall with the four drywall
anchors and screws provided.
6. On the Air Inlet Tube coming out of the rebox, there is a cap that must have four (4), 5/32” (0.156) diameter
holes drilled in it for the fresh air installation. The cap is on the front side of the tube just under the burnpot.
Remove burnpot. Using a long screwdriver or equivalent, knock the cap off by inserting it from the back of
the stove and pecking with a hammer. Drill holes, then replace cap and burnpot.
7. Attach one of the 2” ex hoses to the backside of the rebox, then to air inlet pipe at the back of the stove
as shown.
8. Stretch the 2” ex hose to the air inlet on the back of the stove. Attach using the other 2” hose clamp. The
hose will extend up to 4 feet in length.
FRESH AIR INTAKE
EXHAUST PIPE
B
C
E
A
A
D
Loading ...
Loading ...
Loading ...