Loading ...
Loading ...
Loading ...
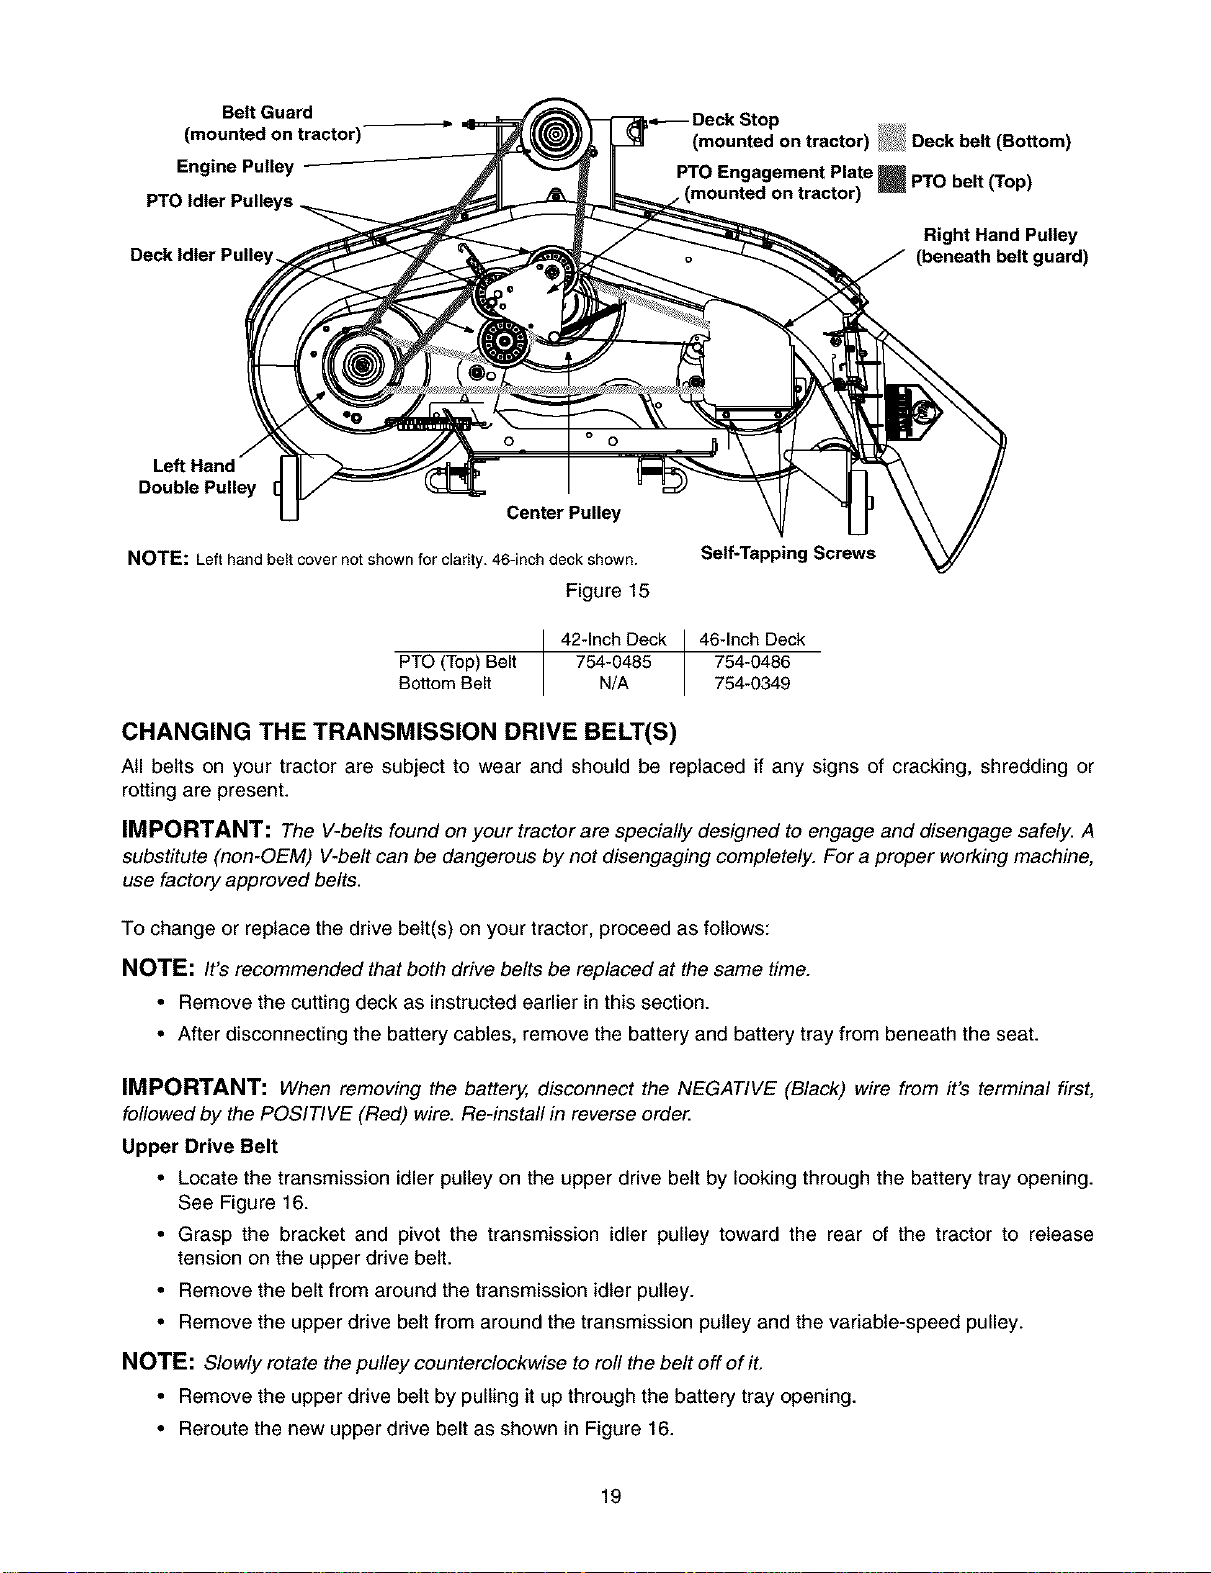
Belt Guard
(mounted on tractor)
Engine Pulley
PTO Idler Pulleys
(mounted on tractor) _£! Deck belt (Bottom)
PTO
Engagement
Plate
PTObelt (Top)
Right Hand Pulley
(beneath belt guard)
Left Hand
Double Pulley
Center Pulley
NOTE: Lefthand belt cover not shownfor clarity. 46-inch deck shown.
Figure 15
Self-Tapping Screws
PTO (Top) Belt
Bottom Belt
42-Inch Deck 46-Inch Deck
754-0485 754-0486
N/A 754-0349
CHANGING THE TRANSMISSION DRIVE BELT(S)
All belts on your tractor are subject to wear and should be replaced if any signs of cracking, shredding or
rotting are present.
IMPORTANT: The V-belts found on your tractor are specially designed to engage and disengage safely. A
substitute (non-OEM) V-belt can be dangerous by not disengaging completely. For a proper working machine,
use factory approved belts.
To change or replace the drive belt(s) on your tractor, proceed as follows:
NOTE: It's recommended that both drive belts be replaced at the same time.
• Remove the cutting deck as instructed earlier in this section.
• After disconnecting the battery cables, remove the battery and battery tray from beneath the seat.
IMPORTANT: When removing the battery, disconnect the NEGATIVE (Black) wire from it's terminal first,
followed by the POSITIVE (Red) wire. Re-install in reverse order:
Upper Drive Belt
• Locate the transmission idler pulley on the upper drive belt by looking through the battery tray opening.
See Figure 16.
• Grasp the bracket and pivot the transmission idler pulley toward the rear of the tractor to release
tension on the upper drive belt.
• Remove the belt from around the transmission idler pulley.
• Remove the upper drive belt from around the transmission pulley and the variable-speed pulley.
NOTE: Slowly rotate the pulley counterclockwise to roll the belt off of it.
• Remove the upper drive belt by pulling it up through the battery tray opening.
• Reroute the new upper drive belt as shown in Figure 16.
19
Loading ...
Loading ...
Loading ...