Loading ...
Loading ...
Loading ...
LOCKOUT FEATURE (TOUCH PAD MODELS)
Your ice and water dispensing system can be locked out to
rrevent unwanted use,, To do this, press the picture of the
for 3-5 seconds. When the system is locked off, a
;mall red light will appear over' the padlock. To unlock the
press the padlock for' 3-5 seconds until the small
red light goes out° Your ice and water dispenser is now
ready to use again.
CE DISPENSER TIPS
tce cubes stored too long may develop an odd flavor:
Empty the container and return it to the proper position.
The _ceMaker will then produce more ice.
2, Occasionally shake the container to keep ice separated.
3 If the dispensing arm is pushed in for more than 4
minutes, the dispenser motor' may overload and stop,
The overload protector win reset automatically after 3 or
4 minutes,, if a large quantity of ice is needed at one
time, it is best to remove cubes directly from the ice
storage bin.
4. Certain sounds are normal when the Ice Maker is
operating_ They are:
• Motor operation
- Ice being loosened from the tray
• ice dropping from the storage bin
o Running water
. Water valve opening or closing
For more information on these operations, see Normal
Operating Sounds.
5. Stop the Ice Maker when cleaning the freezer or for long
vacations_
6 If the Ice Maker is to be turned off for a !ong period of
time, turn the water supply valve to the closed position.
CLEANING THE ICE DISPENSER
Clean the dispenser' and ice storage bin at regular intervals,
particulmty before you take a vacation or move, or if the ice
Dispenser sticks,,
1. Stop ice production by lifting the wire signal arm to the
"up" or OFF position.
2. Remove ice storage bin by lifting up and out. Empty and
carefully clean the bin with mild detergent. Do not
submerge the bin while cleaning, Rinse with clear water:
Do not use harse or abrasive cleaners. Allow ice bin to
dry completely before replacing in the freezer.
3_ Remove ice chips and clean the shelf and chute that
supports the ice storage bin.
4o Replace the ice storage bin,, Lower the wire signal arm
on the Ice Maker to the "down" position or ON position
and the Ice Maker will resume production,
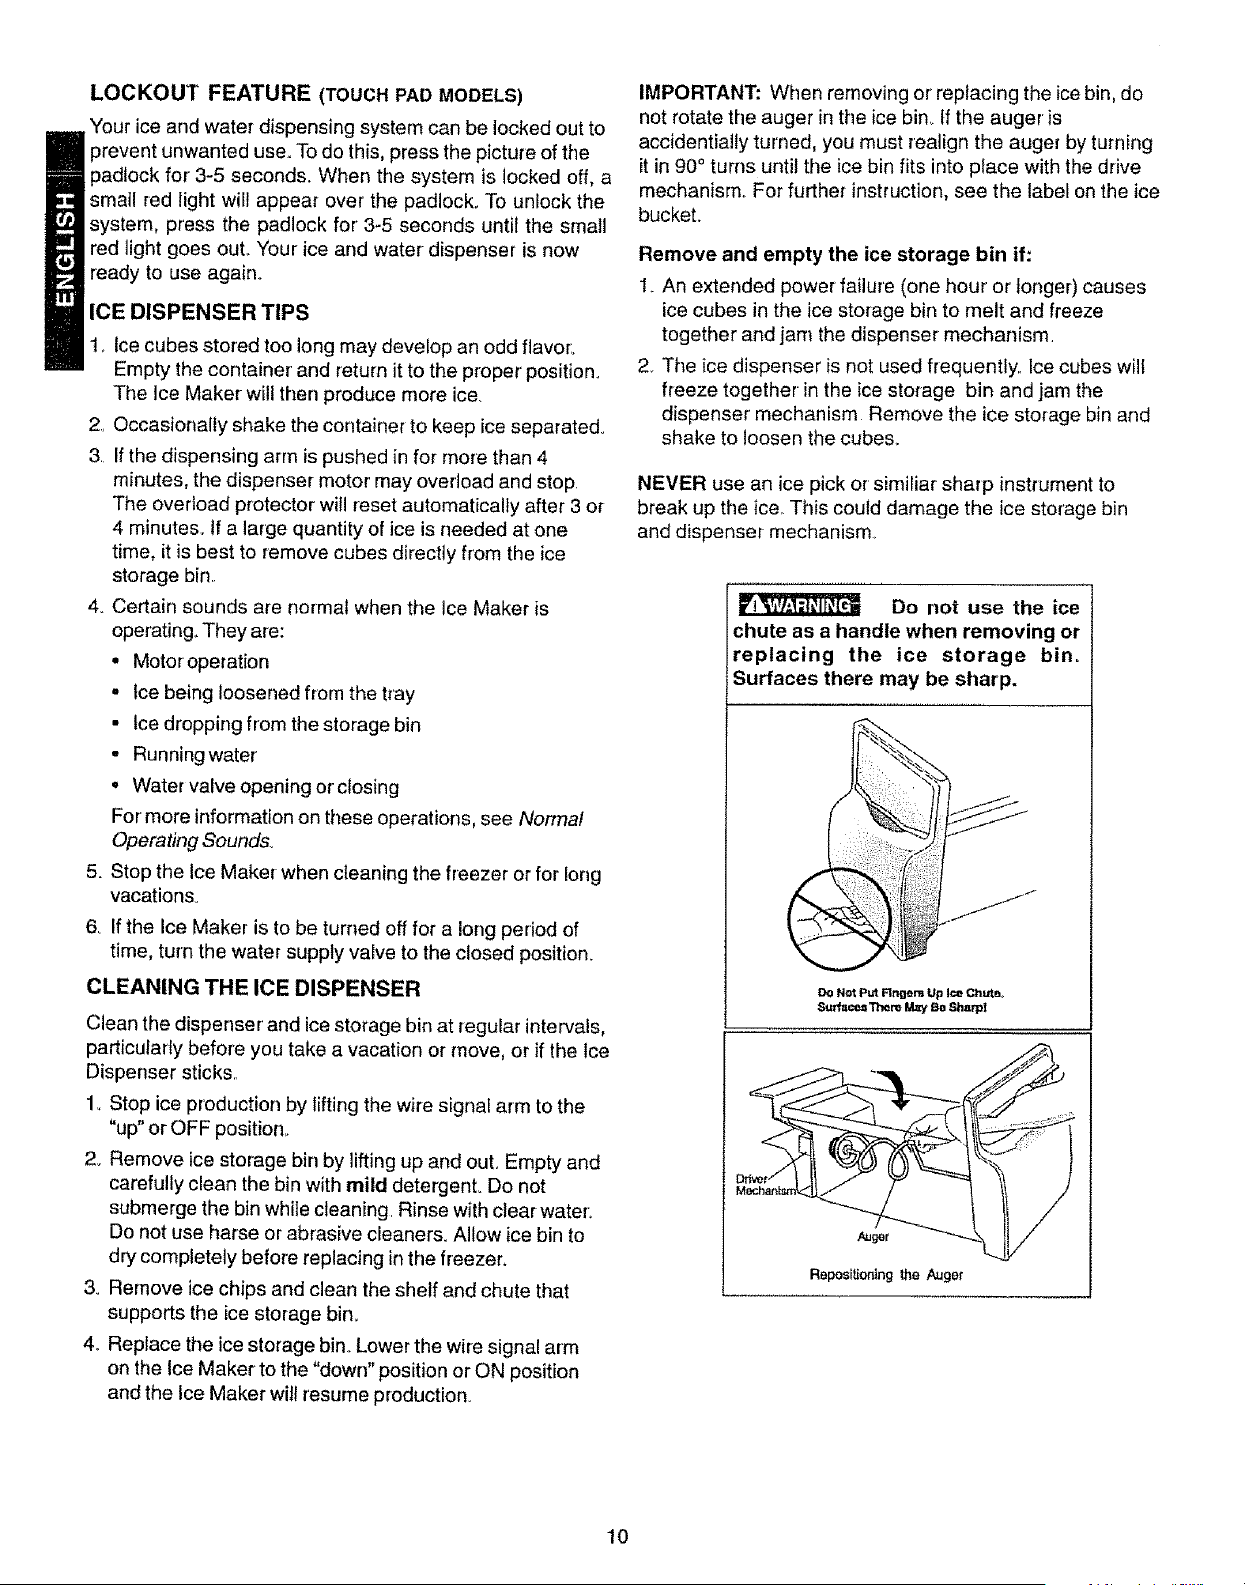
IMPORTANT: When removing or' replacing the ice bin, do
not rotate the auger in the ice bin,. tf the auger is
accidentialty turned, you must realign the auger by turning
it in 90 ° turns until the ice bin fits into place with the drive
mechanism,, For further instruction, see the label on the ice
bucket.
Remove and empty the ice storage bin if:
1_An extended power' failure (one hour or longer) causes
ice cubes in the ice storage bin to melt and freeze
together and jam the dispenser mechanism,
2_The ice dispenser is not used frequently. Ice cubes will
freeze together in the ice storage bin and jam the
dispenser mechanism Remove the ice storage bin and
shake to loosen the cubes_
NEVER use an ice pick or' sirniliar sharp instrument to
break up the ice,.This could damage the ice storage bin
and dispensel mechanism
Do not use the ice
chute as a handle when removing or
replacing the ice storage bin.
Surfaces there may be sharp.
Do Hot pu_FIngera Up Ice C_.u_e,
Su_ceaThere May Be Sharp!
10
Loading ...
Loading ...
Loading ...