Loading ...
Loading ...
Loading ...
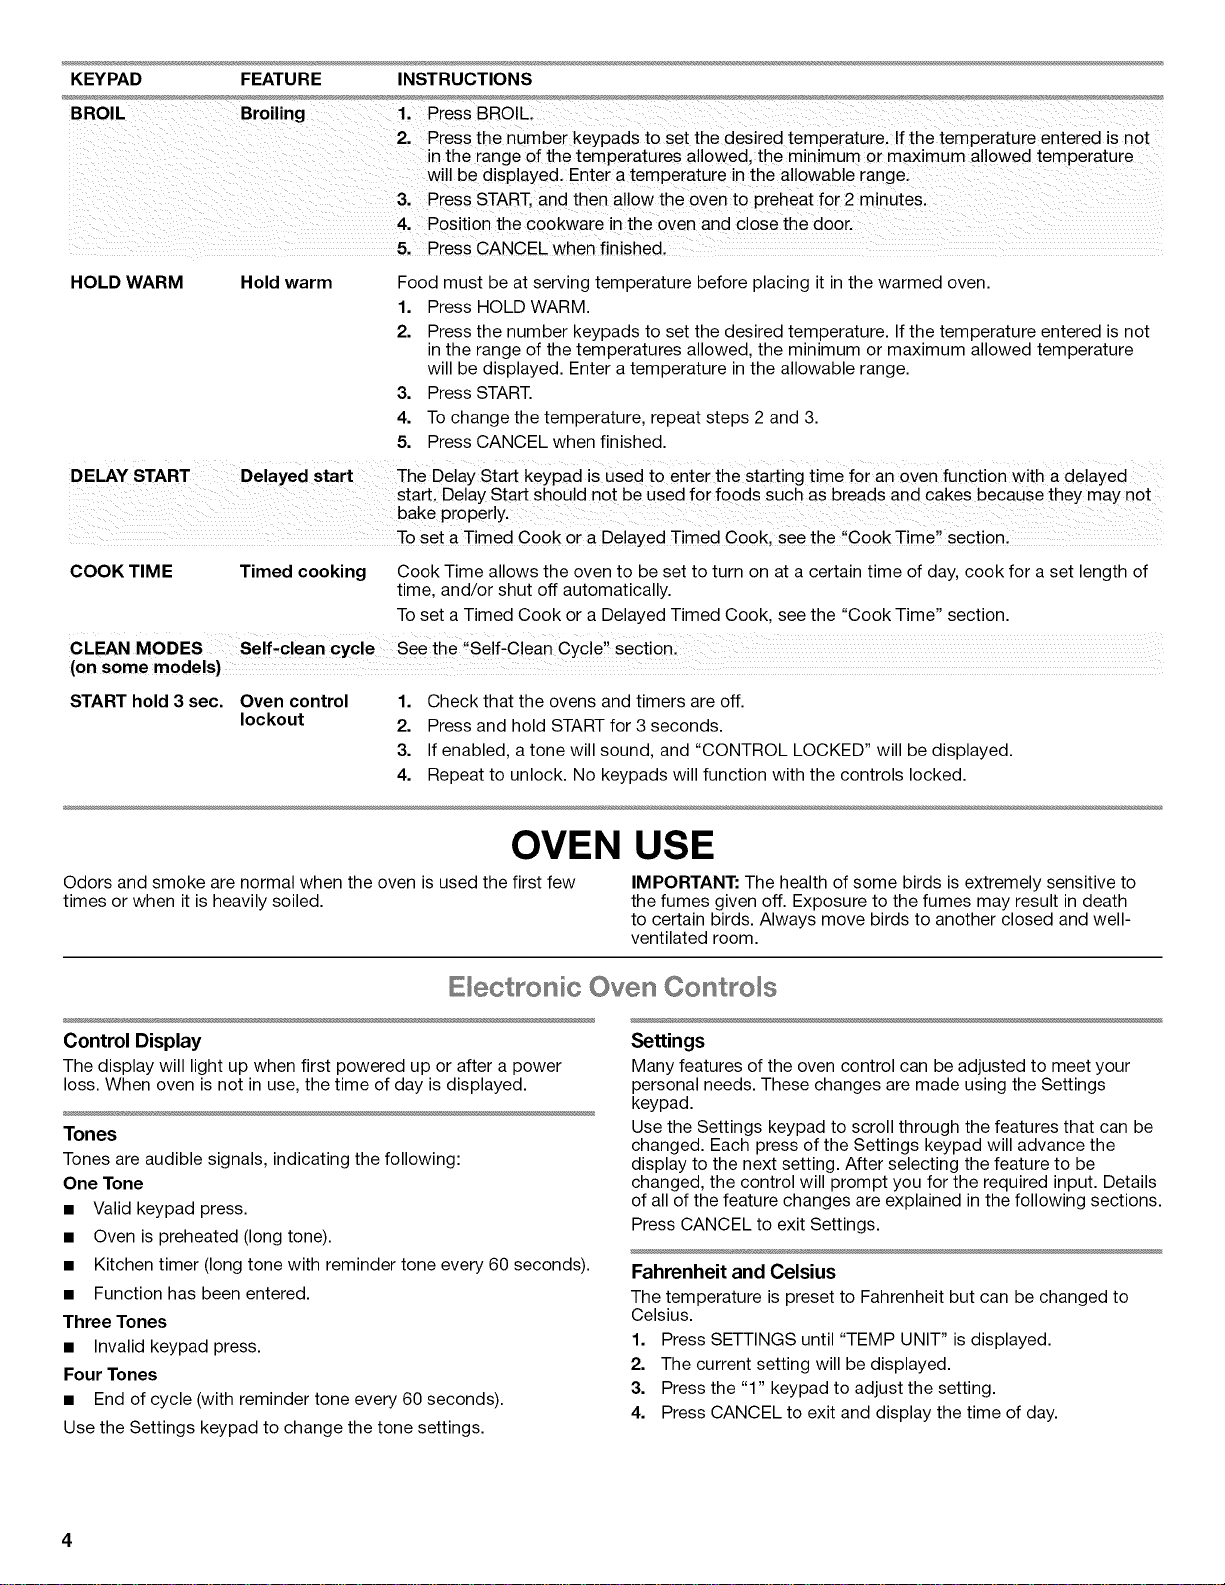
KEYPAD FEATURE
BROIL Broiling
INSTRUCTIONS
1. Press BROIL.
2. Press the number keypads to set the desired temperature. Ifthe temperature entered is not
in the range of the temperatures allowed, the minimum or maximum allowed temperature
will be displayed. Enter a temperature in the allowable range,
3. Press START and then allow the oven to preheat for 2 minutes.
4. Position the cookware in the oven and close the door.
5. Press CANCEL when finished.
HOLD WARM Hold warm Food must be at serving temperature before placing it in the warmed oven.
1. Press HOLD WARM.
2. Press the number keypads to set the desired temperature. If the temperature entered is not
in the range of the temperatures allowed, the minimum or maximum allowed temperature
will be displayed. Enter a temperature in the allowable range.
3. Press START.
4. To change the temperature, repeat steps 2 and 3.
5. Press CANCEL when finished.
DELAY START Delayed start The Delay Start keypad is Used to enter the starting time for an oven function with a delayed
start' Delay Start sh°uld n°t be used f°r f°°ds such as breads and cakes because they may n°t
bake properly.
To set a Timed Cook or a De!aYed Timed Cook, see the Cook Time sectionl
COOK TIME Timed cooking Cook Time allows the oven to be set to turn on at a certain time of day, cook for a set length of
time, and/or shut off automatically.
To set a Timed Cook or a Delayed Timed Cook, see the "Cook Time" section.
(on some models)
START hold 3 sec. Oven control 1. Check that the ovens and timers are off.
lockout 2. Press and hold START for 3 seconds.
3. If enabled, a tone will sound, and "CONTROL LOCKED" will be displayed.
4. Repeat to unlock. No keypads will function with the controls locked.
OVEN USE
Odors and smoke are normal when the oven is used the first few
times or when it is heavily soiled.
IMPORTANT: The health of some birds is extremely sensitive to
the fumes given off. Exposure to the fumes may result in death
to certain birds. Always move birds to another closed and well-
ventilated room.
E ectronic Oven ControB
Control Display
The display will light up when first powered up or after a power
loss. When oven is not in use, the time of day is displayed.
Tones
Tones are audible signals, indicating the following:
One Tone
• Valid keypad press.
• Oven is preheated (long tone).
• Kitchen timer (long tone with reminder tone every 60 seconds).
• Function has been entered.
Three Tones
• Invalid keypad press.
Four Tones
• End of cycle (with reminder tone every 60 seconds).
Use the Settings keypad to change the tone settings.
Settings
Many features of the oven control can be adjusted to meet your
personal needs. These changes are made using the Settings
keypad.
Use the Settings keypad to scroll through the features that can be
changed. Each press of the Settings keypad will advance the
display to the next setting. After selecting the feature to be
changed, the control will prompt you for the required input. Details
of all of the feature changes are explained in the following sections.
Press CANCEL to exit Settings.
Fahrenheit and Celsius
The temperature is preset to Fahrenheit but can be changed to
Celsius.
1. Press SETTINGS until "TEMP UNIT" is displayed.
2. The current setting will be displayed.
3. Press the "1" keypad to adjust the setting.
4. Press CANCEL to exit and display the time of day.
Loading ...
Loading ...
Loading ...