Loading ...
Loading ...
Loading ...
Installation
Freezer Drawer Amignment
(if necessary)
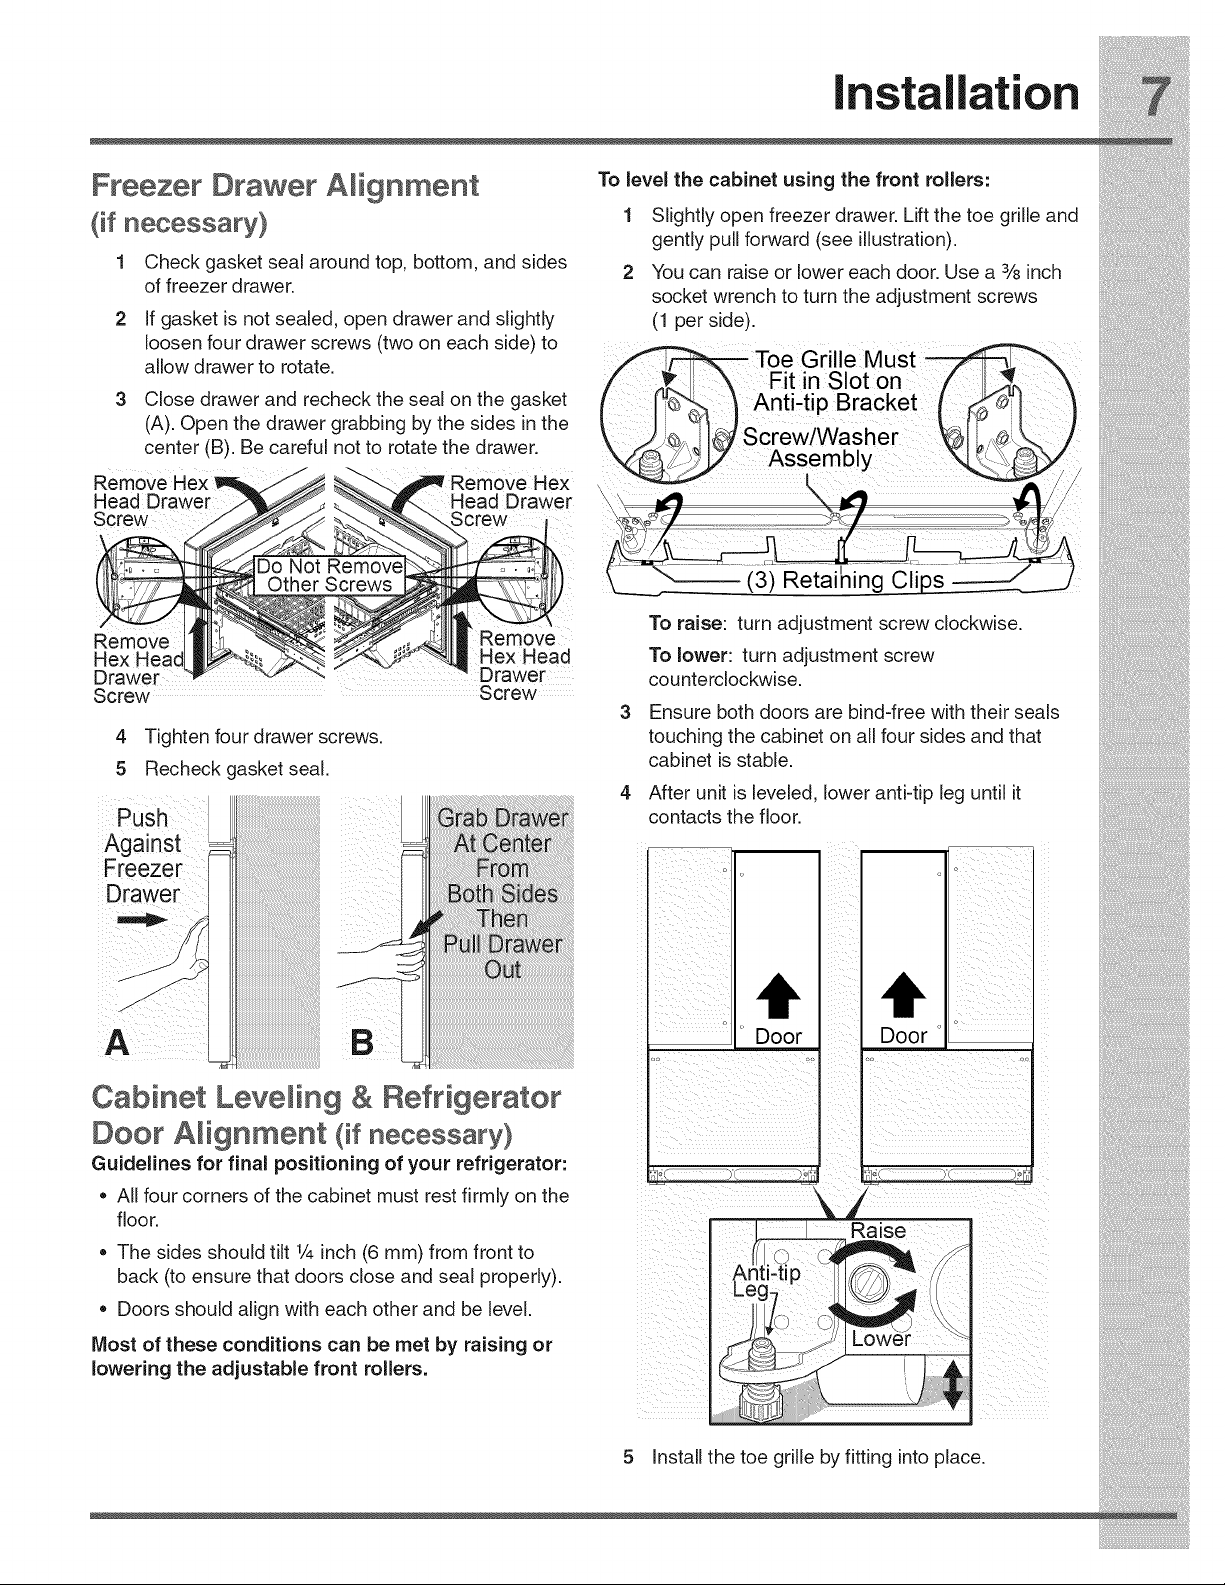
1 Check gasket seal around top, bottom, and sides
of freezer drawer.
2 If gasket is not sealed, open drawer and slightly
loosen four drawer screws (two on each side) to
allow drawer to rotate.
3 Close drawer and recheck the seal on the gasket
(A). Open the drawer grabbing by the sides in the
center (B). Be careful not to rotate the drawer.
Remove H ex
: Head Drawer
Screw:
To level the cabinet using the front rollers:
1 Slightly open freezer drawer. Lift the toe grille and
gently pull forward (see illustration).
2 You can raise or lower each door. Use a 3/sinch
socket wrench to turn the adjustment screws
(1 per side).
Toe Grille Must _
• " _1
Ft nSoton / I_',7.
Antiitip Bracket (_. _"
\_Z_ 12" Assembly _J,_ BY
_" / /
______'_---- (3) Retaining Clips
Remove Remove
Hex Head
Drawer Drawer
Screw Screw
4 Tighten four drawer screws.
5 Recheck gasket seal.
To raise: turn adjustment screw clockwise.
To lower: turn adjustment screw
counterclockwise.
Ensure both doors are bind-free with their seals
touching the cabinet on all four sides and that
cabinet is stable.
4 After unit is leveled, lower anti-tip leg until it
contacts the floor.
Against , ,, ,,
Freezer : o :
Drawer
b h
o_ _ o_ _
Cabinet Leve_in 9 & Refrigerator I
DOOr Amignment (if necessary)
Guidelines for final positioning of your refrigerator" :: , :: : :::::::::
All four corners of the cabinet must rest firmly on the _ ,j
f oor
= The sides should tilt 1/4inch (6 mm)from front to _ (/,O '_ /y'_
back (to ensure that doors c ose and sea proper y) I Anti-tip _'q /,/
Leg /i
• Doors should align with each other and be level. _/_!\ I
Most of these conditions can be met by raising or _
lowering the adjustable front rollers.
g. y..g. p .
Loading ...
Loading ...
Loading ...