Loading ...
Loading ...
Loading ...
16
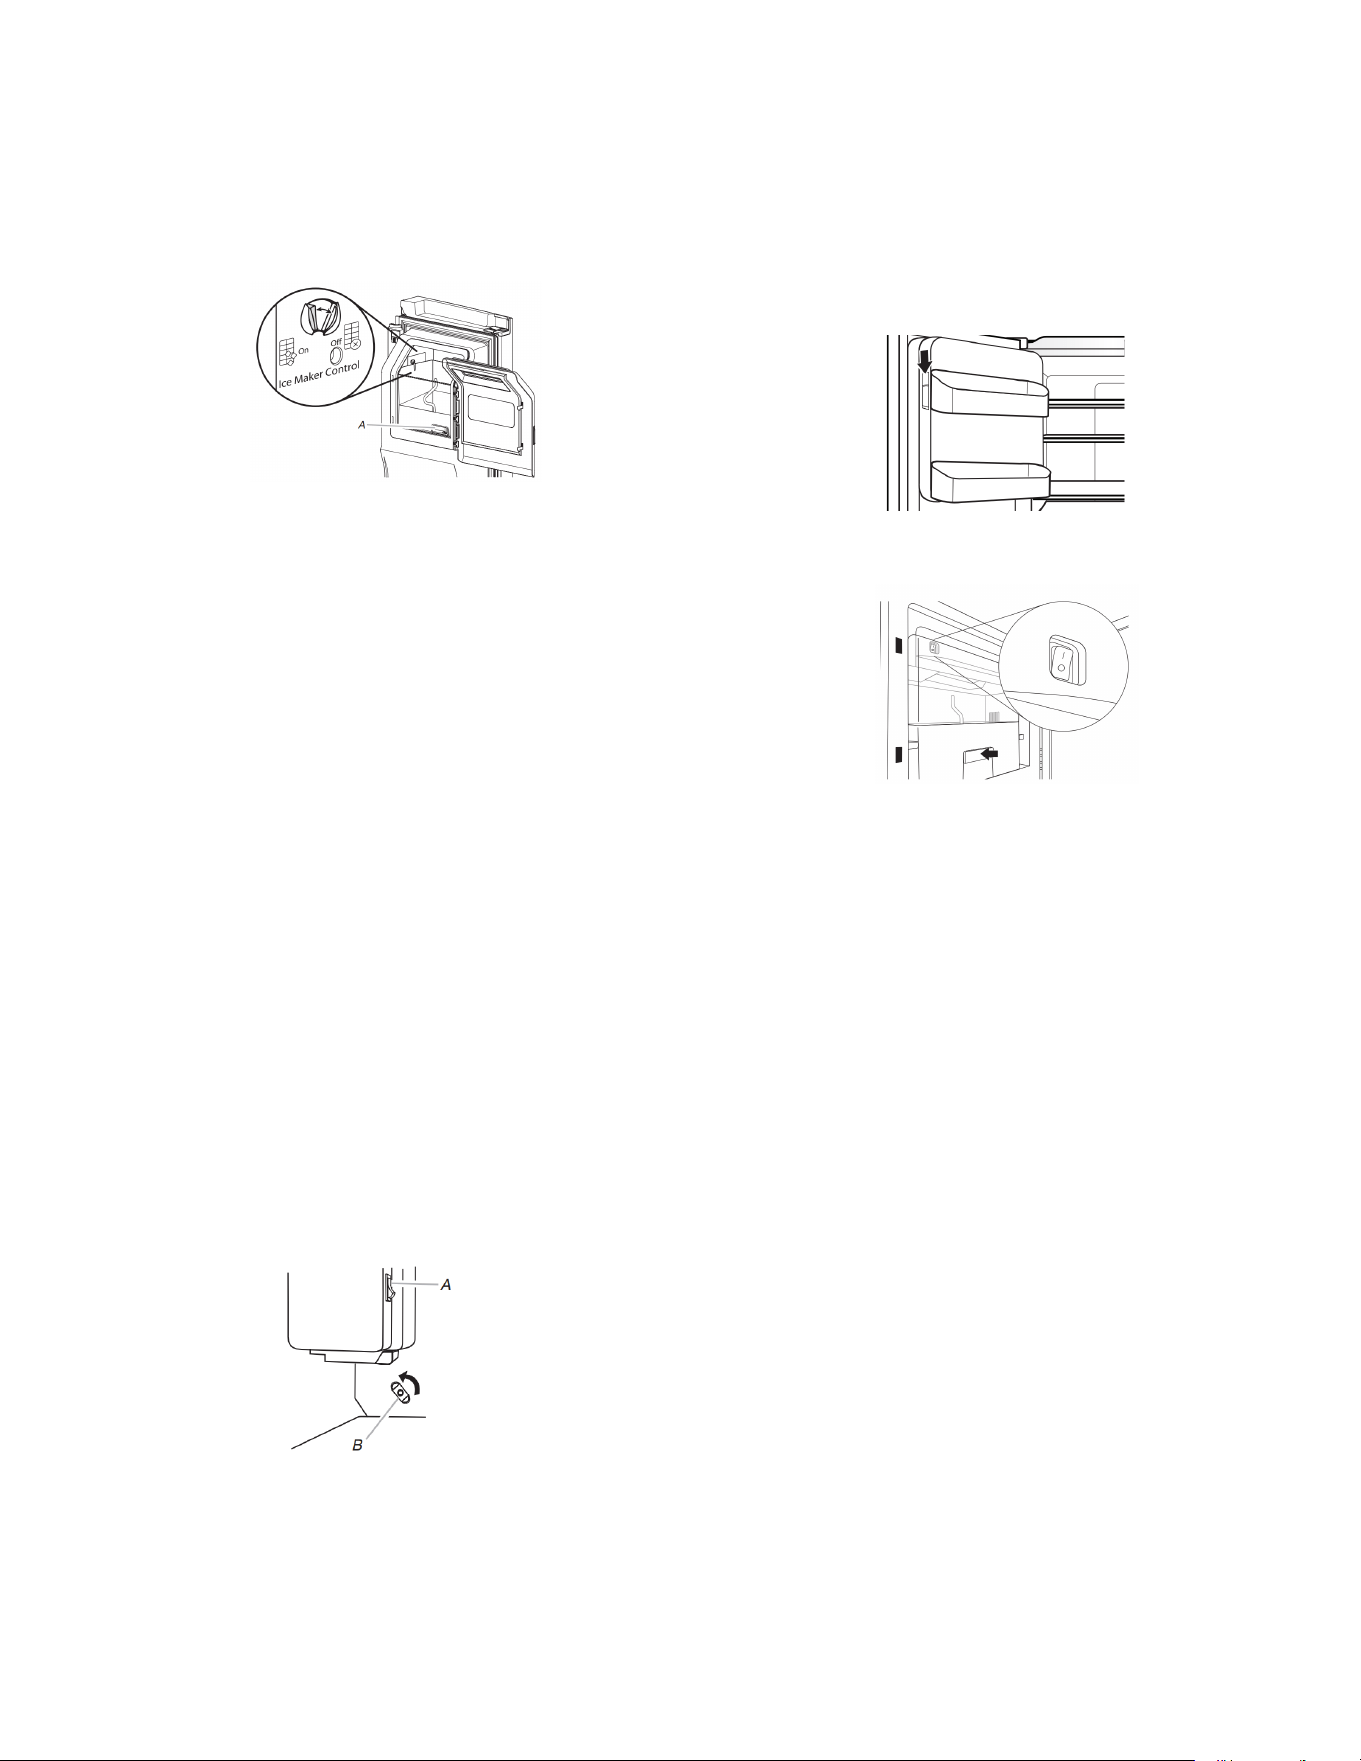
2. Turn on the ice maker by moving the switch to the (left) on
position.
� To manually turn off the ice maker, move the control to the
off (right) position.
� Your ice maker has an automatic shutoff. The sensor will
automatically stop ice production if the storage bin is full, if
the door is open or the storage bin is removed. The control
will remain in the on (left) position.
A. Ice storage bin release latch
3. Close the ice compartment door.
Remove and Replace the Ice Storage Bin:
� Remove the ice storage bin by inserting your fingers into the
hole at the base of the bin and squeezing the latch to release
the bin from the compartment. Lift the storage bin up and pull it
straight out.
� Replace the storage bin inside the ice compartment and push
down to make sure it is firmly in place.
Style 2—Upper Left-Hand Side of the Refrigerator
Compartment
The ice maker and storage bin are located in the upper left-hand
side of the refrigerator compartment.
Some models have an on/off switch located on the ice maker. To
turn on the ice maker, press the switch to the On position. To
manually turn off the ice maker, press the switch to the Off
position.
To manually turn off the ice maker, see the Quick Start Guide for
more information.
Remove and Replace the Ice Storage Bin:
1. Hold the base of the storage bin and press the release button
on the lower right.
2. Pull out the storage bin until resistance is felt. Lift up the front
of the ice bin and remove.
3. Press the switch to Off (on some models).
IMPORTANT: To remove the ice storage bin, it may be necessary
to turn the auger driver, behind the ice bin, counterclockwise to
properly align the ice bin with the auger driver. The ice storage bin
must be locked in place for proper ice dispensing.
A. On position (on some models)
B. Auger driver
1. Press the switch to On (on some models).
2. Slide the ice bin into the guide rails located on either side of
the enclosure.
3. Push the ice bin in until resistance is felt. Raise the front
slightly and push the ice bin in until an audible “click” is heard.
Style 3—Left-Hand Door Behind the Refrigerator Bins
The ice maker is located on the left door behind the bins. Ice
cubes are ejected into the ice storage bin located on the left-hand
refrigerator door.
Turn the Ice Maker On/Off:
1. Push up on the latch on the left-hand side of the ice
compartment to open the door.
2. Turn on the ice maker by moving the switch to the On (I)
position.
3. Close the ice compartment door.
Remove and Replace the Ice Storage Bin:
� Remove the ice storage bin by inserting your fingers into the
hole at the base of the bin and squeezing the latch to release
the bin from the compartment. Lift the storage bin up and pull it
straight out.
� Replace the storage bin inside the ice compartment and push
down to make sure it is firmly in place.
Water Filtration System
Do not use with water that is microbiologically unsafe or of
unknown quality without adequate disinfection before or after the
system. Systems certified for cyst reduction may be used on
disinfected waters that may contain filterable cysts.
IMPORTANT: The disposable water filter should be replaced at
least every 6 months. If the water flow to the water dispenser or
ice maker decreases noticeably before 6 months have passed,
replace the water filter more often.
Install the Water Filter
To order a replacement filter, contact us at www.whirlpool.com/
Parts & Accessories. See the “Quick Start Guide” for details.
NOTE: If the filter is not installed correctly, water may dispense at
a lower flow rate and there will be slower ice production. Improper
filter installation may also cause the water filter housing to leak.
Loading ...
Loading ...
Loading ...