Loading ...
Loading ...
Loading ...
5
2. PREPARE THE INSTALLATION
NOTE: Before proceeding to the installation, check the contents of the box. If items are missing or damaged, contact the manufacturer.
Make sure that the following items are included:
- Hood
- Accessories • Decorative flue assembly (lower and upper flues)
• Hood mounting bracket (taped inside the hood)
• Upper flue mounting bracket (taped inside the hood)
• 2 hybrid filters
• 3¼” x 10” adapter/damper (for horizontal or vertical discharge) taped inside the decorative flue
• Bag of parts (taped inside the hood) including: 5 no. 8 x 1½” countersunk screws, 8 no. 8 x 3/4” screws,
6 no. 8 x 3/8” screws, 6 drywall anchors, 3 washers,
2 no. 8 x 1/2”, 2 foam squares. If need be, discard extra hardware.
Parts sold separately:
- Duct, elbows, wall or roof caps.
- Optional flue extension for 10-ft. ceilings model AEWCB3SB.
- Glass panel for WCB3I30SBN and WCB3I36SBN models (see service parts list on page 15).
NOTE: During installation, protect countertop and/or cooktop.
WARNING
!
When performing installation, servicing or cleaning the unit, it is recommended to wear safety glasses and gloves.
HK0059A
C
L
9¾”
3
3
⁄16”
11
”
1
5
⁄8”
14
15
⁄16”
17
15
⁄16”
36” WIDTH HOOD
30” WIDTH HOOD
HORIZONTAL DISCHARGE
HK0060A
C
L
9¾”
7/8”
14
15
⁄16”
17
15
⁄16”
36” WIDTH HOOD
30” WIDTH HOOD
3
3
⁄16”
VERTICAL DISCHARGE
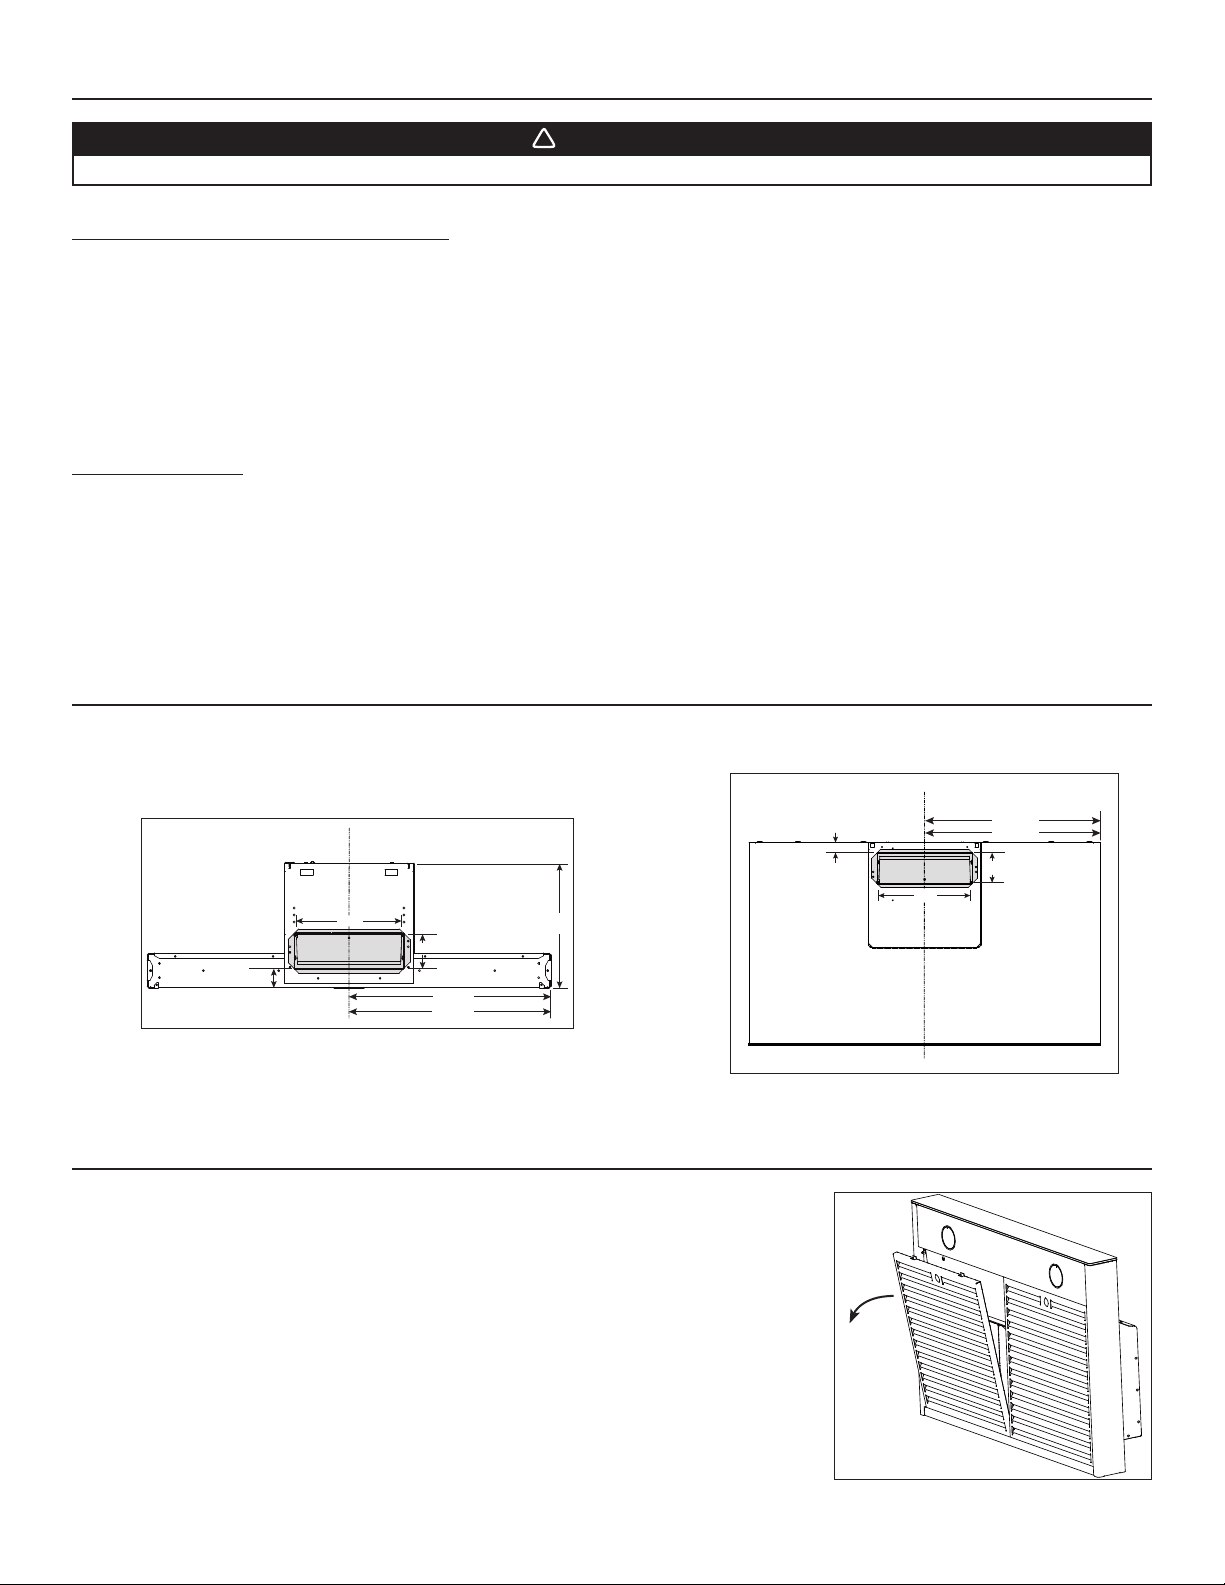
3. SELECT INSTALLATION TYPE
Refer to illustrations below to locate duct opening according to discharge type chosen (grey parts to be installed later).
4. REMOVE HYBRID FILTERS
Lay the back of the hood on a table. Use a piece of cardboard to avoid damaging the table or
the hood. Remove tape on filters. Remove filters by pushing them down and flipping downwards.
Set the filters aside.
HO0250
Loading ...
Loading ...
Loading ...