Loading ...
LNWDB1_QSG_EN_R3
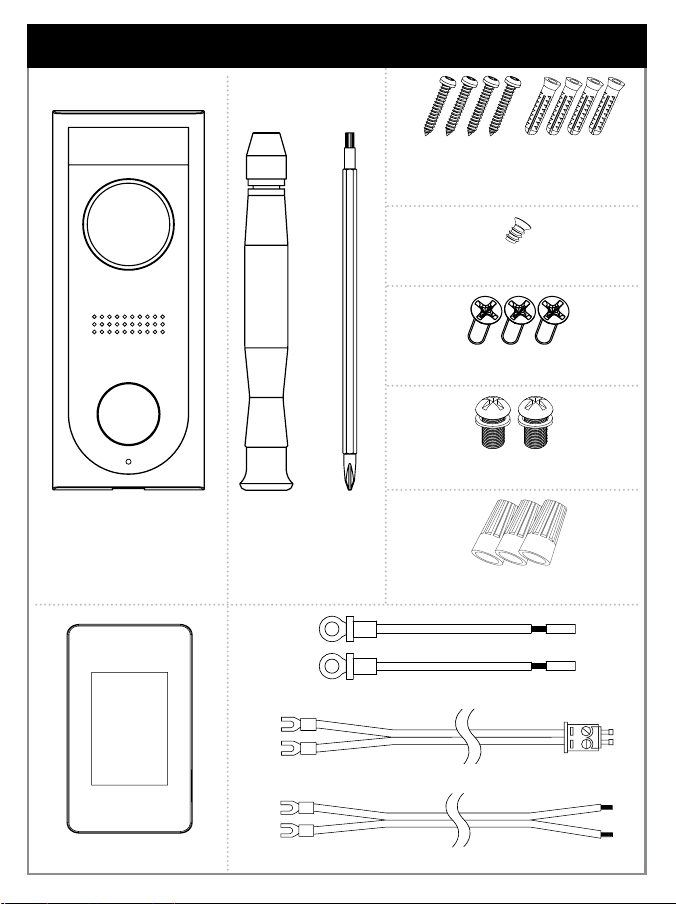
Loop the power cables around the
power ports of the doorbell.
STEP 3: Wiring the Doorbell
Push the wiring through the hole
in the wall or door frame. Slide the
doorbell down so the plastic tab on the
doorbell locks into the notch on the
mounting bracket.
Use the included screws (×2) to
secure the power cables.
Note: If the power cables in the wall are not long enough, use the extension power
cables and wire caps. Ensure there is enough space to t the cable connectors
and wire caps into the hole in your wall or door frame.
STEP 4: Wiring the Chime
You must determine the type of doorbell chime you
have in your home: electronic or mechanical.
Not sure? If your doorbell chime is a classic
*ding-dong* sound, chances are your chime is
mechanical. If you are still not sure, remove the
cover panel of your chime box – if you nd spring-
loaded levers and a physical metal chime, you have
a mechanical chime.
For users with a mechanical chime, follow the extra
steps below to complete the installation.
For mechanical chime owners:
1. Remove the cover panel of your doorbell chime
box.
2. Loosen the screws labeled FRONT and TRANS
using the Phillips end of the included screwdriver.
Do not remove the screws, and be sure not to
detach any connected wiring.
3. Connect the included chime kit to the green terminal
on the end of the included wiring as shown below.
REAR TRANS
FRONT
4. Connect the wiring from the chime kit to the FRONT
and TRANS connectors in the chime box. Ensure that
the existing wiring stays connected as well.
Note: You may connect either wire to either connector.
5. Mount the chime kit to the inside of your chime box, or
along the cover plate, using the included double-sided
tape.
Ensure the chime kit and wires are not touching
the chimes or any moving components inside the
chime box, or the doorbell chime will not sound
correctly.
6. Reconnect power to the doorbell and chime at the
breaker.
App Live View
Device settings
Shared users
Pause / Play FullscreenViewing
modes
Mute /
Unmute
Streaming
quality*
Play back
recorded
video
* Change the streaming quality to SD (Standard Denition) to conserve bandwidth while
watching live video. This will not impact the quality of recorded video.
Calling screen:
Answer
Reject
Insert the included security screw
through the mounting bracket and into
the screw hole on the bottom of the
doorbell. Fasten tightly using the star-
shaped end of the included screwdriver
to complete the installation.
STEP 5: App Setup
1. Download the Lorex Home app by scanning the QR code.
2. Open the Lorex Home app, and sign in or create an
account.
3. Once the status indicator on the doorbell is solid blue, tap
+
. Follow the in-app instructions to complete the device
setup.
1
2 3
4
STEP 6: Linking the Doorbell and Chime
1. After completing the doorbell setup, tap Link Third Party Chime.
2. Select Electronic Chime or Mechanical Chime based on the type of
chime in your home.
Note: Make sure to select the correct chime box in the app.
To link the doorbell and chime:
Wait for the doorbell to start up.
This may take up to 5 minutes after reconnecting
power at the breaker.