INSIGNIA - QUICK SETUP (INSTALLATION) GUIDE for 50"/55"/58'/75" LED TV 4K ULTRA HD
Models: NS-50F301NA22, NS-55F301NA22, NS-58F301NA22 and NS-75F301NA22.

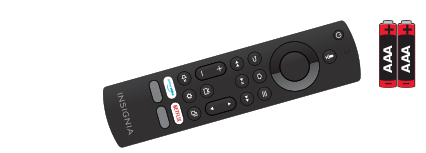
INCLUDED ACCESSORIES
Voice Remote with Alexa and two AAA batteries.
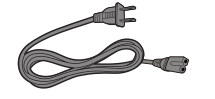
Power cord
STOP
Before using your new product, please read these instructions to prevent any damage. Do not plug your power cord in until all other devices have been connected.
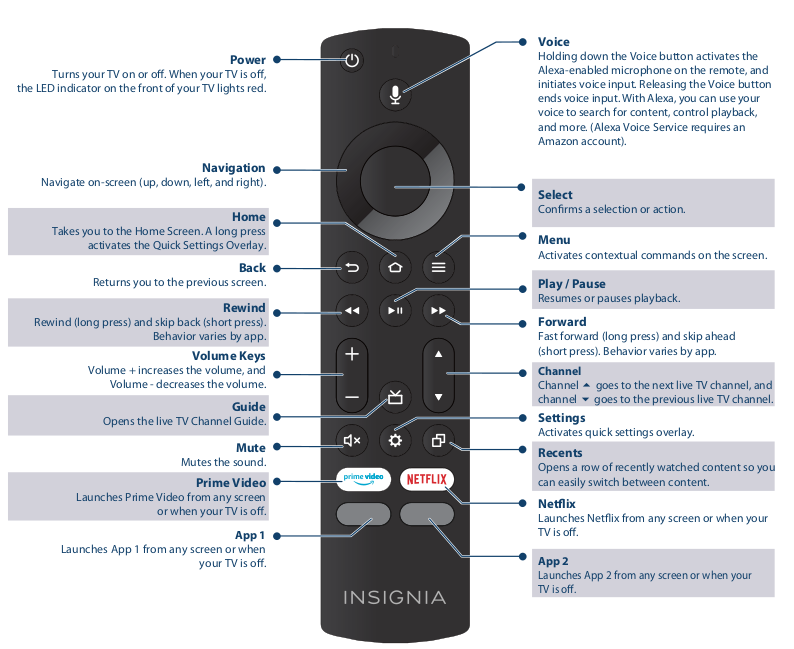
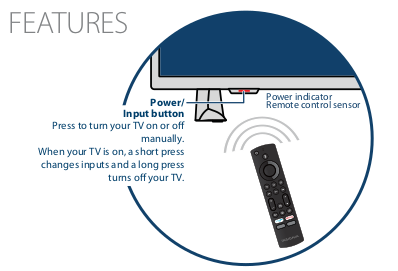
FEATURES
Note: Images do not necessarily represent the exact design of your television.
[IMAGE}
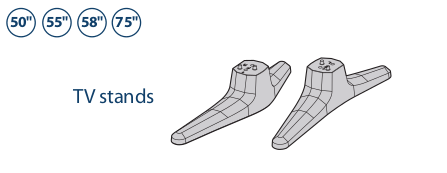
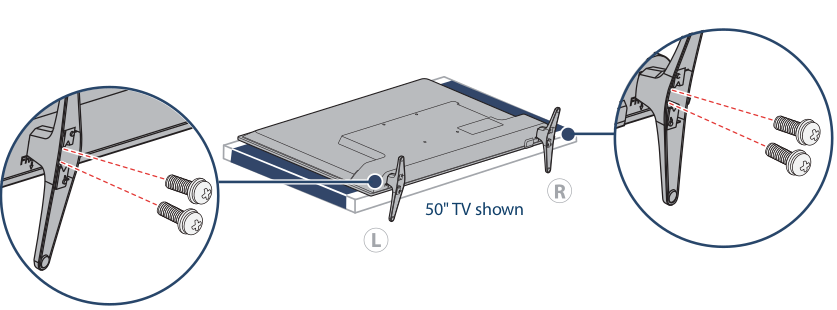
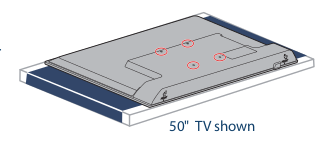
INSTALLING THE STANDS OR A WALL MOUNT
Place your TV face-down on a cushioned, clean surface.
STANDS
1 Align the TV stand screw holes with the holes on the bottom of your TV.
2 Use a Phillips screwdriver and two provided screws to secure each stand to your TV.
WALL MOUNT
Before you mount your TV, make sure that:
- You remove the stands.
- The wall-mount bracket supports the weight of your TV.
See the instructions that came with your wall mount for more information about how to correctly mount your TV.
WARNING: Your TV has four VESA mounting holes on the back. You must secure a wall-mount bracket to all fourholes.
If you do not use all four holes, your TV may fall and cause property damage or personal injury.
Note: Wall-mount screws are not included.
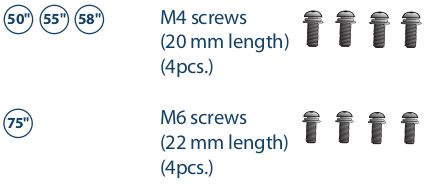
50" VESA Mounting Pattern
- 200 x 200 mm
- Screws: type M6, 16 mmto 24mm length depending onthe wall mount
55" VESA Mounting Pattern
- 200 x 200 mm
- Sctews: type M6,16 mm to 24mm length depending on the wall mount
58" VESA Mounting Pattern
- 300 x 200 mm
- Screws: type M6, 12mm to 14mm length depending onthe wall mount
75" VESA Mounting Pattern
- 600 x 400 mm
- Screws: type M8, 22 mm to 24mm length depending onthe wall mount
MAKING CONNECTIONS
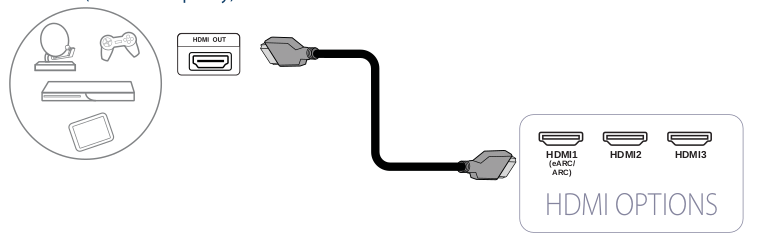
HDMI (best video quality)
Note: You can use the HDMI 1 (eARC/ARC) jack toconnecta digital audio system.
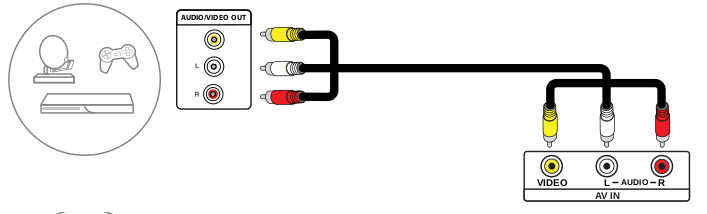
AV (good video quality)
Coaxial (good video quality)
Connect an antenna to access live over-the-air TV.

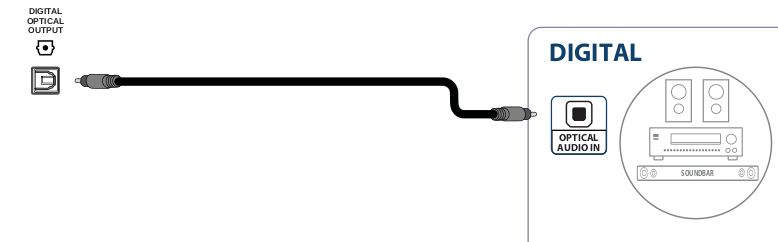
AUDIO OPTIONS
You can use the DIGITAL OPTICAL OUTPUT jack or the HDMI (eARC/ARC) jack.
Note: If youneed to change the digital audio format, go to the Home menu, select Settings, then select Display & Sounds. Select Audio Output, then select Digital Audio Format and change the setting to PCM or Dolby Digital.
DIGITAL
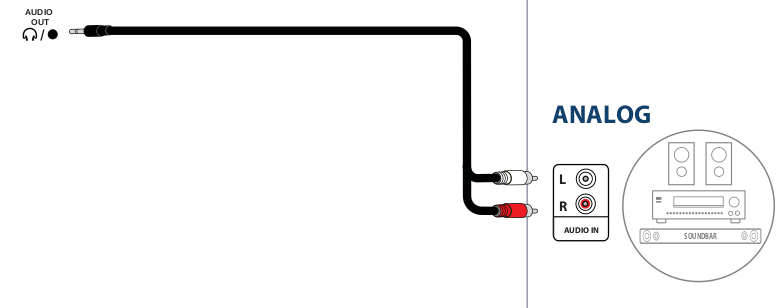
ANALOG
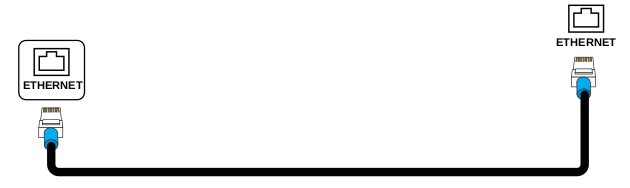
ETHERNET (optional)
Note: You can use a wired Ethernet connection to access the internet instead of a Wi-Fi connection. Plug an Ethernet cable into the ETHERNET jack on your TV and your Ethernet connection.
TURNING ON YOUR TV
1 Plug the power cord into the back of your TV anda power outlet.
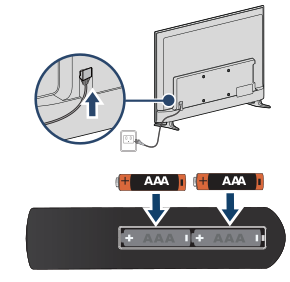
2 Remove the remote control cover and install the batteries.
3 Press Power  on your Voice Remote with Alexa.
4 Follow the on-screen instructions.
COMPLETE THE ON SCREEN SETUP
Your TV should automatically pair to your new Voice Remote with Alexa.
1. If your remote is not paired, press  . If you continue to have issues, re-insert or replace the batteries and try again.
2. Select your Wi-Fi network from the displayed network list.
Note: If your Wi-Fi network is password protected, enter your network password using the on-screen keyboard. If your network is hidden, select the Join Other Network tile.
3. Select your experience: Full (recommended) or Basic.
+ Select Fulll to access live TV, over tens of thousands of streaming movies and TV episodes, thousands of apps, and Alexa skills. To get started, sign into or sign up for a free Amazon account.
+ Select Basic to access live TV and the six preset streaming apps. Alexa and the full Appstore are not included.
4. Ifyou connected your TV to an antenna or cable wall jack:
A Go to Settings > Live TV > Channel Scan.
B Follow the on-screen instructions to scan for channels.
Note: To browse and watch live TV, use the On Now row or press  on your remote.
USING YOUR VOICE REMOTE WITH ALEXA