Loading ...
Loading ...
Loading ...
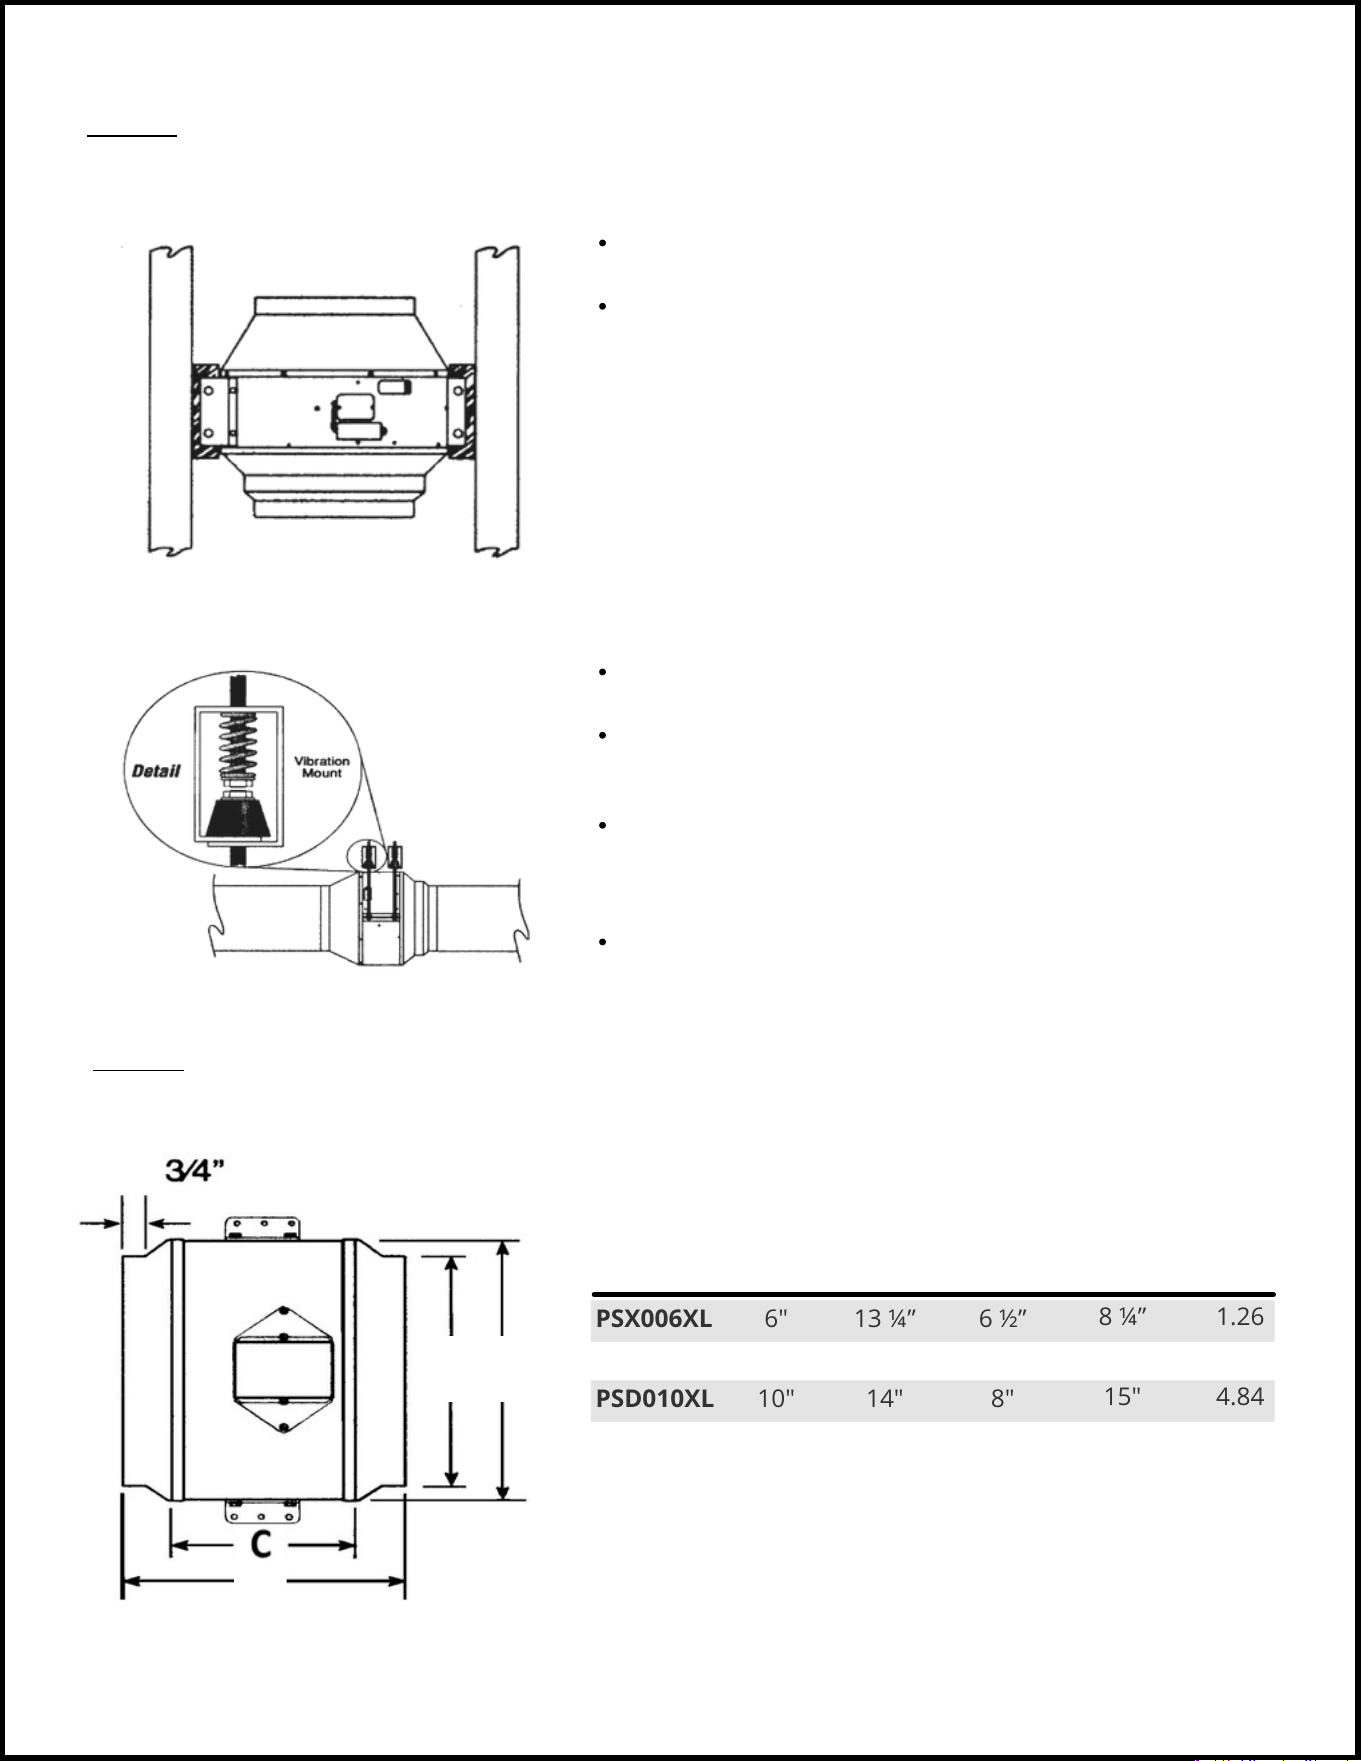
PSX006XL
PSD008XL
PSD010XL
1.26
2.99
4.84
8 ¼”
15 ½"
15"
6 ½”
7"
8"
13 ¼”
12 ½"
14"
6"
8"
10"
A
B
D
MODEL AMPS
D
CB
A
© 2 0 2 3 T R A D E - W I N D M A N U F A C T U R I N G , L L C
P R O V E R B S 2 2 : 2 9
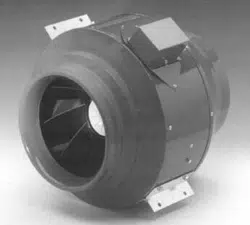
PART 2: SECURING THE BLOWER/VENTILATOR
Follow all applicable codes when installing this unit.
Build and install wood supports to framing structure for blower
mounting.
Attach blower directly to wood supports.
The In-Line Blower’s mounting brackets are designed for flexible and easy
installation at any angle—horizontal, vertical or diagonal.The brackets
should be bolted directly to a 2” x 4” type wood framing structure (e.g., an
attic truss) or suspended by threaded rod, slotted angle-iron or hurricane
strap. The installation should be sufficient to support the blower’s weight.
Follow all applicable codes when installing this unit.
Equipment should be hung in position with temporary fixtures that can
be removed after vibration hangers* are installed.
Optional vibration hanger* may be fastened directly to the structure or
somewhere between the suspended unit. Be sure not to over tighten
the neoprene element. Install hangers.
If threaded rod is used, turn nuts on rod assembly clockwise one
complete turn on each hanger.Repeat this procedure until temporary
hanging fixtures are loose and blower is suspended completely on the
vibration hangers.
Remove temporary fixtures and level ducting and blower by taking
additional turns on the spring / top hanger rod nut as required.
MOUNTING ILLUSTRATION OPTION 1
MOUNTING ILLUSTRATION OPTION 2
4
PART 3: ELECTRICAL CONNECTION
DIMENSIONS
DIMENSIONS DATA & AMPERAGE
*Above specifications apply to picture on left
Loading ...
Loading ...