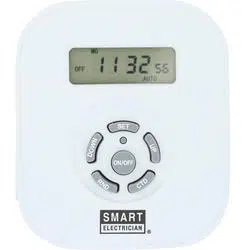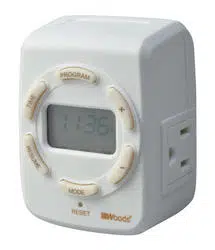

Indoor 7-Day Astronomic Timer
INSTRUCTIONS
Charge the Battery: Plug the timer into wall outlet for 30 minutes to charge internal battery. Note: You can then unplug the timer from the
wall outlet and comfortably hold it in your hand to program the timer.
Clear the Memory: Press the RESET button with a tooth pick to erase any previous settings.
Note: Inactivity for approximately 30 seconds and the timer will return to clock mode.
To Set the Clock:
1. Press the TIME button to set the currently year: Then press the “+” or “-” button to adjust the number from 2012 to 2099.
2. Press the TIME button again to set the month: Press the “+” or “-” button to adjust the number from 01 to 12.
3. Press the TIME button again to set the date: Then press the “+” or “-” button to adjust the number. The maximum date will depend on
which month you choose.
4. Press the TIME button again to set the daylight savings time feature: DST will appear on the bottom of the display screen. Then press
the “+” or “-” button to set DST AUTO mode or DST OFF mode.
5. Press the TIME button again to set the hour: Then press the “+” or “-” button to adjust the number from 12AM~11AM to 12PM~11PM.
6. Press the TIME button again to set the minute: Then press the “+” or “-” button to adjust the number from 00 to 59.
7. Press the TIME button again to set the Astronomic function: Then press the “+” or “-” button to select the zone you are in (refer to
map). North = “nor”, Center = “cen” and South = “sou”.
8. Press the TIME button again to adjust the Sunrise time. Press "+" or "-" button to adjust the time.
9. Press the TIME button again to adjust the Sunset time. Press "+" or "-" button to adjust the time.
10. Press the TIME button again to finish the setting or press and hold the TIME button for 4 sec that will go back to standby.
To Program the Timer:
1. Press the PROGRAM button once to display the first ON setting
2. Press TIME button. Press "+" or "-" button to adjust the day or group of days you want for the program. Scroll to select from: every
day, each individual day, weekdays or weekends
3. Press TIME button to set the hour. Press “+” or “-“ to scroll through 12-hours AM, 12-hours PM, sunrise time or sunset time for first on
setting. Note: If you select Sunrise/Sunset as the programmed ON timer, press the Program button to continue programming OFF
setting.
4. Press TIME button to setting the minutes. Press button “+” and “-“to adjust from 00-59.
5. Press the PROGRAM button again to display the first OFF setting and repeat steps 2 through 4 to program.
6. Repeat steps 1 through 5 for additional ON/OFF settings
7. Press the MODE button once, at any time exit time setting or program setting. If no button is pushed for 30 seconds, the timer will
automatically return to standby mode.
Note: Pressing the RESUME button will cancel the setting
Sun tracking technology: the timer adjusts automatically to sunrise/sunset times. For example, program lights to turn On at sunset and Off
at 10:00pm. As daylight hours extend, the sunset time will increase. For example sunset may be at 5:41pm on Monday, 5:42pm on
Tuesday and 5:44pm on Wednesday. The timer will adjust to this On time accordingly and will always turn off at 10:00pm as programmed.
To Connect/Operate the Timer:
Plug device in to the timer and turn the device on. Plug timer into wall outlet.
To Operate the Timer / Use Manual Override Function: Press MODE to choose different function between ON, ON AUTO , ON RDM,
OFF, OFF AUTO,OFF RDM
1. ON — load is ON permanently in manual mode
2. ON AUTO —AUTO mode has been selected and load has been forced ON and will stay ON until a contrary scheduled event.
3. ON RDM —RDM mode has been selected and load has been forced ON and will stay ON until a contrary scheduled RDM event.
4. OFF - load is OFF permanently in manual mode.
5. OFF AUTO — AUTO mode has been selected and load has been forced OFF and will stay OFF until a contrary scheduled event.
6. OFF RDM - RDM mode has been selected and load has been forced OFF and will stay OFF until a contrary scheduled RDM event.
Random Setting Security Feature: When the random setting is ON, the timer will turn On/Off +/- 30 minutes around progam on and
program off times.
Daylight Savings Time Feature: When the DST function is on “DST AUTO”, the sunrise and sunset time will increases 1 hour on the
second Sunday in March at 02:00am every year. It will then decrease 1 hour on the first Sunday in November at 02:00am every year. For
example if sunrise is 6:12am on March 9th, will it be 7:11am on March 10th.
• Up to 7 on/off settings, repeats weekly
• Program flexibility: Lights turn on/off at sunset, sunrise or anytime of your choosing
• Sunrise and sunset program: Timer settings automatically adjust throughout the year
• Auto adjusts to daylight savings time
125Vac, 60Hz
8A / 1,000W tungsten
15A / 1,875W resistive
15A / 1,875W general purpose
500VA electroinic ballast
120Vac, 60Hz, 8.3A ballast