MAY[AG
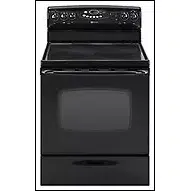
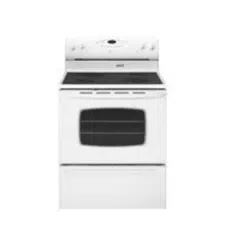
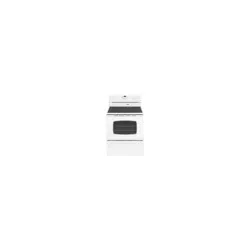
Maytag Electric Smoothtop
Double Oven Range
Precision Touch 850 Series
Table
Safety .......................................... 1 =3
Surface Cooking ...................... 4=7
Controls
Smoothtop Surface
Warming Center
Oven Cooking ......................... 8=18
Control _anel
Baking
Cook & Hold
Delay
Toasting
Broiling
Keep Warm
Favorite
Oven Racks
Form No. A/05/06 Part No 8113P639-60
Care & Cleaning ................... 19=22
Self-Clean Oven
Cleaning Procedures
Maintenance ......................... 23=24
Oven Doors
Oven Window
Oven Light
Troubleshooting ................... 25=26
_ Warranty & Service 27
Guide d'utilisation et
d'entretien ................................... 28
Gu[a de use y cuidado .............. 58
<_2006 Maytag Appliances Sales Co. All rights reserved. Lithe USA.
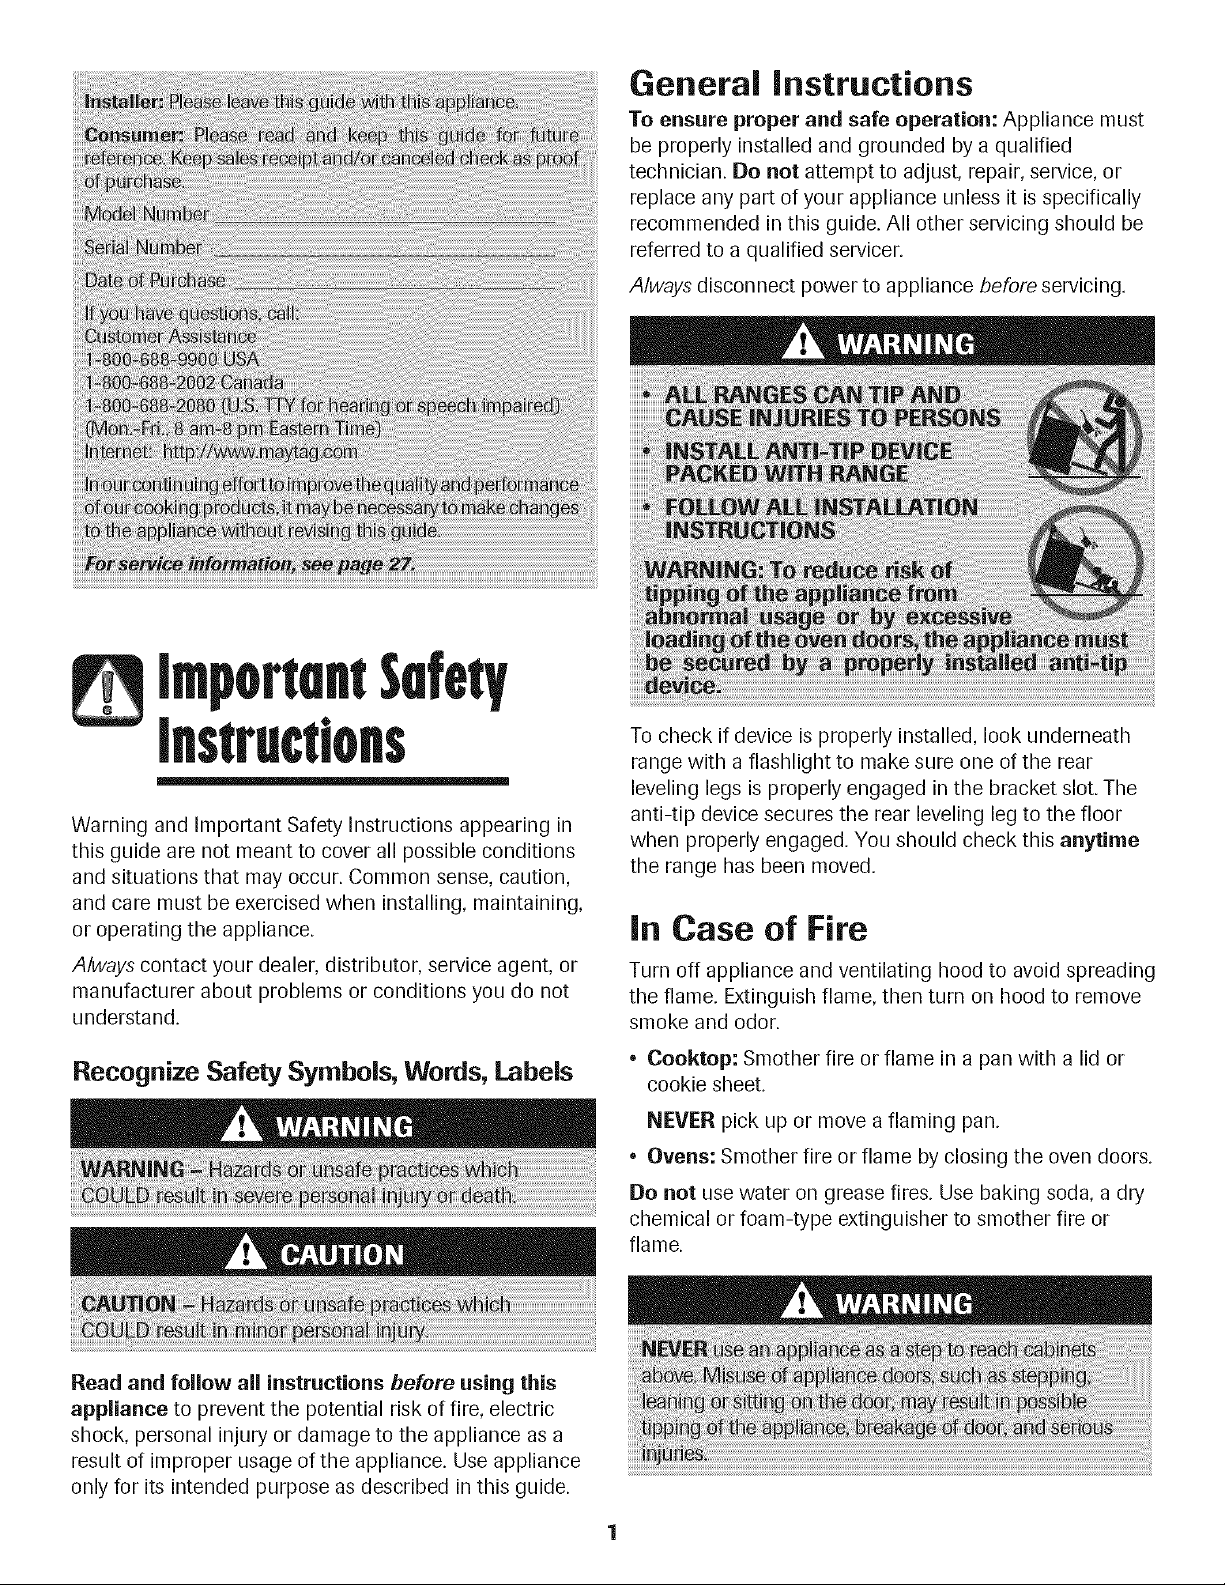
General instructions
To ensure proper and safe operation: Appliance must
be properly installed and grounded by a qualified
technician. Do not attempt to adjust, repair, service, or
replace any part of your appliance unless it is specifically
recommended in this guide. All other servicing should be
referred to a qualified servicer.
Always disconnect power to appliance before sewicing.
ImportentSurety
Instructions
Warning and Important Safety Instructions appearing in
this guide are not meant to cover all possible conditions
and situations that may occur. Common sense, caution,
and care must be exercised when installing, maintaining,
or operating the appliance.
Always contact your dealer, distributor, service agent, or
manufacturer about problems or conditions you do not
understand.
Recognize Safety Symbols, Words, Labels
To check if device is properly installed, look underneath
range with a flashlight to make sure one of the rear
leveling legs is properly engaged in the bracket slot. The
anti-tip device secures the rear leveling leg to the floor
when properly engaged. You should check this anytime
the range has been moved.
in Case of Fire
Turn off appliance and ventilating hood to avoid spreading
the flame. Extinguish flame, then turn on hood to remove
smoke and odor.
• Cooktop: Smother fire or flame in a pan with a lid or
cookie sheet.
NEVER pick up or move a flaming pan.
* Ovens: Smother fire or flame by closing the oven doors.
Do not use water on grease fires. Use baking soda, a dry
chemical or foam-type extinguisher to smother fire or
flame.
Read and follow all instructions before using this
appliance to prevent the potential risk of fire, electric
shock, personal injury or damage to the appliance as a
result of improper usage of the appliance. Use appliance
only for its intended purpose as described in this guide.
1
Impona,tSuretyinstructions
If appliance is installed near a window, precautions should
be taken to prevent curtains from blowing over surface
elements.
NEVER use appliance to warm or heat the room. Failure to
follow this instruction can lead to possible burns, injury, fire,
or damage to the appliance.
NEVER wear loose-fitting or hanging garments while using
the appliance. Clothing could catch utensil handles or ignite
and cause burns if garment comes in contact with hot
heating elements.
To ensure proper operation and to avoid damage to the
appliance or possible injury, do not adjust, service, repair or
replace any part of the appliance unless specifically
recommended in this guide. Refer all other servicing to a
qualified technician.
NEVER store or use gasoline or other combustible or
flammable materials in the ovens, near surface units or in the
vicinity of this appliance as fumes could create a fire hazard
or an explosion.
To prevent grease fires, do not let cooking grease or other
flammable materials accumulate in or near the appliance.
Use only dry potholders. Moist or damp potholders on hot
surfaces may result in a steam burn. Do not let potholders
touch hot heating elements. Do not use a towel or other
bulky cloth which could easily touch hot heating elements
and ignite.
Aiwaysturn off all controls when cooking is completed.
NEVER heat unopened containers on the surface unit or in
the ovens. Pressure build-up in the container may cause
container to burst resulting in burns, injury or damage to the
appliance.
NEVER use aluminum foil to line drip bowls or cover oven
racks or oven bottoms. This could result in risk of electric
shock, fire, or damage to the appliance. Use foil only as
directed in this guide.
Aerosol-type cans are EXPLOSIVE when exposed to heat
and may be highly flammable. Do not use or store near
appliance.
Cooktop
NEVER leave surface units unattended, especially when
using high heat. An unattended boilover could cause
smoking and a greasy spillover can cause a fire.
This appliance is equipped with different sized surface
elements. Select pans with flat bottoms large enough to cover
element. Fitting pan size to element will improve cooking
efficiency.
If pan is smaller than element, a portion of the element will
be exposed to direct contact and could ignite clothing or
potholder.
Only certain types of glass, glass-ceramic, ceramic,
earthenware, or other glazed utensils are suitable for
cooktop or oven service without breaking due to the sudden
change in temperature. Follow utensil manufacturer's
instructions when using glass.
This appliance has been tested for safe performance using
conventional cookware. Do not use any devices or
accessories that are not specifically recommended in this
manual. Do not use stove top grills or add-on oven
convection systems. The use of devices or accessories that
are not expressly recommended in this manual can create
serious safety hazards, result in performance problems, and
reduce the life of the components of this appliance.
Turn pan handle toward center of cooktop, not out into the
room or over another surface element. This reduces the risk
of burns, ignition of flammable materials, or spillage if pan is
accidently bumped or reached by small children.
Glass-Ceramic Cooktop
NEVER cook on broken cooktop. If cooktop should break,
cleaning solutions and spillovers may penetrate the broken
cooktop and create a risk of electric shock. Contact a
qualified technician immediately.
Clean cooktop with caution. Some cleaners can produce
noxious fumes if applied to a hot surface. If a wet sponge,
cloth, or paper towel is used on a hot cooking area, be
careful to avoid steam burn.
Heating Elements
NEVER touch surface or oven heating elements, areas near
elements, or interior surfaces of ovens.
Heating elements may be hot even though they are dark in
color. Areas near surface elements and interior surfaces of
the ovens may become hot enough to cause burns. During
and after use, do not touch or let clothing or other
flammable materials contact heating elements, areas near
elements, or interior surfaces of ovens until they have had
sufficient time to cool.
Other potentially hot surfaces include: Cooktop, areas
facing the cooktop, oven vent, and surfaces near the vent
opening, oven doors, areas around the doors and oven
windows.
importantSurety
Deep Fat Fryers
Use extreme caution when moving the grease pan or
disposing of hot grease. Allow grease to cool before
attempting to move pan.
Ovens
Use care when opening doors. Let hot air or steam escape
before removing or replacing food.
For proper oven operation and performance, do not block
or obstruct oven vent duct. When ovens are in use, the vent
and surrounding area near the vent may become hot
enough to cause burns.
A/ways place oven racks in desired locations while ovens
are cool. If rack must be moved while an oven is hot, do
not let potholder contact hot element in oven.
Self-Cleaning Ovens
Clean only parts listed in this guide. Do not clean door
gasket. The gasket is essential for a good seal. Do not rub,
damage, or move the gasket.
Do not use oven cleaners. No commercial oven cleaner or
oven liner protective coating of any kind should be used in or
around any part of the ovens.
Wipe up excessive spillovers, especially greasy spills, before
the clean cycle to prevent smoking, flare-ups or flaming.
It is normal for the cooktop to become hot during a clean
cycle. Therefore, avoid touching the cooktop, door, window or
oven vent during a clean cycle.
Child Safety
NEVER leave children alone or unsupervised in area where
appliance is in use or is still hot.
NEVER allow children to sit or stand on any part of the
appliance as they could be injured or burned.
Children must be taught that the appliance and utensils in
or on it can be hot. Let hot utensils cool in a safe place, out
of reach of small children. Children should be taught that an
appliance is not a toy. Children should not be allowed to
play with controls or other parts of the unit.
Ventilating Hoods
Clean range hood and filters frequently to prevent grease or
other flammable materials from accumulating on hood or
filter and to avoid grease fires.
Turn the fan on when flambeing foods (such as Cherries
Jubilee) under the hood.
important Safety Notice
and Warning
The California Safe Drinking Water and Toxic
Enforcement Act of 1986 (Proposition 65) requires the
Governor of California to publish a list of substances
known to the State of California to cause cancer or
reproductive harm, and requires businesses to warn
customers of potential exposures to such substances.
Users of this appliance are hereby warned that when the
oven is engaged in the self-clean cycle, there may be
some low-level exposure to some of the listed
substances, including carbon monoxide. Exposure to
these substances can be minimized by properly venting
the oven to the outdoors by opening the windows and/or
door in the room where the appliance is located during
the self-clean cycle.
IMPORTANT NOTICE REGARDING PET BIRDS: Never
keep pet birds in the kitchen or in rooms where the
fumes from the kitchen could reach. Birds have a very
sensitive respiratory system. Fumes released during an
oven self-cleaning cycle may be harmful or fatal to birds.
Fumes released due to overheated cooking oil, fat,
margarine and overheated non-stick cookware may be
equally harmful.
Save These instructions for
Future Reference
¢00ktn
Surface Controls
Use to turn on the surface elements. An infinite choice of
heat settings is available from Low to High. The knobs can
be set on or between any of the settings.
Setting the Controls
1. Place pan on surface element.
2. Push in and turn the knob in either direction to the desired
heat setting.
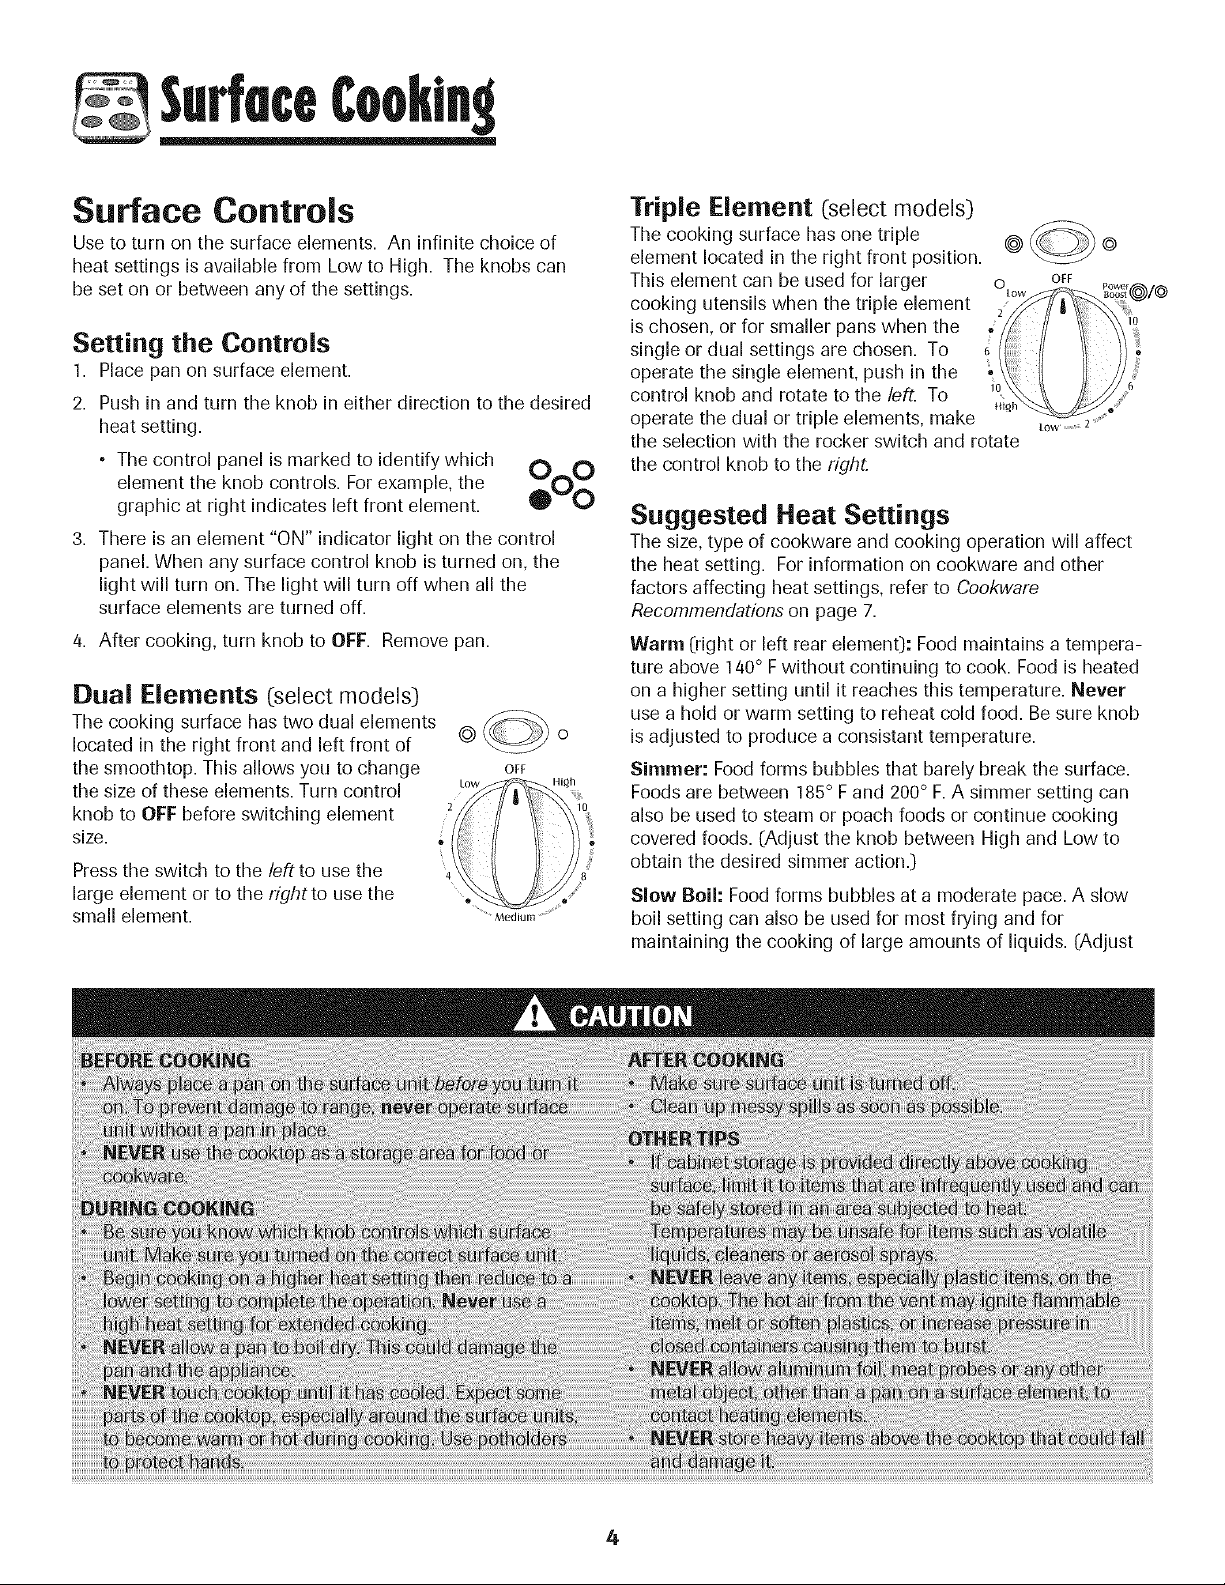
• The control panel is marked to identify which O O
element the knob controls. For example, the _O_
graphic at right indicates left front element.
3. There is an element "ON" indicator light on the control
panel. When any surface control knob is turned on, the
light will turn on. The light will turn off when all the
surface elements are turned off.
4. After cooking, turn knob to OFF. Remove pan.
Dual Elements (:select models:)
The cooking surface has two dual elements
located in the right front and left front of
the smoothtop. This allows you to change
the size of these elements. Turn control
knob to OFF before switching element
size.
Press the switch to the left to use the
large element or to the rightto use the
small element.
o/ o
OFF
LOW Iligh
Triple Element (select models:)
The cooking surface has one triple
element located in the right front position.
This element can be used for larger o
cooking utensils when the triple element
is chosen, or for smaller pans when the ,
single or dual settings are chosen. To 6
operate the single element, push in the
control knob and rotate to the left. To i0
Hl£h
operate the dual or triple elements, make
the selection with the rocker switch and rotate
the control knob to the right.
@
OFF
Low 2
10
Suggested Heat Settings
The size, type of cookware and cooking operation will affect
the heat setting. For information on cookware and other
factors affecting heat settings, refer to Cookware
Recommendations on page 7.
Warm (right or left rear element): Food maintains a tempera-
ture above 140° F without continuing to cook. Food is heated
on a higher setting until it reaches this temperature. Never
use a hold or warm setting to reheat cold food. Be sure knob
is adjusted to produce a consistant temperature.
Simmer: Food forms bubbles that barely break the surface.
Foods are between 185° Fand 200° F.A simmer setting can
also be used to steam or poach foods or continue cooking
covered foods. (Adjust the knob between High and Low to
obtain the desired simmer action.)
Slow Boil: Food forms bubbles at a moderate pace, A slow
boil setting can also be used for most frying and for
maintaining the cooking of large amounts of liquids, (Adjust
4
S.rfuceCooktn
the knob between High and Low to obtain the desired boil
action.)
Boil: Liquid forms bubbles at a rapid pace. A fast boil setting
can be used to bring liquid to a boil, brown meat, stir fry,
saute, and heat oil for frying before turning to a lower setting.
The High setting is always used to bring liquids to a boil.
Once the liquid boils, always turn the control to the lowest
setting that will maintain the boil action.
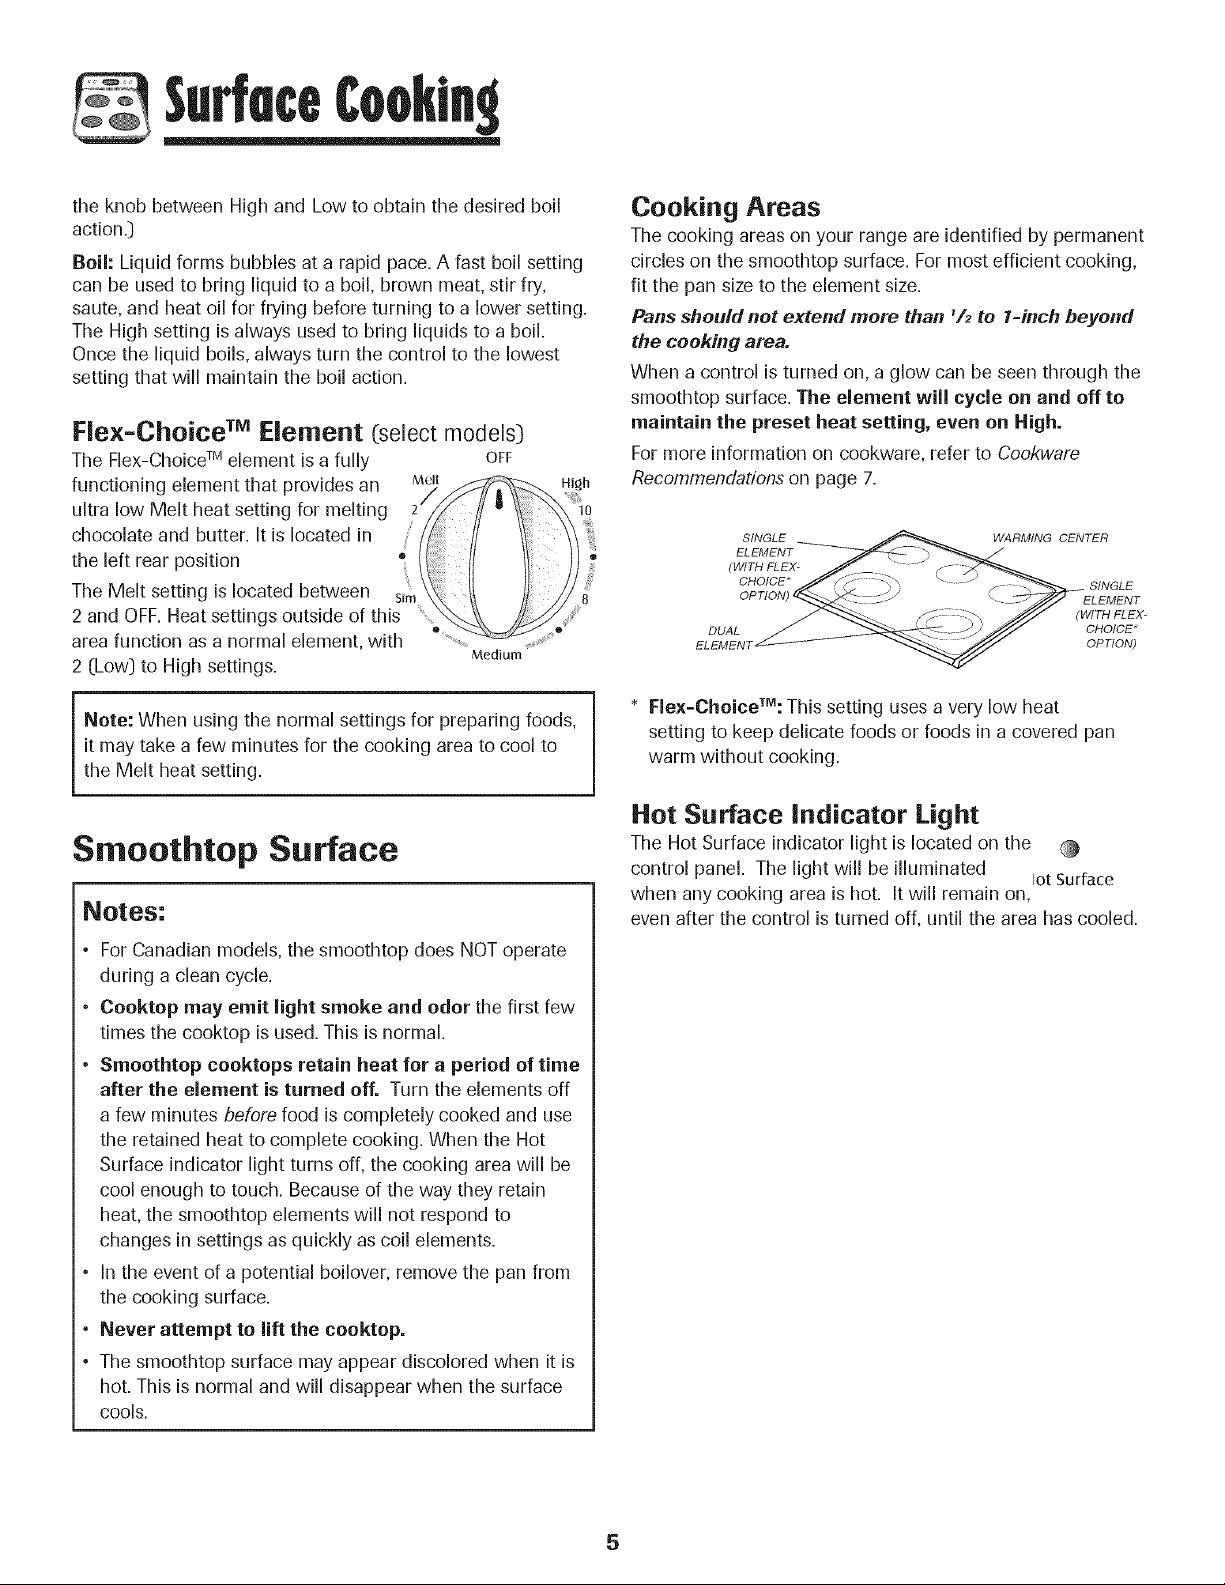
Flex-Choice TMElement (select models:)
The Flex-Choice TM element is a fully OFF
functioning element that provides an Melt
ultra low Melt heat setting for melting
chocolate and butter. It is located in
the left rear position
The Melt setting is located between s_
2 and OFF. Heat settings outside of this \
• ....
area function as a normal element, with
Medium
2 [Low] to High settings.
Note: When using the normal settings for preparing foods,
it may take a few minutes for the cooking area to cool to
the Melt heat setting.
Smoothtop Surface
Notes:
• For Canadian models, the smoothtop does NOT operate
during a clean cycle.
• Cooktop may emit light smoke and odor the first few
times the cooktop is used. This is normal.
• Smoothtop cooktops retain heat for a period of time
after the element is turned off. Turn the elements off
a few minutes before food is completely cooked and use
the retained heat to complete cooking. When the Hot
Surface indicator light turns off, the cooking area will be
cool enough to touch. Because of the way they retain
heat, the smoothtop elements will not respond to
changes in settings as quickly as coil elements.
• In the event of a potential boilover, remove the pan from
the cooking surface.
° Never attempt to lift the cooktop.
° The smoothtop surface may appear discolored when it is
hot. This is normal and will disappear when the surface
cools.
Cooking Areas
The cooking areas on your range are identified by permanent
circles on the smoothtop surface. For most efficient cooking,
fit the pan size to the element size.
Pans should not extend more than _/2to 1-inch beyond
the cooking area.
When a control is turned on, a glow can be seen through the
smoothtop surface. The element will cycle on and off to
maintain the preset heat setting, even on High.
For more information on cookware, refer to Cookware
Recommendations on page 7.
SINGLE
ELEMENT
(WITH FLEX-
CHOICE*
DUAL
WARMING CENTER
SINGLE
ELEMENT
(WITH FLEX-
CHOICE*
OPTION)
* Flex=ChoiceTM:This setting uses a very low heat
setting to keep delicate foods or foods in a covered pan
warm without cooking.
Hot Surface Indicator Light
The Hot Surface indicator light is located on the
control panel. The light will be illuminated
lot Surface
when any cooking area is hot. It will remain on,
even after the control is turned off, until the area has cooled.
5
SufuceCooktn
Warming Center (style may vary by model:)
Use the Warming Center to keep hot cooked foods warm, such
as vegetables, gravies and oven-safe dinner plates.
Setting the Control: %_?[[aCe
Touch the Surface Warming Center pad and f warmn_,
then the Autoset pad. PressAutoset pad again
to turn off.
Notes:
• Never warm food for longer than one hour (eggs for 30
minutes), as food quality may deteriorate.
• Do not heat cold food on the Warming Center.
• Warming temperatures of the food will vary depending on
type and amount of food. Always hold food at proper food
temperatures. USDA recommends food temperatures
between 140°-170° F.
° Use only cookware and dishes recommended as safe for
oven and cooktop use.
• Always use oven mitts when removing food from the
Warming Center as cookware and plates will be hot.
° All foods should be covered with a lid or aluminum foil to
maintain food quality.
• When warming pastries and breads the cover should have
an opening to allow moisture to escape.
° Do not use plastic wrap to cover foods. Plastic may melt
on to the surface and be very difficult to clean.
Tips to Protect the
Smoothtop Surface
Cleaning (see page 20 for more information:)
° Before first use, clean the cooktop.
° Clean your cooktop daily or after each use. This will keep
your cooktop looking good and can prevent damage.
• If a spillover occurs while cooking, immediately clean the
spill from the cooking area while it is hot to prevent a tough
cleaning chore later. Using extreme care, wipe spill with a
clean dry towel.
° Do not allow spills to remain on the cooking area or the
cooktop trim for a long period of time.
• Never use abrasive cleansing powders or scouring pads
which will scratch the cooktop.
° Never use chlorine bleach, ammonia or other cleansers not
specifically recommended for use on glass-ceramic.
To Prevent Marks & Scratches
• Do not use glass pans. They may scratch the surface.
° Never place a trivet or wok ring between the surface and
pan. These items can mark or etch the top.
• Do not slide aluminum pans across a hot surface. The pans
may leave marks which need to be removed promptly. (See
Cleaning, page 20.)
• Make sure the surface and the pan bottom are clean before
turning on to prevent scratches.
° To prevent scratching or damage to the glass-ceramic top,
do not leave sugar, salt or fats on the cooking area. Wipe
the cooktop surface with a clean cloth or paper towel
before using.
° Never slide heavy metal pans across the surface since
these may scratch.
To Prevent Stains
• Never use a soiled dish cloth or sponge to clean the
cooktop surface. A film will remain which may cause stains
on the cooking surface after the area is heated.
• Continuously cooking on a soiled surface may/will result in
a permanent stain.
To Prevent Other Damage
• Do net allow plastic, sugar or foods with high sugar
content to melt onto the hot cooktop. Should this happen,
clean immediately. (See Cleaning, page 20.)
° Never let a pan boil dry as this will damage the surface and
pan.
° Never use cooktop as a work surface or cutting board.
° Never cook food directly on the surface.
• Do net use a small pan on a large element. Not only does
this waste energy, but it can also result in spillovers burning
onto the cooking area which requires extra cleaning.
° Do not use non-fiat specialty items that are oversized or
uneven such as round bottom woks, rippled bottom and/or
oversized canners and griddles.
° Do not use foil or foil-type containers. Foil may melt onto
the glass. If metal melts on the cooktop, do not use. Call an
authorized Maytag Servicer.
¢ooktn
Cookware Recommendations
Using the right cookware can prevent many problems, such
as food taking longer to cook or achieving inconsistent
results. Proper pans will reduce cooking times, use less
energy, and cook food more evenly.
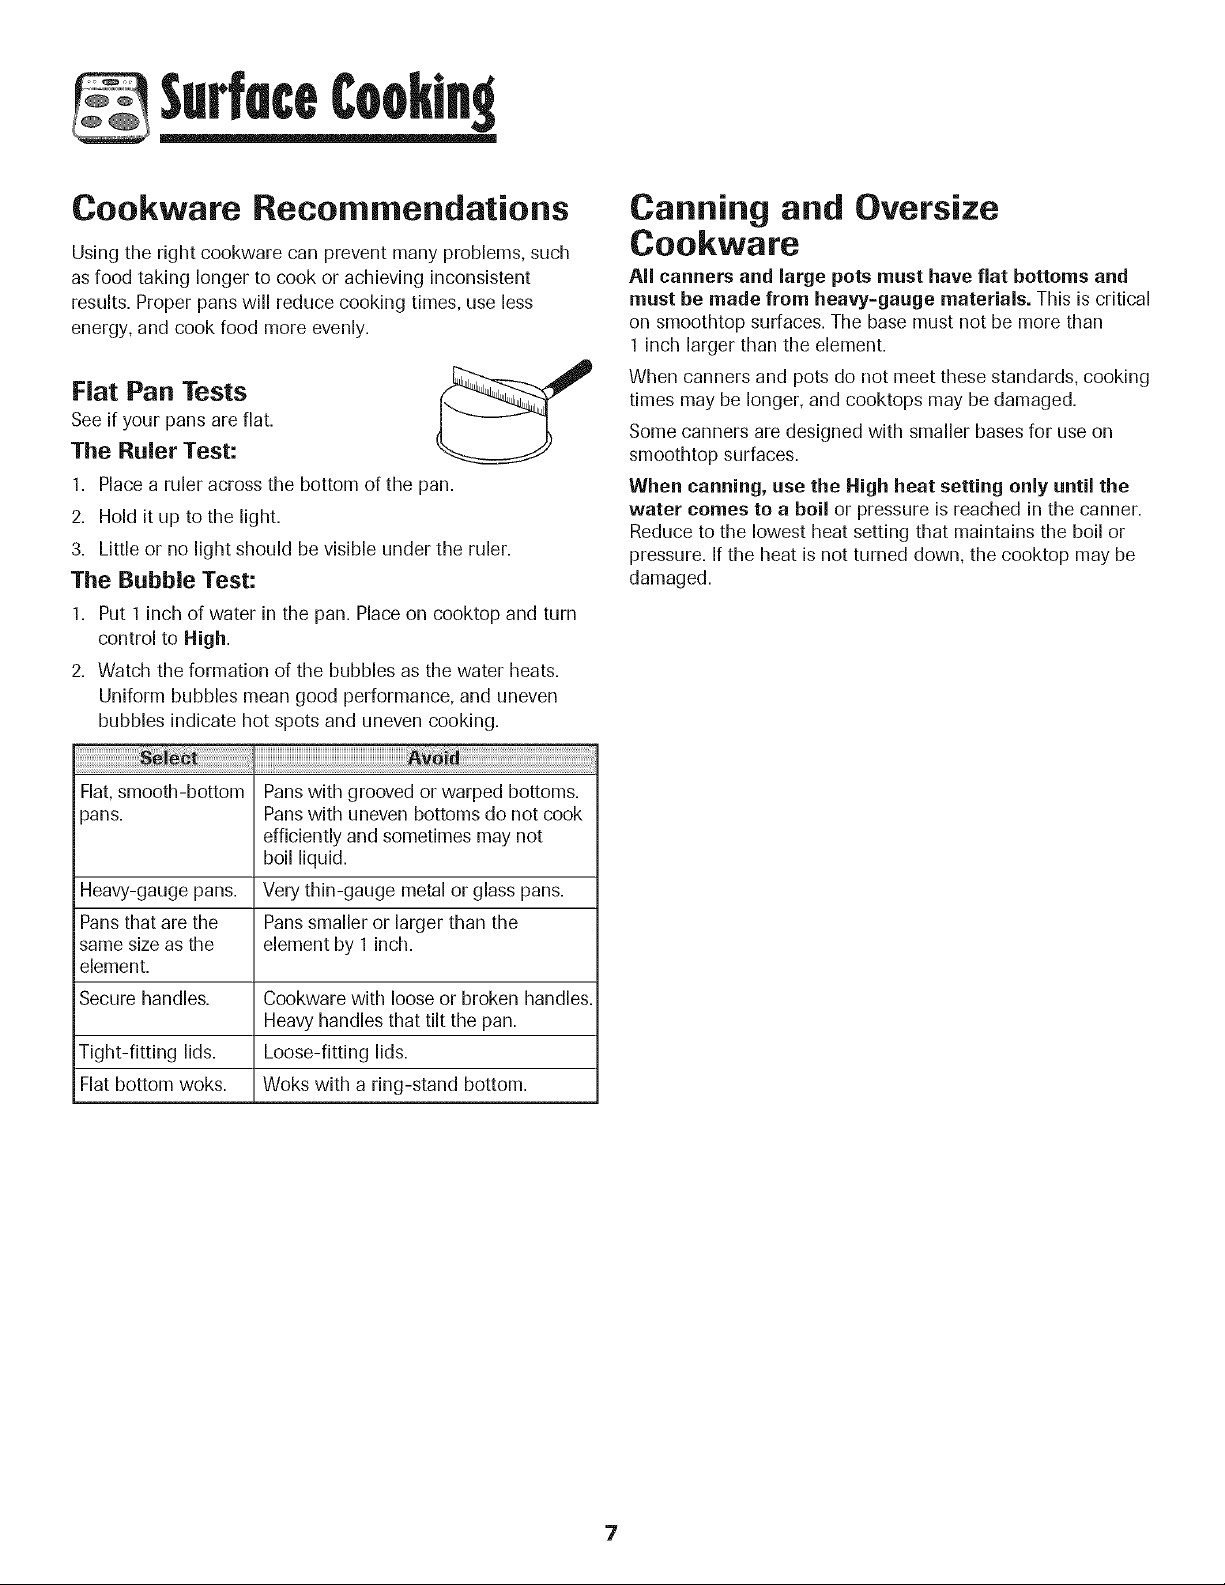
Fiat Pan Tests
See if your pans are flat.
The Ruler Test:
1. Place a ruler across tile bottom of the pan.
2. Hold it up to the light.
3. Little or no light should be visible under the ruler.
The Bubble Test:
1. Put 1 inch of water in the pan. Place on cooktop and turn
control to High.
2. Watch the formation of the bubbles as the water heats.
Uniform bubbles mean good performance, and uneven
bubbles indicate hot spots and uneven cooking.
Flat, smooth-bottom Panswith grooved or warped bottoms.
)ans. Panswith uneven bottoms do not cook
efficiently and sometimes may not
boil liquid.
Heavy-gauge pans. Very thin-gauge metal or glass pans.
Pans that are the Pans smaller or larger than the
same size as the element by 1 inch.
element.
Secure handles. Cookware with loose or broken handles.
Heavy handles that tilt the pan.
Tight-fitting lids. Loose-fitting lids.
Flat bottom woks. Woks with a ring-stand bottom.
Canning and Oversize
Cookware
All canners and large pots must have fiat bottoms and
must be made from heavy-gauge materials. This is critical
on smoothtop surfaces. The base must not be more than
1 inch larger than the element.
When canners and pots do not meet these standards, cooking
times may be longer, and cooktops may be damaged.
Some canners are designed with smaller bases for use on
smoothtop surfaces.
When canning, use the High heat setting only until the
water comes to a boil or pressure is reached in the canner.
Reduce to the lowest heat setting that maintains the boil or
pressure. If the heat is not turned down, the cooktop may be
damaged.

Control Panel
AB C D
Warm S
Clean ...........
Broil
.......... Clean
Ba__ ...............(B,o,i ...............
\ ........ ......... ,
( Bake , .............. Warn?/
' / / ConvecP ......
....... Roast,
, ..... .... Lower
!"C°n!e'!_ I Oven
G Hi
_i_l_ :_i_®_¸'¸' 'i_,_il_!_iii/__¸
........ II !iiiiiill
K L M
N 0 P Q
The control panel is designed for ease in programming. The displaywindow on the control shows time of day, timer and oven functions.
Control panel shown includes model specific features. (Styling may vary depending on model.:)
iiiiiCil;;iiiiiii
iiE:i;i;i;iiii!iil
iJii_ililililililili
Bake
Broil
Clean
Keep Warm
Toast
Number Pads
CANCEL
Convect Bake
Convect Roast
Timer 1 or 2
Clock
Cook & Hold
Delay
Oven Light
Favorite
Autoset
Surface
Warming Center
Use for baking and roasting.
Use for broiling and top browning.
Use to set self-clean cycle.
Use to keep cooked food warm in oven.
Use for toasting bread and products
toasted in toaster or toaster oven.
Use to set time and temperature.
Cancels all operations except timer,
clock and Surface Warming Center.
Use for convection baking.
Use for convection roasting.
Sets the timer.
Use to set time-of-day clock.
Bakes for a preset time, then keeps
food warm for 1 hour.
Programs the oven to start baking or
cleaning at a later time.
Use to turn the oven lights on or off.
Use to set and save a specific Cook &
Hold procedure.
Use to quickly set temperatures.
Useto keep foods warm on the cooktop
for serving.
Using the Touchpads
• Pressthe desired pad.
• Pressthe number pads to enter time or temperature.
• Or, press the Autoset pad to enter temperature.
• A beep will sound when any pad is touched.
• A double beep will sound if a programming error occurs.
Important: Four seconds after entering the time or
temperature it will automatically be entered. If more than 30
seconds elapse between touching a function pad and the
number pads, the function will be canceled and the display
will return to the previous display.
Clock
The clock can be set to display time in a 12-hour or 24-hour
format. The clock is set at the factory for the 12-hour format.
To change the clock to 24-hour format:
1. Pressand hold the upper CANCEL pad and _._
Favorite pad for three seconds. F=_LANLkL)
• 12 HFflashes in the display. [ --_
2. PresstheAutoset pad toselect24 Hr;pressL_, e"i"#_ ......
again to select 12 Hr. ...................._/
3. Set the time of day following the directions in
the To set the Clock section.
To set the Clock:
1. Pressthe Clock pad.
• The time of day flashes in the display.
• Colon flashes in the display.
2. Pressthe appropriate number pads to set the time of day.
3. Pressthe Clock pad again or wait four seconds.
• The colon will remain on.
When electrical power is supplied or after a power
interruption, the last clock time before power was interrupted
will flash.
To recall the time of day when another time function is
showing, press the Clock pad.
8
To cancel the Clock display:
If you do not want the time of day to display:
Press and hold the upper oven CANCEL and
Clock pads for three seconds. The time of day
will disappear from the display.
When the clock display is canceled, press the
Clock pad to briefly display the time of day.
To restore the Clock display:
Press and hold the upper oven CANCEL and Clock pads for
three seconds. The time of day will reappear in the display.
Timer
Each timer can be set from one minute (00:01) up to 99 hours
and 59 seconds (99:59].
The timers can be used independently of any other oven
activity. They can also be set while another oven function is
operating.
The Timers do not control the oven.
To set the Timer 1 or 2:
1. Press the Timer 1 or 2 pad.
• 00:00 and TIMER 1 or 2 flash in the display.
2. Press the appropriate number pads until the correct time
appears in the display.
• The colon and TIMER 1or 2 will continue to flash.
• TIMER 1 or TIMER 2 will be displayed. If both timers are
active, TIMER 1 and TIMER 2 will be displayed.
3. PressTimer pad again or wait four seconds.
° The colon stops flashing and the time begins counting
down.
• The last minute of the timer countdown will be displayed
in seconds.
4. At the end of the set time, one long beep will sound and
"End" will be displayed.
5. Press the Timer pad to clear the display.
To cancel the Timer:
1. Press and hold tile corresponding Timer pad
for three seconds.
OR
2. Press the Timer pad and press '0' using
the number pads.
0
Locking the Control
and Oven Doors
The touchpad and oven doors car/be locked for safety,
cleaning, or to prevent unwanted use. The touchpads will not
function when locked.
If an oven is currently in use, the touchpads and doors cannot
be locked.
The current time of day will remain in the display when the
touchpads and doors are locked.
To lock both doors:
1. Pressand release CANCEL pad.
2. Pressand hold the upper oven CANCEL and
Cook & Hold pads for three seconds.
• OFFappears in the display
° LOCK flashes while the doors are locking.
Both oven doors lock. LOCK remains in the display.
To unlock both doors:
Press and hold tile upper oven CANCEL and Cook & Hold
pads for three seconds. OFFdisappears from the display and
LOCK flashes while the doors are unlocking.
Important: The touchpads and oven doors cannot be locked
if the oven temperature is 400° F or above.
Fault Codes
BAKE or LOCK may flash rapidly in tile display to alert you if
there is an error or a problem. If BAKE or LOCK flash in the
display, press CANCEL pad. If BAKE or LOCK continue to
flash, disconnect power to the appliance. Wait a few minutes,
and then reconnect power. If the flashing still continues,
disconnect power to the appliance and call an authorized
servicer.
Adjusting Sound Level
The factory default setting for sound is medium (MEd), but it
can be changed to low (LO) or high (HI). To change the
setting:
1. Pressand hold Delay and upper oven CANCEL pads for
three seconds. A beep will sound. "bEEP" and the current
sound level CLO", "MEd" or "HI") will appear in the
display.
2. Pressthe Autoset pad to increaseor decrease the sound
level.
3. Wait four seconds and the new setting will be accepted.
4. If the Autoset pad is not pressed within 30 seconds, the
control will return to the existing setting.
Changing Temp °F/°C
The factory default setting for temperature is Fahrenheit. To
change the setting:
1. Pressand hold the upper oven Bake and CANCEL pads
for three seconds. A beep will sound and the current
setting (°F or °C) will appear in the display.
9
2. Press the Autoset pad to change the setting between °F
and °C.
3. Wait four seconds and the new setting will be accepted.
4. If the Autoset pad is not pressed within 30 seconds, the
control will return to the existing setting.
Return To Factory Default
Settings
Tile control car/be reset to tile factory default settings. To
return to the default settings:
1. Press and hold upper oven Keep Warm and CANCEL
pads for three seconds. A single beep will sound and 12:00
will appear in the display.
2. Reset the clock to the current time of day.
Setting Oven Functions
Auto Set Pad
Use with function pads to automatically set:
• 350° F bake temperature
• HI or LO broil
• three hours of cleaning time
• four minutes of toasting time
• 170° F keep warm temperature
Baking
To set Bake:
1. Press the Bake pad for desired oven.
• BAKE and 000 will flash in the display.
2. Select the oven temperature Press the Autoset/_""_ ""?
o " , , AU][OSeT
pad for 350 F or the appropriate number pans. ...... /
• Each additional press of the Autoset pad will increase
the temperature by 25°.
• The oven temperature can be set from 170° to 550°.
3. Press Bake pad again or wait four seconds.
• BAKEwill stop flashing and light in the display.
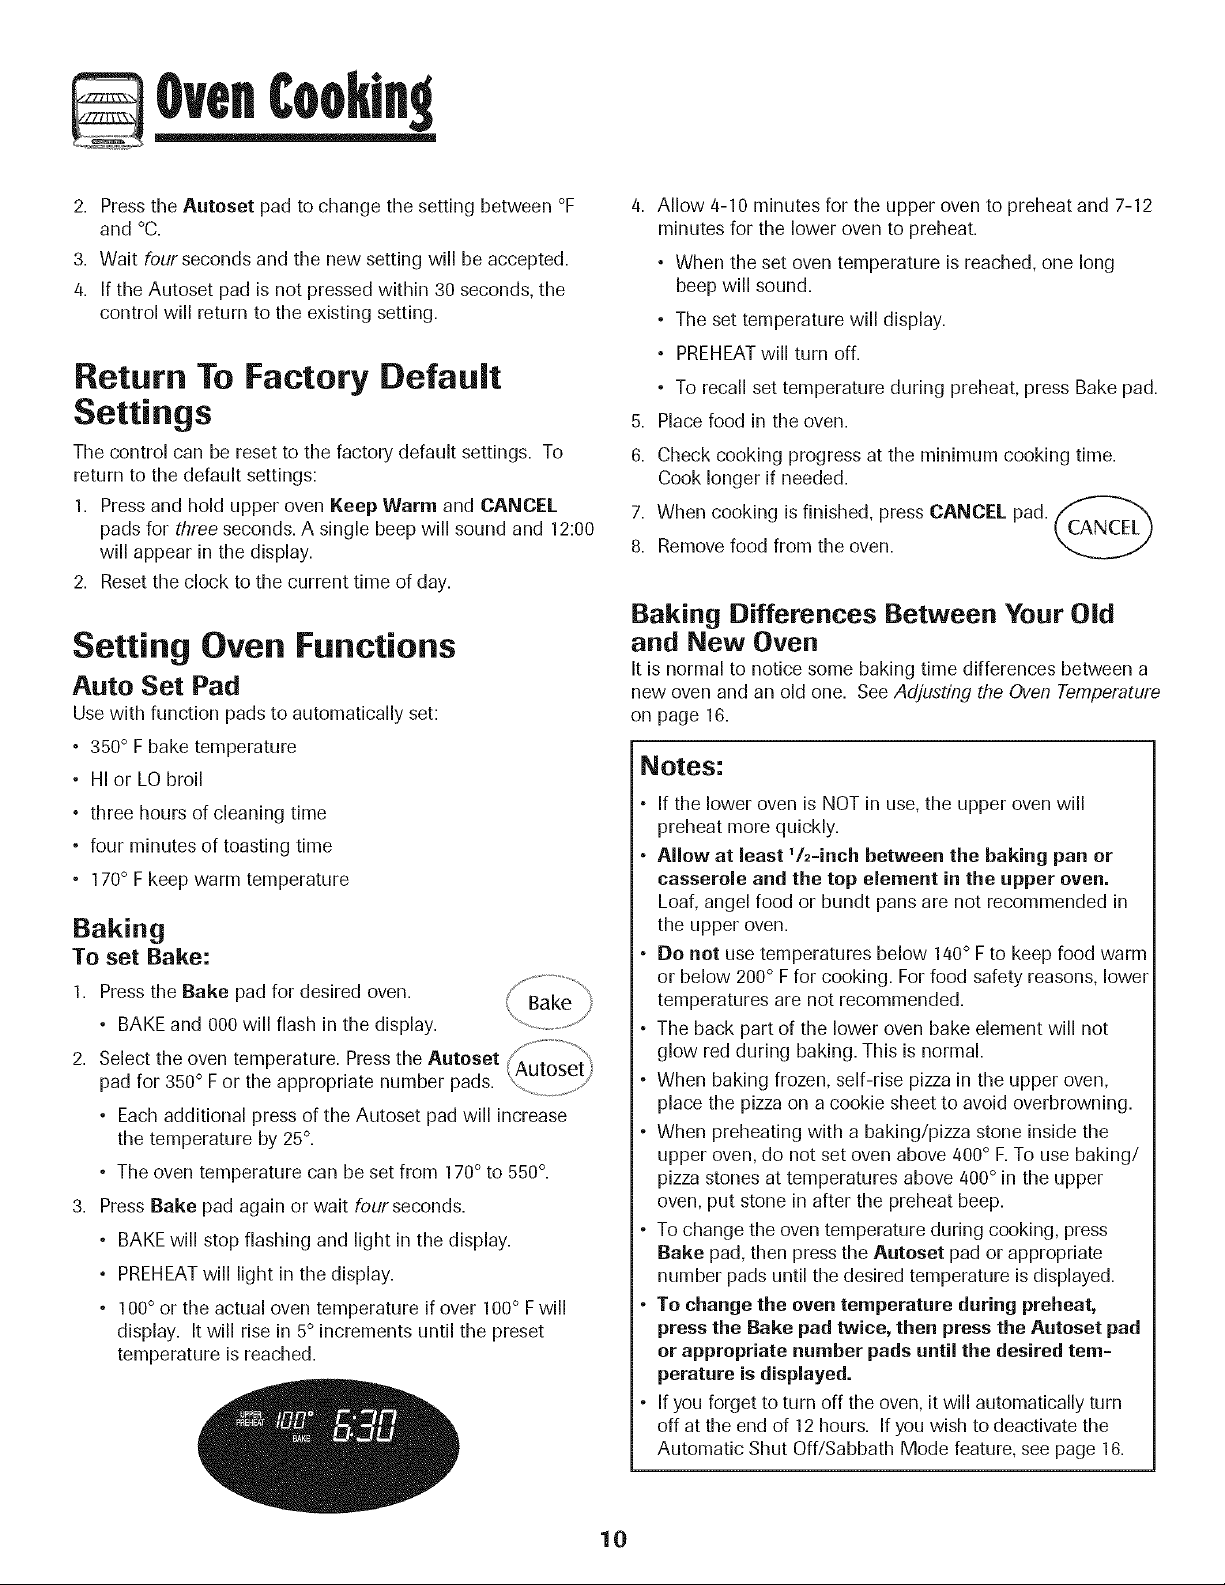
• PREHEATwill light in the display.
• 100° or the actual oven temperature if over 100° F will
display. It will rise in 5° increments until the preset
temperature is reached.
4. Allow 4-10 minutes for the upper oven to preheat and 7-12
minutes for the lower oven to preheat.
• When the set oven temperature is reached, one long
beep will sound.
• The set temperature will display.
• PREHEATwill turn off.
• To recall set temperature during preheat, press Bake pad.
5. Place food in the oven.
6. Check cooking progress at the minimum cooking time.
Cook longer if needed.
7. When cooking is finished, press CANCEL pad. _'_l'_"_
8. Remove food from the oven.
Baking Differences Between Your Old
and New Oven
It is normal to notice some baking time differences between a
new oven and an old one. See Adjusting the Oven Temperature
on page 16.
Notes:
If the lower oven is NOT in use, the upper oven will
preheat more quickly,
Allow at least V2-inch between the baking pan or
casserole and the top element in the upper oven.
Loaf, angel food or bundt pans are not recommended in
the upper oven.
Be not use temperatures below 140° F to keep food warm
or below 200° F for cooking. For food safety reasons, lower
temperatures are not recommended.
The back part of the lower oven bake element will not
glow red during baking. This is normal.
When baking frozen, self-rise pizza in the upper oven,
place the pizza on a cookie sheet to avoid overbrowning.
When preheating with a baking/pizza stone inside the
upper oven, do not set oven above 400° F.To use baking/
pizza stones at temperatures above 400° in the upper
oven, put stone in after the preheat beep.
To change the oven temperature during cooking, press
Bake pad, then press the Autoset pad or appropriate
number pads until the desired temperature is displayed.
To change the oven temperature during preheat,
press the Bake pad twice, then press the Autoset pad
or appropriate number pads until the desired tern-
perature is displayed.
If you forget to turn off tile oven, it will automatically turn
off at the end of 12 hours. If you wish to deactivate the
Automatic Shut Off/Sabbath Mode feature, see page 16.
10
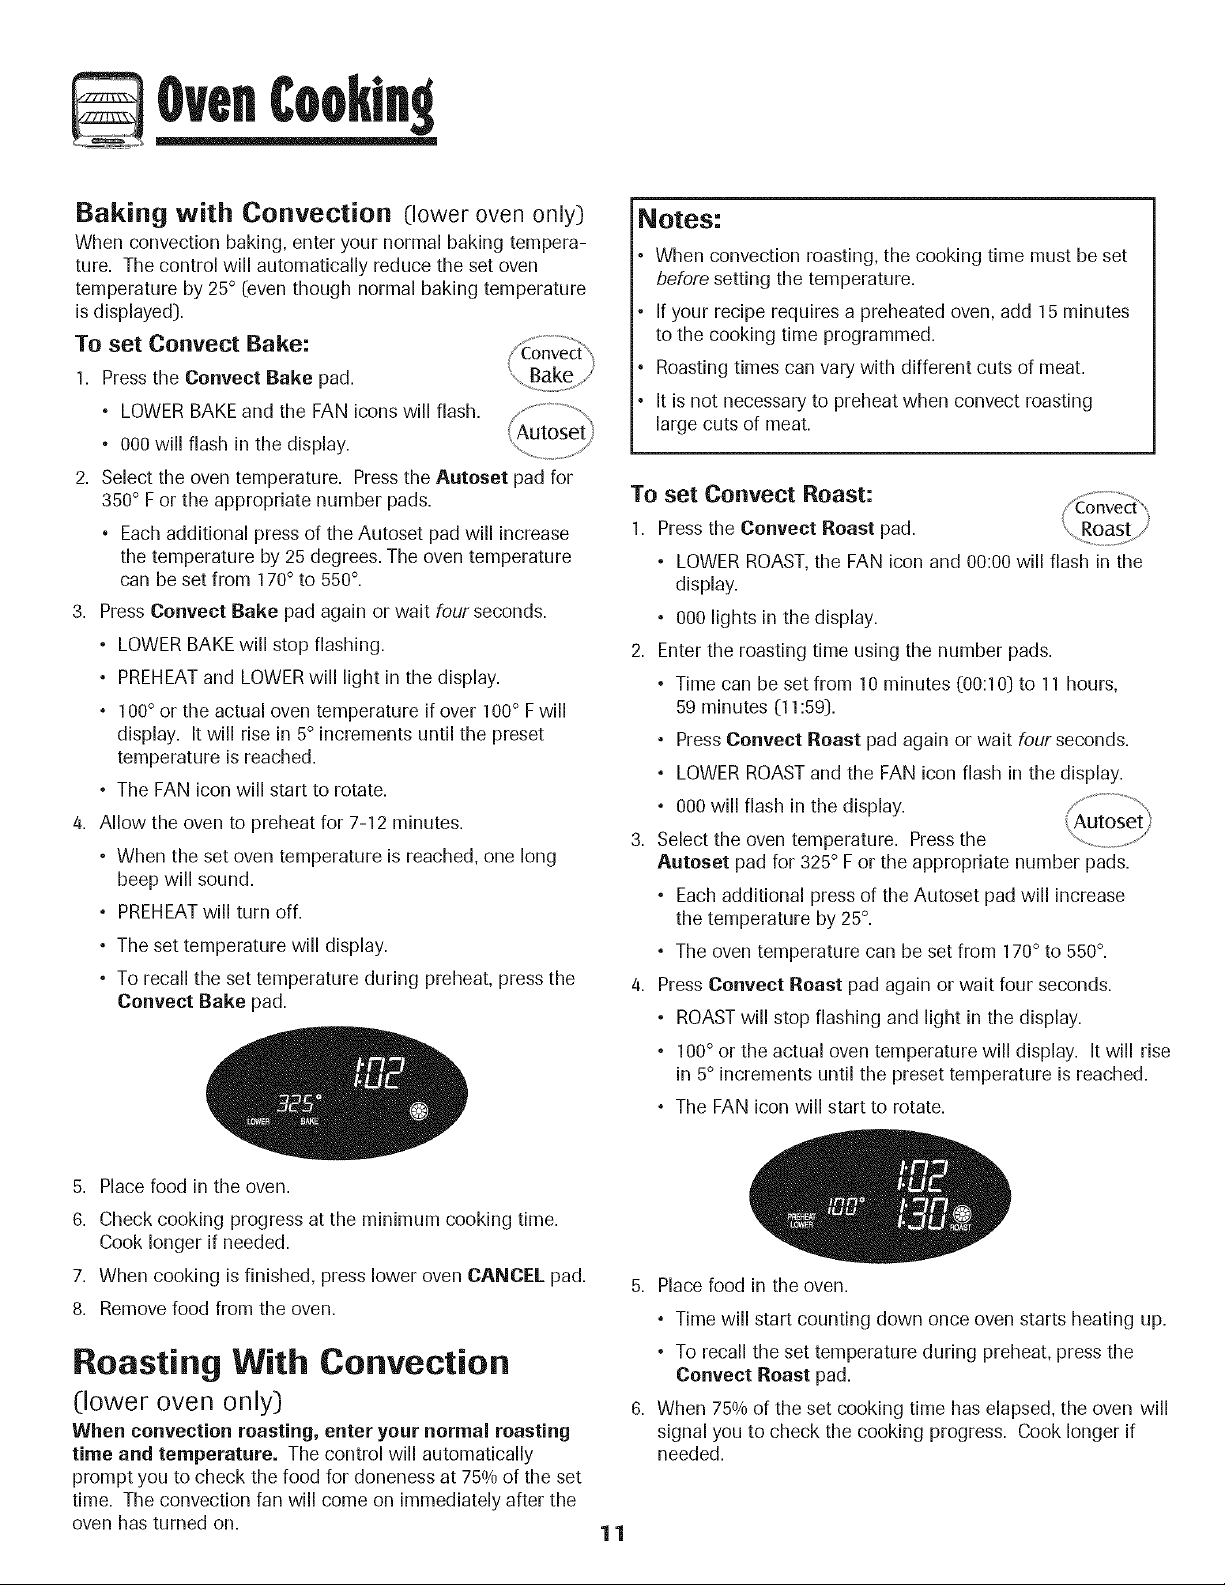
Baking with Convection (loweroven only)
When convectionbaking,enteryournormalbakingtempera-
ture.The controlwillautomaticallyreducethesetoven
temperatureby 25°[eventhoughnormalbakingtemperature
isdisplayed).
To set Convect Bake:
I. PresstileConvect Bake pad.
• LOWER BAKE and the FAN iconswillflash.
• 000willflashinthedisplay.
2. Selecttheoventemperature.PresstheAutoset pad for
350°F or theappropriatenumber pads.
• Each additionalpressoftheAutosetpad willincrease
thetemperatureby 25 degrees.The oven temperature
can be set from 170° to 550°.
3. Press Convect Bake pad again or wait four seconds.
• LOWERBAKE will stop flashing.
° PREHEATand LOWER will light in the display.
° 100° or the actual oven temperature if over 100° F will
display. It will rise in 5° increments until the preset
temperature is reached.
• The FAN icon will start to rotate.
4. Allow the oven to preheat for 7-12 minutes.
• When the set oven temperature is reached, one long
beep will sound.
° PREHEATwill turn off.
° The set temperature will display.
• To recall the set temperature during preheat, press the
Convect Bake pad.
Notes:
When convection roasting, tile cooking time must be set
before setting the temperature.
If your recipe requires a preheated oven, add 15 minutes
to the cooking time programmed.
Roasting times can vary with different cuts of meat.
It is not necessary to preheat when convect roasting
large cuts of meat.
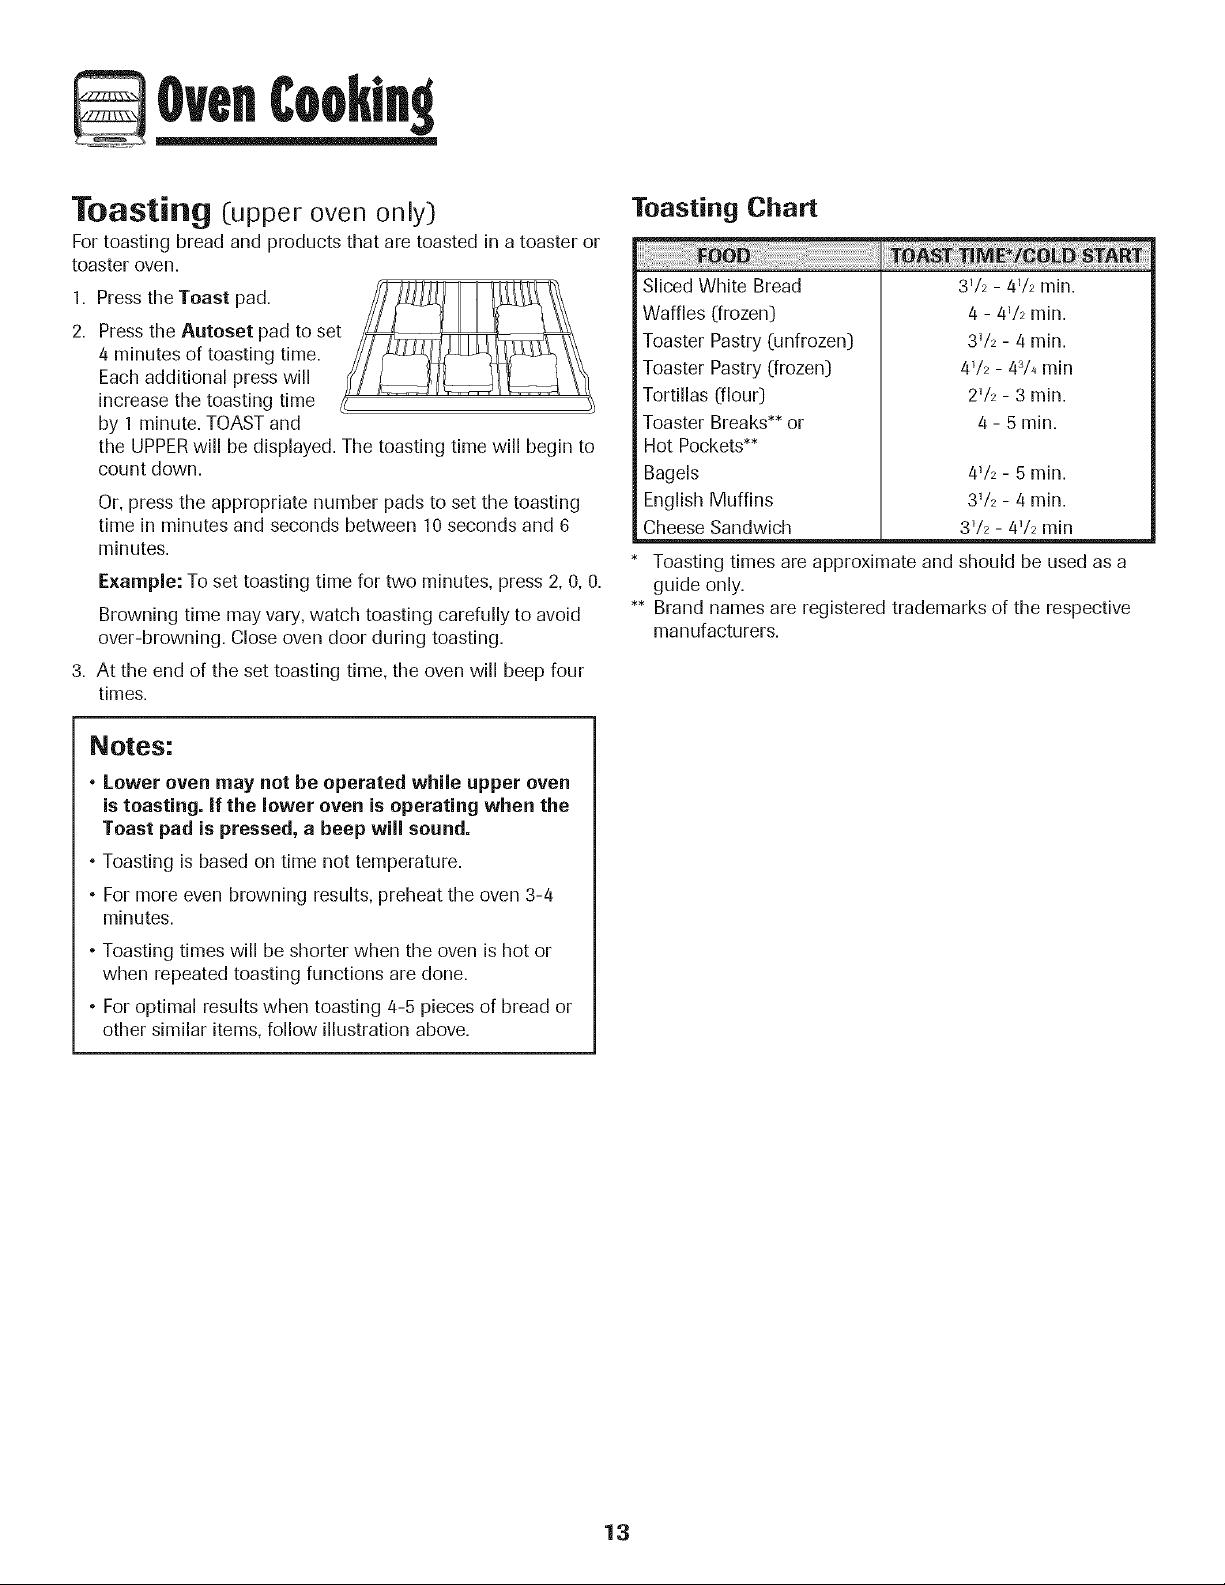
To set Convect Roast:
1. Presstile Convect Roast pad.
• LOWERROAST,the FAN icon and 00:00 will flash in the
display.
• 000 lights in the display.
2. Enter the roasting time using the number pads.
• Time can be set from 10 minutes [00:10) to 11 hours,
59 minutes [11:59).
° Press Convect Roast pad again or wait four seconds.
° LOWERROASTand the FAN icon flash in the display.
° 000 will flash in the display.
3. Select the oven temperature. Press the
Autoset pad for 325° F or the appropriate number pads.
• Each additional press of the Autoset pad will increase
the temperature by 25°.
° The oven temperature can be set from 170° to 550°.
4. Press Convect Roast pad again or wait four seconds.
• ROASTwill stop flashing and light in the display.
• 100° or the actual oven temperature will display. It will rise
in 5° increments until the preset temperature is reached.
° The FAN icon will start to rotate.
5. Place food inthe oven.
6. Check cooking progress at the minimum cooking time.
Cook longer if needed.
7. When cooking is finished, press lower oven CANCEL pad.
8. Remove food from the oven.
Roasting With Convection
(lower oven only:)
When convection roasting, enter your normal roasting
time and temperature. The control will automatically
prompt you to check the food for doneness at 750/0of the set
time. The convection fan will come on immediately after the
oven has turned on.
5. Place food in the oven.
° Time will start counting down once oven starts heating up.
• To recall the set temperature during preheat, press the
Convect Roast pad.
6. When 750/0of the set cooking time has elapsed, the oven will
signal you to check the cooking progress. Cook longer if
needed.
11

• The oven light will remain on until the Oven Light pad
is pressed.
• Press any pad to recall the cook time remaining.
7. When cooking is finished, press CANCEL pad.
8. Remove food from the oven.
Cook & Hold
When using the Cook & Hold feature, the oven begins to heat
immediately after the control has been set. Then, the oven
cooks for a specified length of time. When that time has
elapsed, the oven will keep the food warm for up to one hour
then automatically turn off.
To set Cook & Hold:
1. Press the Cook & Hold pad once for upper oven
or twice for lower oven ....................
• HOLD will flash to indicate that you are in
Cook & Hold programming.
• 00:00 and either UPPERor LOWERwill flash in the display.
2. Select the amount of time you want to cook by using the
number pads.
• HOLD continues to flash.
° The time will light in the display.
• Time can be set from 00:10 to 11:59.
/j .................
3. Press Bake (upper and lower ovens), Convect ,_
Bake or Convect Roast (lower oven only:) and t Bake
select the oven temperature. Press the Autoset _ ..........................,
pad for 350° F or the appropriate number pads. (Autoset
° The desired function, 000 and either UPPER "" '/
or LOWERwill flash.
• The oven temperature can be set from 170° Fto 550° F.
4. Press the desired function pad again OR wait four seconds.
° The desired function will remain lit.
° The cooking time will show in the display.
• PREHEATwill show in the display.
• The actual oven temperature will be displayed
during preheat.
° The set temperature will display when the oven is
preheated.
When the cooking time has elapsed:
• Four beeps will sound.
° WARM and HOLD will light.
• 170° appears in the display.
After one hour in WARM HOLD:
• Tile oven turns off automatically.
° Press CANCEL pad and remove food from the oven.
To cancel Cook & Hold at any time: CA__L
Press the CANCEL pad. Remove food from oven.
Delay Cook & Hold
When using Delay, the oven begins to cook later in the day.
Set the amount of time that you want to delay before the oven
turns on and how long you want to cook. The oven begins to
heat at the selected time and cooks for the specified length of
time, then keeps food warm for one hour.
Delay time can be set from 10 minutes (00:10) to 11 hours, 59
minutes (11:59).
To set a Delayed Cook & Hold cycle:
1. Pressthe Delay pad once to program the upper
oven or twice to program the lower oven.
• DELAY flashes in the display.
° 00:00 and either UPPERor LOWER flash in the display.
2. Using the appropriate number pads, enter the amount of
time you want to delay the start of the Cook & Hold cycle.
3. Pressthe Cook & Hold pad.
• HOLD and DELAY flash in the display.
° 00:00 and either UPPERor LOWER flash.
4. Enter the amount of time you want to cook using the
number pads.
5. Press Bake (upper and lower ovens), Convect Bake or
Convect Roast (lower oven only).
6. Set the oven temperature desired by pressing the Autoset
pad or the appropriate number pads.
° 350° will light when Autoset is pressed.
• After four seconds, the entered delay time
will appear in the display.
• BAKE and DELAY remain lit to remind you that
a delayed Cook & Hold function has been programmed.
Important:
° Do not use Delayed Cook & Hold for items that require a
preheated oven, such as cakes, cookies, and breads.
• Do not use Delayed Cook & Hold if oven is already hot.
12
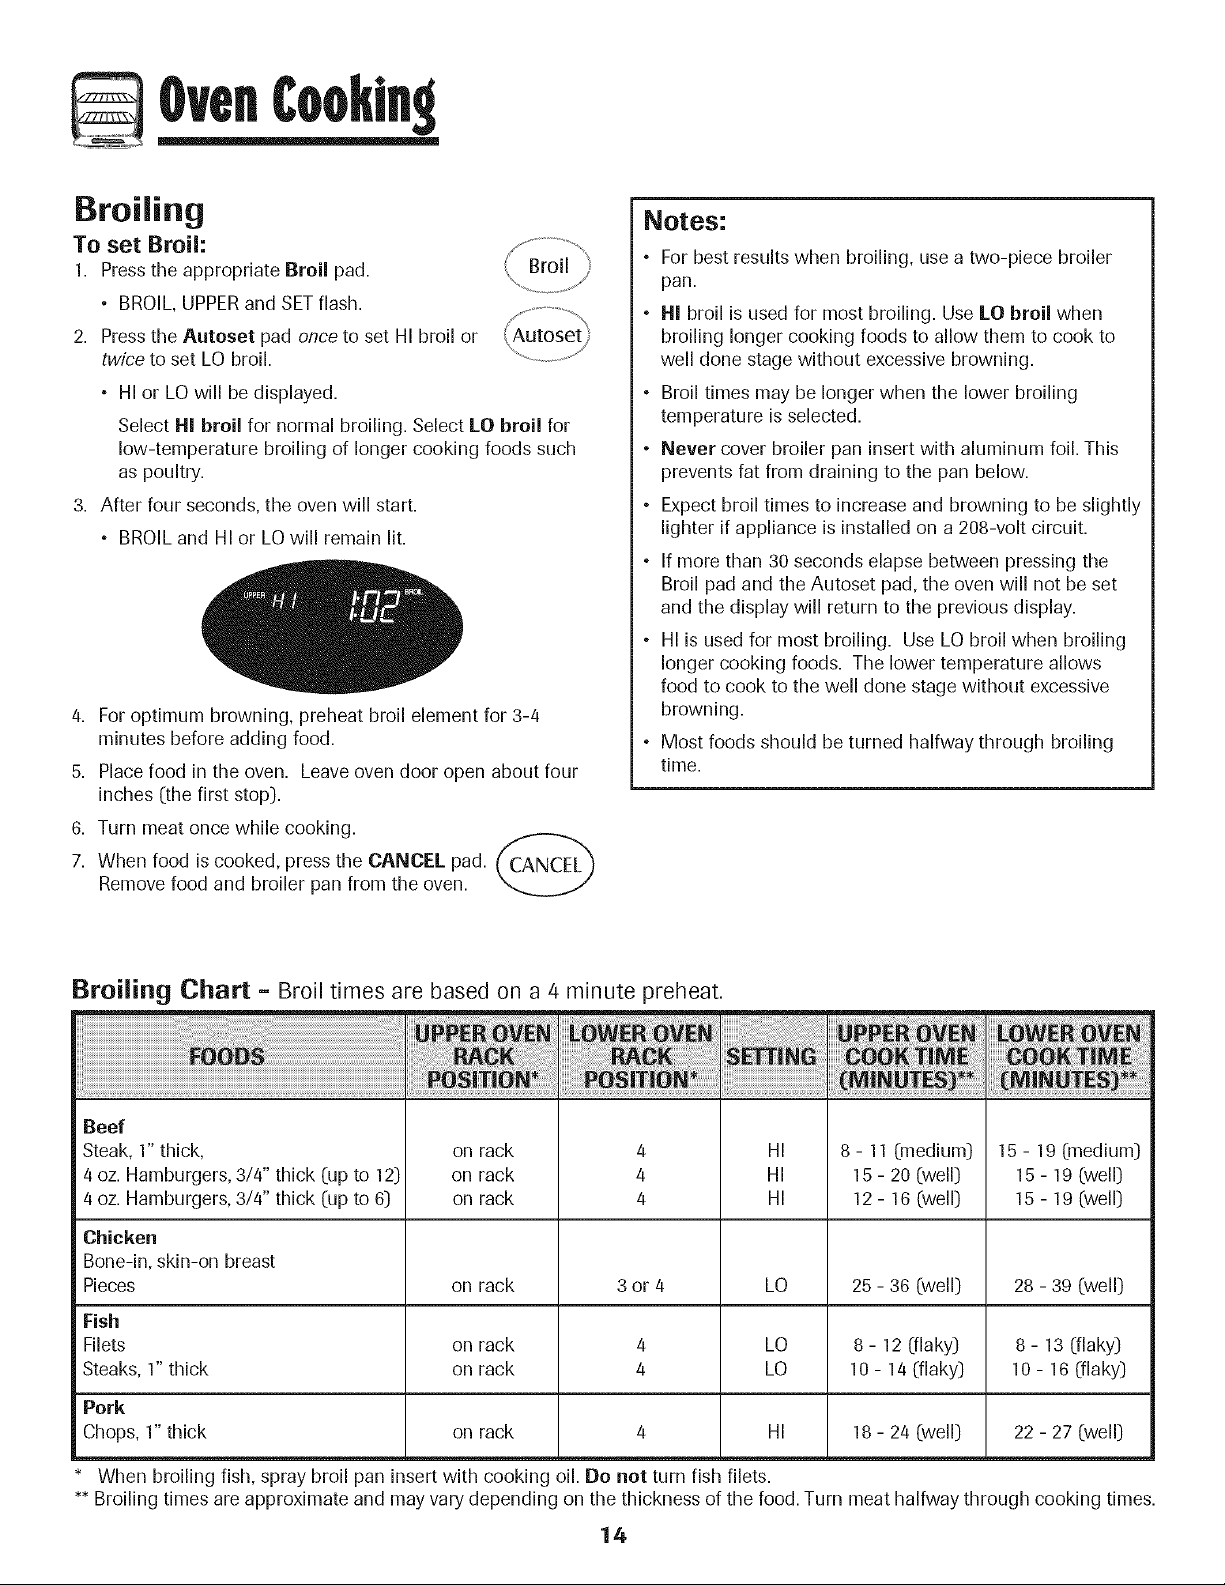
TosstiBg (upper oven only)
For toasting bread and products that are toasted in a toaster or
toaster oven.
1. Press the Toast pad.
2. Press the Autoset pad to set /_\
4 minutes of toasting time. /// ___ \\\
Each additional press will ((/ _'//_[/_ '\_
increase the toasting time (_ ............... '_
by 1 minute. TOASTand
the UPPERwill be displayed. The toasting time will begin to
count down.
Or, press the appropriate number pads to set the toasting
time in minutes and seconds between 10 seconds and 6
minutes.
Example: To set toasting time for two minutes, press 2, 0, 0.
Browning time may vary, watch toasting carefully to avoid
over-browning. Close oven door during toasting.
3. At the end of the set toasting time, the oven will beep four
times.
Notes:
• Lower oven may not be operated while upper oven
is toasting, if the lower oven is operating when the
Toast pad is pressed, a beep will sound.
• Toasting is based on time not temperature.
• For more even browning results, preheat the oven 3-4
minutes.
• Toasting times will be shorter when the oven is hot or
when repeated toasting functions are done.
° For optimal results when toasting 4-5 pieces of bread or
other similar items, follow illustration above.
Toasting Chart
Sliced White Bread
Waffles (frozen:)
Toaster Pastry (unfrozen:)
Toaster Pastry (frozen:)
Tortillas (flour:)
Toaster Breaks** or
Hot Pockets**
Bagels
English Muffins
Cheese Sandwich
31/2 - 41/2 min.
4 - 4V2min.
31/2 - 4 min.
41/2 - 43/4 min
2V2- 3 rain.
4 - 5 min.
4V2- 5 min.
31/2 - 4 min.
31/2 - 41/2 min
* Toasting times are approximate and should be used as a
guide only.
** Brand names are registered trademarks of the respective
manufacturers.
13
Broiling
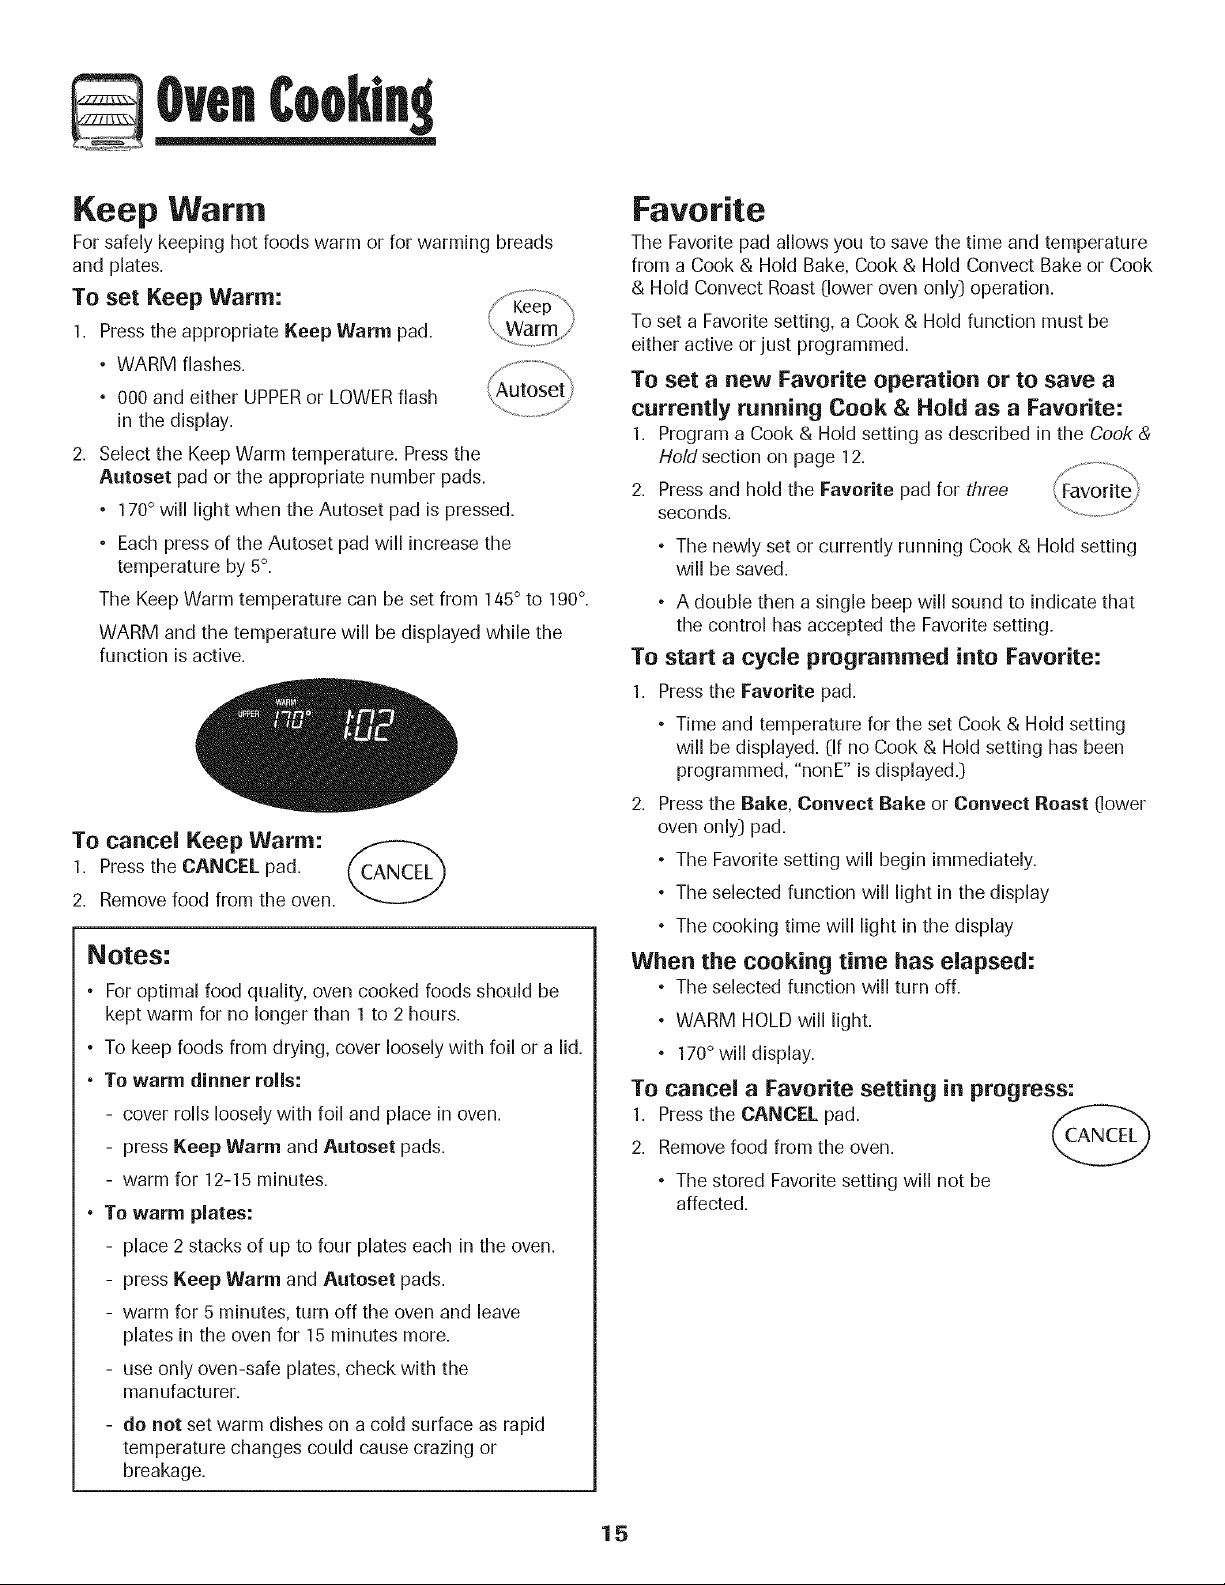
To set Broil:
1. Press the appropriate Broil pad.
• BROIL, UPPERand SET flash.
2. Press the Autoset pad once to set HI broil or
twice to set LO broil.
• HI or LO will be displayed.
Select HI broil for normal broiling. Select LO broil for
low-temperature broiling of longer cooking foods such
as poultry.
3. After four seconds, the oven will start.
• BROIL and HI or LO will remain lit.
4. For optimum browning, preheat broil element for 3-4
minutes before adding food.
5. Place food in the oven. Leave oven door open about four
inches (the first stop].
6. Turn meat once while cooking.
7. When food is cooked, press the CANCEL pad. _CANCEL_
Remove food and broiler pan from the oven.
Notes:
• For best results when broiling, use a two-piece broiler
pan.
• HI broil is used for most broiling. Use LO broil when
broiling longer cooking foods to allow them to cook to
well done stage without excessive browning.
• Broil times may be longer when the lower broiling
temperature is selected.
• Never cover broiler pan insertwith aluminum foil. This
prevents fat from draining to the pan below.
• Expect broil times to increaseand browning to be slightly
lighter if appliance is installedon a 208-volt circuit.
• If more than 30 seconds elapse between pressing the
Broil pad and the Autoset pad, the oven will not be set
and the display will return to the previous display.
• HI is used for most broiling. Use LO broil when broiling
longer cooking foods. The lower temperature allows
food to cook to the well done stage without excessive
browning.
° Most foods should be turned halfway through broiling
time.
Broiling Chart = Broil times are based on a 4 minute preheat.
Beef
Steak, 1" thick,
4 oz. Hamburgers, 3/4" thick (up to 12)
4 oz. Hamburgers, 3/4" thick (up to 6]
Chicken
Bone-in, skin-on breast
Pieces
Fish
Filets
Steaks, 1" thick
Pork
on rack
on rack
on rack
on rack
on rack
on rack
4
4
4
3or4
4
4
HI
HI
HI
LO
LO
LO
8 - 11 [medium]
15 - 20 (well)
12 - 16 (well)
25 - 36 [well)
8 - 12 [flaky]
10- 14 [flaky]
15 - 19 [medium]
15 - 19 (well)
15 - 19 (well)
28 - 39 (well)
8 - 13 [flaky]
10- 16 [flaky]
Chops, 1" thick on rack 4 HI 18 - 24 (well) 22 - 27 (well)
When broiling fish, spray broil pan insert with cooking oil. Do not turn fish filets.
** Broiling times are approximate and may vary depending on the thickness of the food. Turn meat halfway through cooking times.
14
Keep Warm
For safely keeping hot foods warm or for warming breads
and plates.
To set Keep Warm:
1. Press the appropriate Keep Warm pad.
• WARM flashes.
• 000 and either UPPERor LOWERflash
in the display.
2. Select the Keep Warm temperature. Press the
Autoset pad or the appropriate number pads.
• 170° will light when the Autoset pad is pressed.
• Each press of the Autoset pad will increase the
temperature by 5°.
The Keep Warm temperature can be set from 145° to 190°.
WARM and the temperature will be displayed while the
function is active.
To cancel Keep Warm:
1. Press the CANCEL pad.
_ttt
2. Remove food from the oven.
NOteS:
• For optimal food quality, oven cooked foods should be
kept warm for no longer than 1 to 2 hours.
• To keep foods from drying, cover loosely with foil or a lid.
• To warm dinner rolls:
- cover rolls loosely with foil and place in oven.
- press Keep Warm and Autoset pads.
- warm for 12-15 minutes.
• To warm plates:
- place 2 stacks of up to four plates each in the oven.
- press Keep Warm and Autoset pads.
- warm for 5 minutes, turn off the oven and leave
plates in the oven for 15 minutes more.
- use only oven-safe plates, check with the
manufacturer.
- do not set warm dishes on a cold surface as rapid
temperature changes could cause crazing or
breakage.
Favorite
The Favorite pad allows you to save the time and temperature
from a Cook & Hold Bake, Cook & Hold Convect Bake or Cook
& Hold Convect Roast (lower oven only) operation.
To set a Favorite setting, a Cook & Hold function must be
either active or just programmed.
To set a new Favorite operation or to save a
currently running Cook & Hold as a Favorite:
1. Program a Cook & Hold setting as described in the Cook &
Hold section on page 12.
2. Press and hold the Favorite pad for three
seconds.
° The newly set or currently running Cook & Hold setting
will be saved.
• A double then a single beep will sound to indicate that
the control has accepted the Favorite setting.
To start a cycle programmed into Favorite:
1. Press the Favorite pad.
• Time and temperature for the set Cook & Hold setting
will be displayed. (If no Cook & Hold setting has been
programmed, "nonE" is displayed.)
2. Press the Rake, Convect Rake or Convect Roast (lower
oven only) pad.
• The Favorite setting will begin immediately.
• The selected function will light in the display
• The cooking time will light in the display
When the cooking time has elapsed:
• The selected function will turn off.
• WARM HOLD will light.
• 170°will display.
To cancel a Favorite setting in progress:
1. Press the CANCEL pad. _,_
2. Remove food from the oven.
• The stored Favorite setting will not be
affected.
15
Automatic Shut-Off/Sabbath
Mode
The ovens will automatically turn off after 12 hours if you
accidentally leave them on.
To cancel the 12-hour shut=off and run an
oven continuously for 72 hours:
1. Press and hold the Clock pad for three seconds
• "SAb" will be displayed and flash for five seconds.
• "SAb" will then be displayed continuously until turned
off or until the 72-hour time limit is reached.
• BAKEwill also be displayed if a bake setting is in use
while the oven is in Sabbath Mode.
• All pads are inactive except CANCEL and Clock. All
other functions EXCEPTBAKE 0-imer, Keep Warm,
Clean, etc.:)are locked out during the Sabbath Mode.
Adjusting the Oven Temperature
Oven temperatures are carefully tested for accuracy at the
factory. It is normal to notice some baking or browning
differences between a new oven and an old one. As ovens
get older, the oven temperature can shift.
You may adjust the oven temperature if you think the oven is
not baking or browning correctly. To decide how much to
change the temperature, set the temperature 25 degrees
higher or lower than your recipe recommends, then bake.
The results of the first bake should give you an idea of how
much to adjust the temperature.
To adjust the oven temperature:
1. Press tile appropriate Bake pad.
2. Enter 550° by pressing the appropriate number pads.
3. Press and hold the Bake pad for several seconds or until
00° appears in the display.
If the oven temperature was previously adjusted, the
change will be displayed. For example, if the oven
temperature was reduced by 15° the display will show
-_15°""
4. Press the Autoset pad to adjust the temperature.
Each time the Autoset pad is pressed, the temperature
changes by 5°. The oven temperature can be increased or
decreased by 5° to 35 °.
5. The time of day will automatically reappear in the display.
You do not need to readjust the oven temperature if there is a
power failure or interruption. Temperature adjustment applies
to Bake, Convect Bake and Convect Roast (lower oven only:)
only.
To cancel the Sabbath Mode:
1. Press tile Clock pad for three seconds.
• "SAb" will flash for five seconds.
• The time of day will return to the display.
OR
2. After 72 hours, the Sabbath Mode will end.
• "SAb" will flash for five seconds.
• The time of day will return to the display.
Notes:
• Sabbath Mode can be turned on at any time with or
without the ovens on.
• Sabbath Mode cannot be turned on if the keypads are
locked out or when the doors are locked.
Most prompts and messages and all beeps are
deactivated when Sabbath Mode is active.
If an oven is baking when Sabbath Mode is set, BAKE
will go out at the end of the baking cycle or when the
CANCEL pad is pressed. There will be no audible beeps.
If the oven lights are desired while in Sabbath Mode,
they must be turned on before the Sabbath Mode is
started.
When the Sabbath Mode is started, the temperature
display will immediately show the set temperature, rather
than the actual oven cavity temperature. No preheat beep
will sound.
• The self-clean cycle and automatic door lock do not
operate during the Sabbath Mode.
• Pressing CANCEL pad will cancel a Bake cycle, however
the control will stay in the Sabbath Mode.
• If power fails, the ovens will power up in Sabbath Mode
with 72 hours remaining and no cycle active.
16

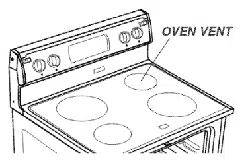
Oven Vent
When the oven is in use the area near the vent may become
hot enough to cause burns. Never block the vent opening.
]'he oven vent is located below the backguard on your
range.
When high moisture foods are cooked in the upper oven,
steam may be visible coming from the oven vent. This is
normal. OVEN VENT
LOCATION
Do not place
plastics near the
vent opening as
heat from the vent
could distort or
melt the plastic.
Oven Lights
The oven lights automatically come on whenever ,,,,....................
/ Upper ",
an oven door is opened. When the door is closed, _Oven Lights
press the Oven Light pad to turn the oven light
on or off. A beep will sound every time the Oven
Light pad is pressed.
Oven Bottom
Protect oven bottom against spillovers, especially acidic or
sugary spills, as they may discolor the porcelain enamel. Use
the correct pan size to avoid spillovers and boilovers. Do not
place utensils or aluminum foil directly on the oven
bottom.
Oven Racks
All racks are designed with a lock-stop edge.
Upper oven
• Is equipped with one rack and rack
position.
• When pulling the upper oven rack out to
remove or check food, grasp the top edge
of the rack.
lower oven
Is equipped with one RollerGlideTM rack and two regular flat
racks.
To remove oven racks:
• Pull rack straight out until it stops at the lock-stop position;
lift up on the front of the rack and pull out.
• For RollerGlideTM rack, pull both the rack glide and rack
base out together.
To replace oven racks:
• Place rack on the rack support in
the oven; tilt the front end up
slightly; slide rack back until it
clears the lock-stop position; lower
front and slide back into the oven.
Oven Fan
A convection fan is used to circulate hot air in the oven when
the convection feature is selected. It automatically turns on
after the Convect Bake or Convect Roast pads are pressed
and will turn off when convection is canceled.
Important: The convection fans will automatically stop when
the oven door is opened.
Baking and Roasting with the
RoilerGlide TMRack (lower oven only)
Baking
• For optimal baking results when baking on one rack, use
the RollerGlideTM rack.
• When baking on two racks, use the RollerGlideTM rack in
the bottom rack position, and the flat rack in the upper rack
position.
Roasting
• When roasting large cuts of meat and poultry, use the
RollerGlideTM rack for ease of movement.
17
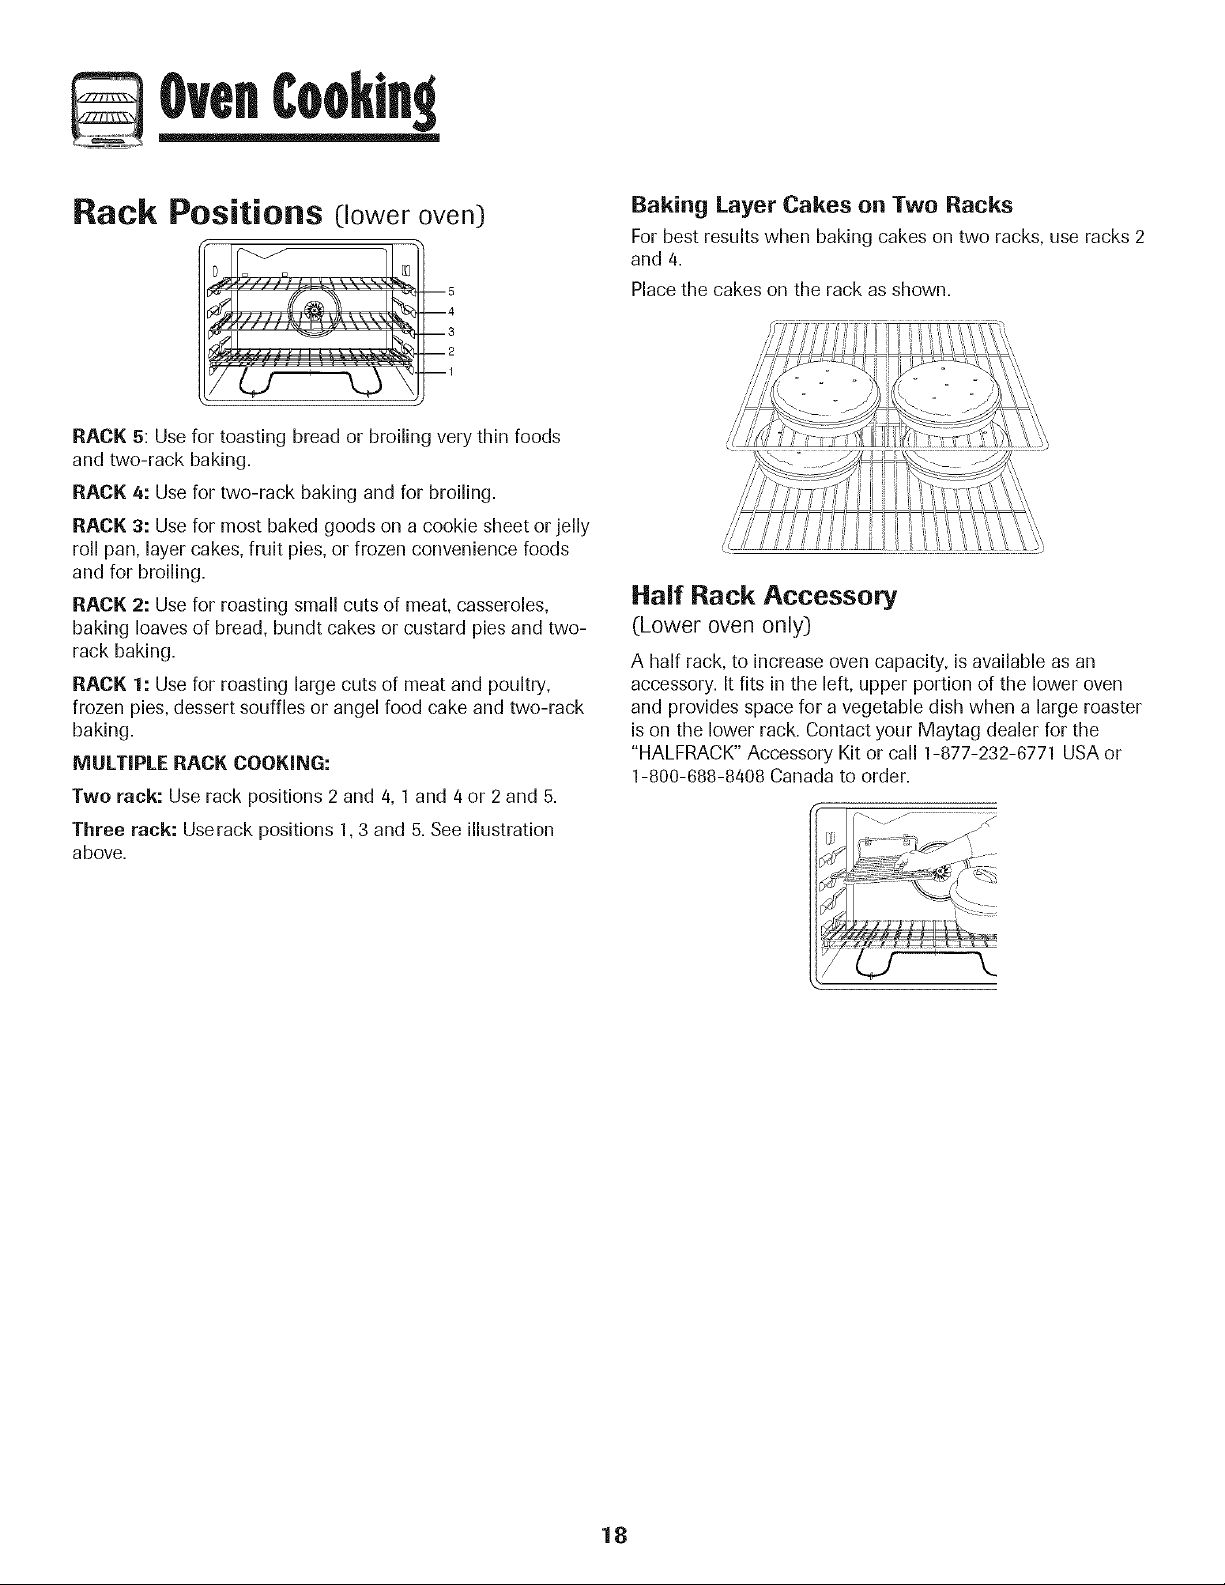
Rack Positions (loweroven)
--5
--4
--3
--2
--1
RACK 5: Use for toasting bread or broiling very thin foods
and two-rack baking.
RACK 4: Use for two-rack baking and for broiling.
RACK 3: Use for most baked goods on a cookie sheet or jelly
roll pan, layer cakes, fruit pies, or frozen convenience foods
and for broiling.
RACK 2: Use for roasting small cuts of meat, casseroles,
baking loaves of bread, bundt cakes or custard pies and two-
rack baking.
RACK 1: Use for roasting large cuts of meat and poultry,
frozen pies, dessert souffles or angel food cake and two-rack
baking.
MULTIPLE RACK COOKING:
Two rack: Use rack positions 2 and 4, 1and 4 or 2 and 5.
Three rack: Userack positions 1,3 and 5. See illustration
above.
Baking Layer Cakes on Two Racks
For best results when baking cakes on two racks, use racks 2
and 4.
Place the cakes on the rack as shown.
Half Rack Accessory
(Lower oven only)
A half rack, to increase oven capacity, is available as an
accessory. It fits in the left, upper portion of the lower oven
and provides space for a vegetable dish when a large roaster
is on the lower rack. Contact your Maytag dealer for the
"HALFRACK" Accessory Kit or call 1-877-232-6771 USA or
1-800-688-8408 Canada to order.
18
Cleantn
Self-Clean Ovens
The self-clean cycle uses above-normal cooking temperatures
to automatically clean the oven interior.
The oven should be cleaned regularly by wiping up spillovers
to prevent excessive smoke and flare-ups. Do not allow a
heavy build-up of soil to accumulate in the oven.
During the cleaning process, the kitchen should be well
ventilated to get rid of normal odors associated with cleaning.
Before Self=Cleaning
1. Turn off the oven light before cleaning as the light may
burn out during the clean cycle.
2. Remove broiler pan, all pans, and oven racks from the
oven. The oven racks will discolor and may not slide easily
after a self-clean cycle if they are not removed.
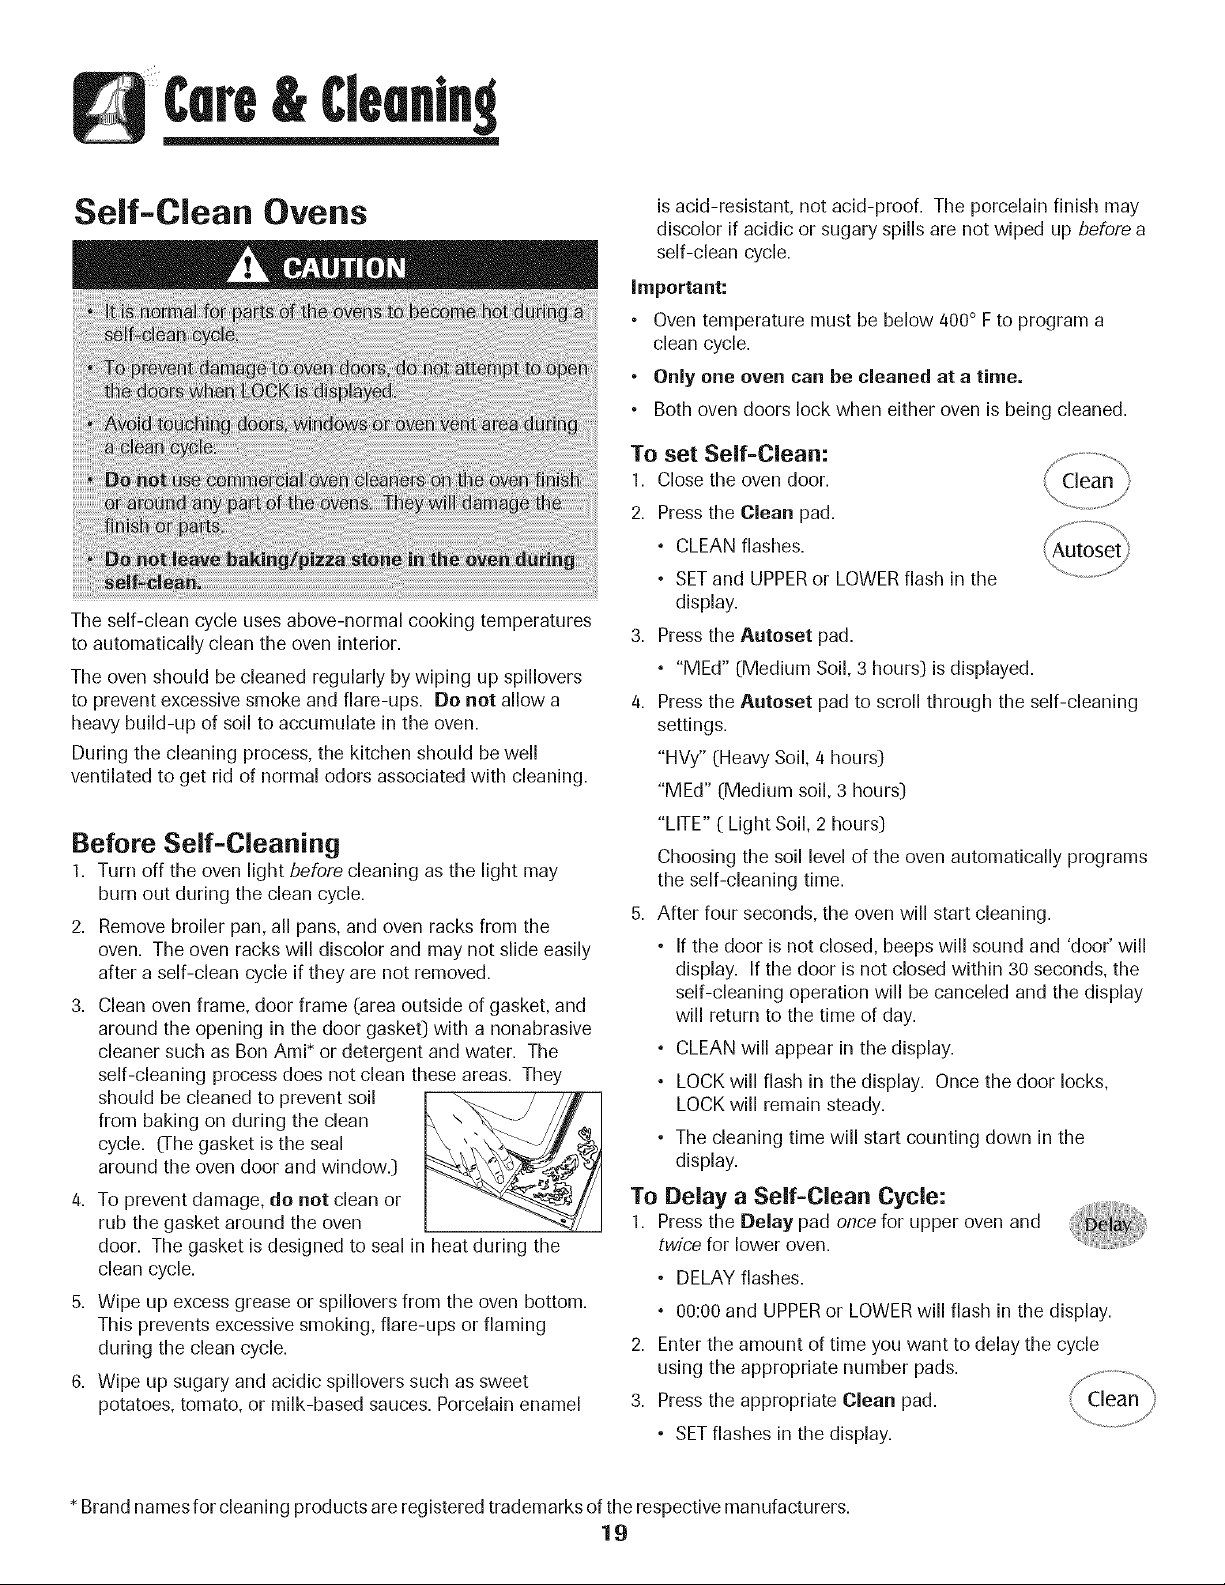
3. Clean oven frame, door frame (area outside of gasket, and
around the opening in the door gasket] with a nonabrasive
cleaner such as Bon Ami* or detergent and water. The
self-cleaning process does not clean these areas. They
should be cleaned to prevent soil
from baking on during the clean
cycle. 0-he gasket is the seal
around the oven door and window.]
4. To prevent damage, do not clean or
rub the gasket around the oven
door. The gasket is designed to seal in heat during the
clean cycle.
5. Wipe up excess grease or spillovers from the oven bottom.
This prevents excessive smoking, flare-ups or flaming
during the clean cycle.
6. Wipe up sugary and acidic spillovers such as sweet
potatoes, tomato, or milk-based sauces. Porcelain enamel
is acid-resistant, not acid-proof. The porcelain finish may
discolor if acidic or sugary spills are not wiped up before a
self-clean cycle.
Important:
• Oven temperature must be below 400° Fto program a
clean cycle.
• Only one oven can be cleaned at a time.
Both oven doors lock when either oven is being cleaned.
To set Self=Clean:
1. Close the oven door.
2. Pressthe Clean pad.
• CLEAN flashes.
• SETand UPPERor LOWERflash in the
display.
3. Pressthe Autoset pad.
• "MEd" (Medium Soil, 3 hours] is displayed.
4. Pressthe Autoset pad to scroll through the self-cleaning
settings.
"HVy" (Heavy Soil, 4 hours]
"MEd" (Medium soil, 3 hours]
"LITE" ( Light Soil, 2 hours]
Choosing the soil level of the oven automatically programs
the self-cleaning time.
5. After four seconds, the oven will start cleaning.
• If the door is not closed, beeps will sound and 'door' will
display. If the door is not closed within 30 seconds, the
self-cleaning operation will be canceled and the display
will return to the time of day.
• CLEAN will appear in the display.
• LOCK will flash in the display. Once the door locks,
LOCK will remain steady.
• The cleaning time will start counting down in the
display.
To Delay a Self=Clean Cycle:
1. Presstile Delay pad once for upper oven and
twice for lower oven.
• DELAY flashes.
° 00:00 and UPPERor LOWERwill flash in the display.
2. Enter the amount of time you want to delay the cycle
using the appropriate number pads.
3. Pressthe appropriate Clean pad.
• SETflashes in the display.
* Brand names for cleaning products are registered trademarks of the respective manufacturers.
19
Cleantn
4. Press the Autoset pad.
• "LITE" (Light soil level} is displayed.
5. Press the Autoset pad to scroll through the
self-cleaning settings.
"HVy" (Heavy Soil, 4 hours}
"MEd" (Medium Soil, 3 hours}
"LITE" (Light Soil, 2 hours}
Choosing the soil level of the oven automatically programs
the self-cleaning time.
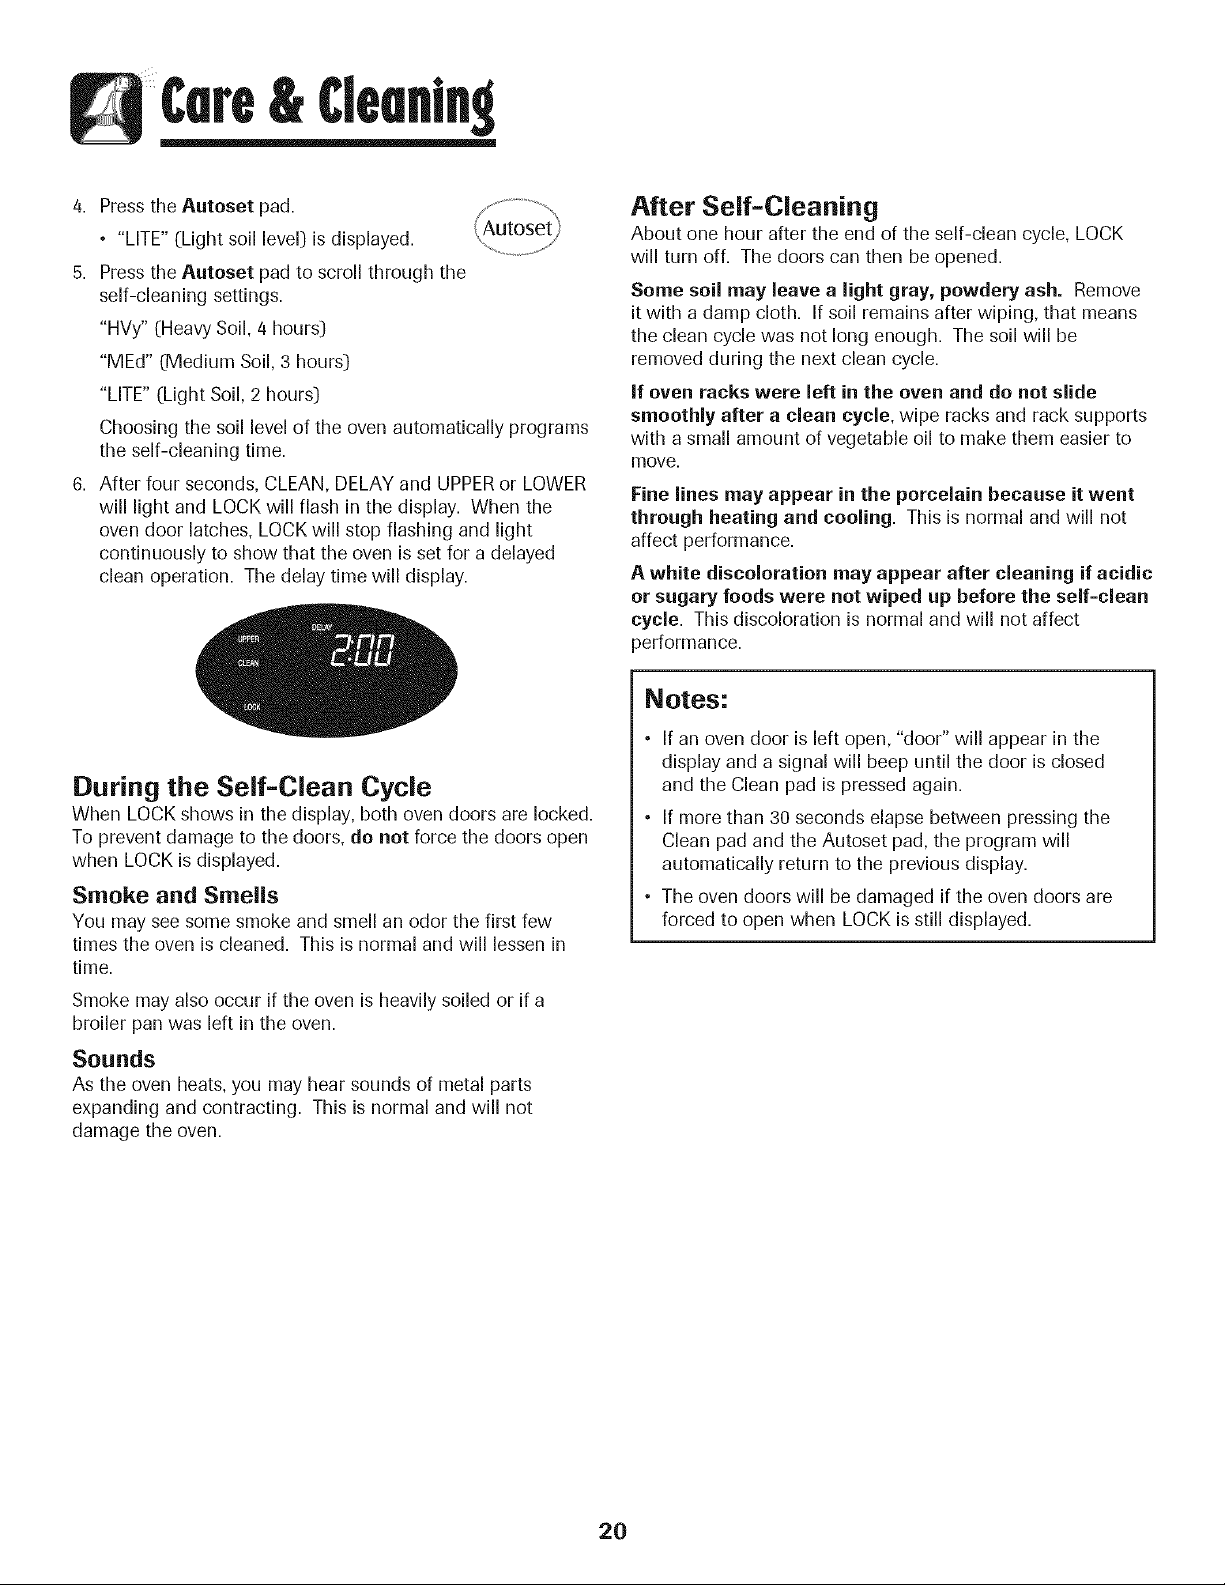
6. After four seconds, CLEAN, DELAY and UPPERor LOWER
will light and LOCK will flash in the display. When the
oven door latches, LOCK will stop flashing and light
continuously to show that the oven is set for a delayed
clean operation. The delay time will display.
During the Self-Clean Cycle
When LOCK shows in the display, both oven doors are locked.
To prevent damage to the doors, do not force the doors open
when LOCK is displayed.
Smoke and Smells
You may see some smoke and smell an odor the first few
times the oven is cleaned. This is normal and will lessen in
time.
Smoke may also occur if the oven is heavily soiled or if a
broiler pan was left in the oven.
Sounds
As the oven heats, you may hear sounds of metal parts
expanding and contracting. This is normal and will not
damage the oven.
After Self=Cleaning
About one hour after the end of the self-clean cycle, LOCK
will turn off. The doors can then be opened.
Some soil may leave a light gray, powdery ash. Remove
it with a damp cloth. If soil remains after wiping, that means
the clean cycle was not long enough. The soil will be
removed during the next clean cycle.
If oven racks were left in the oven and do not slide
smoothly after a clean cycle, wipe racks and rack supports
with a small amount of vegetable oil to make them easier to
move.
Fine lines may appear in the porcelain because it went
through heating and cooling. This is normal and will not
affect performance.
A white discoloration may appear after cleaning if acidic
or sugary foods were not wiped up before the self=clean
cycle. This discoloration is normal and will not affect
performance.
Notes:
° If an oven door is left open, "door" will appear in the
display and a signal will beep until the door is closed
and the Clean pad is pressed again.
° If more than 30 seconds elapse between pressing the
Clean pad and the Autoset pad, the program will
automatically return to the previous display.
• The oven doors will be damaged if the oven doors are
forced to open when LOCK is still displayed.
2O
Cleentn9
Cleaning Procedures
Brand names are registered trademarks of the
respective manufacturers.
_*To order call 1-877-232-6771 USA and
1-800-688-8408 Canada.
Backguard and Porcelain enamel is glass fused on metal and may crack or chip with misuse. It is acid-resistant, not acid-
Cooktop - proof. All spillovers, especially acidic or sugary spillovers, should be wiped up immediately with a dry cloth.
Porcelain • When cool, wash with soapy water, rinse and dry.
Enamel • Never wipe off a warm or hot surface with a damp cloth. This may cause cracking or chipping.
• Never use oven cleaners, abrasive or caustic cleaning agents on exterior finish of range.
Broiler Pan
insert
Clock and
Control Pad
Area
Control Knobs
Cooktop -
Glass-Ceramic
Never cover insert with aluminum foil as this prevents the fat from draining to the pan below, a n d
• Place soapy cloth over insert and pan; let soak to loosen soil.
• Wash in warm, soapy water. Use scouring pad to remove stubborn soil.
• Broiler pan and insert can be cleaned in dishwasher.
• To activate "Control Lock"for cleaning, see page 9.
• Wipe with a damp cloth and dry. Do not use abrasive cleaning agents as they may scratch the surface.
• Glass cleaners may be used if sprayed on a cloth first. DO NOTspray directly on controlpad and
display area.
• Remove knobs in the OFFposition by pulling forward.
• Wash, rinse and dry. Do not use abrasive cleaning agents as they may scratch the finish.
• Turn on each element to be sure the knobs have been correctly replaced.
Never use oven cleaners, chlorine bleach, ammonia or glass cleaners with ammonia. NOTE: Call
an authorized servicer if the glass-ceramic top should crack, break or if metal or aluminum foil
should melt on the cooktop.
° Allow the cooktop to cool before cleaning.
° General - Clean cooktop after each use, or when needed, with a damp paper towel and Cooktop Cleaning
Creme_ (Part No. 20000001)_*. Then, buff with a clean dry cloth.
Important: Permanentstains will develop ffsoil is allowed to cook onby repeatedly using the cooktop when soiled.
• Heavy Soils or Metal Marks - Dampen a "scratchless" or "never scratch" scrubber sponge. Apply
Cooktop Cleaning Creme_ (Part No. 20000001)_ and scrub to remove as much soil as possible. Apply a
thin layer of the creme over the soil, cover with a damp paper towel and let stand 30 to 45 minutes (2-3
hours for very heavy soil). Keep moist by covering the paper towel with plastic wrap. Scrub again, then
buff with a clean, dry cloth.
Important: Only use a CLEAN,DAMP "scratchless"pad that is safe for non-stick cookware. Thepattern and glass
will be damaged ff the pad is not damp, ff the pad is soiled, or ff another type of pad is used.
• Burned=on or Crusty Soils - Scrub with a "scratchless" or "never scratch" scouring pad and Cooktop
Cleaning Creme_.
Important: Hold a razor blade scraper at 30° angle and scrape any remaining soil. Then,clean as de- /
_cribed ab_v_.D_ n_t _s_ th_ raz_r blade f_r da_y c_ean_ngas_tmay wear th_ pattern _n the glass__
IVlelted Sugar or Plastic - Immediately turn element to LOW and scrape sugar or
plastic from hot surface to a cool area. Then turn element OFF and allow to cool. Clean
residue with razor blade scraper and Cooktop Cleaning Creme_. ,_
21

Cleam
Oven Windows
and Doors -
Glass
• Avoid using excessive amounts of water which may seep under or behind glass causing staining.
• Wash with soap and water. Rinsewith clear water and dry. Glasscleaner can be used if sprayed on acloth
first.
• Do not use abrasive materials such as scouring pads, steel wool or powdered cleaners asthey will scratch
glass.
Oven Interiors • Follow instructionson pages 19-20 to set a self-clean cycle.
Oven Racks
Stainless Steel
(select models)
Door Handle,
Side Panels -
Painted Enamel
o
o
o
Clean with soapy water.
Remove stubborn soil with cleansing powder or soap-filled scouring pad. Rinse and dry.
Rackswill permanently discolor and may not slide smoothly if left in the oven during a self-clean operation.
If this occurs, wipe the rack edge and rack support with a small amount of vegetable oil to restore ease
of movement, then wipe off excess oil.
° DO NOT USE ANY CLEANING PRODUCT CONTAiNiNG CHLORINE BLEACH.
° DO NOT USEABRASIVE OR ORANGE CLEANERS.
° ALWAYS WiPE WiTH THE GRAIN WHEN CLEANING.
• _ai_y__eaning/Lig_tSoi__-_ipewith_ne_fthef____wing-s_apywater_whitevinegar/waters__uti_n_
Formula 409 Glass and Surface Cleaner* or a similar glass cleaner - using a sponge or soft cloth. Rinse
and dry. To polish and help prevent fingerprints, follow with Stainless Steel Magic Spray (Part No.
20000008)_.
• Moderate/Heavy Soil -- Wipe with one of the following - Bon Ami, Smart Cleanser, or Soft Scrub _ -
using a damp sponge or soft cloth. Rinse and dry. Stubborn soils may be removed with a damp multi-
purpose Scotch-Brite _ pad; rub evenly with the grain. Rinse and dry. To restore luster and remove streaks,
follow with Stainless Steel Magic Spray*.
• Discoloration -- Using a damp sponge or soft cloth, wipe with Cameo Stainless Steel Cleaner*. Rinse
immediatelyand dry. To remove streaks and restore luster, follow with Stainless Steel Magic Spray*.
° When cool, wash with warm soapy water, rinse and dry. Never wipe a warm or hot surface with a damp
cloth as this may damage the surface and may cause a steam burn.
• Forstubborn soil, use mildly abrasive cleaning agents such as baking soda paste or Bon Ami. _Do not use
abrasive, caustic or harsh cleaning agents such as steel wool pads or oven cleaners. These products will
scratch or permanently damage the surface.
important:: Use a dry towel or cloth to wipe up spills, especially acidic or sugary spills. Surface
may discolor or dull if soil is not immediately removed. This is especially important for
white surfaces.
Brand names for cleaning products are registered trademarks of the respective manufacturers.
_ To order direct, call 1-877-232-6771 USA and 1-800-688-8408 Canada.
22
Oven Doors
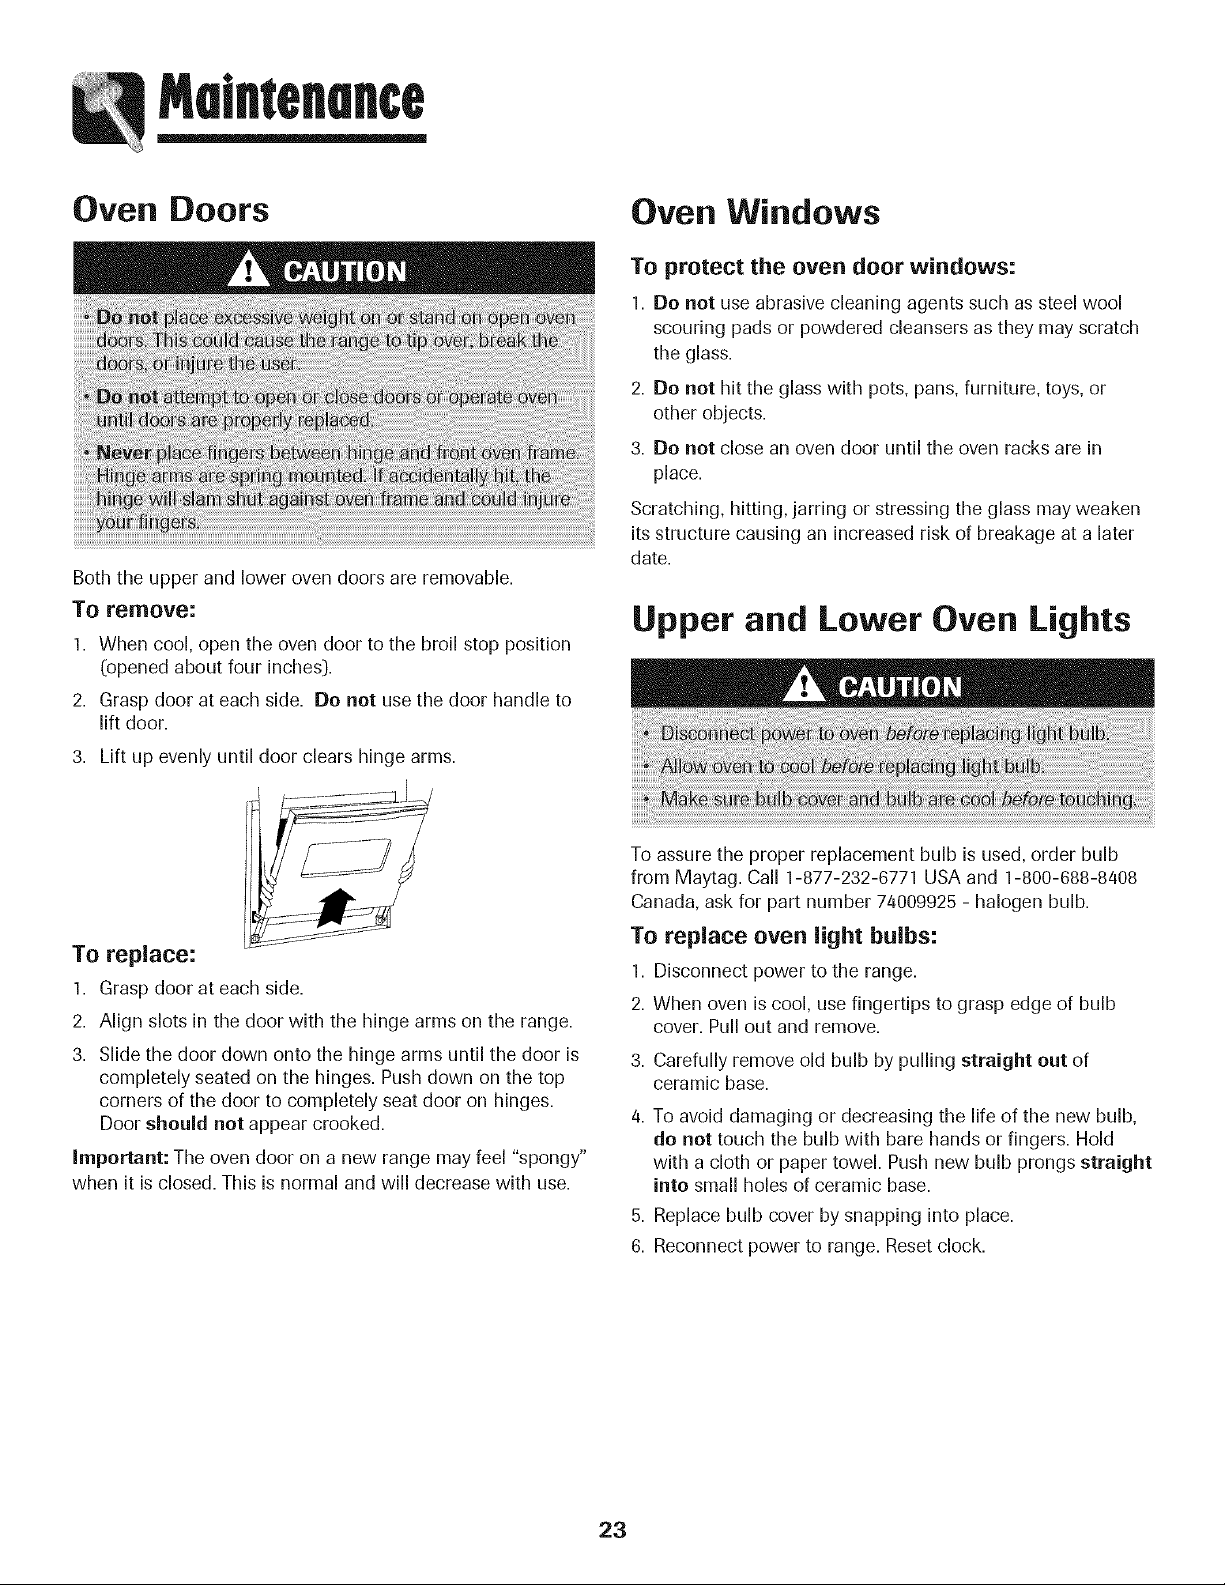
Both the upper and lower oven doors are removable.
To remove:
1. When cool, open the oven door to the broil stop position
(opened about four inches:).
2. Grasp door at each side. Do not use the door handle to
lift door.
3. Lift up evenly until door clears hinge arms.
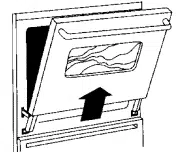
Oven Windows
To protect the oven door windows:
1. Do not use abrasive cleaning agents such as steel wool
scouring pads or powdered cleansers as they may scratch
the glass.
2. Be not hit the glass with pots, pans, furniture, toys, or
other objects.
3. Be not close an oven door until the oven racks are in
place.
Scratching, hitting, jarring or stressing the glass may weaken
its structure causing an increasedrisk of breakage at a later
date.
Upper and Lower Oven Lights
To replace:
1. Grasp door at each side.
2. Align slots in the door with the hinge arms on the range.
3. Slide the door down onto the hinge arms until the door is
completely seated on the hinges. Push down on the top
corners of the door to completely seat door on hinges.
Door should not appear crooked.
Important: The oven door on a new range may feel "spongy"
when it is closed. This is normal and will decrease with use.
To assure the proper replacement bulb is used, order bulb
from Maytag. Call 1-877-232-6771 USA and 1-800-688-8408
Canada, ask for part number 74009925 - halogen bulb.
To replace oven light bulbs:
1. Disconnect power to the range.
2. When oven is cool, use fingertips to grasp edge of bulb
cover. Pull out and remove.
3. Carefully remove old bulb by pulling straight out of
ceramic base.
4. To avoid damaging or decreasing the life of the new bulb,
do not touch the bulb with bare hands or fingers. Hold
with a cloth or paper towel. Push new bulb prongs straight
into small holes of ceramic base.
5. Replace bulb cover by snapping into place.
6. Reconnect power to range. Reset clock.
23
Melntenence
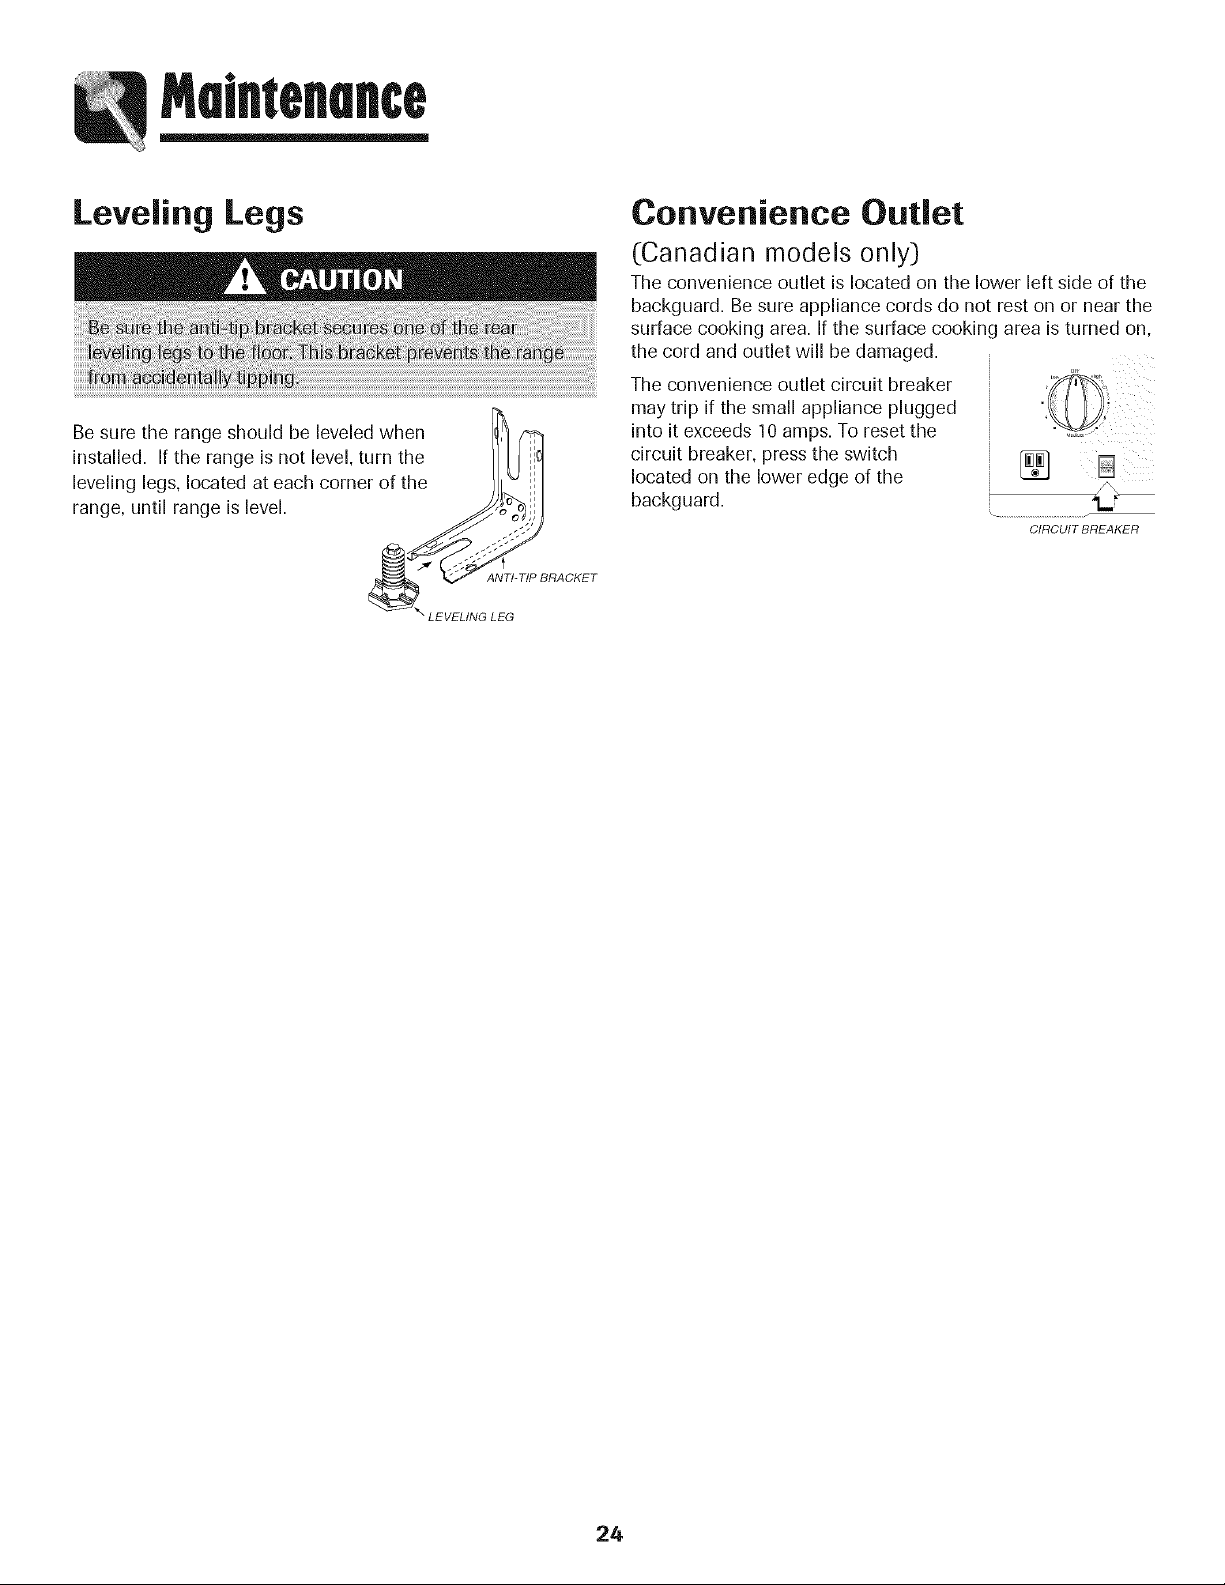
Leveling Legs
Be sure the range should be leveled when (_
installed. If the range is not level, turn the I 1
leveling legs, located at each corner of the
range, until range is level. _ _,,JJ
_ANT/_BRACKET
LEVELING LEG
Convenience Outlet
(Canadian models only)
The convenience outlet is located on the lower left side of the
backguard. Be sure appliance cords do not rest on or near the
surface cooking area. If the surface cooking area is turned on,
the cord and outlet will be damaged.
The convenience outlet circuit breaker
may trip if the small appliance plugged
into it exceeds 10 amps. To reset the
circuit breaker, press the switch
located on the lower edge of the
backguard.
B ¸
...............................................f
CIRCUIT BREAKER
24
froubleshoofln9
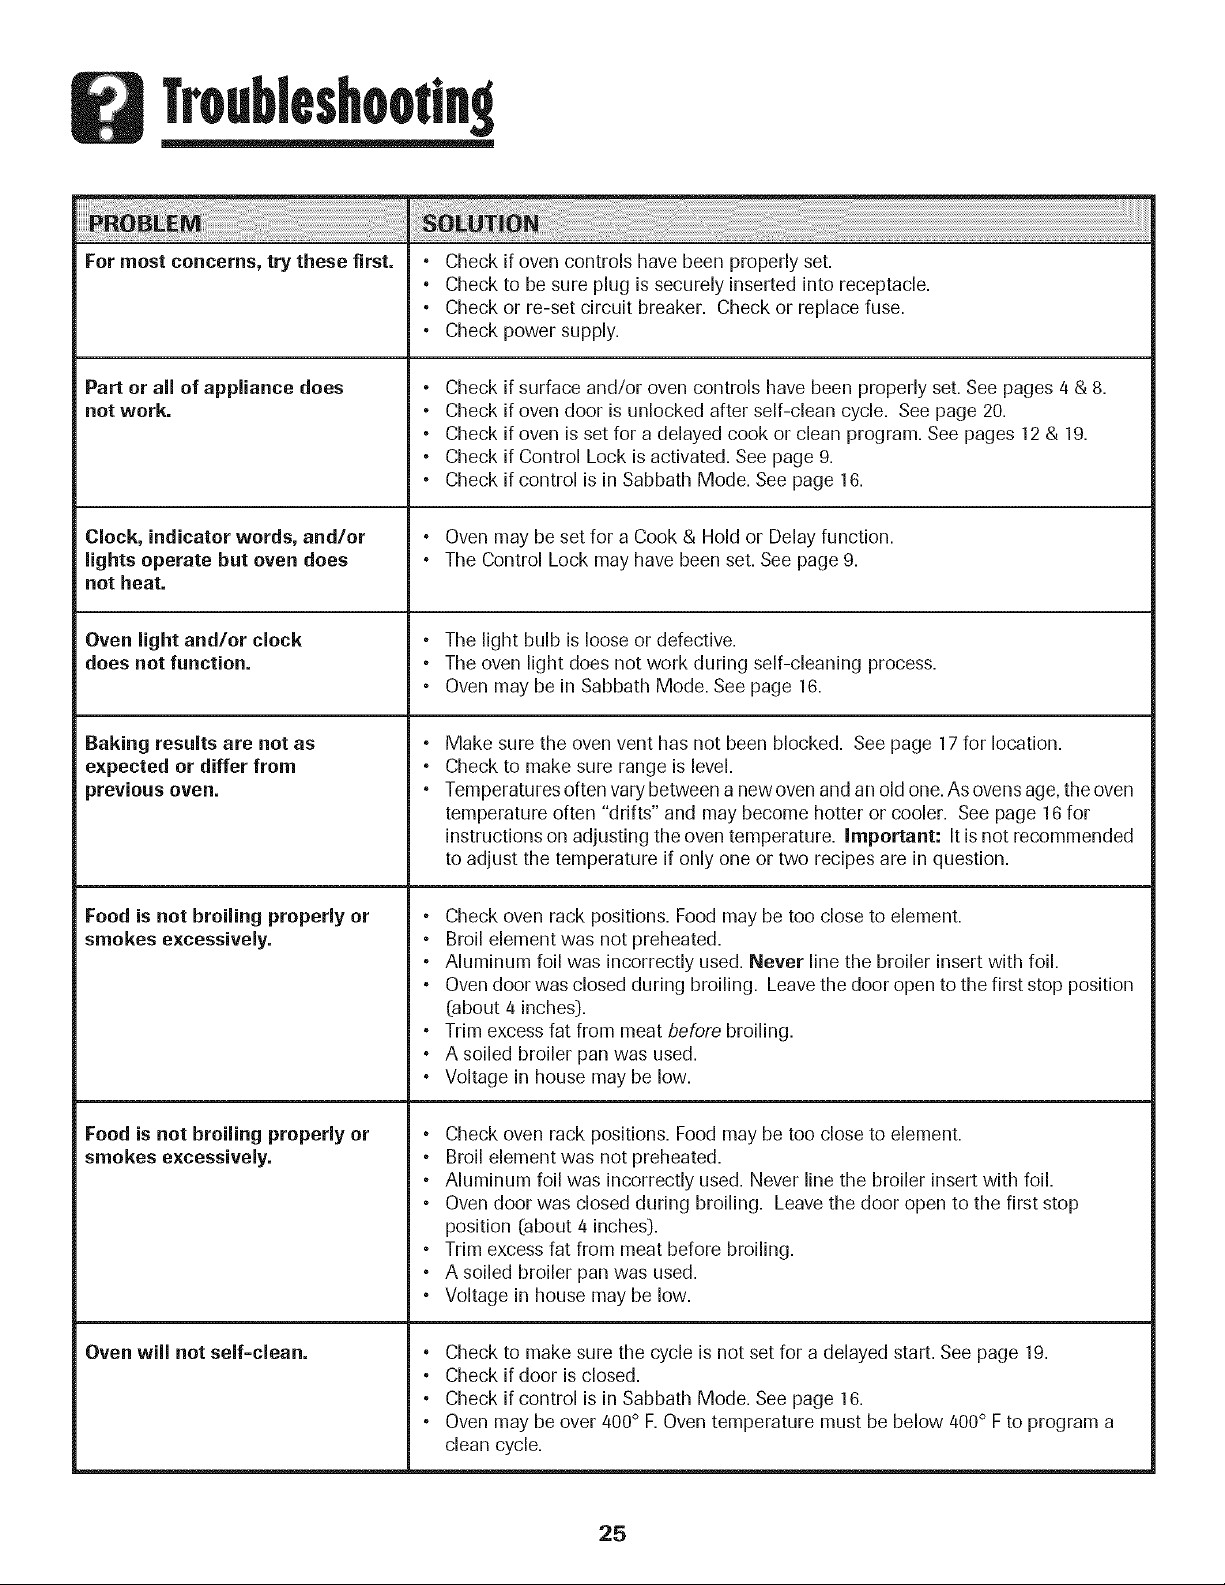
For most concerns, try these first.
Part or all of appliance does
not work.
Clock, indicator words, and/or
lights operate but oven does
not heat.
Oven light and/or clock
does not function.
Baking results are not as
expected or differ from
previous oven.
Food is not broiling properly or
smokes excessively.
Food is not broiling properly or
smokes excessively.
Oven will not self=clean.
o
o
o
o
Check
Check
Check
Check
if oven controls have been properly set.
to be sure plug is securely inserted into receptacle.
or re-set circuit breaker. Check or replace fuse.
power supply.
®
®
®
®
®
Check
Check
Check
Check
Check
if surface and/or oven controls have been properly set. See pages 4 & 8.
if oven door is unlocked after self-clean cycle. See page 20.
if oven is set for a delayed cook or clean program. See pages 12 & 19.
if Control Lock is activated. See page 9.
if control is in Sabbath Mode. See page 16.
• Oven may be set for a Cook & Hold or Delay function.
• The Control Lock may have been set. See page 9.
• The light bulb is loose or defective.
• The oven light does not work during self-cleaning process.
• Oven may be in Sabbath Mode. See page 16.
o
o
o
Make sure the oven vent has not been blocked. See page 17 for location.
Check to make sure range is level.
Temperatures often vary between a new oven and an old one. As ovens age, the oven
temperature often "drifts" and may become hotter or cooler. See page 16 for
instructions on adjusting the oven temperature. Important: It is not recommended
to adjust the temperature if only one or two recipes are in question.
• Check oven rack positions. Food may be too close to element.
• Broil element was not preheated.
• Ahminum foil was incorrectly used. Never line the broiler insert with foil.
• Oven door was closed during broiling. Leave the door open to the first stop position
(about 4 inches).
• Trim excess fat from meat before broiling.
• A soiled broiler pan was used.
• Voltage in house may be low.
• Check oven rack positions. Food may be too close to element.
• Broil element was not preheated.
• Aluminum foil was incorrectly used. Never line the broiler insert with foil.
• Oven door was closed during broiling. Leave the door open to the first stop
position (about 4 inches).
• Trim excess fat from meat before broiling.
• A soiled broiler pan was used.
• Voltage in house may be low.
• Check to make sure the cycle is not set for a delayed start. See page 19.
• Check if door is closed.
• Check if control is in Sabbath Mode. See page 16.
• Oven may be over 400° F. Oven temperature must be below 400° F to program a
clean cycle.
25
froubleshootln9
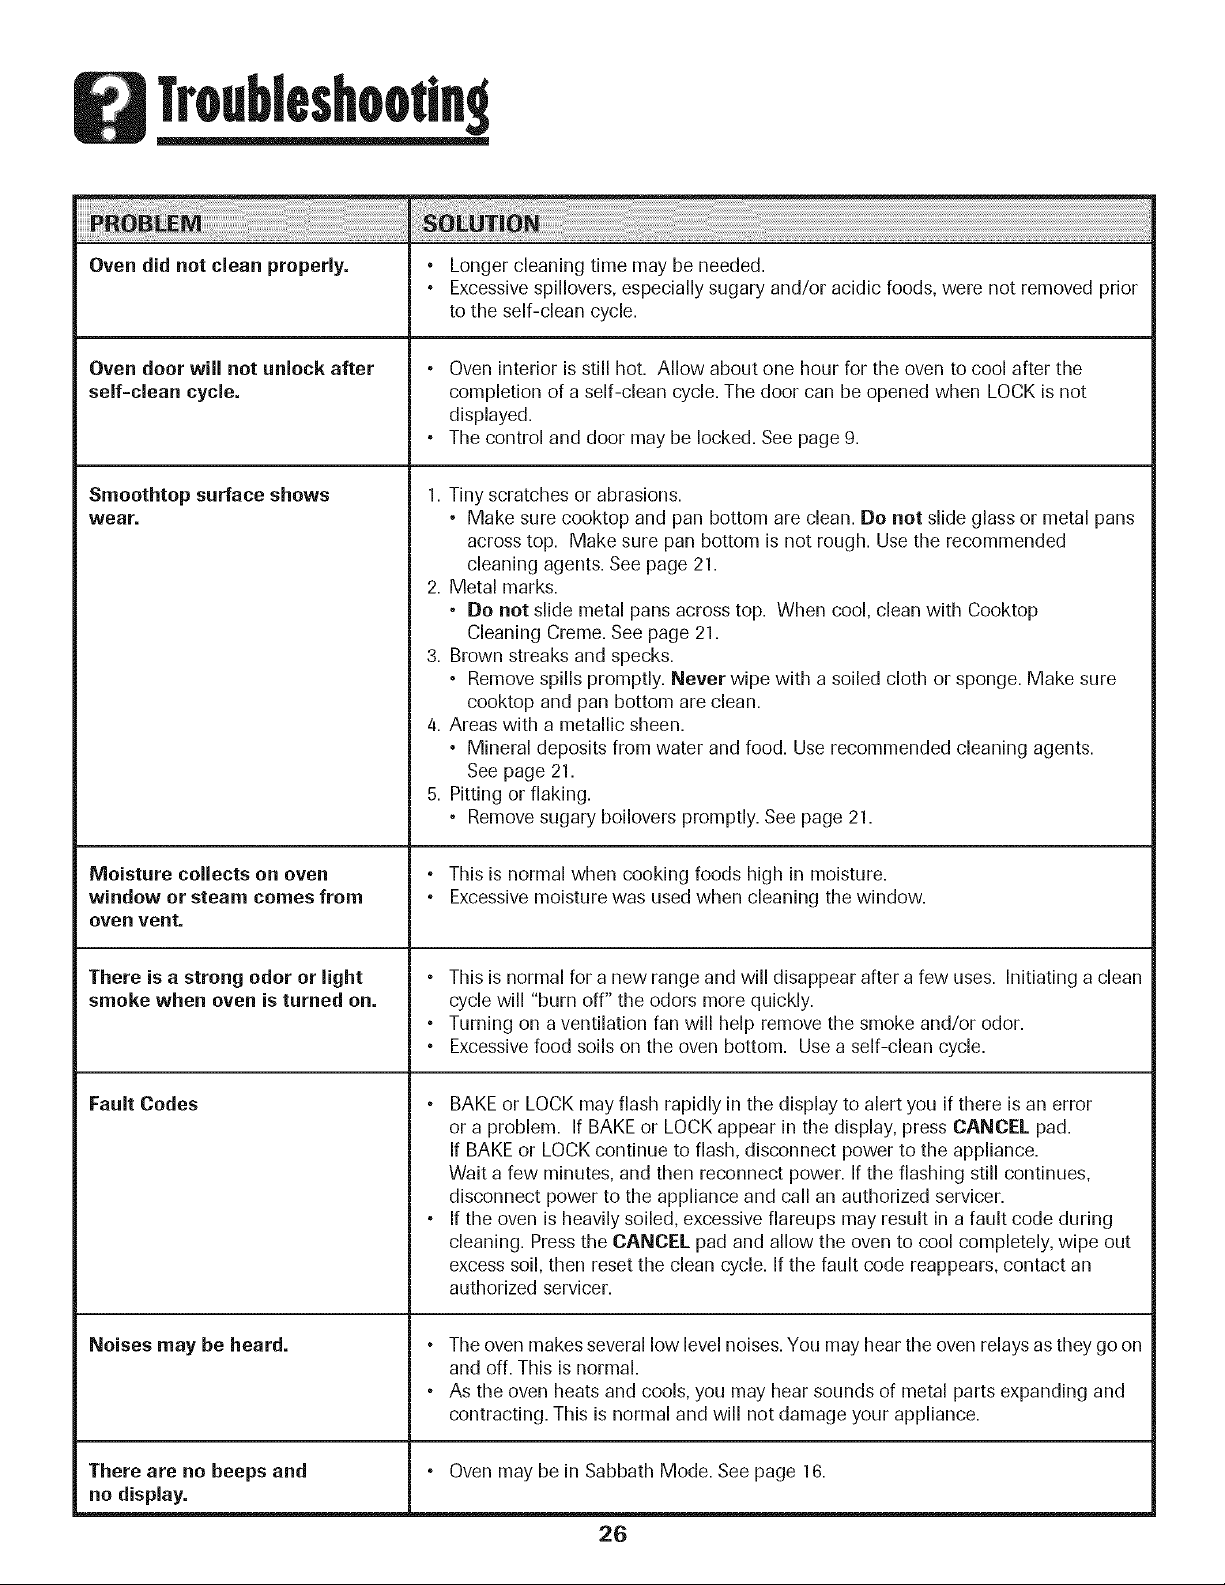
Oven did not clean properly.
Oven door will not unlock after
self=clean cycle.
Smoothtop surface shows
wear=
Moisture collects on oven
window or steam comes from
oven vent.
There is a strong odor or light
smoke when oven is turned on.
Fault Codes
Noises may be heard.
There are no beeps and
no display.
• Longercleaning time may be needed.
° Excessivespillovers, especially sugary and/or acidic foods, were not removed prior
to the self-clean cycle.
° Oven interioris still hot. Allow about one hour for the oven to cool after the
completion of a self-clean cycle, The door can be opened when LOCK is not
displayed,
° The control and door may be locked, See page 9.
1. Tiny scratches or abrasions.
• Make sure cooktop and pan bottom are clean. Do not slide glass or metal pans
across top. Make sure pan bottom is not rough. Use the recommended
cleaning agents. See page 21.
2. Metal marks.
• Do not slide metal pans across top. When cool, clean with Cooktop
Cleaning Creme. See page 21.
3. Brown streaks and specks.
° Remove spills promptly. Never wipe with a soiled cloth or sponge. Make sure
cooktop and pan bottom are clean.
4. Areas with a metallic sheen.
° Mineral deposits from water and food. Use recommended cleaning agents.
See page 21.
5. Pitting or flaking.
• Remove sugary boilovers promptly. See page 21.
° This is normal when cooking foods high in moisture.
° Excessive moisture was used when cleaning the window.
• This is normal for a new range and will disappear after a few uses. Initiating a clean
cycle will "burn off" the odors more quickly.
• Turning on a ventilation fan will help remove the smoke and/or odor.
• Excessivefood soils on the oven bottom. Use a self-clean cycle.
• BAKE or LOCK may flash rapidly in the display to alert you if there is an error
or a problem. If BAKE or LOCK appear in the display, press CANCEL pad.
If BAKE or LOCK continue to flash, disconnect power to the appliance.
Wait a few minutes, and then reconnect power. If the flashing still continues,
disconnect power to the appliance and call an authorized servicer.
° If the oven is heavily soiled, excessive fiareups may result in a fault code during
cleaning. Press the CANCEL pad and allow the oven to cool completely, wipe out
excess soil, then reset the clean cycle. If the fault code reappears, contact an
authorized servicer.
• The oven makes several low level noises. You may hear the oven relays as they go on
and off. This is normal.
• As the oven heats and cools, you may hear sounds of metal parts expanding and
contracting. This is normal and will not damage your appliance.
• Oven may be in Sabbath Mode. See page 16.
26
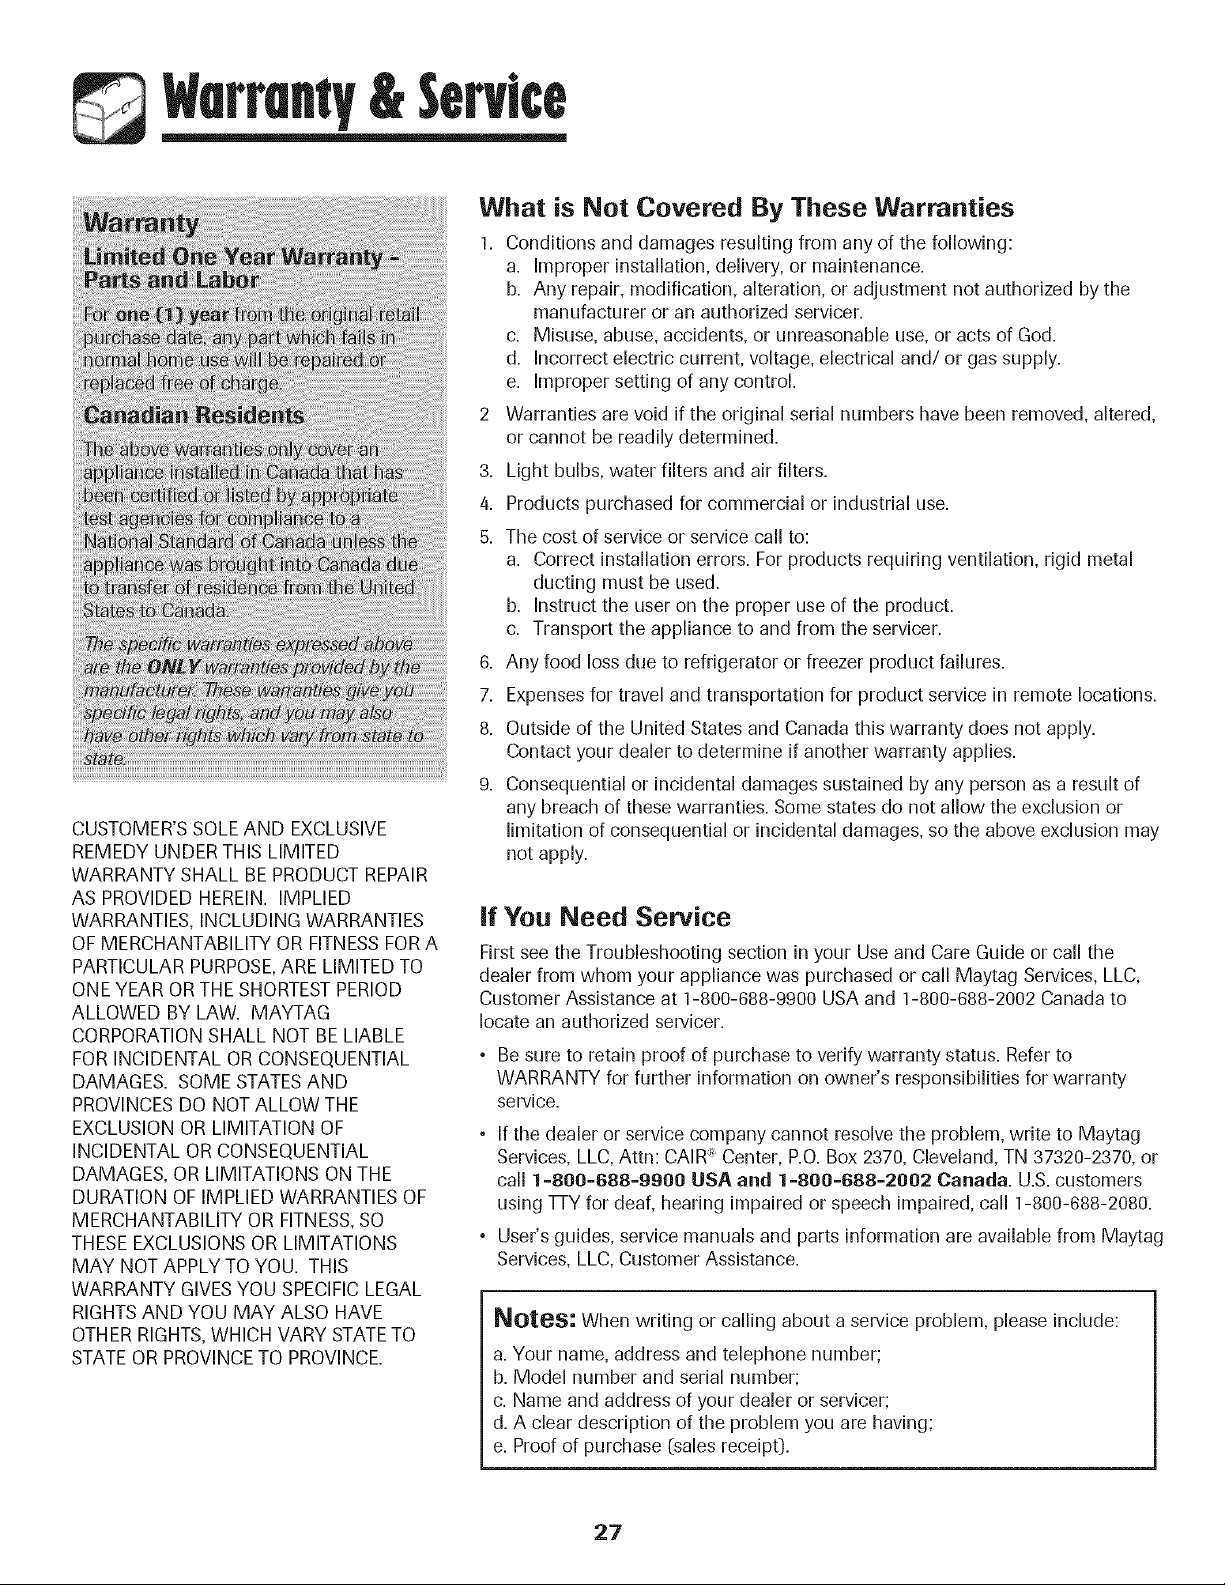
WerrentVV
CUSTOMER'SSOLE AND EXCLUSIVE
REMEDY UNDER THIS LIMITED
WARRANTY SHALL BE PRODUCT REPAIR
AS PROVIDEDHEREIN. IMPLIED
WARRANTIES, INCLUDING WARRANTIES
OF MERCHANTABILITY OR FITNESSFOR A
PARTICULAR PURPOSE,ARE LIMITED TO
ONE YEAR OR THE SHORTESTPERIOD
ALLOWED BY LAW. MAYTAG
CORPORATIONSHALL NOT BELIABLE
FOR INCIDENTAL OR CONSEQUENTIAL
DAMAGES. SOME STATESAND
PROVINCESDO NOT ALLOW THE
EXCLUSION OR LIMITATION OF
INCIDENTAL OR CONSEQUENTIAL
DAMAGES, OR LIMITATIONS ON THE
DURATION OF IMPLIED WARRANTIES OF
MERCHANTABILITY OR FITNESS,SO
THESEEXCLUSIONSOR LIMITATIONS
MAY NOT APPLY TO YOU. THIS
WARRANTY GIVESYOU SPECIFICLEGAL
RIGHTSAND YOU MAY ALSO HAVE
OTHER RIGHTS,WHICH VARY STATETO
STATEOR PROVINCETO PROVINCE.
What is Not Covered By These Warranties
1. Conditions and damages resulting from any of the following:
a. Improper installation,delivery, or maintenance.
b. Any repair, modification, alteration, or adjustment not authorized by the
manufacturer or an authorized servicer.
c. Misuse, abuse, accidents, or unreasonable use, or acts of God.
d. Incorrect electric current, voltage, electrical and/or gas supply.
e. Improper setting of any control.
2 Warranties are void if the original serial numbers have been removed, altered,
or cannot be readily determined.
3. Light bulbs, water filters and air filters.
4. Products purchased for commercial or industrialuse.
5. The cost of service or service call to:
a. Correct installationerrors. For products requiring ventilation, rigid metal
ducting must be used.
b. Instruct the user on the proper use of the product.
c. Transport the appliance to and from the servicer.
6. Any food loss due to refrigerator or freezer product failures.
7. Expenses for travel and transportation for product service in remote locations.
8. Outside of the United States and Canada this warranty does not apply.
Contact your dealer to determine if another warranty applies.
9. Consequential or incidental damages sustained by any person as a result of
any breach of these warranties. Some states do not allow the exclusion or
limitation of consequential or incidental damages, so the above exclusion may
not apply.
if You Need Service
First see the Troubleshootingsection in your Use and Care Guide or call the
dealer from whom your appliance was purchased or call Maytag Services, LLC,
Customer Assistance at 1-800-688-9900 USA and 1-800-688-2002 Canada to
locate an authorized servicer.
• Be sure to retain proof of purchase to verify warranty status. Refer to
WARRANTY for further information on owner's responsibilities for warranty
service.
• If the dealer or service company cannot resolve the problem, write to Maytag
Services, LLC, Attn: CAIR:_Center, P.O. Box 2370, Cleveland, TN 37320-2370, or
call 1=800-688=9900 USA and 1=800-688=2002 Canada. U.S.customers
using TrY for deaf, hearing impaired or speech impaired, call 1-800-688-2080.
° User's guides, service manuals and parts informationare available from Maytag
Services, LLC, Customer Assistance.
Notes." When writing or calling about a service problem, please include:
a. Your name, address and telephone number;
b. Model number and serial number;
c. Name and address of your dealer or servicer;
d. A clear description of the problem you are having;
e. Proof of purchase (sales receipt).
27
VlA AG
Cuisini_re _lectrique & deux
fours et dessus lisse Maytag
Precision Touch S_rie 850
is/n/e
S6curit_ .................................. 29=32
Cuisson sur la surface ........ 33=36
Commandes
Surface_ dessuslisse
Centrede rSchauffage
Cuisson an four .................... 37=48
Tableau de commande
Cuissoncouranteau four
Cuissonetmaintien
D6marragediff6r6
Fonctiongrille-pain
Cuissonau gril
Maintienau chaud
Favorite
Grillesdu four
Nettoyage .............................. 49=52
Four autonettovant
M_thodes de nettoyage
Entretien .....
Portes ae four
Hublot
Lampe de four
53=54
Recherche des pauues ....... 55=56
_ Garautie et service 57
Guia de uso y cuidado .............. 58
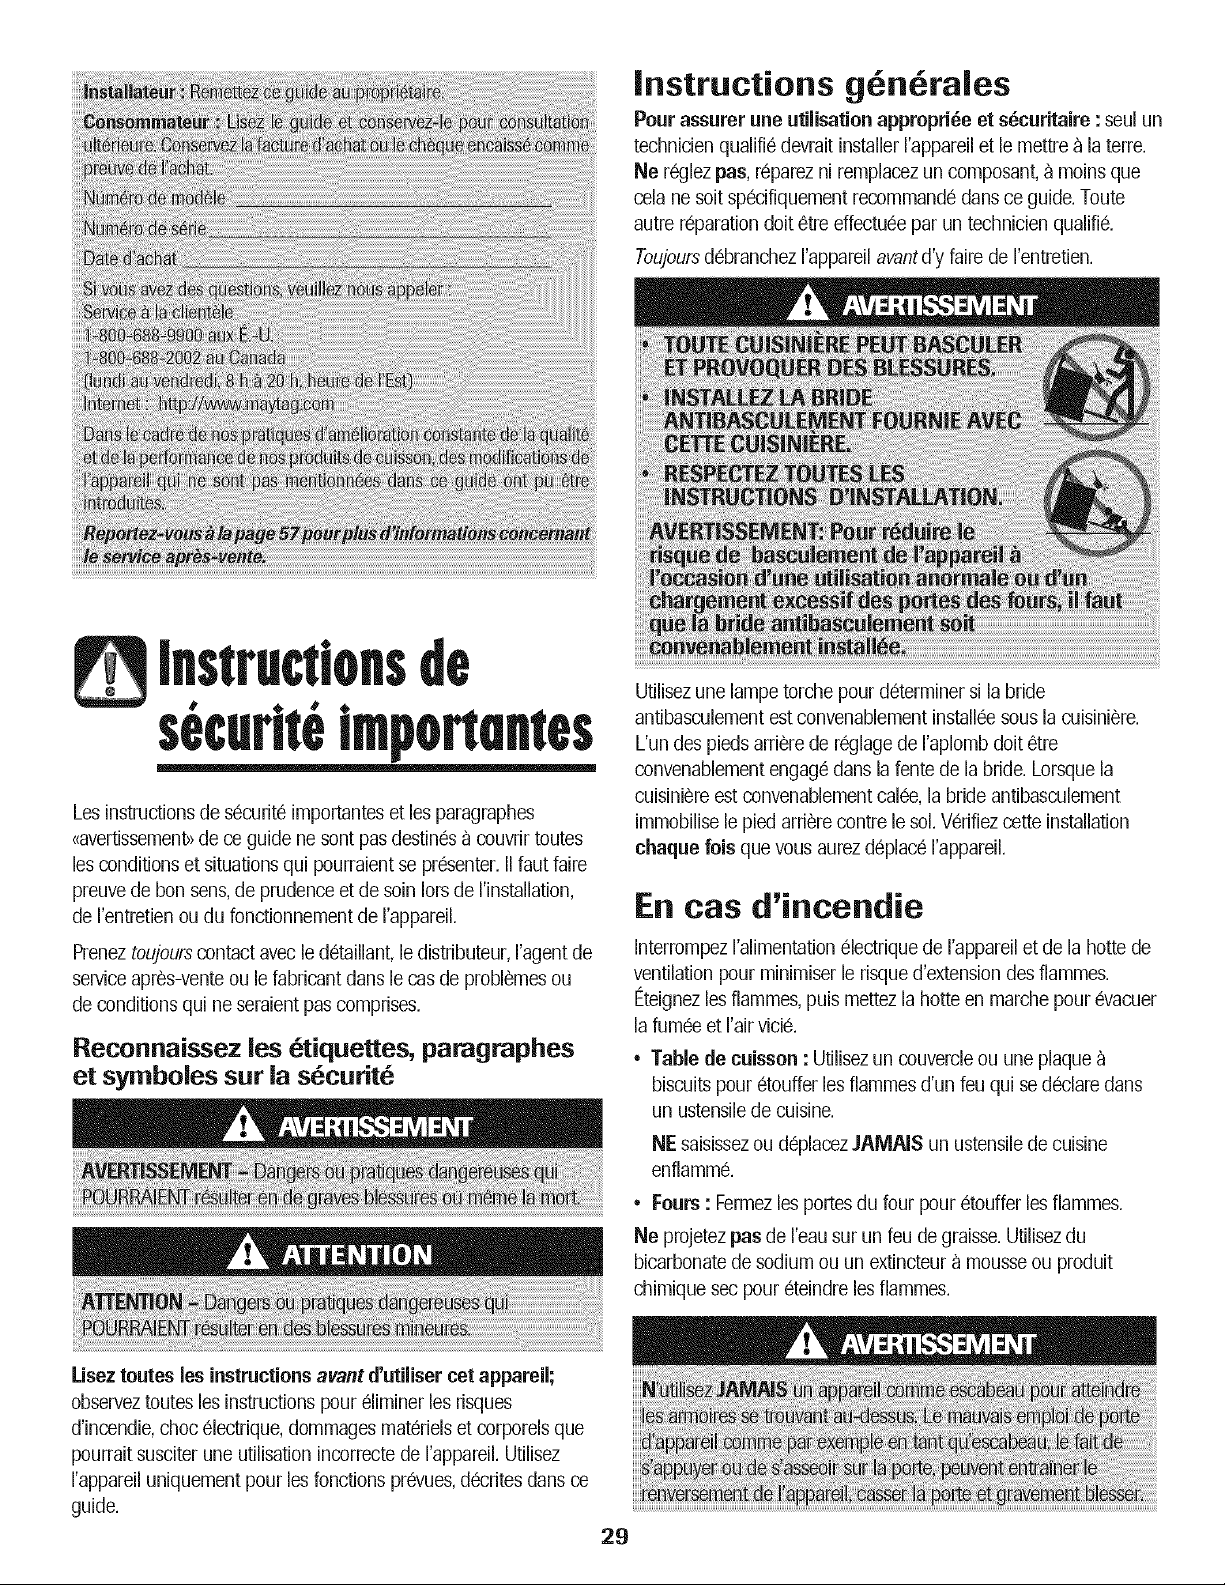
instructions g n rales
Pour assurer une utilisation appropri_e et s_curitaire : seul un
technicien qualifie devrait installerrappareil et le mettre _ la terre.
Ne reglez pas, reparez ni remplacez un composant, _ moins que
cola ne soit specifiquement recommande dartsce guide. Toute
autre r_parationdolt etre effectuee par un technicien qualifi&
Toujoursdebranchez rappareil avantd'y faire de rentretien.
instructionsde
securlt6imponentes
Les instructions de securite importanteset les paragraphes
{{avertissemenb>de ce guide ne sont pas destines _ couvfir toutes
los conditions et situationsqui pourraient se presenter.II faut faire
preuve de bon sens,de prudence et de soin lots de rinstallation,
de rentretien ou du fonctionnement de rappareil.
Preneztoujours contact avec le detaillant, le distfibuteur, ragent de
serviceapres-vente ou le fabficant dans le cas de problemesou
de conditions qui ne seraient pas comprises.
Reconnaissez los 6tiquettes, paragraphes
et symboles sur la s_curit_
Utilisezune lampe torche pour determiner si la bride
antibasculement est convenablementinstallee sous la cuisiniere.
L'un des pieds arriere de reglage de raplomb dolt etre
convenablementengage dans la fente de la bride. Lorsque la
cuisiniere est convenablementcalee,la bride antibasculement
immobilise le pied arfiere contre le sol. Verifiezcette installation
chaque fois que vous aurez deplace rappareil.
En cas d'incendie
Intermmpez ralimentation electrique de I'appareil et de la hotte de
ventilation pour minimiser le risque d'extensiondes flammes.
Eteignezlos flammes,puis mettezla hotte en marche pour evacuer
la fumee et rair vici&
• Table de cuisson : Utilisez un couvercle ou une plaque
biscuitspour etouffer les flammes d'un feu qui se declare dans
un ustensile de cuisine.
NE saisissezou deplacezJAMAIS un ustensile de cuisine
enflamme.
• Fours: Fermezlos pores du four pour etouffer los flammes.
Ne projetez pas de reau sur un feu de graisse. Utilisezdu
bicarbonatede sodium ou un extincteur _ mousse ou produit
chimique sec pour eteindre los flammes.
Lisezroutes les instructions avant d'utiliser cot appareil;
observeztoutes les instructions pour eliminer les risques
d'incendie, choc electrique, dommages materiels et corporels que
pourrait susciter une utilisation incorrecte de rappareil. Utilisez
rappareil uniquement pour les fonctions prevues,decfites dans ce
guide.
29

instructionsde " imponentes
Si rappareil est installe,pre,sd'une fene,tre,des pre,cautions
approprie,esdoivent e,treprises pour e,viterque le vent entraine les
rideaux au-dessus des e,le,mentschauffants.
N'utilisez JAMAB cet appareil pour chauffer ou re,chaufferune
pie,ce,sinon des brOhres, des blessures,un incendie ou des
dommages _ rappareil pourraient s'ensuivre.
N' e,vitezJAMAB de porter des ve,tementsamples ou _ Iongues
manches pendant rutilisation de rappareil. IIspeuvent prendre feu si
le ve,temententre en contact avec un e,le,mentde cuisson brOlant.
Pourvous assurer du bon fonctionnement de rappareil et pour
e,viterde rendommager ou de vous blesser,ne rajustez pas, n'y
faites pas de rentretien ni des re,parationset ne remplacez pas de
pie,cesde rappareil saul si cela estspe,cifiquementrecommande,
dans ce guide. Toute autre r@aration doit e,treeffectue,epar un
technicien qualifie,.
NE rangez et n'utilisezJAMAIS de ressence ou d'autres combus-
tibles ou matie,resinflammables dans les fours, pre,sdes e,le,ments
de surface ou _ proximite,de cet appareil puisque les vapeurs
pourraient creer un risque d'incendie ou une explosion.
Pour empe,cherqu'un feu de graisse ne se de,clare,e,viteztoute
accumulation de graisse ou autres matie,resinflammables dans
rappareil ou au voisinage.
N'utilisez que des maniques se,ches.Des maniques humides
peuvent provoquer la formation de vapeur brQhnte. Ne laissezpas
les maniques en contact avecdes e,le,mentschauffants chauds.
N'utilisez jarnais un torchon _ vaisselleou autre article textile; un tel
article pourrait trainer surun e,le,mentet s'enflammer.
Eteigneztoujourstoutes les commandes une fois la cuisson
termine,e.
NI: faites JANIAIS chauffer un re,cipientnon ouvert sur re,ie,mentde
surface ou dans les fours. L'accumulation de pressiondans le
re,cipientpounait provoquer son e,clatementet de graves
dommages mate,rielsou corporeis.
NE garnissezJAMAIS les cuvettesde proprete,, la sole ou une grille
du four avec de la feuille d'ahminium. Ceci pourrait susciter un
risque de choc e,iectriqueou d'incendie, ou une autre de,te,rioration
de rappareiL Utilisezde la feuille d'ahminium uniquement seion les
instructions de ce guide.
Les flacons d'ae,rosolpeuvent EXPLOSERIorsqu'on les expose _ la
chaleur,et ils peuvent contenir un produit tre,sinflammable.
N'utilisez pas ou ne langez pas pre,sde rappareil.
Table de caisson
NE laissezJAMAIS un element de surface allume,sans surveillance,
particulie,rementavecchauffage e,leve,.Le de,bo_dementdu contenu
de rustensile pounait provoquer la generation de fume,eabondante
et rinflammation de lagraisse.
3O
Cet appareilcomporte des e,le,mentschauffants de diffe,rentes
tailbs. Utiliseztoujours un ustensib _ fond plat,de taille suffisante
pour qu'il puisse recouvrir comple,tementre,le,ment.Pouroptimiser
refficacite,,choisissezun ustensib de me,me taille que re,le,ment.
Si rustensile est plus petit que re,le,ment,une partie de re,le,ment
sera expose,ce qui peut entrainer un contact direct et enflammer
les ve,tementsou les maniques.
Seulscertains mate,riauxen verre, vitroce,_amique,celamique, gre,s,
ou certains ustensilesvitrifie,s/e,maille,speuvent e,treutilise,ssur la
table de cuisson ou dans le four sans risque de bris sous reffet du
choc thermique. Observezles instructions du fabricant lots de
rutilisation d'un ustensile en verre.
La se,curite,de fonctionnement de cet appareil a e,te,teste,e_ raide
d'ustensiles de cuisine conventionnels.N'utilisez pas un ustensile
ou accessoirequi n'est pas spe,cifiquementrecommande,dans ce
guide. N'utilisez pas de gril place,sur la table de cuisson ou de
syste,mede convectionadditionnel. L'utilisationd'un dispositif ou
accessoirequi n'est pas expresse,mentrecommande,dans ce guide
peut de,graderla se,curite,de rappareil ou sa performance, ou
re,duirela Ionge,vite,des composants.
Orientezla poigne,ede chaque ustensile vers le centre de la table
de cuisson et non versrexte,rieurou vers un autre e,le,ment;ceci
re,duilale risque de brQhre, d'inflammation de matie,reinflammable
ou de renversement(un jeune enfant pourrait saisir et renverser un
ustensile dont le manche est oriente,vers rexte,rieur).
Table de caisson en
vitroc6ramique
N'utilisezJAMAIS un dessus casse,.Si la table de cuisson est
casse,e,les agents de nettoyage et les produits renverse,speuvent
pe,ne,trer_ rinte,rieuret donc entrainer un risque de de,charge
e,lectrique.Contactez imme,diatementun re,parateurqualifie,.
Nettoyezprudemment la table de cuisson. Certainsproduits de
nettoyage peuventge,ne,rerdes vapeurs nocives Iorsqu'ilssont
applique,ssur une surface chaude. Travaillezprudemment pour
e,viterdes brOhres par lavapeur en cas d'utilisation d'un chiffon
ou d'une e,pongehumide sur une surface chaude.
f
B ments de caisson
NE touchez JAMAIS les elements chauffants de surface ou des
fours, les zones_ proximite,de ces elements ni les parois
interieures des fours.
Les e,le,mentschauffants peuvent e,trebrQlantsme,mes'ils ne sont
plus rouges.Les surfacesinte,rieuresdes fours peuventatteindre
une tempe,raturesuffisamment e,leve,epour infligerdes brQhres.
Pendantet apre,susage, ne touchez pas les elements chauffants
ni les parois inte,rieuresdes fours et e,vitezbur contact avecdes
ve,tementsou autres mate,riauxinflammablesavant qu'ils n'aient
eu le temps de refroidir suffisamment.
instructionsdesecudtetmpomntes
Autres surfaces potentiellement chaudes : table de cuisson,
surfaces faisant face _ latable de cuisson,event de four, surfaces
pres de revent, portesde four et zonesvoisines des pores et des
hublots.
Friteuses
Exercezune prudence extreme Iorsdu deplacement du recipient de
graisseou Iors de relimination de graissechaude. Laissezla graisse
refroidir avantde deplacer rustensile.
FOurS
Ouvreztoujours la porte du four tres prudemment. Laissezrair chaud
ou la vapeur s'echapper avantde retirer ou d'introduire un plat.
Ne bloquez pas ou n'obstruez pas revent du four. Lorsque lesfours
fonctionnent, lessurfaces voisines de revent peuvent devenir assez
chaudes pour entrai'nerdes brQlures.
Placeztoujourslesgrilles _ la position appropriee darts le four Iolsque
lefour estfroid. Si la grille dolt etre deplacee Iolsque le four est
chaud, ne laissezpas les maniquesentrer en contact avec relement
chaud du four.
Fours autonettoyants
Nettoyezuniquement lespieces mentJonneesdans ce guide. Ne
nettoyezpusle jointde porte. Le jointjoue un role essentielquant
retancheit& Ne frottez pas,n'endommagez pas ou ne d@lacez pas
lejoint.
N'utiiisez pusde nettoyants abrasifs. N'utiiisez pas de produits de
nettoyage pour four ou enduits de four, duns les fours
autonettoyantsou sur leszones voisines.
Essuyezle plus gros des renversementsimportants,surtout ceux
comportant des matieres grassesavant de commencer
rautonettoyage pour eviterla formation de fumee et de flammes.
II est normal que la table de cuisson devienne tres chaude Iors
d'un cycle de nettoyage.Parconsequant,evitez de toucher la
surface de cuisson, la porte,le hublot et la zone des events du four
Iors d'un cycle d'autonettoyage.
S curit6 pour les enfants
NE laissezJAMAIS un enfant seul ou sans surveillanceIorsque la
cuisiniere fonctionne ou qu'elle est chaude.
NE laissezJAMAIS un enfant s'asseoirou se tenir sur une partie
quelconque de rappareiL IIpourrait se blesserou se brQler.
Apprenez _ vos enfants que la cuisiniere et les casseroles
deposeessur la surface de cuisson ou introduites dans le four
peuvent etre chaudes. Laissezrefroidir les ustensilesen un lieu
sQr,hors d'atteinte des enfants. Les enfants doivent comprendre
que la cuisiniere n'est pas un jouet. IIs ne doivent pus jouer avec
les boutons ou route autre piece de rappareiL
Hottes d'extraction
Nettoyezfrequemment les filtres et la hotte de la cuisiniere pour
empecher la graisseou d'autres produits inflammables de
s'accumuler sur lesfiltres ou la hotte en provoquantdes feux de
graisse.
Pourflamber des aliments sous la hotte, mettezle ventilateur en
marche.
31
securlteimponentes
Avertissement et avis
important pour la s_curit_
La Ioi californienne _ Safe Drinking Water and Toxic Enforce-
ment Act >>de 1986 (proposition 65) stipule [a publication par [e
gouverneur de la Californie d'une liste de substances que I'etat
de Californie considere comme cancefigenes ou dangereuses
pour le systeme reproducteur, et impose aux entreprises
commerciales robligation de signaler _ leurs clients les risques
d'exposition _ de telles substances.
Nous informons les utilisateurs de cet appareil que Iors d'une
operation d'autonettoyage, ils peuvent etre exposes _ une faible
concentration de certaines substances figurant dans la liste
mentionnee ci-dessus, dont le monoxyde de carbone. Pour
minimiser I'exposition, veillez _ ce que la piece ouse trouve le
four soit convenablement aeree durant une operation
d'autonettoyage par I'ouverture d'une fenetre ou d'une porte.
AVIS IMPORTANT - OISEAUX FAMILIERS : He gardez pas
un oiseau famiiier dans [a cuisine ou dans une piece ou i[
pourrait etre exposeaux fumees. Les oiseaux ont un systeme
respiratoire tres sensible. Les vapeurs qui s'echappent d'un four
pendant [e cycle autonettoyant peuvent leur etre nocives ou
meme fatales. De plus, les vapeurs qui s'echappent [orsque
rhufle de cuisson, [es corps gras, [a margarine et [es poeles ou
marmites _ revetement antiadhesif sont surchauffes peuvent
egaiement ¢tre nocives.
Conservez ces instructions pour consultation uJt_rieure
32
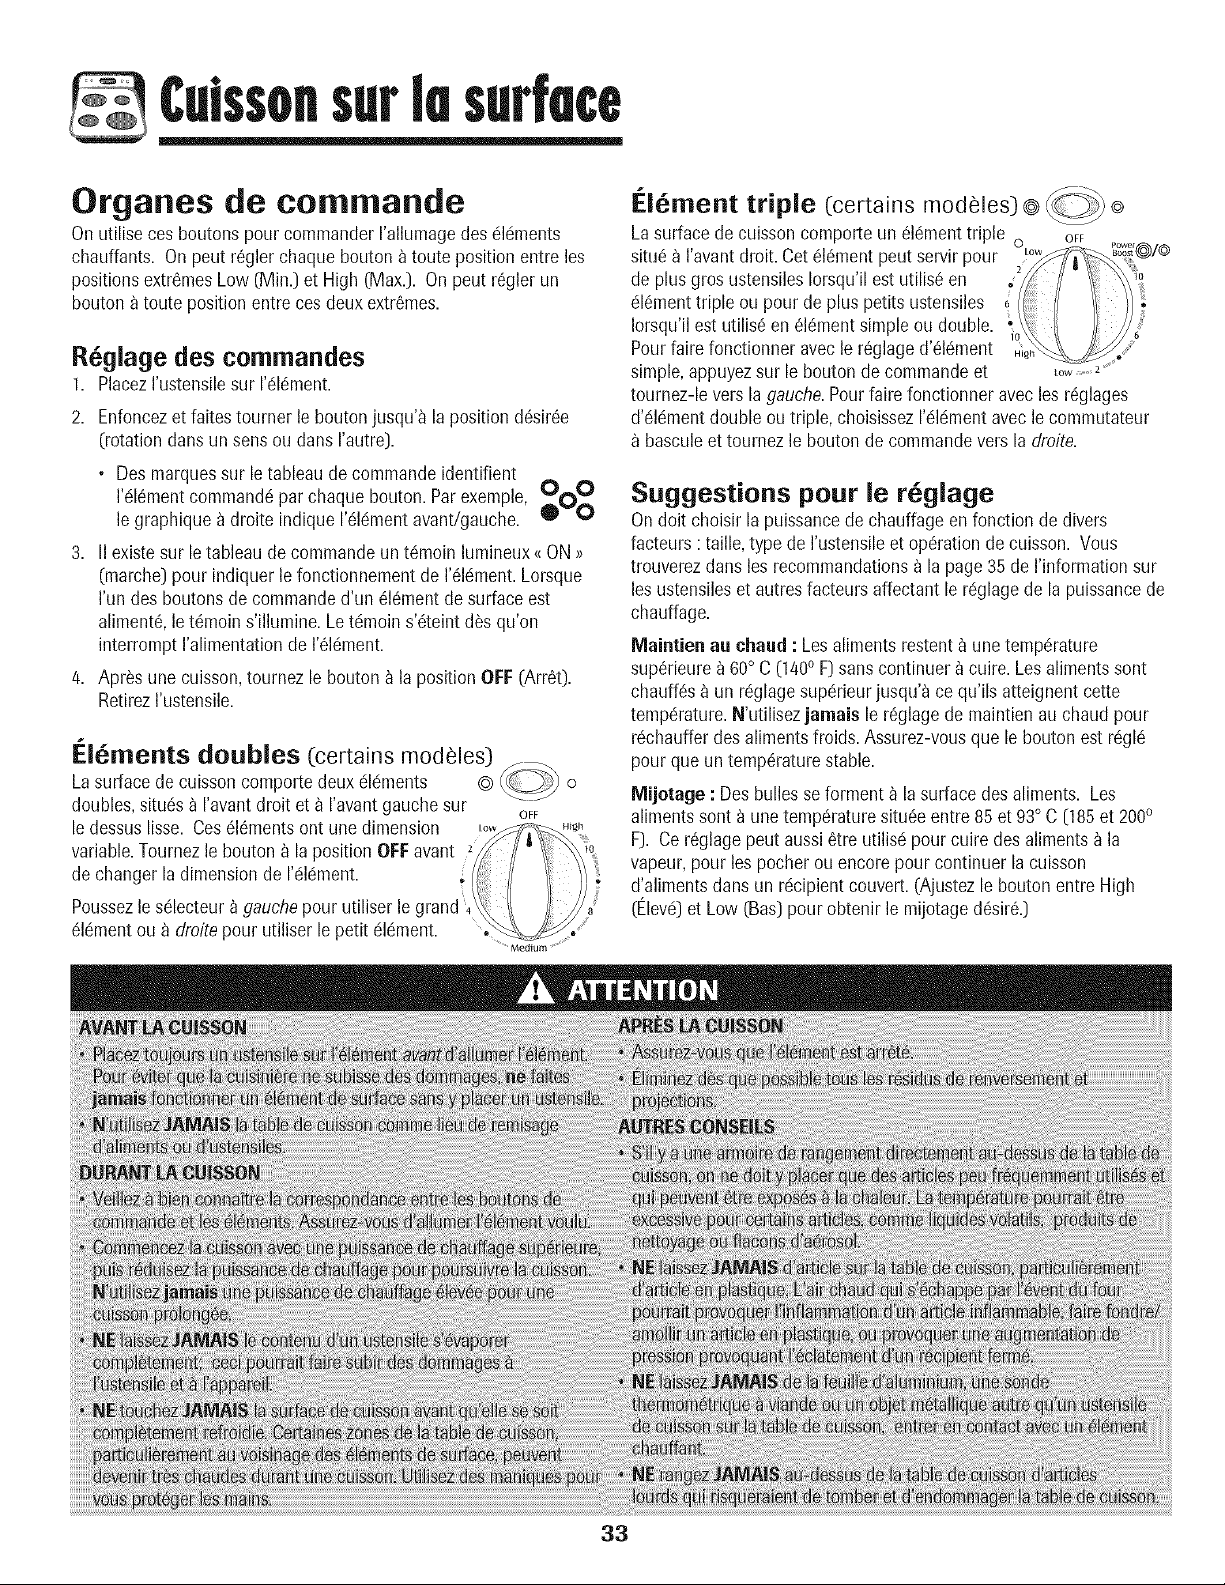
@issonsurle surfece
Organes de commande
Onutilise ces boutons pour commanderI'allumagedesc!16rnents
chauffants. On peut r_gierchaque bouton _toute position entre les
positionsextr6mesLow (Min.) et High (Max.). On peut r_gier un
bouton atoute positionentre cos deuxextr6mes.
R glage des commandes
1. PiacezI'ustensilesur I'c!16rnent.
2. Enfoncezet faites tourner le boutonjusqu'_ la position d6sir_e
(rotationdans un sensou dans rautre).
• Des marquessur letableau decommandoidentifient
O O
I'dl_mentcommand6par chaquebouton. Parexemple, O O_,a
le graphiquea droite indique 1'61dmentavant/gauche.
3. II existesur le tableaude commandeun t(gmoinlumineux{{ ON>>
(marche)pour indiquer le fonctionnementde I'dldment.Lorsque
I'un des boutonsde commanded'un 616mentdesurface est
aliment6,le t6moin s'illumine. Le t6moin s'6teint d_s qu'on
interrompt I'alimentationde 1'_16ment.
4. Apr_s une cuisson,tournezle bouton _ la positionOFF(Arr6t).
RetirezI'ustensile.
t':16ments doubles (certains modeles)
Lasurfacede cuissoncomportedeux c!lc!ments ©
doubles,situ(_sa I'avantdroit et _ ravant gauchesur
ledessuslisse. Cos 616mentsont unedimension
variable.Tournezle bouton _ la positionOFFavant
dechanger la dimensionde 1'616mont.
Poussezlesdlecteur_ gauchepour utiliser le grand 4
61dmentou a droite pour utiliserle petit dldment.
O
OFF
33
lf:l ment
triple
(certains modules) @_(_ @
Lasurface decuisson comporteun 616merittriple o OFF
situ6a I'avantdroit. Cot 816mentpeut servir pour
de plus gros ustensilesIorsqu'il estutilis_ en
dl_menttriple ou pour de plus petits ustensiles
Iorsqu'il est utilis6 en 616mentsimpleou double.
Pourfaire fonctionner avecle r_glaged'_ldment
simple,appuyezsur le bouton de commandeet _.........
tournez-levers lagauche.Pourfaire fonctionner avecles r6glages
d'dldmentdouble outriple, choisissezr61dmentavec le commutateur
basculeet tournezle bouton de commandoversla droite.
Suggestions pour le r glage
Ondoit choisir la puissancede chauffageenfonction de divers
facteurs: taille,type de I'ustensileet op6rationde cuisson. Vous
trouverezdartslos recommandationsa la page35de I'information sur
los ustensileset autresfacteursaffectant le rdglagede la puissancede
chauffage.
Maintien au chaud : Los alimentsrestent_ une temp6rature
sup_rieurea 60° C (1400F) sanscontinuer _ cuire. Losalimentssont
chauff6s_ un rdglagesupdrieurjusqu'a ce qu'ils atteignent cette
temp6rature.N'utilisezjamais le r6glagede maintienau chaud pour
rdchaufferdes alimentsfroids.Assurez-vousque le bouton estrdgld
pour queun temp6raturestable.
IVlijotage : Desbulles se forment _ la surface des aliments. Los
alimentssont a une tempdraturesitu6eentre 85et 93° C (185et 200o
F). Ce r6glagepout aussi8tre utilis6pour cuire des aliments_ la
vapeur,pour los pocherou encore pour continuerla cuisson
d'alimentsdansun rdcipientcouvert.(Ajustezle bouton entre High
(Elevd)et Low (Bas)pour obtenir le mijotaged6sir6.)
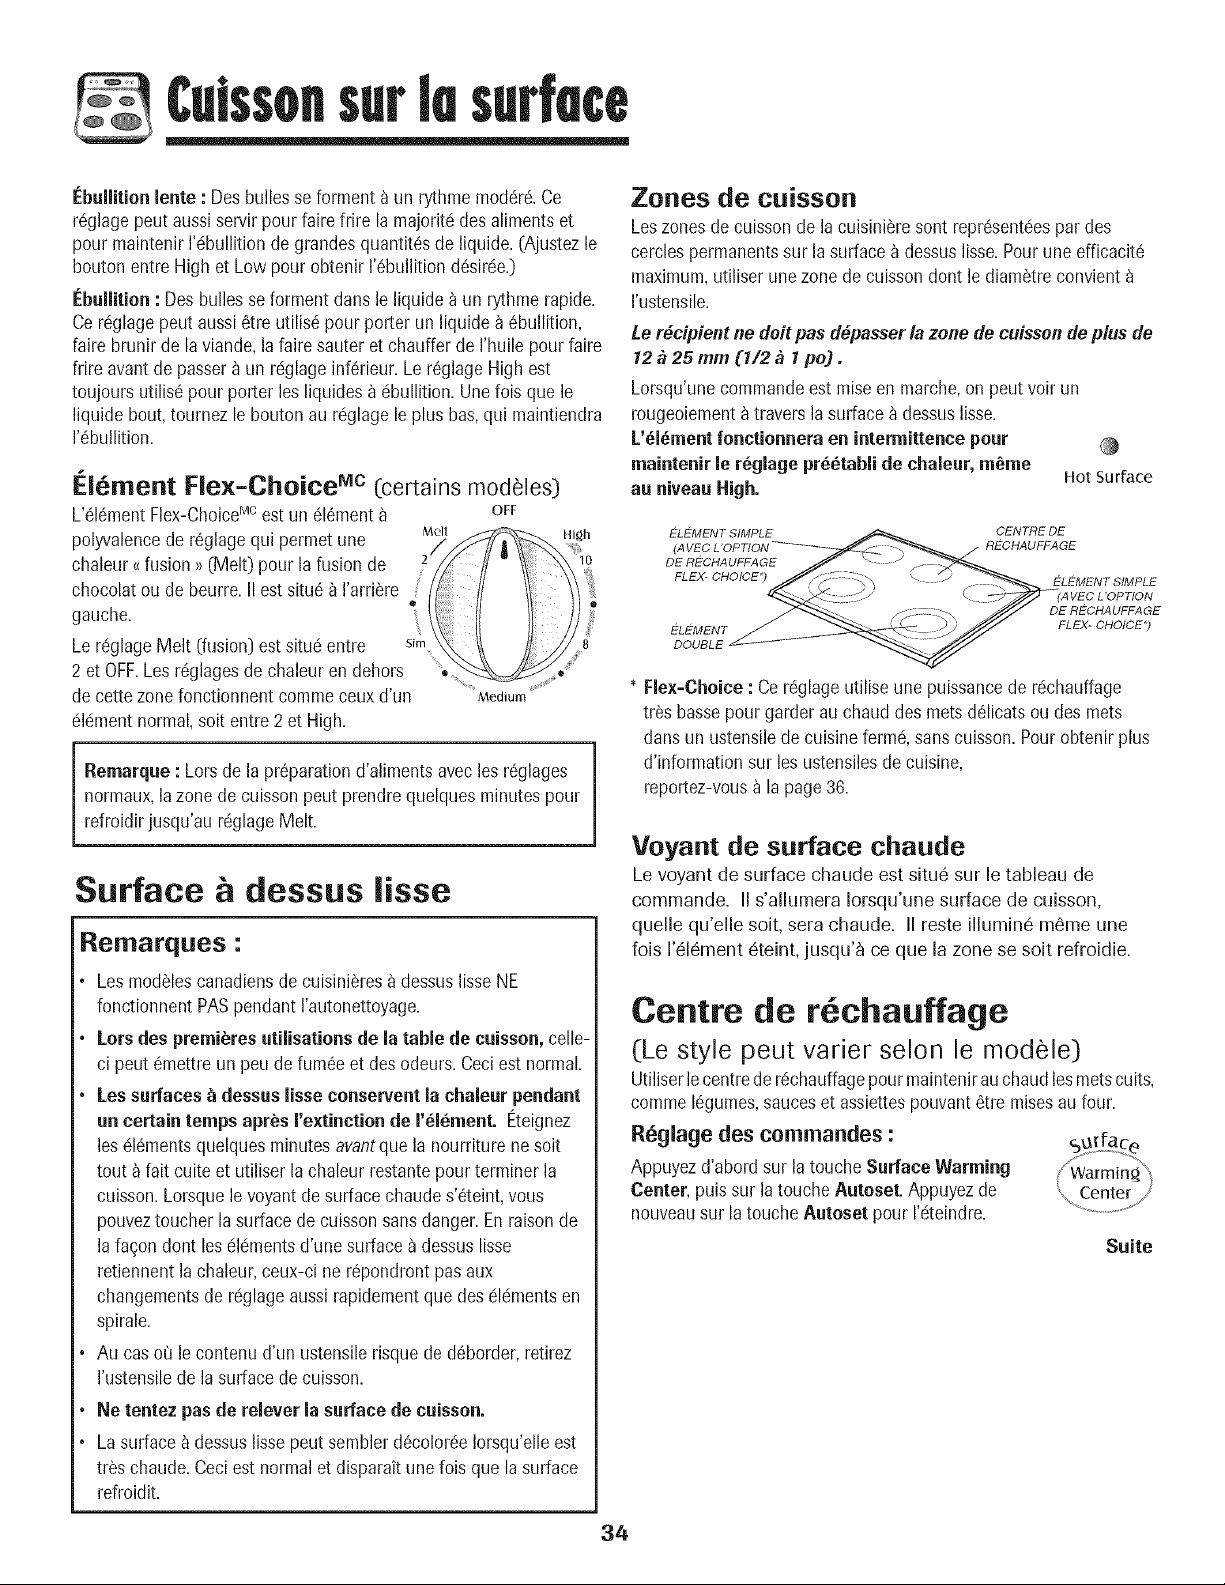
Culssonsurle surfece
Ebullition lento : Des bulles se forment aun rythmemod_r& Ce
r6glagepout aussiservir pourfaire frire la majorit_ des alimentset
pour maintenirI'c!bullitionde grandesquantit6sde liquide. (Ajustezle
bouton entre Highet Low pour obtenir I'_bullition d_sirc!e.)
lebullition : Des bulles seforment dunsle liquide aun rythme rapide.
Ce r6glagepout aussi6tre utilis_ pour porter un liquide a _bullition,
faire brunir de la viande,la faire sauter et chaufferde I'huile pour faire
frire avantde passer_ un rc!glageinf6rieur.Le r%lage High est
toujoursutilis_ pour porter los liquides_ 6bullition. Unefois que le
liquide bout,tournezle bouton au rc!glagele plus bus,qui maintiendra
1'6bullition.
t':16ment Flex=Choice Mc (curtains modules)
L'616mentFlex-ChoiceMcest un 616taunt_ OFF
Melt Ill_h
polyvalencede r6glagequi permetune
chaleur_ fusion _ (Molt) pour la fusion de
chocolatou de beurre.II est situ6 _ I'arri_re
gauche.
Le rc!glageMelt (fusion)estsituc!entre sim 8
i
2 et OFF.Losr6glagesdechaleur en dehors
decette zonefonctionnent commeceuxd'un Medium
c!lc!mentnormal,soit entre 2 et High.
Remarque : Lors de la pr@arationd'alimentsaveclos r%lages
normaux,la zonede cuissonpeut prendrequelquesminutespour
refroidir jusqu'au rc!glageMelt.
Surface dessus lisse
Reilrlarqt=es :
*Les modulescanadiensde cuisini_res_ dessuslisse NE
fonctionnent PASpendant I'autonettoyage.
. Lors des premieres utilisationsde la table de cuisson,celle-
ci peut 6mettre un peu defum6eet des odeurs.Ceciest normal.
. Les surfaces _ dessuslisseconserventla chaleur pendant
un certain temps apr_s rextinction de I'_l_ment. Eteignez
les c!k_,mentsquelquesminutesavantque la nourriture ne soit
tout _ fait cuiteet utiliser la chaleurrestantepour terminer la
cuisson.Lorsquele voyantde surfacechaudes'6teint, vous
pouveztoucher la surfacede cuissonsansdanger. En raisonde
la fa9on dont les_k!mentsd'une surfacea dessuslisse
retiennentla chaleur, ceux-ci ne r@ondront pusaux
changementsde rc!glageaussirapidementque des c!lc!mentsen
spirale.
° Au cas cO le contenu d'un ustensilerisquede d6border,retirez
I'ustensilede la surfacede cuisson.
• Ne tentez pasde relever la surface de cuisson.
• La surface_ dessuslissepeut semblerd6color6eIorsqu'elleest
tr_s chaude.Ceciest normalet disparait unelois que lasurface
refroidit.
Zones de ct=isson
Leszones de cuisson de la cuisini_re sont repr_sentc!espar des
cerclespermanentssur lasurface_ dessuslisse.Pouruneefficacit6
maximum,utiliser unezone decuissondont le diam_treconvient
I'ustensile.
ie r_cipient ne doit pusd_passerla zone de cuisson de plus de
12 _ 25 mm (I/2 _ 1 po_ .
Lorsqu'unecommandoest miseen marche,on peut voir un
rougeoiement_travers lasurface _ dessuslisse.
L'_l_ment fonctionneraen intermittence pour
maintenir le r_glage pr_tabli de chaleur, m_me
au niveau High. Hot Surface
L:LEMENT SIMPLE CENTRE DE
(, RECHAUFFAGE
DE RL:CHAUFFAGE
L:LEMENT
DOUBLE
ELEMENT SIMPLE
A VEC L'OPTION
DE RECHAUFFAGE
FLEX- CHOICE _)
* Flex-Choice : Cer_glage utilise une puissancede r_!chauffage
tr_s bassopour garderau chaud des metsd61icatsou des mets
duns un ustensilede cuisineform& sanscuisson. Pourobtenir plus
d'informationsur los ustensilesde cuisine,
reportez-vousa la page36.
Voyant de st=trace chat=de
Le voyant de surface chaude est situ_ sur le tableau de
commando. II s'allumera Iorsqu'une surface de cuisson,
quelle qu'elle soit, sera chaude. II reste illumin_ m_me une
fois I'_l_ment _teint, jusqu'_ ce que la zone se soit refroidie.
Centre de r chauffage
(Le style peut varier selon le modele)
Utiliserle centrede r_chauffagepourmaintenirauchaudlesmetscults,
commeI_gumes,sauceset assiettespouvant_tre raisesau four,
R_glage des commandos :
Appuyezd'abord sur la touche SurfaceWarming
Center, puis sur latouche Autoset. Appuyezde
nouveausur la touche Autoset pour I'_!teindre.
Suite
34
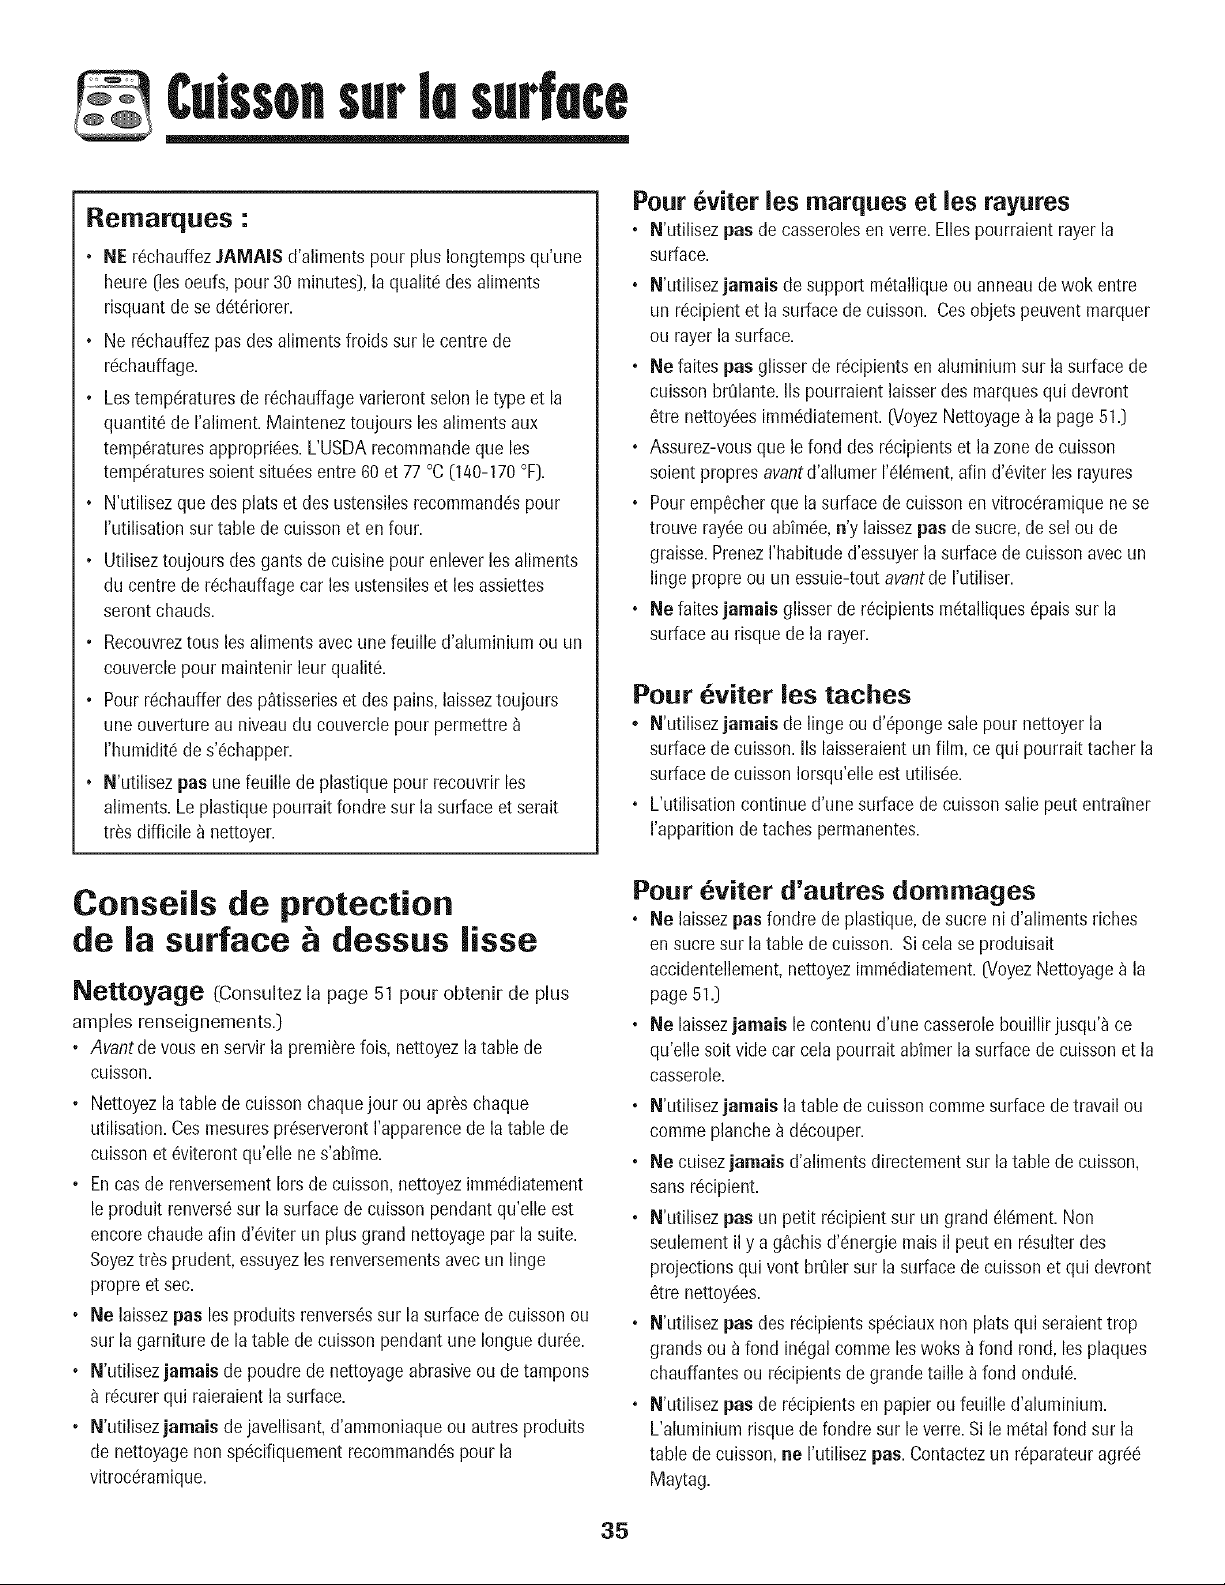
Culssonsurle surfece
Remarques :
• NE r_chauffezJAMAiS d'alimentspour plus Iongtempsqu'une
heure(les oeufs,pour 30 minutes), laqualit6 des aliments
risquantde sed6t6riorer.
• Ne rc!chauffezpas desalimentsfroids sur le centre de
rc!chauffage.
° Lestemp6raturesde r6chauffagevarierontselonle type et la
quantit6de I'aliment.Mainteneztoujoursles alimentsaux
temp6raturesappropri6es.L'USDArecommandeque les
tempc!raturessoientsitu6esentre 60 et 77 °C(140-170°F].
• N'utilisezque des plats et des ustensilesrecommand6spour
I'utilisationsur table decuisson et en four.
• Utiliseztoujoursdes gantsde cuisinepour enleverles aliments
du centrede r6chauffagecar les ustensileset les assiettes
seront chauds.
, Recouvreztousles aliments avecune feuille d'aluminium ou un
couverclepour maintenir leur qualit&
, Pourrdchaufferdes p_tisserieset des pains, laisseztoujours
uneouvertureau niveaudu couverclepour permettre
I'humidit6de s'6chapper.
• N'utilisezpas unefeuille deplastiquepour recouvrir les
aliments.Leplastiquepourrait fondre sur la surface et serait
tr_s difficile a nettoyer.
Conseils de protection
de la surface & dessus lisse
Nettoyage (Consultez la page 51 pour obtenir de plus
amples renseignements.)
• Avantde vous en servir la premierefois, nettoyezlatable de
cuisson.
° Nettoyezla table de cuissonchaquejour ou apr_schaque
utilisation.Cesmesurespr6serverontI'apparencede la table de
cuissonet 6viterontqu'elle ne s'abime.
° Encasde renversementlots de cuisson,nettoyezimm6diatement
le produit renvers6sur lasurfacede cuisson pendantqu'elle est
encorechaudeafin d'c!viterun plus grand nettoyagepar lasuite.
Soyeztr_s prudent,essuyezles renversementsavecun linge
propreet sec.
• Ne laissez#as lesproduits renvers6ssur lasurface de cuissonou
sur la garniture de la table decuisson pendantune Ionguedurc!e.
° N'utilisezjamais de poudre de nettoyageabrasiveoude tampons
r6curerqui raieraientla surface.
• N'utilisezjamais dejavellisant,d'ammoniaqueou autresproduits
de nettoyagenon spc!cifiquementrecommand6spour la
vitrocc!ramique.
Pour eviter les marques et les rayures
• N'utilisezpas de casserolesen verre.Ellespourraient rayerla
surface.
• N'utilisezjamais de support m6talliqueou anneaude wok entre
un rdcipientet lasurface decuisson. Cesobjets peuventmarquer
ou rayerla surface.
° Ne faites pas glisserde r6cipientsen aluminium sur lasurfacede
cuisson brOlante.IIs pourraient laisserdes marquesqui devront
6tre nettoydesimmddiatement.[VoyezNettoyage_ la page 51.]
° Assurez-vousque le fond des r6cipientset la zone de cuisson
soient propresavantd'allumerI'dldment,afin d'6viter les rayures
• Pouremp6cherque lasurfacede cuissonen vitrocdramiquene se
trouve ray6eou abimde,n'y laissezpas de sucre,desel ou de
graisse.PrenezI'habituded'essuyerla surfacede cuissonavecun
lingepropre ou un essuie-tout avantde I'utiliser.
• Ne faitesjamais glisserde r6cipientsmc!talliques@ais sur la
surface au risquede la rayer.
Pour viter ies taches
• N'utilisezjamais de linge ou d'@onge sale pour nettoyerla
surface decuisson.IIslaisseraientun film, ce qui pourrait tacher la
surface decuisson Iorsqu'elleest utilisc!e.
• L'utilisationcontinued'une surface de cuissonsalie peut entrainer
I'apparitionde tachespermanentes.
Pour viter d'autres dommages
°Ne laissezpus fondre de plastique,de sucreni d'aliments riches
en sucresur latable decuisson. Si cela se produisait
accidentellement,nettoyezimmddiatement.(VoyezNettoyagea la
page51.]
• Ne laissezjamais le contenu d'une casserolebouillir jusqu'ace
qu'elle soit vide car celapourrait abimer la surfacede cuissonet la
casserole.
° N'utilisezjamais la table de cuissoncommesurfacede travailou
comme planchea d_couper.
• Ne cuisezjamais d'alimentsdirectementsur latable de cuisson,
sans rdcipient.
° N'utilisezpas un petit r6cipientsur un grand616ment.Non
seulementil y a g_chis d'dnergie maisil peut en rdsulterdes
projectionsqui vent brOlersur lasurface decuisson et qui devront
6tre nettoy6es.
• N'utilisezpas des r6cipientssp6ciauxnon plats qui seraienttrop
grands ou a fond in_galcommeleswoks a fond rond, les plaques
chauffantesou r6cipientsde grandetaille afond ondul&
° N'utilisezpas de rdcipientsen papier ou feuille d'aluminium.
L'aluminiumrisque defondre sur le verre.Si le mdtalfond sur la
table de cuisson,ne I'utilisezpas. Contactezun r@arateuragrd_
Maytag.
35
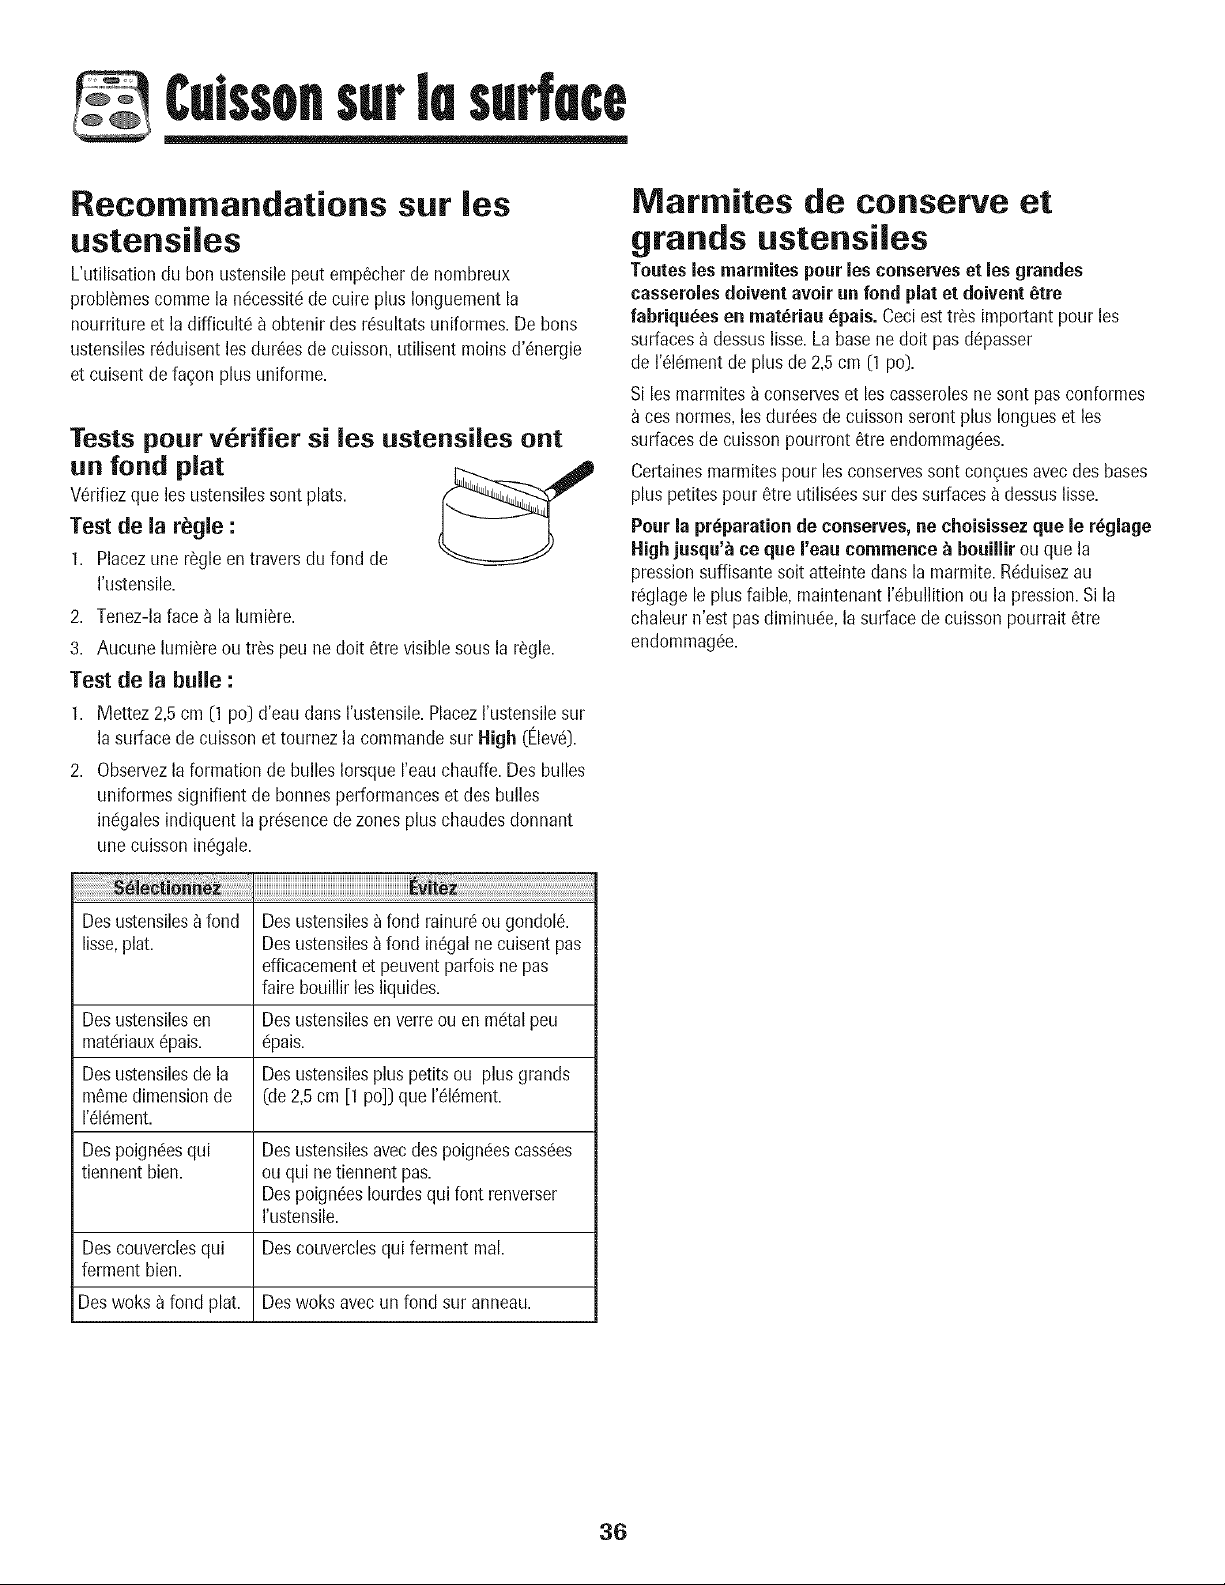
Culssonsurlesurfece
Recommandations sur les
ustensiles
L'utilisationdu bon ustensilepeut emp6cherde nombreux
probl_mescommela n6cessitdde cuire plus Ionguementla
nourriture et la difficultd _ obtenir des r6sultats uniformes.De bons
ustensilesr6duisentlos dur#esde cuisson,utilisent moinsd'6nergie
et cuisent de fa(;onplus uniforme.
Tests pour v_rifier si los ustensiles ont
un fond plat
V6rifiezque les ustensilessont plats.
Test de la r_gle :
1. Placezune r_gle entraversdu fond de
I'ustensile.
2. Tenez-laface_ la lumi_re.
3. Aucune lumi_reou tr_s peu nedolt 6tre visiblesousla r_gle.
Test de la bulle :
1. Mettez 2,5cm (1 po] d'eau dans I'ustensile.PlacezI'ustensilesur
la surfacede cuissonet tournez la commandosur High (Elevd).
2. Observezla formation de bulles IorsqueI'eauchauffe. Des bulles
uniformessignifient de bonnesperformanceset des bulles
inc!galesindiquent la prc!sencede zones plus chaudesdonnant
une cuissoninc!gale.
iiiiiiiiiiiiiiiiiiiiiiiiiiiiiiiiiiiiiiiiiiiiiiiiiiiiiiiiiiiiiiiiiiiiiiiiiiiiiiiiiiiiiii!ii
Desustensiles_ fond Desustensilesa fond rainur6ou gondol&
lisse,plat. Desustensiles_fond in6galnecuisentpas
efficacementet peuventparfoisne pas
faire bouillirlosliquides.
Desustensilesen Desustensilesenverreou en mdtalpeu
matdriaux_pais. dpais.
Desustensilesde la Desustensilesplus petitsou plus grands
m6medimensionde (de 2,5cm [1 po]] que1'616mont.
1'616mont.
Despoigndesqui Desustensilesavecdes poignc!escassdes
tiennent bien. ouqui ne tiennent pas.
Despoign6esIourdesqui font renverser
rustensile.
Descouverclesqui Descouverclesqui ferment real.
ferment bien.
Deswoks afond plat. Deswoks avec un fond sur anneau.
Nlarmites de conserve et
grands ustensiles
Toutesles marmites pour les conserves et les grandes
casserolesdoivent avoir un fond plat et doivent _tre
fabriqu_es en mat_riau _pais. Ceciest tr_s important pourles
surfaces_ dessuslisse.La basene dolt pasd6passer
de I'_ldmentde plus de 2,5cm [1 po].
Si lesmarmites_ conserveset les casserolesnesont pas conformes
cosnormes,losdur6esde cuissonseront plus Iongueset los
surfacesde cuissonpourront 6tre endommagdes.
Certainesmarmitespour les conservessent con_uesavecdes bases
plus petites pour 6tre utilis6essur dessurfaces_dessuslisse.
Pour la preparation de conserves,ne choisissezque le r_glage
Highjusqu'_ ce que reau commencet_bouillirou que la
pressionsuffisantesoit atteinte dans la marmite.R6duisezau
rdglagele plus faible,maintenant1'6bullitionou la pression.Si la
chaleur n'est pasdiminude,lasurface de cuissonpourrait 6tre
endommag6e.
36
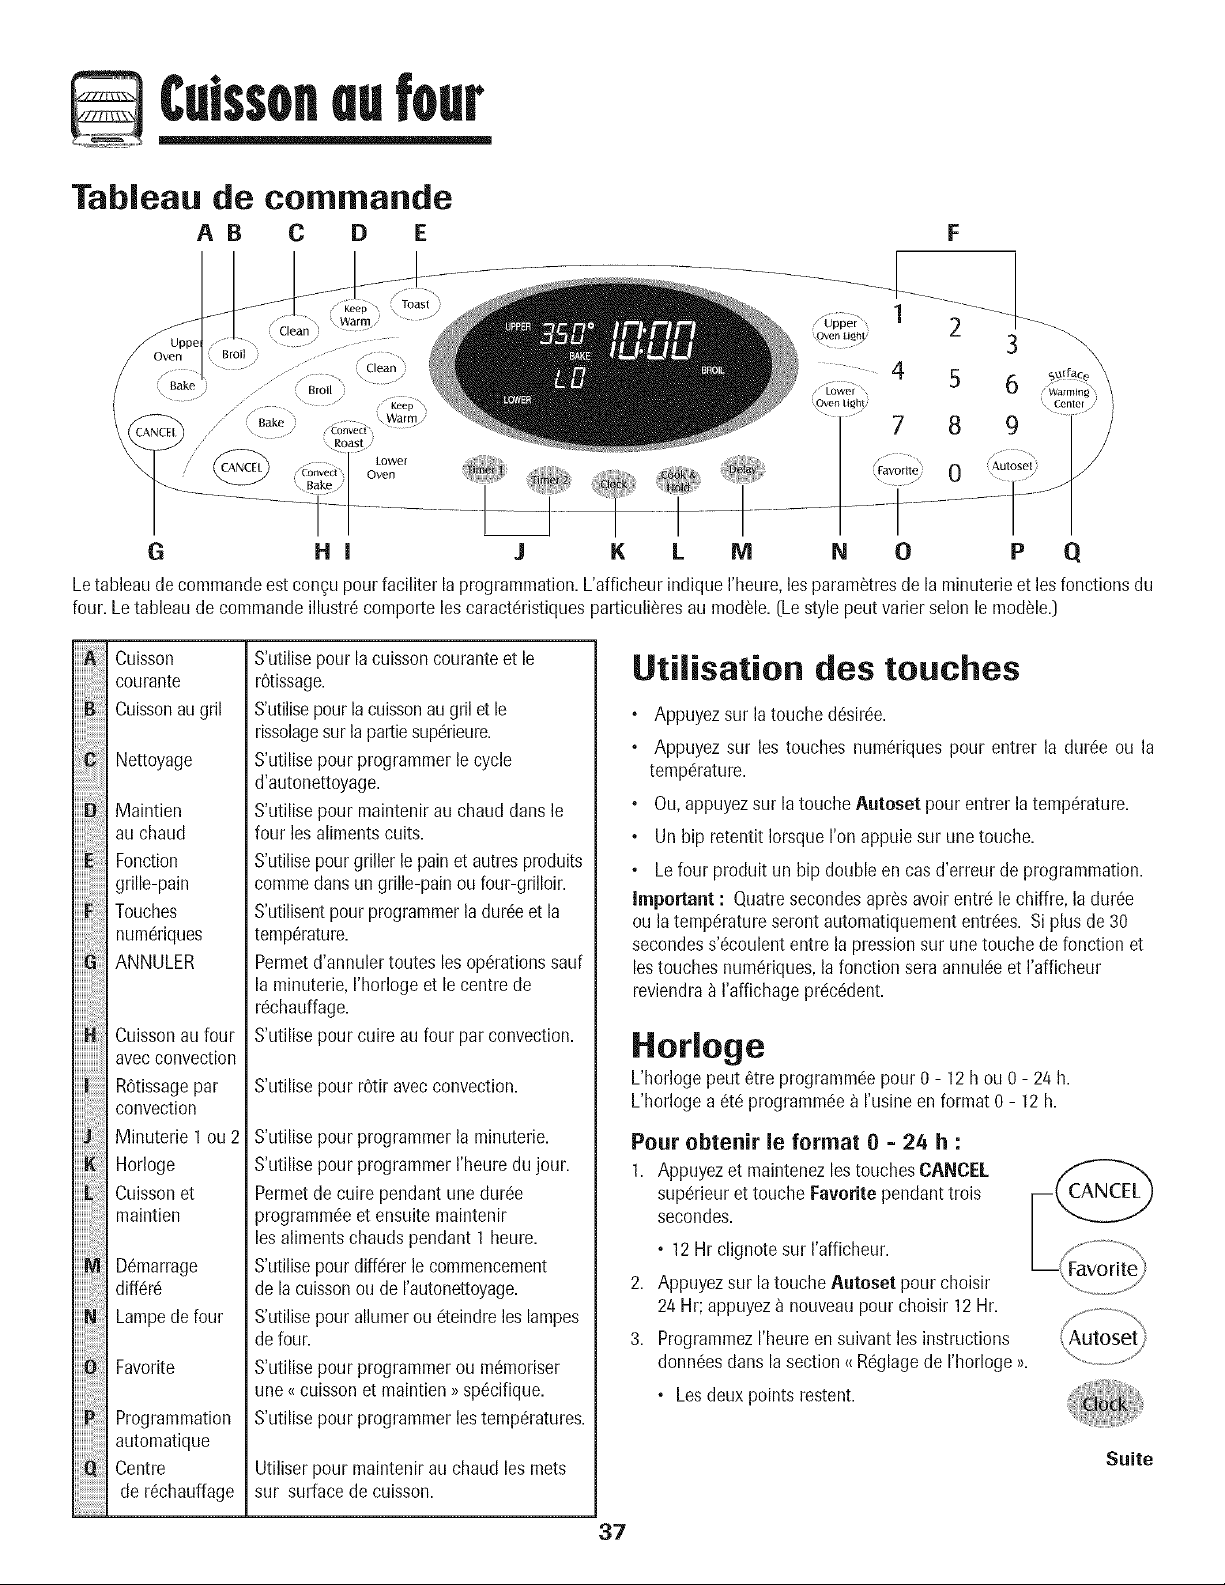
@issoneufour
Tableau de commande
AB C D E F
2
...........4 5 6
pven li_h_
7 8 9
/ .............
Autoseti
K L M N 0 P q
Letableaude commandeestcongupour faciliter laprogrammation.L'afficheurindiqueI'heure,lesparam_tresde laminuterieet lesfonctions du
four. Letableaude commandeillustr6comporte lescaract6ristiquesparticuli_resau module. [Le stylepeut varier scion le module.)
iiiiii_!,!,!_!,,!,!!,!!,!_iiiiiiiii!,!
iiiiii i!!i!i !i !ii!iiiiii!
iiiii ! i!:i!ii!ii!iii; !!ii
iiiiii !iiiiiiii!i!i i
iiiiii 'ii iii i
iiiiii !ii!ii!ii!ii!i:i
Cuisson
courante
Cuissonaugril
Nettoyage
Maintien
au chaud
Fonction
grille-pain
Touches
num_!nques
ANNULER
Cuissonau four
avecconvection
ROtissagepar
convection
Minuterie 1ou 2
Horloge
Cuissonet
maintien
D6marrage
diff_!r_!
Lampede four
Favorite
Programmation
automatique
Centre
de r6chauffage
S'utilisepourla cuissoncouranteet le
rOtissage.
S'utilisepourla cuissonau gril et le
rissolagesur la partiesup6rieure.
S'utilisepour programmerlecycle
d'autonettoyage.
S'utilisepour maintenirau chaud dartsle
four les alimentscuits.
S'utilisepourgriller lepainet autresproduits
commedans ungrille-painou four-grilloir.
S'utilisentpourprogrammerla dur6e et la
temp6rature.
Permetd'annuler toutes les op6rationssauf
la minuterie,rhorloge et le centre de
r_chauffage.
S'utilisepour cuire au four par convection.
S'utilisepour r6tir avecconvection.
S'utilisepour programmerla minuterie.
S'utilisepour programmerI'heuredu jour.
Permetde cuire pendant uneduroc
programm_eet ensuite maintenir
les alimentschaudspendant 1 heure.
S'utilisepour diff_!rerle commencement
de lacuissonou de I'autonettoyage.
S'utilisepour allumerou _!teindreles lampes
defour.
S'utilisepour programmerou m_moriser
une _cuissonet maintien >>sp_cifique.
S'utilisepour programmerlestemperatures.
Utiliser pour maintenirau chaud les mets
sur surfacede cuisson.
Utilisation des touches
37
• Appuyez sur la touche d6sir_!e.
• Appuyez sur les touches numSriquespour entrer la dur6e ou la
temp_!rature.
Ou,appuyezsur la toucheAutoset pour entrer la temp6rature.
Un bip retentit IorsqueI'on appuie sur une touche.
Lefour produit un bip doubleen cas d'erreur de programmation.
Important : Quatresecondesapr_s avoirentr_!le chime, la dur6e
ou latemperatureseront automatiquemententr6es. Siplus de 30
secondess'6coulententre lapressionsur unetouche de fonction et
lestouches num(griques,la fonction seraannuk!eet I'afficheur
reviendra_ I'affichage pr_!c_dent.
Horloge
L'horloge peut 8tre programm_epour0 - 12h ou 0 - 24 h.
L'hofloge a 6t_ programm_ea I'usine en format 0 - 12h.
Pour obtenir le format 0 = 24 h :
1.
2,
3.
Appuyezet maintenezlestouchesCANCEl.
sup_rieuret touche Favorite pendanttrois
secondes.
• 12 Hr clignote sur I'afficheur.
Appuyezsur latouche Autoset pour choisir
24 Hr;appuyeza nouveaupour choisir 12Hr.
t Favorite_
Programmezrheureen suivant les instructions
donn6esdans la section _ R_glagede rhorloge ;_.
• Les deux points restent.
Suite
Culssoneufour
Lorsquele courant 6lectrique arriveou apr_s une interruptionde
courant,la derniSreheure avant I'interruptionde courantva
clignoter.
PourrappelerI'heuredujour Iorsqu'uneautre fonction de durde
s'affiche,appuyezsur la touche Clock.
Annulation de I'affichage de I'heure :
Si I'onne d6sire pasraffichage de I'heuredu jour :
Appuyezet maintenezlos touchesCANCELsup6rieur (CANCEL")
et Clock pendant troissecondes.L'heuredu jour
disparaitde I'afficheur.
LorsqueI'affichagede I'heureest annuld,appuyezsur
la toucheClock pour afficher briSvementI'heuredu jour.
R6affichage de I'heure :
Appuyezet maintenezlostouches CANCELsup6rieuret Clock
pendant troissecondes.L'heuredu jour rdapparaita I'afficheur.
Minuterie
Chaqueminuterie pout 6tre programm6epour une p6riode de une
minute (00:01)_ 99 heureset 59 seconds(99:59).
Los minuteriespeuvent6tre utilis6esind@endammentdetoute
fonction du four. Ellespeuvent6tre programmc!esalors qu'une autre
fonction du four estutilisde.
Los minuteriesnecommandentpas le four.
Programmation de la minuterie 1 ou de la 2 :
1. Appuyezsur la touche Timer 1 ou 2 (Minuterie).
• 00:00et le motTIMER1ou 2 (MINUTERIE1 ou 2)
clignotent_ I'afficheur.
2. Appuyezsur lostouches numc!riquesappropri6es
jusqu'_ ce que I'heurejuste paraisse_ I'afficheur.
• Losdeux pointset TIMER1et/ou 2 continueront_ clignoter.
• TIMER1 ou TIMER2 seraaffich& Silos deux sont utilisc!es,
TIMER1 et TIMER2 serontaffichc!s.
3. Appuyez) nouveausur la touche Timer ouattendez
quatresecondes.
• Losdeux pointss'arr6tentde clignoter et le d_comptede la
dur_ecommence.
• Laderni_reminutedu dc!comptesera affich_esousformede
secondes.
4. A la fin de ladur6e programmc!e,un hip long retentit et le mot
_ End_(Fin)sera affichc!.
5. Appuyezsur latouche Timer pour dc!gagerI'afficheur.
Annulation de la minuterie :
1. Appuyezsur la touche Timer qui convient et
maintenez-laainsi pendant troissecondes.
OU
2. Appuyezsur latouche Timer et _0 _ _ I'aidedes
touches numc!riques.
0
Verrouillage des commandos
et de la porte du four
Losportesdesfours et lostouches peuvent6tre verrouill6espour des
raisonsde s_curit6,nettoyageou pour emp6chertoute utilisation non
souhait6e. Lostouches ne fonctionnerontpassi oliossontverrouillc!es.
Siun four est en cours d'utilisation,los toucheset los portes ne
peuvent6tre verrouillc!es.
L'heure actuelledu jour restera_ I'afficheur Iorsquelostouches et los
portesserontverrouill6es.
Pour verrouiller los deu× portes : C__1. Appuyezet d_gagezlatouche CANCEL.
2. Appuyezet maintenezlostouchesCANCEL
supc!rieuret Cook & Hold pendant troissecondes.
• LesymboleOFF(ARRET]apparaitsur I'afficheur.
• LOCKclignotequand los portesse verrouillent.Los deuxpores
sentverrouillc!es.LOCKreste.
D6verrouillage des deu× portes :
Appuyezet maintenezlostouches CANCELsupc!rieuret Cook & Hold
pendant troissecondes.OFFdisparaitde I'afficheuret LOCKclignote
alors que losportesse d_verrouillent.
Important : Lostouches et losportesde four ne peuventpas 6tre
verrouill6essi la tempc!raturedu four est a 400° F (204° C) ou plus.
Codes d'anomalie
BAKEou LOCKpeuvent clignoter rapidementpourvousavertird'une
erreurou d'un probl_me. Si tel est le cas,appuyezsur la touche
CANCEL. Si les mots BAKEou LOCKcontinuent ) clignoter,
d_branchezI'appareil. Attendezquelques minutes,puis rebranchez
I'appareil.Si un des rootscontinue_ clignoter,d_!branchezrappareil
et prenezcontact avec un r@arateur autoris&
38
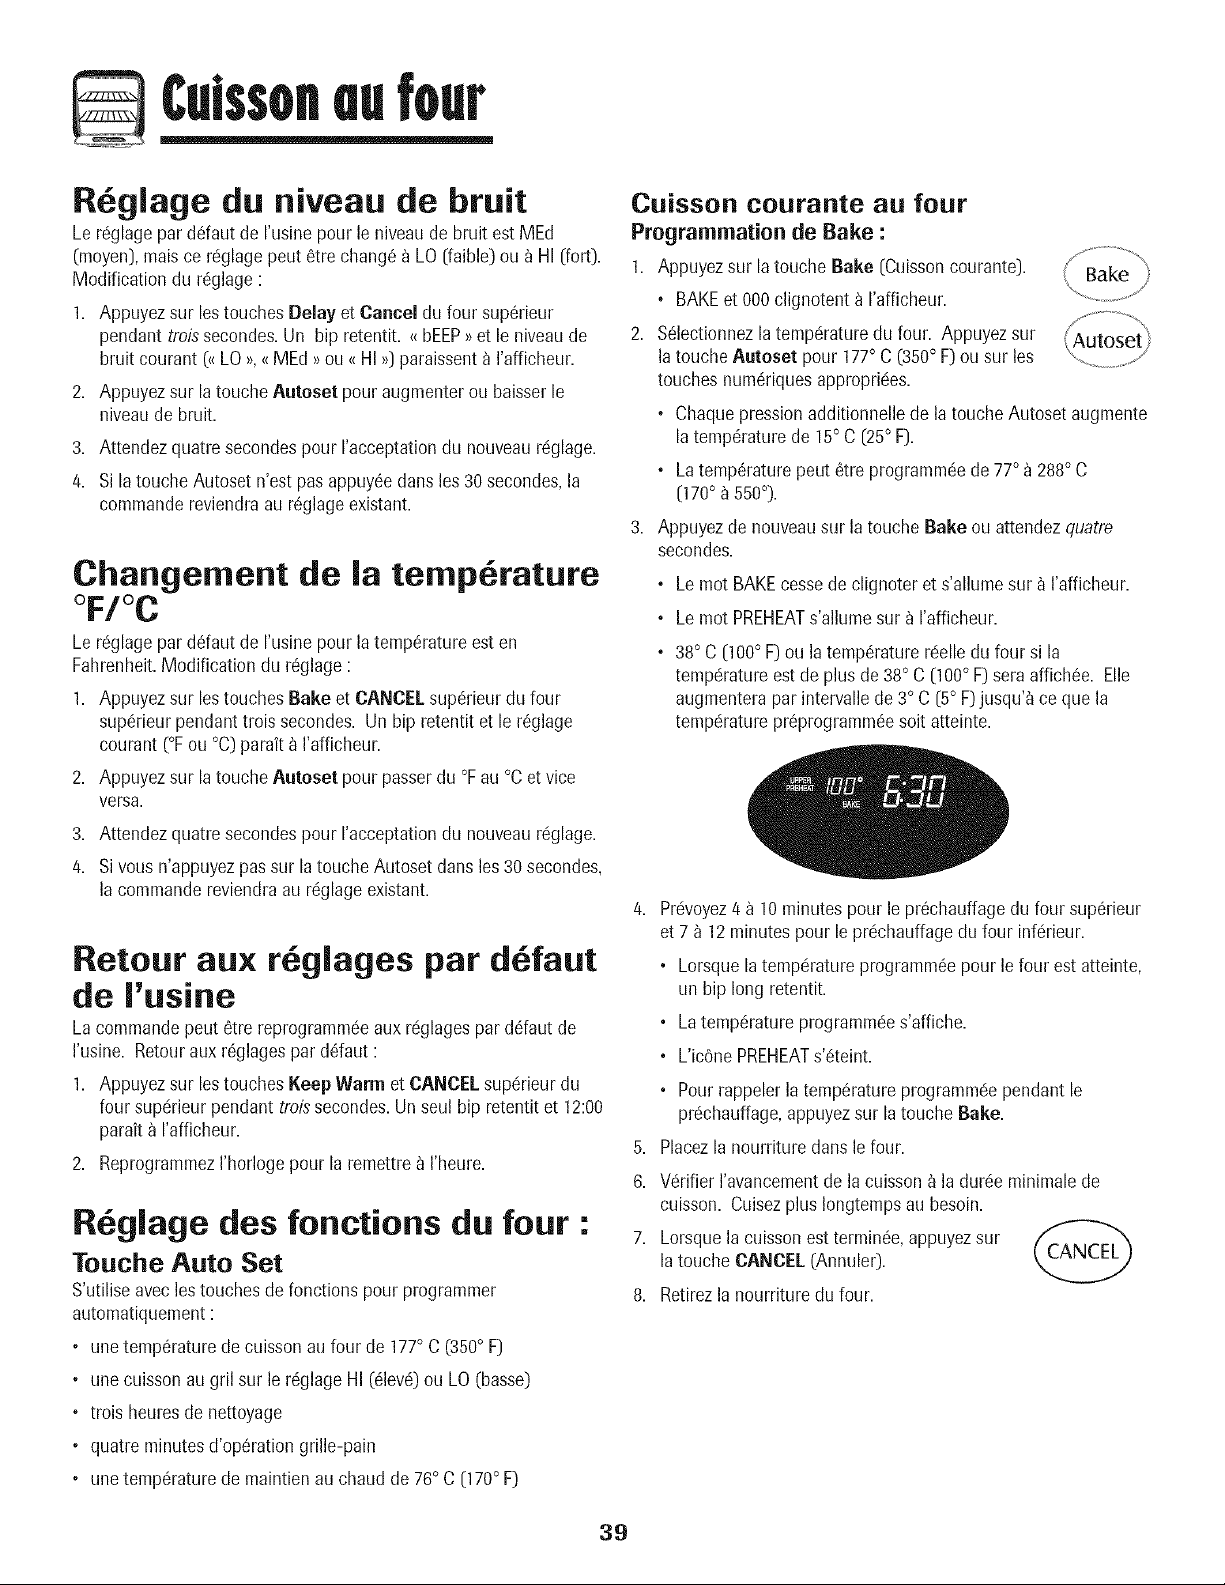
Culssoneufour
RCglage du niveau de bruit
Le rc!glagepar ddaut de rusine pour le niveaude bruit estMEd
(rnoyen],rnaisce rc!glagepeut 6tre chang6a LO (faible)ou a Hi (fort).
Modification du rCgiage:
1. Appuyezsur lestouchesDelay et Cancel du four supCrieur
pendant troissecondes.Un bip retentit. _ bEEP_et le niveaude
bruit courant (_LO_,_ MEd _ ou _ HI _0paraissenta I'afficheur.
2. Appuyezsur latouche Auteset pouraugmenterou baisserle
niveaude bruit.
3. Attendezquatre secondespour racceptationdu nouveaurc!glage.
4. Si latouche Autoset n'est pas appuy_edarts los 30 secondes,la
cornrnandereviendraau rCglageexistant.
Changement de la temperature
°F/° C
Le rc!glagepar ddaut de rusine pour laternpCratureest en
Fahrenheit.Modification du rCglage:
1. Appuyezsur lostouches Bake et CANCELsupCrieurdu four
supCrieurpendanttrois secondes. Un hip retentit et le r_glage
courant (°Fou °C)parait _ I'afficheur.
2. Appuyezsur latouche Auteset pour passerdu °Fau °Cet vice
versa.
3. Attendezquatre secondespour I'acceptationdu nouveaurCglage.
4. Si vousn'appuyezpas sur latoucheAutoset dartslos30 secondes,
la commandoreviendraau rc!glageexistant.
Retour au× r glages par d faut
de I'usine
La cornrnandepeut 6tre reprograrnrnc!eaux rc!glagespar ddaut de
I'usine. Retouraux rCglagespar ddaut •
1. Appuyezsur lostouches Keep Warm et CANCELsup(grieurdu
four sup(grieurpendant troissecondes.Un seul bip retentitet 12:00
parait a I'afficheur.
2. ReprograrnrnezI'horlogepour laremettre_ I'heure.
R giage des fonctions du four :
Touche Auto Set
S'utiliseavecleatouches de fonctionspour programmer
automatiquement:
• unetempCraturede cuissonau four de 177° C (350° F]
• unecuisson au gril sur le rCglageHI (61evC)ou LO(basso)
• trois heuresde nettoyage
• quatre minutesd'op_rationgrille-pain
• unetempCraturede maintienau chaud de 76° C (170° F)
Cuisson courante au four
Pregrammatien de Bake :
1. Appuyezsur la touche Bake (Cuissoncourante].
, BAKEet 000 clignotent a I'afficheur.
2. S_lectionnezla temp(!raturedu four. Appuyezsur
latouche Autoset pour 177° C (350° F)ou sur los
touches numCriquesappropric!es.
, Chaquepressionadditionnellede la touche Autoset augmente
latempCraturede 15° C (25° F].
• LatempCraturepeut 6tre prograrnrnc!ede 77° a 288° C
(170° _550°).
3. Appuyezde nouveausur la touche Bake ou attendezquatre
secondes.
• Lemot BAKEcessede clignoter et s'allumesur _ I'afficheur.
° Lemot PREHEATs'allurnesur a rafficheur.
• 38° C (100° F) ou la tempCraturer_!elledu four si la
ternp(gratureeatde plus de 38° C (100° F) seraaffich_e. Elle
augrnenterapar intervallede 3° C (5° F)jusqu'_ ceque la
ternp_!raturepr@rogramrn_esoit atteinte.
4. Pr_!voyez/4a 10 minutespour le pr_chauffagedu four sup_rieur
et 7 _ 12minutespour le pr_!chauffagedu four inf_!rieur.
° Lorsquela ternp(gratureprogramrn_epour lefour est atteinte,
un bip long retentit.
° LaternpCratureprograrnm_!es'affiche.
, L'icCnePREHEATs'Cteint.
° Pourrappelerla ternp(_ratureprograrnrn_ependantle
pr_!chauffage,appuyezsur la toucheBake.
5. Placezla nourriture darts le four.
6. V_!rifierI'avancernentde la cuisson_ la durCerninirnalede
cuisson. Cuisezplus Iongternpsau besoin.
7. Lorsquela cuissonest terrnin_e,appuyezsur /_,_r._
latouche CANCEL(Annuler).
8. Retirezla nourriture du four.
39
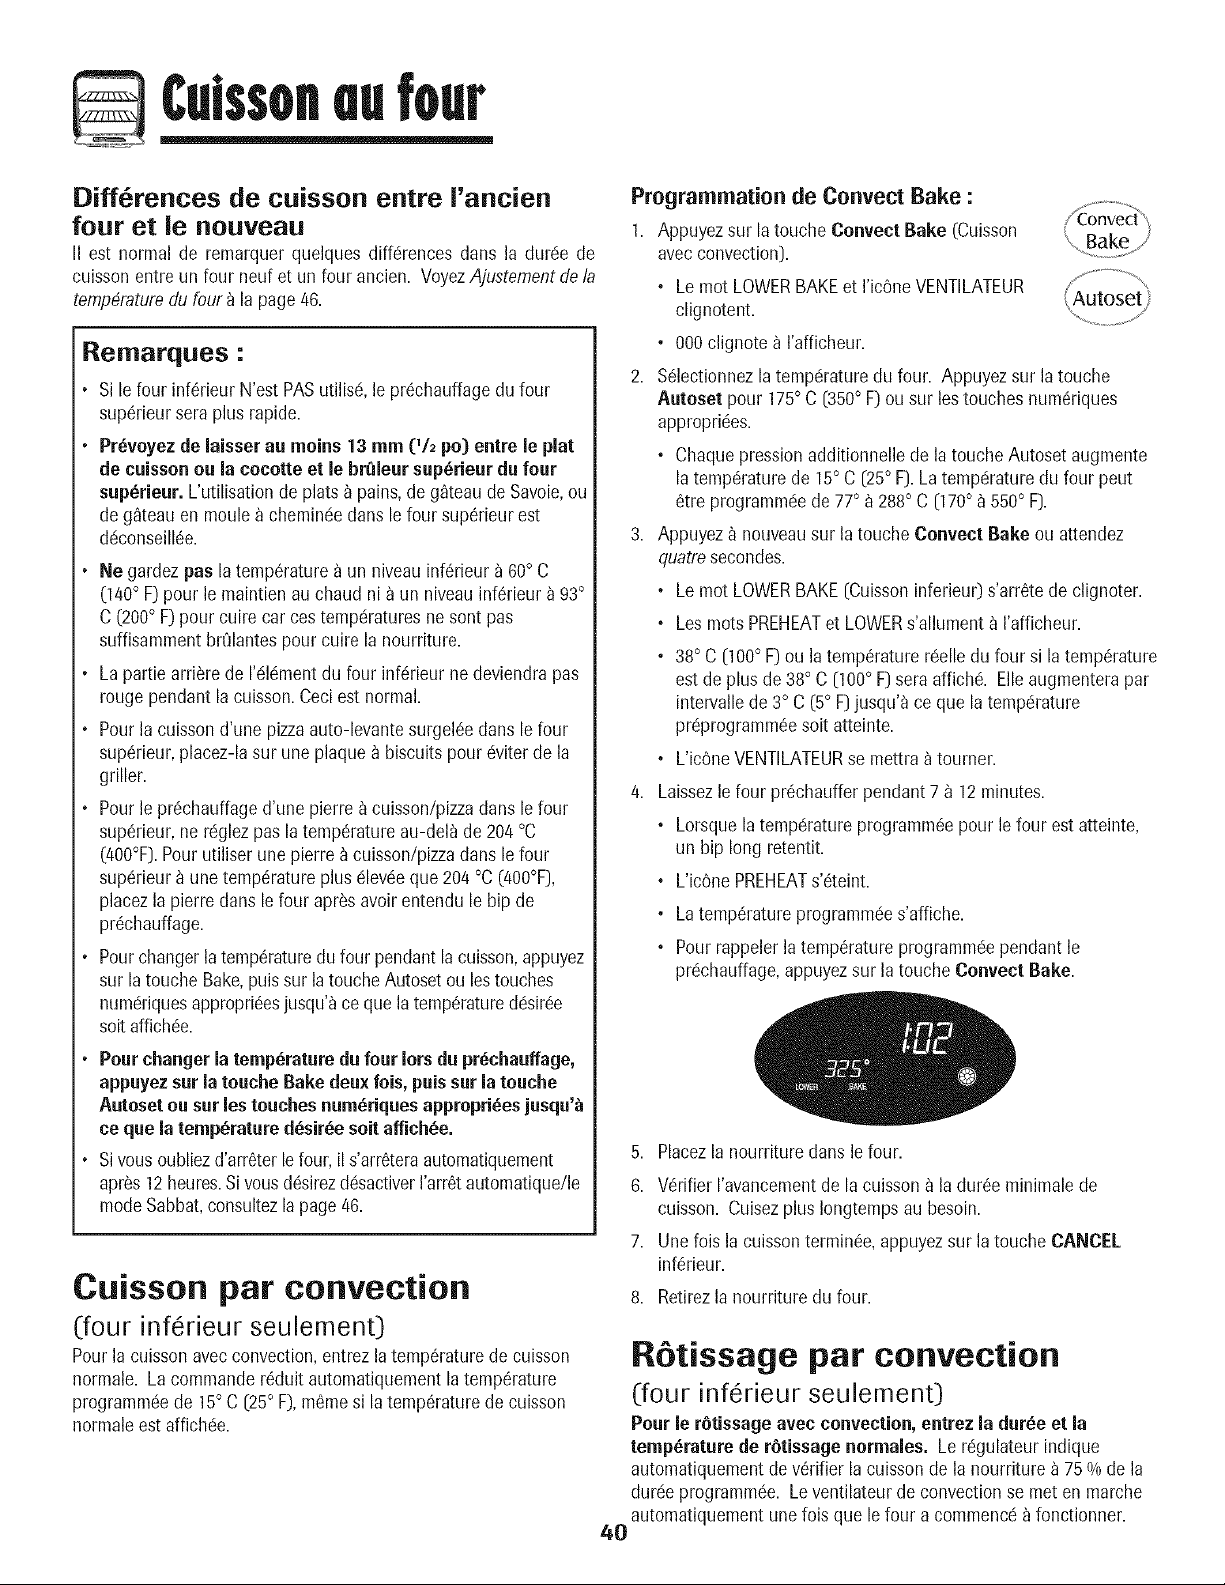
¢ulssoneufour
Diff6rences de cuisson entre I'ancien
four et le nouveau
II est normal de remarquer queiques diff6rences dans la durde de
cuissonentre un four neuf et un four ancien. VoyezAjustementde la
temp4raturedu four a la page46.
Remarques :
Sile four inf6rieur N'estPASutilisd, le pr_chauffagedu four
sup6rieursera plus rapide.
Pr6voyezde laisser au moins 13 mm (1/2po) entre le plat
de cuissonou la cocotteet le brQleur sup6rieur du four
sup6rieur. L'utilisationde plats _ pains, de g_teaude Savoie,ou
de g_teau en moulea chemindedans le four sup6rieurest
ddconseill6e.
Ne gardez puslatemp6raturea un niveauinf6rieur a 60° C
(140° F)pour le maintien au chaud ni a un niveauinf6rieur _ 93°
C (200° F)pour cuire car cestempdraturesnesent pus
suffisammentbrQlantespour cuire la nourriture.
Lapattie arri_re de I'dldmentdu four inf6rieur ne deviendrapus
rougependant lacuisson.Ceciest normal.
Pourla cuisson d'une pizzaauto-levantesurgel6eduns lefour
sup6rieur,placez-lasur une plaque_ biscuits pour dviter de la
griller.
Pourle pr6chauffaged'une pierre _ cuisson/pizzaduns lefour
sup6rieur,nerdglez pusla temp6ratureau-delade 204°C
(400°F}.Pourutiliserune pierre _ cuisson/pizzaduns le four
sup6rieur_ une temperatureplus _levdeque 204°C (400°F},
placezla pierredans le four apr_s avoirentendu le bip de
pr6chauffage.
Pourchangerla temperaturedufour pendantla cuisson,appuyez
sur latouche Bake,puissur la toucheAutosetou lestouches
numdriquesappropri6esjusqu'ace que la temperatureddsir6e
soit affich6e.
Pourchanger la temp6rature du four Iorsdu pr6chauffage,
appuyez surla touche Bake deuxlois, puissur la touche
Autosetou sur les touches num6riquesappropri6es jusqu'_
ce que la ternp6rature d6sir6e soit affich6e.
Sivousoubliezd'arr6terlefour,il s'arr6teraautomatiquement
apr_s 12heures.Si vousd_sirezdc!sactiverI'arr6tautomatique/le
modeSabbat,consultezla page 46.
Cuisson par convection
(four inf rieur seulement)
Pourla cuissonavec convection,entrezlatemp6raturede cuisson
normale. Lacommander6duit automatiquementlatemp6rature
programmdede 15° C [25° F),m6mesi latemp6raturede cuisson
normaleest affichde.
Programmatien de Convect Bake :
1. Appuyezsur la touche Convect Bake (Cuisson
avecconvection}.
• Lemot LOWERBAKEet I'ic6neVENTILATEUR
clignotent.
° 000clignote a I'afficheur.
2. Sdlectionnezla tempdraturedu four. Appuyezsur latouche
Autoset pour 175° C {350° F) ou sur les touches num_riques
approprides.
• Chaquepressionadditionnellede la touche Autoset augmente
latempdraturede 15° C {25° F}.Latempdraturedu four pout
_tre programm_!ede 77° _ 288° C [170° _ 550° F}.
3. Appuyez_ nouveausur la touche OonvectBake ou attendez
quatresecondes.
• Lemot LOWERBAKE{Cuissoninferieu0 s'arr_tede clignoter.
• LosrootsPREHEATet LOWERs'allument_ I'afficheur.
° 38° C [lOO° F) ou la temperature r6elledu four si la tempdrature
est de plus de38oC {100° F}seraaffich& Elleaugmenterapar
intervallede3° C (5° F}jusqu'a ceque la tempdrature
prdprogramm_esoit atteinte.
• L'ic6neVENTILATEURse mettra a toumer.
4. Laissezle four prdchaufferpendant7 _ 12minutes.
• Lorsquela tempdratureprogrammdepour lefour est atteinte,
un bip long retentit.
• L'ic0nePREHEATs'dteint.
° Latempdratureprogrammdes'affiche.
• Pourrappelerla temperatureprogrammdependant le
prdchauffage,appuyezsur latouche Convect Bake.
5. Placezla nourriture duns le four.
6. Vdrifier I'avancementde la cuisson_ la duroc minimale de
cuisson. Cuisezplus Iongtempsau besoin.
7. Unelois la cuissontermin_e,appuyezsur la touche CANCEL
infdrieur.
8. Retirezla nourriture du four.
R6tissage par convection
(four inf rieur seulement)
Pour le r6tissage avec convection,entrez la dur6e et la
temp6rature de r6tissagenormales. Le rdgulateurindique
automatiquementde v_rifier la cuissonde la nourriture a 75 % de la
durdeprogrammde. Leventilateur deconvectionse meten marche
automatiquementune lois que le four a commencda fonctionner.
40
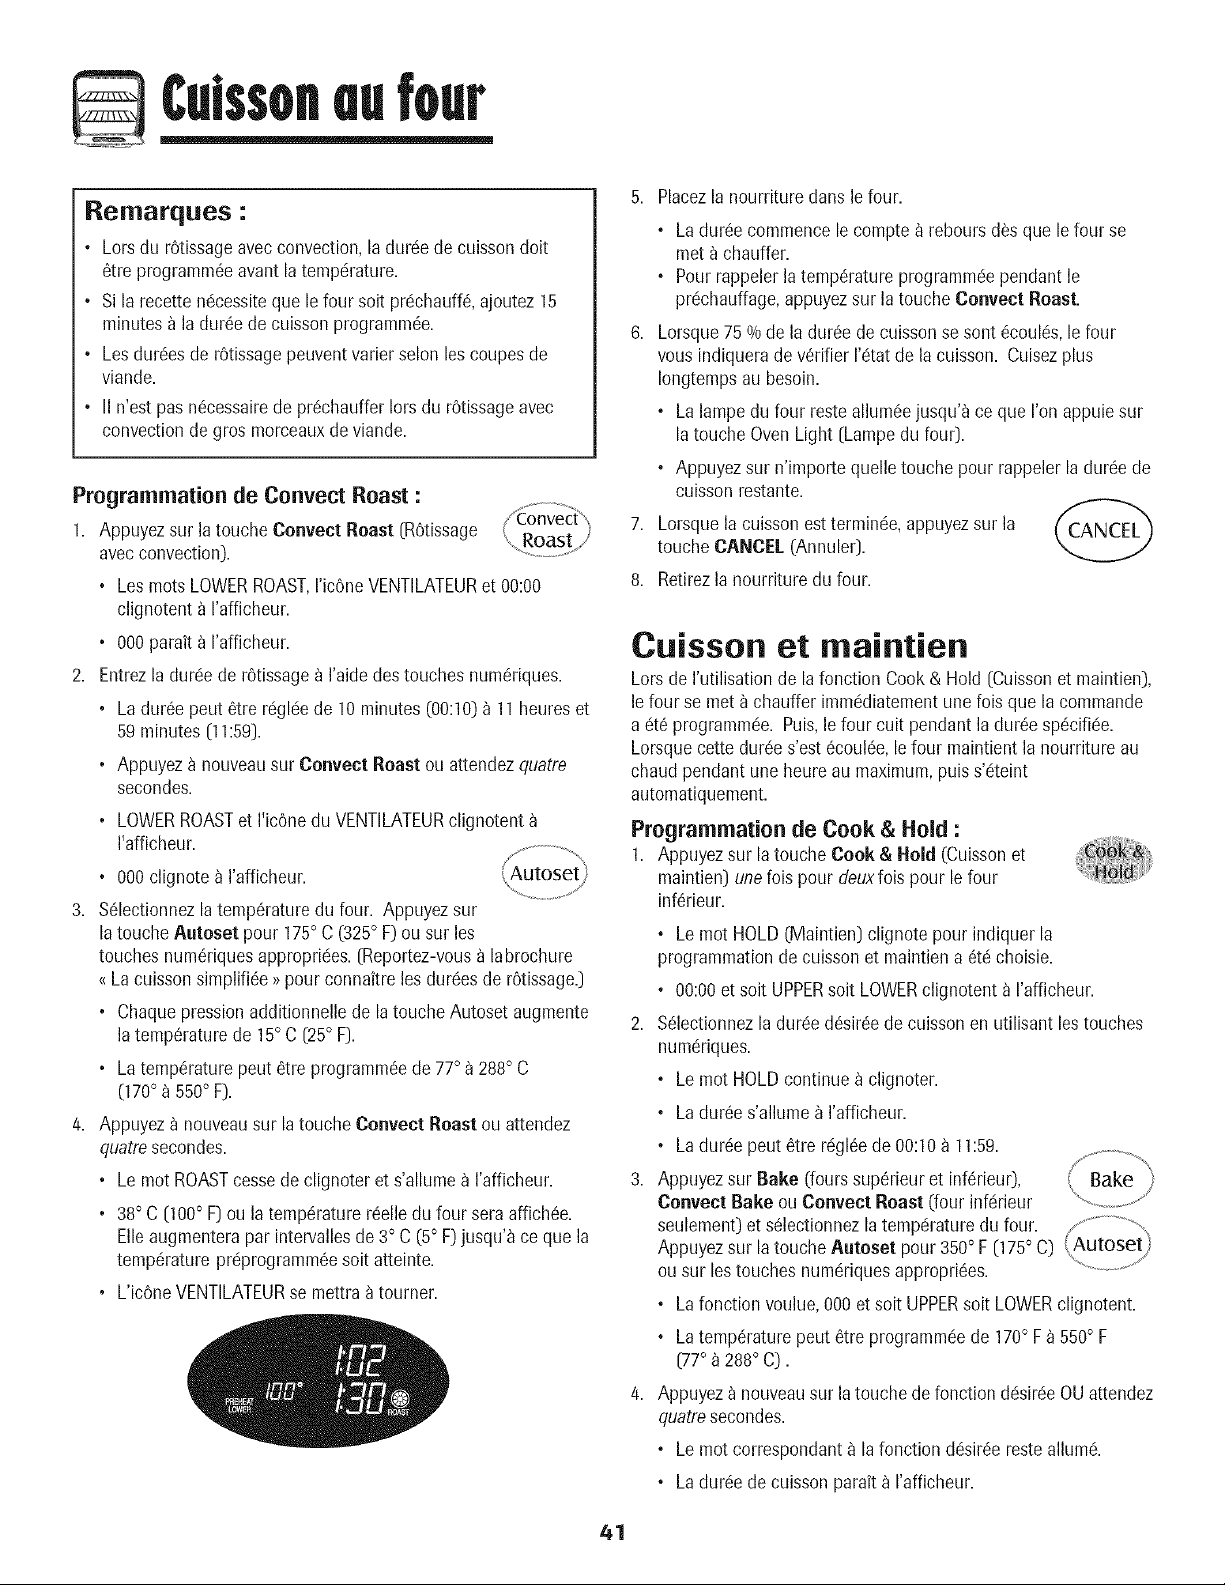
¢ulssoneufour
Remarques :
• Lorsdu r6tissageavecconvection,ladurc!ede cuissondolt
6tre programm6eavant latempc!rature.
• Si la recette n6cessitequa le four soit prc!chauff6,ajoutez 15
minutesa la durra de cuisson programm6e.
• Losdur6es de r6tissagepeuventvarier solon los coupesde
viande.
• II n'est pas n6cessairede pr6chaufferIorsdu rOtissageavec
convectionde gros morceauxde viande.
Programmation de Convect Roast :
1. Appuyezsur latouche Convect Roast(R6tissage
avecconvection).
,Les rootsLOWERROAST,I'ic6ne VENTILATEURet 00:00
clignotent a I'afficheur.
, 000parait a I'afficheur.
2. Entrezladurc!ede r6tissagea I'aidedestouches num6riques.
• Ladur_epout 6tre rc!glc!ede 10 minutes (O0:lO)_ 11heureset
59 minutes (11:59).
° Appuyeza nouveausur Convect Roast ou attendezquatre
secondes.
° LOWERROASTet I'icOnedu VENTILATEURclignotent
I'afficheur.
, 0O0clignote _ I'afficheur.
3. %lectionnez latemp6raturedu four. Appuyezsur
latoucheAutoset pour 175° C (325° F)ou sur los
touches num6riquesappropri(!es.(Reportez-vousa labrochure
_La cuissonsimplifi6e_pour connaitrelos dur6esde r6tissage.)
• Chaquepressionadditionnellede latoucheAutoset augmente
latemp6raturede 15° C (25° F).
, Latemp6raturepout 6tre programm6ede 77° a 288° C
(170° a 550° F).
4. Appuyeza nouveausur la touche Conveet Roast ou attendez
quatresecondes.
• Lemot ROASTcessede clignoteret s'allume a I'afficheur.
° 38° C (100° F) ou la temp6raturer6elledu four sara affich6e.
Ellaaugmenterapar intervallesde 3° C (5° F)jusqu'_ ce qua la
temp6rature prc!programmSesoit atteinte.
• L'icOneVENTILATEURse mettraa tourner.
5. Placezla nourriture dans le four.
• Ladur_ecommencele compte _ reboursd_s que lefour se
meta chauffer.
, Pourrappelerla temp6ratureprogrammc!ependant le
prc!chauffage,appuyezsur latouche Convect Roast.
6. Lorsque75 %de la dur6e de cuissonse sont 6coul6s,le four
vous indiquerade v6rifier I'c!tatde la cuisson. Cuisezplus
Iongtempsau besoin.
, Lalampedu four resteallum6ejusqu'a ce qua I'on appuiesur
latouche OvenLight (Lampedu four).
, Appuyezsur n'importe quelletouchepour rappelerla dur6ede
cuisson restante.
7. Lorsquelacuisson estterminc!e,appuyezsur la _CANCFI_
touche CANCEL(Annule0.
8. Retirezla nourriture du four.
Caisson et maintien
Lorsde I'utilisationde la fonction Cook& Hold (Cuissonet maintien),
le four se met_ chauffer immc!diatementunefois qua la commando
a €!t6programmc!e.Puis,le four cult pendant la dur6e sp6cific!e.
Lorsquecette dur6e s'est_coul_e,le four maintient la nourritureau
chaud pendantune heure au maximum,puis s'_!teint
automatiquement.
Programmation de Cook & Hold :
1. Appuyezsur la touche Cook & Hold (Cuissonet
maintien)unefoispour deuxfois pour le four
inf_rieur.
2,
• Lemot HOLD(Maintien)clignote pour indiquer la
programmationde cuissonet maintiena _t_!choisie.
° 00:00et soit UPPERsoit LOWERclignotent a I'afficheur.
S_lectionnezla dur_!ed_sir_ede cuissonen utilisant lestouches
num_!riques.
• Lemot HOLDcontinue a clignoter.
, Ladur_es'allume_ I'afficheur.
° Ladur6epeut 6tre r_!gl6ede 00:10a 11:59.
3. Appuyezsur Bake (fours sup6rieuret inf6rieu0,
Convect Bake ou Convect Roast (four inf_!rieur
seulement)et sSlectionnezlatemp_!raturedu four. / .......................,
Appuyezsur latouche Autoset pour 350° F (175° C) Autoset
ou sur lostouches num_!riquesappropri_es. "........ /
, Lafonction voukJe,000et soit UPPERsoit LOWERclignotent.
° Latemp6raturepout 6tre programm6ede 170° F_ 550° F
(77° _ 288° C).
/4. Appuyeza nouveausur la touche de fonctiond_!sir_!eOU attendez
quatresecondes.
, Lemot correspondant_ la fonction d_!sir_eresteallum_!.
° Ladur_ede cuissonparak a I'afficheur.
41

Culssoneufour
• L'ic6nePREHEAT(Prdchauffage)parait a I'afficheur.
• Latempdraturerdelledu four sera affich6ependant le
pr6chauffage.
• Latempdratureprogramm6es'affiche Iorsque le four est
pr6chauff6.
Lorsque la dur6e de caisson s'est 6coul6e :
• Quatrebips retentissent.
•Les mots WARM(Chaud)et HOLD (Maintien)
s'allument.
• 77° (170°) parait a I'afficheur.
Apr_s une heure de MAINTIEN AU CHAUD :
• Lefour s'c!teintautomatiquement.
• Appuyezsur la touche CANCEL (Annule0 et retirezla
nourrituredu four.
Annulation de Cook & Hold _ tout moment :
Appuyezsur latoucheCANCEL. Retirezla _-_,
nourriture du four.
Caisson et maintien differ6s
2. A I'aidedestouches num6riquesappropri6es,entrez la duroc
d'attente avantque ned_bute le cyclede cuissonet maintien.
3. Appuyezsur latouche Cool{ & Hold.
, Losmots HOLDet DELAYelignotent_ I'afficheur.
, 00:00et soit UPPERsoit LOWERclignotent.
4. Entrezladurc!ed6sir6ede cuisson_ I'aidedes touches
num6riques.
5. Appuyezsur Bake (fours sup6rieuret inf6rieu0,Conveet Bake
ou Conveet Roast (four inf6rieur seulement).
6. Programmezla temp6raturedu four dc!sir_een
appuyantsur la toucheAutoset ou sur lostouches
numc!riquesappropri6es.
• 175° [350°) s'allume IorsqueI'onappuiesur latouche Autoset.
• Apr_s quatre secondes,la duroc d'attenteentrc!e
parait _ I'afficheur.
, Losmots BAKE(Cuissoncourante)et DELAYrestentallumc!s
pour rappelerqu'un cyclede cuissonet cyclede cuissonet
maintiendiffc!rc!sa _t6 programm&
important :
N'utilisez pas le cycle de cuissonet maintien diff6r6spour des
articlesqui n_cessitentque lefour soit prc!chauff6,commelos
g_teaux,los petits biscuitset los pains.
N'utilisez pas lecycle de cuissonet maintiendiff6r_s sile four
est d6j_chaud.
Avecla fonction Delay(D@art diffc!r6),lefour se met_ cuire plus
tard dartslajournc!e. Programmezla dur6ed'attente d6sirc!eavant
que lefour nese mette en marcheet la dur6e de cuissondc!sirc!e.
Lefour commence_ chauffer a I'heures61ectionn6eet cult pour la
dur6esp6cifi6eet maintient la nourriture au chaud pendant une
heure.
La dur6ed'attentepeut 6tre programmc!ede 10minutes(00:10)_ 11
heures,59 minutes[11:59).
Pregrammatien d'un cycle de caisson et
maintien diff6r_s :
1. Appuyezsur la touche Delay unefois pour
programmerlefour sup6rieurou deuxfois pour
lefour infc!rieur.
° Lemot DELAY(Attente)clignote a I'afficheur.
° 00:00et soit UPPERsoit LOWERclignotent_ I'afficheur.
42
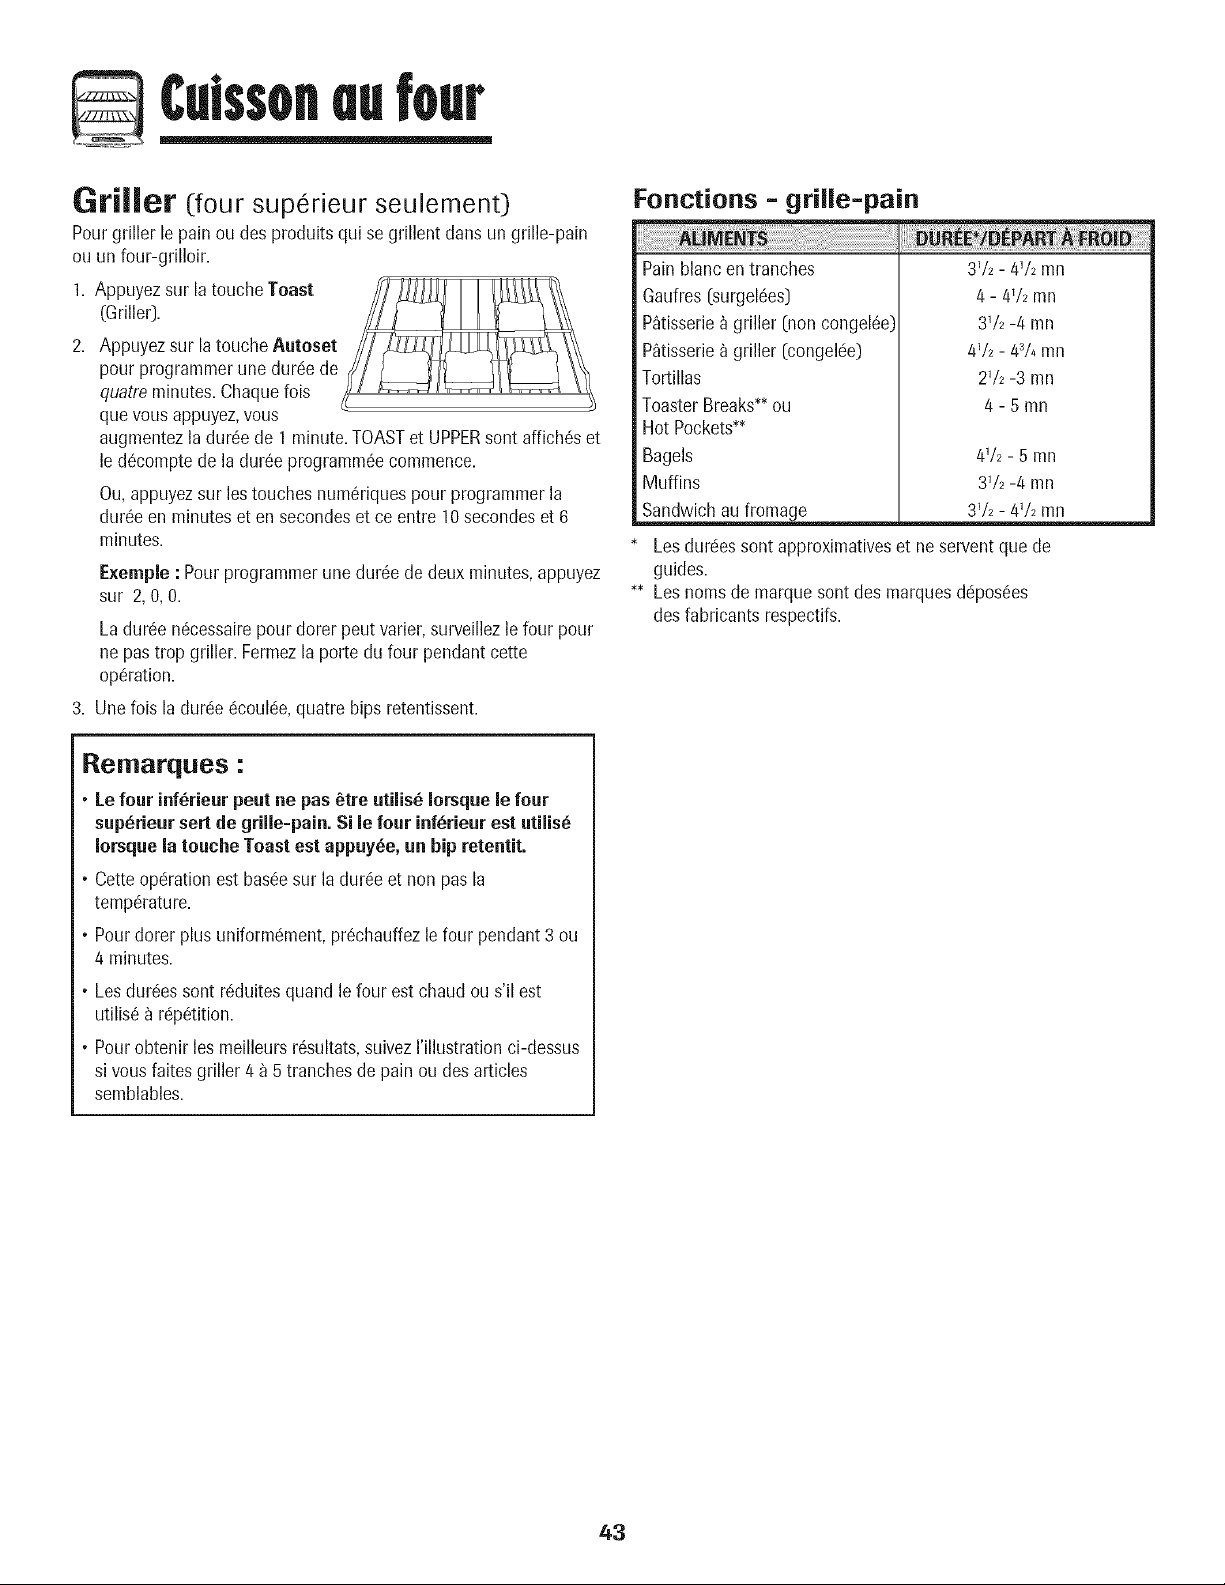
Culssoneufour
Griller (:four sup rieur seulemenO
Pourgriller le painou desproduits qui se grillent dartsun grille-pain
ou un four-grilloir.
1. Appuyezsur latoucheToast
(Griller].
2. Appuyezsur latouche Autoset
pourprogrammerune dur6e de
quatreminutes.Chaquefois
que vousappuyez,vous
augmentezla dur6e de I minute.TOASTet UPPERsont affich6set
le d_comptede la dur_e programm6ecommence.
Ou,appuyezsur lestouches num6riquespour programmerla
dur6e en minuteset en secondeset ce entre l0 secondeset 6
minutes.
Exeraple: Pour programmerune dur6e de deux minutes,appuyez
sur 2, O,O.
Ladur6e n6cessairepour dorerpeut varier,surveillezle four pour
nepas trop griller. Fermezla porte du four pendant cette
op@ation.
3. Une fois la durc!ec!coul6e,quatre bips retentissent.
Reilrlarques :
• Le four inf_rieur peat ne pas _tre atiJis_Iorsque le four
sup_rieursert de grille=pain.Si le four inf_rieur est utJlis_
Iorsque la touche Toast est appuy_e, un hip retentJt.
° Cetteop@ationest bas6esur la dur6e et non pas la
temp6rature.
• Pour dorer plus uniformc!ment,pr_chauffezle four pendant3 ou
4 minutes.
• Lesdur6essont r6duitesquand lefour est chaud ou s'il est
utilis6 a r@6tition.
• Pour obtenir les meilleurs r6sultats,suivezI'illustrationci-dessus
si vousfaites griller 4 a 5 tranchesde pain ou desarticles
semblables.
Fonctions = grille=pain
Painblancen tranches 3V_- 4V2mn
Gaufres{surgel6es] 4 - 4V2mn
P_tisserieDgriller {noncongel6e) 3V2-4 mn
P_tisserieDgriller [congel6e) 4'/_ - 43/4mn
Tortillas
ToasterBreaks**ou
Hot Pockets**
Bagels
Muffins
2V2-3 mn
4-5mn
4V2 - 5 mn
3V2 -4 mn
Sandwichau fromag_ 3V2- 4V2mn
Les duties sontapproximativeset ne serventquede
guides.
** Les nomsde marquesont des marques d@os_es
des fabricantsrespectifs.
43
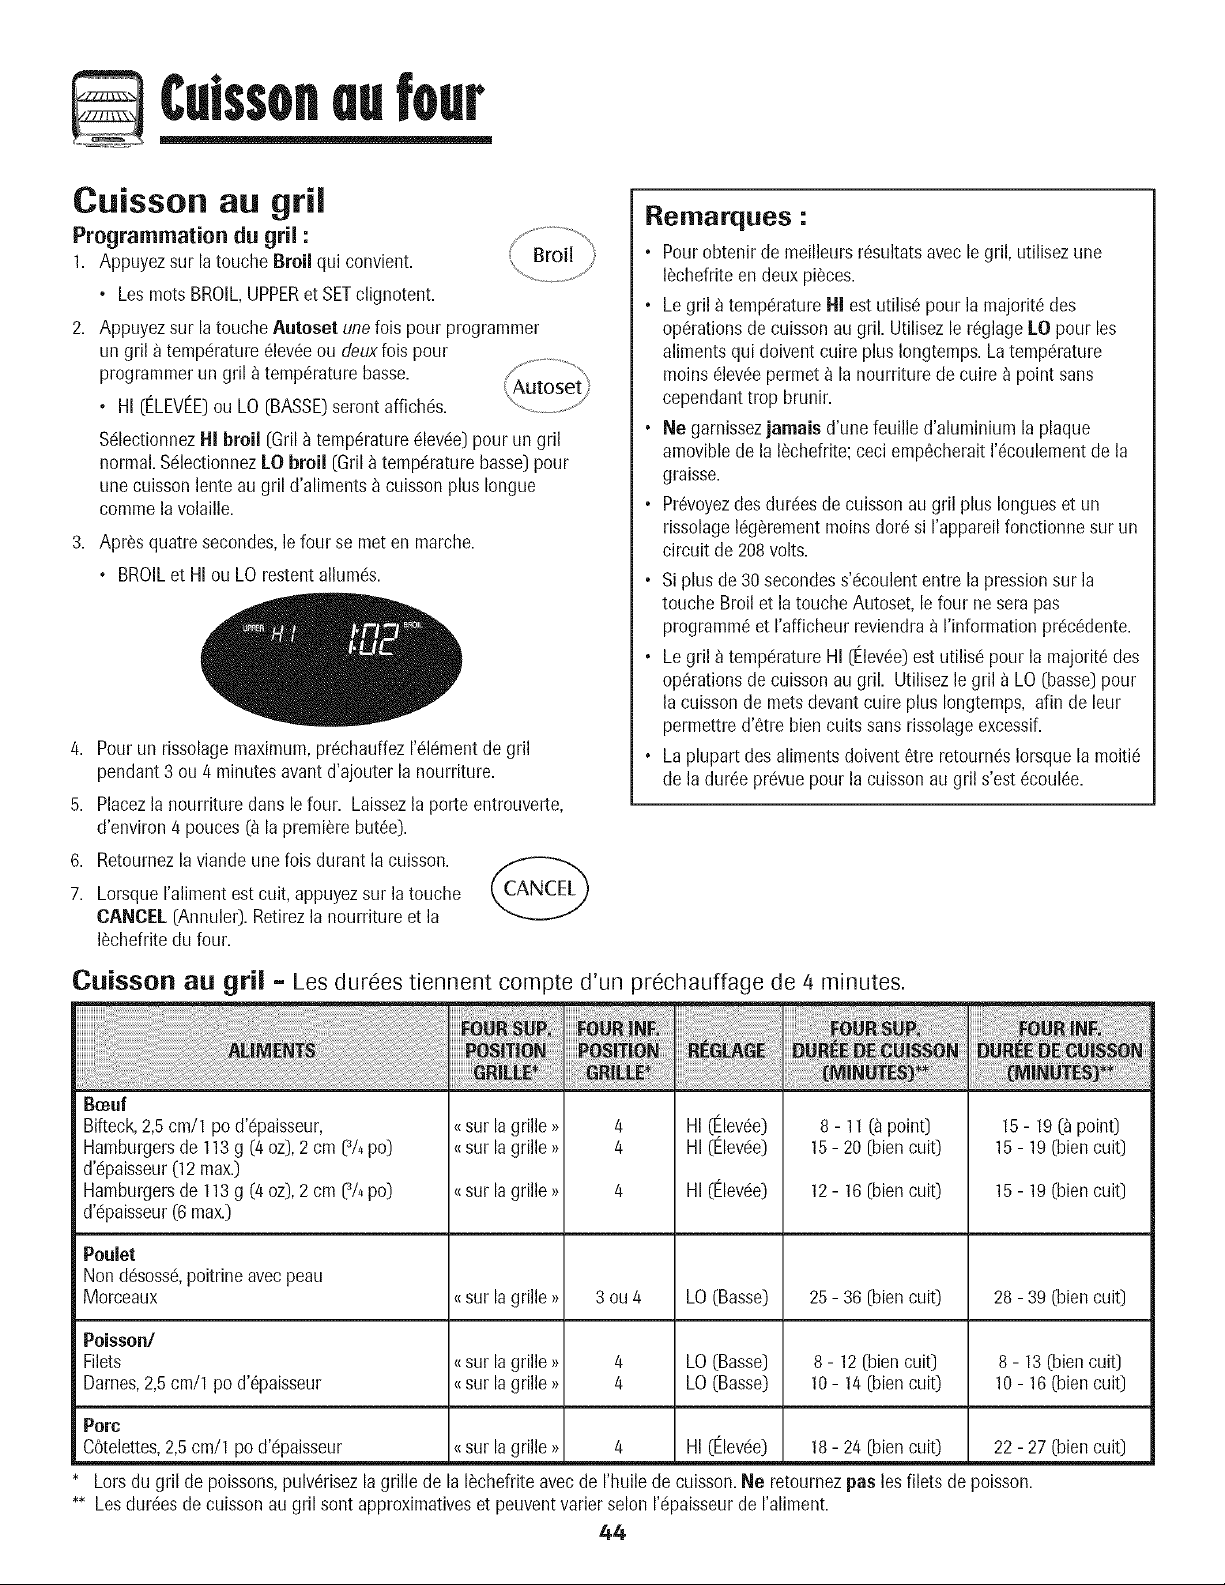
¢ulssoneufour
Cuisson au gril
Programmation du gril :
1. Appuyezsur la touche Broil qui convient. Broil
• LosrootsBROIL,UPPERet SETclignotent.
2. Appuyezsur latouche Autoset unelois pour programmer
un gril a temp6rature61ev6eou deuxlois pour
programmerun gril _ temp6raturebasso.
• HI (ELEVEE)ou LO {BASSE)seront affich6s.
S61ectionnezHI broil {Gril_ temp6raturec!lev6e)pour un gril
normal.S61ectionnezLO broil {Gril_temp6raturebasso)pour
unecuissonlento au gril d'aliments_ cuisson plus Iongue
comme lavolaille.
3. Apr_s quatre secondes,le four se met en marche.
• BROILet HI ou LO restentalhm6s.
4. Pourun rissolagemaximum,pr6chauffez1'616meritde gril
pendant 3 ou 4 minutesavantd'ajouter la nourriture.
5. Placezla nourriture dartslefour. Laissezla porte entrouverte,
d'environ4 pouces(_ la premi6rebut6e}.
6. Retournezla viandeune fois durant la cuisson. _--_
7. Lorsque I'alimentest cult, appuyezsur la touche
CANCEL[Annulet}. Retirezla nourriture et la
16chefritedu four.
Rellrlarques :
• Pourobtenir de meilleursr6sultatsaveclegril, utilisezune
I_chefriteen deux pi_ces.
• Le gril a temp6ratureHI est utilis6pour la majorit6des
op6rationsde cuissonau gril. Utilisezle r6giageLO pour los
alimentsqui doivent cuire plus Iongtemps.Latemp6rature
moins61ev6epermet_ la nourriturede cuire _ point sans
cependanttrop brunir.
• Ne garnissezjamais d'une feuille d'aluminium la plaque
amoviblede la I_chefrite;ceci emp6cherait1'6coulementde la
graisse.
• Pr6voyezdes dur6esde cuissonau gril plus Iongueset un
rissolage16g_rementmoins dot6 si I'appareilfonctionne sur un
circuit de208volts.
• Si plus de 30 secondess'6coulententre lapressionsur la
touche Broilet latoucheAutoset,le four nesera pas
programm6et I'afficheur reviendraa I'informationpr6c6dente.
• Le gril a temp6ratureHI [Elev6e)est utilis6 pour la majorit6 des
op6rationsde cuissonau gril. Utilisezle gril a LO(basse]pour
la cuissonde metsdevant cuire plus Iongtemps, afin de leur
permettred'6tre biencults sansrissolageexcessif.
• La plupart desaliments doivent 6tre retourn6sIorsquela moiti6
de la dur6epr@uepour la cuissonau gril s'est 6coul6e.
Cuisson all gril = Les durees tiennent compte d'un prechauffage de 4 minutes.
Bo_ui
Bifteck,2,5cm/1 po d'(Tpaisseur,
Hamburgersde 113 g (4 oz),2 cm [3/4po)
d'@aisseur(12 max.)
Hamburgersde 113 g (4 oz),2 cm [3/4po)
d'c!paisseur(6max.)
Poulet
Nond6soss6,poitrineavecpeau
Morceaux
Poisson/
Filets
Dames,2,5cm/1 po d'@aisseur
Porc
{<sur la grille>>
<{sur la grille>>
_ sur la grille >_
_<sur la grille _
_sur lagrille_
_sur lagrille_>
3ou4
HI(Elev6e)
HI(Elev6e)
Hl(Elevde)
LO(Basse)
LO(Basse)
LO(Basse)
8 - 11(_point)
15- 20 [bien cult)
12 - 16 [bien cult)
25 - 36 [bien cult)
8 - 12 {bien cult)
10 - 14 {bien cult)
C6telettes,2,5cmll po d'6paisseur <<sur lagrille>> 4 HI (Elev6e] 18- 24 {bien cult)
Lorsdu gril de poissons,pulv6risezla grille de la I_chefriteavec de I'huilede cuisson.Ne retournezpas los filets de
** Les dur6esde cuissonau gril sont approximativeset peuventvarier solon 1'6paisseurde I'aliment.
44
15 - 19 (a point]
15 - 19 (bien cuit]
15 - 19 (biencult)
28 - 39 (biencuit]
8 - 13(biencult)
10- 16(biencult)
22 - 27 (biencult)
3oisson.
Culssoneufour
Maintien au chaud
Pourgarderles alimentschauds ou rCchaufferlos assiettesou pains.
Programmation du maintien au chaud :
1. Appuyezsur la touche KeepWarm [Maintien au
chaud].
• Lemot WARMclignote.
• 00:00et soit UPPERsoit LOWERclignotent
I'afficheur.
2. SClectionnezlatempCraturede maintienau chaud.Appuyezsur
latoucheAutoset ou sur lostouches numCriquesappropriCes.
• 75° 070 °) s'allume IorsqueI'on appuiesur la toucheAutoset.
• Chaquepressionsur latouche Autosetaugmentela
tempc!raturede 3° C (5° F].
Latempc!raturede maintienau chaud pout 6tre programmc!ede
63 et 90° C [145et 190° F).
Lemot WARM (Chaud)et la tempCratureseront affich_spendant
que la fonction est active.
Remarqaes :
• Pourque la qualit(!des metssoit optimale,ceux qui sont cults
au four nedoivent pus6tre maintenuschaudspendant plus de
1a 2 heures.
, PourempCcherlos alimentsde dess_cher,recouvrez-lesde
papierd'aluminium,sans serrer,ou d'un couvercle.
. Pour r_chauffer des petits pains :
- recouvrezlospetits pains de papierd'aluminiumsans les
serrer et placez-lesaufour.
- appuyezsur lestouchesKeep Warm et Autoset.
- rCchauffezpendant 12 _ 15minutes.
• Pour r_chauffer des assiettes :
- placezdeuxpiles de quatre assiettesmaximumduns le four.
- appuyezsur lestouchesKeep Warm et Autoset.
- rCchauffezpendant 5 minutes,arrCtezlefour et laissezlos
assiettesau four pendantencore 15 minutes.
- n'utilisezque des assiettespouvantaller au four, a vc!rifier
avecle fabricant.
- ne posezpus des assiettestildes sur unesurfacefroide; los
changementsrapidesde tempc!raturepourraient los fissurer
ou lesabimer.
Annulation du maintien au chaud :
1. Appuyersur la toucheCANCEL[Annule0.
2. Retirezla nourriture du four.
Favorite
Latouche Favoritepermetde mCmoriserla durCeet la tempc!rature
d'une opCrationde cuissoncourante et maintien,cuissoncourante et
maintienavecconvectionou rCtissageet maintien avec convection
[four infCrieurseulemen0.
Pourprogrammerun cycle Favorite,unefonction Cuissonet
maintiendolt 6tre activeou juste programmc!e.
Pour programmer un nouveau cycle Favorite ou
pour m_moriser un cycle de cuisson et maintien en
cours comme un favori :
1. Programmezun cycle de cuissonet maintiencomme il est d_crit
duns la section Cuissonet maintiena la page41.
2. Appuyezsur latouche Favorite et maintenez-la
ainsi pendanttrois secondes.
, Lecyclecuisson et maintiennouvellementprogramm6ouen
cours defonctionnementserasauvegardc!.
, Un hip double et un hip simple se feront entendrepour
indiquerquele rCgulateura accept6le r_glage Favorite.
D_marrage d'un cycle programm_ duns Favorite :
1. Appuyezsur la touche Favorite.
, LadurCeet latempc!raturedu cycleprogramm6de cuissonet
• maintienserontaffichc!es.[Si aucun cycle decuisson et
maintienn'a c!t6programm&_nonE_sera affichC).
2. Appuyezsur latouche Rake, Convect Bake ouConvect Roast
[four infCrieurseulemen0.
, Lecycle FavoritecommenceimmCdiatement.
, Lafonction choisie s'allumea I'afficheur.
• LadurCede cuissons'allume_ I'afficheur.
Lorsque la duree de cuisson s'est ecoulee :
. Lafonction choisie s'arrCte.
•Les rootsWARM et HOLD[Maintien) s'allument.
• 170° (75°) parait _ I'afficheur.
Annulation d'un cycle favori en tours :
1. Appuyezsur la touche CANCEL.
2. Retirezla nourriture du four.
Lecycle Favoritesauvegard_nesera pusaffect&
45
Culssoneufour
Arr t automatique/mode
Sabbat
Lesfours s'arr6tentautomatiquementapr_s 12heuress'ils sont
laiss6saccidentellementen marche.
Annulation de I'arret de 12 heures et
fonctionnement des fours en continu pendant
72 heures :
1. Appuyezsur la touche Olock et maintenez-laainsi
pendant troissecondes.
• {{SAb>>s'affiche et clignote pendantcinq secondes.
• {{SAb>>sara alors affich_ encontinujusqu'a la raisea I'arr6t
oujusqu'_ ce qua les72 heuressoient 6coul6es.
° BAKEsara aussiaffich_ si un cycle de cuissonestutilis6
alors qua lefour esten mode Sabbat.
• Touteslostouchessont inactivessauf Cancel (Annuler)et
Clock.Touteslos autresfonctionssauf Bake(Minuterie,
Maintien au chaud,Nettoyage,etc.) sontverrouilldespendant
le modeSabbat.
Annulation du mode Sabbat :
1. Appuyezsur la touche Clock pendant troissecondes.
• {{SAb>>clignote pendant5 secondes.
• L'heure dujour revient a I'afficheur.
OU
2. Apr_s72 heures,le modeSabbatse termine.
° {{SAb>>clignote pendant5 secondes.
• L'heure dujour revient a I'afficheur.
R glage de la temp6rature
des fours
La pr6cisiondes rc!glagesde temp6raturea 6t6 soigneusement
vdrifi(gea I'usine. II est normalde remarquerquelquesdiffc!rences
dans [a dur6ede cuissonentre un four neuf et unfour ancien. La
tempc!raturedesfours pout c!ventuellementse d6caler.
Vousajustezla tempdraturedes fourssi vouspensezqu'ils ne cuisent
pas oune dorent puscorrectement. Pour d6ciderde ['ajustement
apporter,r6glez lefour _ unetemp6raturede 15 °C(25°F)plus 6levde
ou plus basseque la tempc!ratureindiqu6eduns la recette, puisfaites
cuire la pr6paration. Les r6sultatsdu premieressaide cuissondoivent
donnerune id6e du nombrede degr6sduquel latemp6raturedoit 6tre
ajust6e.
Ajustement de la temperature du four :
1. Appuyezsur la touche Bake qui convient.
2. Entrez285° C (550° F)en appuyantsur los touches numc!riques
approprides.
3. Appuyezsur [atouche Bake et maintenez-laainsi pendant
plusieurssecondesou jusqu'a ce qua OO° paraissea I'afficheur.
Si latemp6raturedu four a 6t6 pr6c6demmentajust6e,le
changementseraaffichc!. Parexample,si latempdraturedu four a
6tc!r6duitede 8° C (15° F),I'afficheur indiquera-8 ° C (-15° F).
4. Appuyezsur latouche Autoset pour ajusterlatemp6rature.
A chaque fois qua I'onappuiesur la touche Autoset, la
tempdraturechangede 3° C (5° F). Latemp6raturedu four pout
6tre augment6eou diminuc!ede3 a 20° C (5a 35° F).
5. L'heuredu jour rc!apparaitautomatiquementa I'afficheur.
II n'est pas ndcessairede rdajuster latemp6raturedu four en cos de
panneou d'interruption de courant.L'ajustementde la temp6rature
s'appliqueseulementaux fonctionsde cuisson,cuissonavec convec-
tion et r6tissageavecconvection (four infdrieur seulement).
Reilrlarques :
° Le modeSabbatpout 6tre misen marche_ tout moment,que
le four soit en marcheou non.
• Le modeSabbatne pout pas 6tre mis en marchesi los touches
sontverrouill6esou la porte verrouillc!e.
, La majorit_des messageset tous les bips sont d_sactiv_sen
modeSabbat.
, Siun four cuit Iorsquele modeSabbatest programm(!,BAKE
disparaitra_ la fin de la cuissonou Iorsque la touche CANCEL
estappuy_e. Aucun bip retentira.
• Si vousvoulezque les lampesde four soientallum_esen mode
Sabbat,allumezles lampesavantle d_but du modeSabbat.
• D_s le d_but du modeSabbat,I'afficheurmontre latemperature
programm_!eplut0t que la temperatureactuellede la cavit_!du
four. Aucun bip de r_chauffagenese fera entendre.
• L'autonettoyageet leverrouillageautomatiquedes portes ne
fonctionnentpus pendantle modeSabbat.
° Si I'onappuiesur latouche CANCEL,un cycle de cuisson
couranteaufour sera annul_!.Cependant,le r_gulateur restera
en modeSabbat.
• Encasde pannede courant,les fours se remettenten marche
en modeSabbatavec 72heures restantessanscycleen oours.
46
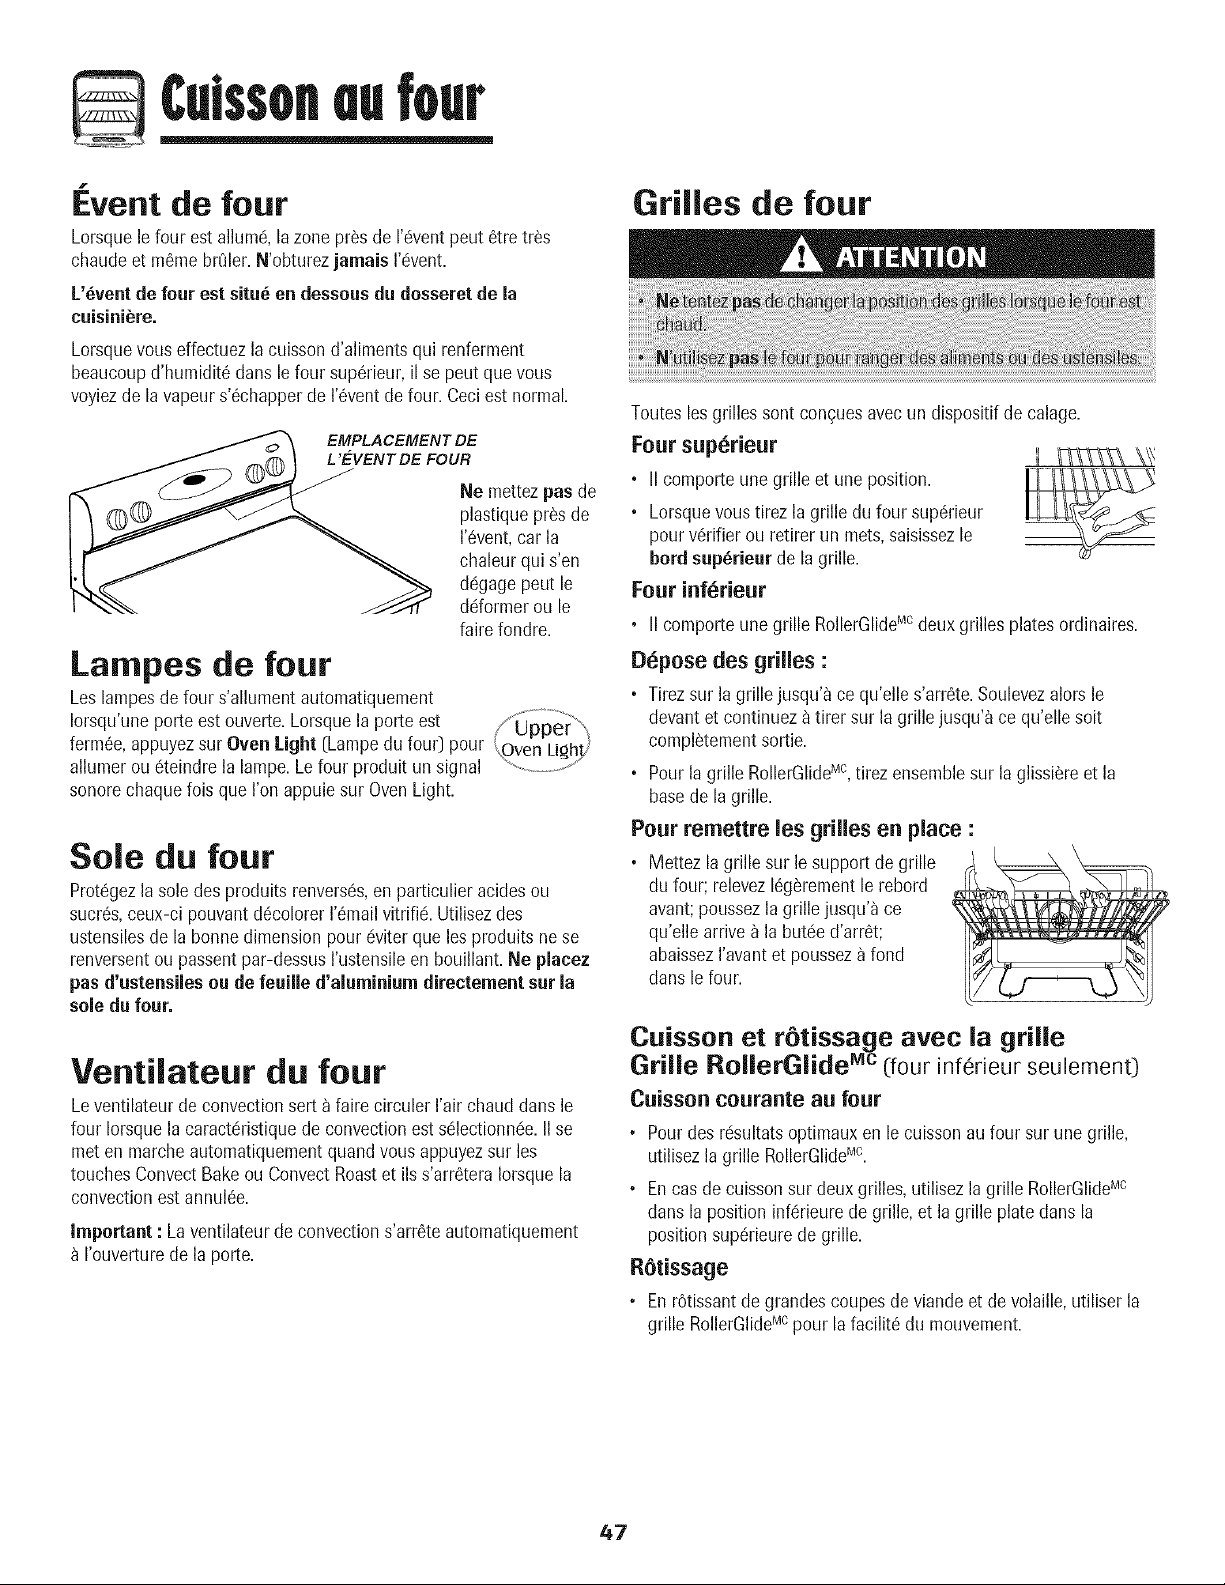
Culssoneufour
f
Event de four
Lorsquele four est allure& la zone pros de 1'6ventpeut 6tretr_s
chaudeet m6me brQler.Nobturezjamais I'c!vent.
L'_ventde four est situ_ en dessousdu dosseretde la
euisini_re.
Lorsquevous effectuezla cuissond'alimentsqui renferment
beaucoupd'humidit6 dans le four sup6rieur,il se peut que vous
voyiezde la vapeurs'_chapperde I'_ventdefour. Ceci est normal.
EMPLA CEMENT DE
VENT DE FOUR
Ne mettezpas de
plastiquepros de
I'_vent,car la
chaleur qui s'en
d6gagepout le
ddormer ou le
faire fondre.
Lampes de four
Leslampes de four s'allumentautomatiquement
Iorsqu'uneporte estouverte.Lorsquela porte est i/Uppei" ",_
ferm6e,appuyezsur Oven Light [Lampedu four) pour
',OvenLi_hLJ
allumerou _teindre la lampe.Lefour produit un signal ,f'
sonore chaquelois que I'onappuiesur OvenLight.
Sole du four
Prot%ezla sole desproduits renvers6s,en particulier acidesou
sucr6s,ceux-ci pouvantd6colorer I'_mailvitrifi& Utilisezdes
ustensilesde la bonnedimensionpour c!viterque losproduits nese
renversentou passentpar-dessusI'ustensileen bouillant.Ne plaeez
pas d'ustensiiesou de feuille d'aluminium direetement sur Ja
sole du four.
Ventilateur du four
Leventilateur de convectionserta faire circuler I'air chaud dans le
four Iorsquela caractc!ristiquede convectionest selectionnc!e.IIse
meten marche automatiquementquandvousappuyezsur les
touchesConvect Bakeou ConvectRoastet ils s'arr6tera Iorsquela
convectionest annul6e.
important : La ventilateurdeconvections'arr6teautomatiquement
I'ouverturede la porte.
Grilles de four
Touteslosgrilles sont con£uesavecun dispositifde calage.
Four superieur
II comporteune grille et une position.
• Lorsquevoustirezla grille du four sup6rieur
pour v6rifierou retirer un roots,saisissezle
bord sup_rieur de lagrille.
Four inferieur
II comporteune grille RollerGlideMcdeux grilles plates ordinaires.
Depose des grilles :
• Tirezsur lagrille jusqu'_ ce qu'elle s'arr6te.Soulevezalors le
devantet continuez_ tirer sur la grillejusqu'_ ce qu'elle soit
compl_tementsortie.
MC
• Pourla grille RollerGlide , tirez ensemblesur la glissi_reet la
basede la grille.
Pour remettre los grilles en place :
• Mettez la grille sur lesupport degrille
du four; relevez16g_rementle rebord
avant;poussezla grillejusqu'a ce
qu'elle arrive_ la but6ed'arr6t;
abaissezI'avantet pousseza fond
duns lefour.
Caisson et r6tissage avec la grille
Grille RollerGlide Mc (four inferieur seulement)
Caisson courante au four
, Pourdes rdsultatsoptimaux en le cuissonau four sur une grille,
utilisezla grille RollerGlideMc.
• Encas decuissonsur deuxgrilles, utilisez la grille RollerGlideMc
duns la positioninf6rieurede grille,et la grille plate duns la
positionsup6rieurede grille.
Rgtissage
. En rOtissantde grandescoupesde viandeet de volaille,utiliser la
grille RollerGlideMcpour la facilit6 du mouvement.
47
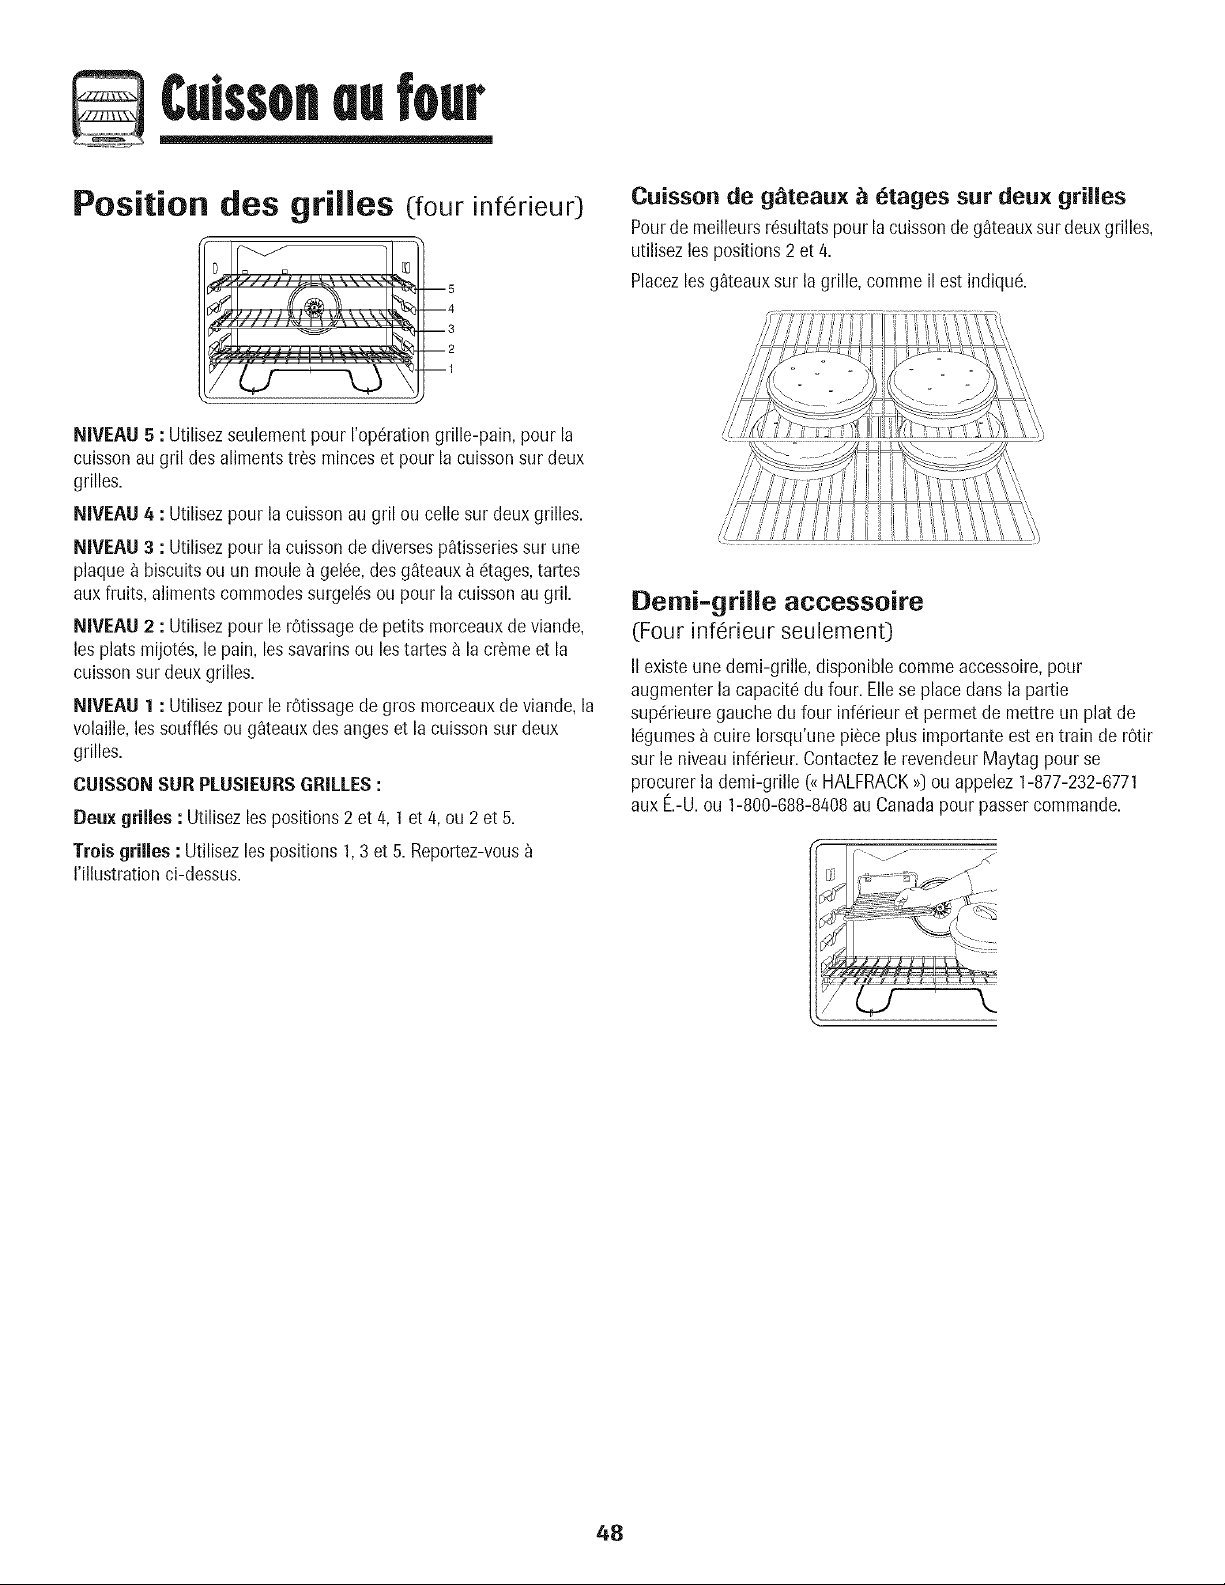
Culssoneufour
Position des grilles (:fourinf rieur)
--5
--4
--3
--2
--1
NIVEALI5 : Utilisezseulementpour rop6ration grille-pain, pour la
cuissonau gril des alimentstr_s minces et pour la cuissonsur deux
grilles.
NIVEAU 4 : Utilisez pour lacuissonau gril ou celle sur deuxgrilles.
NIVEAU 3 : Utilisez pour lacuissonde diversesp_tisseriessur une
plaque_ biscuits ou un moule_ gel_e,des g_teaux_ c!tages,tartes
aux fruits, alimentscommodessurgek!sou pour la cuisson augril.
NIVEAU 2 : Utilisez pour le r6tissagede petits morceauxde viande,
les platsmijot6s,le pain, les savarinsou lestartes _ lacr_meet la
cuissonsur deux grilles.
NIVEAU 1 : Utilisez pour le r6tissagede gros morceauxde viande,la
volatile,les soufflc!sou g_teauxdesangeset la cuissonsur deux
grilles.
CUISSGN SUBPLUSIEURSGRILLES:
Deuxgrilles : Utilisezlespositions2 et 4, 1et 4, ou 2 et 5.
Trois grilles : Utilisezles positions1,3 et 5. Reportez-vous
I'illustrationci-dessus.
Caisson de g_teaux _ etages sat deax grilles
Pourde meilleursr6sultatspour lacuissonde g_teauxsur deux grilles,
utilisezles positions2 et 4.
Placezlesg_teauxsur la grille, commeil est indiqu&
Demi=grille accessoire
(Four inf6fieur seulement)
IIexiste unedemi-grille,disponiblecomme aceessoire,pour
augmenterla capacit6du four. Ellese placedans la partie
sup6rieuregauche du four inf_rieur et permetde mettre un plat de
I_gumes_ cuire Iorsqu'unepiece plus importanteest en train de r0tir
sur le niveau inf_rieur.Contactezle revendeurMaytagpour se
procurer la demi-gfille ({{HALFRACK>0ou appelez1-877-232-6771
aux E.-U.ou 1-800-688-8408au Canadapour passercommande.
48
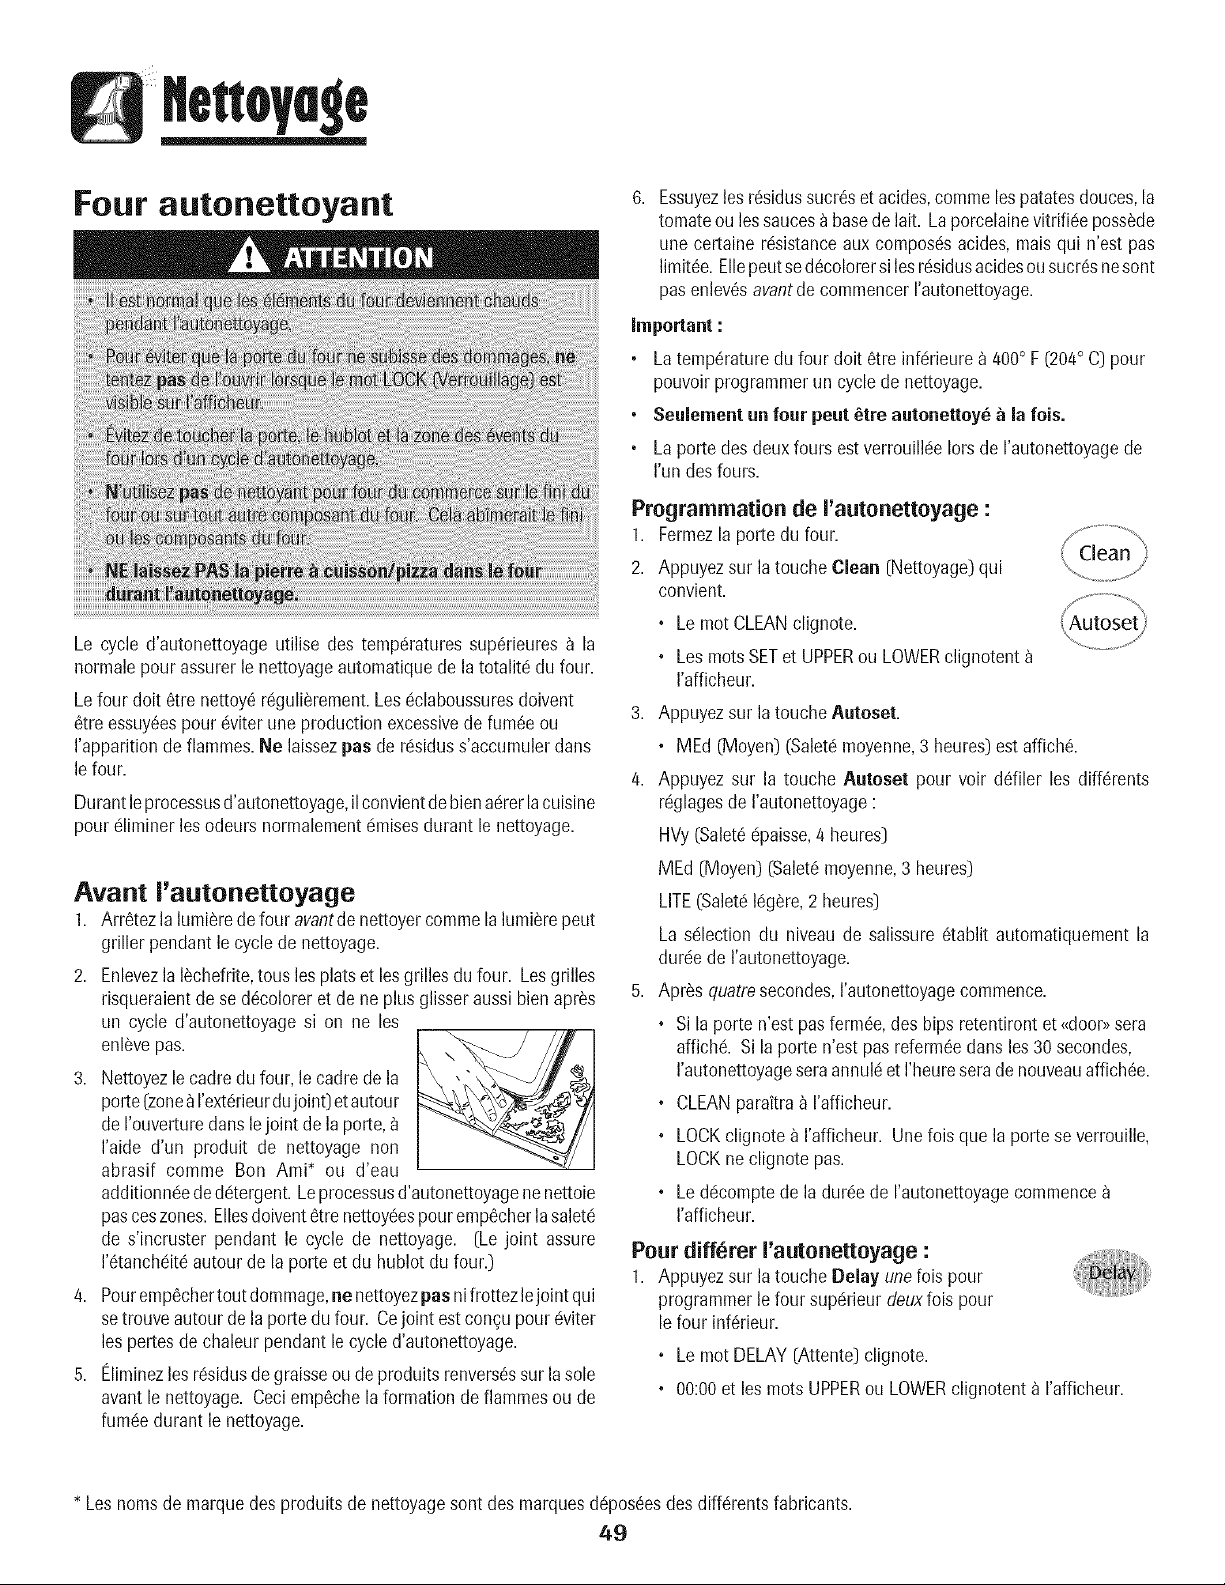
nettoyu e
Four autonettoyant
Le cycle d'autonettoyageutilise des tempc!raturessup6rieures a la
normalepour assurerle nettoyageautomatiquede la totalit6 du four.
Lefour dolt _tre nettoy6r6guli_rement.Losc!claboussuresdoivent
6tre essuy6espour6viterune production excessivede fum6eou
I'apparitionde flammes.Ne laissezpas de rc!siduss'accumulerdans
le four.
Durantleprocessusd'autonettoyage,ilconvientdebiena_rerlacuisine
pour c!liminerlos odeurs normalementc!misesdurant le nettoyage.
Avant I'autonettoyage
1. Arr6tez lalumi_redefour avantdenettoyercommelalumi_repout
griller pendant le cyclede nettoyage.
2. Enlevezla I_chefrite,tous los plats et losgrilles du four. Losgrilles
risqueraientde se d6coloreret de ne plus glisseraussibienapr_s
un cycle d'autonettoyage si on neles
enl_vepas.
Nettoyezle cadre du four, le cadrede la
porte(zone_I'ext6rieurdujoint) etautour
de I'ouverturedartslejoint de la porte,
I'aide d'un produit de nettoyage non
abrasif comme Bon Ami* ou d'eau
additionn6ede d_tergent.Leprocessusd'autonettoyagenenettoie
pascoszones. Ellesdoivent6tre nettoy_espour emp6cherlasalet(!
de s'incruster pendant le cycle de nettoyage. (Le joint assure
I'_tanchc!it6autour de la porte et du hublot du four.)
Pouremp6chertoutdommage,ne nettoyezpasnifrottezlejoint qui
se trouveautour de laporte du four. Cejoint estconcupour c!viter
los pertesde chaleur pendantle cycle d'autonettoyage.
Eliminezlosr6sidusde graisseou de produits renvers_ssur lasole
avant lenettoyage. Ceci emp6chela formation de flammes ou de
fumc!edurant le nettoyage.
6. Essuyezlos r6sidussucreset acides,commelospatatesdouces,la
tomatoou lossaucesa basede lait. La porcelainevitrific!eposs_de
une certaine rc!sistanceaux compos(!sacides, maisqui n'est pas
limit6e. Ellepoutsed6colorersilos r_sidusacidesousucresnesont
pas enlev6savantdecommencerI'autonettoyage.
Important :
• La temp6raturedu four dolt 6tre infc!rieure_ 400° F (204° C)pour
pouvoir programmerun cycle de nettoyage.
• Seulement un four pout _tre autonettoy_ _ Jalois,
• La porte des deuxfours est verrouilk!eIors de I'autonettoyagede
I'un des fours.
Programmation de I'autonettoyage :
1. Fermezla portedu four.
2. Appuyezsur la toucheClean (Nettoyage)qui
convient.
• Le mot CLEANclignote.
• LosrootsSETet UPPERou LOWERclignotent
I'afficheur.
3. Appuyezsur la toucheAutoset.
, MEd (Moyen) (Saletc!moyenne,3 heures)est affich6.
4. Appuyez sur la touche Autoset pour voir driller los diff6rents
rc!glagesde I'autonettoyage:
HVy(Salet6c!paisse,4 heures)
MEd (Moyen)(Salet6moyenne,3 heures)
LITE(Saletc!16g_re,2 heures)
La s(!lection du niveau de salissure_tablit automatiquement la
durc!ede I'autonettoyage.
5. Apr_s quatresecondes,I'autonettoyagecommence.
• Si la porte n'est pasferm6e,des hips retentirontet {{door>>sera
affich& Si la porte n'est pas referm_edartsles 30secondes,
I'autonettoyageseraannuk!et I'heureseradenouveauaffich_e.
, CLEANparaitra_ I'afficheur.
• LOCKclignote_ I'afficheur. Unelois que la portese verrouille,
LOCKne clignote pas.
• Led_comptede la dur_ede I'autonettoyagecommence
I'afficheur.
Pour differer I'autonettoyage :
1. Appuyez sur la touche Delay unelois pour
programmerle four sups!flourdeuxlois pour
le four inf_rieur.
° Le motDELAY(Attente)clignote.
, 00:00et les mots UPPERou LOWERclignotent _ I'afficheur.
Losnomsde marquedes produits de nettoyagesont des marquesd_!pos_esdes diff,!rents fabricants.
49
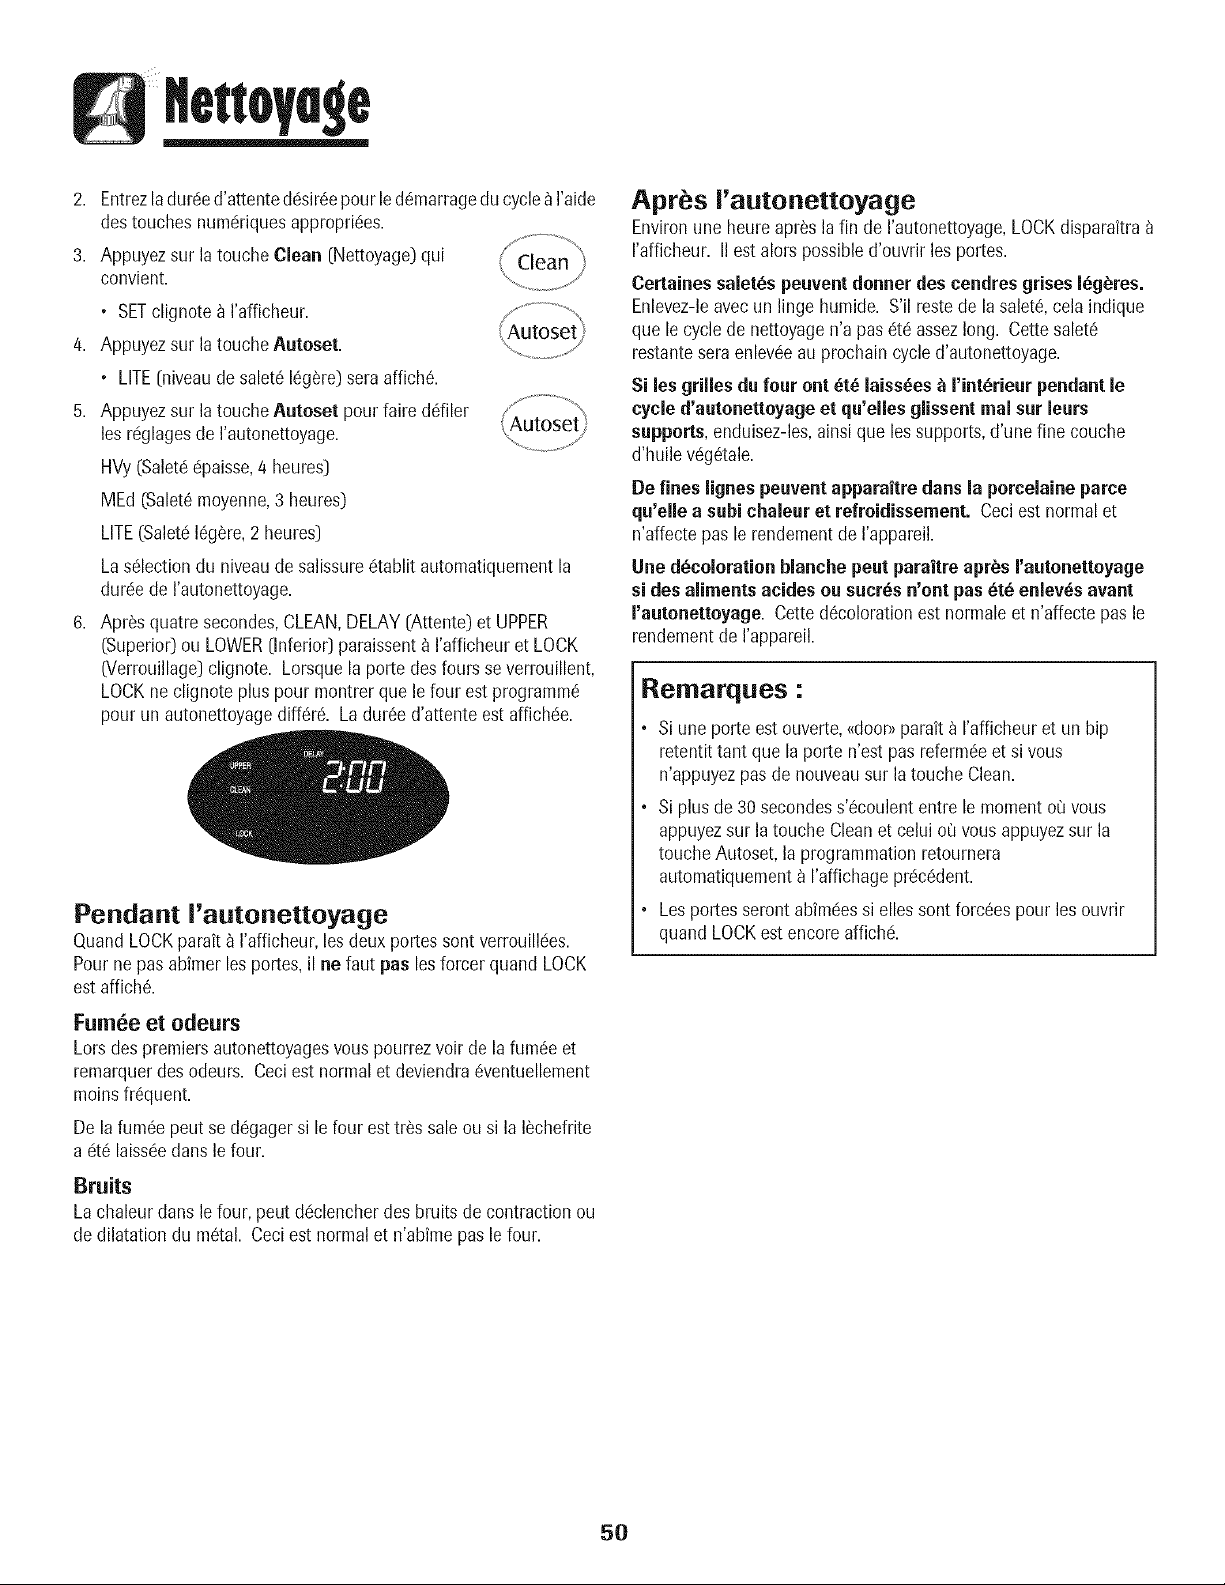
nettoya e
2. Entrezladur_ed'attented(!sir6epourled6marragedu cycle_ I'aide
destouches num@iquesappropri6es.
3. Appuyezsur la touche Clean (Nettoyage)qui
convient.
• SETclignote_ I'afficheur.
4. Appuyezsur la touche Autoset.
• LifE (niveaude salet616g_re)seraaffich_.
5. Appuyezsur la touche Autoset pour faire driller
los rc!glagesde I'autonettoyage.
HVy(Salet6@aisse,4 heures)
MEd (Salet6moyenne,3 heures)
LifE (Salet616g_re,2 heures)
Las61ectiondu niveaude salissurec!tablitautomatiquementla
durc!ede I'autonettoyage.
6. Apr_squatre secondes,CLEAN,DELAY(Attente)et UPPER
(Superio0ou LOWER(Inferio0 paraissent_ I'afficheur et LOCK
(Verrouillage)clignote. Lorsquela porte desfours severrouillent,
LOCKne clignote plus pour montrer que le four est programm6
pour un autonettoyagediff@_. La dur6e d'attente est affichc!e.
Pendant i'autonettoyage
O,uandLOCKparait _ I'afficheur,los deux portessentverrouillc!es.
Pournepas abfmerlosportes,il ne faut pas los forcerquand LOCK
est affich6.
Fum6e et odeurs
Lotsdes premiersautonettoyagesvous pourrezvoir de lafum_e et
remarquerdes odeurs. Ceciest normal et deviendra6ventuellement
moinsfrequent.
De lafum6e pout se d6gagersile four esttr_s sale ou si la I_chefrite
a 6t6 laiss6edartsle four.
Bruits
Lachaleurdans le four, pout dc!clencherdes bruits de contraction ou
de dilatation du m6tal. Ceciest normalet n'abfmepas le four.
Apr s I'autonettoyage
Environune heure apr_sla fin de I'autonettoyage,LOCKdisparakra
I'afficheur. IIest alorspossibled'ouvrir los portes.
Certainessalet_s peuventdonner des cendresgrises I_g_res,
Enlevez-leavecun linge humide. S'il restede lasalet6,cela indique
que le cycle de nettoyagen'a pas_te!assezlong. Cettesalet6
restantesera enlev6eau prochain cycled'autonettoyage.
Si les grilles du four ont _t_ laiss_es _ I'int_rieur pendantle
cycle d'autonettoyage et qu'elles glissent real sur leurs
supports, enduisez-les,ainsi que lossupports,d'une fine touche
d'huile vc!g6tale.
De fines lignespeuvent apparaitre dans [a porcelaine parce
qu'eiie a suhi chaieur et refroidissement. Ceciest normalet
n'affectepas le rendementde I'appareil.
Une d_colorationblanche peut paraJtreapr_s rautonettoyage
si des aliments acides ou sucres n'ont pas _t_ eniev_s avant
I'autonettoyage. Cetted_colorationest normaleet n'affecte pasle
rendementde I'appareil.
Remarques :
• Si une porte est ouverte,_door)_parait a I'afficheuret un bip
retentit tant que [a porte n'est pasreferm6eet si vous
n'appuyezpasde nouveausur la toucheClean.
• Si plus de 30 secondess'6coulententre le momentcOvous
appuyezsur la touche Cleanet celui cOvous appuyezsur la
toucheAutoset,la programmationretournera
automatiquementa I'affichageprc!c6dent.
• Los portesseront abim_essi ellessont forc6espour los ouvrir
quandLOCKest encoreaffichc!.
5O
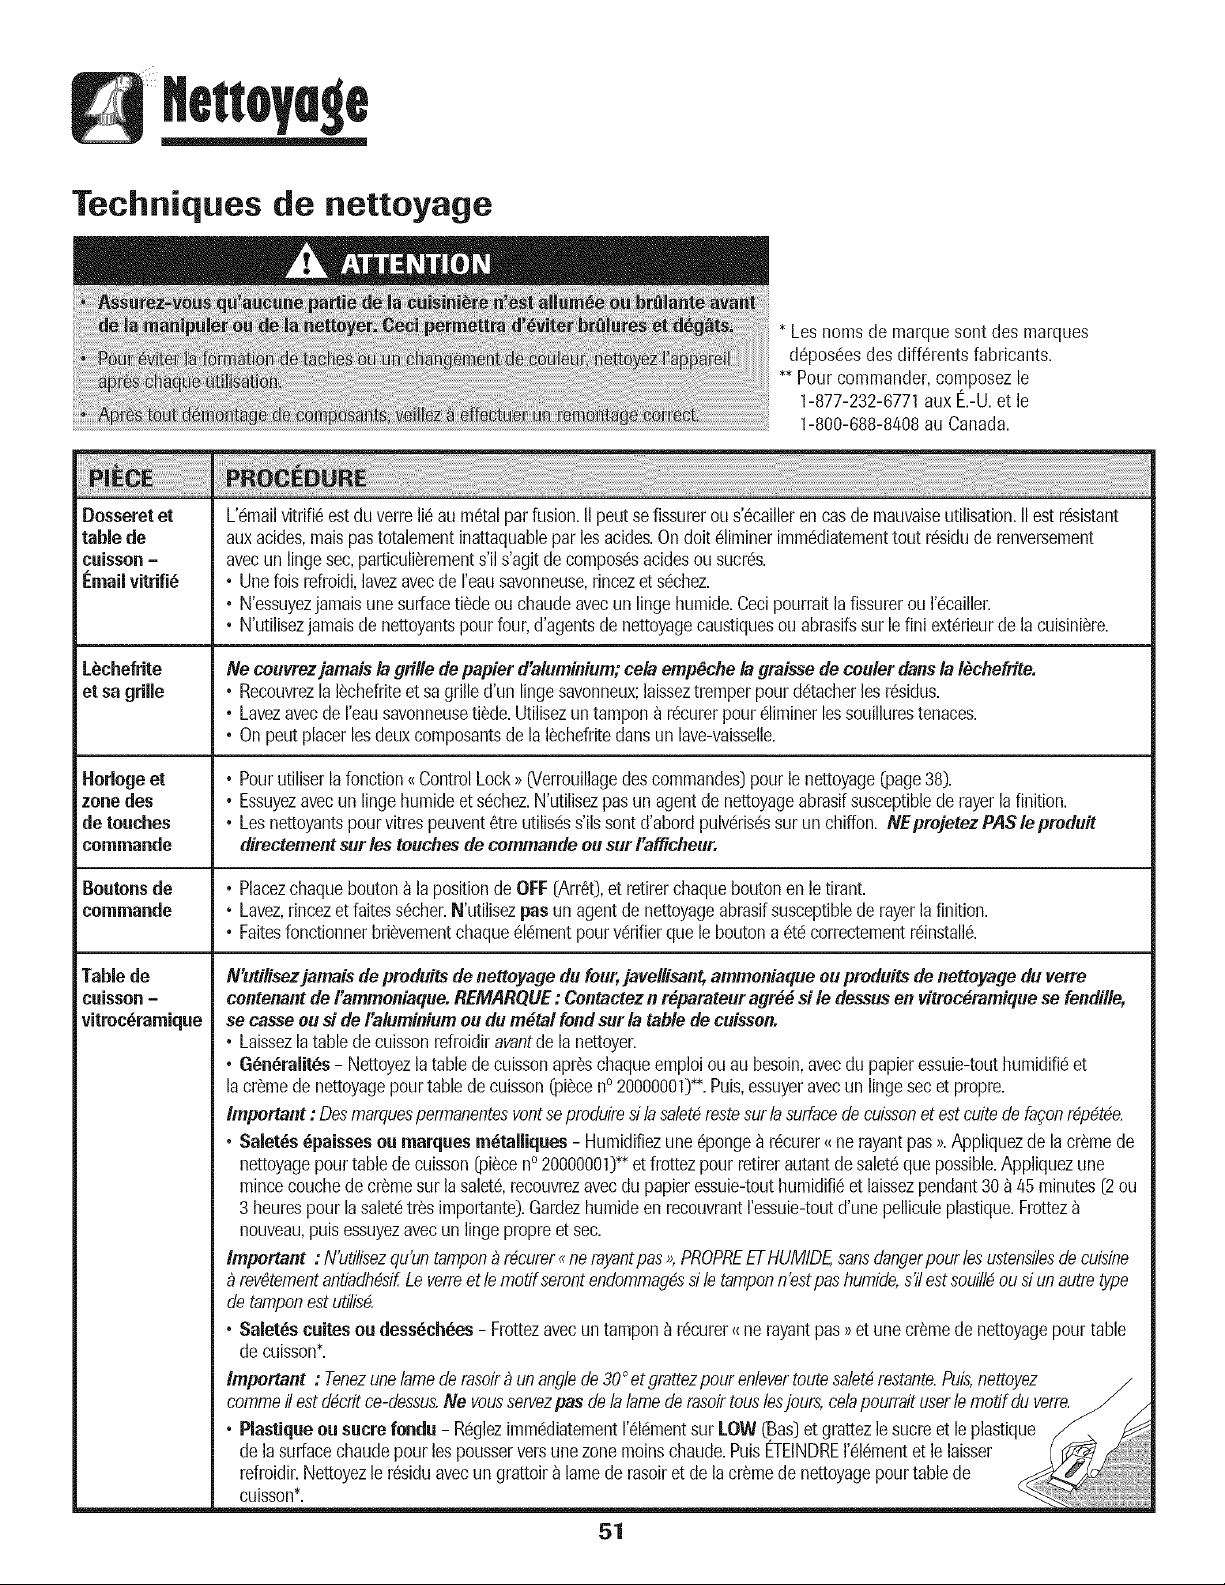
Techniques de nettoyage
*Les noms de marquesont des marques
d6pos6esdes diff6rentsfabricants.
** Pourcommander,composezle
1-877-232-6771aux E.-U.et le
1-800-688-8408au Canada.
Lbchefrite
et sa grille
Horlogeet
zone des
de touches
comnlande
Boutons de
commande
Table de
cuisson-
vitroc6ramique
Ne ceuvrezjamais la grille depapier d'aluminium;cola emp_che la grai_e de cooler dansla I_hefrite.
• RecouvrezlaI_chefriteet sa grilled'un lingosavonneux;laisseztrernperpour d6tacherlosr6sidus.
. Lavezavecde I'eausavonneusetilde. Utilisezuntampona rc!curerpourc!liminerlossouillurestenaces.
. On poutplacerlosdeuxcomposantsde la16chefritedartsun lave-vaisselle.
. Pourutiliserla fonction_ControlLock;_07errouillagedescommandos)pourle nettoyage(page38).
° Essuyezavecunlingohumideet s6chez.N'utilisezpasun agentde nettoyageabrasifsusceptiblede rayerlafinition.
° Losnettoyantspourvitrespeuvent6treutilisc!ss'ilssontd'abordpulvc!ris6ssurun chiffon. NEprojetezPASle produit
directementsur lostouches de commandoou surI'amcheur.
° Placezchaquebouton_ lapositionde OFF(Arr60,et retirerchaqueboutonen le tirant.
° Lavez,rincezet faitess_cher.N'utilisezpasun agentde nettoyageabrasifsusceptiblede rayerlafinition.
° Faitesfonctionnerbri_vementchaque_lc!mentpourvc!rifierque le boutona_t6correctementrc!install6.
N'utilisezjamaisdeproduits denettoyage do four,javellisan_ ammoniaqueou produits de nettoyage du verre
contenantde/'ammoniaque.REMARQUE: Contactezn r_parateuragr_ sile dessusen vitroc_ramique se fendi/le,
se casseousi de I'aluminiumou du mdtal fond sur la tablede cuisson.
° Laissezla tabledecuissonrefroidiravantdelanettoyer.
° G6n6ralit_s- Nettoyezlatabledecuissonapr_schaqueemploiou au besoin,avecdu papieressuie-touthumidific!et
lacr_medenettoyagepour tabledecuisson(pieceno 20000001)**.Puis,essuyeravecun lingosecet propre.
Important: Desmarquespermanentesvontseproduiresila salat_restesurlasurfacedecuissonet estcuitedefa_onr_p_t_e.
, Salet6s6paisses ou marquesrn6_alliques- Humidifiezune_ponge_ r_curer<_ne rayantpas_._pliquez de lacr_mede
nettoyagepourtablede cuisson[pieceno20000001)**etfrottezpourretirerautant desalet_que possible.Appliquezune
mincecouchedecr_mesur lasaletS,recouvrezavecdu papieressuie-touthumidifi_!et laissezpendant30 _ 45 minutes(2ou
3 heurespour la salet_tr_s importante).Gardezhumideen recouvrantressuie-toutd'une pelliculeplastique.Frottez
nouveau,puisessuyezavecun lingopropreet sec.
Important : N'utilisezqu'untampon_ r_curer_nerayantpas_,PROPREEI-NUMIDE,sansdangerpourlos ustensilasde cuisine
rev_tementantiadh_sifLeverreet le motif semntendommag_ssila tamponn'estpashumide,s'ilestsouill_ou dun autretype
detamponestutilis_.
° Salet6s cuites ou dess6ch6es- Frottezavecun tampon_ r_curer_ne rayantpas_et unecr_mede nettoyagepour table
de cuisson*.
Important : Tenezunelamede rasoir_ unanglede 30°etgmttezpour enlavertoutesalat_restante.Pub,nettoyez
commeil estd_critce-dessus.Ne vousservezpas delalamede rasoirtouslasjours,colapourraituserla modf du verr__ _.
Plastiqueou sucrefondu - Reglezimm_diatementI'_l_!mentsur LOW(Bas)et grattezlesucreet leplastique _,
de lasurfacechaudepourlos pousserversunezonemoinschaude.PuisETBNDREI'_!l_mentet lelaisser
refroidir.Nettoyezle r_siduavecungrattoir_ lamede rasoiret dela cr_mede nettoyagepourtable de
cuisson*. ........
51
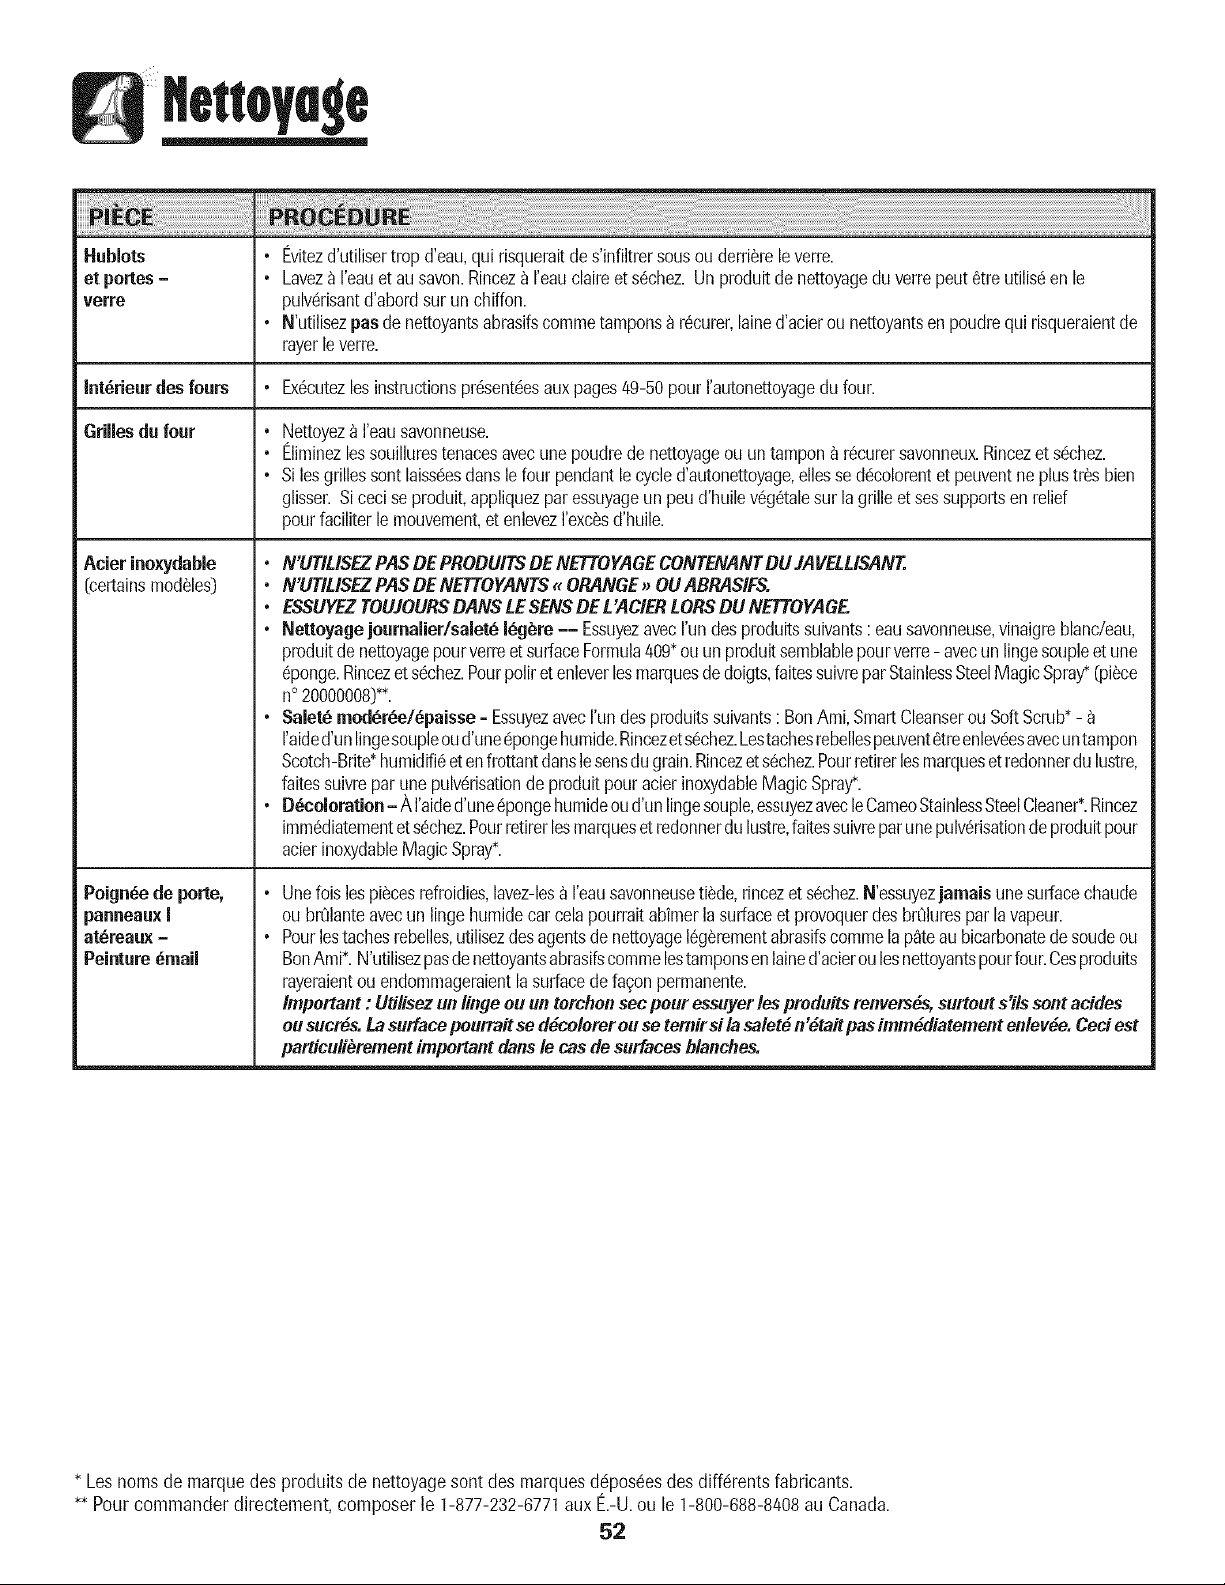
Hublots • Evitezd'utilisertrop d'eau,qui risqueraitdes'infiltrersousouderriereleverre.
et portes- • Laveza I'eauet ausavon.RincezaI'eauclaireets6chez. Unproduitdenettoyagedu verrepeut6treutilisden le
verre pulvdrisantd'abordsur un chiffon.
• N'utilisezpus denettoyantsabrasifscommetamponsa r6curer,lained'acierounettoyantsen poudrequi risqueraientde
rayerle verre.
int_rieurdes fours • Ex6cutezlosinstructionspr6sentdesauxpages49-50 pourrautonettoyagedu four.
Grillesdufour
Aeier inoxydable
[curtainsmoddles)
Poign_ede porte,
panneau×I
at_reaux-
Peinture_mail
o
o
o
Nettoyez_ I'eausavonneuse.
Eliminezlossouillurestenacesavecunepoudredenettoyageouuntampon_ r6curersavonneux.Rincezet sdchez.
Si losgrillessont laissdesdanslefour pendantle cycled'autonettoyage,oliosseddcolorentet peuventneplustrds bien
glisser.Si ceci seproduit,appliquezparessuyageun peud'huilev6g_talesur lagrilleet sossupportsen relief
pourfaciliterle mouvement,et enlevezrexc_sd'huile.
• N'UT/USEZPASDEPRODUITSDENETTOYAGECONTENANTDUJAVELLISANT
• N'UTIUSEZPASDENETTOYANTS_ ORANGE_ OUABRASIFS.
• ESSUYEZTOUJOUR$DANSLESENSDE L'ACIERLOR$DU NETTOYAGE
• Nettoyagejoumalier/salet_I_g_re -- EssuyezavecI'undesproduitssuivants: eausavonneuse,vinaigreblanc!eau,
produitde nettoyagepourverreet surfaceFormula409*ouunproduitsemblablepourverre- avecun lingosoupleetune
_ponge.Rincezet s6chez.Pourpolket enleverlosmarquesdedoigts,faitessuivrepar StainlessSteelMagicSpray*(piece
n° 200000081**.
• Salet_ mod_r_e/dpaisse - EssuyezavecFundes produitssuivants: BonAmi,SmartCleanserou SoftScrub*-
I'aided'unlingesoupleoud'une6pongehumide.Rincezets6chez.Lestachesrebellespeuvent6treenlev(_esavecuntampon
Scotch-Brite*humidifi6eten frottantdunslesonsdugrain.Rincezets_chez.Pourretirerlosmarqueset redonnerdulustre,
faitessuivrepar une pulv6risationde produitpouracierinoxydableMagicSpray*.
• D_eoloraUon=A I'aided'unedpongehumideoud'un lingesouple,essuyezavecleCameoStainlessSteelCleaner*.Rincez
imm6diatementets_chez.Pourretirerlosmarqueset redonnerdulustre,faitessuivreparunepulv6risationdeproduitpour
acierinoxydableMagicSpray*.
• Unefoislospi_ces_f_idies, lavez-les_ I'eausavonneusetilde, rincezet s6chez.N'essuyezjamaisunesurfacechaude
oubr01anteavecun lingehumidecar celapourraitabimerla surfaceet provoquerdes br01urespar lavapeur.
• Pourlostachesrebelles,utilisezdesagentsde nettoyageI_g_rementabrasifscommelap_teaubicarbonatede soudeou
BonAmi*.N'utilisezpasde nettoyantsabrasifscommelostamponsenlained'acieroulosnettoyantspourfour.Cosproduits
rayeraientou endommageraientlasurfacedefa_onpermanente.
important: Udlisezun lingoou un torchon secpour essuyer losproduits renvers_._surtout s_lssont addes
ousucres.Lasurface pourrait se ddcolorerou se temirsi la salet_ n'_taitpas immddiatement en/ev_e.Ceciest
particuli_rement importantdans lecas de surfaces blanches.
*Les nomsde marquedes produitsde nettoyagesont des marquesd_!posdesdes diffdrentslubricants.
** Pour commander directement, composer le 1-877-232-6771aux E.-U.ou le 1-800-688-8408au Canada.
52
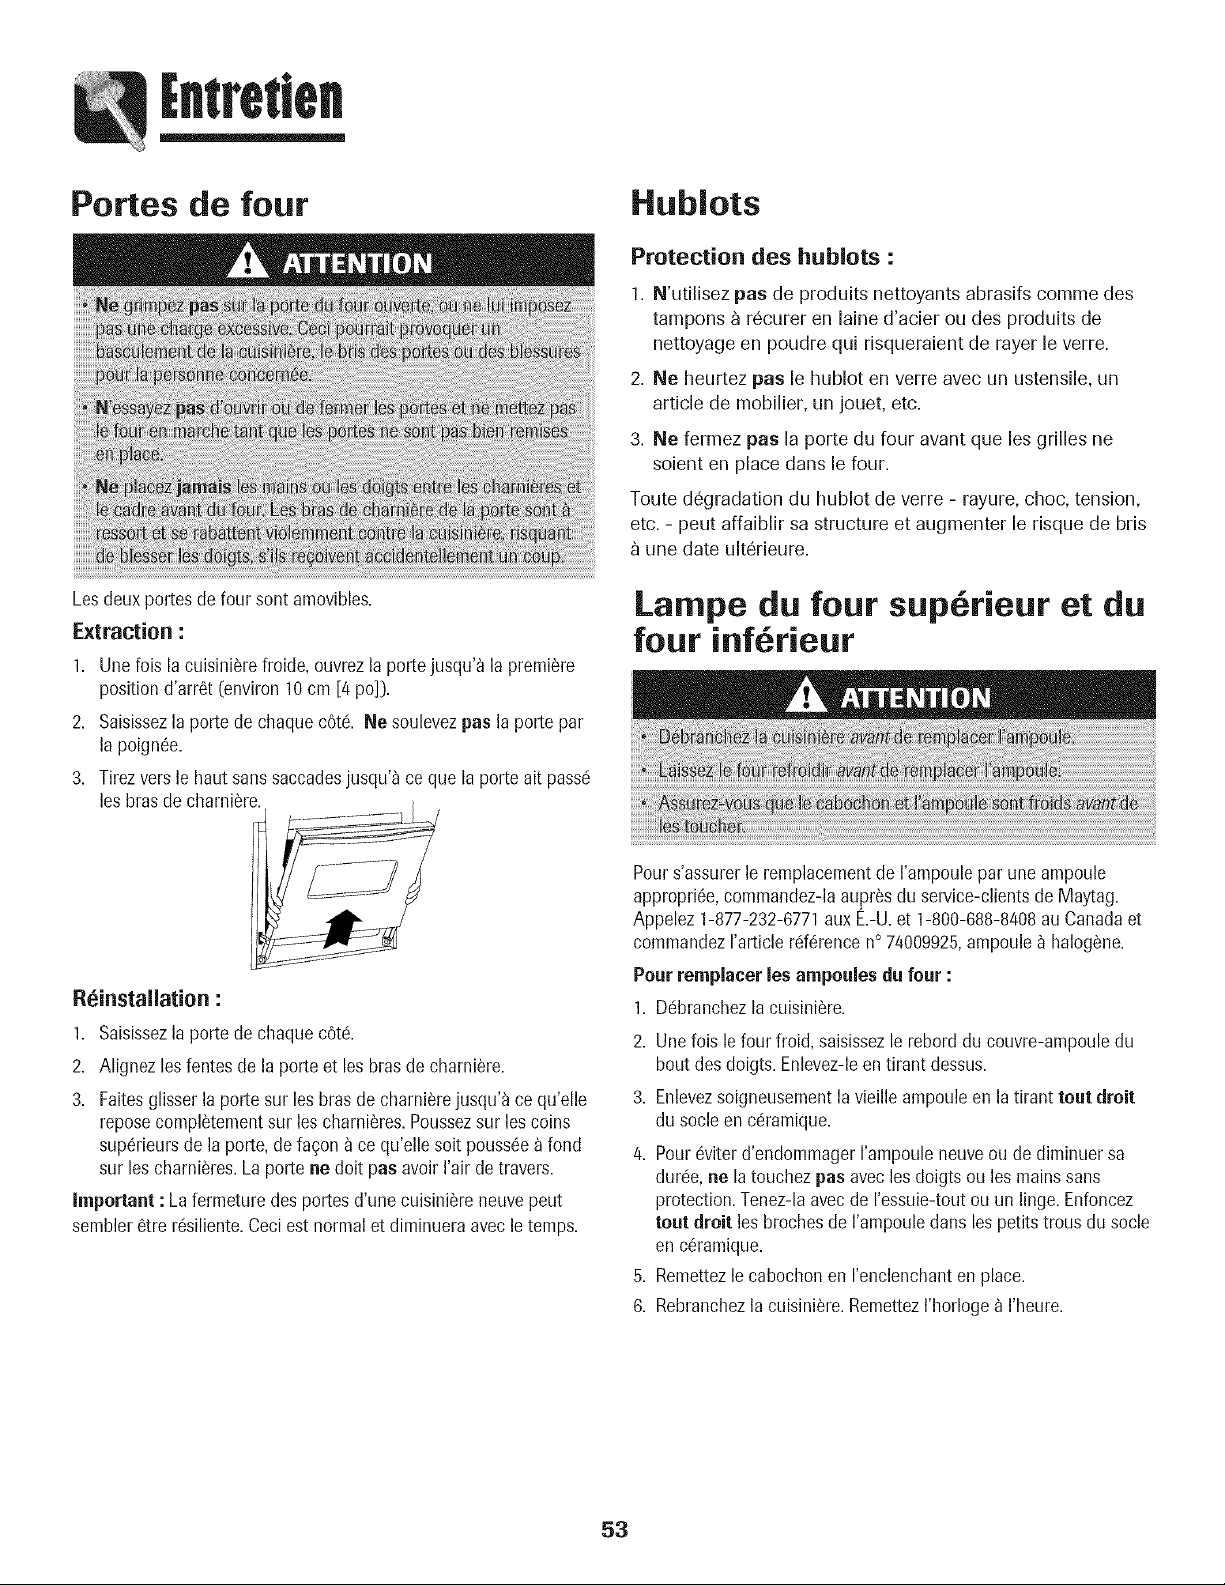
Portes de four
Losdeux portesde four sont an]ovibles.
Extraction :
1. Unefois la cuisini_refroide,ouvrezla portejusqu'_ la pren]i_re
positiond'arr6t (environ 10cn] [4 po]).
2. Saisissezla portede chaquec6t& Ne soulevezpas la porte par
la poign6e.
3. Tirezvers le haut sanssaccadesjusqu'a ce que la porte ait pass6
los brasde charni_re.
Hublots
Protection des hnblots :
1. N'utilisez pas de produits nettoyants abrasifs comme des
tampons _ r6curer en laine d'acier ou des produits de
nettoyage en poudre qui risqueraient de rayer le verre.
2. Ne heurtez pas le hublot en verre avec un ustensile, un
article de mobilier, un jouet, etc.
3. Ne fermez pas la porte du four avant que les grilles ne
soient en place dans le four.
Toute d6gradation du hublot de verre - rayure, choc, tension,
etc. -peut affaiblir sa structure et augmenter le risque de bris
une date ult6rieure.
Lampe du four sup rieur et du
four inf6rieur
Reinstallation :
1. Saisissezla portede chaque c6t6.
2. Alignez les fentesde la porte et les bras de charniSre.
3. Faitesglisserla porte sur los bras de charni_rejusqu'a ce qu'elle
reposecompl_tementsur les charni_res.Poussezsur los coins
sup6rieursde la porte,de fagon_ ce qu'elle soit pouss6ea fond
sur les charniSres.La porte ne doit pas avoirI'air de travers.
Important : Lafern]eture des portesd'une cuisini_re neuvepeut
sen]bier6tre r6siliente.Ceci est normal et diminuera avecletemps.
Pours'assurerle remplacementde I'ampoulepar une ampoule
appropri6e,con]n]andez-laaupr_sdu service-clientsde Maytag.
Appelez 1-877-232-6771auxE.-U.et 1-800-688-8408au Canadaet
commandezI'articlerdf6rencen° 74009925,ampoule_ halog_ne.
Pour remplacer les ampoules du four :
1. Dc!branchezla cuisini_re.
2. Unelois le four froid, saisissezle reborddu couvre-ampouledu
bout desdoigts. Enlevez-leentirant dessus.
3. Enlevezsoigneusen]entla vieille ampouleen la tirant tout droit
du socleen cc!ramique.
4. Pour_viter d'endon]n]agerI'an]pouleneuveou de din]inuer sa
duroc,ne la touchezpas avec los doigts ou los mainssans
protection.Tenez-laavecde I'essuie-toutou un lingo. Enfoncez
tout droit les brochesde I'ampouledans les petits trous du socle
en c6ramique.
5. Ren]ettezle cabochonen I'enclenchanten place.
6. Rebranchezla cuisini6re.Ren]ettezI'horloge_ I'heure.
53
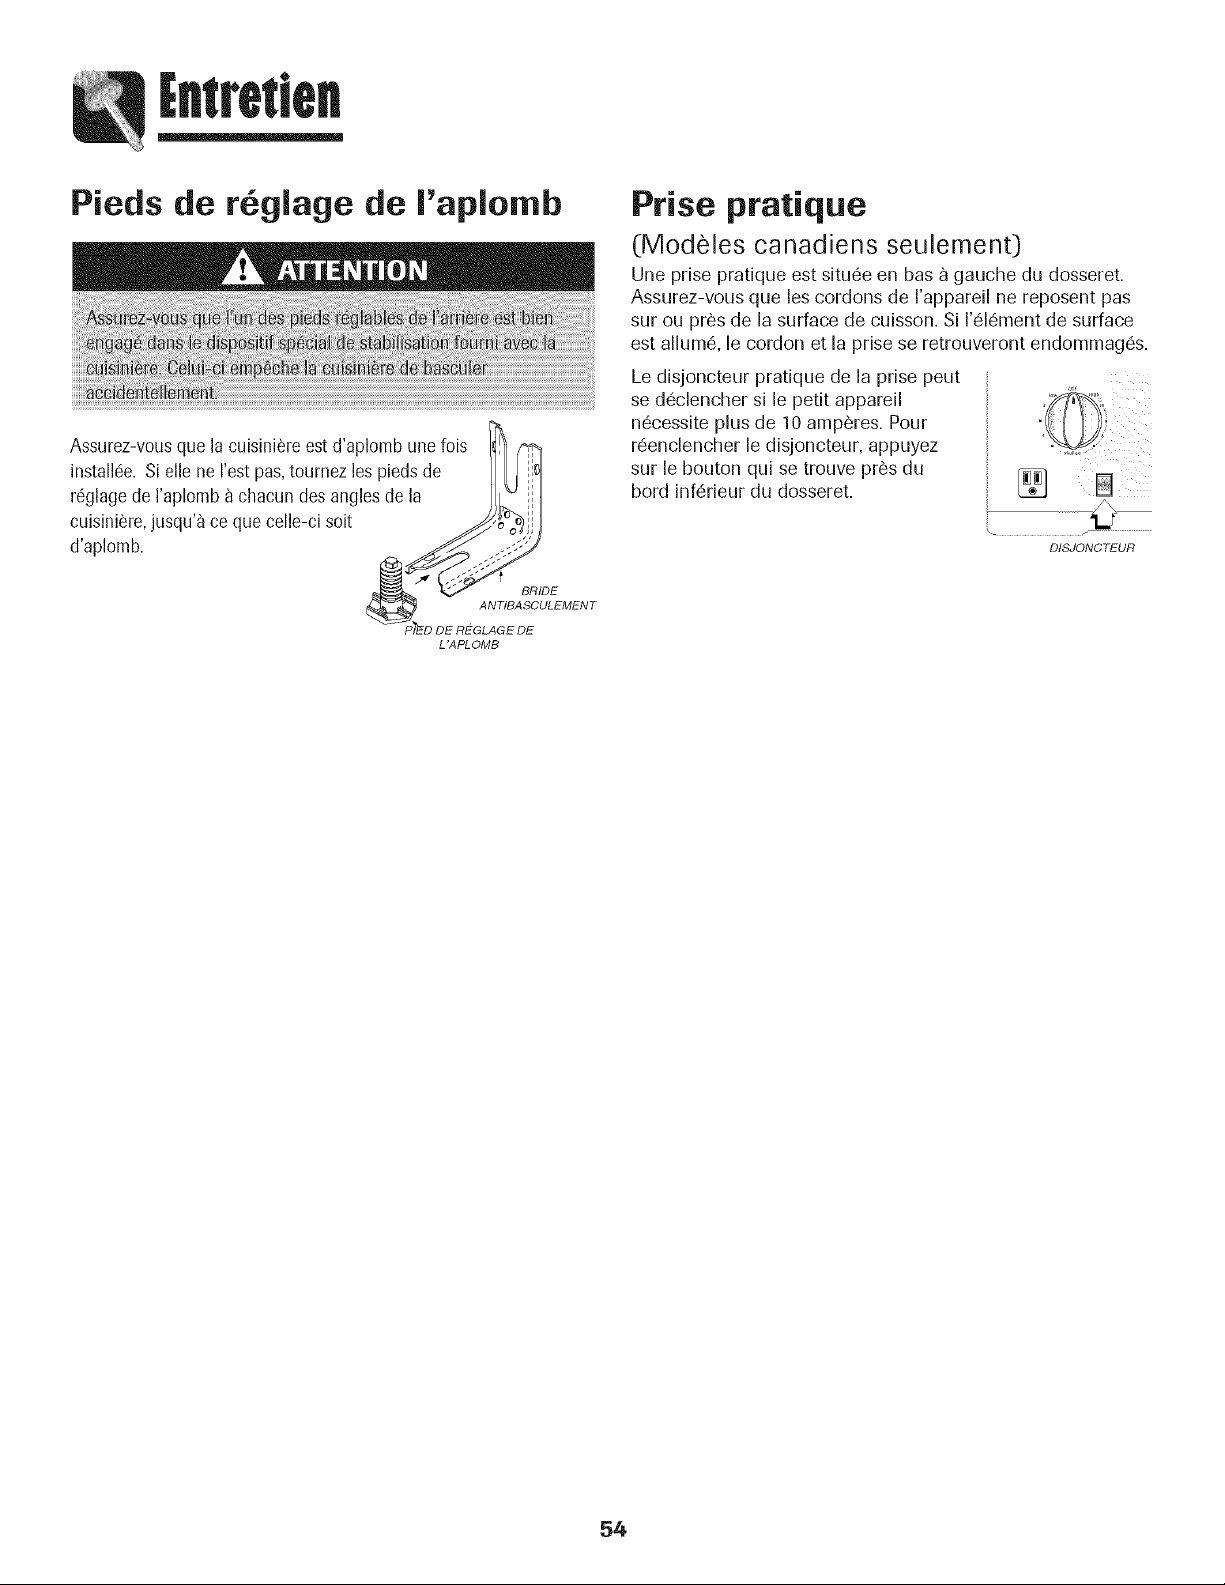
Pieds de r glage de I'aplomb
Assurez-vousque la cuisini_reest d'aplombune fois (-_
install_e. Si elle ne I'estpas,tournezles pieds de
r_glagede I'aplomb_ chacundes anglesde la
cuisini_re,jusqu'_ ce que celle-cisoit _ _,,//
d'aplomb, f
_£_ BRIDE
L'APLOMB
Prise pratique
(Modeles canadiens seulement)
Une prise pratique est situ_e en bas _ gauche du dosseret.
Assurez-vous que les cordons de I'appareil ne reposent pas
sur ou pros de la surface de cuisson. Si 1'61_mentde surface
est allum_, le cordon et la prise se retrouveront endommag_s.
Le disjoncteur pratique de la prise peut
se d_clencher si le petit appareil
n6cessite plus de 10 amperes. Pour
r_enclencher le disjoncteur, appuyez
sur le bouton qui se trouve pros du
bord inf_rieur du dosseret.
DISJONCTEUR
54

Pour la plupart des probleraes • V_!rifiezqua les commandesdu four sontcorrectementr_gldes.
obsew_s, essayez d'abord • Vdrifiez sile four est bien raccord_!au circuit _lectrique.
ce qui suit. ° Inspectez/rdarmezledisjoncteur. Inspectez/remplacezles fusibles.
° ContrOlezla source d'alimentation_lectrique.
Une partie ou la totaJit_de Ja
euisinibrene fonetionne pus.
L'horloge,losic_nes et/ou
loslampesfonctionnent,mais
le four ne chauffe pus.
La lampe de four et/ou rhorloge
ne fonetionnent pus.
[es r_sultatsde la caisson °
differentde ceux du °
four precedent.
Les aliments ne grillent pus •
eorreeternentou produisent •
trop de furn_e. •
o
o
°
o
Les aliments ne grillent pus •
eorreeternentou produisent •
trop de furn_e. •
o
o
°
o
L'autonettoyagene se fait pus. •
°
o
°
• V_!rifiezsi lasurfaceet/ou les commandosdu four sont bien rdgk!es.Voyezpages33 et 39.
• V_!rifiezsi laporte du four est ddverrouilk!eapr_sun autonettoyage.Voyezpage50.
• Vdrifiez sile four est rdgld pour une cuisson dif_!rdeou pour un autonettoyage.Voyezpages42
et 49.
• V_!rifiezsile verrouillagedes commandesest activd. Voyezpage38.
• Vdrifiez si la commandeesten mode Sabbat.Voyezpage46.
• Lefour peut 8tre programm(!pour unefonction Cook& Hold ou Delay.
, Lacommandede verrouillagede four pout ne pas_tre programme°.Voyezpage38.
• L'ampouleest ddectueuse ou realserr_e.
• La lamp° de four nefonctionne paspendant I'autonettoyage.
° Lefour pout 6tre en mode Sabbat.Voyezpage46.
D6terminezsi I'_!ventdu four est obstru& Voyezson emplacementpage47.
Assurez-vousque la cuisini_re°st d'aplomb.
Los r_glagesde temp_!raturevarientsouvententre un four neuf et le four qu'il remplace.Avec
I'_gedes fours, latemp(!ratureestsouventd_cal_edans unsonsou dans I'autre.Voyezpage46
pour obtenir los instructionssur le r_!glagede la temp(!raturedes fours. Important : II n'est
pas recommand_!de r_gler latemperaturesi colaconcern° une ou deuxrecettes soul°mont.
V_!rifiezla positionde grille. L'alimentestpeut-_tretrop pros de I'_!l_!ment.
L'_l_mentdu gril n'a pas _!t_pr_chauff&
Lepapier d'aluminiuma _!t_real utilis_!.Ne garnissezjamais la grille de I_chefriteavec de
la feuille d'aluminium.
Portedu four ferm_edurant la cuissonau gril. Laissezla porte ouvertejusqu'a la premiere
but_!e[environ4 po).
EnlevezI'excSsde graissesur la piece de viand° avantla cuissonau gril.
Utilisationd'une I_chefritesouill_e.
Latension_lectriquede la maison estpeut-Strebasso.
V_!rifiezla positionde grille. L'alimentestpeut-_tretrop pros de I'_!l_!ment.
L'_l_mentdu gril n'a pas _t_ pr_chauff&
Lepapier d'aluminiuma _!t_real utilis_!.Ne garnissezjamais la grille de I_chefriteavec de la
feuille d'aluminium.
Portedu four ferm_edurant la cuissonau gril. Laissezla porte ouvertejusqu'a la premiere
but_!e[environ4 po).
EnlevezI'excSsde graissesur la piece de viand° avantla cuissonau gril.
Utilisationd'une I_chefritesouillSe.
Latension_lectriquede la maison °st peut-_tre basse.
D_terminezque I'appareiln'a pas_!t_programm_!pourun autonettoyagediff_!r_!.Voyezpage49.
V_rifiezque la porte °st ferm_e.
V_!rifiezsi lacommando°st en mode Sabbat.Voyezpage 46.
Lefour °st pout _tre a unetemperaturesup_!rieurea 204° C (400° F).LatempSraturedu four
doit _tre inf_rieurea 204° C [400° F) pour pouvoir programmerun cycled'autonettoyage.
55
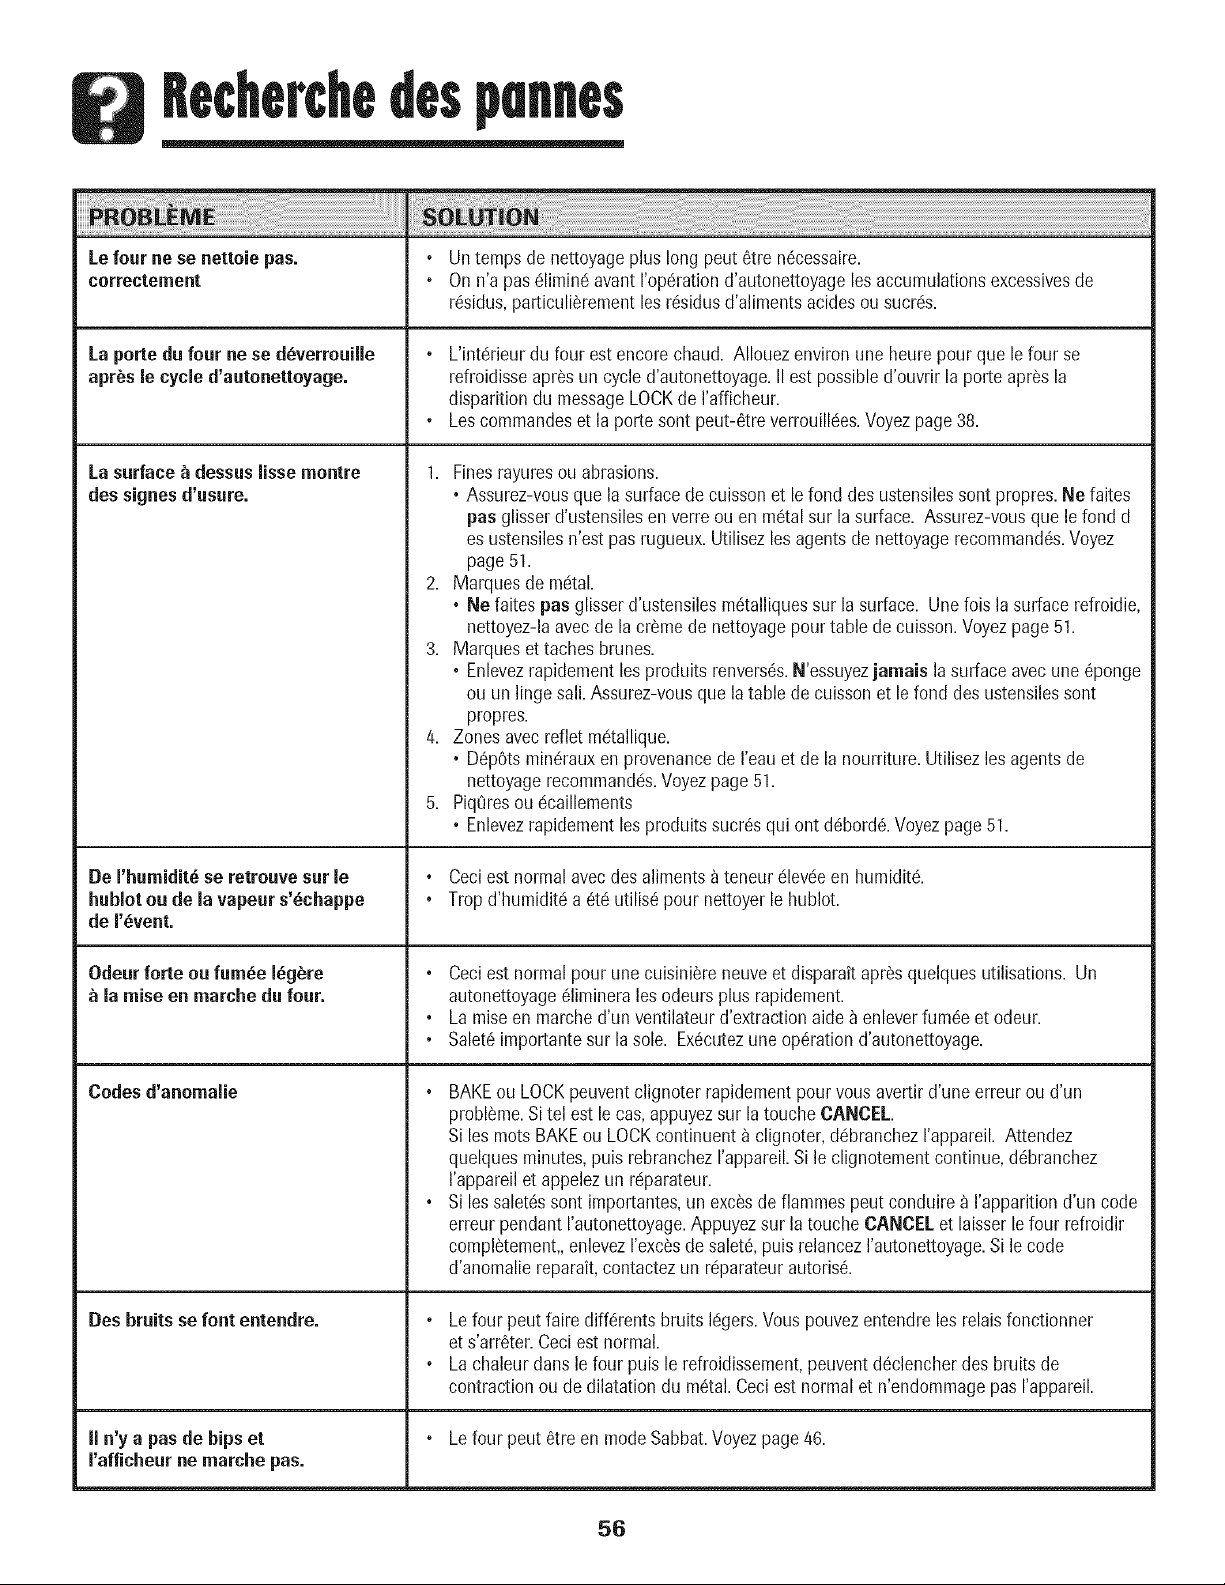
Le four ne se nettoie pas.
correctement
La porte dufour ne se d_verrouille
apr_s le cycle d'autonettoyage.
La surface _ dessus lisse montre
des signes d'usure.
De I'humidit_se retrouvesur le
huMot ou de la vapeur s'_chappe
de r_vent.
Odeur forte ou furn_e I_g_re
la raise en marchedu four.
Codes d'anomalie
Des bruits se font entendre.
II n'y a pas de hips et
rafficheur ne marche pas.
• Un temps de nettoyageplus longpeut 6tre n6cessaire.
• On n'a pas c!limin6avant I'op6rationd'autonettoyageles accumulationsexcessivesde
r6sidus,particuliSrementlesr6sidus d'alimentsacidesou sucrc!s.
• L'int6rieurdu four est encorechaud. AIIouezenviron une heure pour que le four se
refroidisseapr_sun cycle d'autonettoyage.IIest possibled'ouvrir la porte apr_s la
disparitiondu messageLOCKde I'afficheur.
• Lescommandeset la portesont peut-6treverrouillc!es.Voyezpage38.
1. Finesrayuresou abrasions.
, Assurez-vousque la surfacede cuissonet le fond des ustensilessont propres.Ne faites
pas glisserd'ustensilesen verre ouen metalsur la surface. Assurez-vousquele fond d
es ustensilesn'est pas rugueux.Utilisezlesagentsde nettoyagerecommand6s.Voyez
page51.
2. Marquesde mdtal.
• Ne faites pas glisserd'ustensilesm6talliquessur la surface. Unefois la surfacerefroidie,
nettoyez-laavecde la cr_me de nettoyagepourtable decuisson.Voyezpage51.
3. Marqueset taches brunes.
• Enlevezrapidementles produits renvers6s.N'essuyezjamais la surfaceavec une 6ponge
ou un linge sali.Assurez-vousque latable decuisson et lefond des ustensilessont
propres.
4. Zonesavecrefiet m6tallique.
° D6p0tsmindrauxenprovenancede I'eauet de la nourriture.Utilisez lesagentsde
nettoyagerecommandc!s.Voyezpage51.
5. PiqOresoucgcaillements
° Enlevezrapidementles produitssucresqui ont d6bord&Voyezpage51.
° Ceci est normalavecdesaliments ateneur 61ev6een humidit&
, Tropd'humiditc!a _tc!utilis_pour nettoyer lehublot.
• Ceci est normalpour unecuisini_reneuveet disparait apr_squelquesutilisations. Un
autonettoyage61iminerales odeurs plus rapidement.
° La mise en marched'un ventilateurd'extractionaide _ enleverfum6e et odeur.
° Salet6importantesur la sole. Ex6cutezune op6ration d'autonettoyage.
• BAKEou LOCKpeuventclignoterrapidementpourvousavertir d'une erreurou d'un
probl_me.Sitel est le cas,appuyezsur latouche CANCEL.
Si les rootsBAKEou LOCKcontinuent _ clignoter,d(gbranchezI'appareil. Attendez
quelquesminutes,puis rebranchezI'appareil.Si le clignotement continue,d6branchez
I'appareilet appelezun rcgparateur.
, Si lessalet6ssont importantes,un exc_sde flammes peut conduirea I'apparitiond'un code
erreurpendant I'autonettoyage.Appuyezsur la touche CANCELet laisserle four refroidir
compl_tement,,enlevezI'exc_sde salet6,puis relancezI'autonettoyage.Si le code
d'anomaliereparait,contactezun rc!parateurautoris&
° Lefour peut faire diff6rents bruits Ic!gers.Vouspouvezentendreles relaisfonctionner
et s'arr6ter.Ceciest normal.
• La chaleurdarts le four puis le refroidissement,peuvent d6clencherdes bruits de
contractionou de dilatation du m6tal.Ceciest normal et n'endommagepasI'appareil.
• Lefour peut 6tre en modeSabbat.Voyezpage46.
56
LESEULETUNIQUERECOURSDUCLIENTEN
VERTUDECETfEGARANTIELIMITEEESTLA
REPARATIONDU PRODUITCOMMEDECRITE
PRECEDEMMENT.LESGARANTIESIMPLICITES,
Y COMPRISLESGARANTIESDEQUALITE
MARCHANDEOUD'ADAPTATIONA UN USAGE
PARTICULIER,SONTLIMITEESA UN AN OUA
LA PERIODELA PLUSCOURTEPERMISEPARLA
LOI.MAYTAGCORPORATIONNE SERAPAS
TENUERESPONSABLEDESDOMMAGES
DIRECTSOUINDIRECT&CERTAINSETATSET
CERTAINESPROVINCESINTERDISENT
L'EXCLUSIONETLA LIMITATIONDES
DOMMAGESDIRECTSOU INDIRECTSAINSI
QUELESLIMITATIONSSUR LA DUREEDES
GARANTIESIMPLICITESDEQUALITE
MARCHANDEOUD'ADAPTATIONA UN USAGE
PARTICULIER.IL ESTDONCPOSSIBLEQUECES
LIMITATIONSNES'APPLIQUENTPASA VOUS.
CETTEGARANTIEVOUSCONFEREDESDROITS
JURIDIQUESSPECIFIQUESETILSE PEUTQUE
VOUSAYIEZ D'AUTRESDROITS,QUIVARIENT
D'UN ETATA L'AUTREOU D'UNEPROVINCEA
L'AUTRE.
Ne scat pas couverts par ces garanties
1. Lesprobl_meset dommagesrc!sultantdes situationssuivantes:
a. Mise en service,livraisonou entretieneffectu6sincorrectement.
b.Toute r@aration,modification,alto!rationet tout r_glagenon autoris6spar le
fabricant ou par un prestatairedeserviceapr_s-venteagrc!6.
c. Mauvaisemploi, emploi abusif,accidents,usage non raisonnable,ou catastrophe
naturelle.
d. Courantc!lectrique,tension,alimentationc!lectriqueou en gaz incorrects.
e. R_glageincorrectd'une commande.
2. Lesgarantiesne peuvent6tre honorc!essi les num@osde s6ried'origine ont €!t6
enlev6s,modific!sou nesont pasfacilement lisibles.
3. Ampoules,filtres a eauet filtres _ air.
4. Lesproduitsachet6s_ desfins commercialesou industrielles.
5. Lesfraisde d@annageou de visite pour :
a. Correctiond'erreursde raiseen service.Pour lesproduits nc!cessitantune
ventilation,un conduit m_talliquerigide dolt 6tre utilis&
b. Initiationde I'utilisateura I'emploide I'appareil.
c. Transportde I'appareilchezle r@arateur et retour de I'appareilchez I'utilisateur.
6. Toutaliment perduen raison depannesdu rdrig6rateur ou du congc!lateur.
7. D@ensesde d@lacementet detransport pour la r@aration du produit danades
endroitsc!loignc!s.
8. Cette garantien'est pas validea I'ext6rieurdes Etats-Uniset du Canada.Communiquez
avecvotredc!taillantpour savoirsi une autre garanties'applique.
9. Dommagesindirectsou accessoiressubis par toute personnea la suited'une
quelconqueviolation des garanties.CertainsEtatsou provincesne permettentpas
I'exclusionou la limitation de responsabilit6en ce qui concerneleadommagesdirects
ou indirects.L'exclusionci-dessus peut en consc!quencene pas s'appliquer_votre cas.
Si vous avez besoin d'aide
Consultezd'abord la sectionsur le d@annagedans le manueld'utilisationet d'entretien,
puis appelezled(!taillantde qui vous avezachetc!votre appareil ou leservice_ la clientSle
de MaytagServices,LLCau 1-800-688-9900aux Etats-Uniset au 1-800-688-2002au
Canadapour savoiroL'Jtrouver un r@arateur autoris_.
• Veillez) conserverlafacture d'achat pour justifier de la validit6 de la garantie. Pour
d'autres renseignementsconcernantles responsabilitc!sdu propric!tairea I'c!garddu
servicesous garantie,voir le texte de la GARANTIE.
• Si le dc!taillantou I'agencede serviceapr_s-ventene peut r6soudrele probl_me,6crivez
MaytagServices,LLC_ I'adressesuivante: CAIR:_Center,P.O.Box2370,Cleveland,TN
37320-2370Etats-Unis,ou appelezau 1=800=688=9900 aux Etats=Unisou au
1=800=688=2002ae Canada.
• Lesguides d'utilisation,les manuelsde serviceet les renseignementssur lespisces sont
disponiblesaupr_sdu service_ la clientSlede MaytagServices,LLC.
Rel_al'[lues -"Veilleza fournir I'informationsuivanteIorsquevouscommuniquez
avecnous ausujet d'un probl_me:
a. Vosnom,adresseet num@odet_l@hone;
b. Num_rode moduleet num@ode s_rie de I'appareil;
c. Nomet adressedevotre d_!taillantou devotre agencede service;
d. Descriptiond_!tailk!edu problSmeobserve;
e. Preuved'achat (facture de vente).
57
M_ Y[AG
®
Estufa el6ctrica de cubierta lisa
con doble homo Nla:ytag
serie 'Precision Touch' 850
Tabla
Seguridad .............................. 59=61
Cocci(in en la cubierta ........ 62=65
Controles
Cubierta lisa
Elemento calentador
Cocci(in en el homo ............ 66=77
Panel de control
Horneado
'Cook& Hold' (Cocinar y mantener caliente)
'Delay' (Diferir:)
Tostado
Asado a la parrilla
'Keep Warm' (Mantener caliente)
'Favorite' (Favorito:)
Parrillas del homo
Cuidado y Iimpieza .............. 78=81
Horno autolimpiante
Procedimientos de limpieza
Mantenimiento ..................... 82=83
Puertas de los hornos
Ventanilla del horno
Luz del norno
Localizaci6n y soluci6n
de averias .............................. 84=85
Garantia y servicio ..................... 87
lnstrucciones generales
Para asegurar el funcionarniento correcto y seguro del
electrodorn_stico: El electrodom_stico debe ser instalado
debidamentey puestoa tierra por un tScnicocalificado. No intente
ajustar, repararo reemplazarninguna piezadel electrodomestico a
menos que se recomiendeespedficamente en esta guia. Todas las
otras reparacionesdeben ser hechas por un tScnicocalificado.
Siempredesenchufe el electrodomestico antesde realizar
reparaciones.
Lasadvertencias e instruccionesimportantes sobre seguridad que
aparecen en esta guia no est_n destinadasa cubfir todas las
posiblescircunstanciasy situacionesque puedan ocurrir. Se debe
ejercer sentido com_n, precauci6n y cuidado cuando se instale,se
realice mantenimientoo se haga funcionar el electrodomestico.
Siemprep6ngaseen contacto con su distfibuidor, agente de
servicio o fabficante si surgen problemas o situacionesque usted
no comprenda.
Reconozca los simbolos, advertencias y
etiquetas de seguridad
Paraverificar si el dispositivoest_ debidamente instalado,mire
debajo de la estufa con una hterna para asegurarsede que uno
de los tornillos niveladorestraseros estedebidamente
enganchado en la ranura del soporte. Eldispositivoantivuelco
asegura el tornillo nivelador trasero al piso cuando est_
debidamente enganchado.Verifique este dispositivo carla vez
que la estufa sea movida.
En caso de incendio
Apague el electrodomesticoy la campana de ventihci6n para evitar
que las llamasse dispersen.Apague las llamas y luego encienda la
campana paraexpulsar el humo y el olor.
• En [a cubierta: Apague el fuego o la llamaen una sart6ncon
una tapa o una bandejade hornear.
NUNCA [evanteo mueva una sart6n en llamas.
• En los homes: Apague el fuego o la llama del homo cerrando
[aspuertas de los hornos.
No use agua en los incendios de grasa. Usebicarbonato de sodio,
un producto qu{mico secoo un extinguidor de espuma para apagar
un incendio o llama.
Lea y siga todas las instrucciones antes de usar este
electrodorn_stico para evitar el riesgo potencial de incendio,
choque eiectrico, lesiones personales o daffo al
eiectrodomestico como resuitado de su uso inapropiado. UtiHce
este eiectrodomestico soiamente para el prop6sito para el cual
ha sido destinado segQnse describe en esta gu{a.
59
importentes se:gurlded
Si el electrodom6sticoesta instalado cerca de una ventana,se debe
tener cuidado paraevitar que las cortinas pasensobre los
elementos superiores.
NUNOA use este electrodom6stico para entibiar o calentar la
habitaci6n. El incumplimiento de esta instrucci6n puede conducir a
posiblesquemaduras, lesiones,incendio o da_o al
electrodom6stico.
NUNOA use ropa suelta u holgada cuando est6 usando el
electrodom6stico.La ropa puede enredarse en los mangos de los
utensilios o encendersey causar quemadulas si la ropa entra en
contacto con los elementos calefactorescalientes.
Paraasegurar el funcionamiento debido y evitar da_os al
electrodom6sticoo posibleslesiones,no ajuste, repare ni
reemplace ninguna pieza del electrodom6sticoa menos que se
recomiendeespecfficamenteen esta gufa. Todaslas otras
reparacionesdeben set hechas por un t6cnico calificado.
NUNOA almacene ni use gasolina u otros matefiales combustibles
o inflamablesen los hornos, cercade los elementos superioreso en
la vecindad de este electrodom6sticopues los vaporespueden
crear un peligro de incendio o una explosi6n.
Paraevitar incendios de grasa, no deje que se acumule grasa de
cocinar ni otros materialesinflamables en la estufa o cerca de ella.
Usesolamente tomaollas secos.Los tomaollas ht_medoso mojados
pueden producir quemaduras por vapor al tocar las superficies
calientes.No deje que los tomaollas toquen los elementos
calefactorescalientes. No use una toalla ni otto paso voluminoso
que puedaentrar en contacto facilmente con los elementos
calefactorescalientes y encenderse.
Siempreapague todos los controles cuando haya terminado de
cocinar.
NUNOA caliente envasescerradosen lacubierta o en los hornos.
La acumulaci6n de presi6n en el envasepuede hacerlo reventary
causarquemaduras, lesionespersonaleso da_os al
electrodom6stico.
NUNOA use papel de aluminio para cubrir los platillos protectores,
las parrillas o la parte inferior de los hornos. Esto puede crear
riesgosde choque el6ctrico,incendio o da_os al electrodom6stico.
Useel papel de aluminio solamente como se indica en esta gufa.
Los envasesde tipo aerosolson EXPLOSIVOScuando son
expuestosal calory pueden ser altamente inflamables.No los use
ni los guarde cerca del electrodom6stico.
Cubierta
NUNCA deje los elementos superiores sin supervisi6n,
especialmentecuando esta usando los ajustes de calor altos. Un
derrame que no reciba la debida atenci6n puede causar humo y un
derrame de grasa puede causar un incendio.
Esteelectrodom6sticotiene diferentes tama_os de elementos
supefiores.Seleccioneutensilios que tengan bases planas Io
suficientementegrandes para cubfir el elemento. La relaci6n
60
adecuadaentre el utensiNoy el elemento mejorara la eficiencia al
cocinar.
Siel utensilioes mas peque_o que el elemento, una porci6n del
elementoquedar_ expuestay puedeencender la ropa o un tomaollas.
Solamenteciertos tipos de utensiNosde vidfio, vidrio/ceramico,
ceramic& gres u otros utensiNosvidfiados son convenientespara
cocinar en la cubierta o en el homo sin que se quiebren debido al
cambio repentino de temperatura.Siga las instrucciones del
fabricante del utensiliocuando usevidrio.
Elrendimiento y funcionamiento seguro de este electrodom6stico se
han comprobado usando utensilios de cocina convencionales.No
use ningQndispositivoo accesofioque no haya sido especificamente
recomendadoen esta gufa. No use parrillas para cubiertas o sistemas
adicionalesde convecci6n para hornos. El uso de dispositivoso
accesofiosque no est6n expresamente recomendadosen estagufa
puede crear peligros gravesde seguridad,afectar el rendimiento y
reducir lavida Qtilde los componentes de este electrodom6stico.
Girelos mangos de los utensiNoshacia el centro de la cubierta, no
hacia la habitaci6n o sobre otto elemento superior. Estoreduce el
riesgo de quemaduras,de encendido de materiales inflamables o de
deNamessi el sart6nes tocado accidentalmente o alcanzado por
ni_os peque_os.
Cubierta de vidrio cer mico
NUNCA cocine sobre una cubierta rota. Sila cubierta de la estufa
se rompe, los agentes de limpieza y los deNamespueden penetrar
la cubierta rota y crear un riesgo de choque el6ctfico. P6ngaseen
contacto con un t6cnico calificado inmediatamente.
Limpie la cubierta con cuidado. AIgunos limpiadores pueden
producir vaporesnocivos si se apNcana una superficie caliente.Si
se usa una esponja,paso o toaNade papel hQmedaen un area de
la cubierta que est6caliente, tenga cuidado pala evitar
quemaduras por el vapor.
Elementos calefactores
NUNCA toque loselementos supefiores o de los hornos, las areas
cercanas a enoso las superficiesdel interior de los hornos.
Los elementos calefactores pueden estar caNentesat_ncuando se
vean de color oscuro. Lasareas cerca de los elementossupefiores
y las superficiesdel interior de los hornos se pueden calentar Io
suficiente como para causar quemaduras. Durantey despu6s del
uso, no toque ni deje que la ropa u otros matefiales inflamables
entren en contacto con los elementos calefactores,con las areas
cerca de enoso con las areasdel interior de los hornos que no se
hayan enffiado completamente.
Otras superticies que pueden estar calientes son las
siguientes: La cubierta, lassuperficies que estan dirigidas hacia la
cubierta, el respiradero del homo, las superficies cercanas a la
abertura del respi_adero,las puertasde los hornos y las areas que
las rodean, y las ventanillasde los hornos.
tmponentes seguri@d
Ollas freidoras
Use extremo cuidado cuando muevala olla con aceite o descarte
la grasa caliente. Deje que la grasa se enfffe antesde intentar
mover el utensilio.
Hornos
Tenga cuidado cuando abra las puertas. Permitaque el aire o
vapor caliente escapeantesde retirar o colocarel alimento.
Paraun funcionamiento y rendimiento adecuados del homo, no
bloquee u obstruya el conducto del respiraderodel homo. Cuando
los homos estan en uso,el respiraderoy el area que Io rodea se
pueden calentar Io suficiente como para causar quemaduras.
Siernprecoloque las parfillas del homo en las posiciones deseadas
cuando los hornos esten fffos. Sise debe mover una parfilla
cuando el homo est8 caliente, no permita que el tomaollas entre
en contacto con el elemento calientedel horno.
Hornos autolimpiantes
i i i i i i
®! !!m
Limpie _]nicamentelas piezasque se indican en esta gula. No
Iimpie lajunta de la puerta. La junta de la puerta es esencialpara
obtener un sellado hermetico. No frote, daffe o muevalajunta.
No use Iimpiadores de hornos. No se debe utilizarningun
Iimpiador de hornos o ninguna capa protectora para forros de
hornos dentro del homo o en cualquiera de sus piezas.
Limpie los derrames excesivos,especialmentelos derrames de
grasa,antesdel ciclo de autolimpieza paraevitar el humo,
Ilamaradaso las llamas en el horno.
Es normal que la cubierta se caliente durante un ciclo de
autolimpieza.PorIo tanto, evitetocar la cubierta, la puerta, la
ventanillao el respiradero del homo durante un ciclo de
autolimpieza.
Seguridad para los ni os
NUNCA deje a los nlffos soloso sin supervisi6ncuando el
electrodom_sticoest_en uso o est_caliente.
@UNCA permlta que los nlffos se sienten o se parenen nlnguna
parte del electrodomestico pues se pueden lesionar o quemar.
Seles debe ensehar a los nlffos que el electrodomestico y los
utensillosque estan en el o sobre el pueden estar callentes. Deje
enffiar los utensillos calientesen un lugar seguro,fuera del alcance
de los nlffos pequeffos.Seles debe enseffara los nlffos que un
electrodomesticono es un juguete. No se debe permltir que los
nlffos jueguen con los controles u otras piezasde la cubierta.
Campanas de ventilaci6n
Limpie la campana de ventilaci6n de la estufa y los filtros con
frecuencia para evltar que se acumulen grasa u otros matefiales
inflamables en la campana o en el filtro y tambien paraevitar
incendiosde grasa.
Enciendael ventilador cuando flamee alimentos (tales como
cerezasflambe] debajo de la campana.
Aviso y advertencia
importantes sobre seguridad
La Propuesta65 de la Ley sobre Seguridad y Contaminaci6n del
Agua Potable del Estadode California de 1986 (California Safe
Drinking Water and Toxic Enforcement Act of 1986] exige que el
Gobernador de California publique una lista de las sustancias
que, segL]nel Estado de California causan cancer o daffos al
sistema reproductor, y exige que los negocios adviertan a sus
clientes de la exposici6n potencial a tales sustancias.
Los usuarios de este electrodomestico quedan advertidos de que
cuando el homo est(_en el ciclo de autolimpieza, puede resultar
en una exposici6n de bajo nlvel a algunas de las sustancias
publicadas, incluyendo el mon6xido de carbono. La exposici6n a
estas sustancias puede set minimizada ventilando el homo
adecuadamente al exterior durante el ciclo de autolimpieza
abfiendo las ventanas y/o la puerta de la habitaci6n donde se
encuentra el electrodomestico.
AVISO IMPORTANTE RESPECTOA LOS PAJAROS
DOMI_STICOS: Nunca mantenga a los pajaros domesticos en la
cocina o en habitaciones hasta donde puedan Ilegar los humos de
la cocina. Los pajaros tienen un sistema respiratorio muy sensible.
Los vapores producidos durante el ciclo de autollmpieza del horno
pueden ser perjudlciales o mortales para los pajaros. Losvapores
que despiden el aceite de cocina, la grasa y la margarina
sobrecalentadosy la vajllla antiadherente sobrecalentada pueden
tamblen set perjudlciales.
Conserve estas instrucciones
para referencia futura
61
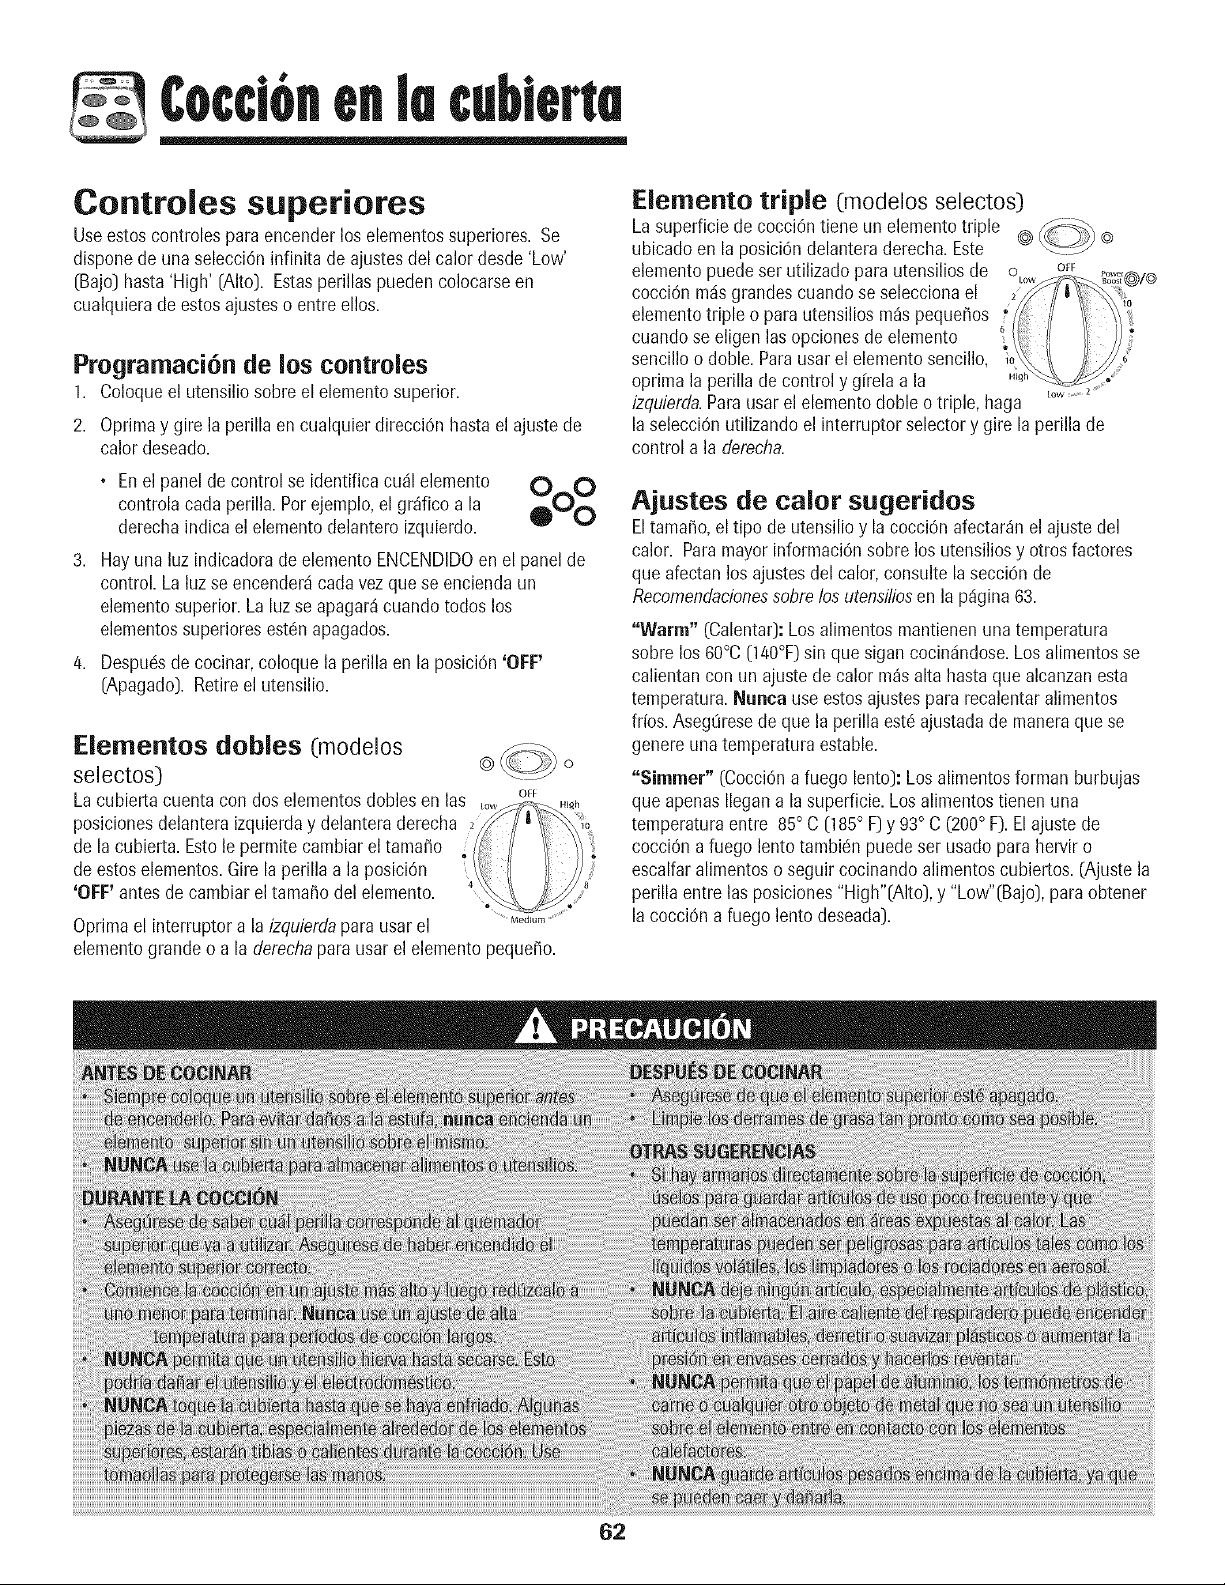
¢occi6nenla cublerta
Controles superiores
Useestoscontrolespara encenderlos elementossuperiores. Se
disponede una selecci6ninfinita de ajustesdel calor desde 'Low'
[Bajo) hasta'High' [Alto). Estasperillas puedencolocarseen
cualquierade estosajusteso entre ellos.
Programaci6n de los controles
1. Coloqueel utensilio sobreel elernentosuperior.
2. Oprimay gire la perilla en cualquierdirecciOnhastael ajustede
calor deseado.
, Enel panelde control se identificacu_ilelemento O O
oontrolaoadaperilla.Porejemp[o,elgr_ficoa la AO_-_
derechaindica el elementodelantero izquierdo.
3. Hayuna luz indicadoradeelementoENCENDIDOen el panel de
control. Laluz se encender_icada vezquese enciendaun
elementosuperior.Laluz se apagar_cuando todoslos
elementossuperioresest6n apagados.
/4. Despu6sde cocinar,coloque la perilla en la posici6n 'OF[:'
[Apagado). Retireel utensilio.
Elementos dobles (modelos
selectos)
Lacubiertacuentacon doselementosdoblesen las
posicionesdelanteraizquierday delanteraderecha
de la cubierta. Estole permitecambiareltamale
de estoselementos.Gire la perilla a la posiciOn
'OFF' antesde cambiareltama_o delelemento.
Oprimael interruptor a la izquierdaparausar el
elementograndeo a la derechaparausar el elementopeque_o.
62
Elemento triple (modelos selectos)
Lasuperficiede cocci6ntiene un elementotriple _(_--_
ubicado en la posici6ndelanteraderecha.Este @_ o
elementopuedeset utilizado parautensiliosde o o_F
cocciOnm_isgrandescuandose seleccionael
elementotriple o para utensiliosm_s pequeffos
cuando se eligenlas opcionesde elemento
sencilloo doble. Parausar el elementosencillo,
oprima la perilla decontrol y gfrela a la '"_
izquierda.Parausar el elementodoble o triple, haga ........2
laselecciOnutilizandoel interruptorselectory gire la perilla de
control a la derecha.
Ajustes de taler sugeridos
Eltama_o,el tipo de utensilio y la cocci6n afectar_nel ajustedel
calor. ParamayorinformaciOnsobre los utensiliosy otrosfactores
que afectan los ajustesdel calor,consulte lasecci6n de
Recomendacionessobrelos utensiliosen la p_igina63.
"Warm" (Calentar):Losalimentosmantienenunatemperatura
sobre los 60°0 [140°F)sin quesigan cocindndose.Los alimentosse
calientancon un ajustedecalor m_salta hastaque alcanzanesta
temperatura.Nunca use estosajustespara recalentaralimentos
frios. Asegtiresede que la perilla est6 ajustada de maneraque se
genereunatemperaturaestable.
"Simmer" [Cocci6n a fuego lento): Losalimentosformanburbujas
que apenasIlegana la superficie.Los alimentostienen una
temperaturaentre 85° C [185° F)y 93° C (200° F). El ajustede
cocci6n a fuego lento tambi6n puedeser usado para hervir o
escalfaralimentoso seguir cocinando alimentoscubiertos.(Ajustela
perilla entre las posiciones"High"[Alto), y "Low"[Bajo),paraobtener
lacocci6n a fuego lento deseada).

Coccl6nen[acubiem
"Slow Boil" (Hen/orlento): Losalimentosforman burbujas
moderadamente.Elajustede hen/or lentotambi6n puedeser usado
parala mayoffade lasfrituras y para mantener lacocciOnde grandes
cantidadesde I[quido. [Ajustela perilla entre las posiciones"High"y
"Low", para obtener el hen/ordeseado).
"Boil" (HerviO:Losalimentosforman burbujasa gran velocidad.Este
ajustetambidnpuedeser usadopara hacerhervir I[quidos,dorar
came,para prepararalimentossalteadosy paracalentaraceitepara
freff antesde reducir latemperatura.Elajuste"High" siemprese usa
parahacer hen/ir los I[quidos.Unavezqua el I[quidoest6hirviendo,
siempregire la perilla al ajustem_sbajoqua mantengael hen/or.
Elemento Flex=Choice mn (modelos selectos)
Elelemento'Flex-ChoiceMR',enteramente OFF
funcional,proporcionaun ajustede calor M_+t High
ultrabajo 'Melt' (derretir) para para derretir _/
chocolate o mantequilla.Se encuentraen la
posici6ntraseraderecha.
Elajuste'Melt' se encuentraentre 2y 'OFF'. S_m
LOSajustesde calor situadosfuera de esta
dreafuncionancomoun elementonormal,con Medium
ajustesdesde2 hasta 'High'.
Nota: Cuandouselos ajustesnormalespara prepararalimentos,
puedequa la superficie de cocci6ndemote unos pocos minutos
en enfriarsepara Ilegaral ajuste de calor 'Melt'.
Cubierta lisa
Notas:
Enlos modeloscanadienses,la cubierta NOfuncionadurante el
ciclo de autolimpieza.
La eebierta puede emitir un olor y humo leve las primeras
vecesqua se use.Estoes normal.
Las cubiertas lisasretienen el taler durante an periodo
despu_s de qua el elemento se ha apagado. Apaguelos
elementosunos pocos minutosantesde qua el alimentoest_
completamentecocinado y useel calor retenido para completar
la cocci6n.Cuandose apagala luz indicadorade superficie
caliente,el _rea de la superficieestar_isuficientementefr[a para
tocarla. Debidoa la maneraen la que retienenel calor, los
elementosno responder_ina los cambiosde ajustetan
r_pidamentecomo los elementostubulares.
Enel casode un posible derrame,retire el utensiliodel _reade
cocci6n.
Nunca intente Jevantar Jacubierta.
Lasuperficiede la cubierta lisa se puede ver descolorida
cuando est_caliente.Estoes normaly desaparecer_cuando la
superficiese enfrfe.
Areas de cocci6n
Las_reasde cocciOndesu estufase identificanmediantecffculos
permanentesen la superficie lisa. Parauna cocciOnm_iseficiente,el
tamafio del utensiliodebe ser igualal tamafio del elemento.
Los utensiliosde cocina no deben extenderse robs de _/_a 1
pulgada (1,27 a 2,54 cm) del #rea de cocciSn.
Cuandoseenciende un control,se puede percibir un brillo a Io largo
de la superficielisa. EJeJementopasar_ per cieios de encendido
y apagado para mantener eJajuste de caJorseieccionado,
inclusiveen el ajuste alto.
Paramayorinformaci6nsobre los utensiliosde cocina, consultelas
Recomendacionessobrelos utensiliosen la p_gina 65.
ELEMENTO
ELEMENTO
SENCILLO (CON
OPCION DE CALENTADOR
ELEMENTO
CALENTADOR
'FLEX- CHOICE _)
ELEMENTO
DOBLE
ELEMENTO
SENCILLO
(CON
OPCION DE
ELEMENTO
CALENTADOR
'FLEX-
CHOICE')
* ElementoCaientador'Flex-Choice': Estafunci6n usa un ajuste
de calor muybajopara mantenercalientesalimentosdelicadoso
cubiertos sin cocinarlos.
Luz indicadora de superficie caliente
La luz indicadoradesuperficie calientese encuentraen el panelde
control. La luzse iluminardcuando cualquier_rea
de cocci6nestc!caliente. La mismapermanecer_
encendidaaun despuc!sde que el control hayasido Net Surface
apagadoy hastaque el drease enfr[e.
EJemento caJentador (el estilo puede varias
seg0n el modelo)
Use el _ireacalentadora para mantener calientes los alimentos ya
cocinados,talescomevegetales,salsasy platesdeservirresistentesal
homo.
Programaci6n de los controies: s_rfac
Oprimala tecla Surface Warming Center (elemento!,_ .... ,,Z\
¢ ++,vo+H.,_
calentador superior) y [uegooprlma la tecia +, Center+/
Autoset [Autoajustar).Vuelvaa oprimir la tecla ...........................
'Autoset' [Autoajusta0paraapagarlo.
63
¢occ16nenla
Notas:
Nunca calientelosalimentospor m_sde una hora (o huevos
pot 30 minutos_,pues se puede deteriorarla calidaddel
alimento.
No calientealimentosfr[os en el dreacalentadora.
• Lastemperaturasde calentamientode los alimentosvariar_
dependiendodel tipo y cantidadde alimento.Siempremantenga
el alimentoa las temperaturasapropiadas.ElDepartamentode
Agricultura de los EstadosUnidos(USDA)recomienda
temperaturasentre60°Cy 77°C(140°Fy 170°F_.
• Use solamenteutensiliosde cocina y platosrecomendadospara
uso en el homo y en la cubierta.
, Siempreuseguantes para homo cuando retirealimentosdel
_reacalentadorapues los utensiliosy los platosestardn
calientes.
• Todoslosalimentosdebencubrirsecon unatapa o con papel
de aluminio paramantenerlacalidad del alimento.
• Cuandocalientepastelesy panes,la cubierta debe tener una
abertura paraqueescapela humedad.
, No useenvolturade pkisticoparacubrir los alimentos.El
pl_stico puedederretirseen la superficiey ser muydificil de
limpiar.
Consejos para proteger
la cubierta lisa
Limpieza [vea la p_gina 80 para mayor informaciOn_)
• Antes de usar, limpie la cubierta.
• Limpie la cubierta diariamenteo despu_sde cada uso. Esto
ayudar_a mantenerel aspectode la cubierta y a prevenirdafios.
• Si ocurre un derramecuando est6cocinando,limpielo
inmediatamentedel _reade cocciOncuando todav[aest_caliente
paraevitartener que limpiarlo con mayordificultad m_isadelante.
Con extremocuidado,limpie el derramecon una toalla seca.
• No permitaque los derramespermanezcanen el _ireade cocciOn
o en la moldurade la cubiertadurante un periodode tiempo largo.
• Nunca use polvos limpiadoresabrasivoso esponjasde restregar
pues puedenrayarla cubierta.
• Nunca use blanqueadorcon cloro, amoniacou otros limpiadores
que no est6nespecificamenterecomendadospara uso en vidrio
cer_mico.
Para evitar marcas y rayaduras
• No use utensiliosdevidrio. Puedenrayarla superficie.
• Nunca use un soporte o un anillo de wok entre la superficie y el
utensilio. Estosart[culospueden marcaro rayar la cubierta.
, No desliceutensiliosde aluminioa Io largo de la cubiertacaliente.
Los utensiliospuedendejar marcasque debenser removidas
inmediatamente.Nea la secciOnde Limpiezaen lap%ina 80.)
, Aseg0resede que la superficiey la parte inferior del utensilio
estc!nlimpiosantesde encenderla estufaparaevitar rayaduras.
• Paraevitarrayaduraso dafio a la cubierta de vidrio cer_mico,no
dejeaz0car,sal ni grasaen el _rea decocciOn.Limpie la superficie
de la cubiertacon un patio limpio o con una toalla de papel antes
de usarla.
• Nunca desliceutensiliosde metalpesadosa Io largo de la
cubiertapues puederayarse.
Para evitar manchas
° Nunca use un patio o unaesponjasucia para limpiar la superficie
de la cubierta.Quedar_una pel[cula que puedecausarmanchas
en la superficiede cocci6n despuc!sde que el drease caliente.
° Sicocinacontinuamentesobre una cubierta sucia puede manchar
la cubiertade manerapermanente.
Para evitar otros da os
° No permita que se derritan pl_stico,az0caro alimentoscon un
alto contenidode az0caren la cubiertacaliente. Si esto Ilegaa
ocurrir,limpie el derrameinmediatamente.OTeala secci6nde
Limpiezaen la pdgina80._
° Nunca deje queun utensiliohiervahastaquedarsecopuesesto
puededaharla cubierta y el utensilio.
• Nunca use la cubierta como una superficiede trabajo ni como
tabla de cortar.
° Nunca cocine el alimento directamenteen la supefficie.
° NOuse tin utensilio pequefio en un elementogrande.No
solamentedesperdiciaenergfasino qtJetambk!n puede resultaren
derramesquese quemenen el _rea de cocciOnIo cual requiere
limpiezaadicional.
• Ne use utensiliosno pianosque seanmuy grandeso disparejos,
talescomowoks de fondo redondo,de fondo ondulado y/o rejillas
y ollas grandesparahervir conservas.
• Ne use papel ni contenedoresde aluminio.Elaluminiose puede
derretir en elvidrio.Si el metalse derrite sobre la cubierta,no la
use.Llamea un tc!cnicodeserviciode Maytag.
B4
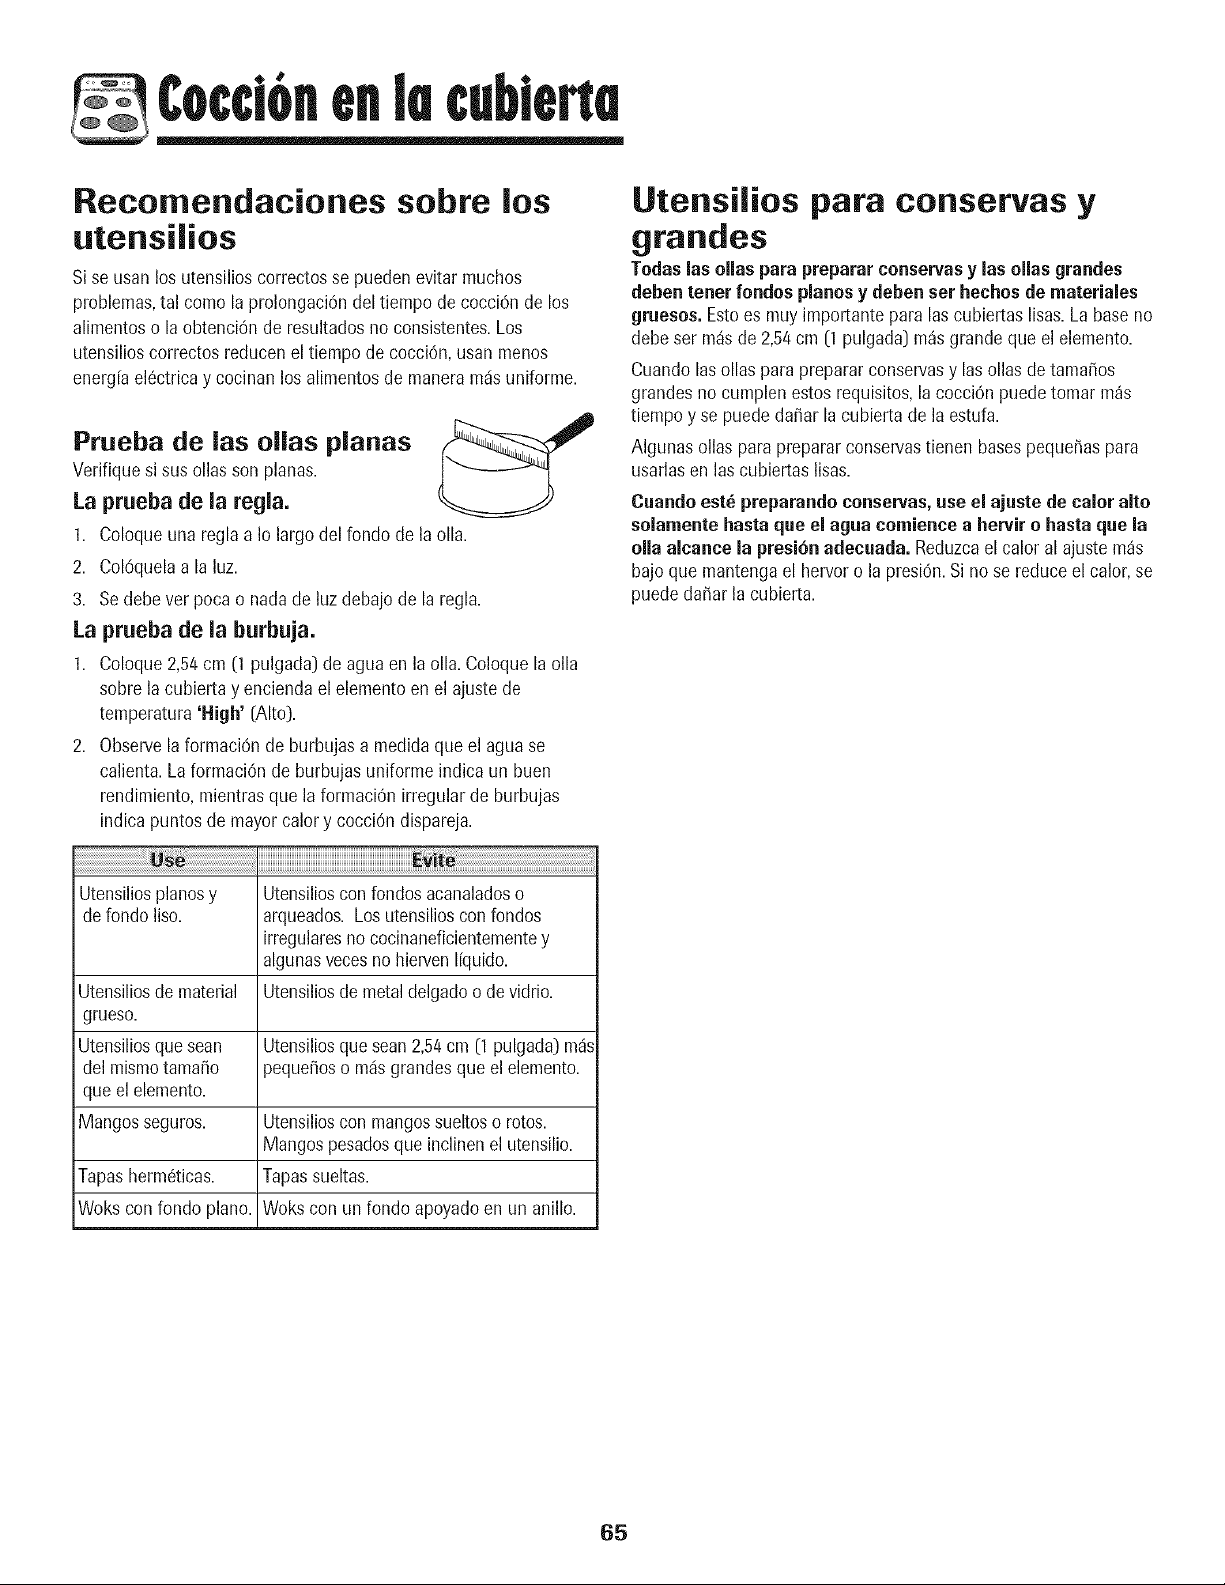
Cocd6ne. le ceblene
Recomendaciones sobre los
utensilios
Sise usanlos utensilioscorrectosse puedenevitar muchos
problemas,tal come la prolongaci6ndeltiempo de cocci6n de los
alimentoso la obtenciOnde resultadosno consistentes.Los
utensilioscorrectos reducenel tiempode cocci6n,usan menos
energ[ael_ctricay cocinan los alimentosde maneram_isuniforme.
Prueba de las elias planas
Verifiquesi sus elias son planas.
La prueba de la regla.
1. Coloqueuna regla a Io largo del fondo de la ella.
2. Col6quelaa la luz.
3. Sedebever pocao nadade luz debajode la regla.
La prueba de la burbuja.
1. Coloque2,54crn (1 pulgada)de aguaen la ella.Coloquela ella
sobre la cubiertay enciendael elemento en el ajuste de
temperatura'High' [Alto).
2. Observela formaci6nde burbujas a medidaqueel aguase
calienta.La formaci6nde burbujas uniformeindica un buen
rendimiento,mientrasque la formaciOnirregularde burbujas
indica puntosde mayorcalory cocciOndispareja.
Utensiliosplanesy Utensilioscon rondosacanaladoso
defondo liso. arqueados.Losutensilioscon fondos
irregularesno cocinaneficientementey
algunasvecesno hiervenI[quido.
Utensiliosde material Utensiliosde metaldelgado o devidrio.
grueso.
Utensiliosquesean Utensiliosque sean2,54cm (1pulgada)m_s
del mismotamafio pequefioso m_isgrandesque elelemento.
que elelemento.
Mangosseguros. Utensilioscon mangossueltoso rotes.
Mangospesadosque inclinenel utensilio.
Tapasherm6ticas. Tapassueltas.
Wokscon fondo plane. Wokscon un fondo apoyadoen un anillo.
Utensilios para conservas y
grandes
Tedss Iss elias pars prepsrsr censervasy Iss elias grandes
deben toner fendes pianos y (lebenser heches de msterisles
grueses. Estoes rnuyiraportanteparalas cubiertas lisas.La baseno
debeser m_sde 2,54cm (1 pulgada)m_sgrandeque el elemento.
Cuandolas elias paraprepararconservasy las elias de tamafios
grandesno cumplen estos requisites,la cocci6n puede tomar m_s
tiempoy se puededafiar la cubiertade la estufa.
Algunas eliaspara prepararconservastienen basespequefiaspara
usarlasen las cubiertaslisas.
Csande est_ preparande censervas,use el sjsste de taler alto
seiamente hssts qse el sgus cemience a hervir e hasts qse la
ells slcance Is presi6nadecsads. Reduzcael calor al ajuste m_s
bajo que mantengael hervoro la presi6n.Si no se reduceel calor, se
puededafiar lacubierta.
65
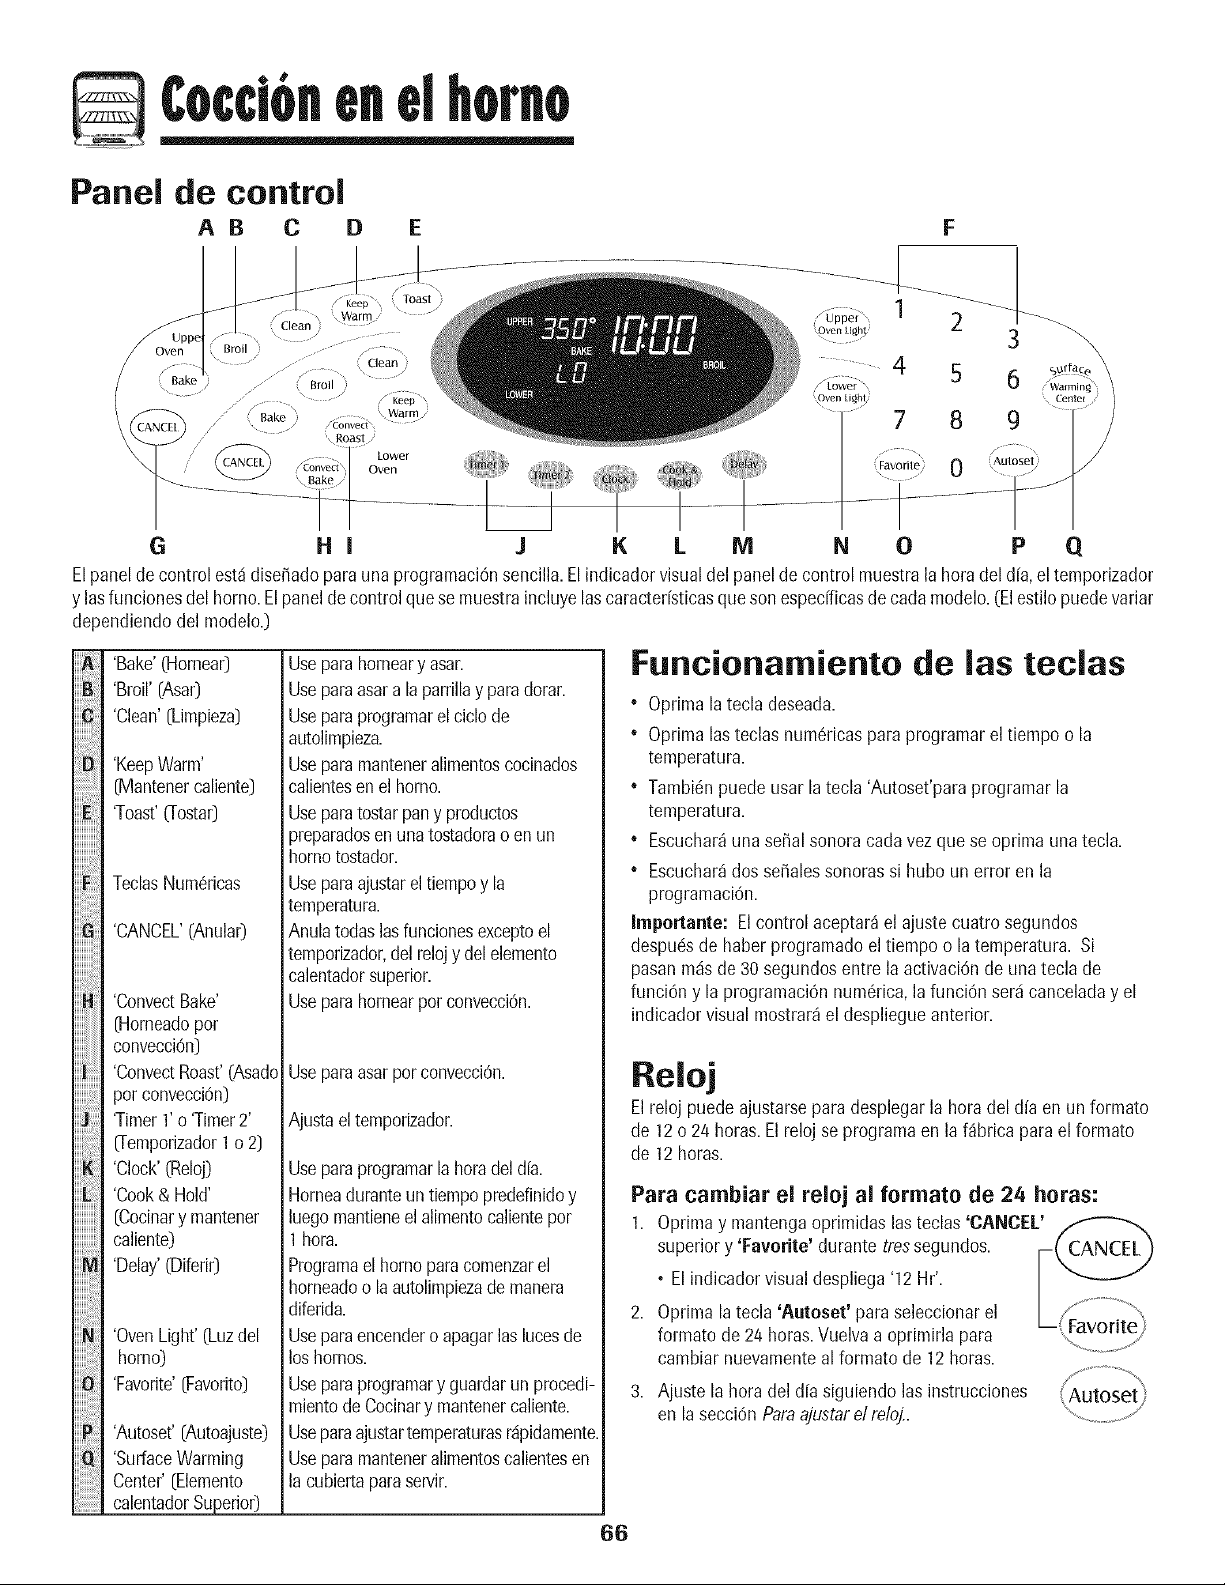
Cocci6.e. elhor.o
Panel de control
AB C D E F
1 2
........ 4 5 6
7 8 9
\
Autoset
Favorite 0 '
\ ...........
G HI J K L M N O P Q
Elpanelde control est,1dise_adopara una programaci6nsencilla.Elindicadorvisual delpaneldecontrol muestrala hora deld[a,eltemporizador
y lasfuncionesdel homo. Elpaneldecontrol quese muestraincluyelascaracter[sticasque son especfficasde carla model& (Elestilopuedevariar
dependiendodel modelo.)
'Bake'(Hornear)
'Broil' [Asar)
'Clean'[Limpieza)
'KeepWarm'
_antener caliente)
'Toast'(Tosta0
TeclasNum6ricas
'CANCEL'(Anula0
'ConvectBake'
Norneadoper
convecci6n)
'ConvectRoast'(Asado
per convecci6n)
'Timer1'o 'Timer2'
_remporizadorI o 2)
'Clock'(Reloj)
'Cook& Hold'
(Cocinary mantener
caliente)
'Delay'(Diferi0
'OvenLight'(Luzdel
homo)
'Favorite'[Favorito)
'Autoset'(Autoajuste)
'SurfaceWarming
Center'[Elemento
calentador
Useparahorneary asar.
Useparaasara la parrillay paradorar.
Useparaprogramarelciclode
autolimpieza.
Useparamanteneralimentoscocinados
calientesen el homo.
Useparatostarpany productos
preparadosenunatostadorao en un
homotostador.
Useparaajustareltiempoy la
temperatura.
Anulatodaslasfuncionesexceptoel
temporizador,del relojy del elemento
calentadorsuperior.
Useparahomearpot convecciOn.
Useparaasarpor convecci6n.
Ajusta el temporizador.
Useparapmgramarla horndeld[a.
Horneaduranteuntiempopredefinidoy
luegomantieneelalimentocalientepor
1hora.
Programael homoparacomenzarel
horneadoo laautolimpiezademanera
diferida.
Useparaencendero apagarlas lucesde
loshornos.
Useparaprogramary guardarun procedi-
mientodeCocinary mantenercaliente.
Useparaajustartemperaturasr_ipidamente.
Useparamanteneralimentoscalientesen
la cubiertaparasen/ir.
Funcionamiento de las teclas
• Oprimala tecladeseada.
• Optimalas teclasnum6ricasparaprogramarel tiempo o la
temperatura.
• Tambi6npuedeusar latecla 'Autoset'paraprogramarla
temperatura.
• Escuchar_una sepalsonoracada vezque se oprima una tecla.
• Escuchar_dos so,ales sonorassi huboun error en la
programaci6n.
Iraportante: El control aceptar_el ajuste cuatrosegundos
despu6sde haberprogramadoel tiempo o la temperatura. Si
pasanm_isde 30 segundosentre la activaci6nde una tecla de
funci6ny la programaci6nnum6rica,la funci6n ser_icanceladay el
indicadorvisual mostrar_el despliegueanterior.
Reloj
Elreloj puede ajustarsepara desplegarla horadeldfa en un formato
de 12o 24 horas.Elreloj se programaen la f_brica para el formato
de 12horas.
Para cambiar el reloj al formate de 24 horas:
1. Oprimay mantengaoprimidaslasteclas 'CANCEL'
superior y 'Favorite' durante tressegundos. _t' ¢'ANIC'FI
• El indicadorvisualdespliega'12 Hr'. //_,_2_
2. Opr ma a tec a 'Autoset' para se ecc onar e //_ ..........................X
L.
Favorite
formate de 24horas.Vuelvaa oprimirla para '....... Y
cambiar nuevamenteal formato de 12 horas.
3. Ajuste la horadel d[a siguiendolas instrucciones
en la secci6n Paraajustarel reloj..
66
¢occi6nenelhomo
Para ajustar el reloj:
1. Optima latecla 'Clock' [Reloj].
, La heradel din destellar_en el indicadorvisual.
, Los dos puntos destellar_nen el indicadorvisual.
2. Oprima Insteclas num6ricascorrespondientesparaprogramarla
heradel dfa.
3. Optima latecla 'Clock' nuevamenteo esperecuatrosegundos.
, Los dos puntos permanecer_inencendidos.
Cuandose suministracorrienteel6ctricao despuc!sde una
interrupci6nelc!ctrica,la 01timaheradel din antesde la interrupci6n
deenergfadestellar_en el indicadorvisual.
Paramostrarla hera del dfa mientrasotras funcionesdetiempo est6n
activas,optima la tecla 'Clock'.
Para anular el despliegue de la hera del din:
Siusteddeseaque la heradel dfa no se muestre:
Optimay mantengaoprimidasInsteclas'CANCEL' (Anular] del
homo superiory 'Clock' durantetres segundos.La hera del dfa
desaparecer_idel indicadorvisual.
Cuandose ha anuladoel desplieguede la hera del ,f_'--'-_
dfa,optima la tecla 'Clock' para mostrarla heradel
dfa brevemente.
Para restablecer el despliegue de la hera ......
del din:
Oprimay mantengaoprimidas las teclas'CANCEL' del horno superior
y 'Clock' durante tressegundos.Laheradel dfa reaparecer_en el
indicadorvisual.
Temporizador
Cadatemporizadorpuede programarseentre un minute (00:01]y 99
horasy 59 segundos[99:59].
Lostemporizadorespueden usarseindependientementede cualquier
otra actividad. Lostemporizadorestambic!npuedenser programados
mientrasotras funcionesest6nactivas.
Lostemporizadoresno controlan el homo.
Para programar el Temporizador 1 e 2:
1. Oprima latecla 'Timer 1' o 'Timer 2'.
. '00:00'y 'TIMER1' O-emporizador1]
o 'TIMER2' O-emporizador2] destellar_inen el indicadorvisual.
2. Optima Insteclas num6ricascorrespondienteshastaqueel tiempo
correctose muestreen el indicadorvisual.
• Los dos puntos y 'TIMER1' o 'TIMER2' seguir_ndestellando.
• El indicador visual mostrar_'TIMER1' o 'TIMER2'.Si ambos
temporizadoresest_nactivos,el indicadorvisual mostrar_
'TIMERl' y 'TIMER2'.
5,
Para anular el temporizader:
1. Oprimay mantengaoprimida latecla 'Timer'
correspondientedurante tres segundos.
0
2. Oprimala tecla 'Timer' y optima el nOmero'0' en el
tecladonum6rico.
Oprimala tecla 'Timer' nuevamenteesperecuatro
segundos.
• Los dos puntos dejar_inde destellar y el temporizador
comenzar_la cuenta regresiva.
° ElOltimominuto del conteo deltemporizadorse mostrar_
en segundos.
AI finalizarel tiempo programaticse escuchar_una sepalsonora
largay 'End' (Fin)se desplegar_en el indicadorvisual.
Oprimala tecla 'Timer' para restablecerel indicadorvisual.
0
Bloqueo del control y de Ins
puertas de los homes
Eltecladoy las puertasde los homespuedenbloquearsepara mayor
seguridad,limpiezao paraevitarsu use no autorizado. Lasteclas
dejar_nde funcionar cuando est6n bloqueadas.
Si un homo est_ enfuncionamiento,el teclado y Ins puertas no
podr_nser bloqueados.
Lahornactual del din permanecer_ienel indicadorvisual cuandose
bloqueenel tecladoy Inspuertas.
Para blequear ambas puertas:
1. Oprimay libere la tecla 'CANCEL'. _-_-,,,,
2. Optimay mantengaoprimidaslas teclas 'CANCEL'
del homo superiory 'Cook & Hold' [Cocinary
mantenercaliente] durante tressegundos.
• La palabra'OFF'(Apagado]aparecer_ien el
indicadorvisual.
• 'LOCK' [Bloqueado]destellar_ien el indicadorvisualmientras
Inspuertasse est_inbloqueando.Ambaspuertasse
bloquean.
Para desbloquear ambas puertas:
Optimay mantengaoprimidasInsteclas 'CANCEL' del horno
superiory 'Cook & Hold' durante tres segundos.La palabra'OFF'
desaparecer_idel indicadorvisual y 'LOCK'[Bloqueado] destellar_i
mientraslaspuertas se desbloquean.'LOCK'permanecer_i
encendidoen el indicador visual.
Importante: Eltecladoy Inspuertasde los hornosno pueden
bloquearsesi la temperaturadel homo es igual o mayorde 204°C
[400°F].
67
¢occi6nenelhomo
C6digos de fallas
'BAKE'(Hornea0o 'LOCK'[Bloqueado] pueden destellar
r_pidamenteenel indicadorvisual paraadvertirlede alg0nerror o
problem& Si 'BAKE'o 'LOCK'destellan en el indicadorvisual,
optima latecla 'CANCEL' (Anular). Si 'BAKE'(Hornea0 o 'LOCK'
[Bloqueado]contin0andestellando,desenchufeel electrodom6stico.
Esperevarios minutosy vuelvaaenchufarlo.Si el indicadorvisual
sigue destellando,desenchufeel electrodom6sticoy Ilamea un
agentede servicioautorizado.
Ajuste del nivel de sonido
Elajustede f_brica del sonido es el nivel intermedio('MEd'],pero
puedeset cambiadoa bajo ('LO') o alto ['HI']. Paracambiar el
ajuste:
1. Oprimay mantengaoprimidaslas teclas'Delay' (Diferir] y
'CANCEL'superiordurante tres segundos.Escuchar_iuna serial
sonora larga. 'bEEFy el nivel desonido actual ('LO','MEd' o 'HI']
se desplegar_en el indicador visual.
2. Oprimalatecla 'Autoset' [Autoajuste)paraaumentaro disrninuir
el nivelde sonido.
3. Esperecuatrosegundospara guardar el nuevoajuste.
4. Si no se oprime la tecla 'Autoset' dentro de los siguientes30
segundos,el control regresar_al ajuste existente.
Cambio de la temperatura
de °F/°C
Elajustede f_brica de la medidade temperaturaes Fahrenheit.Para
carnbiarel ajuste:
1. Oprimay mantengaoprimidaslas teclas'Bake' y 'CANCEL'
superioresdurante tressegundos. Escuchar_unaserial sonoray
el ajusteactual (°Fo °C] se desplegar_en el indicadorvisual.
2. Oprimalatecla 'Autoset' paracambiarentre °Fy °C.
3. Espere4 segundospara guardar el nuevoajuste.
4. Si no se oprime la tecla 'Autoset' dentro de los siguientes30
segundos,el control regresar_al ajuste existente.
Ajuste de las funciones
del homo
Tecla 'Autoset'
Usecon las teclasde funci0n paraprogramarautom_iticamente:
• Unatemperaturade homeadode 177°C(350%)
• Asadoa la parrilla en'HI' [Alto) o 'LO' [Bajo]
• Tres horasparael ciclo de autolimpieza
• Cuatro minutosparatostar
• Unatemperaturapara la funci6nMantener calientede 77°C
[170°F]
Homeado
Para homear:
1. Optima la tecla 'Bake' (Hornea0correspondiente
al homo que deseeusar.
, 'BAKE'y '000' destellar_inenel indicadorvisual.
2. Seleccionelatemperaturadel homo. Oprimala
tecla 'Auteset' para 177°C[350°F]o la temperatura
adecuadaen °Fusandolasteclas num6ricas.
• Cadavezque oprima latecla 'Autoset'aumentar_ila
temperaturaen 14°C(25%).
• Latemperaturadel homo puedeprogramarseentre 77°C
[170°F]y 288°C(550°F].
3. Optima latecla 'Bake' nuevamenteo esperecuatrosegundos.
° 'BAKE'dejar_ de destellary se iluminar_ien el indicadorvisual.
• 'PREHEAT'[Precalentamiento]se iluminar_ien el indicador
visual.
° '100°', o latemperaturaactualen grados Fahrenheitsi la misma
est_sobre los 38°C(100%),indicadorvisual. La temperatura
aumentar_en incrementosde 3°C[5%] hastaalcanzar
latemperaturaprogramada.
Restauraci6n de los ajustes
de f brica
Sepuederestaurarel control a los ajustespredefinidosde f_ibrica.
Pararestaurarlos ajustesde f_brica:
1. Oprimay mantengaoprimidaslas teclas'Keep Warm'
[Mantener caliente]y 'CANCEL' superior durante tressegundos.
Escuchar_unaserial sonora0nica y '12:00'se desplegar_ien el
indicadorvisual.
2. Vuelvaa ajustar el reloj a la temperaturaactualdel dfa.
4. Esperede 4 a 10 minutosparaque el homo superior se
precalientey de 7 a 12minutospara que el homo inferior se
precaliente.
• Cuandoel homo alcancelatemperaturaprogramada,
escuchar_iunaserialsonora larga.
• Latemperaturaprogramadase desplegar&
° 'PREHEAT'se apagar&
• Paramostrarla temperaturaprogramadadurante el
precalentamiento,oprima la tecla 'Bake'.
68
Cont.
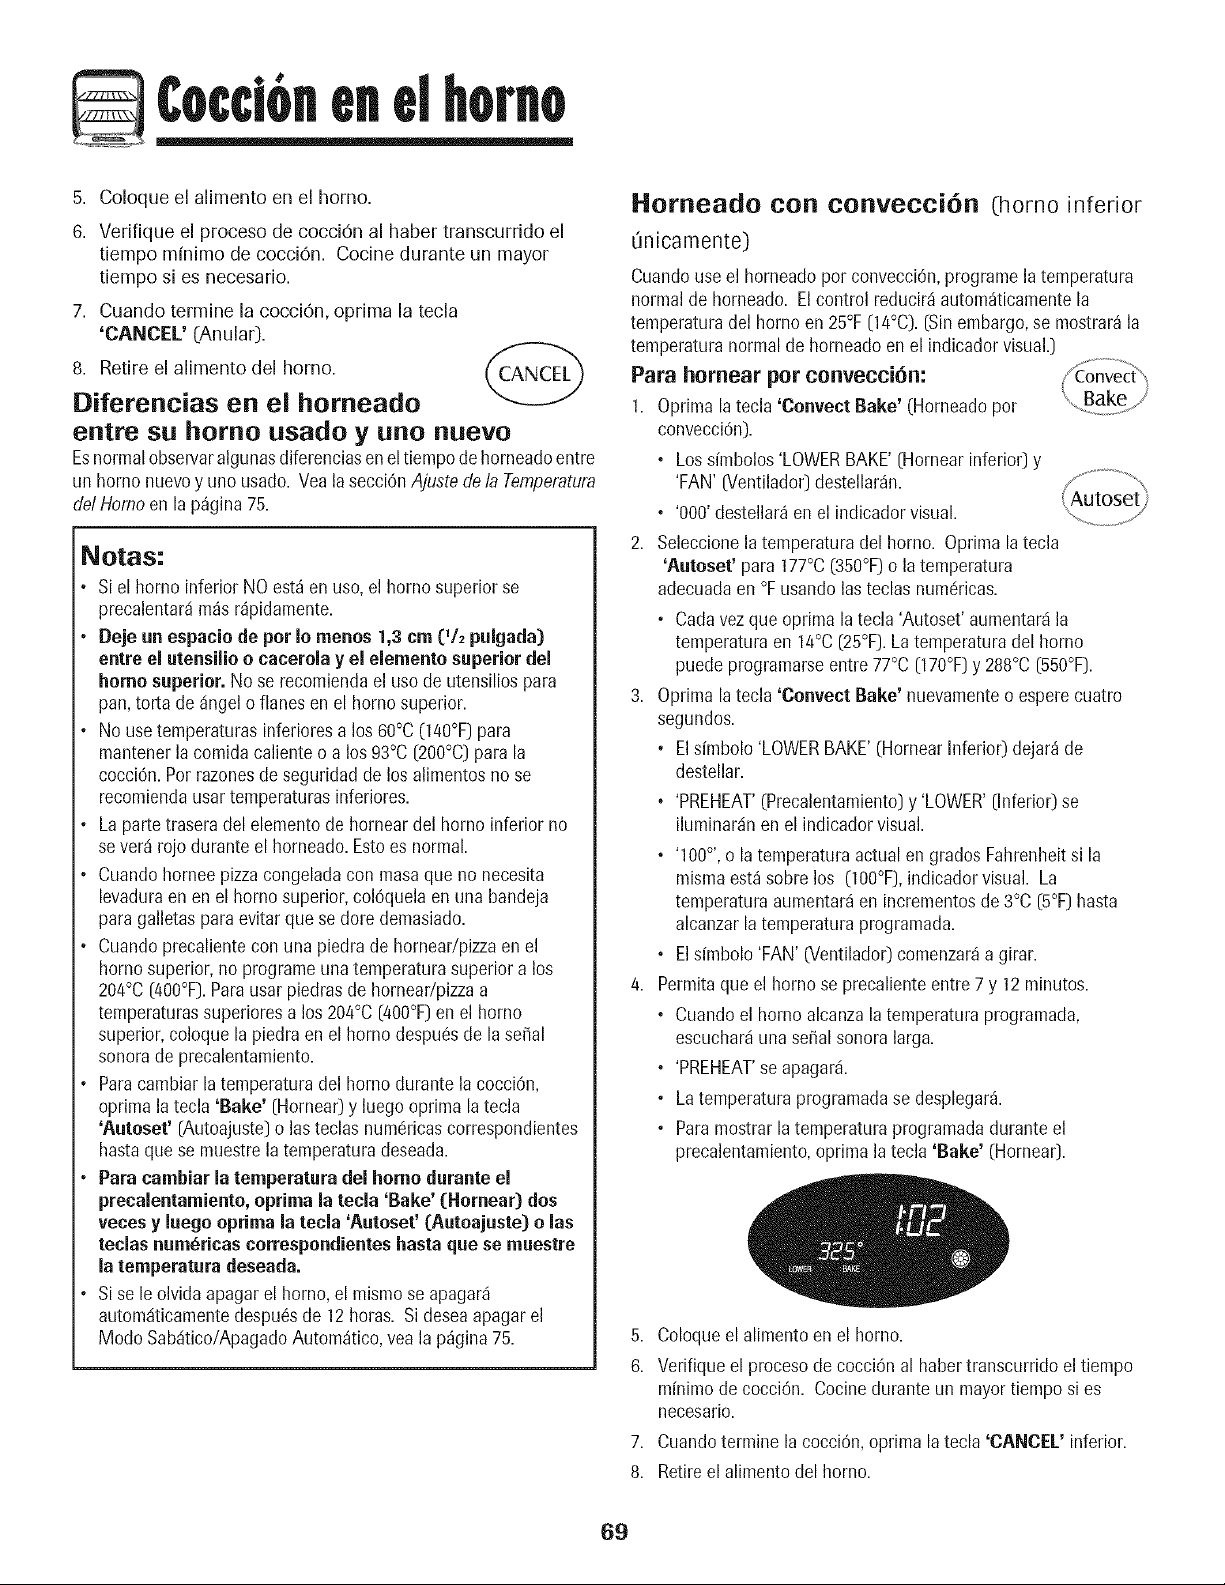
¢occi6nenelhomo
5. Coloque el alimento en el homo.
6. Verifique el proceso de cocciOn al haber transcurrido el
tiempo mfnimo de cocciOn. Cocine durante un mayor
tiempo si es necesario.
7. Cuando termine la cocciOn, oprima la tecla
'CANCEL' (Anular].
8. Retire el alimento del homo.
Diferencias en el horneado
entre su homo usado y uno nuevo
Esnormalobservaralgunasdiferenciaseneltiempodehorneadoentre
un homo nuevoy uno usado. VealasecciOnAjustedela Ternperatura
delHomo en la p_gina75.
Notas:
Siel homo inferior NO est_en uso,el homo superior se
precalentardm_srdpidamente.
Deje un espacio de per Io menos 1,3 cm (1/2 pulgada)
entre el utensilio o eacerola y el elemento superiordel
homo superior. No se recomiendael uso de utensiliospara
pan,torta de angel o flanes en el homo superior.
No usetemperaturasinferioresa los 60°C (140°F)para
mantenerlacomida calienteo a los93°C[200°C)parala
cocciOn.Porrazonesde seguridadde los alimentosno se
recomiendausartemperaturasinferiores.
La partetrasera del elementode hornear del homo inferior no
severd rojo durante el horneado.Estoes normal.
Cuandohomee pizzacongeladacon masaque no necesita
levaduraen en el homo superior,col0quelaen una bandeja
paragalletasparaevitarque se dore demasiado.
Cuandoprecalientecon una piedra de hornear/pizzaen el
homo superior,no programeuna temperaturasuperiora los
204°0 [400°F).Parausar piedrasde hornear/pizzaa
temperaturassuperioresa los 204°C[400°F)enel homo
superior,coloque la piedraen el homo despu_sde la sepal
sonorade precalentamiento.
Paracambiarla temperaturadel homo durante la cocciOn,
oprima latecla 'Bake' [Hornear)y luegooprima latecla
'Autoset' [Autoajuste)o las teclas num_ricascorrespondientes
hastaquese muestrelatemperaturadeseada.
Para cambiar la temperatura del homo durante el
preealentamiento,optima la tecla 'Bake' [Hornear} dos
vecesy luego oprima la tecla 'Autoset' {Autoajuste} o las
tecias num_ricascorrespondienteshasta que se muestre
la temperatura deseada.
Sise le olvida apagarel horno,el mismose apagar_
autom_iticamentedespu6sde 12 horas. Si deseaapagarel
Modo Sab_itico/ApagadoAutom_tico,yea la p_gina 75.
I-iorneado con convecei6n (homo inferior
Onicamente)
Cuandouseel horneadopor convecci0n,programela temperatura
normal de horneado. Elcontrol reducir_ autom_ticamentela
temperaturadel homo en 25°F(14°C).(Sinembargo,se mostrar_la
temperaturanormalde horneadoen el indicador visual.)
Para homear per convecci6n:
1. Oprima la tecla 'Convect Bake' (Horneadopor
convecciOn).
• Lossimbolos'LOWERBAKE'[Hornearinferior) y
'FAN' [Ventilador)destellar_n.
• '000' destellar_en el indicadorvisual.
2. Seleccionelatemperaturadel homo. Oprimala tecla
'Autoset' para 177°C(350°F)o la temperatura
adecuadaen °Fusandolasteclas numc!ricas.
, Cadavezque oprima latecla 'Autoset'aumentar_la
temperaturaen 14°0 (25°F).Latemperaturadel homo
puede programarseentre 77°C[170°F)y 288°C[550°F).
3. Optima latecla 'Convect Bake' nuevamenteo esperecuatro
segundos.
, Elsimbolo 'LOWERBAKE'(HornearInferio0 dejar_de
destellar.
• 'PREHEAT'(Precalentamiento)y 'LOWER'[Inferio0 se
iluminar_inenel indicadorvisual.
• '100°', o la temperaturaactualen grados Fahrenheitsi la
mismaest_ sobre los (100°F),indicadorvisual. La
temperaturaaumentar_en incrementosde 3°C [5°F)hasta
alcanzarlatemperaturaprogramada.
• Elsfmbolo 'FAN' (Ventilado0comenzar_a girar.
4. Permitaqueel homo se precalienteentre 7y 12 minutos.
• Cuandoel homo alcanzalatemperaturaprogramada,
escuchar_iunasepalsonora larga.
• 'PREHEAT'se apagar_i.
, Latemperaturaprogramadase desplegar_.
, Paramostrarla temperaturaprogramadadurante el
precalentamiento,oprima la tecla 'Bake' (Hornea0.
5. Coloqueel alimento en el homo.
6. Verifiqueel procesode cocci6nal habertranscurrido el tiempo
minimodecocci6n. Cocinedurante un mayortiempo si es
necesario.
7. Cuandotermine la cocci0n, optima la tecla 'CANCEL' inferior.
8. Retireel alimentodel homo.
B9
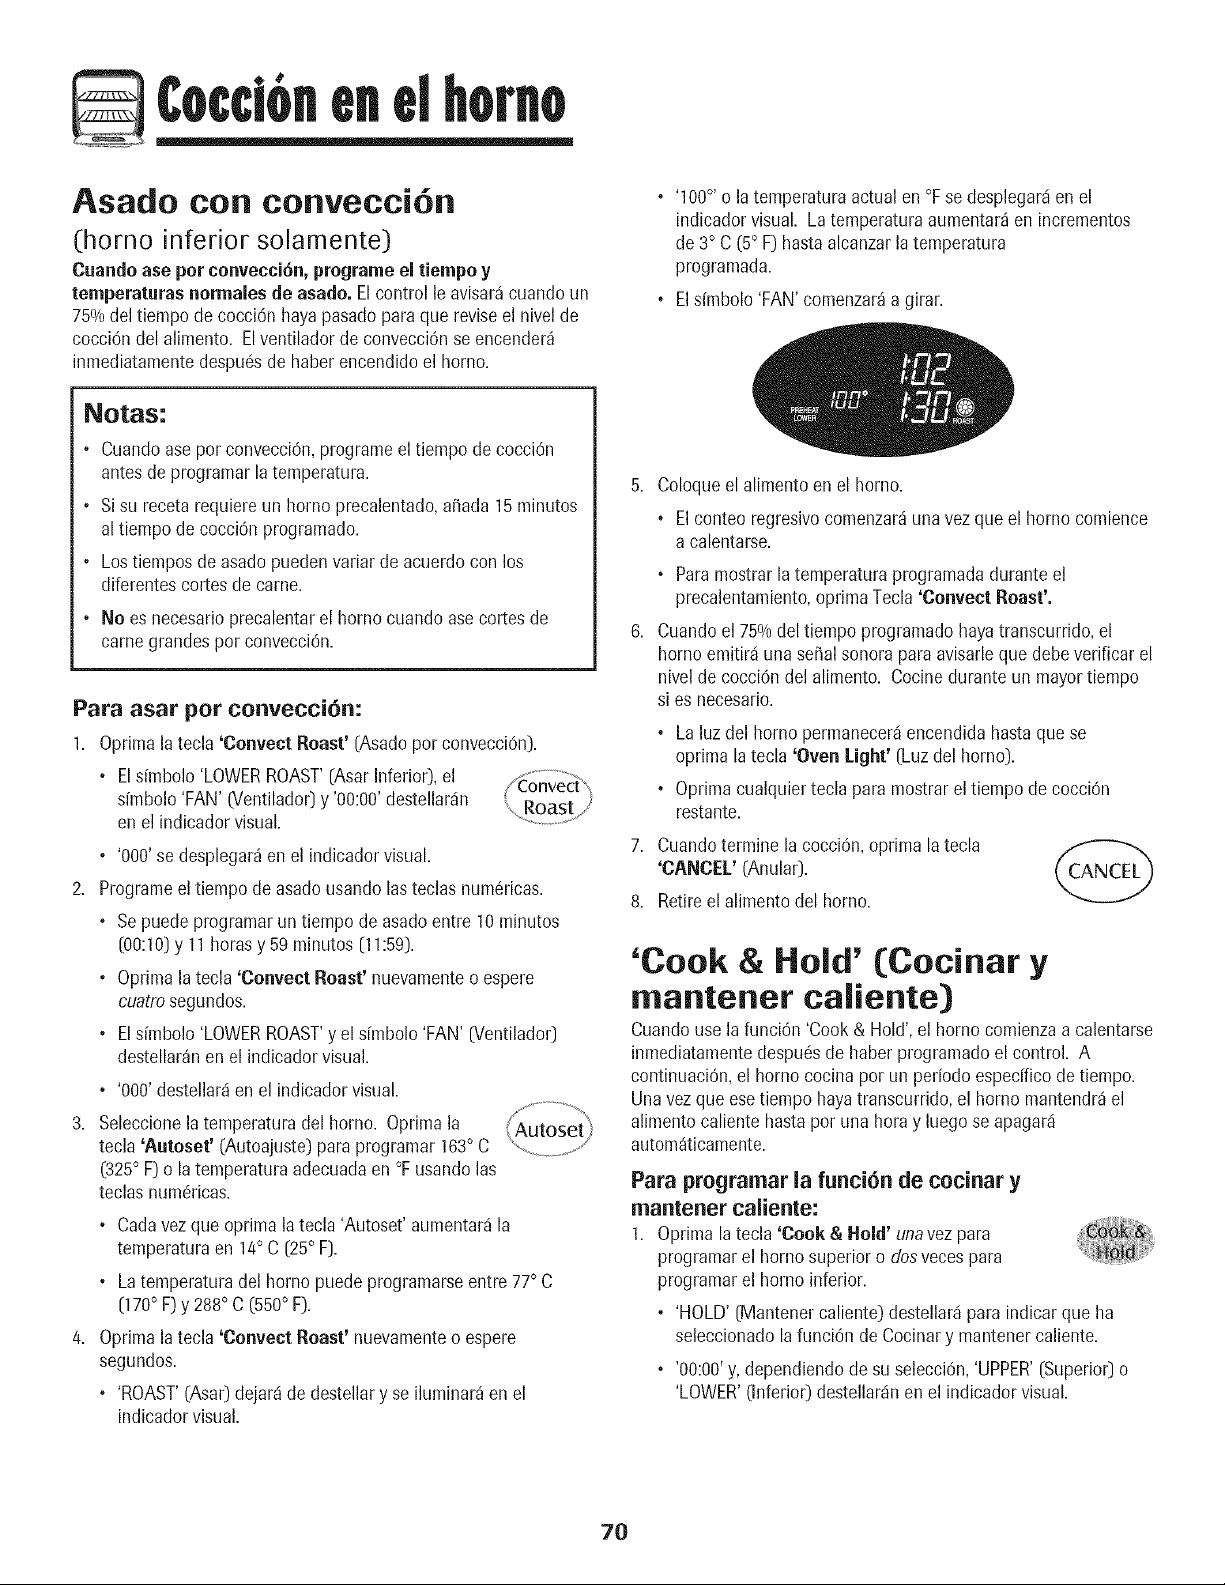
¢occi6nenelhomo
Asado con convecci6n
(horno inferior solamente)
Cuando ase por convecci6n,programe el tiempo y
temperaturas normalesde asado. El control le avisar_cuandoun
750/0deltiempo de cocci6n hayapasadoparaque reviseel nivelde
cocci6ndel alimento. Elventiladorde convecci6nse encender_
inmediatamentedespu6sde haberencendidoel homo.
Notas:
• Cuandoase por convecci0n,programeel tiempo de cocci6n
antesde programarla temperatura.
• Si su receta requiereun homo precalentado,a0ada15minutos
al tiempo decocci6n programatic.
• Los tiemposde asadopuedenvariarde acuerdo con los
diferentescortes de came.
• No es necesarioprecalentarel homo cuando asecortesde
came grandespor convecci6n.
Para asar por convecci6n:
1. Oprimala tecla 'Convect Roast' [Asadoporconvecci6n).
• Elsimbolo 'LOWERROAST'[Asar Inferior),el
simbolo 'FAN' (Ventilador)y '00:00'destellardn
enel indicadorvisual.
• '0O0'se desplegar_en el indicadorvisual.
2. Programeel tiempo de asado usandolasteclas num6ricas.
• Se puede programarun tiempo de asadoentre 10minutos
[00:10)y 11horasy 59 minutos [11:59).
• Optimalatecla 'Convect Roast' nuevamenteo espere
cuatrosegundos.
• Elsimbolo 'LOWERROAST'y el sfmbolo'FAN' [Ventilador)
destellar_nen el indicadorvisual.
• 'OOO'destellarden el indicadorvisual.
d J _...................,,
3. Seleccionelatemperaturadel homo. Oprimala _Autoset
tecla 'Autoset' (Autoajuste)paraprogramar 163° C ' ..........,y_
(325° F)o la temperaturaadecuadaen °Fusandolas
teclas num6ricas.
• Cadavezque oprima latecla 'Autoset'aumentar_la
temperaturaen 14° C [25° F).
• Latemperaturadel homo puedeprogramarseentre 77° C
[170° F)y 288° C (550° F).
4. Oprimalatecla 'Convect Roast' nuevamenteo espere
segundos.
• 'ROAST'(Asar)dejard de destellary se iluminar_en el
indicadorvisual.
• '100°' o latemperaturaactualen °Fse desplegarden el
indicadorvisual. La temperaturaaumentar_en incrementos
de 3° C (5° F) hastaalcanzarla temperatura
programada.
• Elsimbolo 'FAN'comenzar_a girar.
5. Coloqueel alimento en el homo.
• Elconteoregresivocomenzarduna vezqueel homo comience
a calentarse.
• Paramostrarla temperaturaprogramadadurante el
precalentamiento,optima Tecla'Convect Roast'.
6. Cuandoel 75% del tiempo programatic hayatranscurrido,el
homo emitirduna seffalsonorapara avisarlequedebeverificar el
nivelde cocciOndel alimento. Cocinedurante un mayor tiempo
si es necesario.
° Laluz del homo permanecerdencendidahastaque se
optima la tecla 'Oven Light' [Luz del homo).
° Optima cualquiertecla para mostrarel tiempode cocci6n
restante.
7. Cuandotermine la cocciOn,oprima latecla
'CANCEL' (Anular).
8. Retireel alimentodel homo.
'Cook & Bold' (Cocinar y
mantener caliente)
Cuandouse la funci6n 'Cook & Hold',el horno comienzaa calentarse
inmediatamentedespu6sde haberprogramatic el control. A
continuaciOn,el homo cocinapor un periodoespecfficode tiempo.
Unavez que esetiempo hayatranscurrido,el homo mantendrdel
alimentocalientehastapor unahoray luegose apagard
autom_ticamente.
Para programar la funci6n de cocinar y
mantener caliente:
1. Oprima la tecla 'Cook & Hold' unavez para
programarel homo superioro dosvecespara
programarel homo inferior.
, 'HOLD' [Mantener caliente)destellardparaindicar que ha
seleccionadola funci6n de Cocinary mantenercaliente.
° '00:00'y, dependiendode su selecci0n,'UPPER'[Superior)o
'LOWER'(inferior) destellardnen el indicadorvisual.
70
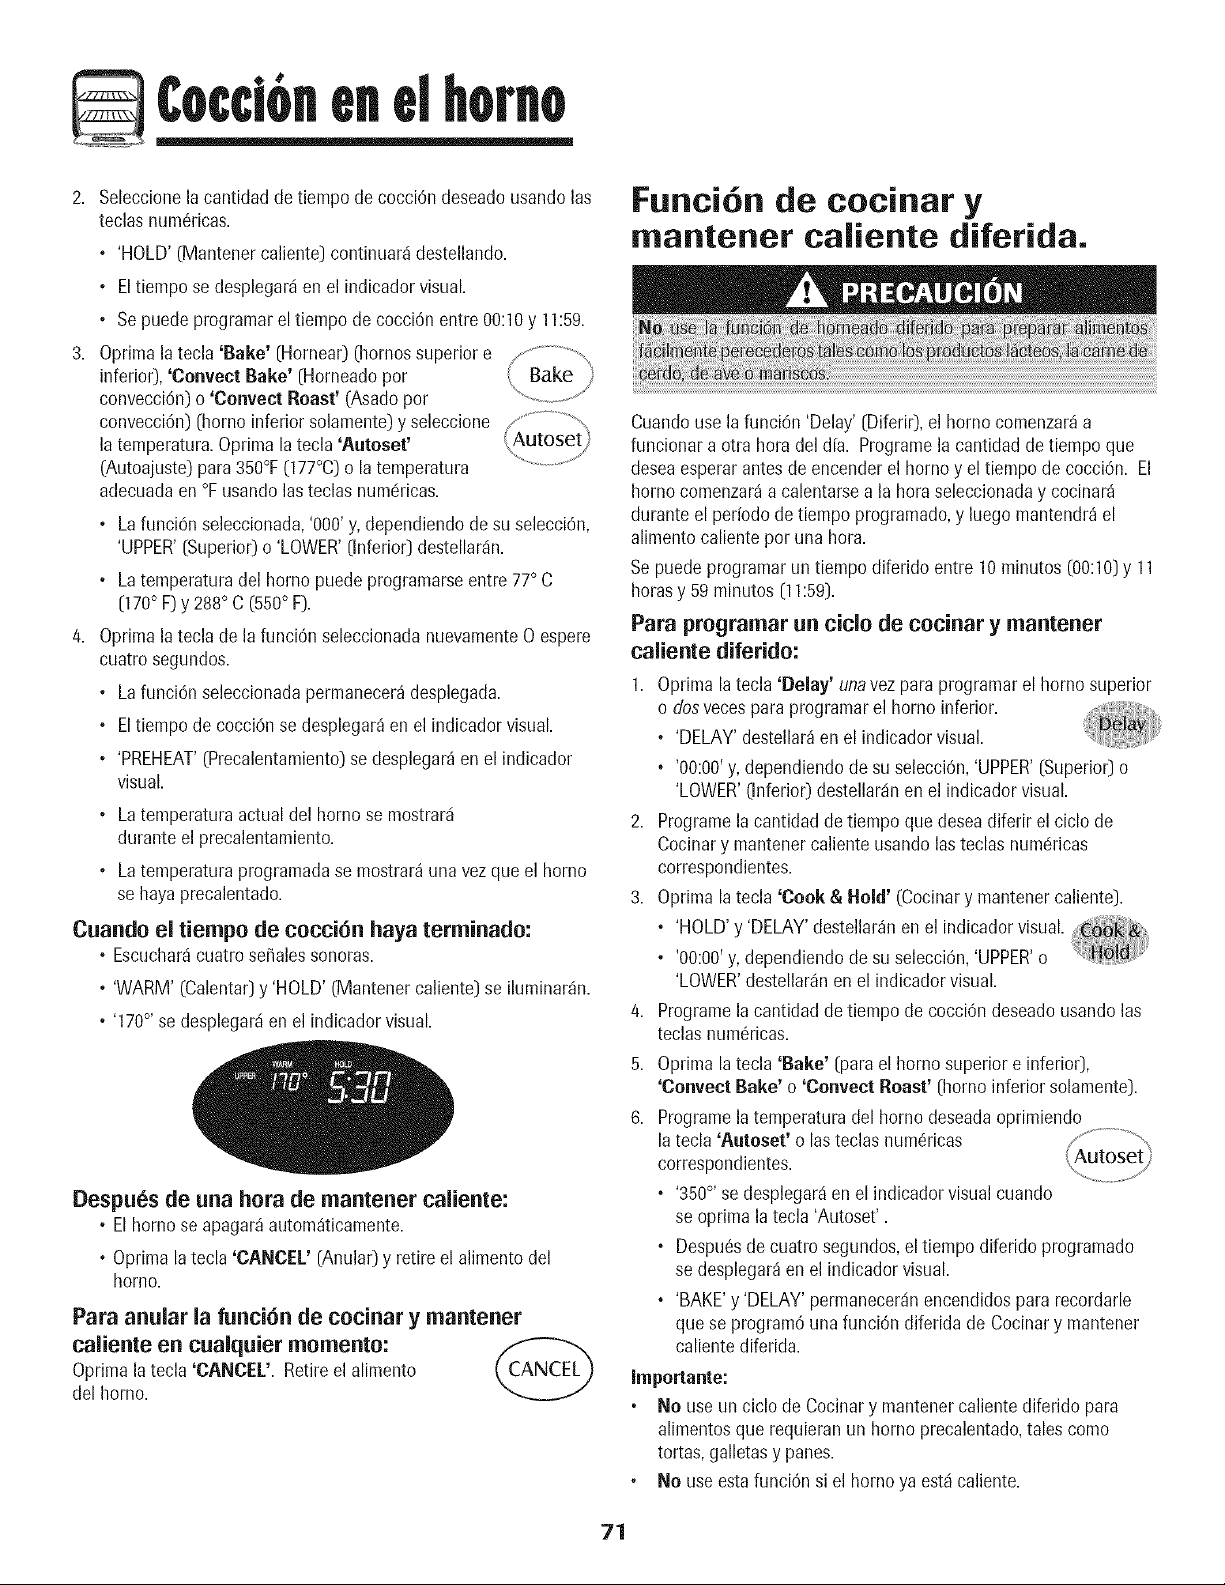
¢occi6nenelhomo
2. Seleccionelacantidad de tiempo de cocciOndeseadousandolas
teclas num6ricas.
• 'HOLD'(Mantenercaliente)continuar_idestellando.
• Eltiempo se desplegar_ien el indicadorvisual.
• Se puede programarel tiempo de cocciOnentre 00:10y 11:59.
3. Oprimalatecla 'Bake' [Hornea0 (berriessuperior e
inferior),'Convect Bake' [Horneadoper Bake
convecciOn)o 'Convect Roast' (Asadoper
convecci6n)(homo inferior solamente)y seleccione / ......................
A
latemperatura.Oprimala tecla 'Autoset' utose!i
(Autoajuste)para 350°F(177°C)o la ternperatura
adecuadaen °Fusandolasteclas numdricas.
• Lafunci6n seleccionada,'OOO'y,dependiendode su selecciOn,
'UPPER'(Superior)o 'LOWER'(Inferior) destellardn.
• Latemperaturadel homo puedeprogramarseentre 77° C
[170° F)y 288° C (550° F).
4. Oprimalatecla de la funei6nseleccionadanuevamenteO espere
cuatro segundos.
• Lafunci6n seleccionadapermanecer_desplegada.
• Eltiempo de cocci6nse desplegar_en el indicador visual.
• 'PREHEAT'(Precalentamiento)se desplegar_enel indicador
visual.
• Latemperaturaactualdel homo se mostrar_i
duranteel precalentamiento.
• Latemperaturaprogramadase mostrar_una vez que el homo
se haya precalentado.
Cuande el tiempe de cecci6n haya terminade:
• Escuchar_cuatrose_alessonoras.
• 'WARM' (Calentar)y 'HOLD'(Mantenercaliente)se iluminar_n.
• '170°,se desplegar_ien el indicadorvisual.
Despues de aria hera de mantener caliente:
• El borne se apagar_autom_ticamente.
•Oprima latecla 'CANCEL' (Anular)y retire el alimentodel
homo.
Para anular la funci6n de cocinar y mantener
caliente en cualquier memente: ,/_-_-'-_,
Oprimala tecla 'CANCEL'. Retireel alimento
del homo.
Funci6n de cocinar y
mantener caliente diferida.
Cuandouse la funci0n 'Delay' [Diferir),el homo comenzar_a
funcionara otra hera del d[a. Programela cantidaddetiempo que
deseaesperarantesde encenderel homo y el tiempode cocci6n. El
homo comenzar_a calentarsea la hera seleccionaday cocinar_
durante el periododetiempo programado,y luego mantendr_el
alimentocalienteper una hera.
Sepuedeprogramarun tiempodiferido entre 10minutes (00:10)y 11
horasy 59 minutes [11:59).
Para pregramar un title de cecinar y mantener
caliente diferide:
1. Oprima la tecla 'Delay' unavezpara programarel borne superior
o dosvecespara programarel homo inferior.
, 'DELAY'destellar_en el indicadorvisual.
, 'OO:0O'y, dependiendode su selecci6n,'UPPER'(Superior)o
'LOWER'(Inferior)destellaranen el indicadorvisual.
2. Programelacantidadde tiempo que deseadiferir el ciclode
Cocinary mantenercalienteusandolasteclas numc!ricas
correspondientes.
3. Optima latecla 'Cook & Hold' (Cocinary mantener caliente).
, 'HOLD'y 'DELAY'destellar_nen el indicadorvisual.
, '00:0O'y, dependiendode su selecci6n,'UPPER'o
'LOWER'destellar_nen el indicadorvisual.
4. Programelacantidadde tiempo de cocciOndeseadousando las
teclas num6ricas.
5. Optima latecla 'Bake' [parael homo superior e inferior),
'Convect Bake' o 'Convect Roast' (homo inferior solamente).
6. Programelatemperaturadel homo deseadaoprimiendo
latecla 'Aatoset' o las teclas num6ricas
correspondientes.
, '350°,se desplegar_ien el indicadorvisualeuando
se oprima la tecla 'Autoset'.
, Despu_sde cuatro segundos,eltiempo diferido programado
se desplegar_en el indicador visual.
• 'BAKE'y 'DELAY'permanecer_inencendidospara recordarle
que se program0una funci0ndiferida de Cocinary mantener
calientediferida.
Importante:
No use un ciclo de Cocinar y mantenercaliente diferido para
alimentosque requieran un homo precalentado,talescome
tortas,galletasy panes.
No useestafunciOnsi el homo ya est,1caliente.
71
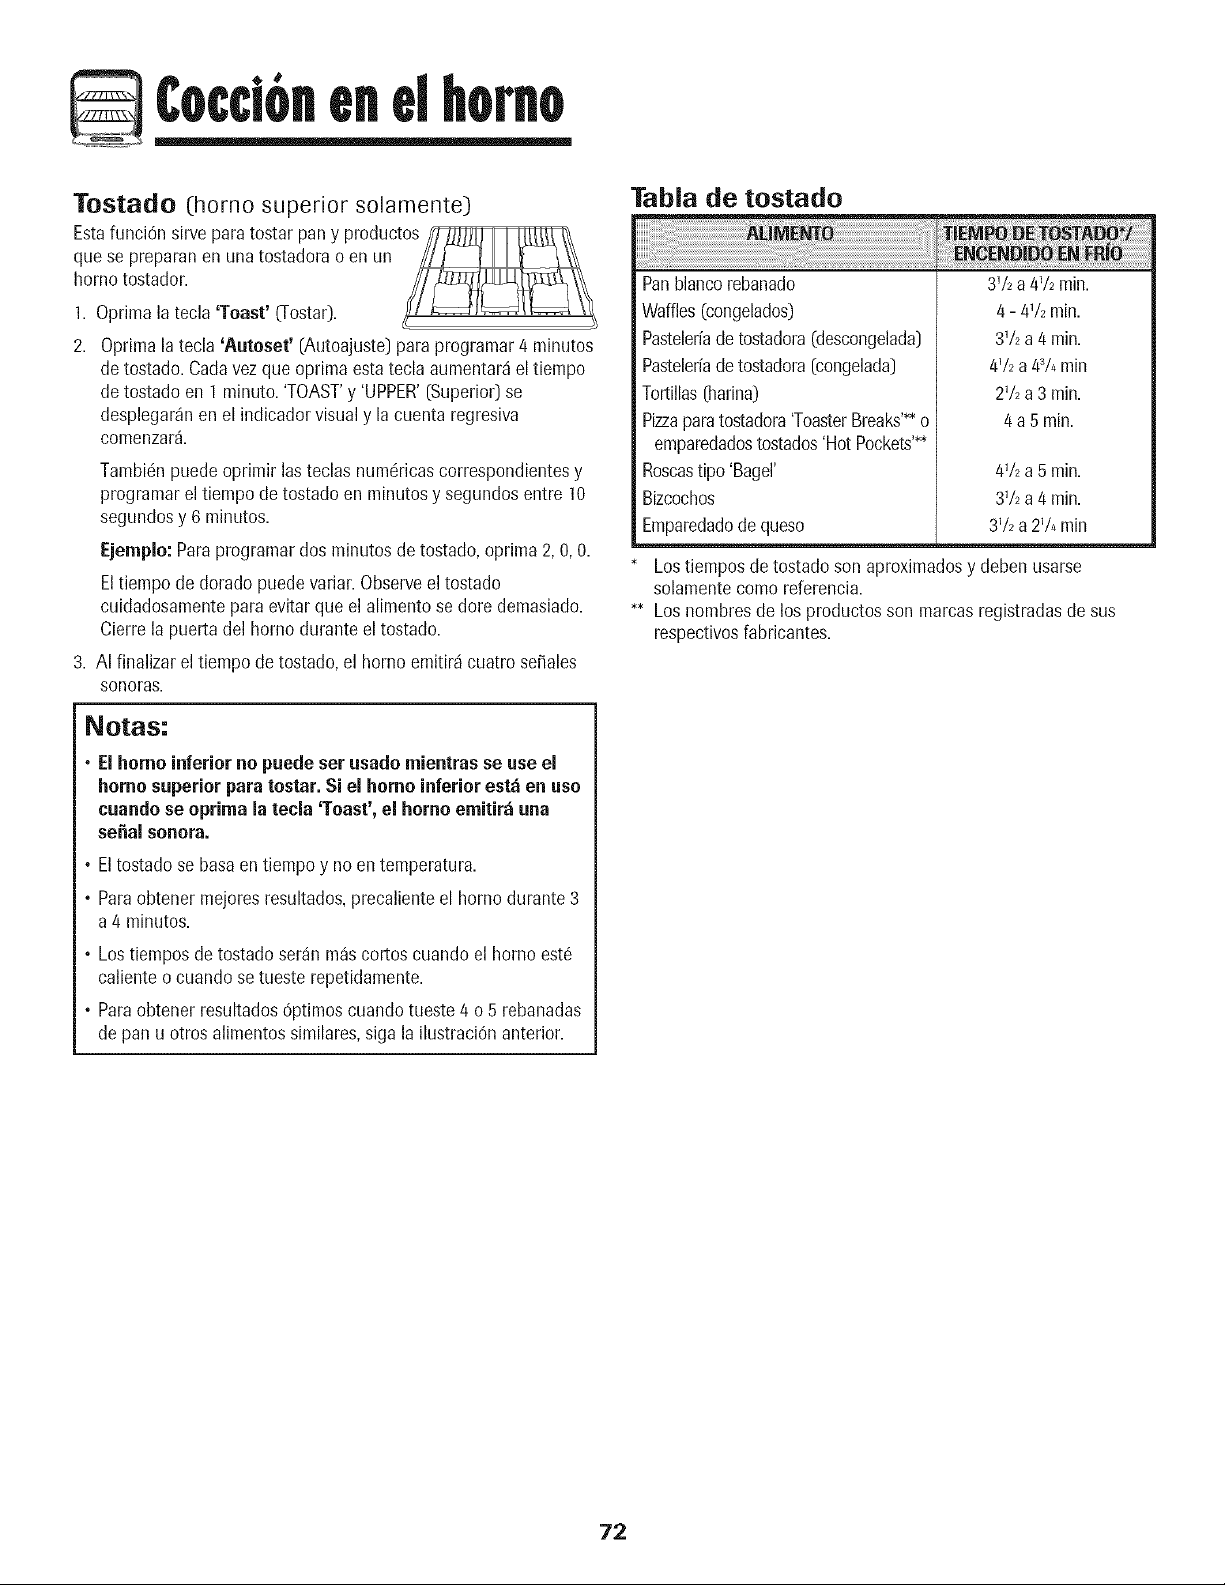
¢occi6nenelhomo
Tostado (homo superior solamente)
Estafunci6nsirveparatostar pany productos/_\
que se preparanen unatostadorao en un /_
hornotostador. //_ \%
1. Optima la tecla 'Toast' _Tostar). _l _::_:_:_ _/_
2. Oprimala tecla 'Autoset' [Autoajuste)paraprogramar4 minutos
detostado.Cadavezqueoptima estateclaaumentar_el tiempo
detostado en I minuto.'TOAST'y 'UPPER'(Superior)se
desplegar_nen el indicadorvisual y lacuenta regresiva
comenzar_.
Tambic!npuedeoprimir las teclas numc!ricascorrespondientesy
programarel tiempo de tostadoen minutosy segundosentre 10
segundosy 6 minutos.
Ejemplo: Paraprogramardos minutos detostado,optima 2,0, 0.
Eltiempode dorado puedevariar. Observeel tostado
cuidadosamenteparaevitarque el alimento sedote demasiado.
Cierrela puerta del homo durante el tostado.
3. AI finalizar el tiempode tostado,el homo emitir_icuatro sefiales
sonoras.
Notas:
• Ei homo inferior no puede set usado mientras se use el
homo superior paratostar. Si el homo inferiorest_ en uso
cuandose optima la tecla 'Toast', el homo emitir_ una
serial sonora.
• El tostado se basa en tiempo y no en temperatura.
• Para obtener mejores resultados, precaliente el homo durante 3
a 4 minutos.
• Lostiempos detostado ser_n m_scortos cuando el homo est6
calienteo cuandose tueste repetidamente.
, Paraobtener resultados6ptimoscuando tueste4 o 5 rebanadas
de panu otros alimentossimilares,siga la ilustraci6nanterior.
Tabla de tostado
Panblancorebanado
Waffles(congelados)
Pasteleriade tostadora(descongelada)
Pasteleriade tostadora[congelada)
Tortillas01arina)
Pizzaparatostadora'ToasterBreaks'**o
emparedadostostados'Hot Pockets'**
Roscastipo 'Bagel'
Bizcochos
Emparedadode queso
3V_a4% min.
4 - 4V2min.
3V2a4 min.
4V_a 43Arain
2V2a3 min.
4a5 rain.
4V_a5 min.
3V2a4 min.
3V=a 2% rain
Lostiemposde tostadoson aproximadosy deben usarse
solamentecomo referencia.
** Loshombresde los productosson mamasregistradasdesus
respectivosfabricantes.
72
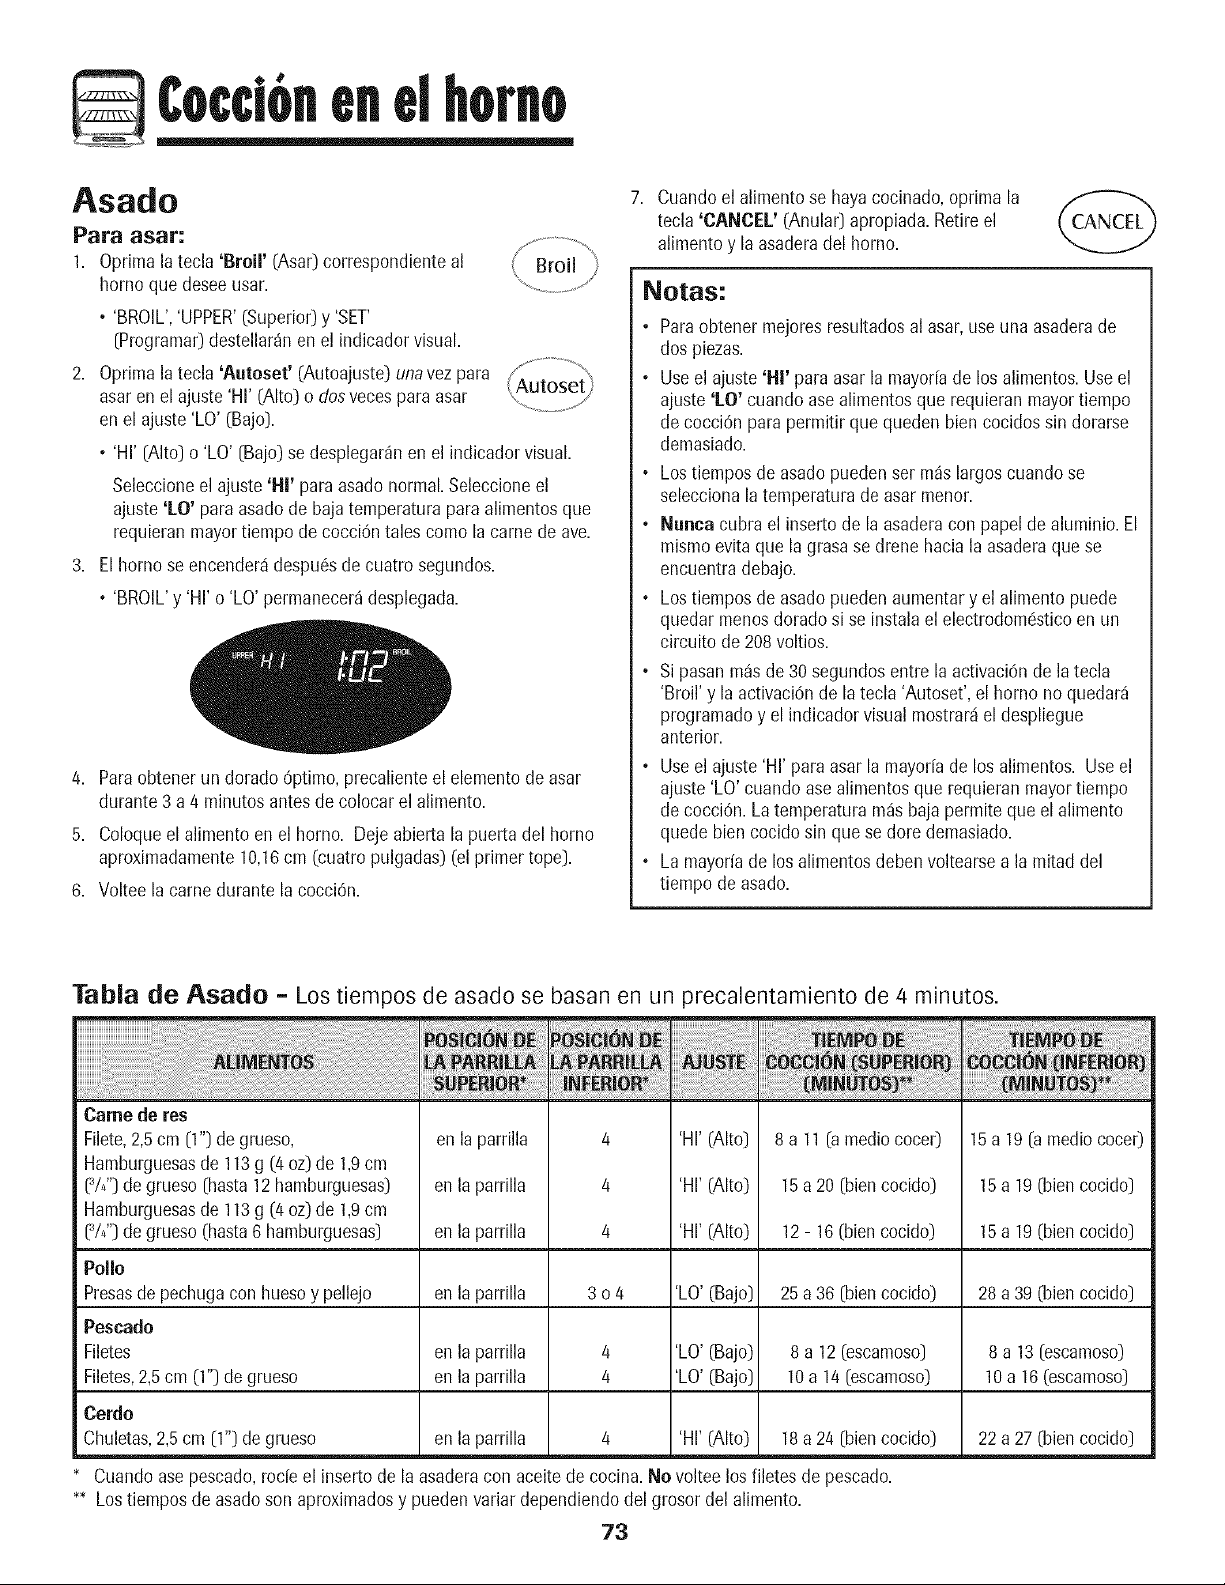
Cocd6n#nel horno
Asado
Para asar:
1. Oprimala tecla 'Broil' (Asar)correspondienteal
homo que deseeusar.
• 'BROIL','UPPER'(Superio0y 'SET'
[Programa0destellar_nen el indicadorvisual.
2. Oprimalatecla 'Aetoset' (Autoajuste)unavez para
asar en elajuste 'HI' (Alto) o dosvecesparaasar
en el ajuste'LO' (Bajo).
• 'HI' (Alto) o 'LO' [Bajo) sedesplegar_nen el indicador visual.
Seleccioneel ajuste'HI' para asadonormal.Seleccioneel
ajuste'LO' para asadode bajatemperaturapara alimentosque
requieranmayortiempo decocciOntales como la came de ave.
3. Elhomo se encender_despu6sde cuatro segundos.
• 'BROIL'y 'HI' o 'LO' permanecer_desplegada.
4. Paraobtener un dorado6ptimo,precalienteel elementode asar
durante 3 a 4 minutosantesde colocar el alimento.
5. Coloqueel alimento en el homo. Dejeabierta la puertadel homo
aproximadamente10,16cm (cuatropulgadas)(el primer tope).
6. Voltee lacame durante lacocci6n.
7. Cuandoel alimento se hayacocinado,optima la
tecla 'CANCEL' (Anula0 apropiada.Retireel
alimentoy la asaderadel homo.
Notas:
®
o
Paraobtener mejoresresultadosal asar, useuna asaderade
dos piezas.
Useelajuste 'Hi' paraasar la mayor[ade los alimentos.Useel
ajuste'LO' cuando asealimentosque requieranmayortiempo
decocciOnpara permitir que queden bien cocidossin dorarse
demasiado.
• Lostiempos deasado puedenset m_s largoscuandose
seleccionala temperaturade asar menor.
• Nuaea cubra el inserto de la asaderacon papelde aluminio.El
mismoevita que la grasase drone hacia la asaderaque se
encuentradebajo.
• Lostiempos deasado puedenaumentary el alimentopuede
quedarmenosdoradosi se instalael electrodomc!sticoen un
circuito de 208voltios.
Sipasanm_s de 30segundosentre laactivaci6nde la tecla
'Broil' y la activaci6nde latecla 'Autoset',el homo no quedar_
programadoy el indicadorvisual mostrar_iel despliegue
anterior.
• Use elajuste 'HI' para asar la mayor[ade los alimentos. Use el
ajuste'LO' cuandoase alimentosque requieran mayortiempo
decocci6n.Latemperatura m_sbaja permite queel alimento
quedebiencocido sin que se doredemasiado.
• La mayorfade losalimentosdeben voltearsea la mitaddel
tiempo de asado.
Tabla lie Asado = Los tiempos de asado se basan en un precalentamiento de 4 minutos.
Ca[he de [es
Filete,2,5cm (1") de grueso,
Hamburguesasde 113g (4 oz)de 1,9cm
(3/4")de grueso(hasta12hamburguesas)
Hamburguesasde 113g (4 oz)de 1,9cm
(3/4")de grueso(hasta6 hamburguesas)
Polio
Presasde pechugacon huesoy pellejo
Peseado
Filetes
Filetes,2,5cm (1") degrueso
Cerdo
Chuletas,2,5cm (1") degrueso
en la parrilla
en la parrilla
en la parrilla
'HI' (Alto)
'HI' (Alto)
'HI' (Alto)
enla parrilla 'LO' (Bajo)
enla parrilla 'LO' (Bajo)
enla parrilla 'LO' (Bajo)
4
4
4
3o4
4
4
4
enla parrilla
'HI' (Alto)
8 a 11 (a medio cocer)
15 a 20 [bien cocido)
12 - 16 (bien cocido)
25 a 36 (bien cocido)
8 a 12 (escamoso)
10 a 14 (escamoso)
18 a 24 (bien cocido)
Cuandoasepescado,rode el insertode la asaderacon aceitede cocina. No volteelos filetes de pescado.
** Lostiemposde asadoson aproximadosy puedenvariar dependiendodel grosor del alimento.
73
15 a 19 (a medio cocer)
15 a 19 (bien cocido)
15 a 19 (bien cocido)
28 a 39 (bien cocido)
8 a 13 (escamoso)
10 a 16 (escamoso)
22 a 27 (bien cocido)
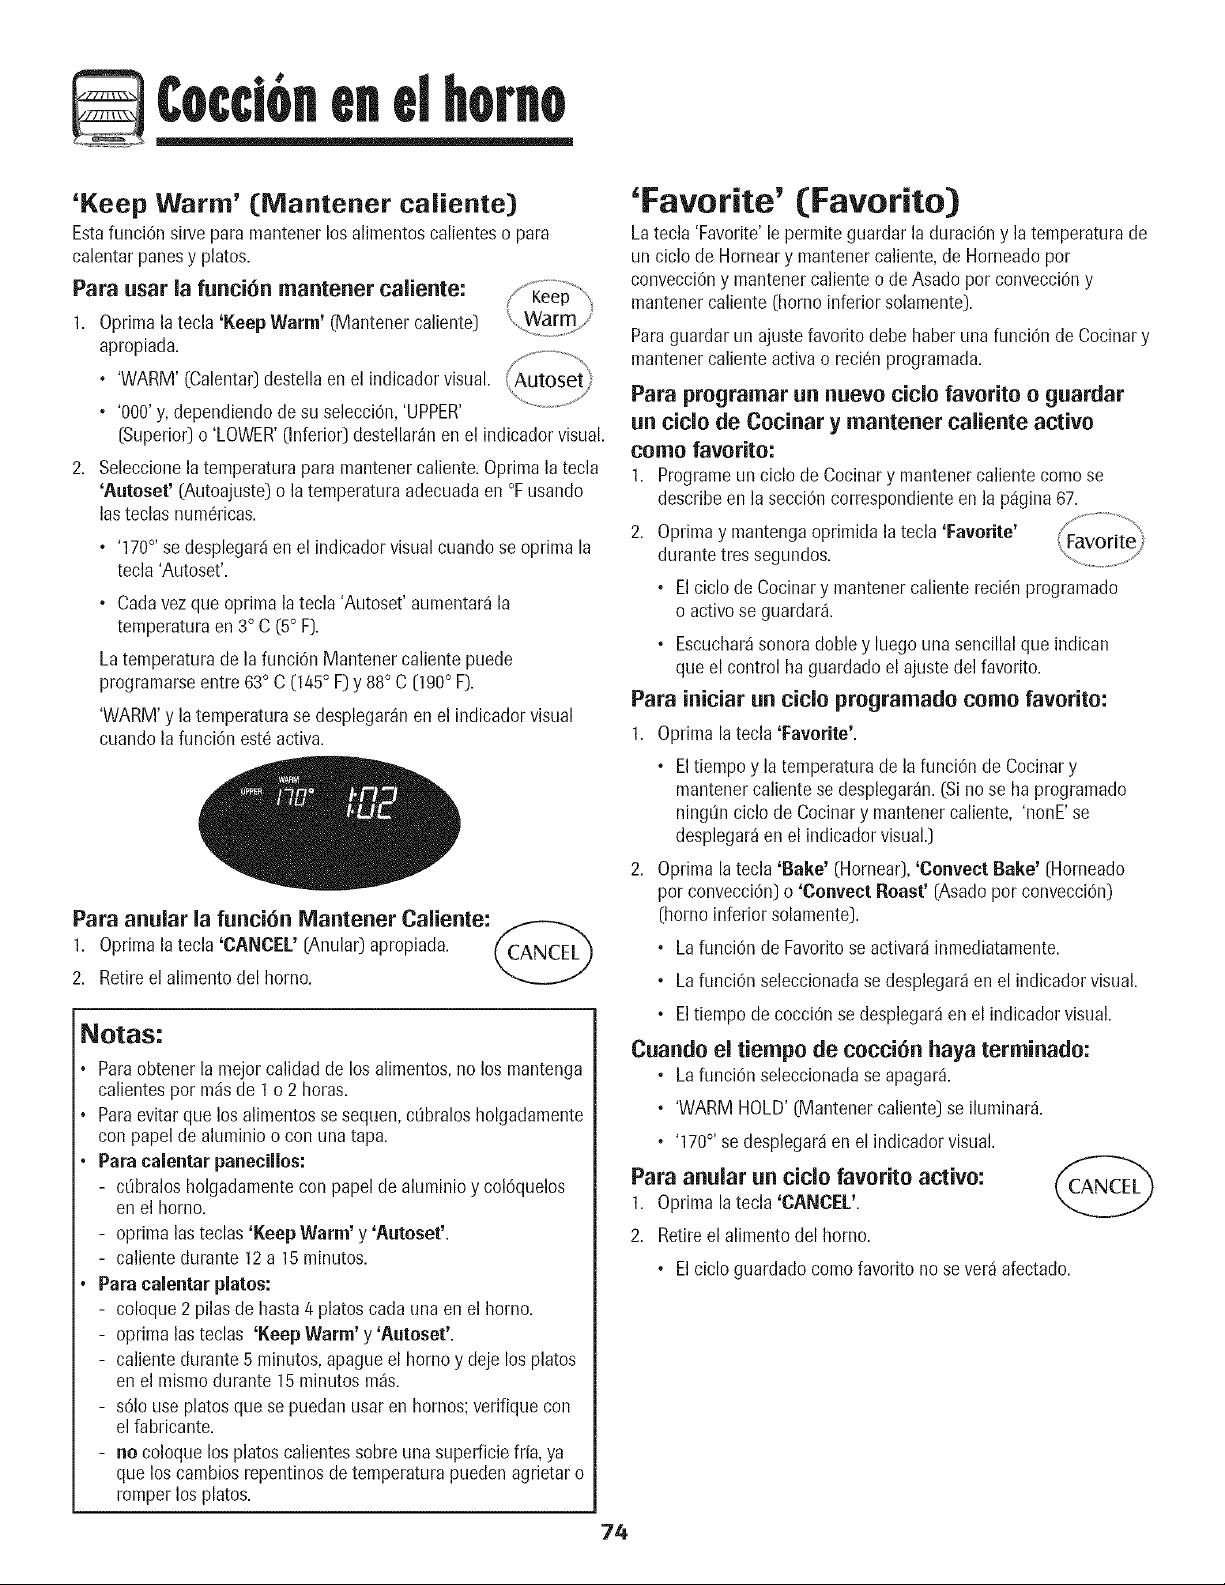
¢occi6nenelhomo
'Keep Warm' (Nlanter|er caliente)
Estafunci6n sirveparamantenerlosalimentoscalienteso para
calentarpanesy plates.
Para usar la funci6n mantener caliente:
1. Oprimala tecla 'Keep Warm' (Mantenercaliente)
apropiada.
!/f ..............
• 'WARM' (Calentar)destella en el indicadorvisual. ; Autoset_
/,
• '000'y,dependiendode su selecci6n,'UPPER'
(Superior)o 'LOWER'(Inferior) destellar_nen el indicadorvisual.
2. Seleccionelatemperaturapara mantenercaliente.Oprimala tecla
'Auteset' (Autoajuste)o la temperaturaadecuadaen °Fusando
lasteclas num6ricas.
• '170°' se desplegarden el indicadorvisual cuando se oprima la
tecla 'Autoset'.
• Cadavezque oprima latecla 'Autoset'aumentar_la
temperaturaen 3° C (5° F).
Latemperaturade la funciOnMantenercalientepuede
programarseentre 63° C (145° F)y 88° C (190° F).
'WARM'y latemperaturase desplegar_nen el indicadorvisual
cuando la funciOnest6activa.
Para anular la funci6n Mantener Caliente:
1. Oprimala tecla 'CANCEL' (Anular)apropiada. (CANCEL_
2. Retireel alimentodel homo.
Notas:
Paraobtener la mejor calidadde los alimentos,no los mantenga
calientesper rodsde 1 o 2 horas.
Paraevitarque los alimentosse sequen,cObralosholgadamente
con papelde aluminio o con una tap&
Para ealentar panecillos:
- c_bralosholgadamentecon papelde aluminio y col6quelos
en el homo.
- oprima lasteclas 'Keep Warm' y 'Auteset'.
- calientedurante 12a 15minutes.
Para calentar plates:
- coloque2 pilas de hasta4 platescada unaen el homo.
- oprima lasteclas 'Keep Warm' y 'Aateset'.
- calientedurante5 minutes,apagueel homo y deje los plates
en el mismodurante 15 minutesm_s.
- sOIouse platesque se puedanusar en hornos;verifiquecon
el fabricante.
- no coloquelos platescalientessobre una superficiefrfa, ya
que los cambiosrepentinosdetemperaturapuedenagrietar o
romper los plates.
'Favorite' (Favorite)
Latecla 'Favorite'le permiteguardarla duraci6ny la temperaturade
un ciclo de Horneary mantenercaliente,de Horneadoper
convecci6ny mantenercalienteo de Asado per convecci6ny
mantenercaliente (homo inferior solamente).
Paraguardarun ajustefavorite debehaber una funci6n de Cocinary
mantenercalienteactiva o reci6nprogramada.
Para programar an nuevo title favorite o guardar
an cido de Cocinar y mantener caliente active
come favorite:
1. Programeun ciclo de Cocinary mantenercaliente come se
describeen la secciOncorrespondienteen la pdgina67.
2. Oprimay mantengaoprimida la tecla'Favorite'
durante tressegundos.
• Elciclode Cocinary mantener caliente reci6nprogramado
o activese guardar&
• Escuchar_sonoradone y luegouna sencillalque indican
que el control ha guardadoel ajustedel favorite.
Para iniciar an cicio programado come favorite:
1. Oprima la tecla 'Favorite'.
• Eltiempoy la temperaturade la funci6n de Cocinary
mantenercalientese desplegar_n.(Sinose haprogramado
ning[in ciclo de Cocinary mantenercaliente, 'nonE'se
desplegar_en el indicador visual.)
2. Optima latecla 'Bake' (Hornear),'Cenvect Bake' (Horneado
per convecci6n)o 'Cenveet Roast' (Asadoper convecci6n)
(homo inferior solamente).
• Lafunci6n de Favoritese activardinmediatamente.
° Lafunci6n seleccionadase desplegar_en el indicadorvisual.
° Eltiempo de cocci6nse desplegar_en el indicadorvisual.
Cuando el tiempo de cocci6n haya terminado:
° Lafunci0n seleccionadase apagar&
• 'WARM HOLD'(Mantener caliente) se iluminar&
• '170°,se desplegarden el indicadorvisual.
Para anular un title favorite active:
1. Oprima la tecla 'CANCEL'.
2. Retireel alimentodel homo.
° Elcicloguardadocomefavorite no severd afectado.
74
Cocclbnenelhomo
Apagado autom tico/Niodo
sab tico
Loshornosse apagar_nautomdticamentedespuOsde 12 horassi los
deja encendidosaccidentalmente.
Para anular el apagado autom_tico a las 12 horas y
permitir que el homo funcione de manera continua
durante 72 horas:
1. Oprimay mantengaoprimida latecla 'Clock' (Reloj)
durante tressegundos.
• 'SAb' se desplegar_en el indicadorvisualy destellar4durante
cincosegundos.
• 'SAb' permanecer_desplegadocontinuamentehastaquese
apagueo hastaalcanzarel Ifmitede 72 horas.
• 'BAKE'(HorneaOtambidn se mostrardsi se est_ horneando
mientrasel homo estden Modo sab_tico.
• Todaslasteclas estardndesactivadasexcepto'CANCEL'
[Anular)y 'Clock'.Todaslas demosfunciones EXCEPTO
HORNEARO-emporizador,Mantener caliente,Autolimpieza,
etc.)se bloqueardnduranteel Modo sabdtico.
Para anular el IVlodo sab;itico:
1. Oprimala tecla 'Clock' durante tressegundos.
• 'SAb' destellar4durante cinco segundos.
• La hora del d[a reaparecerden el indicadorvisual.
0
2. DespuOsde 72horas,el Modo sab_tico habrdterminado.
• 'SAb' destellarddurante cinco segundos.
• La hora del d[a reaparecerden el indicadorvisual.
Ajuste de la temperatura
del homo
Lastemperaturasde los hornosse prueban cuidadosamenteen la
fdbricapara asegurarsu precision. Esnormalobservaralgunas
diferenciasen el tiempo de horneadoo doradoentre un homo nuevo
y uno usado. A medidaque se usan los hornos,la temperaturade
los mismospuedecambiar.
Ustedpuede ajustar la temperaturadel homo si consideraqueel
mismono estd horneando o dorandocorrectamente.Paradecidir
cudntodebecambiarla temperatura,ajustela misma14° C (25° F]
rodsalta o rodsbaja que la recomendadaen la receta y hornee. Los
resultadosdel primer horneadole dar_una mejor ideadecudnto
debeajustarla temperatura.
Para ajustar la temperatura del homo:
1. Oprima la tecla 'Bake' apropiada.
2. Programe288° C (550° F] oprimiendo lasteclas numOricas
correspondientes.
3. Oprimay mantengaoprimida latecla 'Bake' durante varios
segundoso hastaque '00°' se despliegueen el indicadorvisual.
Si latemperaturadel homo habia sido ajustadaanteriormente,el
cambioanterior se mostrardenel indicadorvisual. Porejemplo,
si se habiareducido latemperaturadel homo en 8° C (15° F),el
indicadorvisual mostrar_'-8°,('-15°').
4. Oprima latecla 'Autoset' [Autoajuste)paraajustar la
temperatura.
Cadavez que oprima la tecla 'Autoset',la temperaturacambiard
en 3° C (5° F]. Latemperaturadel homo puedeaumentarseo
reducirseentre 3° C (5° F)y 9° C (35° F).
5. Lahoradel dia reaparecer_automdticamenteen el indicador
visual.
No es necesariovolveraajustarel homo si ocurre una falla o
interrupciOneldctrica.Los ajustesdetemperatura0nicamente
afectanel horneado,el horneadopor convecci6ny el asado por
convecciOn[homo inferiorsolamente).
Notas :
• El Modo sabdticopuedeactivarseen cualquier momentoya
sea que los hornosestOnencendidoso no.
• El Modo sabdtico no puedeactivarsesi elteclado o las puertas
estdnbloqueados.
° Lamayor[ade los avisosy mensajesy todas lasso,ales
sonorasse desactivancuando el Modo sab_ticoest_activado.
° Si el homo est4encendidocuando se programael Modo
sabdtico,'BAKE'se apagar_al finalizarel ciclo o cuandose
optimala tecla 'CANCEL'[Anula0. No se escuchardninguna
sepal sonora.
Sideseanutilizar las luces de los hornos en Modo sabdtico,las
mismasdebenestarencendidasantes de activar esta funciOn.
• Cuandose activael Modo sab_tico,el indicador visualmostrard
latemperaturaprogramadaenvezde la temperaturaactual del
interior del homo. No se escuchar_una sepalsonorade
precalentamiento.
° Elciclo de autolimpiezay el bloqueoautom_ticode las puertas
nofuncionan duranteel Mode sab_tico.
° Sioprime la tecla 'CANCEL'se detendrdel ciclo de horneado,
peroel control permanecer_en Modo sabdtico.
• Si ocurre unafalla elOctrica,los hornosse encender_nen Modo
sabdticocon 72 horasrestantesy ning0n ciclo active.
75
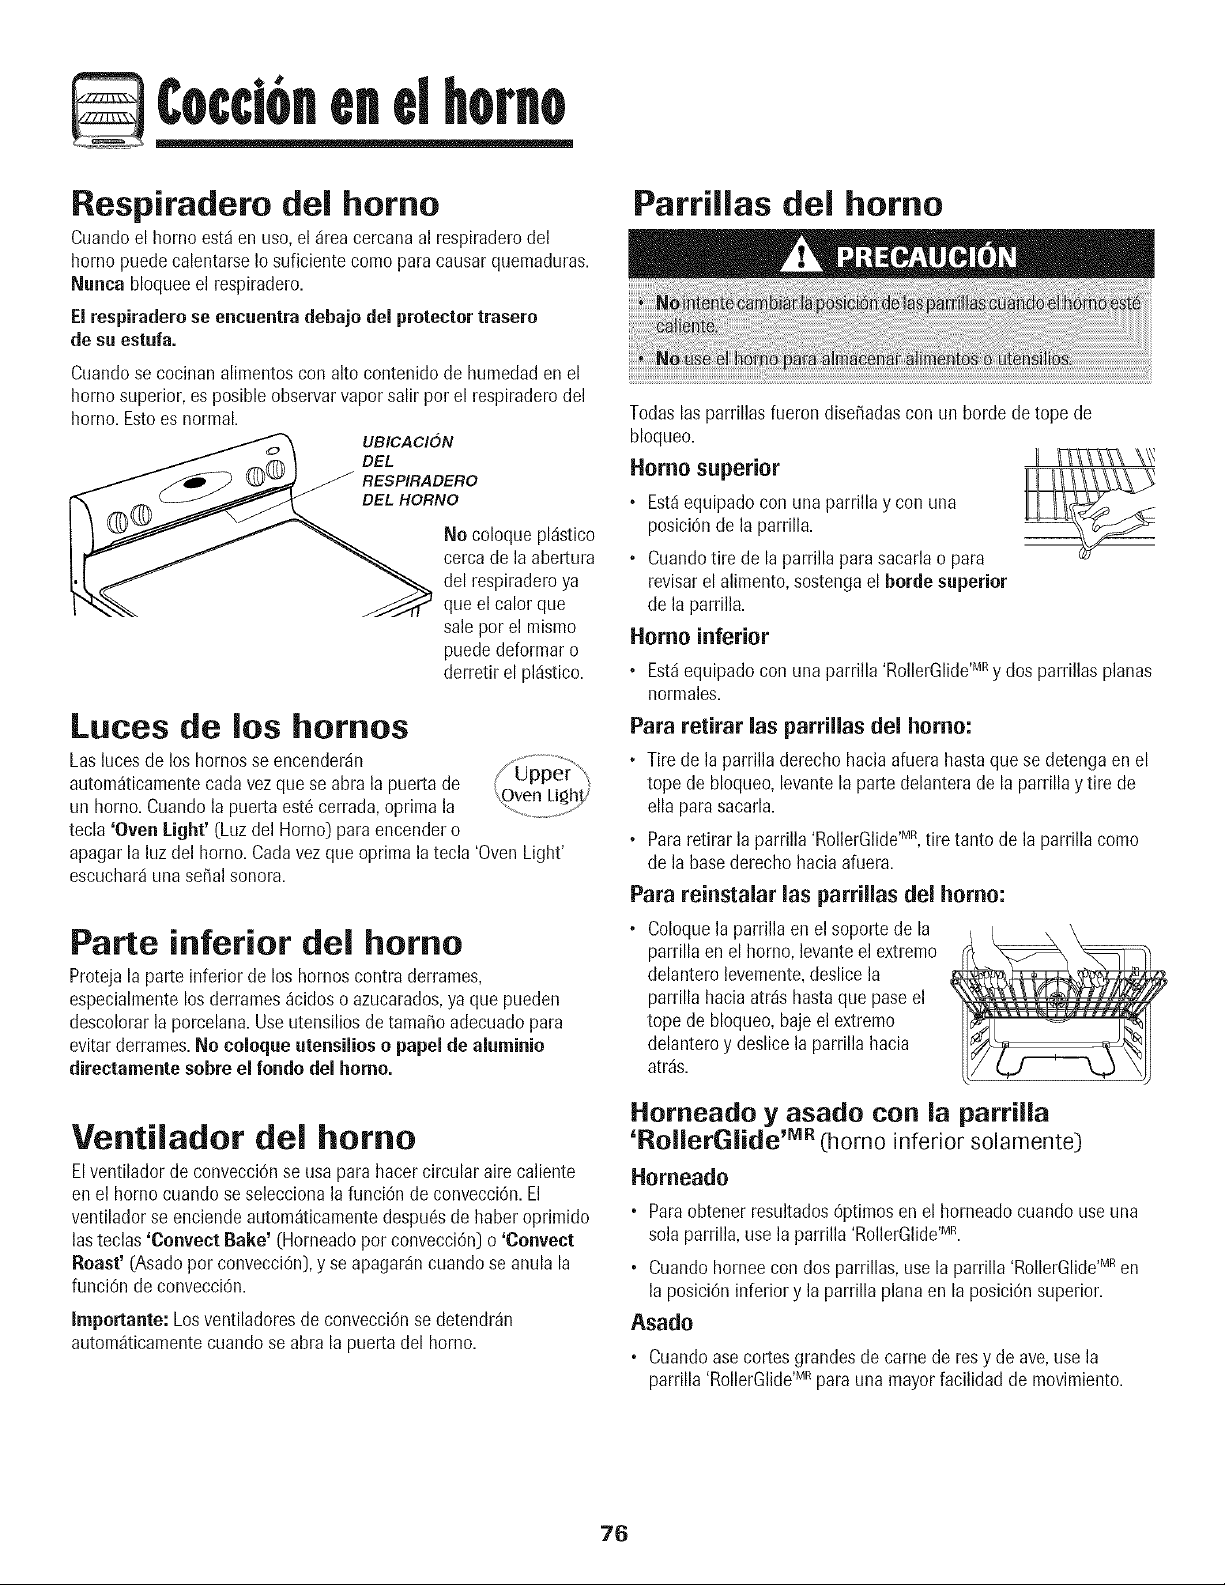
¢occi6nenelhomo
Respiradero del homo
Cuandoel horno est,1en uso,el _ireacercanaal respiraderodel
homo puedecalentarseIo suficiente como para causarquemaduras.
Nunca bloqueeel respiradero.
El respiraderose encuentra debajo del protectortrasero
de su estuIa.
Cuandose cocinanalimentoscon alto contenido de humedaden el
homo superior,es posibleobservarvaporsalir pot el respiraderodel
homo. Estoes normal.
UBICAClON
DEL
RESPIRADERO
DEL HORNO
No coloque pl_stico
cercade la abertura
del respiraderoya
que el calor que
sale por el mismo
puededeformaro
derretir el pl_istico.
Luces de los homes
Lasluces de los hornosse encender_in
autom_ticamentecada vezque se abra la puertade
un homo.Cuandola puerta est6 cerrada,oprima la
tecla 'Oven Light' (Luzdel Homo) para encendero
apagarla luz del homo. Cadavezque oprima la tecla 'OvenLight'
escuchar_iunaserialsonora.
Parte inferior del homo
Protejala parte inferior de los hornoscontraderrames,
especialmentelosderrames_cidos o azucarados,ya que pueden
descolorarla porcelana.Use utensiliosde tamafioadecuadopara
evitarderrames.No coloque utensilioso papel de aluminio
directamente sobre el rondo del homo.
Ventilador del homo
Elventiladorde convecci6nse usa parahacer circularaire caliente
enel homo cuando seseleccionala funciOnde convecciOn.El
ventiladorse enciendeautom_ticamentedespu_sde haber oprimido
lasteclas 'Convect Bake' (Horneadopor convecci6n)o 'Convect
Roast' (Asadopot convecci6n),y seapagar_incuando se anula la
funci6nde convecciOn.
Importante: Losventiladoresde convecci6nse detendr_n
autom_ticamentecuando se abrala puerta del homo.
Parrillas del homo
Todaslasparrillas fueron disefiadascon un borde de tope de
bloqueo.
Homo superior II _T_l_ \\_
IIW__\\_\\\ _
• Est,1equipadocon una parrillay con una 1__
posici6nde la parrilla.
. Cuandotire de la parrillaparasacarlao para
revisarel alimento,sostengael borde superior
de la parrilla.
Homo inferior
• Est4equipadocon una parrilla 'RollerGlide'MRy dos parrillas planas
normales.
Para retirar las parrillas del homo:
, Tire de la parrilla derecho haciaafuera hastaque se detengaen el
tope de bloqueo,levante la partedelanterade la parrillay tire de
ella parasacarla.
• Pararetirar la parrilla 'RollerGlide'MR,tire tanto de la parrilla como
de la basederecho haciaafuera.
Para reinstalar las parrillas del homo:
. Coloquela parrilla enel soportede la
parrillaen el homo,levanteel extremo
delantero levemente,deslicela
parrillahaciaatr_s hastaque pasoel
tope de bloqueo,baje el extremo
delanteroy deslice la parrilla hacia
atr_s.
Horneado y asado con la parrilla
'RollerGlide 'MR (homo inferior solamente)
Horneado
• Paraobtener resultados6ptimosen el horneadocuando useuna
sod parrilla,use la parrilla 'RollerGlide'MR.
• Cuandoborneocon dos parrillas,use la parrilla 'RollerGlide'MRen
la posici6ninferior y la parrillaplanaen la posici6n superior.
Asado
• Cuandoasecortes grandesde came de res y de ave,use la
parrilla 'RollerGlide'MRparauna mayorfacilidadde movimiento.
76
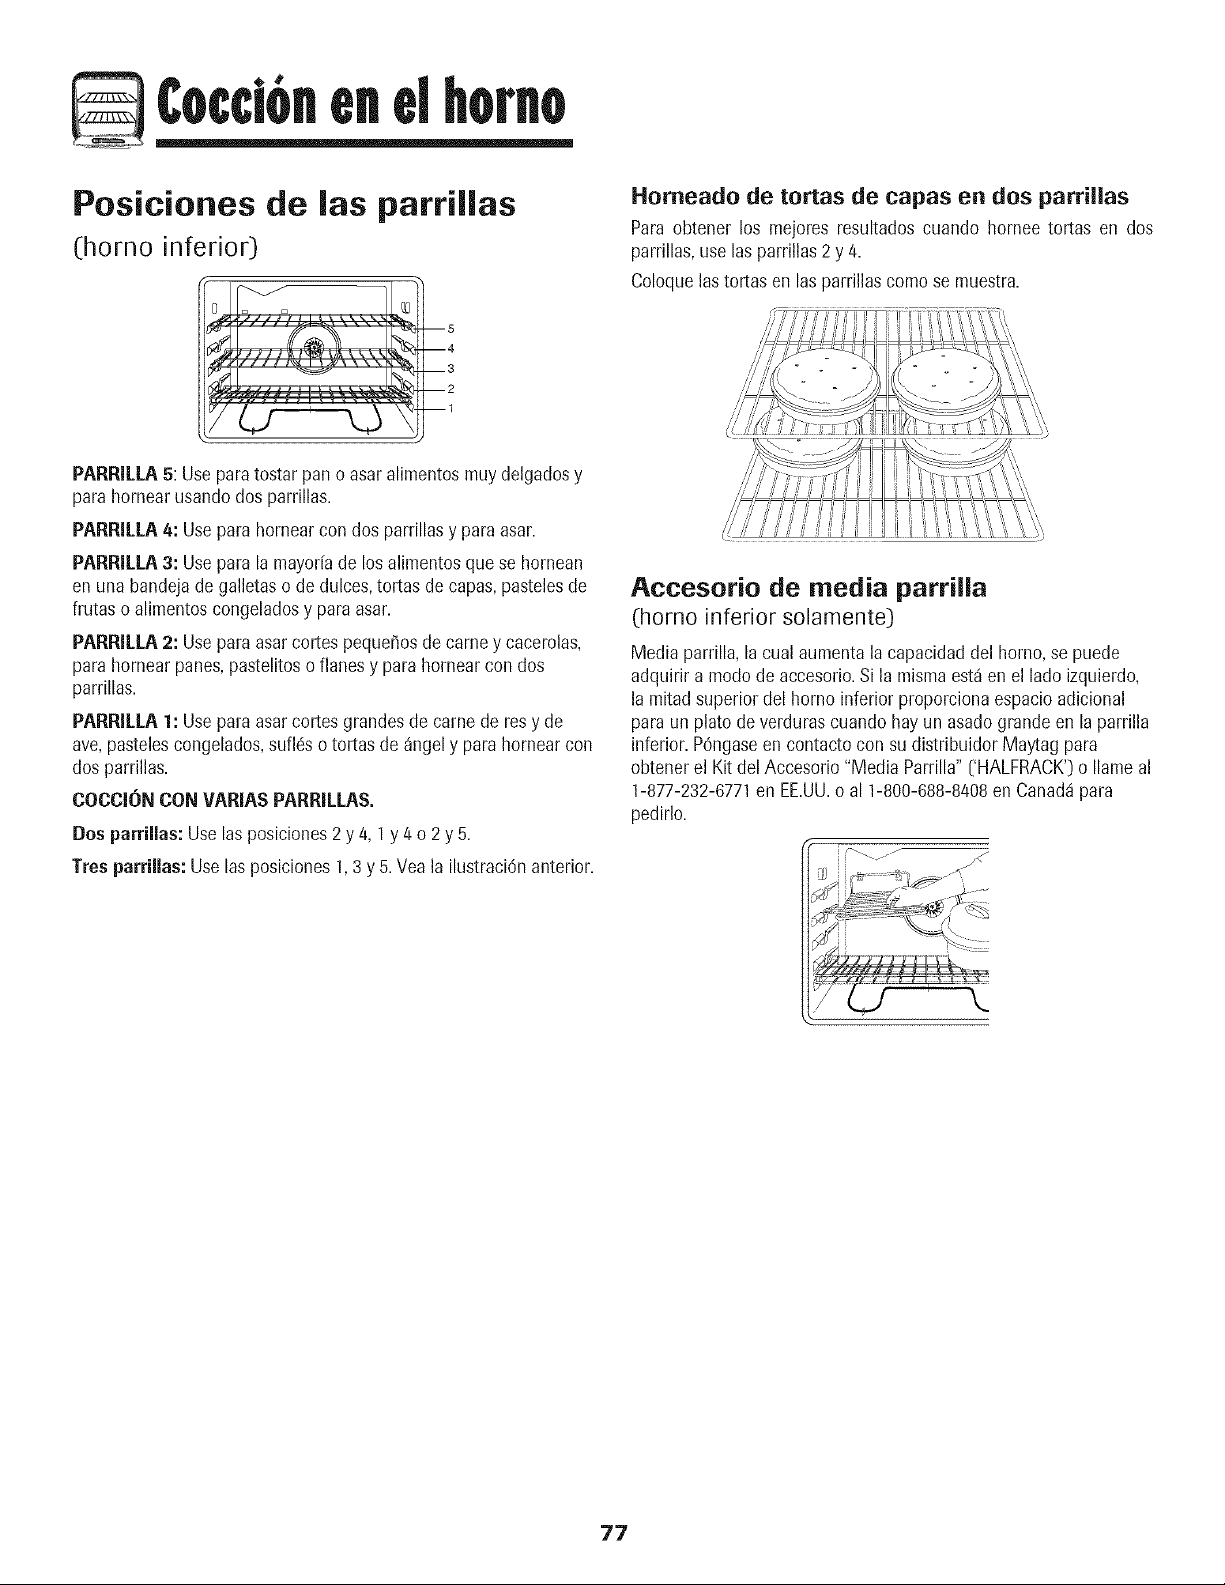
¢occ16nenelhorno
Posiciones de las parrillas
(homo inferior)
--5
--4
--3
--2
--1
PARRILLA 5: Useparatostar pano asar alimentosmuy delgadosy
parahornearusandodos parrillas.
PARRI[LA 4: Usepara hornearcon dos parrillasy paraasar.
PARRILLA 3: Usepara la mayor[ade losalimentosque se hornean
en una bandejade galletaso dedulces,tortas de capas,pastelesde
frutas o alimentoscongeladosy paraasar.
PARRI[LA 2: Useparaasar cortespeque_osdecame y cacerolas,
parahornearpanes,pastelitoso flanes y parahornearcon dos
parrillas.
PARRJLLA1: Useparaasar cortesgrandesde came de resy de
ave,pastelescongelados,suflc!so tortas de angely parahornearcon
dos parrillas.
COCCIONCON VARIAS PARRILLAS.
Dos parrillas:Uselasposiciones2y 4, 1y/4 o 2 y 5.
Tres parrillas:Uselas posiciones1,3 y 5. Vea la ilustraci6nanterior.
Horneado de tortas de capas en dos parriUas
Para obtener los mejores resultados cuando hornee tortas en dos
parrillas,use las parrillas2 y 4.
Coloquelastortas en lasparrillascomo se muestra.
Accesorio de media parrilla
(homo inferior solarnente)
Media parrilla, la cual aumentala capacidaddel homo, se puede
adquirir a modode accesorio.Si la mismaest_ en el lado izquierdo,
la mitadsuperior del homo inferior proporcionaespacioadicional
paraun plato deverdurascuandohay un asadograndeen la parrilla
inferior.P6ngaseen contactocon su distribuidor Maytagpara
obtenerel Kit delAccesorio "Media Parrilla" ['HALFRACK')o Ilameal
1-877-232-6771en EE.UU.o al 1-800-688-8/408en Canadapara
pedirlo.
77
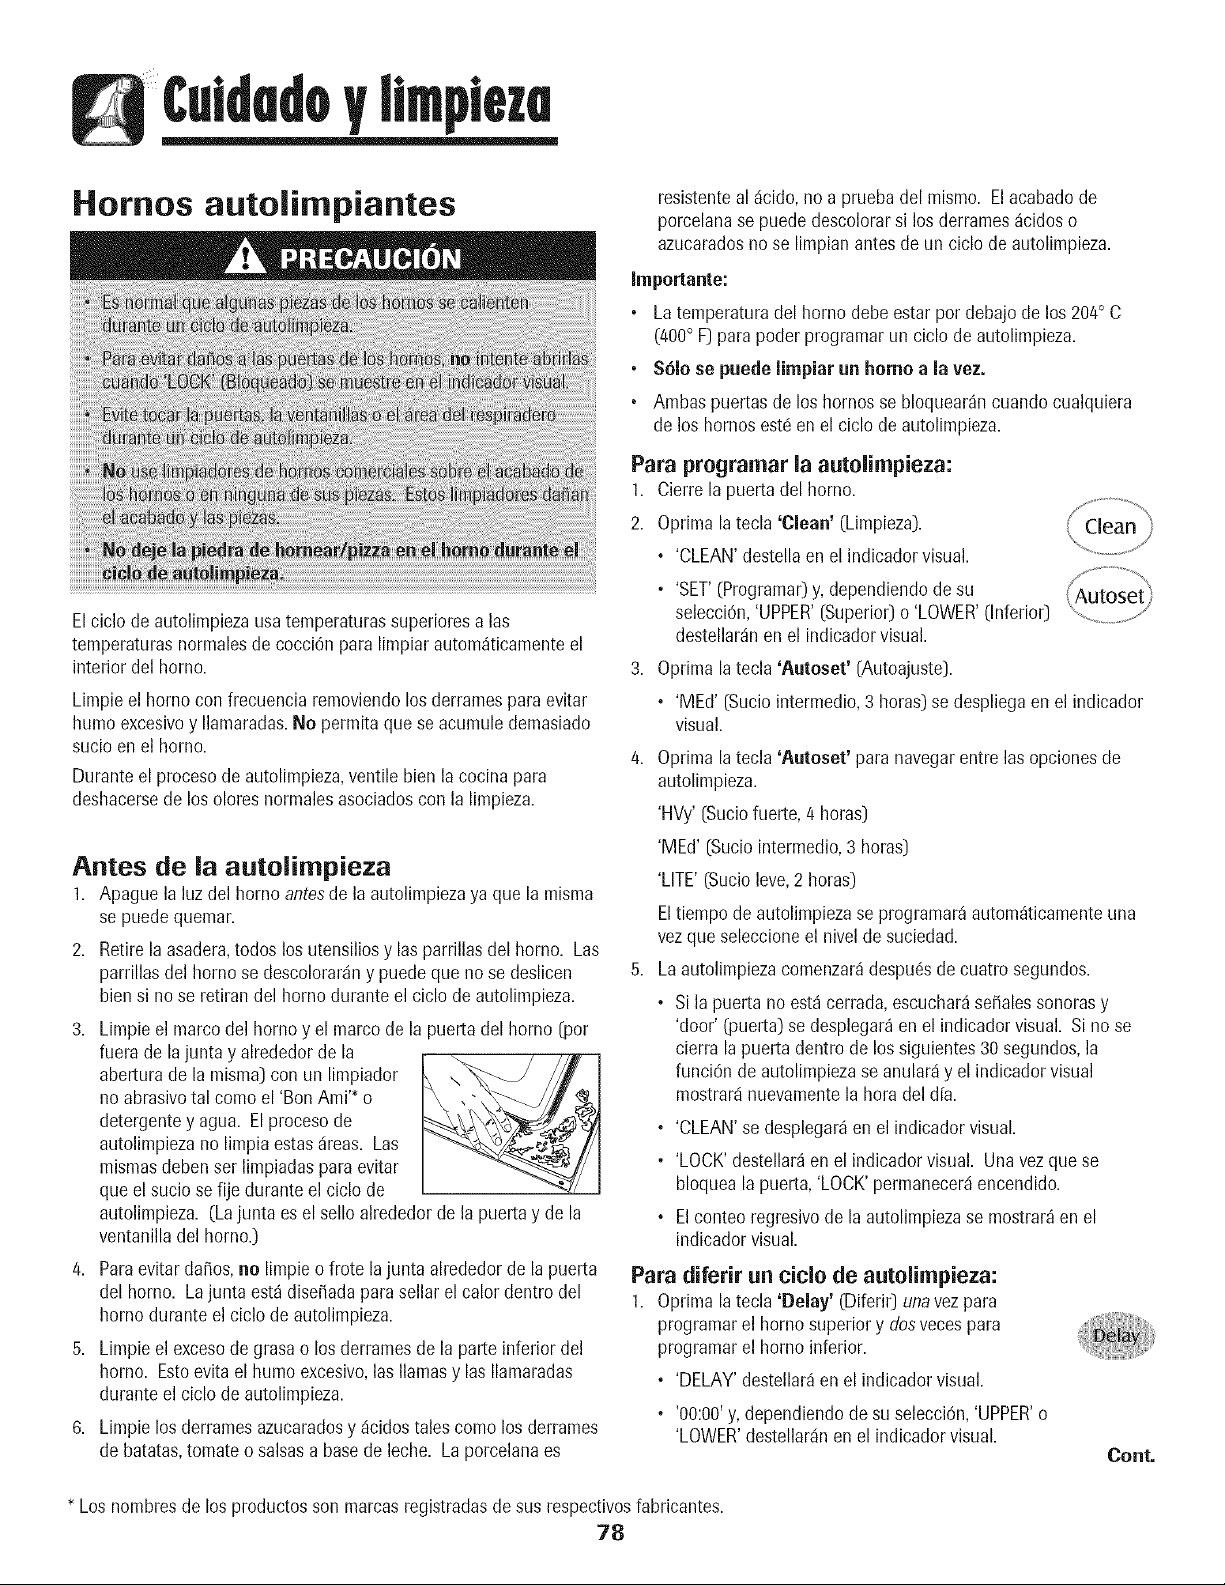
HmMeze
Hornos autolimpiantes
Elciclo de autolimpiezausatemperaturassuperioresalas
temperaturasnormalesde cocciOnpara limpiarautom_ticamenteel
interior del homo.
Limpie el homo con frecuencia removiendolosderramespara evitar
humo excesivoy Ilamaradas.No permita que se acumule demasiado
sucioen el homo.
Duranteel procesode autolimpieza,ventile bien la cocina para
deshacersede los olores normalesasociadoscon la limpieza.
Antes de la autolimpieza
1. Apague la luzdel hornoantesde la autolimpiezaya que la misma
se puedequemar.
2. Retirela asadera,todos los utensiliosy las parrillasdel homo. Las
parrillasdel homo se descolorar_ny puedeque nose deslicen
biensi nose retiran del homo duranteel ciclo de autolimpieza.
3. Limpieel marcodel homoy el marco de la puerta del homo (per
fuera de lajunta y alrededorde la
aberturadelamisma]conunlimpiador \\ \_J //_ I
noabrasivotal comoel 'Bon Ami'_o
detergentey agua. El procesode
autolimpiezano limpia estas_ireas. Las
mismasdebenser limpiadasparaevitar
que el suciose fije durante el ciclo de
autolimpieza. (Lajunta es el sello alrededorde la puertay de la
ventanilladel homo.)
4. Paraevitarda_os,ae limpie o frote lajunta alrededorde la puerta
del homo. Lajunta est_dise_adaparasellar el calor dentro del
homo durante el ciclo de autolimpieza.
5. Limpieel excesode grasa o los derramesde la parte inferior del
homo. Estoevitael humo excesivo,las llamasy las Ilamaradas
durante el ciclo de autolimpieza.
6. Limpie losderramesazucaradosy _icidostales comolos derrames
de batatas,tomate o salsasa basede leche. La porcelanaes
resistenteal _icido,no a pruebadel mismo. Elacabadode
porcelanase puededescolorarsi los derrames_cidoso
azucaradosno se limpian antesde un ciclo de autolimpieza.
Jmportante:
• La temperaturadel horno debe estarpor debajode los 204° C
(400° F]parapoder programarun ciclo de autolimpieza.
• S61ose puede limpiar un homo a la vez.
• Ambas puertas de los hornosse bloquear_ncuando cualquiera
de los hornos estc!en el ciclode autolimpieza.
Para programar la autolimpieza:
1. Cierre la puertadel horno.
2. Optima latecla 'Clean' (Limpieza).
• 'CLEAN'destellaen el indicadorvisual.
%
, 'SET'(Programar)y, dependiendodesu (_Autoset
selecciOn,'UPPER'(Superior]o'LOWER' (Inferior] , ...... /
destellar_nen el indicadorvisual.
3. Optima latecla 'Autoset' (Autoajuste].
,'MEd' (Suciointermedio,3 horas)se despliegaen el indicador
visual.
4. Oprima latecla 'Autoset' para navegarentre las opcionesde
autolimpieza.
'HVy' (Suciofuerte,4 horas]
'MEd' (Suciointermedio,3 horas]
'LITE'(Sucioleve,2 horas)
Eltiempo de autolimpiezase programar_autom_ticamenteuna
vezque seleccioneel nivel de suciedad.
5. Laautolimpiezacomenzar_despu_sde cuatro segundos.
• Si la puerta no est_cerrada, escuchar_se_alessonorasy
'door' _uerta) se desplegar_en el indicadorvisual. Si no se
cierra lapuerta dentro de los siguientes30 segundos,la
funci6n de autolimpiezase anular_iy el indicadorvisual
mostrar_inuevamentela hora del d[a.
, 'CLEAN'se desplegar_en el indicadorvisual.
, 'LOCK' destellar_en el indicador visual. Una vezque se
bloqueala puerta,'LOCK'permanecer_iencendido.
° Elconteoregresivode la autolimpiezase mostrar_en el
indicadorvisual.
Para diferir un title de autolimpieza:
1. Oprima la tecla 'Delay' (Diferir] unavez para
programarel homo superiory dosvecespara
programarel homo inferior.
, 'DELAY'destellar_en el indicadorvisual.
• '00:00'y, dependiendode su selecci6n,'UPPER'o
'LOWER'destellar_inen el indicadorvisual.
Cont.
* Losnombres de los productosson marcasregistradasdesus respectivosfabricantes.
78
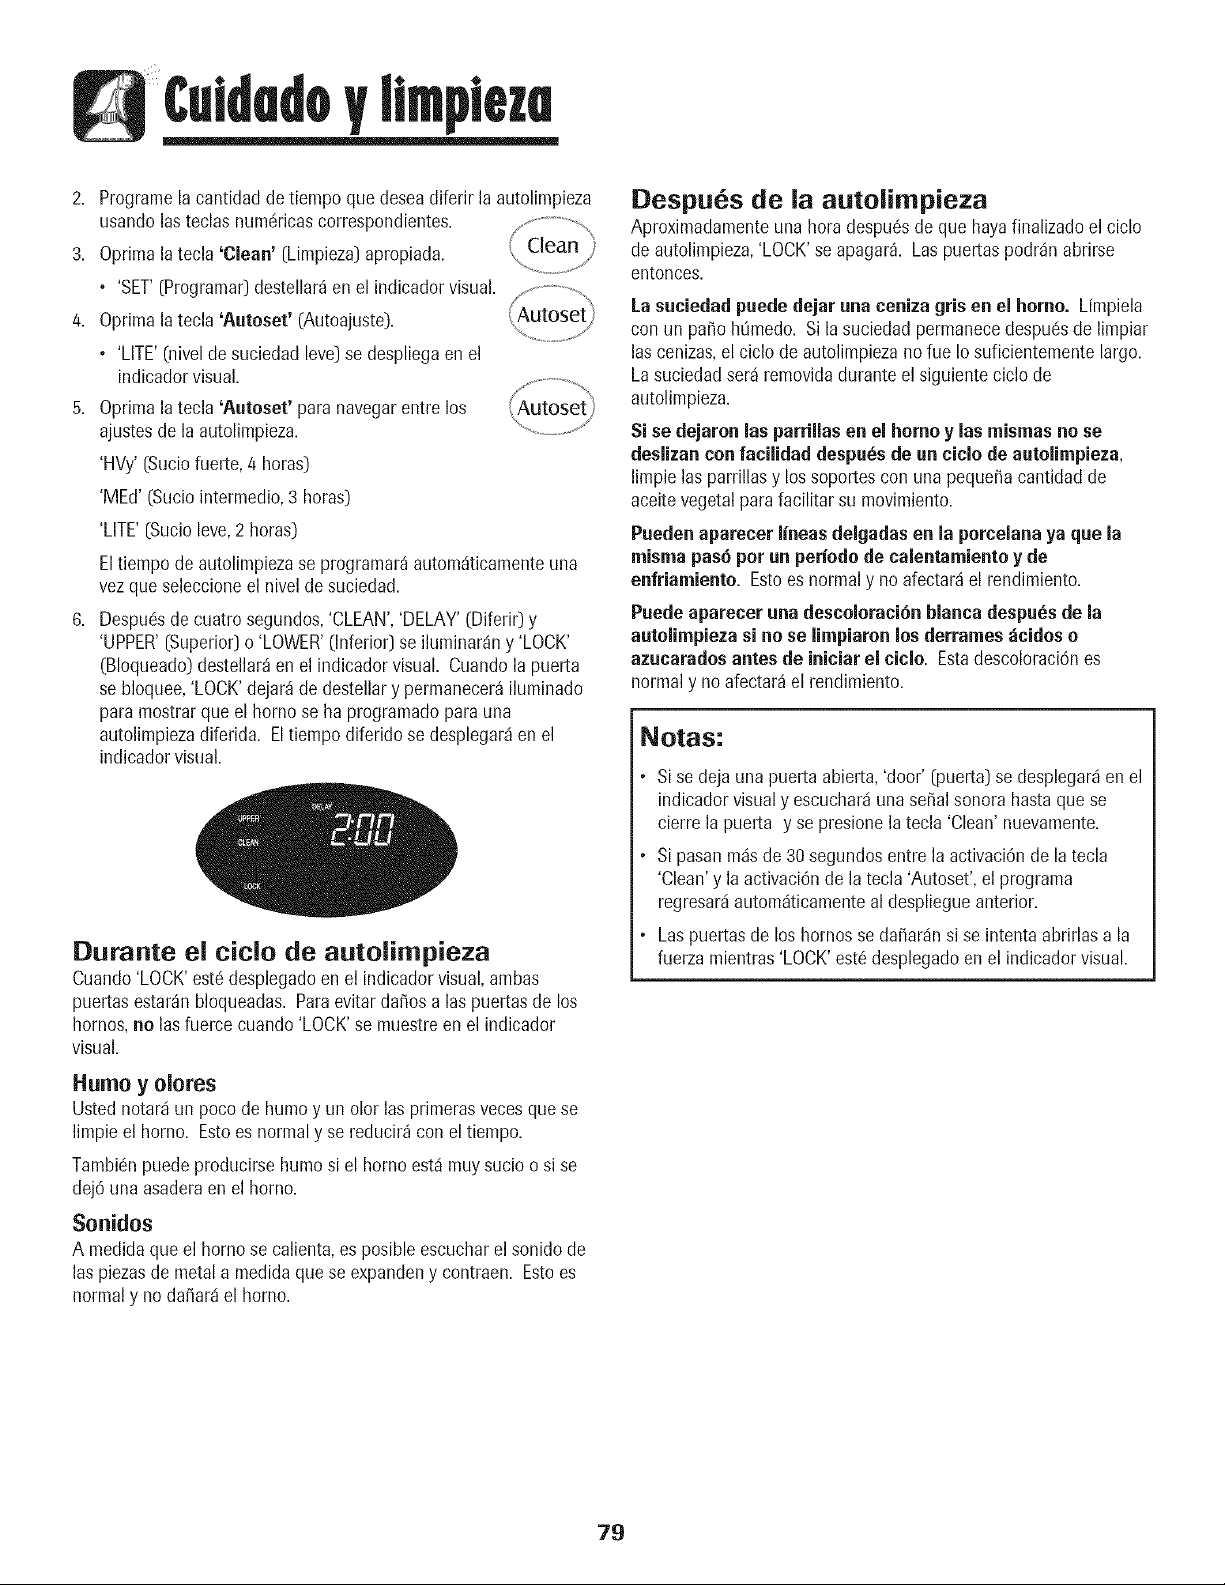
2. Programelacantidad de tiempo que deseadiferir la autolimpieza
usandolasteclas num6ricascorrespondientes.
3. Oprimalatecla 'Clean' (Limpieza)apropiada.
• 'SET'(Programar)destellar_enel indicadorvisual.........................
4. Oprimalatecla 'Autoset' (Autoajuste). (Autoset
• 'LITE'(nivelde suciedadleve)se despliegaen el
indicadorvisual.
5. Optimalatecla 'Auteset' para navegarentre los
ajustesde la autolimpieza.
'HVy' (Sucio fuerte,4 horas)
'MEd' (Suciointermedio,3 horas)
'LITE'(Sucioleve,2 horas)
Eltiempo de autolimpiezase programar_autom_iticamenteuna
vezque seleccioneel nivel de suciedad.
6. Despu6sde cuatrosegundos,'CLEAN','DELAY'(Diferi0 y
'UPPER'(Superior]o 'LOWER'(Inferior] se ihminar_n y 'LOCK'
(Bloqueado)destellar_en el indicador visual. Cuandola puerta
se bloquee,'LOCK'dejar_de destellary permaneeer_iluminado
paramostrarque el homo se ha programadopara una
autolimpiezadiferida. El tiempo diferido se desplegar_en el
indicadorvisual.
Durante el title de autolimpieza
Cuando'LOCK'est6desplegadoen el indicadorvisual,arnbas
puertasestar_nbloqueadas. Paraevitar da_osa las puertasde los
homes,ne las fuercecuando 'LOCK'se muestreen el indicador
visual.
Humo y olores
Usted notary1un poco de humo y un olor las primerasvecesque se
limpie el homo. Estoes normaly se reducir_ con el tiempo.
Tambic!npuedeproducirsehumosi el homo est,1muysucioo si se
dej6 unaasaderaen el homo.
Sonidos
A medidaque el hornose calienta,es posible escucharel sonido de
las piezasde metala medidaque se expandeny contraen. Estoes
normaly no da_ar_iel homo.
Despu6s de la autolimpieza
Aproximadamenteunahera despu6sde que hayafinalizadoel ciclo
de autolimpieza,'LOCK'se apagar& Las puertaspodr_n abrirse
entonoes.
La suciedad puede dejar una ceniza gris en el home. Lfmpiela
con un pa_oh_medo. Si la suciedadpermanecedespu_sde limpiar
las cenizas,el ciclo de autolimpiezano fue Iosuficientementelargo.
Lasuciedadser_iremovidadurante el siguienteciclo de
autolimpieza.
Si se dejaren las parrillasen el home y las mismas no se
deslizan confacilidad despu_sde an cicle de autelimpieza,
limpie las parrillasy los soportescon una peque_acantidadde
aceitevegetalparafacilitar su movimiento.
Pueden aparecer lineas delgadas en la percelana ya que la
misma pas6 per un periede de calentamiente y de
enfriamiente. Estoes normaly no afectar_el rendimiento.
Puede aparecer una desceleraci6n blanca despu_sde la
auteiimpieza si no se limpiaren los derrames _cides e
azucarades antes de iniciarel cicle. Estadescoloraci6nes
normaly no afectar_el rendimiento.
Notas:
Si se dejauna puertaabierta, 'door' [puerta) se desplegar_en el
indicadorvisualy escuchar_iunasepalsonora hastaque se
cierre la puerta y se presionela tecla 'Clean' nuevamente.
Si pasanm_s de 30 segundosentre la activaci6nde la tecla
'Clean'y laactivaci6nde la tecla 'Autoset',el programa
regresar_iautom_ticamenteal despliegueanterior.
Laspuertasde los hornosse da_ar_nsi se intentaabrirlas a la
fuerzamientras'LOCK'est6 desplegadoen el indicador visual.
79
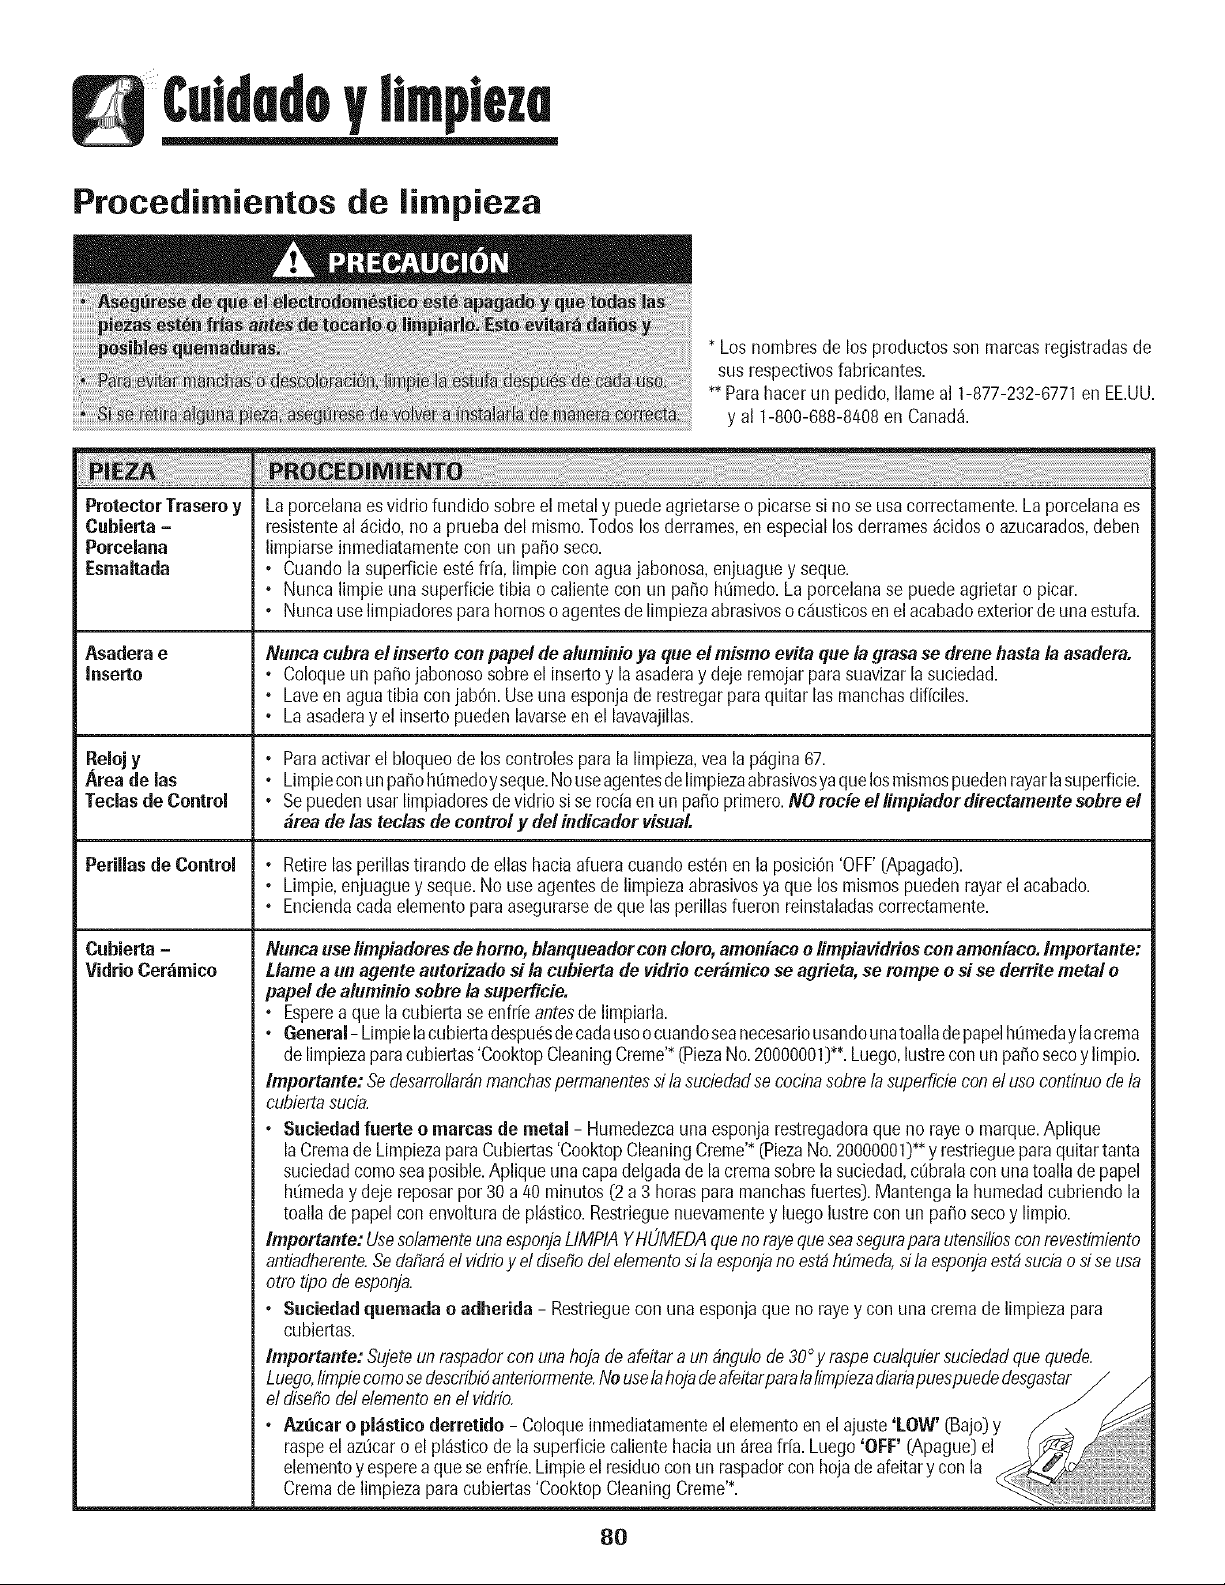
Hmpleze
Procedimientos de limpieza
* Losnombresde los productosson marcasregistradasde
sus respect[yesfabricantes.
**Parahacer un pedido,Ilameal 1-877-232-6771en EE.UU.
y al 1-800-688-8/408en Canad&
ProtectorTrasero y
Cubierta -
Porceiana
Esrnaltada
Asadera e
Inserto
Relojy
Area de las
Teclasde Control
Perillasde Control
Cubierta =
Vidrio Cer_mico
Laporcelanaesvidriofundido sobreel metaly puedeagrietarseo picarsesi no se usacorrectamente.Laporcelanaes
resistenteal _icido,no a pruebadel mismo.Todoslos derrames,en especiallosderrames_cidoso azucarados,deben
limpiarseinmediatamentecon un paso seco.
• Cuandola superficieest6frfa, limpiecon aguajabonosa,enjuaguey seque.
• Nunca limpie unasuperficietibia o caliente con un paso ht3medo.La porcelanase puedeagrietar o picar.
• Nunca uselimpiadoresparahornosoagentesde limpiezaabrasivosoc_iusticosenelacabadoexteriordeunaestufa.
Nunca cubra el insertecon papel de alum[hieya queel mismoevita que la grasa se drenehastala asadera.
• Coloqueunpaso jabonososobreel insertoy la asaderay deje remojarparasuavizarlasuciedad.
• Laveen aguatibia con jab6n.Useuna esponjade restregarparaquitar las manchasdiffciles.
• La asaderay el insertopuedenlavarseenel lavavajillas.
• Paraactivarel bloqueode loscontrolespara la limpieza,vea lap_gina67.
• Limpieconunpaffoh0medoyseque.Nouseagentesdelimpiezaabrasivosyaquelosmismospuedenrayarlasuperficie.
• Se puedenusarlimpiadoresdevidrio si se roda en un paffoprimero.NO retie ellimpiader directamentesebre el
#tea de las teclasde controly del indicader visual.
• Retire lasperillastirando deelias haciaafueracuandoest6nenla posiciOn'OFF'[Apagado).
• Limpie,enjuaguey seque.No useagentesde limpiezaabrasivosyaque los mismospueden rayarel acabado.
• Enciendacadaelementoparaasegurarsede quelas perillasfueron reinstaladascorrectamente.
Nuncauselimp[adoresdehomo,blanqueadorcon clero,amoniace elimpiavidriesconamen[ace./mportante:
Llamea unagente auterizadesi la cubierta de vidrie cerbmicese agrieta,se tempe e sl se derrite metal e
papel de alumhdo sobre la superficie.
• Esperea que la cubiertaseenfrfeantesde limpiarla.
• General- Limpielacubiertadespuc!sdecadausoocuandoseanecesariousandounatoalladepapelht_meday lacrema
de limpiezaparacubiertas'CooktopCleaningCreme'*(PiezaNo.20000001)*'.Luego,lustreconunpasosecoy limpio.
Importante: Sedesarrollar#nrnanchaspermanentessi lasuciedadse cocinasobrela supefficieconel usocontinuode la
cubiertasucia.
• $uciedad fuerte o marcasde metal - Humedezcauna esponjarestregadoraqueno rayeo marque.Aplique
laCremade LimpiezaparaCubiertas'CooktopCleaningCreme'*(PiezaNo.20000001)'*y restriegueparaquitartanta
suciedadcomoseaposible.Aplique unacapadelgadadela cremasobrela suciedad,ct3bralacon unatoalla depapel
hOmeday dejereposarpor 30 a 40minutos(2 a 3 horaspara manchasfuertes).Mantenga lahumedadcubriendola
toalla depapelcon envolturade pl_stico.Restrieguenuevamentey luegolustrecon un pasoseco y limpio.
Importante: UsesolamenteunaesponjaLIMPIAYHOMEDAqueno ravequeseaseguraparautensiliosconrevestimiento
antiadherente.Sedaflar#elvidrioy el disefiodelelementosila esponjano est#h#rneda,sila esponjaest#suciao sise usa
otro tipode esponja.
• Suciedad quernada o adherida - Restrieguecon una esponjaque no rayey con una cremade limpiezapara
cubiertas.
Impertante: Sujeteun raspadorconuna hoja deafeitaraun#ngulode30°y raspecualquiersuciedadquequede.
Luego,limpiecomosedescribidanteriormente.NouselahojadeafeitarparalaIimpiezadiariapuespuededesgastar J /
eldisefiodelelementoen el vidrio. / /
• Azacar o pl_sticoderretido - Coloqueinmediatamenteel elementoenel ajuste'LOW' (Bajo)y
raspeel azL_caro el pl_isticode lasuperficiecaliente haciaun _reafrfa.Luego'OR:' (Apague)el
elementoy espereaquese enfrfe.Limpieel residuoconun raspadorcon hojade afeitary con la
Cremade limpiezaparacubiertas'CooktopCleaningCreme'* :_:::_:_"._/_J_ii_:
8O
Hmpleze
Ventanillasy
de Puertaslos
Hornos =Vidrio
Eviteusar cantidadesexcesivasde agua,ya que puedeescurrirsedebajo o detr_isdel vidrio y mancharlo.
Lavecon aguay jab6n. Enjuaguecon agua limpia y seque. Sepueden usar limpiadoresde vidrio si se redan enun
paso primero.
No use materialesabrasivostales como esponjasde restregar,lanadeacero o limpiadoresen polvoya que los
mismosrayar_inel vidrio.
o
interior del Homo , Sigalas instruccionesen las p_iginas78y 79 paraprogramarun ciclo de autolimpieza.
Parrillas del Homo • Lavecon aguajabonosa.
, Limpie lasmanchasdificilescon un limpiadoren polvoocon unaesponjade restregarjabonosa.Enjuaguey seque.
, Lasparrillasse descolorar_npermanentementey puedeque no se deslicenbien si se dejanenel homo duranteun
ciclo deautolimpieza.Si estosucede,limpieel borde de laparrillay elsoportecon unapeque_acantidaddeaceite
vegetalpararestaurarla facilidad de movimiento.Limpieel excesode aceite.
Aeero InoxidabJe
(modelosselectos)
Manijas de las
Puertas, PaneJes
Laterales -
EsmaJte Pintado
o
o
o
o
NO USEN/NG(IN PRODUCTODE L/MPIEZA OUE CONTENGABLANOUEADORA BASEDE CLORO.
NO USELIMPIADORESABRASIVOSO DE NARANJA.
SIEMPRELIMPIE LAS SUPERFICIESDE ACEROA FAVORDEL GRANO.
Limpieza diaria/Suciedad love - Limpie con uno de los siguientes- aguacon jab6n, una soluci6nde aguay
vinagre blanco,limpiador parasuperficiesy vidrio 'Formula409'*oun limpiadorparavidrio similar - usandouna
esponjaoun paso suave.Enjuaguey seque.Parapuliry evitarmarcasdelos dodos,useel producto 'StainlessSteel
Magic Spray'*(PiezaNO20000008)**.
Suciedad rnoaerada/Manchas rebeldes = Limpiecon uric de los siguientes- 'Bon Ami', 'SmartCleanser'o 'Soft
Scrub'*- sandouna esponjahOmedao un paso suave.Enjuaguey seque.Lasmanchasdiffcilespuedenser quitadas
con una esponja'Scotch-Brite'*h_medafrotando a favor del grano.Enjuaguey seque. Pararestaurarel lustrey
sacarlasvetas,aplique 'StainlessSteelMagic Spray'*.
Deseoloraci6n- Usandouna esponjamojadaoun pasosuave,limpiecon limpiadorparaacero inoxidable'Cameo
StainlessSteelCleaner'*.Enjuagueinmediatamentey seque.Parasacar las marcasy restaurarel lustre,utilice
'StainlessSteel Magic Spray'*.
o
o
Cuandola superficie est6if[a, limpiecon agua jabonosatibia, enjuaguey seque.Nunca limpie unasuperficietibia
o calientecon un paso hOmedoya que se puede da_ar la superficiey causarquemaduraspervapor.
Paramanchasdificiles, use un agentede limpiezaabrasivosuavetal comocremade bicarbonatede sodio o 'Bon
Ami'*. No useagentesde limpiezaabrasives,c_usticoso _sperostalescomo lasesponjasde lanade aceroo los
limpiadoresde hornos.Estosproductosraspar_no da_ar_inpermanentementela superficie.
Importante:Useuna toalla opa#o hgmedopara limpiar derrames,especialmente silos mismos son bcidos
o azucarados. Lasuperficie puede descolorarse u opacarse si no se limpian inmediatamente. Esto es
especialmente importante para las superficies blancas.
* Los hombresde los productos son marcas registradas de sus respectivos fabricantes.
** Parahacer un pedido directo, Ilameal 1-877-232-6771 en EE.UU.y al 1-800-688-8408en Canad&
81
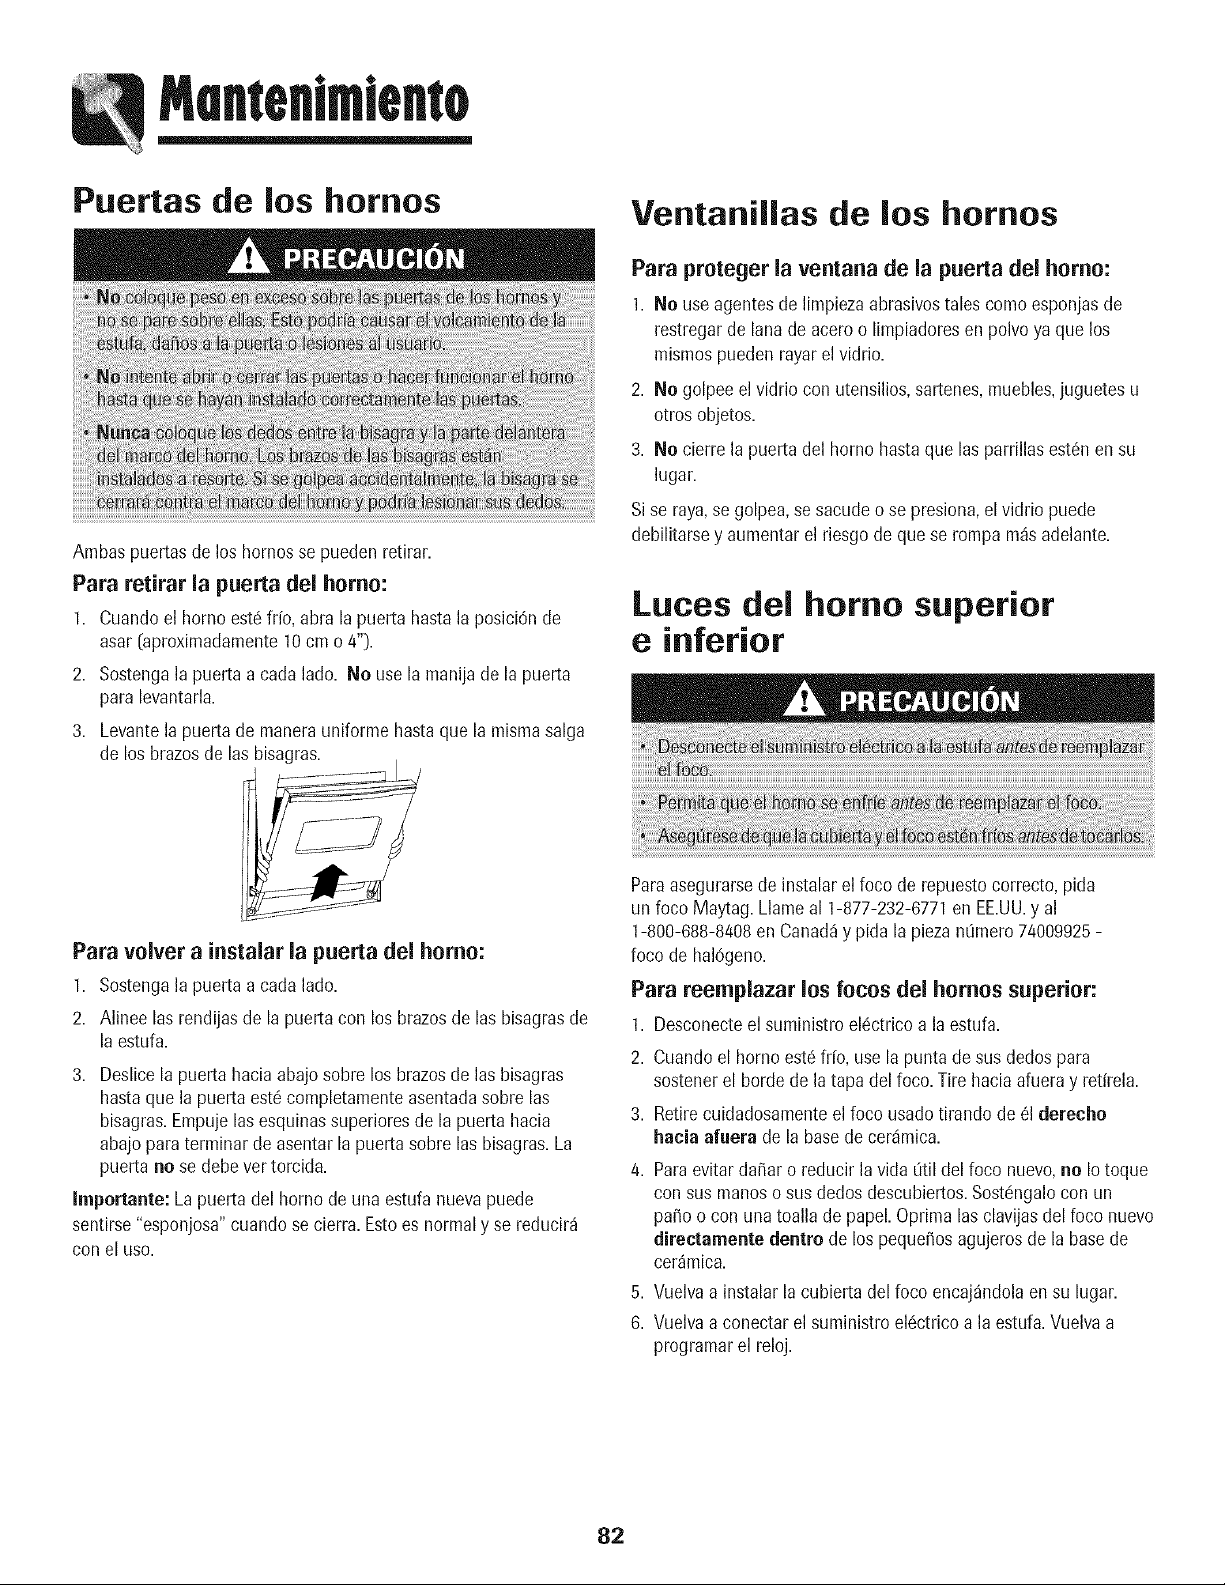
Memenimlemo
Puertas de los homes
Ambaspuertasde los hornosse pueden retirar.
Para retirar la puerta del home:
1. Cuandoel borne est_ frio, abra la puerta hasta la posici6nde
asar (aproximadamente10cm o 4").
2. Sostengala puerta a cadalade. No usela manija de la puerta
paralevantarla.
3. Levantela puertade manerauniforme hastaque la mismasalga
de los brazesde las bisagras.
Ventanillas de los homes
Para proteger la ventana de la puerta del home:
11No useagentes de limpiezaabrasivestalescomeesponjasde
restregarde lanade aceroo limpiadoresen polvo ya que los
mismospuedenrayarel vidrio.
2. No golpee el vidrio con utensilios,sartenes,muebles,juguetesu
otros objetos.
3. No cierre la puertadel homo hasta que lasparrillas est6n en su
lugar.
Sise raya,se golpea,se sacude o se presiona,el vidrio puede
debilitarsey aumentarel riesgode que se rompam_sadelante.
Lutes del homo superior
e inferior
Para velvet a instalar la puerta del homo:
1. Sostengala puerta a carlalade.
2. Alinee las rendijasde la puerta con los brazesde las bisagrasde
la estufa.
3. Deslicela puerta haciaabajosobre los brazesde las bisagras
hastaque la puerta est6comp[etamenteasentadasobre las
bisagras.Empujelas esquinassuperioresde la puerta hacia
abajoparaterminarde asentar lapuerta sobre las bisagras.La
puerta nose debever torcida.
Importante: Lapuerta del homo deuna estufa nuevapuede
sentirse"esponjosa"cuando secierra. Estoes normaly se reducir_
con e[ use.
Paraasegurarsede instalarel foco de repuestocorrecto,pida
un foco Maytag.Llameal 1-877-232-8771en EE.UU.y al
1-800-888-8408enCanaday pida la piezan0mero74009925-
foco de halOgeno.
Para reemplazar los feces del homes superior:
1. Desconecteel suministroel_ctricoa la estufa.
2. Cuandoel homo estc!if[o, usela punta de sus dodos para
sostenerel horde de la tapa del foco.Tire hacia afueray retireD.
3. Retirecuidadosamenteel foco usadotirando de 61derecho
hacia afuera de la basede cer4mica.
4. Paraevitar da_aro reducir la vida 0til del foco nuevo,no Iotoque
con susmaneso sus dodosdescubiertos.Sost6ngalocon un
pa_o o con unatoalla de papel.Optima las clavijasdel foco nuevo
directamente dentro de los peque_osagujerosde la basede
cer_mica.
5. Vuelvaa instalarla cubiertadel focoencaj_ndolaen su lugar.
6. Vuelvaa conectarel suministroeldctricoa la estufa.Vuelvaa
programarel reloj.
82
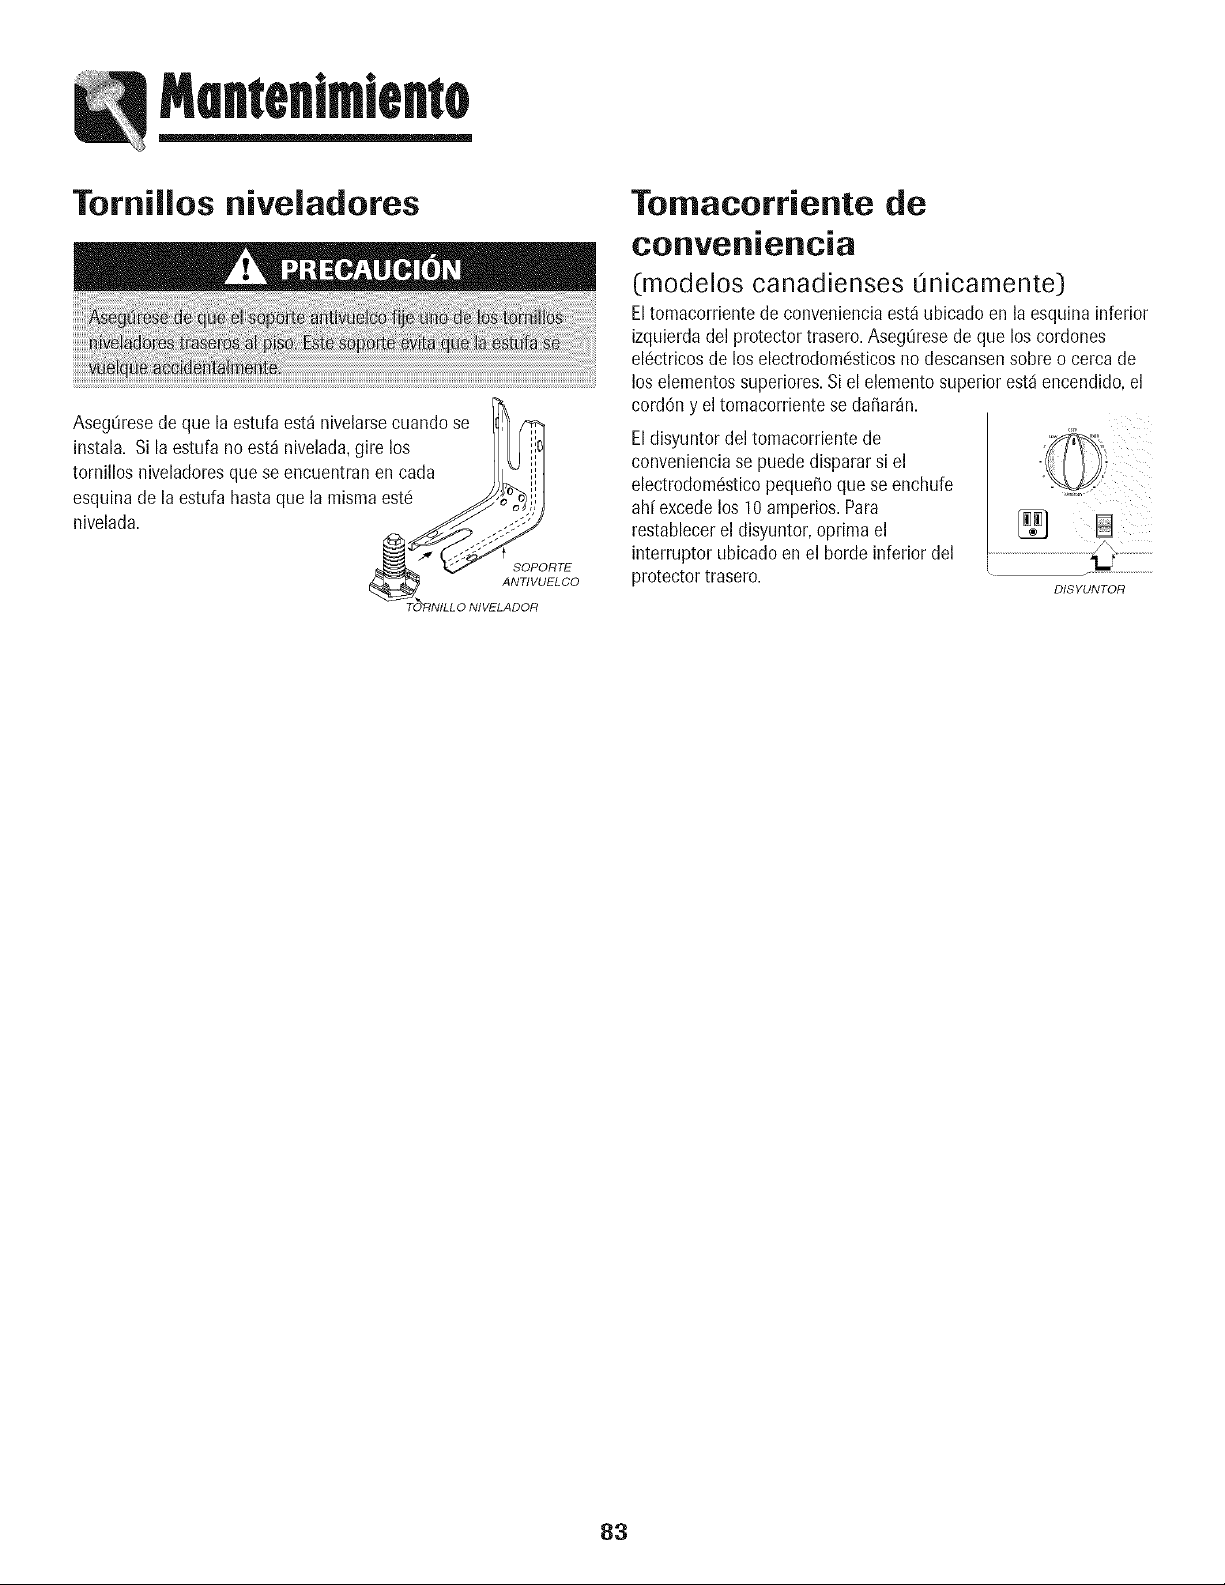
Mementmlemo
Tomillos niveladores
Asegt_resede que la estufaest4 nivelarsecuando se II/] ('_
instala. Si la estufa noest4 nivelada,gire los [ [[I I
tornillos niveladoresque seencuentran en cada J/J_ I
esquinade la estufa hastaque la mismaestc! _$_ o)/,l)
nivelada. /._/_ .;,;'-_
__oPonTE
ANTIVUEL CO
TO_RNILL O NIVELADOR
Tomacorriente de
conveniencia
(modelos canadienses t3nicamente)
Eltomacorrientede convenienciaest_ubicado en laesquina inferior
izquierdadel protectortrasero.Asegt_resede que loscordones
el(!ctricosde los electrodom_sticosnodescansensobre o cercade
los elementossuperiores.Si elelernentosuperiorest,1encendido,el
cord6n y eltomacorrientese da_ar_n.
Eldisyuntor deltomacorrientede
convenienciase puededispararsi el
electrodom6sticopequehoquese enchufe
ah[ excedelos 10amperios.Para
restablecerel disyuntor, optimael
interrupter ubicadoen el horde inferior del
protector trasero.
DISYUNTOR
83
soluclbndeeveries
Para la mayoria de Inssituaeienes, • Verifiquesi los controlesfueron programadoscorrectamente.
sign las siguientes sugereneias. , Verifique que el enchufeest6bien conectadoen el tomacorriente.
, Verifique o restablezcael disyuntor. Verifiqueo reemplaceel fusible.
, Verifique elsuministroel6ctrico.
Una parteo la totalidad del
eleetrodom6sticono funeiona.
La luz del homo y/o el reioj
nofuneionan.
Elreloj, Ins palabrasindicadorasy/o
las laces funcionan pete el homo
noealienta.
Losresultadosdel horneado no
son losesperadoso difieren de
losobtenidosen un homo usado.
Elalimento no hierve adecuadamente
o genera dernasiadohumo.
Elhomo no se autolimpia.
Elhomo no se limpi6 adeeuadamente.
° Verifique si los controles superiores y/o del horno fueron programados correctamente. Vea las
pdginas 62 y 68.
• Verifique si la puerta del homo se desbloque6 despu6s del ciclo de autolimpieza. Vea la p%ina
79.
• Verifique si el homo fue programado para un ciclo de cocci6n o de autolimpieza diferido. Vea
las p_ginas 71 y 78.
• Verifique si el bloqueo de los controles est_ activado. Vea la pdgina 67.
. Verifique que el homo no est6 en Modo Sabdtico. Vea la p%ina 75.
• Elfoco puedeestarsuelto o da_ado.
• Laluz del homo nofunciona durante laautolimpieza.
• Elhomo puedeestaren Modo Sab_tico.Vea la p%ina 75.
° Elhomo puede estar programado para una funci6n de Cocinar y mantener caliente diferida.
° El bloqueo de los controles puede estar activado. Vea la pdgina 67.
o
o
o
AsegOresedeque el respiraderodel homo nohayasido bloqueado. Vea su ubicaci6n en la
pdgina76.
AsegOresedeque la estufa est6nivelada.
Frecuentemente,lastemperaturasvat(anentre un homo nuevoy uno usado.A medidaquese
usanlos hornos,latemperaturatiendea cambiary puedehacersem_scalienteom_sfrfa. Vea
en la pdgina75 las instruccionesparaajustarla temperaturadel homo. Importante: No se
recomiendaajustarla temperaturasi el problemaIo presentans61ouna o dos recetas.
• Verifique las posicionesde las parrillasdel homo. El alimento puedeestardemasiadocerca
del elemento.
• No se precalent6el elementode asar.
• Elpapelde aluminiose us6 demaneraincorrecta.Nunca cubra el insertode la asaderacon
papeldealuminio.
° La puerta del homo estuvocerradaduranteel asado. Dejela puerta abierta hastael primer
tope (aproximadamente10cm o 4")
° Recorteel excesode grasade la came antesde asarla.
° Se us6 una asaderasucia.
• Elvoltajede la casapuedeser bajo.
, Aseg_resede que no hayaprogramadoun ciclo de autolimpiezadiferido. Vea la p%ina 78.
° Verifique que lapuerta est6cerrada.
, Verifique queel homo no estden Modo sabdtico.Veala pdgina 75.
° El homo puede estarsobre los 400° C [204° C).Latemperaturadebeser menorde 400° F
(204° C) parapoderprogramarun ciclo de autolimpieza.
• Esposibleque se requieraun ciclo de autolimpiezam_slargo.
, Losderramesexcesivos,enespeciallosderramesazucaradosy/odcidos,no selimpiaronantes
del ciclo de autolimpieza.
84
La puerta del homo no se
desbloqueadespu_s
del ciclo de autolimpieza.
La superfieie lisa muestra
desgaste.
La humedadse acumula en
la ventanilla del homo o sale vapor
del respiraderodel homo.
Se pereibe unfuerte olor o un hurno
leve cuandose enciende el homo.
C6digosde fallas
Se eseuchanruidos.
No se escuchanse_ales sonorasy
el indicadorvisual estd apagado.
iii¸!i1i i ! !i!i i ! iii ! i i i i i i i i i i i! i i i i i ! i!i!i!i!i!i!i!i!ii! i ii ii ii ii ii ii ii ii ii ii ii ii ii ii ii ii ii ii ii ii ii ii ii ii ii ii ii ii ii ii ii i i iiiiiii i i i i iiiiiiiiiii!i! ! !i! ! !i! i !i!i!i!i!i!i!i!i!i!i!i!i!i!i!i!i!i!i!i!i!i!i!i!i!i!i!i!i!i!i!i i!iii!ii !i ! i ii i ii ii iiiiiiiiiiiiiiiiiiiiii!!ii!!ii!!iiiiiiiiiiiiiiiiiiiiiiiiiiiiiiiiiiiiii i i i i i i i i i!i!i!i!i!i!i!i!i!i i iiiiiiiiiiiiiiiiiiiiiiiiiiiiiiiiiiiiiiiiiiiiiiiiiiiiiiiiiiiiiiiiiiiiiiiiiiiiiiii!i! i !i! i !i! i !i!i!i!i!i!i!i!i!i!i!i!i!i!i!i!i!i!i!ii !i !iii ii iiiiiiiiiii!i i! !i i! !i i! ii iiiiiiiiiiiiiiiiiiiiiiiiii i i iii ii ii ii !i ! !ill! !i i !i i i i i i i i i i i i i i i i ii iii
• Elinteriordelhomotodav[aest,1caliente.Espereaproximadamenteunahoraparaqueelhomo
se enfr[edespu6sde queelciclode autolimpiezahayafinalizado.Lapuerta puedeabrirseuna
vezque la luz indicadora'LOCK' (Bloqueado)nose muestreen el indicadorvisual.
, El control y las puertas puedenestarbloqueados.Vea la p_igina67.
1. Rayaduraso abrasionespequeffas.
• Aseg0resede quela cubiertay el fondo del utensilioest6nlimpios.No desliceutensiliosde
vidrio ni de metalsobre lacubierta. AsegOresede que fondo del utensiliono est6_spero.
Uselosagentes de limpiezarecomendados.Vea la p%ina 80.
2. Marcasde metal.
, No desliceutensiliosde metal sobrela cubierta. Cuandoest6fria, limpie la cubierta
con una cremade limpiezapara cubiertas.Vea la p4gina80.
3. Vetas y manchasmarrones.
• Limpie losderramesinmediatamente.Nunca limpie la cubiertacon una esponjao paffo
sucio.Aseg0resede que la cubierta y el fondo del utensilioest6nlimpios.
4. Areas con un brillo met_lico.
• Dep6sitosmineralesdel agua y del alimento.Uselos agentesde limpiezarecomendados.
Veala p%ina 80.
5. Picaduraso escamas.
° Limpie losderramesazucaradosinmediatamente.Vea la p_igina80.
• Estoes normalcuando se cocinanalimentoscon alto contenidode humedad.
• Se us0 humedadexcesivacuandose limpi6 laventana.
• Estoes normalen unaestufa nuevay desaparecer_idespu6sde variosusos. Un ciclo de
autolimpiezanuevo"quemar_i"los oloresm_isr_ipidamente.
° Si enciendeun ventilador ayudar_a eliminar el humo y/u olor.
• Haysuciedaddealimentosexcesivaen laparteinferiordel homo. Useunciclodeautolimpieza.
• 'BAKE'(Hornea0o 'LOCK'puedendestellarr_ipidamenteen el indicadorvisualparaadvertirle
dealgQnerror o problema. Si 'BAKE'(Hornea0o 'LOCK' (Bloqueado)se iluminan en el
indicadorvisual,optima la tecla 'CANCEL'[Anular].Si 'BAKE'(Hornear]o 'LOCK'continOan
destellando,desenchufeel electrodom(gstico.Esperevarios minutosy vuelvaa enchufarlo.
Si aOnas[estas lucescontinQandestellando,desenchufeel electrodomc!sticoy Ilamea un
t_cnico de servicioautorizado.
° Si el homo est_ demasiadosucio,las Ilamaradasexcesivaspuedencausarun cOdigode error
durante laautolimpieza.Oprima latecla 'CANCEl,' y esperea que el homo se enfrie
completamente.Limpie la suciedadexcesivay vuelvaa iniciar el ciclo de autolimpieza.Si el
c?)digodefalla vuelvea aparecer,pOngaseencontactocon unt6cnico deservicioautorizado.
° El homo hacevariosruidosde bajo nivel. Esposibleque puedaescucharlos rel6sdel homo
cuandose enciendeny se apagan.Estoes normal.
• A medidaque el homo se calientay se enfr[a,es posibleescucharel sonido de las piezasde
metala medidaque se expandeny contraen.Estoes normaly no da_ar_elelectrodom6stico.
, El homo puedeestaren Modo sab_itico.Vea la p%ina 75.
85

86
LA 0NICA Y EXCLUSIVASOLUCIONPARAEL
CLIENTEBAJOESTAGARANT[ALIMITADAES
LA REPARACIONDELPRODUCTOSEGUNSE
INDICAAQU[.LAS GARANTiASIMPLiCITAS,
INCLUYENDOLASGARANT[ASDE
COMERCIALIZACION0 DEAPTITUDPARAUN
PROPOSITOEN PARTICULARESTAN
LIMITADASA UN ANO 0 AL PER[ODODE
TEMPOMiNIMO PERMITIDOPORLA LEY.
MAYTAGCORPORATIONNOSERA
RESPONSABLEDEDANOSINCIDENTALES0
CONSECUENTES.ALGUNOSESTADOSY
PROVlNClASNO PERMITENLA EXCLUSION0
LIMITACIONDEDANOSINCIDENTALES0
CONSECUENTES0 LA LIMITAClONDE LA
DURACIONDELAS GARANT[ASIMPL[CITASDE
COMERCIALIZACION0 APTITUD,PORLOQUE
ESTASEXCLUSIONES0 LIMITACIONES
PUEDENNOAPLICARSEENSU CASO.ESTA
GARANTiALE OTORGADERECHOSLEGALES
ESPEC[FICOS.USTEDTAMBIENPUEDETENER
OTROSDERECHOSQUEVAR[ANDEUN
ESTADOA OTRO0 DEUNA PROVlNCIAA
OTRA.
Lo que no cubren estas garantias
1. Situacionesy dafios resultantesde cualquierade las siguientessituaciones:
a. InstalaciOn,entregao mantenimientoinapropiados.
b. Cualquierreparaci6n,modificaciOn,alteraciOno ajuste no autorizadospot el
fabricanteo taller de servicioautorizado.
c. Mal uso,abuso,accidentes,uso no razonableo hechosfortuitos.
d. Corriente,voltaje,suministroel_ctrico o suministro de gas incorrectos.
e.Ajuste inadecuadode cualquier control.
2. Lasgarant[asquedan hulassi los n0merosde serieoriginales bansido retirados,
alteradoso no se puedendeterminarfdcilmente.
3. Bombillas,filtros de aguay filtros de aire.
4. Los productoscompradospara uso comercialo industrial.
5. Elcosto delservicio o Ilamadadeservicio para:
a. Corregirerroresde instalaci6n.Paralos productosque requieranventilaci6n,se
debenusar conductosde metal r[gido.
b. Instruir al usuarioen el uso adecuadodel producto.
c. Transportedel electrodomdsticoal establecimientode servicioy de regreso.
6. Cualquierpdrdidade alimentosdebido a fallas del refrigeradoro congelador.
7. Costosdeviaje y transporte de servicioen dreasremotas.
8. Estagarantfanose aplica fuera de los EstadosUnidosy Canad&POngaseen contacto
con su distribuidor paradeterminarsi se aplica cualquierotra garant[a.
9. Losdafios consecuenteso incidentalessufridos por cualquierpersonacomo resultado
del incumplimientode estagarant[a.Enalgunos estadosno se permite la exclusiono
limitaciOnde dafios consecuenteso incidentales,por Io tanto la limitaciOno exclusion
anterior puedeno aplicarseensu caso.
Si necesita servicio
Primerorevise la secciOnde IocalizaciOny soluciOnde aver[asen su gufade uso y cuidado
o Ilameal distribuidor dondeadquiri6el electrodomdstico.TambidnpuedeIlamara Maytag
Services,LLC,AtenciOnal cliente,al 1-800-688-9900en EE.UU.y al 1-800-688-2002en
Canaddpara ubicar a un agente deserviciocalificado.
• Aseg0resedeconservarel comprobantede compra para verificar el estadode la
garantia.Consultela secciOnsobre la GARANTiApara mayorinformaciOnsobre las
responsabilidadesdel propietarioparaobtener serviciobajola garantia.
• Si el distribuidor o la compafi[adeserviciono pueden resolverel problem& escriba a
Maytag Services,LLC, Attn: CAIR:_Center,P.O.Box 2370,Cleveland,TN 37320-2370o
Ilameal 1=800=688=9900en EE.UU.y al 1=800=688=2802en Canad&
° Lasgu[as del propietario,manualesde servicioe informaci6nsobre las piezaspueden
solicitarsea MaytagServices,LLC,AtenciOnal cliente.
NOtaS= =CuandoIlameo escribaacercade un problemade servicio,pot favor
incluya lasiguienteinformaciOn:
a. Suhombre,direcciOny n0mero deteldfono;
b. N0merode modeloy n0mero de serie;
c. Nombrey direcciOnde su distribuidor o tOcnicodeservicio;
d. UnadescripciOnclara del problemaque est_experimentando;
e. Comprobantede compra (recibo de compra).
Form No. A/05/06 Part No 8113P639-60 @2006 Maytag Appliances Sales Co All rights reserved. Litho USA