
Loading ...
Loading ...
UNPACKING
THE
PEDESTAL
Preparing
the
pedestal
for
installation
AWARNING
Excessive
Weight
Hazard
Use
two
or
more
people
to
move
and
install
pedestal.
Failure
to
do
so
can
result
in
back
or
other
injury.
IMPORTANT:
Set
the
pedestal
box
aside
for
use
during
installation.
(4
.
Empty
pedestal
drawer
Open
the
pedestal
contents.
The
package
contains
four
#12
x
3/4"
hex-head
sheet
metal
screws
and
a
drawer
divider.
Va
2.
Locate
spacer
pads
Spacer
pads
The
four
spacer
pads
are
installed
on
the
top
of
the
pedestal.
These
pads reduce
vibration
between
the
pedestal
and
the
washer/dryer.
NOTE:
If
your
washer/dryer
has
feet
installed,
remove
them.
Va
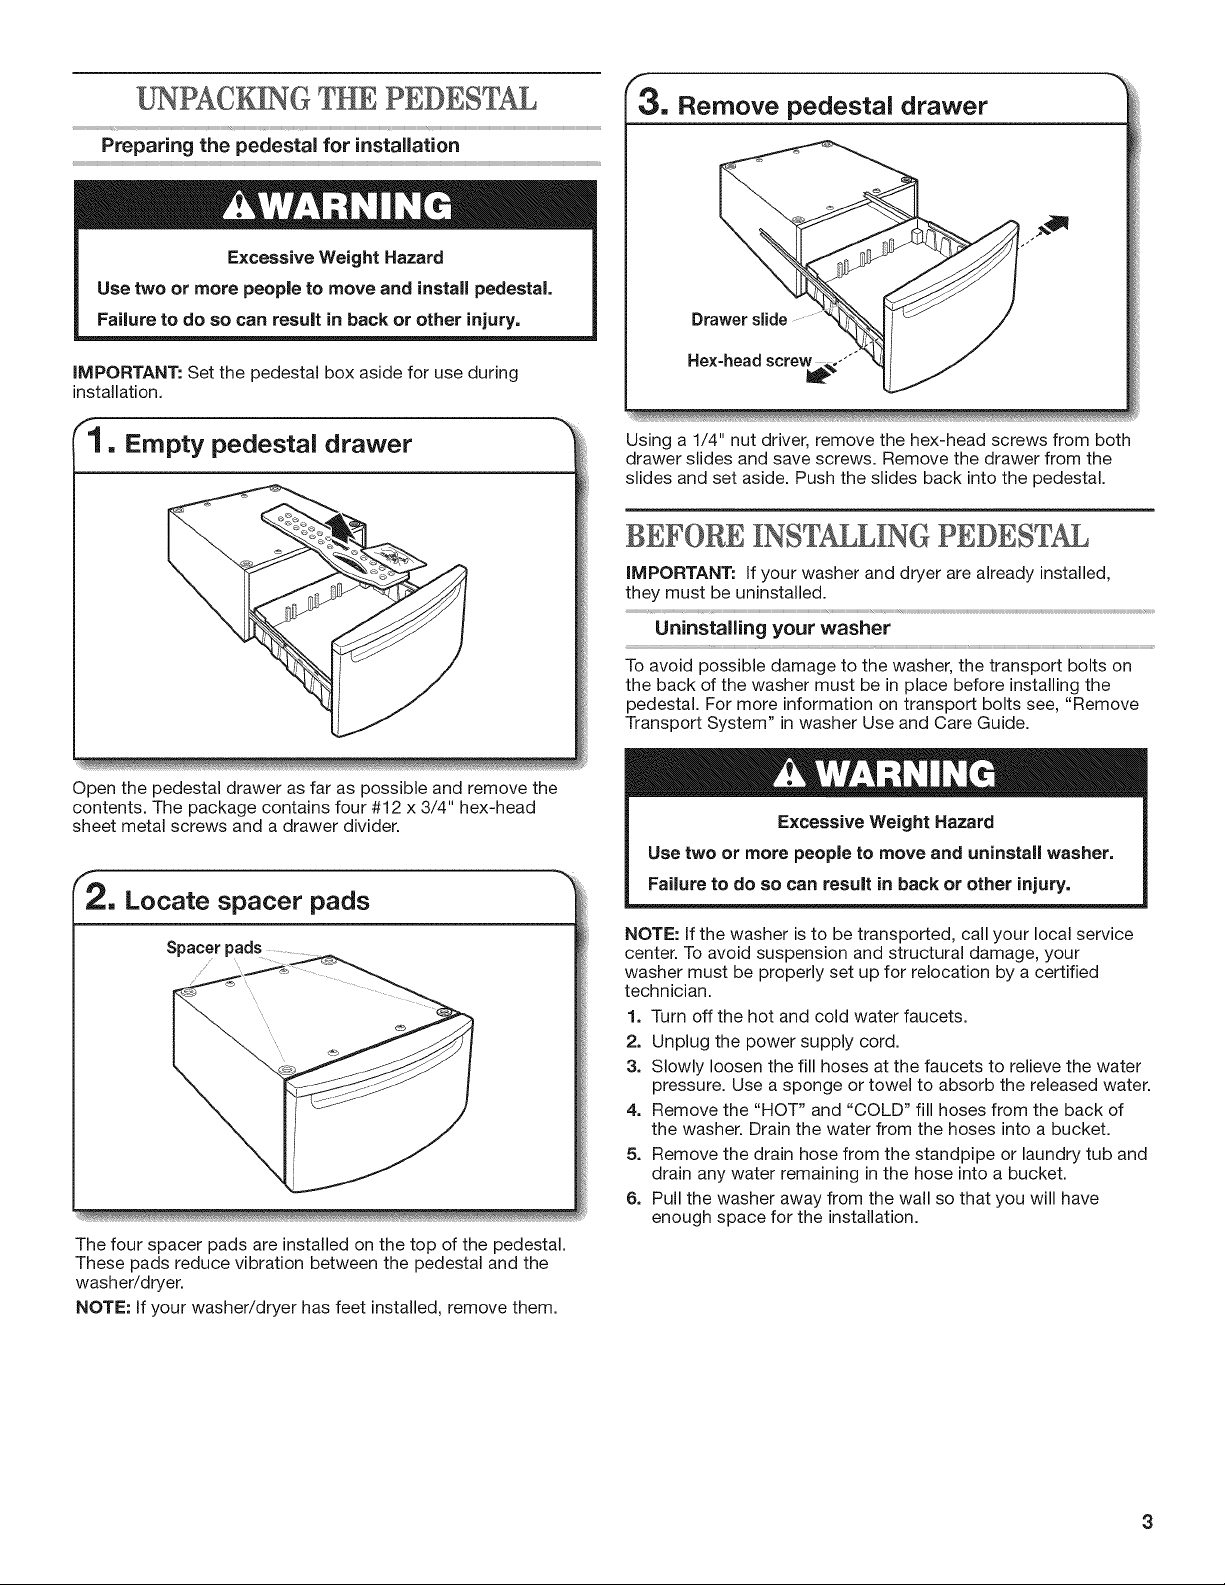
3.
Remove
pedestal
drawer
Hex-head
screw
oe
Using
a
1/4"
nut
driver,
remove
the
hex-head
screws
from
both
drawer
slides
and
save
screws.
Remove
the
drawer
from
the
slides
and
set
aside.
Push
the
slides
back
into
the
pedestal.
BEFORE
INSTALLING
PEDESTAL
IMPORTANT:
If
your
washer
and
dryer
are
already
installed,
they
must
be
uninstalled.
Uninstalling
your
washer
To
avoid
possible
damage
to
the
washer,
the
transport
bolts
on
the
back
of
the
washer
must
be
in
place
before
installing
the
pedestal.
For
more
information
on
transport
bolts see,
“Remove
Transport
System”
in
washer
Use
and
Care
Guide.
A
WARNING
Excessive
Weight
Hazard
Use
two
or
more
people
to
move
and
uninstall
washer.
Failure
to
do
so
can
result
in
back
or
other
injury.
NOTE:
If
the
washer
is
to
be
transported,
call
your
local
service
center.
To
avoid
suspension
and
structural
damage,
your
washer
must
be
properly
set
up
for
relocation
by
a
certified
technician.
1.
Turn
off
the hot
and
cold
water
faucets.
2.
Unplug
the
power
supply
cord.
3.
Slowly
loosen
the
fill
hoses
at
the
faucets
to
relieve
the
water
pressure.
Use
a
sponge
or
towel
to
absorb
the
released
water.
4,
Remove
the
“HOT”
and
“COLD”
fill
hoses
from
the
back
of
the
washer.
Drain
the
water
from
the
hoses
into
a
bucket.
5.
Remove
the
drain
hose
from
the
standpipe
or
laundry
tub
and
drain
any
water
remaining
in
the
hose
into
a
bucket.
6.
Pull
the
washer away
from
the
wall
so
that
you
will
have
enough
space
for
the
installation.
Loading ...
Loading ...
Loading ...