Loading ...
Loading ...
Loading ...
16 49-2000930 Rev. 0
Installation - UVC 9420
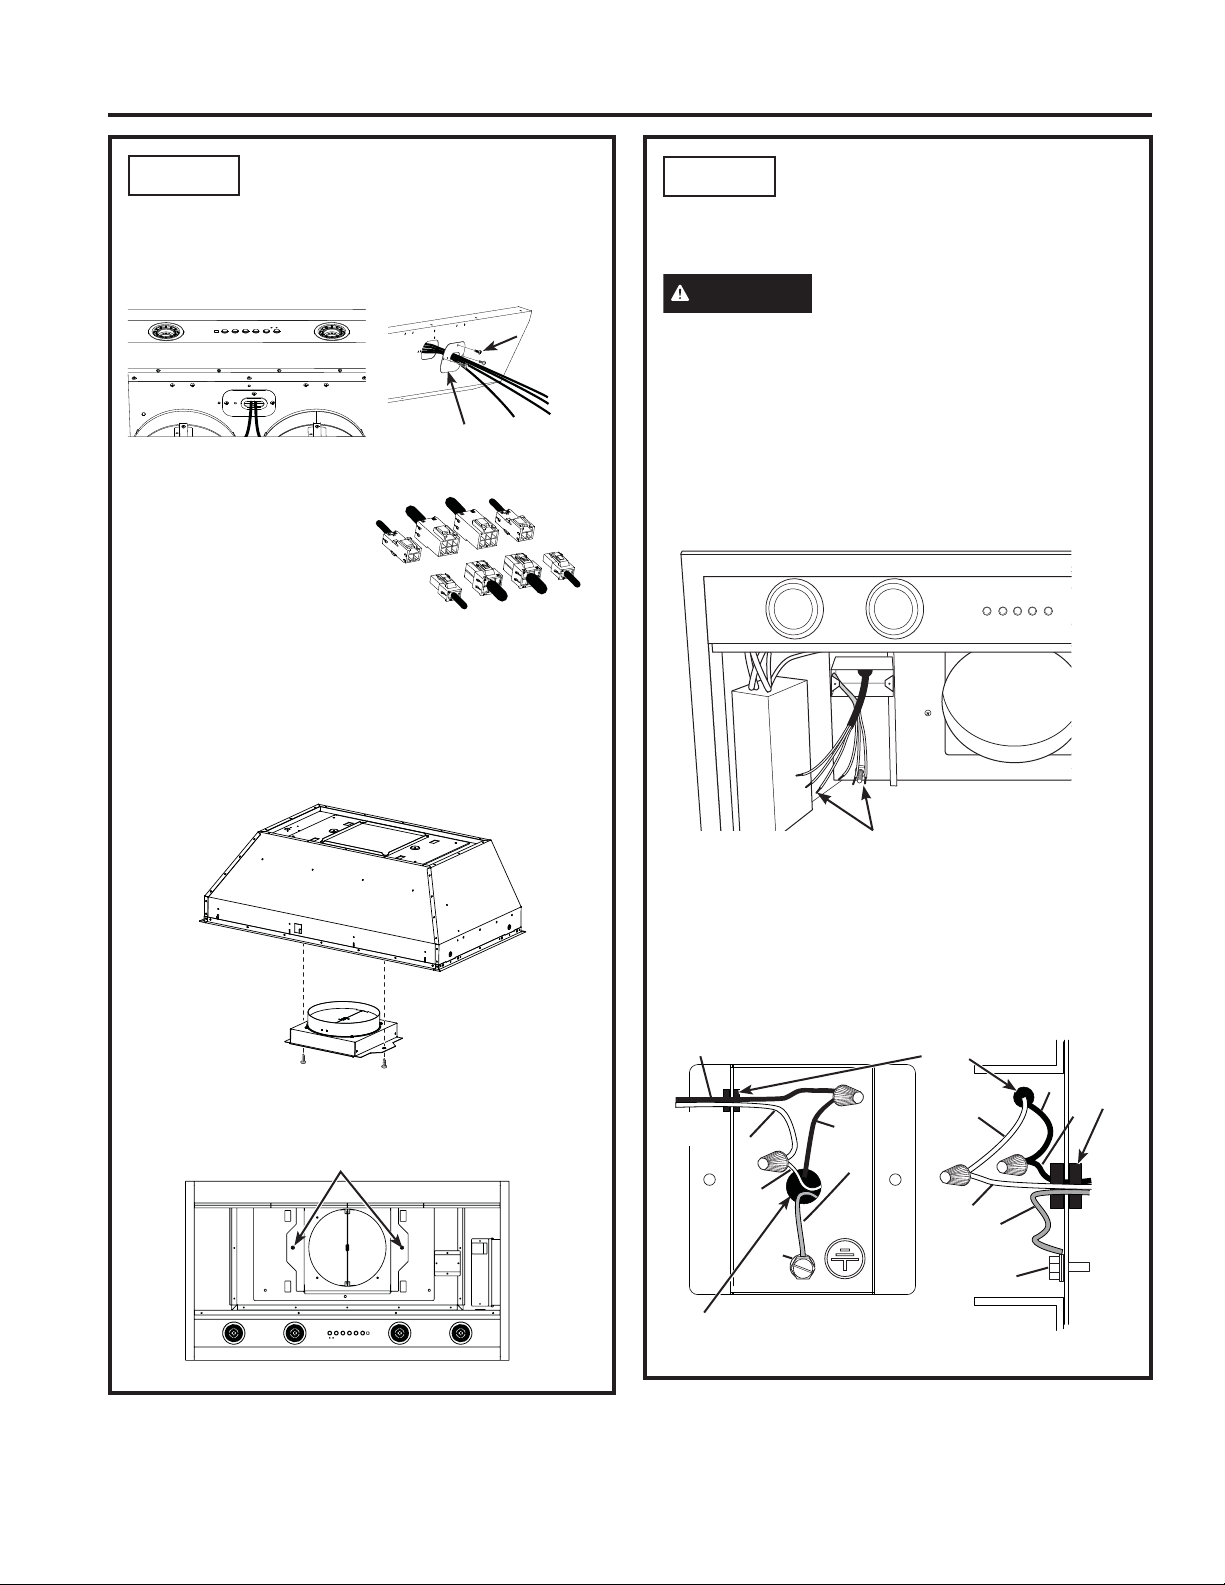
STEP 1
REMOVE MOTOR
ASSEMBLY FROM HOOD CANOPY
1. Remove the metal lid by removing the 3 screws
and allowing access to connectors.
2. Disconnect 2 motor
cable connectors and 2
capacitor connectors.
3. Remove the 4 screws
that attach the motor
assembly to the hood
canopy. Save the screws
for installation.
4. Remove the motor assembly from the hood
canopy by sliding it to release it from the
mounting tabs.
5. Install the damper into the bottom of the exhaust
fan opening using 2 screws provided (D).
a. Check to make sure the damper opens freely.
b. Tighten the 2 screws (D).
STEP 2
CONNECT ELECTRICAL
CABLES
Verify that power is turned off at the source.
WARNING
If house wiring is not 2-wire with
a ground wire, an electrician will need to convert
existing wiring to meet these specs. When house
wiring is aluminum, be sure to use U.L.-approved
anti-oxidant compound and aluminum-to-copper
connectors.
1. Pull power supply wires through wall of insert
canopy and attach the strain relief. Thread the
house wire through the junction box before the
canopy is inserted in the cabinet cutout.
2.
Attach the white lead of the power supply (A) to the
white lead of the range hood (D) with a wire nut.
Attach the black lead of the power supply (B) to the
black lead of the range hood (C) with a wire nut.
Connect the power supply ground wire lead (E) to
the ground screw (F).
Strain
Relief
Hood
Wiring
A
A
D
D
E
E
B
B
F
F
C
C
Power
Supply
Strain
Relief
Strain
Relief
INSTALLATION
Wires
Metal Lid
Screws
Connectors on
Hood Side
Connectors on
Motor Side
Screws
Loading ...
Loading ...
Loading ...