Loading ...
Loading ...
Loading ...
Ice ,Service
Automatic Icemaker
(on icemaker-equipped models)
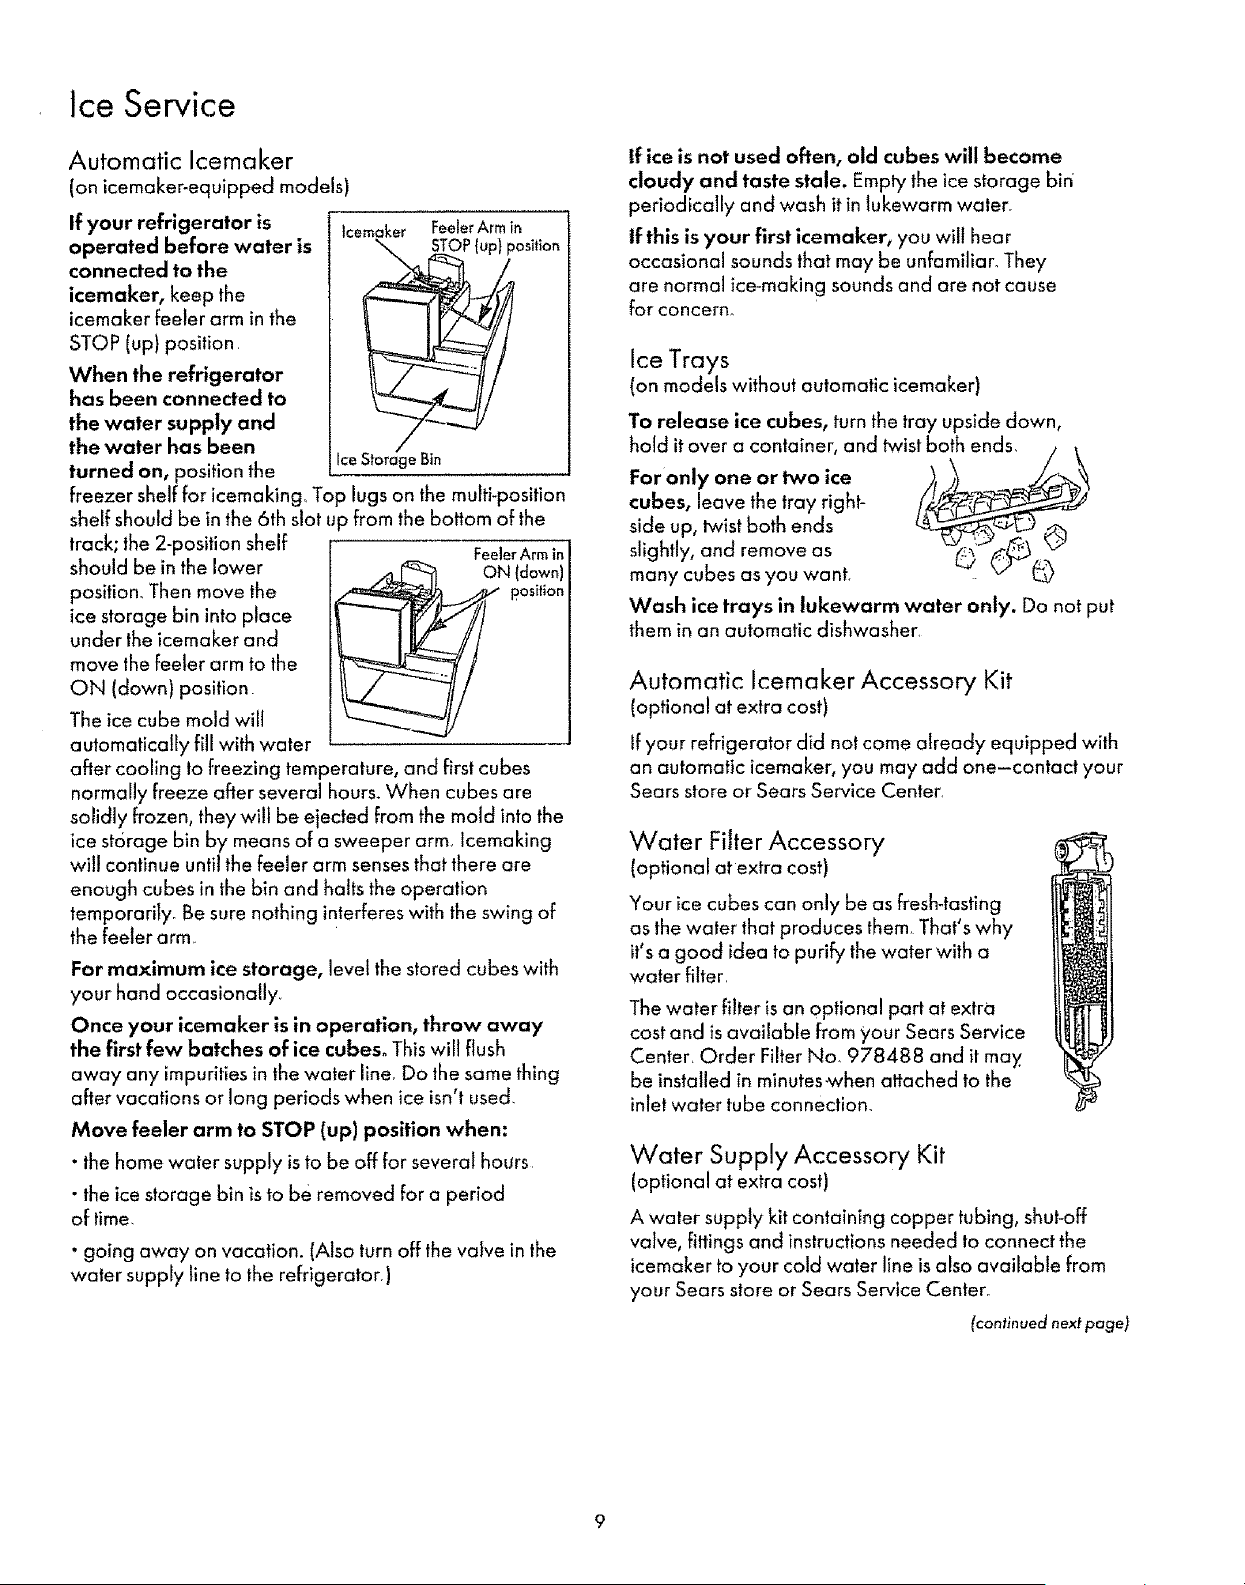
If your refrigerator is
operated before water is
connected to the
icemaker, keep the
icemaker feeler arm in the
STOP [up) position
When the refrigerator
has been connected to
the water supply and
the water has been
turned on, position the
tcemaker Feeler Arm in
o_itian
Ice Storage Bin
freezer shelf for icemaking_ Top lugs on the multi-position
shelf should be in the 6th slot u _ from the bottom of the
track; the 2-position shelf
should be in the lower
position. Then move the
ice storage bin into place
under the icemaker and
move the feeler arm to the
ON (down) position
The ice cube mold wilt
automatically fill with water
Feeler Arm in
after cooling to freezing temperature, and first cubes
normally freeze after several hours. When cubes are
solidly frozen, they will be ejected from the mold into the
ice st6rage bin by means of a sweeper arm Icemaking
wil! continue until the feeler arm senses that there are
enough cubes in the bin and halts the operation
temporarity. Be sure nothing interferes with the swing of
the feeler arm
For maximum ice storage, level the stored cubes with
your hand occasionally
Once your icemaker is in operation, throw away
the first few batches of ice cubes° This will flush
away any impuritiesin the water line Do the same thing
after vacations or long periods when ice isn't used
Move feeler arm to STOP (up) position when:
• the home water supply is to be off for several hmJrs
• the ice storage bin is to be removed for a period
of time
. going away on vacation. (Also turn off the vofve in the
water supply line to the refrigerator,)
If ice is not used often, old cubes will become
cloudy and taste stale. Empty the ice storage bin
periodically and wash it in lukewarm water
If this is your first icemaker, you wilt hear
occasional sounds that may be unfamiliar. They
are normal ice-making sounds and are not cause
for Concern°
Ice Trays
(on models without automatic icemaker)
To release ice cubes, turn the tray upside down,
ho_d it over a container, and twist both ends.
For only one or two ice
cubes, leave the tray right-
side up, lwist both ends _._
slightly, and remove as
many cubes as you want
Wash ice trays in lukewarm water only. Do not put
them in an automatic dishwasher
Automatic Icemaker Accessory Kit
(optional at extra cost)
If your refrigerator did not come already equipped with
an automatic icemaker, you may add one-contact your
Sears store or Sears Service Center
Water Filter Accessory
(optional at extra cost)
Your ice cubes can only be as fresbtasting
as the water that produces them That's why
it'sa good idea to purify the water with a
wafer filter
The water filter is an optional part at extra
cost and is available from your Sears Service
Center Order Filter No. 978488 and it may
be installed in minutes_when attached to the
inlet water tube connection_
Water Supply Accessory Kit
(optional at extra cost)
A water supp{y kit containing copper tubing, shut-off
valve, fittings and instructions needed to connect the
icemaker to your cold water line is also available from
your Sears store or Sears Service Center
(continued next page)
Loading ...
Loading ...
Loading ...