Loading ...
Loading ...
Loading ...
7
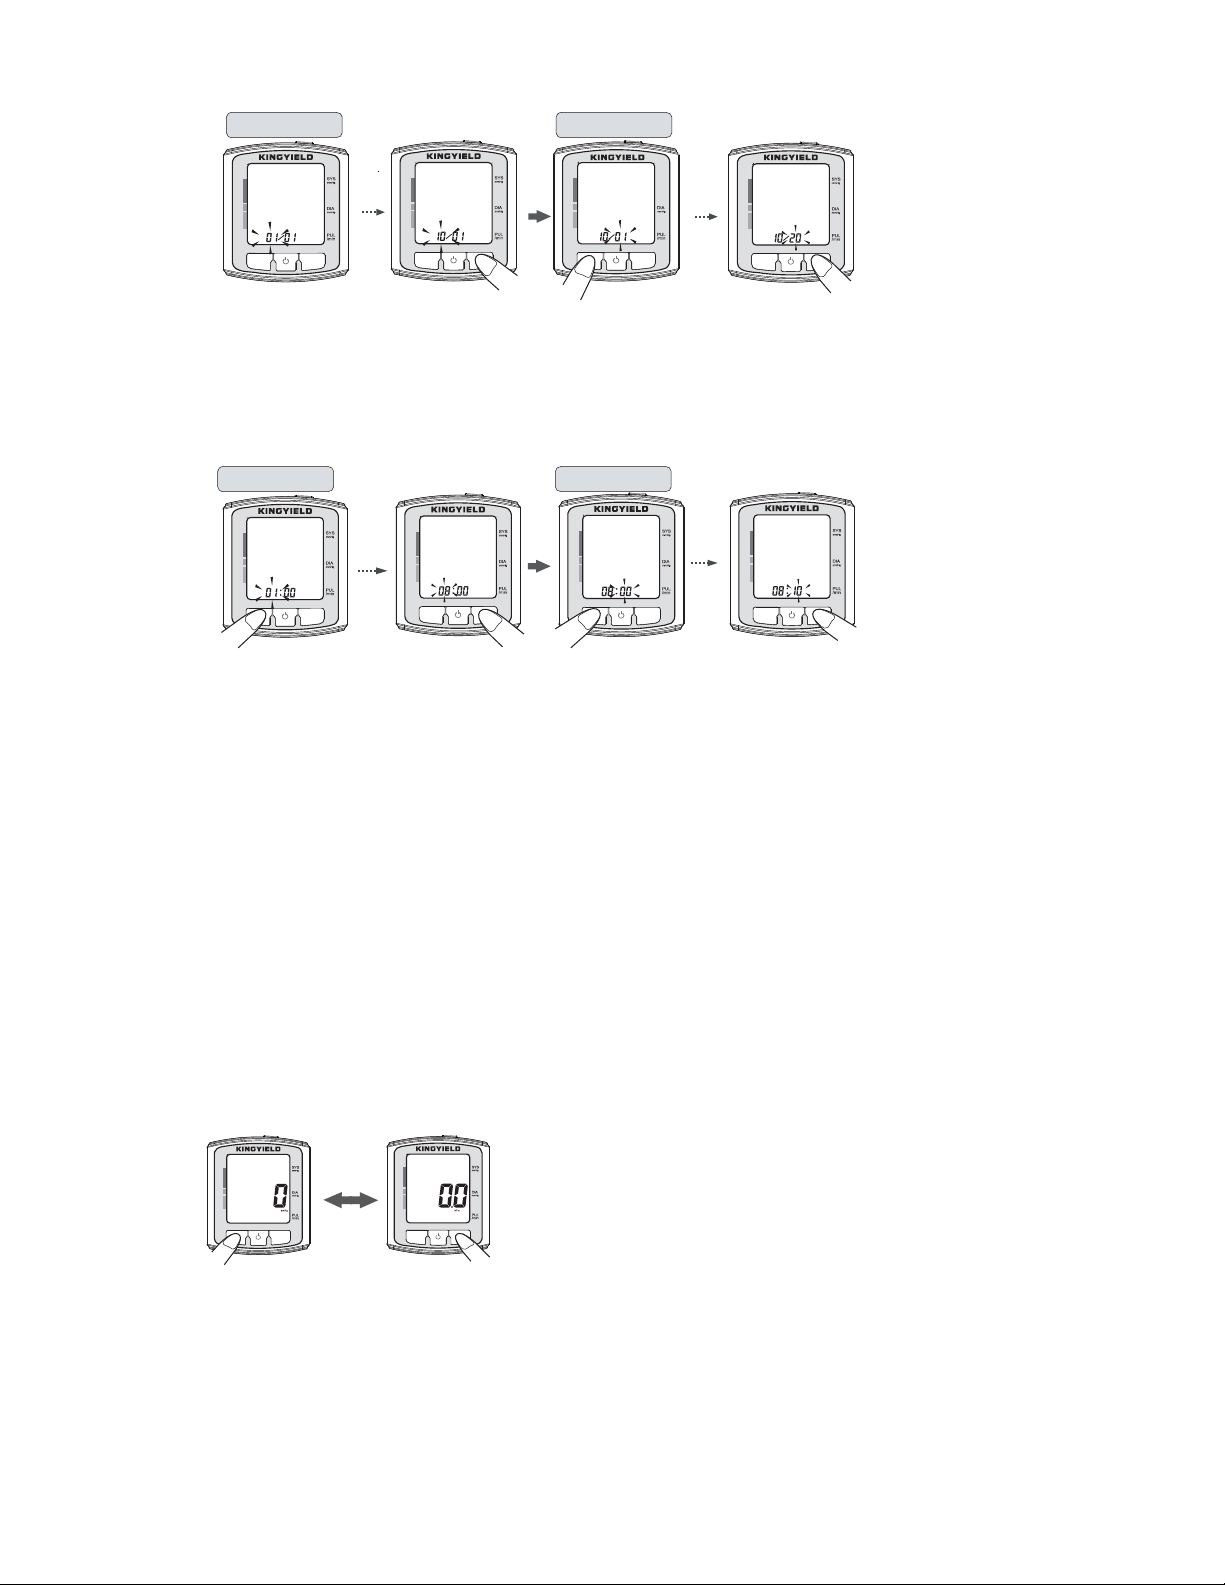
4. After the month and day has been set, the time setting will appear on the screen with the hour
flashing. Press the “MEM” button to change the hour (NOTE: Time is in 24 hour format).Press
the “SET” button once you have reached the desired hour. After hour has been set, the minute
setting will be flashing, take the same steps to set the minute setting.
SETTING THE UNIT OF MEASUREMENT
You can set up your monitor to measure pressure in either kPa or mmHg.
1. After the date and time has been set up, a “0”, with “mmHg” below, will display on the screen.
To change the unit of measurement, press the “MEM” button then press the “SET” button to
save that setting.
SETTING THE POSITIONING SENSOR
The positioning sensor is a new feature in blood pressure monitors that tells the user whether
the position of the blood pressure monitor is too high or too low. The positioning sensor symbol is
the shape of a heart with two arrows going up or down.
1. After the unit of measurement has been set, the word “ON” will be displayed along with the
positioning sensor symbol will be displayed on the screen. This means that the positioning
sensor is on, press “SET” to keep the positioning sensor on. If you wish to turn the positioning
sensor off, press the “MEM” button. Press “SET” to save the setting.
SETTING THE VOICE FUNCTION
The Voice function is a new feature in our blood pressure monitor that speaks to you. It will
tell you whether the cuff is too high or too low and will read out your results.
Day SettingMonth Setting
SET
MEM
SET
MEM
SET
BP213
BP213 BP213
BP213
Minute SettingHour Setting
SET
MEM
SET
MEM
BP213
BP213 BP213 BP213
MEM
BP213
SET
BP213
Loading ...
Loading ...
Loading ...