Loading ...
Loading ...
Loading ...
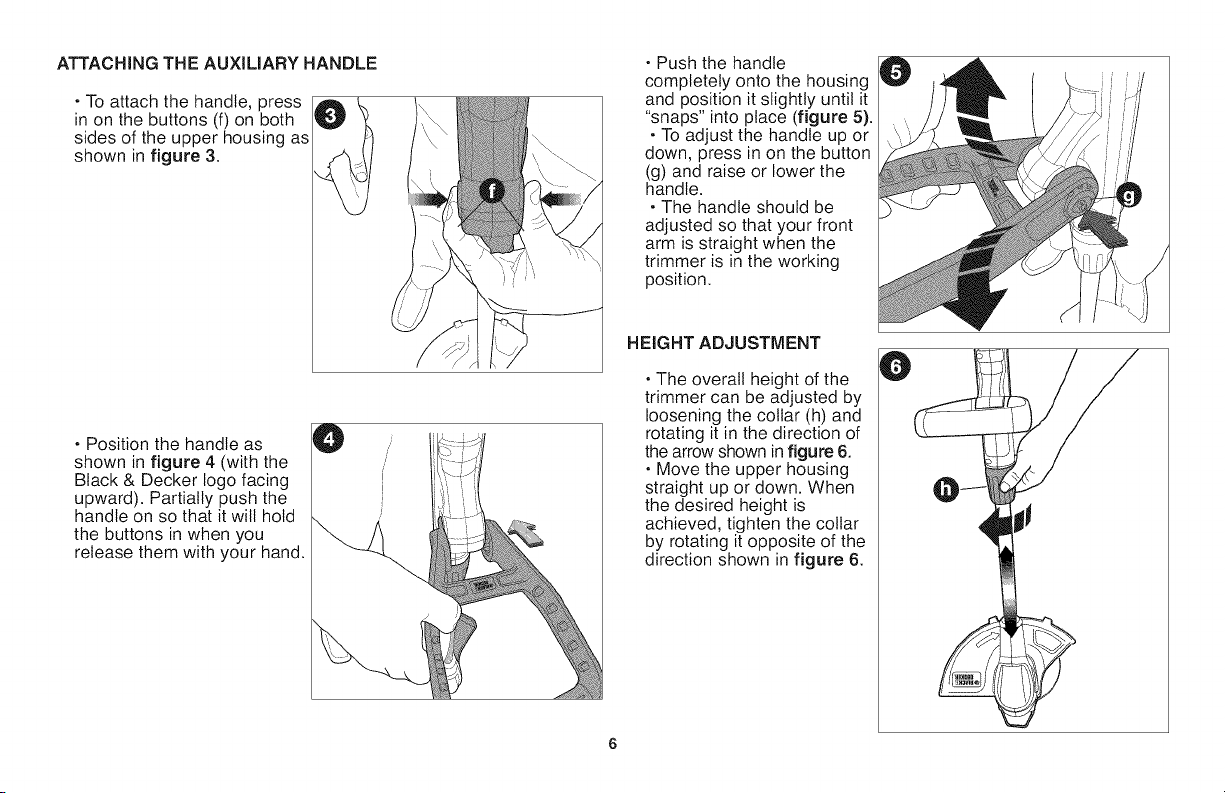
ATTACHING THE AUXILIARY HANDLE
• To attach the handle, press
in on the buttons (f) on both
sides of the upper housing as
shown in figure 3.
• Position the handle as
shown in figure 4 (with the
Black & Decker logo facing
upward). Partially push the
handle on so that it will hold
the buttons in when you
release them with your hand.
• Push the handle
completely onto the housing
and position it slightly until it
"snaps" into place (figure 5).
• To adjust the handle up or
down, press in on the button
(g) and raise or lower the
handle.
• The handle should be
adjusted so that your front
arm is straight when the
trimmer is in the working
position.
HEIGHT ADJUSTMENT
• The overall height of the
trimmer can be adjusted by
loosening the collar (h) and
rotating it in the direction of
the arrow shown in figure 6.
• Move the upper housing
straight up or down. When
the desired height is
achieved, tighten the collar
by rotating it opposite of the
direction shown in figure 6.
O
Loading ...
Loading ...
Loading ...