Operating instructions Heat-pump dryer
Operating the tumble dryer
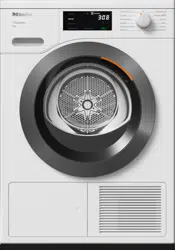
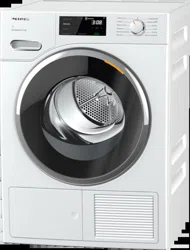
Control panel

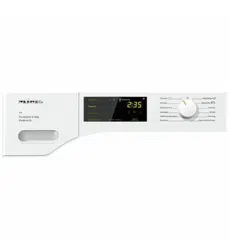
1. Control field The control field consists of various sensor controls, a time display and indicator lights.
2. Sensor controls for drying levels After selecting a drying level programme with the programme selector, the recommended drying level lights up. The drying levels that can be selected for the corresponding programme are dimly lit.
3. Indicator lights (These light up when necessary.)
 Empty the condensate container.
 Clean the fluff and plinth filters.
4. Gentle tumble sensor control Cares for temperature-sensitive textiles.
5.  PerfectDry indicator
flashes after the programme has started and switches off when the running time is displayed. PerfectDry measures the residual moisture of the laundry. In programmes with selectable drying levels, PerfectDry dries the laundry precisely, although the result is also influenced by the calcium content of the water.
lights up towards the end of the programme once the selected drying level has been reached, except in the case of the Woollens handcare, Warm air/DryFresh programmes.
6. Time display After the programme has started, the programme running time will appear on the display in hours and minutes.
- When Delay start is being used, the programme running time will appear after the Delay start period has elapsed.
- With most programmes, the running time displayed may vary or “jump”. The following factors, among others, affect the programme running time displayed: the quantity of laundry, the type of fabric and the residual moisture in the laundry. The electronic module adapts to these factors with increasing accuracy.
7. Start/Add laundry sensor control Touching the Start/Add laundry sensor control starts a programme. The current programme can be interrupted to add laundry. The programme can be started when the sensor control is flashing on and off. The sensor control lights up constantly once the programme has started.
8. Sensor controls
for the Delay start function or the Time Dry/DryFresh programme running time
After touching the  sensor control, a later start time for the programme (Delay start) can be selected. Once selected, lights up brightly.
The < or > sensor controls are used for selecting the duration of the Delay start period or the duration of the Warm air/ DryFresh programme.
9. Optical interface This is used by the Customer Service Department as a transmission point.
10. Programme selector
for selecting programmes and for switching off the appliance. The tumble dryer is switched on by selecting a programme and switched off by turning the programme selector to the  position. If the tumble dryer is connected to the WiFi network, you will have access to the following alternative options for selecting programmes.
- MobileStart You can operate your tumble dryer remotely with the Miele app.
- Wash2Dry A drying programme tailored to the laundry is set in conjunction with the connected washing machine.
How the sensor controls work
The 2, 4, 7 and 8 sensor controls react to fingertip contact. If a sensor control is lit, it can be selected.
If a sensor control is brightly lit, this means it is currently selected.
If a sensor control is dimly lit, this means it can be selected.
Fragrance flacon
Fragrance flacons (optional accessories) can be used to give your laundry a pleasant scent.
Tip: You can simply close the fragrance flacon if you want to dry textiles without adding fragrance.
Removing the protective seal from the fragrance flacon
Only hold the fragrance flacon as illustrated. Do not hold it at an angle or tip it, as the fragrance will leak out of it.
- Take the fragrance flacon out of its packaging.
Do not attempt to open the fragrance flacon.

- Hold the fragrance flacon securely so that you do not open it by mistake.
- Pull off the protective seal.
Inserting a fragrance flacon
- Open the door of the tumble dryer.
The fragrance flacon is inserted in the upper fluff filter in the opening on the right hand side beside the grip.

- Open the cover using the tab until the tab is at the top right hand side as shown.

- Insert the flacon in the opening as far as it will go.

Markers 1 and 2 must line up with one another.

- Turn the outer ring R clockwise a little.
Marker 2 must be in position 0: this is the position at which you can feel a resistance.
Opening the fragrance flacon
Before drying, you can select the intensity of the fragrance.

- Turn the outer ring clockwise: the further you open the fragrance flacon, the more intense the fragrance.
Damp laundry and longer drying durations with sufficient heat transfer are needed for the fragrance to be released into the laundry effectively. The fragrance will also be noticeable in the room air during the process.
Closing the fragrance flacon
After drying, the fragrance flacon should be closed to prevent the fragrance from escaping needlessly.

- Turn the outer ring counter-clockwise until marker 2 is in position 0.
If you wish to dry without the fragrance occasionally: remove the fragrance flacon and store it in its original packaging.
Replace the fragrance flacon with a new one when the intensity of the fragrance is no longer sufficient.
Cleaning and care
Fluff filters
This tumble dryer has 2 fluff filters in the loading area of the door. Both fluff filters trap fluff produced during the drying process
Clean the fluff filters after each drying programme. This avoids having to extend the programme running time. Also clean the fluff filters when the  indicator light comes on.
- To make the indicator light go out, open and close the door while the tumble dryer is switched on.
Removing the fragrance flacon
The intensity of the fragrance will be diminished if the fluff filters and the plinth filter are not cleaned.
- Remove the fragrance flacon. See “Fragrance flacon”, “Removing/replacing the fragrance flacon”.
Removing visible fluff
Tip: You can also use a vacuum cleaner so that you can remove the fluff without touching it.

- Pull the upper fluff filter forwards to remove it.

- Remove the fluff (see arrows).

- Remove the fluff from the filter surface of all the fluff filters and the perforated laundry deflector.
- Push the upper fluff filter back into position until it clicks.
- Close the door.
Cleaning the fluff filters and air flow openings thoroughly
If the drying duration has become longer or the surface of the filters is visibly compacted with fluff, you should carry out the following cleaning procedure.
- Remove the fragrance flacon. See “Fragrance flacon”.
- Pull the upper fluff filter forwards to remove it.

- Turn the yellow dial on the lower fluff filter in the direction of the arrow (until it reaches the stop position).

- Hold the dial and pull the fluff filter forwards to remove it.

- Use a vacuum cleaner with a long crevice nozzle attached to remove any visible fluff from the upper air flow openings.
Finally, clean the fluff filters with water.
Cleaning the fluff filters with water
- Wipe the smooth plastic surfaces of the fluff filters with a damp cloth to clean them.
- Flush the filters through under warm running water.
- Shake the fluff filters thoroughly and then dry them carefully
Ensure the filters are dry before replacing them. Wet filters could cause operational faults.
- Push the lower fluff filter in completely and lock it with the yellow dial.
- Push the upper fluff filter in completely.
- Close the door.
Cleaning the plinth filter
Clean the plinth filter whenever the indicator light comes on or when the programme running time seems to be taking longer than usual.
- To make the indicator light go out, open and close the door while the tumble dryer is switched on.
Removing the plinth filter

- Press the round, indented area on the heat exchanger access panel to open it.
The panel will spring open.

- Pull the plinth filter out by the handle. The right-hand guide pin comes out when the plinth filter is removed.
The guide pin prevents the access panel from closing without the plinth filter.
Cleaning the plinth filter

- Pull the handle out of the plinth filter.
- Clean the plinth filter thoroughly under running water.
- Squeeze the plinth filter very carefully several times as you rinse it.
- Rinse the plinth filter until all visible residues have been removed.
- Use a damp cloth to remove any fluff from the handle.

- Fit the plinth filter back on the handle. Make sure it is the correct way round.

- Push the plinth filter in completely. This will push in the right-hand guide pin at the same time.
Cleaning the plinth filter access panel

- Use a damp cloth to remove any fluff. Make sure that you do not damage the rubber seal when doing this.
- Close the heat exchanger access panel.
CAUTION: Damage or ineffective drying if drying takes place without a plinth filter or when the heat exchanger access panel is open. An excessive accumulation of fluff can damage the tumble dryer. If the system is not leak-tight, this can make drying ineffective. Only operate the tumble dryer with the plinth filter fitted and the heat exchanger access panel closed.
Cleaning the dryer
Disconnect the tumble dryer from the electrical supply.
CAUTION: Damage due to the use of unsuitable care products. Unsuitable care products could damage plastic surfaces and other parts. Do not use any solvents, abrasive cleaners, glass cleaners, or all-purpose cleaners.

- Clean the tumble dryer and the seal on the inside of the door with a slightly damp soft cloth and a mild solution of washing-up liquid and water.
- Dry all parts with a soft cloth.
Problem solving guide
Many malfunctions and faults that can occur in daily operation can be easily remedied. Time and money will be saved because a service call will not be needed.
The following guide may help you to find the reason for a malfunction or a fault, and to correct it.
Indicator lights or information on the time display triggered when a programme is cancelled
|
Problem
|
Cause and remedy
|
|
The indicator light comes on.  and and  flash after a programme has been cancelled, a signal sounds. flash after a programme has been cancelled, a signal sounds.
|
The system has been clogged by fluff or detergent residue.
- To deactivate the message, turn the programme selector to the
 position. position.
- Clean all fluff filters and the plinth filter. Please see “Cleaning and care” for notes on cleaning.
- Check that the fluff filters and the plinth filter are free from damage and in good working order.
If all of the fluff filters are damaged, out of shape or can no longer be cleaned, they must be replaced. “Problem solving guide – Replacing the plinth filter” explains when to replace a plinth filter that is no longer in good working order.
|
|
The indicator light comes on. and continue to flash after a programme has been cancelled despite thorough cleaning.
|
The plinth filter looks clean after thorough cleaning. However, the programme terminates and the fault message appears again. It is likely that the filter contains residue further down inside that could not be removed.
- To deactivate the message, turn the programme selector to the position. Check for the possible causes described below.
|
|
The heat exchanger is clogged.
- Check the heat exchanger. Follow the instructions in “Problem solving guide – Checking the heat exchanger”.
|
|
The plinth filter is clogged further down.
- Check the plinth filter. Follow the instructions described in “Problem solving guide – Replacing the plinth filter”.
- If the plinth filter is not out of shape or damaged, you can reactivate it in a washing machine. Follow the instructions described in “Problem solving guide – Reactivating the plinth filter”.
|
|
The  indicator light comes on after a programme has been cancelled and a signal sounds. indicator light comes on after a programme has been cancelled and a signal sounds.
|
The condensed water container is full or there is kink in the drain hose.
- To switch off the indicator light, open and close the door (with the tumble dryer switched on).
- Empty the condensed water container.
- Check the drain hose.
- See “Cleaning and care”.
|
Indicator lights or information on the time display
|
Problem
|
Cause and remedy
|
|
The indicator light comes on at the end of the programme.
|
The tumble dryer is not working correctly or economically. Possible causes could be clogging caused by fluff or detergent residue.
- To switch off the indicator light, open and close the door (with the tumble dryer switched on).
- Please see “Cleaning and care” for notes on cleaning.
- Clean the fluff filters.
- Also check the plinth filter and clean it if necessary.
|
|
You can influence when the indicator lights up.
- To do this, follow the instructions in “Programmable functions
 Airways indicator”. Airways indicator”.
|
|
 lights up lights up
|
The programme selector has been moved.
- Select the original programme. The time remaining will appear in the display again.
|
|
Bars flash in the display at the end of a programme:

|
The programme has finished but the laundry has not yet cooled down.
- Either remove the laundry and spread it out to cool down or leave it in the tumble dryer to cool down during the cooling phase.
|
|
Lines flash and light up after switching on: _ _ _. Programme selection is not possible.
|
The PIN code is activated.
- See “Programmable functions”, “
 PIN code”. PIN code”.
|
|
and another number combination flash after a programme has been
cancelled, a signal
sounds
|
No obvious cause.
- Switch the dryer off and then on again.
- Start a programme.
If the programme is cancelled again and an error message appears, there is a fault. Contact the Miele Service Department.
|
|
 lights up and the programme has been cancelled, a signal lights up and the programme has been cancelled, a signal
sounds
|
The laundry is unevenly distributed or has rolled up.
- Disentangle the laundry and remove a few items, if necessary.
- Switch the dryer off and then on again.
- Start a programme.
|
|
 lit and programme start is not possible. lit and programme start is not possible.
|
An update is available for the tumble dryer. See “Programmable functions  RemoteUpdate” for more information. RemoteUpdate” for more information.
|
|
 lights up lights up
|
This is not a fault. The tumble dryer is connected to the network.
|
|
 lights up lights up
|
This is not a fault. The remote control function is switched off. See “Programmable functions”.
|
|
 lights up lights up
|
This is not a fault. The tumble dryer is connected to the network.
|
|
 lights up lights up
|
This is not a fault. The tumble dryer is not connected to the network. See “Programmable functions”.
|
Unsatisfactory drying results
|
Problem
|
Cause and remedy
|
|
The laundry is not sufficiently dry.
|
The load consisted of different types of fabric.
- Finish drying using the Warm air programme.
- Select a more suitable programme next time.
Useful tip: You can alter the drying levels for some programmes. See “Programmable functions”, sections “ Drying levels Cottons” and “ Drying levels Cottons” and “ Drying levels Minimum iron”. Drying levels Minimum iron”.
|
|
Laundry or feather filled pillows smell after drying
|
The laundry was washed with insufficient detergent Feathers are a natural product and this is quite normal.
- Laundry: use sufficient detergent next time.
- Pillows: take out of the tumble dryer and air them.
- Use a fragrance flacon (available as an optional accessory) for your favourite fragrance.
|
|
Items made of synthetic fibres are charged with
static electricity after drying
|
Synthetic fibres tend to attract static charge.
- Static charge can be reduced by adding a fabric conditioner to the final rinse in the washing programme.
|
|
There is a build-up of fluff
|
Fluff is principally the result of friction when garments are being worn and to some extent when they are being washed. Machine drying hardly causes any fluff to form.
Fluff is collected by the fluff filters and the plinth filter and can be removed easily.
|
The drying cycle duration is very long
|
Problem
|
Cause and remedy
|
|
The drying process goes on too long or even switches off.*
|
The room where the tumble dryer is located is too warm.
- Ventilate the room thoroughly.
|
|
Detergent residues, hair and fine fluff can clog the filters.
- Clean the fluff filters and the plinth filter.
- Remove visible fluff from the heat exchanger.
|
|
The laundry is unevenly distributed or has rolled up. The drum is too full.
- Disentangle the laundry and remove a few items.
- Start a programme.
|
|
The bottom right grille is blocked.
- Move any objects, such as a laundry basket, away from the dryer.
|
|
The laundry is too damp.
- Spin using a higher spin speed in the washing machine.
|
|
Metallic components, e.g. zips, have prevented the tumble dryer from registering the correct laundry moisture level.
- Open any zips next time.
- If the problem recurs, dry these items using the Warm air/DryFresh programme.
|
* Switch the tumble dryer off and on again before starting a new programme.
Other problems
|
Problem
|
Cause and remedy
|
|
There are humming noises
|
The compressor is operating.
These noises are quite normal and do not indicate a fault.
|
|
A programme does not start
|
No obvious cause.
- Connect the tumble dryer to the mains
- Turn on the tumble dryer
- Close the door
- Check whether the mains fuse has tripped
Has there been a power cut? When power is restored any previously running programme will restart automatically.
|
|
Only the Start/Add laundry sensor control flashes slowly when the programme is running.
|
Once the programme has been running for 10 minutes, the indicators go out. The Start/Add laundry sensor control flashes slowly. This is not a fault, but a normal function to help save energy. Touch a sensor control to switch on the indicators.
See “Control field standby status” in “Programmable functions”.
|
|
The tumble dryer is switched off.
|
The tumble dryer switches off automatically after 15 minutes if no further selections are made. This is not a fault, but a normal function.
|
|
The drum lighting does not come on.
|
To save energy, the drum lighting goes out automatically after a set time and after the programme starts.
- Switch the dryer off and then on again.
- To switch the drum lighting on, open the door of the tumble dryer.
|
|
The drum lighting is faulty.
The drum lighting is designed to last a long time and should not normally need to be replaced.
- If you have tried everything but the drum lighting still does not come on, contact the Miele Customer Service Department.
|
Replacing the plinth filter
The heat exchanger can clog up. Replace the plinth filter immediately if you see the following signs of wear before or after cleaning (optional accessory).
Poor fit : The edges of the plinth filter do not sit properly and the plinth filter is out of shape. Fluff will blow into the heat exchanger unfiltered through edges that do not sit properly. This will, in time, cause a blockage in the heat exchanger.

Deformations : Deformations indicate that the filter has become blocked and worn by continuous use.

Cracks, tears, indentations : Fluff will blow into the heat exchanger through cracks and tears. This will, in time, cause a blockage in the heat exchanger.

White residues or residues of other colours: These residues arise from laundry fibres and traces of detergent components. They can be found on the front and side edges of the plinth filter. In extreme cases, they can form stubborn crust. Residues are a sign that the plinth filter no is longer a snug fit at the sides, even if it appears to be perfect: fluff is getting in unfiltered at the edges. Reactivate the plinth filter. If these residues appear on the plinth filter again soon after cleaning, the plinth filter must be replaced.

Reactivating the plinth filter
You can reactivate one or more soiled plinth filters in a washing machine. You will then be able to use the plinth filter again.
Prior to reactivation, check that the plinth filter is in good order. Check the plinth filter following the instructions provided in “Problem solving guide – Replacing the plinth filter”. Replace the plinth filter if it has worn out.
- Wash the plinth filter(s) separately, not with any laundry items. Do not add any detergent.
- Select a short wash programme with a maximum temperature of 40 °C and a maximum spin speed of 600 rpm.
You can re-insert the plinth filter once the wash and spin cycles are complete
Checking the heat exchanger
CAUTION: Risk of injury from sharp cooling fins. You could cut yourself. Do not touch the cooling fins with your hands
- Look to see if fluff has accumulated.
Remove any fluff you can see.
CAUTION: Damage due to incorrect cleaning of the heat exchanger. The tumble dryer will not dry if the cooling fins are damaged or bent. Clean using a vacuum cleaner with a suction brush attached. Only pass the vacuum cleaner brush over the heat exchanger cooling fins lightly, without applying any pressure.

Use a vacuum cleaner to remove fluff and residues.