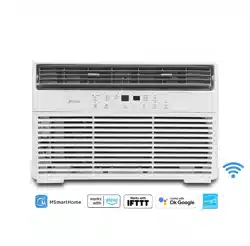
USER MANUAL ComfortSense Smart Window Air Conditioner
NETWORK CONFIGURATION
1. Log in with your account.
2. Use “+” to add appliances.
3. Connect your device to Wireless.
3.1 Connect your device using Bluetooth:
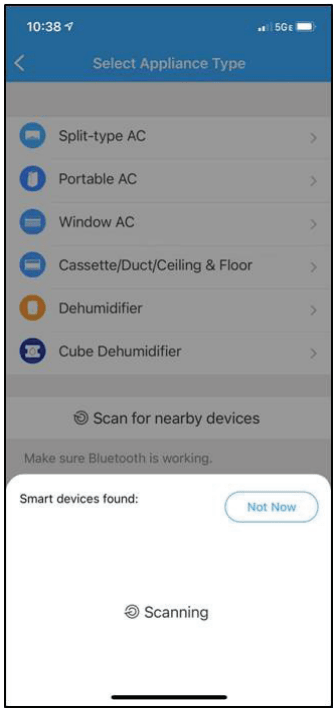
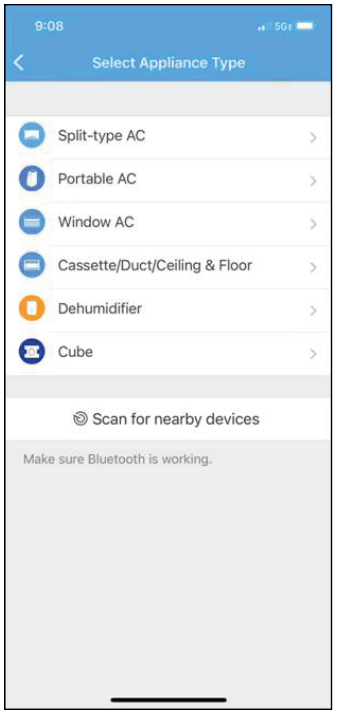
3.1.1 Select Scan for nearby devices.
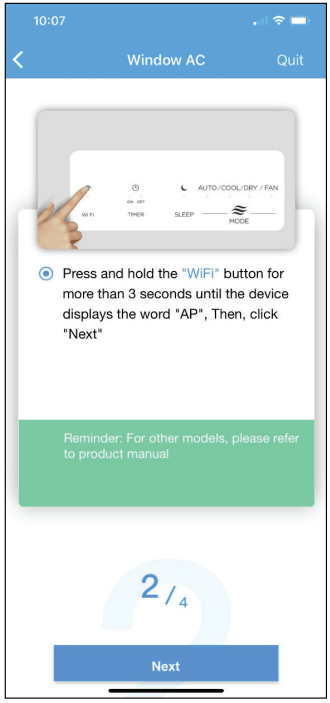
3.1.2 Turn the device on, then press and hold the Connect (Window AC), Swing (Portable AC), Filter (Dehumidifier), or Power (Cube Dehumidifier) button for 3 seconds or until the display shows AP.
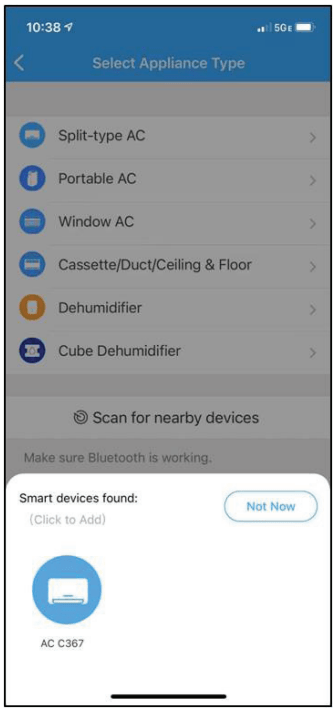
3.1.3 When your device appears, tap the icon to select the device. If multiple devices appear, you can identify your device by checking that the last 4 digits under the icon match the last 4 digits on the QR code sticker on the unit.
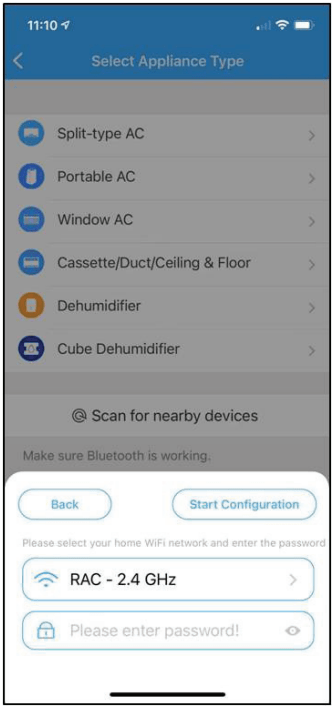
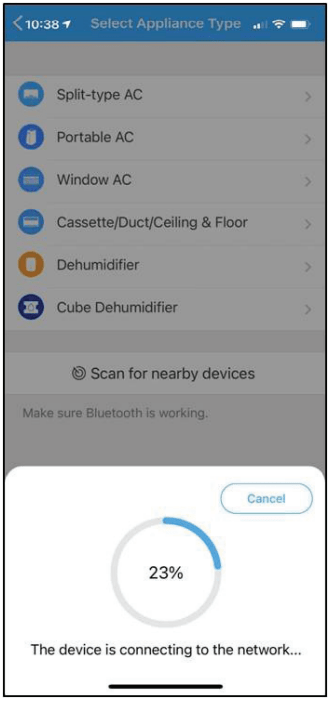
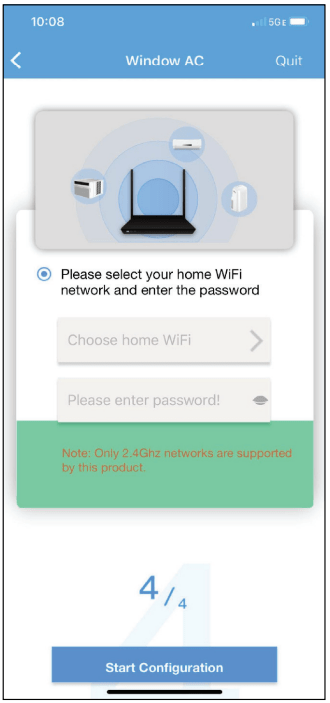
3.1.4 Select your desired wireless network and enter the password. When finished press “Start Configuration”.
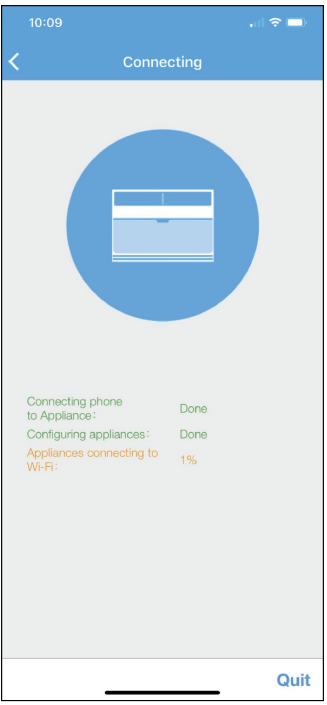
3.1.5 Wait for your device to connect to the network.
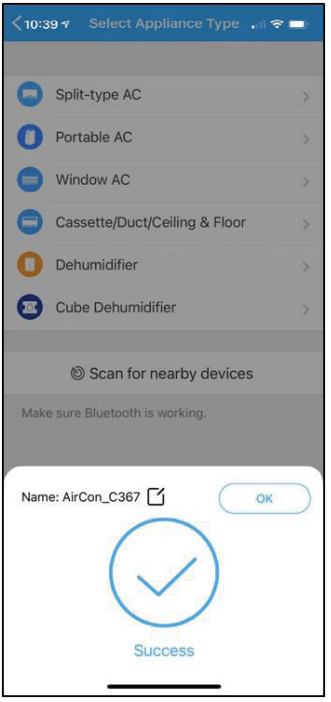
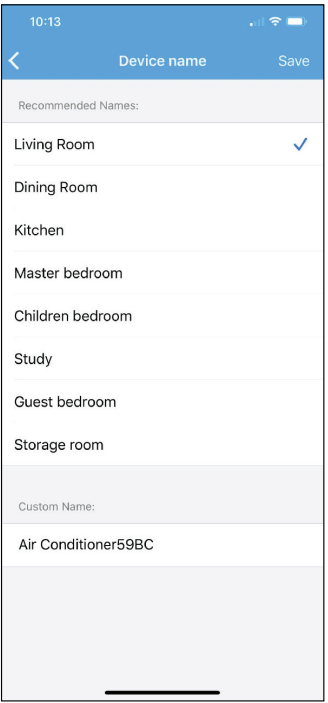
3.1.6 Once the device connects you can edit the name or press OK to finish the connection process.
3.2 Manually connect your device:
3.2.1 Select Scan for nearby devices.
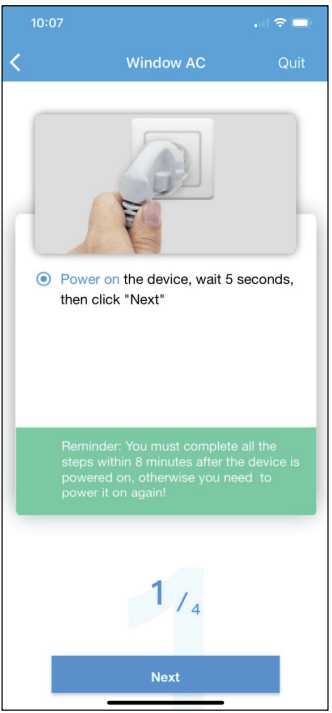
3.2.2 Turn the device on, then wait 5 seconds before continuing.
3.2.3 Press and hold the Connect (Window AC), Vent Angle/ Swing (Portable AC), or Power (Cube dehumidifier) buttons for 3-5 seconds. The unit will enter Access Point mode and the display will show “AP”.
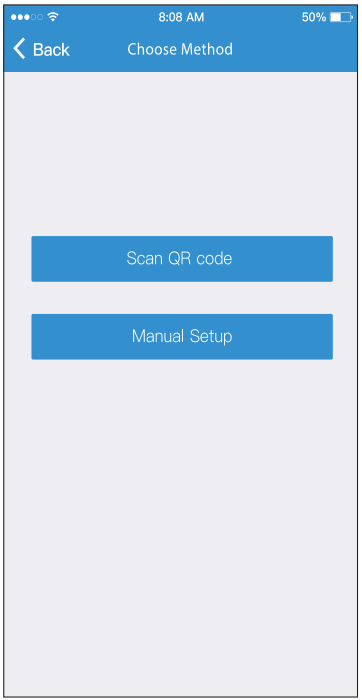
3.2.4 For Android devices, you may choose to scan the QR code on the air conditioner for setup. If not using a QR code, or if you are using an iOS device, select Manual Setup.
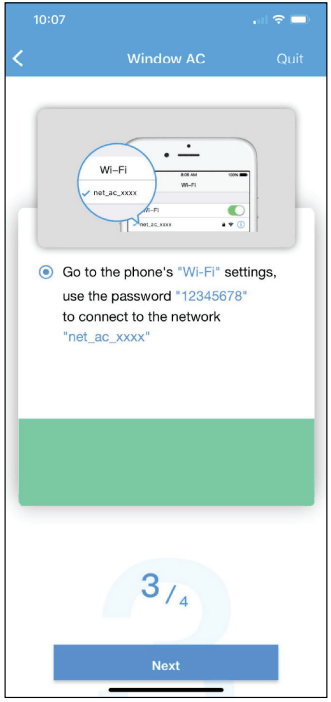
3.2.5 Go to your phone’s wireless network settings, connect to the network named “net_ac_xxxx”, (where each x is some number, 0-9 or letter, A-F) and use the password “12345678”.
3.2.6 Return to the “Midea Air” App, select your preferred 2.4 GHz wireless network, and type in your password. Then press “Start Configuration”.
3.2.7 The app will show you the progress. If there is a failure, please check your network settings and unit and try again.
3.2.8 Name your unit.
HOW TO USE THE APP
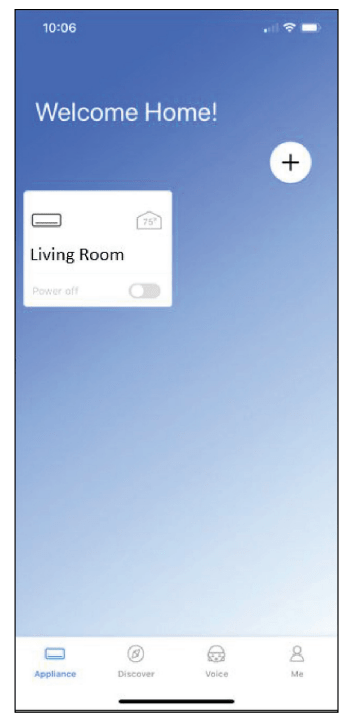
Log in and select your unit to control it from wherever you are, using your smart phone.
SHARED DEVICE SETUP:
You can also add a shared device from another user account using the “+”. After tapping the “+”, choose Add Shared Device and scan the QR Code generated on the other users app through the device settings. Both accounts should now be able to control the device using their own accounts.
Using the App
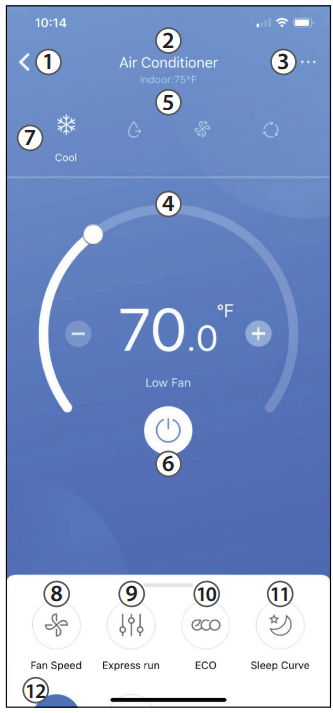
Air Conditioner Display
1.BACK ARROW:
Use this arrow to take you back to the main screen.
2. UNIT NAME:
This is the name of the unit you are currently controlling.
3. FUNCTION:
Use this button to access functions such as express run, sleep curve, and schedule.
4. TEMPERATURE AND MODE DISPLAY:
This display shows what temperature and mode the air conditioner is set to.
5. TEMPERATURES:
This display shows the current temperature readings at the unit.
6. POWER:
Use this button to turn the unit on and off.
7. MODE:
Use these buttons to switch between modes. Modes may include: Auto, Cool, Dry, Fan, and Heat. The background color will also change based on the current mode.
8. FAN SPEED:
Use this button to switch between fan speeds. Fan speeds include: AUTO, LOW, MEDIUM, and HIGH.
9. EXPRESS RUN:
Use this button to set the unit to the Express run settings chosen in the function menu.
10. ECO:
Use this button to turn Eco Mode on and off.
11. SLEEP CURVE:
Use this button to turn the SLEEP CURVE mode on and off.
12. LED:
Use this button to turn the display on or off.
Using the App
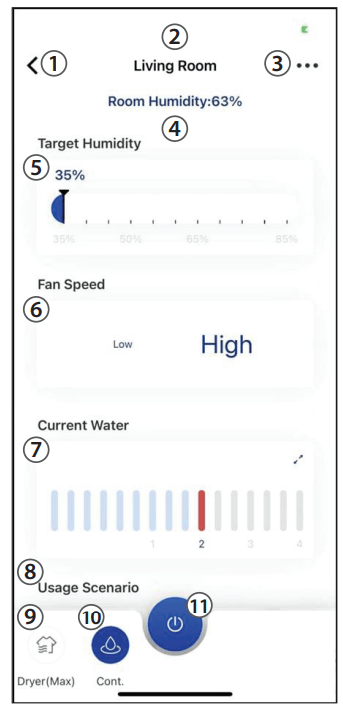
Cube Dehumidifier Display
1.BACK ARROW:
Use this arrow to take you back to the main screen.
2. UNIT NAME:
This is the name of the unit you are currently controlling.
3. FUNCTION:
Use this to access the schedule and device sharing options.
4. CURRENT HUMIDITY DISPLAY:
This display shows the current humidity in the area.
5. HUMIDITY SETPOINT CONTROL AND DISPLAY:
This allows the user to control the humidity setpoint and see what the unit is currently set to.
6. FAN SPEED CONTROL AND DISPLAY:
This allows you to see the current fan speed setting and adjust if desired.
7. CURRENT WATER DISPLAY AND FILL LEVEL SELECTION:
This allows the user to see the estimated current water level in the bucket and adjust the fill level to the desired setting by tapping the arrows in the box and moving the slider that appears.
8. USAGE SCENARIOS:
These options allow you to set the dehumidifier to common settings with the push of one button.
9. MAX MODE:
Use this button to toggle max mode on your unit.
10. CONTINUOUS MODE:
Use this button to toggle continuous mode on your unit.
11. POWER:
Use this button to turn the unit on and off.
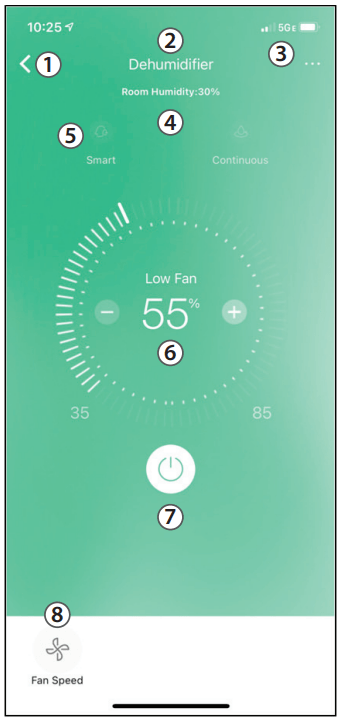
Standard Dehumidifier Display
1.BACK ARROW:
Use this arrow to take you back to the main screen.
2. UNIT NAME:
This is the name of the unit you are currently controlling.
3. FUNCTION:
Use this to access the schedule and device sharing options.
4. CURRENT HUMIDITY DISPLAY:
This display shows the current humidity in the area.
5. MODE SELECTION:
Use this to change the dehumidifier’s mode.
6. HUMIDITY SETPOINT CONTROL AND DISPLAY:
This allows you to control the humidity setpoint and see what the dehumidifier is currently set to.
7. POWER:
Use this button to turn the unit on and off.
8. FAN SPEED CONTROL:
Use this button to open the Fan Speed control and change the setpoint.
Air Conditioner Functions
Power: Toggles the unit On/Off.
Fan Speed: Changes the Fan speed between the supported speeds.
Express Run: Changes the unit’s settings to a user pre-set point.
ECO: Toggles the ECO function On/Off. For details on the Eco function, see the full user manual.
Sleep Curve: Toggles the Sleep Curve mode On/Off. For detailed information about setting the sleep curve, see the special functions section below.
LED: Toggles the LED display on the unit On/Off. Note that even when the LED display is turned off, changing the unit’s settings will illuminate the display for a short period of time.
Sound: Toggles the beep the unit plays when it receives a command On/Off.
Schedules: Toggles the Schedule function On/Off. For detailed information about setting the schedules see the special functions section below.
Horizontal Swing: Toggles the swing function On/Off. When swing is on, the outlet louvers will oscillate.
Direction: Allows the user to set the angle of the outlet louvers to one of five settings.
Dehumidifier Functions
Max: Sets your dehumidifier to run continuously on High Fan Speed.
Continuous: Sets your dehumidifier to run continuously while allowing the fan speed to be adjusted.
Usage Scenario: Features common operating conditions for one touch control on Cube Dehumidifiers.
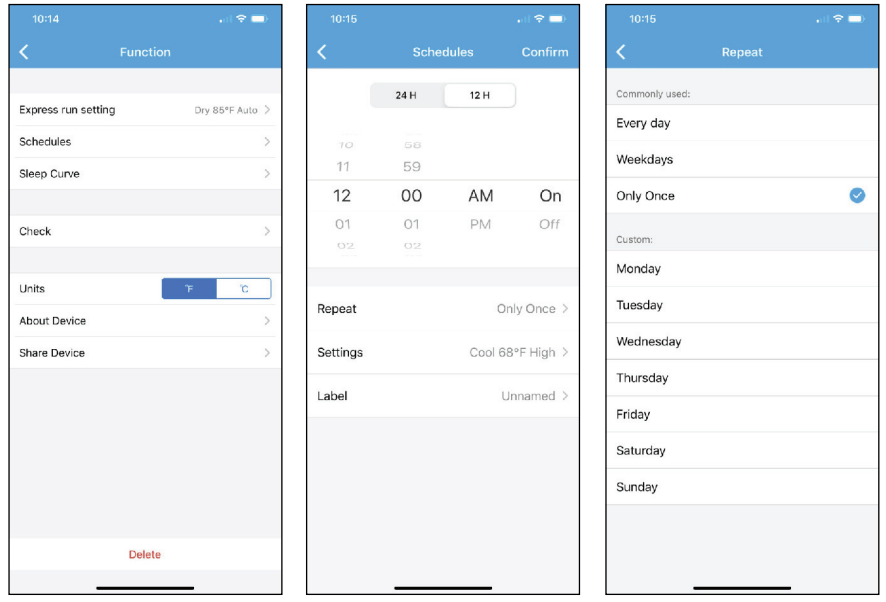
SPECIAL FUNCTIONS
Functions on this page may include: Schedules, Sleep Curve, Check, Express Run, and Share Device.
Schedules
With this function, you can manually set times for your device to change settings. Each setting can be programmed based on the time of day and day of the week. These settings are saved in the app and can be toggled on or off through the Schedules menu.
Customized Sleep Curve
With this function, you can customize your air conditioner’s settings for each hour that you are asleep. Scroll left and right to adjust up to 8 hours of the sleep curve.
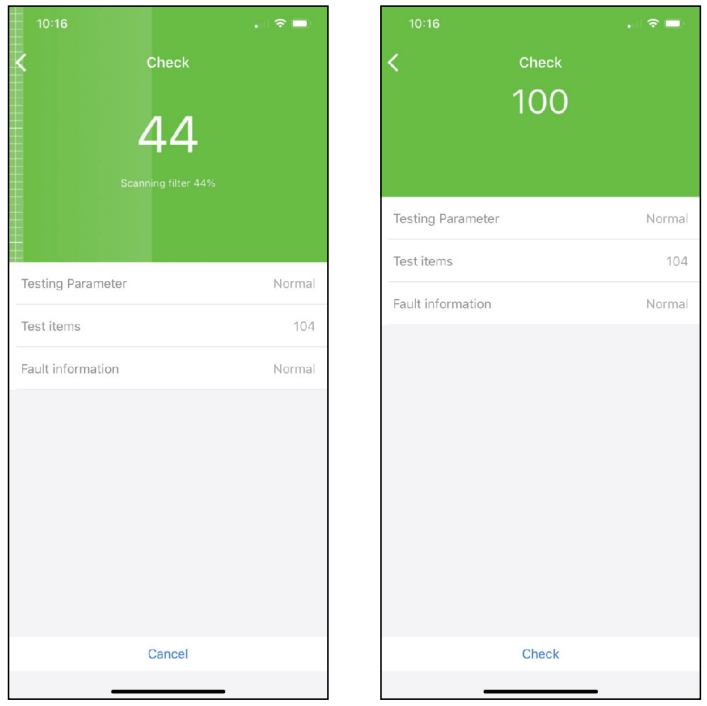
Self Diagnosis - “Check” Function
With this function, you can run a self-diagnosis. The app will show a report on key items and their status.
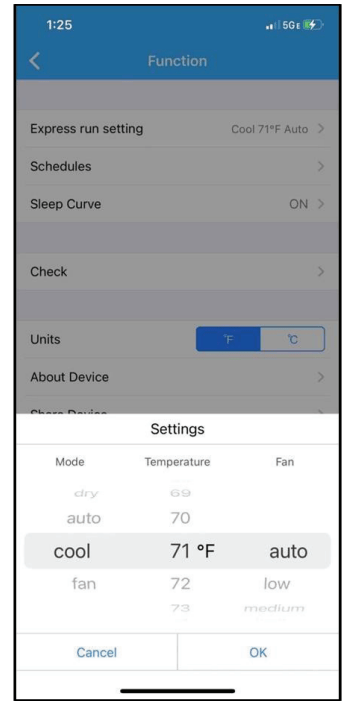
Express Run
With this function you can set specific settings (mode, temperature, fan speed) that can then be turned on with the express run button on the main device control screen.
AMAZON ALEXA CONNECTION INSTRUCTIONS
1. Make sure your AC unit is connected to your Midea Air account.
2. Download the Amazon Alexa app from your compatible App Store.
3. Follow the Amazon Alexa app’s instructions to setup the app.
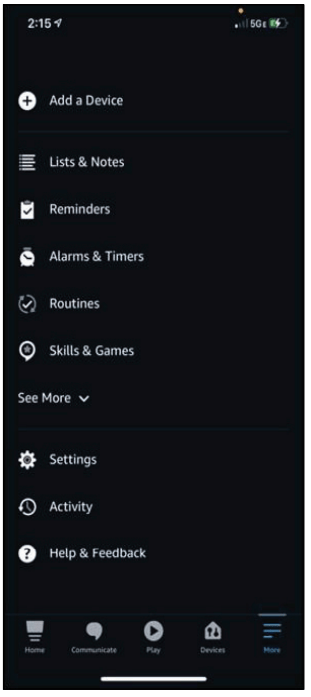
4. Once you see the above screen, navigate to and select the skills and games section under the more tab.
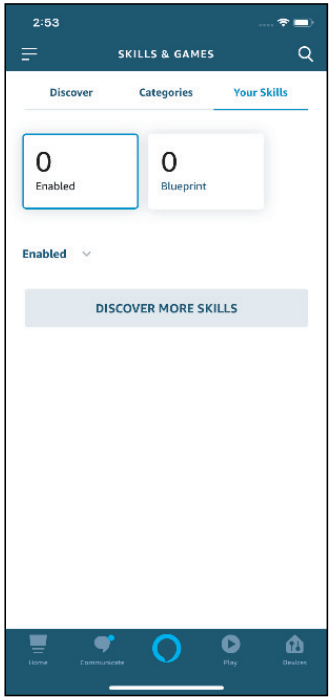
5. Tap the search icon in the top righthand corner of the screen.
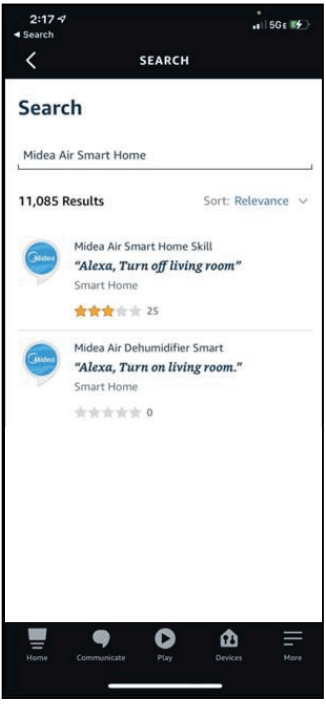
6. Search for “Midea Air Smart Home”. Two skills should appear, if you would like to connect an Air Conditioner, choose the “Midea Air Smart Home Skill”, if you would like to connect a Dehumidifier, choose the “Midea Air Dehumidifier Smart”. Select “Enable to Use” on your chosen skill.
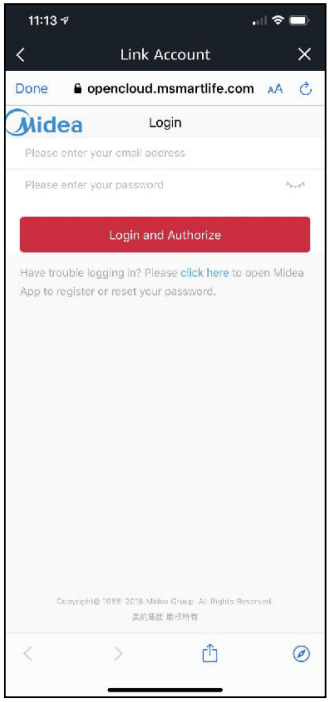
7. Enter your Midea Air credentials into the “Link Account” tab.
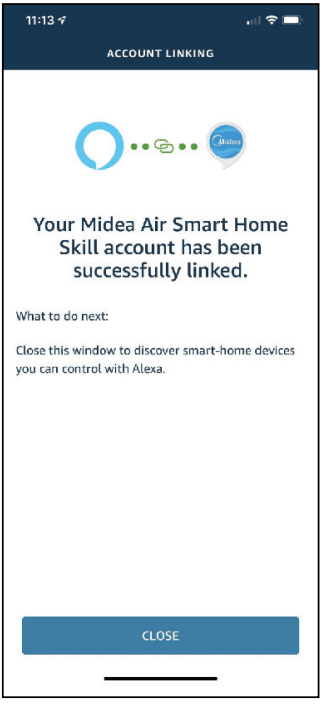
8. Click “Close” and follow the in-app instructions to finish setting up your device(s) with Alexa.
COMMAND EXAMPLES FOR YOUR AMAZON ALEXA AC:
To help get familiar with using your Amazon Alexa connected AC, here are some example commands to help get you started:
“Alexa, turn on (given name of AC).”
“Alexa, set (given name of AC) mode to cool.”
“Alexa, set (given name of AC) temperature to 70.”
GOOGLE HOME CONNECTION INSTRUCTIONS
1. Make sure your AC unit is connected to your Midea Air account.
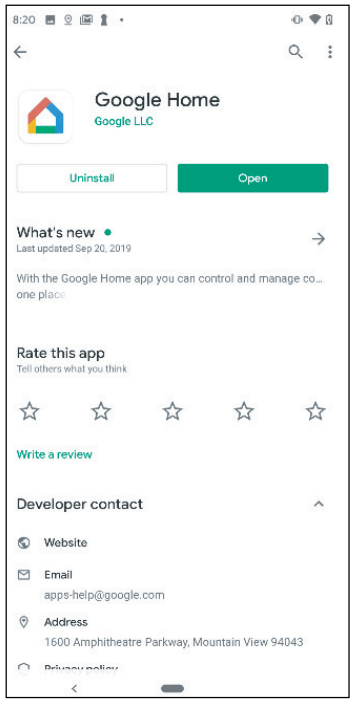
2. Download the Google Home app from your compatible App Store.
3. Sign in or create your Google account.
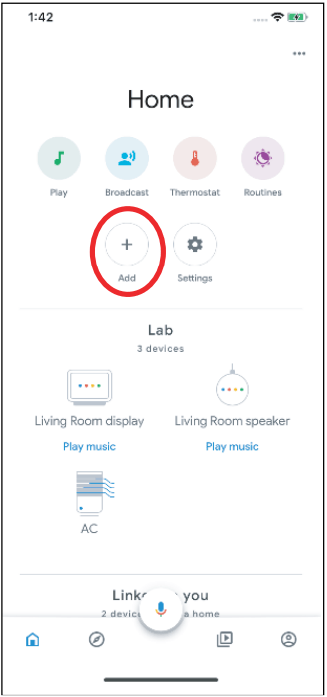
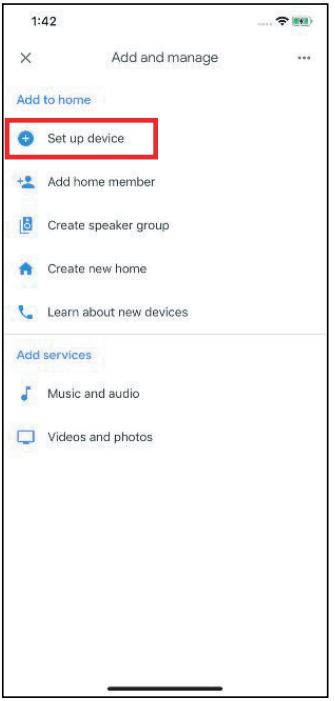
4. Select the plus to begin setting up your device.
5. Under “Add to Home”, select “Set up Device”.
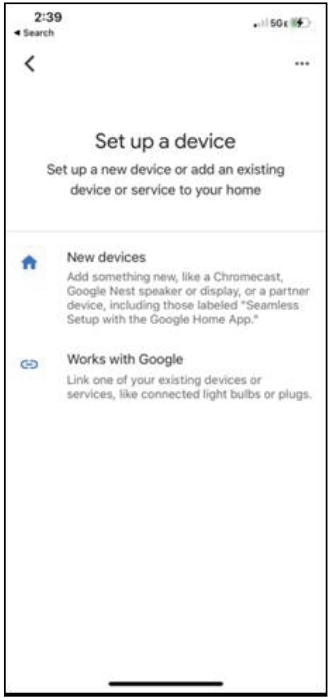
6. Select Works with Google.
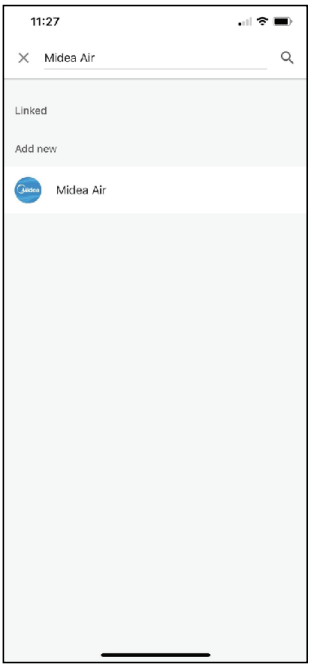
7. Select the search option in the topright corner of the screen and search for Midea Air.
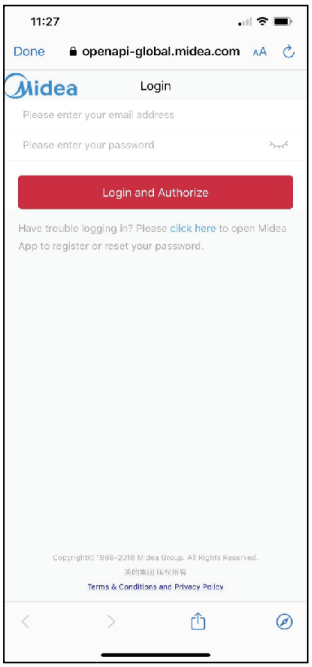
8. Select Midea Air, enter your login credentials, and authorize Google to access your smart device. Follow the in app instructions to finish setting up your device(s) with Google.
COMMAND EXAMPLES FOR YOUR GOOGLE HOME AC:
To help get familiar with using your Google Home connected AC, here are some example commands to help get you started:
“Ok Google, turn on (given name of AC unit)”
“Ok Google, change (given name of AC unit) mode to Auto”
“Ok Google, change (given name of AC unit) temperature setting to 70 degrees”
“Ok Google, set (given name of AC unit) to high”
Tip: All commands work for multiple units if you say “all air conditioners” instead of the specific name of one individual unit.