Loading ...
Loading ...
Loading ...
MAINTENANCE SCHEDULE
FREQUENCY MAINTENANCE REQUIRED
Before each use Check for loose or damaged parts.
Before each use Check for loose fasteners and parts.
Between each use Clean units and labels.
Every 10 hours Clean and re-oil air filter
Every 50 hours Check spark plug condition and gap.
GENERAL RECOMMENDATIONS AIR FILTER MAINTENANCE
WARNING: To prevent serious injury, never
perform maintenance on the unit while it is
running. Shut offthe unitand allow it to cool
down before doing any maintenance.
Disconnect the spark plug wire to prevent the
unitfrom starting.
The warranty on this blower does not cover
items that have been subjected to operator abuse or
negligence. To receive full value from the warranty, the
operator must maintain the unit as instructed in this
operator's manual.
These required maintenance procedures should be
performed at the frequency stated in the table. They
should also be included as part of any seasonal tune-up.
CHECK FOR DAMAGED/WORN PARTS
Inspect the unit for any worn or damaged parts. Repair or
replace damaged parts before operating.
CHECK FOR LOOSE FASTENER PARTS
• Housing Screws
• Air Filter Cover
• Spark Plug Wire
CLEAN UNIT AND LABELS
• Clean the unitand labels using a damp clothwith a
mild detergent.
• Wipe off the unitwith a clean dry cloth.
• Keep air vents free from debris at all times.
NOTE: Clean and re-oil the air filter every 10 hours of
operation. Your unit'sair filter is one of the most
important areas to maintain. Ifit is not maintained, you
will VOID the warranty. Before cleaning, make sure the
unitisturned off.
1. Wipe down the air filtercover and surroundingarea.
This will help prevent any debris entering the
carburetor when the cover is removed.
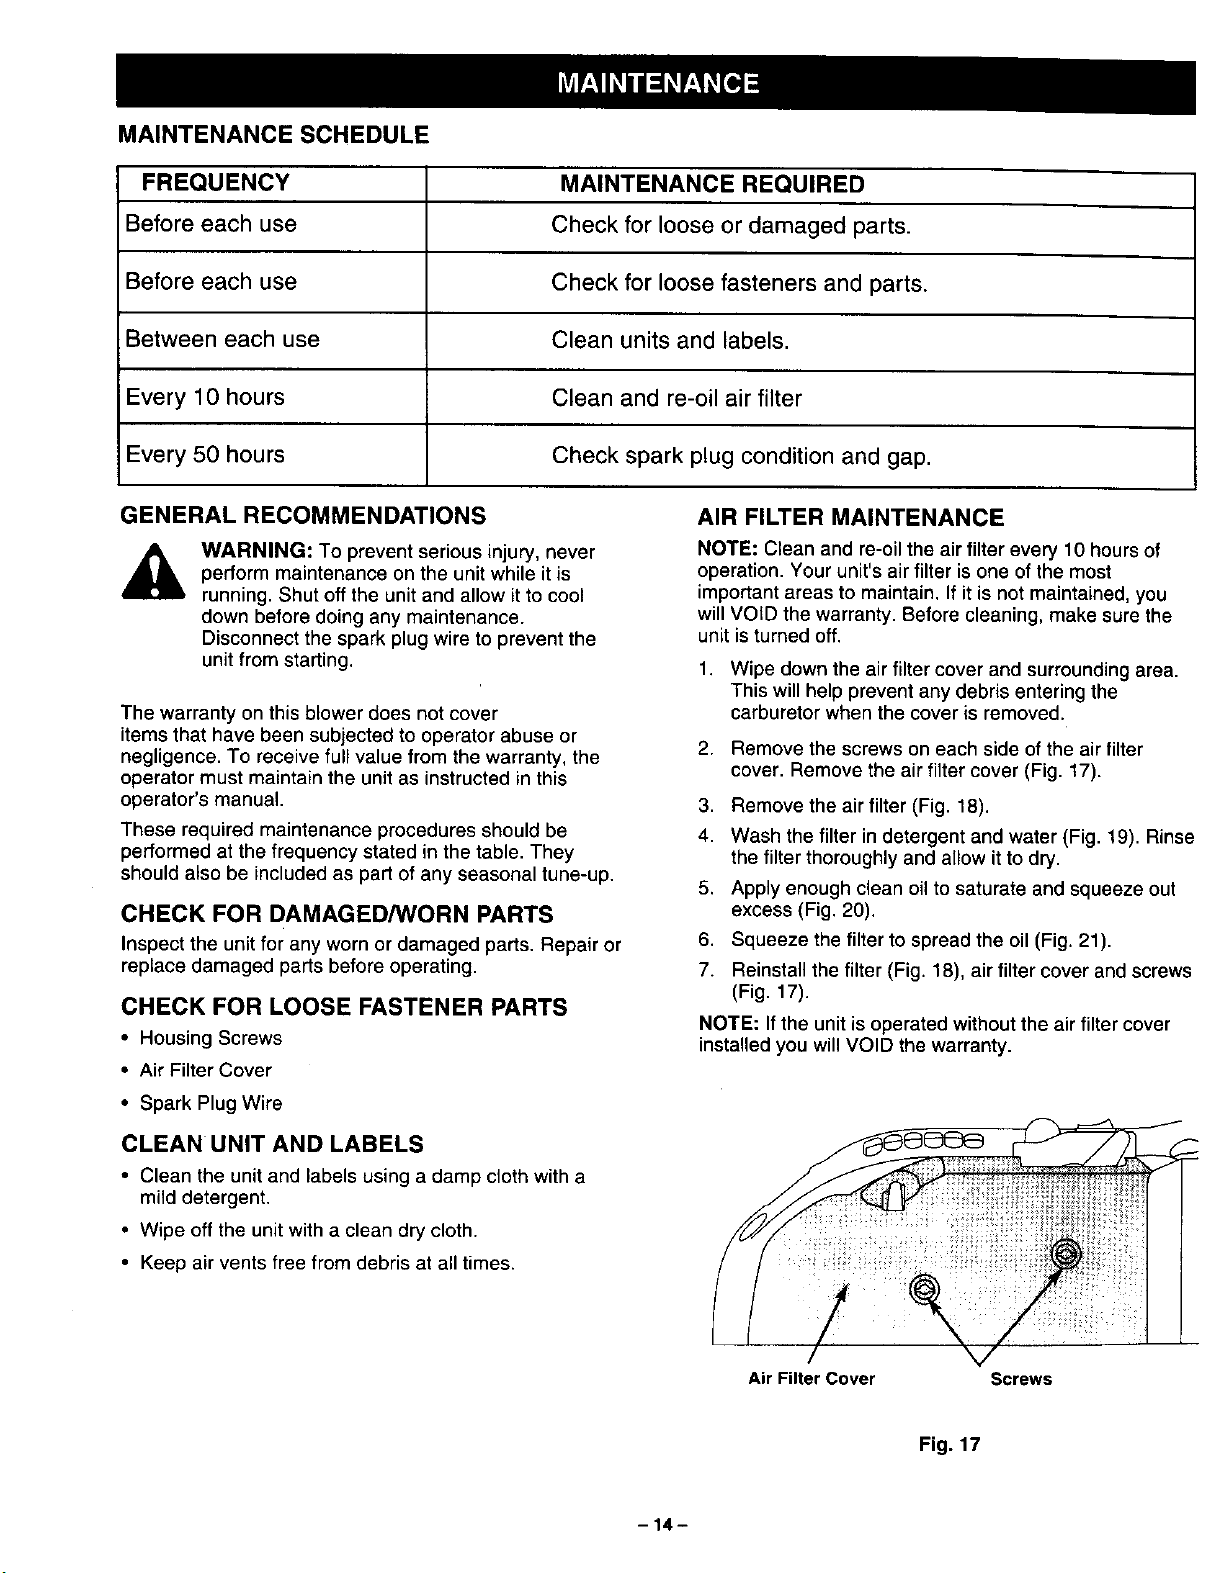
2. Remove the screws on each side of the air filter
cover. Remove the air filter cover (Fig. 17).
3. Remove the air filter (Fig. 18).
4. Wash the filter in detergent and water (Fig. 19). Rinse
the filter thoroughly and allow itto dry.
5. Apply enough clean oil to saturate and squeeze out
excess (Fig. 20).
6. Squeeze the filter to spread the oil (Fig. 21).
7. Reinstall the filter (Fig. 18), air filter cover and screws
(Fig. 17).
NOTE: If the unit is operated without the air filter cover
installed you will VOID the warranty.
Air Filter Cover Screws
Fig. 17
-14-
Loading ...
Loading ...
Loading ...