®
PRO LINE TM SERIES
MODEL
}i i i i i i i x ii ii _x ii I
iiiiiiiiiiiiiiiiiiiiiiiiiiiiiiiiiiiiiiiiiiiiiiiiiiiiiiiiiiiiiiiiiiiiiiiiiiiiiiiiiiiiiiiiiiiiiiiiiiiiiiiiiiiiiiiiiiiiiiiiiiiiiiiiiiiiiiiiiiiiiiiiiiiiiiiiiii@_¸
fictional heatinc
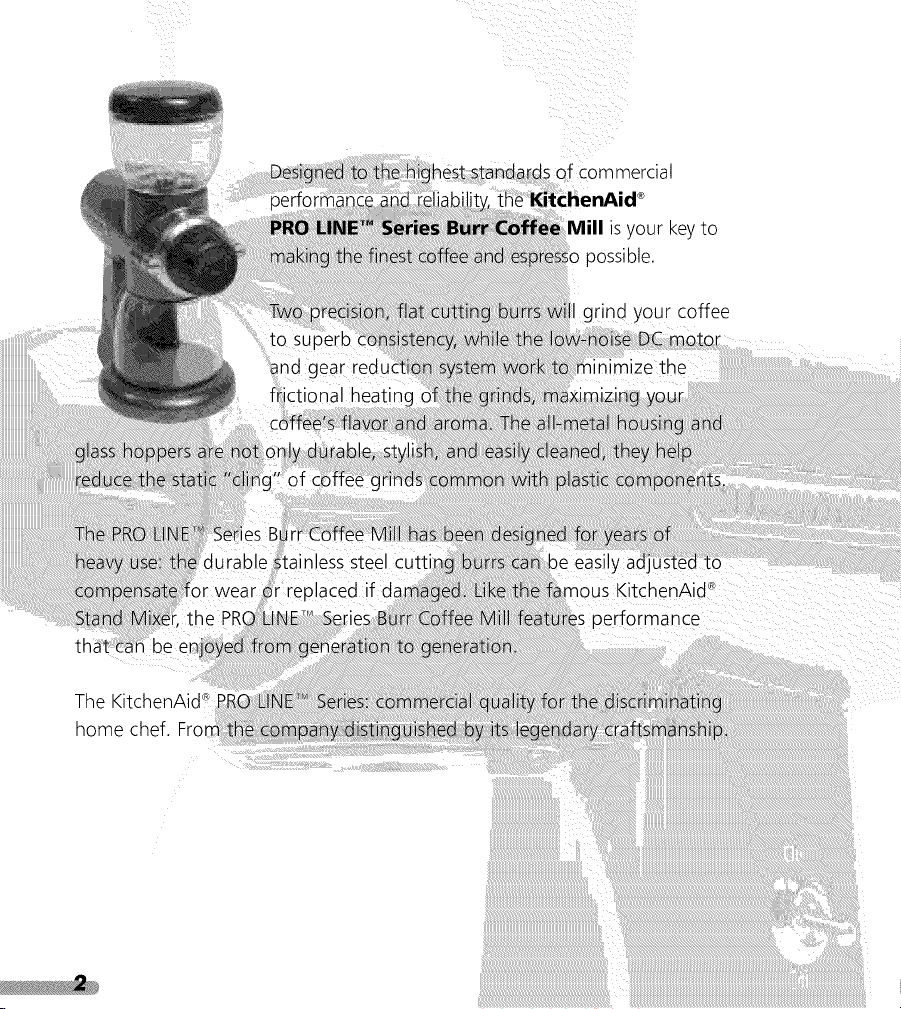
of commercia
d®
Mill is your key to
possible.
I grind your coffee
_inimize the
tain!essste
The KitchenAid_!
home chef. Fro
HTRO©UCT OH
Introduction 2
Proof of Purchase & Product Registration 5
Coffee Maker Safety 6
Important Safeguards 7
Electrical Requirements 8
FEAi[URES As_}_OPERK[/OH
Coffee Mill Features 10
Using the Coffee Mill
Before First Use 13
Operating the Mill 13
Grind Setting Table 16
Adjusting the Cutting Burrs 16
Coffee Mill Tips 19
How the Grind Affects Flavor 21
CARE AHt_CLEAHtNG
Cleaning the Motor Housing & Hoppers 24
Cutting Burrs
Cleaning 25
Adjusting for Wear 28
Replacing 29
Troubleshooting 30
Co @d
Warranty for the 50 United States & District of Columbia 32
Warranty for Puerto Rico 33
Arranging for Hassle-Free Replacement 34
Ordering Accessories and Replacement Parts 34
Arranging for Service After the Warranty Expires 35
Arranging for Service Outside the 50 United States
& Puerto Rico 35
Always keep a copy of the sales receipt showing the date of purchase of
your Coffee Mill. Proof of purchase will assure you of in-warranty service.
Before you use your Coffee Mill, please fill out and mail your product
registration card packed with the unit. This card will enable us to contact
you in the unlikely event of a product safety notification and assist us in
complying with the provisions of the Consumer Product Safety Act. This
card does not verify your warranty.
Pleasecomplete the following for your personal records:
Model Number: KPCG1O0
Serial Number
Date Purchased
Store Name
Your safety and the safety of others are very important.
We have providedmanyimportantsafety messagesin thismanualand on your
appliance.Alwaysreadandobey all safetymessages.
This is the safetyalert symbol.
This symbolalerts youto potentialhazardsthatcan kill or hurt you
and others.
All safetymessageswill followthe safetyalert symbolandeither
the word "DANGER"or"WARNING."Thesewords mean:
You can be killed or seriously injured
if you don't immediatelyfollow
instructions.
Youcan be killed orseriously injured
if you don't follow instructions.
All safetymessageswill tell you what the potentialhazardis, tell you how to
reducethe chance of injury,and tell youwhat can happenif the instructionsare
notfollowed.
Whenusingelectricalappliances,basicsafetyprecautionsshouldalways
befollowed,includingthefollowing:
" Readallinstructions.
) Toprotectagainsttheriskof electricshock,donotputtheCoffeeMill
in waterorotherliquids.
Closesupervisionisnecessarywhenanyapplianceisusedbyor
nearchildren.
4 UnplugtheCoffeeMillfromtheoutletwhennotin use,before
puttingonortakingoff parts,andbeforecleaning.
:i Avoidcontactingmovingparts.
Donotoperateanyappliancewitha damagedcordorplug,orafterthe
appliancemalfunctionsorisdroppedordamagedinanymanner.Return
theapplianceto thenearestauthorizedservicefacilityforexamination,
repair,orelectricalormechanicaladjustment.
;_ The use of attachments not recommended or sold by KitchenAid may
cause fire, electric shock, or injury.
S Do not use outdoors.
9 Do not let cord hang over edge of table or counter, or touch hot surfaces.
( Check the bean hopper for the presence of foreign objects before using.
" This product has been UL Listed for household and commercial use.
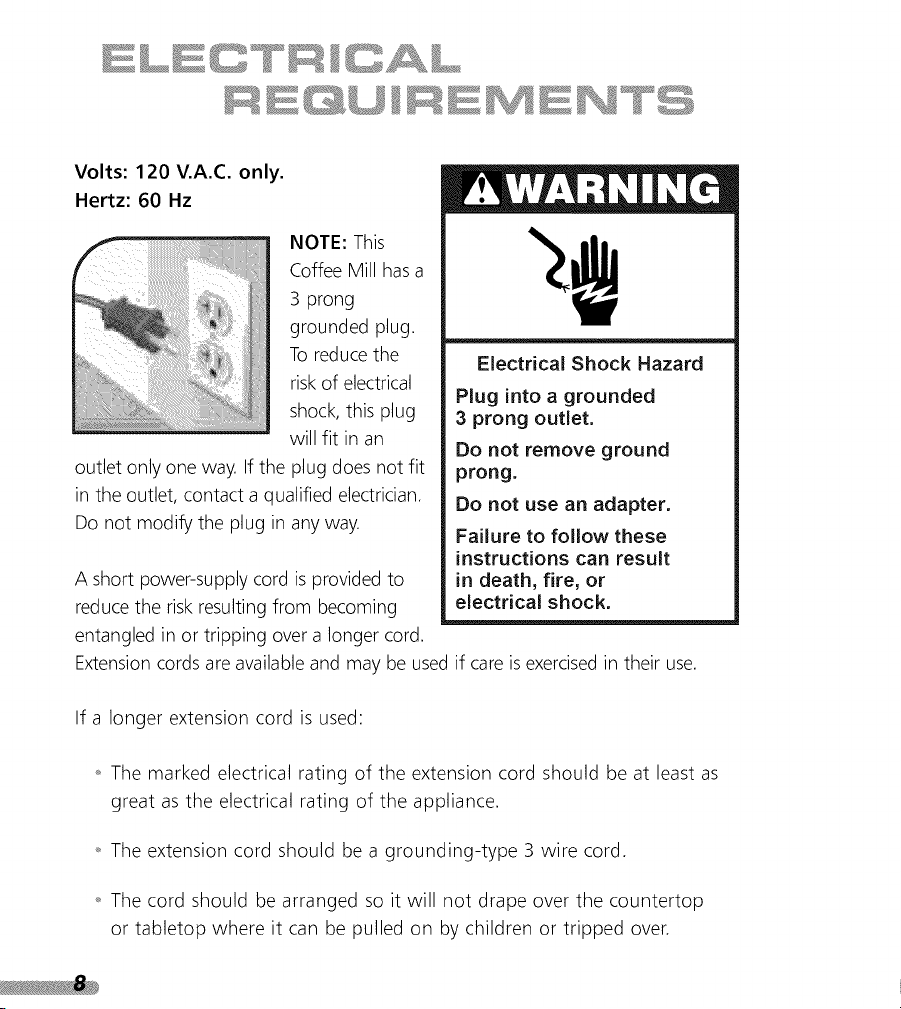
Volts:120V.A.C.only.
Hertz:60 Hz
NOTE:This
CoffeeMillhasa
3prong
groundedplug.
Toreducethe
riskofelectrical
shock,thisplug
willfit inan
outletonlyoneway.Iftheplugdoesnotfit
intheoutlet,contactaqualifiedelectrician.
Donotmodifythepluginanyway.
Ashortpower-supplycordisprovidedto
reducetheriskresultingfrombecoming
entangledinortrippingoveralongercord.
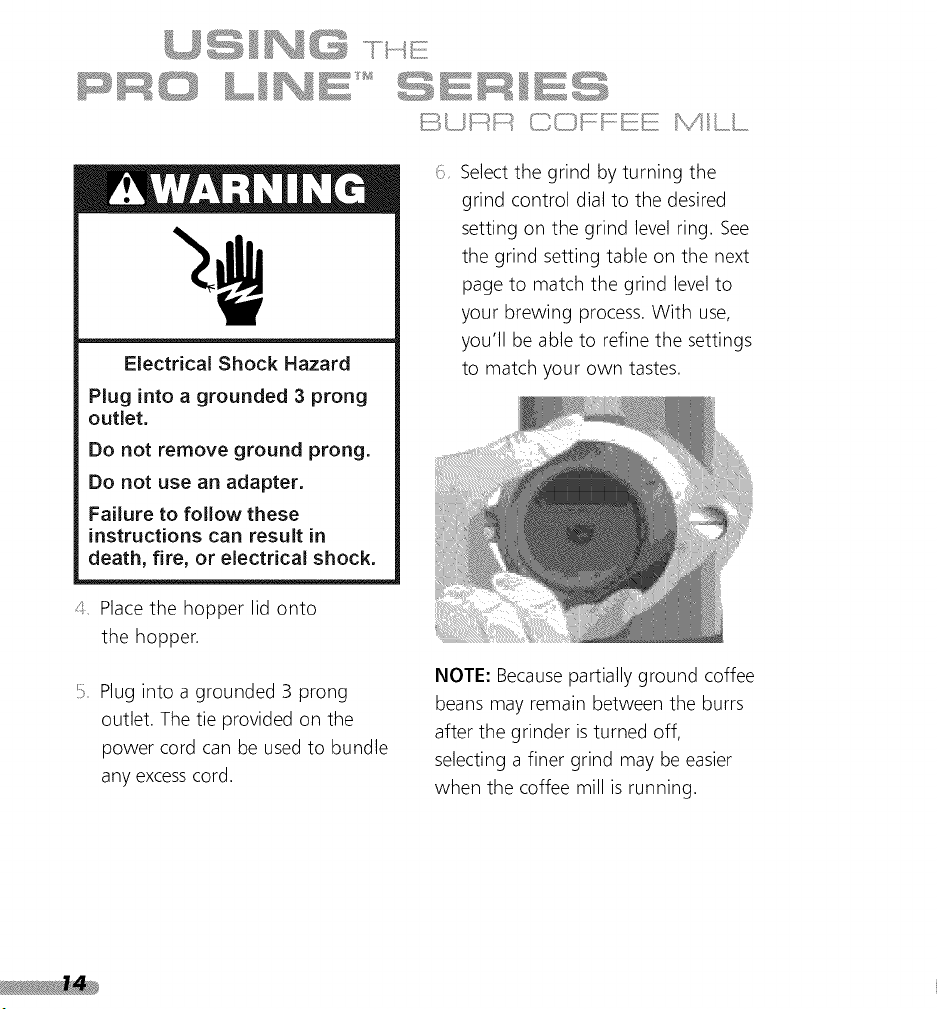
ElectricalShockHazard
Pluginto agrounded
3 prongoutlet.
Donot removeground
prong.
Donot useanadapter.
Failureto followthese
instructions can result
in death, fire, or
electrical shock.
Extensioncords are available and may be used if care is exercisedin their use.
If a longer extension cord is used:
The marked electrical rating of the extension cord should be at least as
great as the electrical rating of the appliance.
The extension cord should be a grounding-type 3 wire cord.
The cord should be arranged so it will not drape over the countertop
or tabletop where it can be pulled on by children or tripped over.

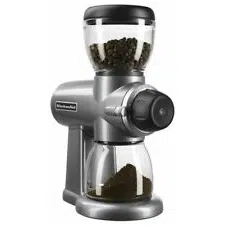
PRO L N E'" SERIES
i ....
_ i i _ i ii ii I
_iiii i _iiiii

_F_ ¸,_o
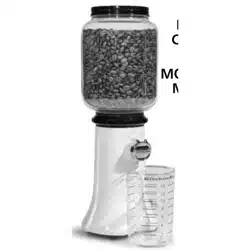
Model KPCGIO0
Burr Coffee Mill
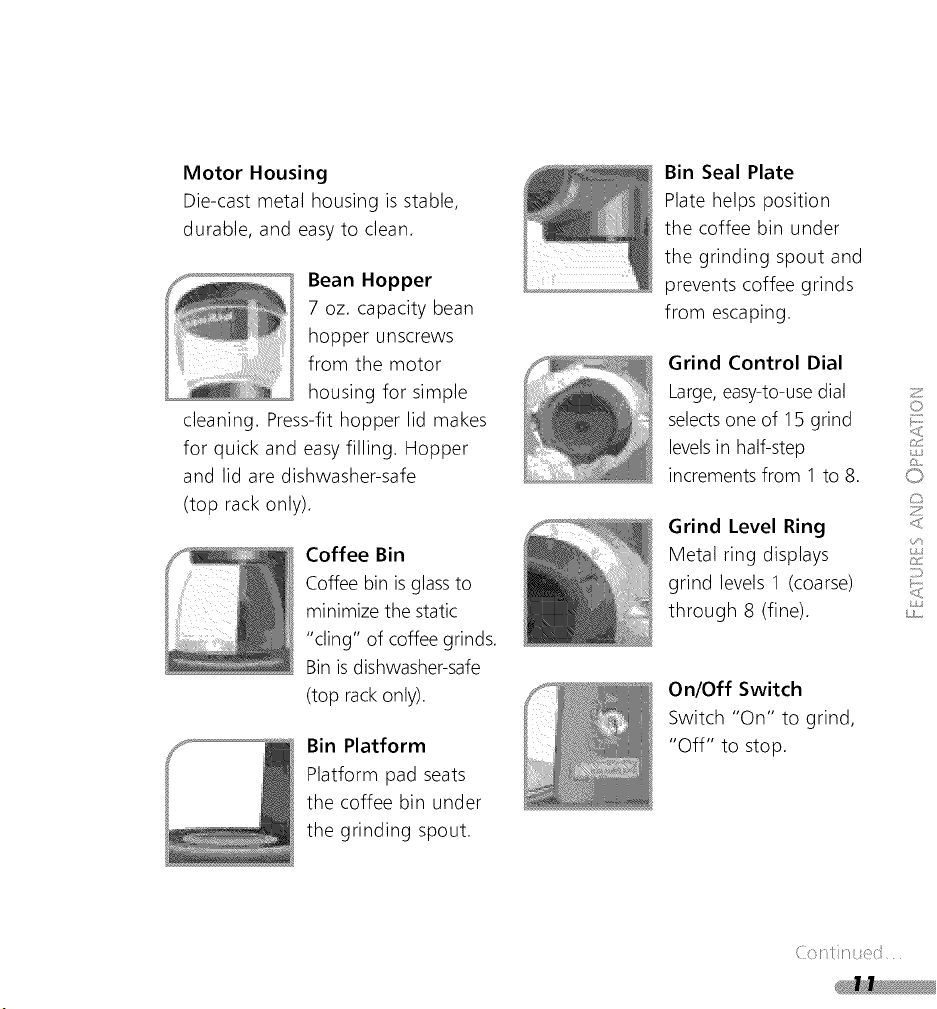
Motor Housing
Die-cast metal housing is stable,
durable, and easy to clean.
Bean Hopper
7 oz. capacity bean
hopper unscrews
from the motor
housing for simple
cleaning. Press-fit hopper lid makes
for quick and easy filling. Hopper
and lid are dishwasher-safe
(top rack only).
Coffee Bin
Coffee bin is glassto
minimize the static
"cling" of coffee grinds.
Bin is dishwasher-safe
(top rack only).
Bin Platform
Platform pad seats
the coffee bin under
the grinding spout.
Bin Seal Plate
Plate helps position
the coffee bin under
the grinding spout and
prevents coffee grinds
from escaping.
Grind Control Dial
Large, easy-to-usedial
selectsone of 15 grind
levelsin half-step
increments from 1 to 8.
Grind Level Ring
Metal ring displays
grind levels 1 (coarse)
through 8 (fine).
On/Off Switch
Switch "On" to grind,
"Off" to stop.
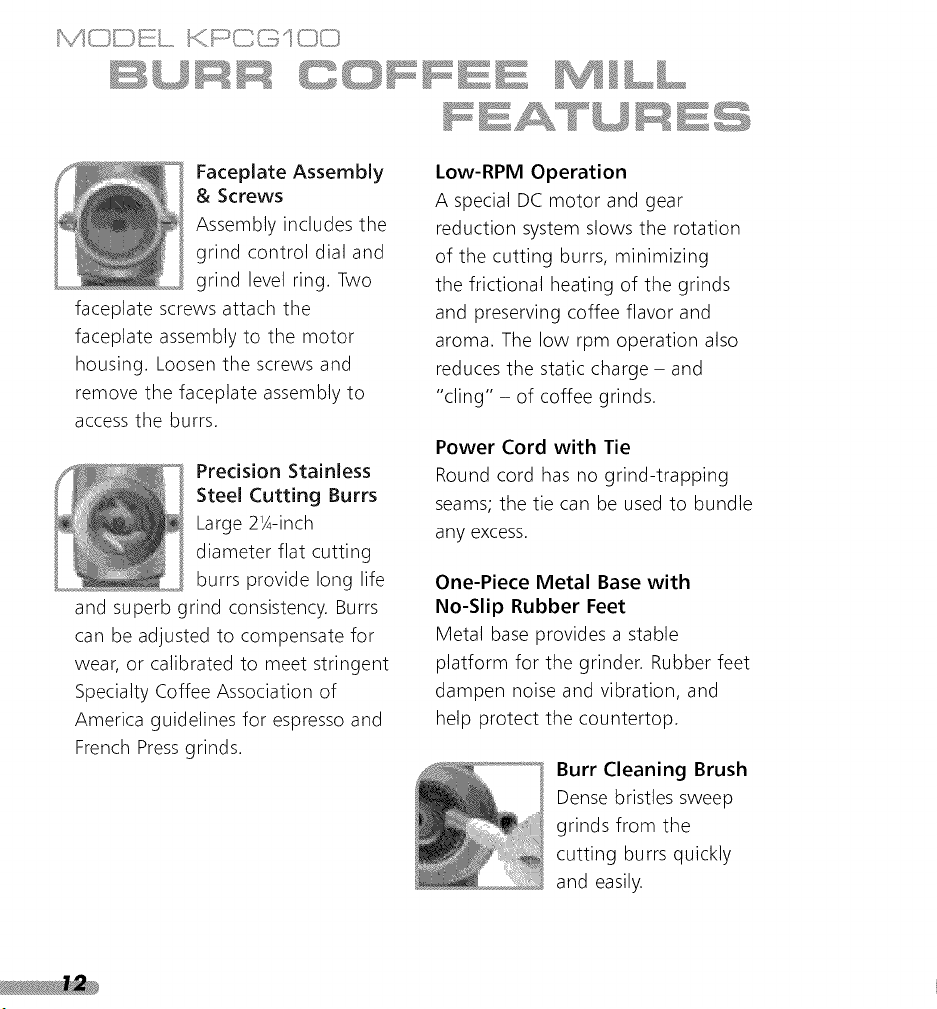
Faceplate Assembly
& Screws
Assembly includes the
grind control dial and
grind level ring. Two
faceplate screws attach the
faceplate assembly to the motor
housing. Loosen the screws and
remove the faceplate assembly to
access the burrs.
Precision Stainless
Steel Cutting Burrs
Large 2_A-inch
diameter flat cutting
burrs provide long life
and superb grind consistency. Burrs
can be adjusted to compensate for
wear, or calibrated to meet stringent
Specialty Coffee Association of
America guidelines for espresso and
French Pressgrinds.
Low-RPM Operation
A special DC motor and gear
reduction system slows the rotation
of the cutting burrs, minimizing
the frictional heating of the grinds
and preserving coffee flavor and
aroma. The low rpm operation also
reduces the static charge - and
"cling" - of coffee grinds.
Power Cord with Tie
Round cord has no grind-trapping
seams; the tie can be used to bundle
any excess.
One-Piece Metal Base with
No-Slip Rubber Feet
Metal base provides a stable
platform for the grinder. Rubber feet
dampen noise and vibration, and
help protect the countertop.
Burr Cleaning Brush
Dense bristles sweep
grinds from the
cutting burrs quickly
and easily.
Before First Use
Before using the coffee mill, wipe
the motor housing and cord with a
clean damp cloth. Wash the bean
hopper, hopper lid, and coffee bin in
hot soapy water, then rinse and dry.
The bean hopper, hopper lid, and
coffee bin can also be washed in the
top rack of a dishwasher.
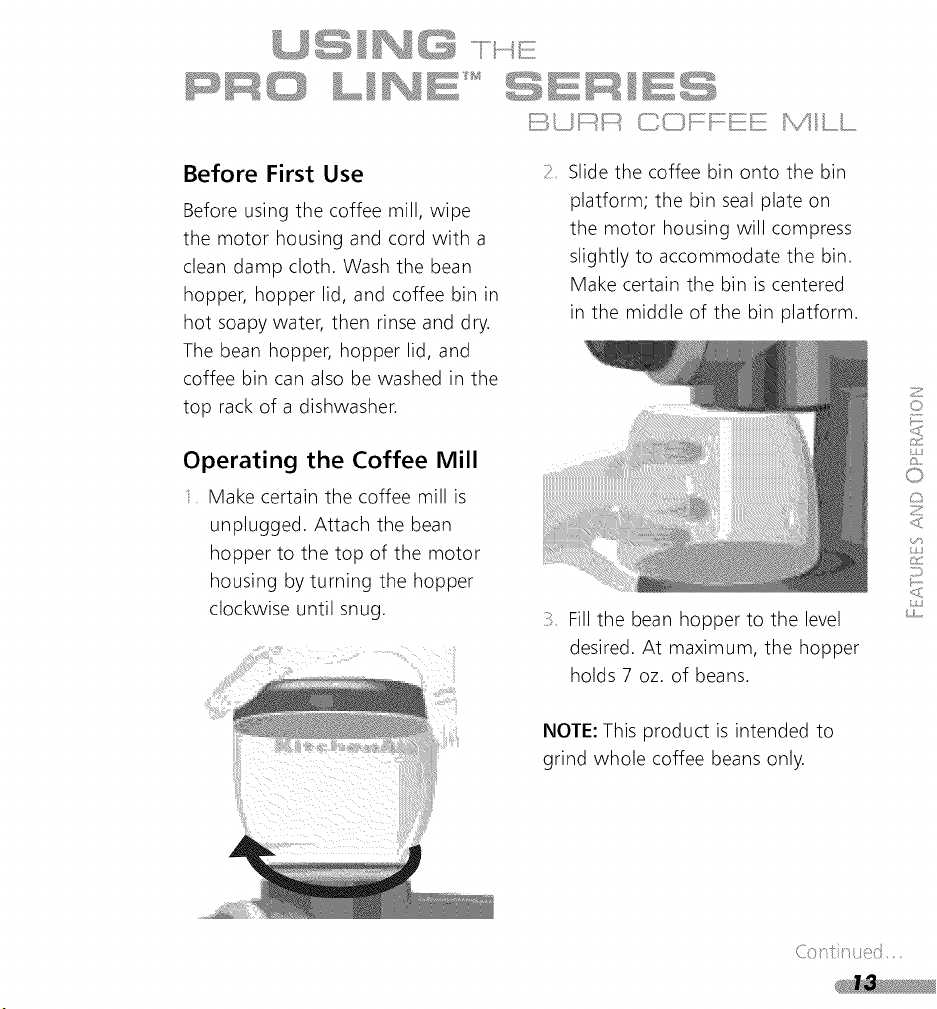
2 Slide the coffee bin onto the bin
platform; the bin seal plate on
the motor housing will compress
slightly to accommodate the bin.
Make certain the bin is centered
in the middle of the bin platform.
Operating the Coffee Mill
i Make certain the coffee mill is
unplugged. Attach the bean
hopper to the top of the motor
housing by turning the hopper
clockwise until snug.
Fill the bean hopper to the level
desired. At maximum, the hopper
holds 7 oz. of beans.
NOTE: This product is intended to
grind whole coffee beans only.
[ii(])i ;(;d ....
_III_,,L,
Electrical Shock Hazard
Plug into a grounded 3 prong
outlet.
Do not remove ground prong.
Do not use an adapter.
Failure to follow these
instructions can result in
death, fire, or electrical shock.
z_ Place the hopper lid onto
the hopper.
Plug into a grounded 3 prong
outlet. The tie provided on the
power cord can be used to bundle
any excesscord.
6_
Selectthe grind by turning the
grind control dial to the desired
setting on the grind level ring. See
the grind setting table on the next
page to match the grind level to
your brewing process. With use,
you'll be able to refine the settings
to match your own tastes.
NOTE: Becausepartially ground coffee
beans may remain between the burrs
after the grinder is turned off,
selecting a finer grind may be easier
when the coffee mill is running.
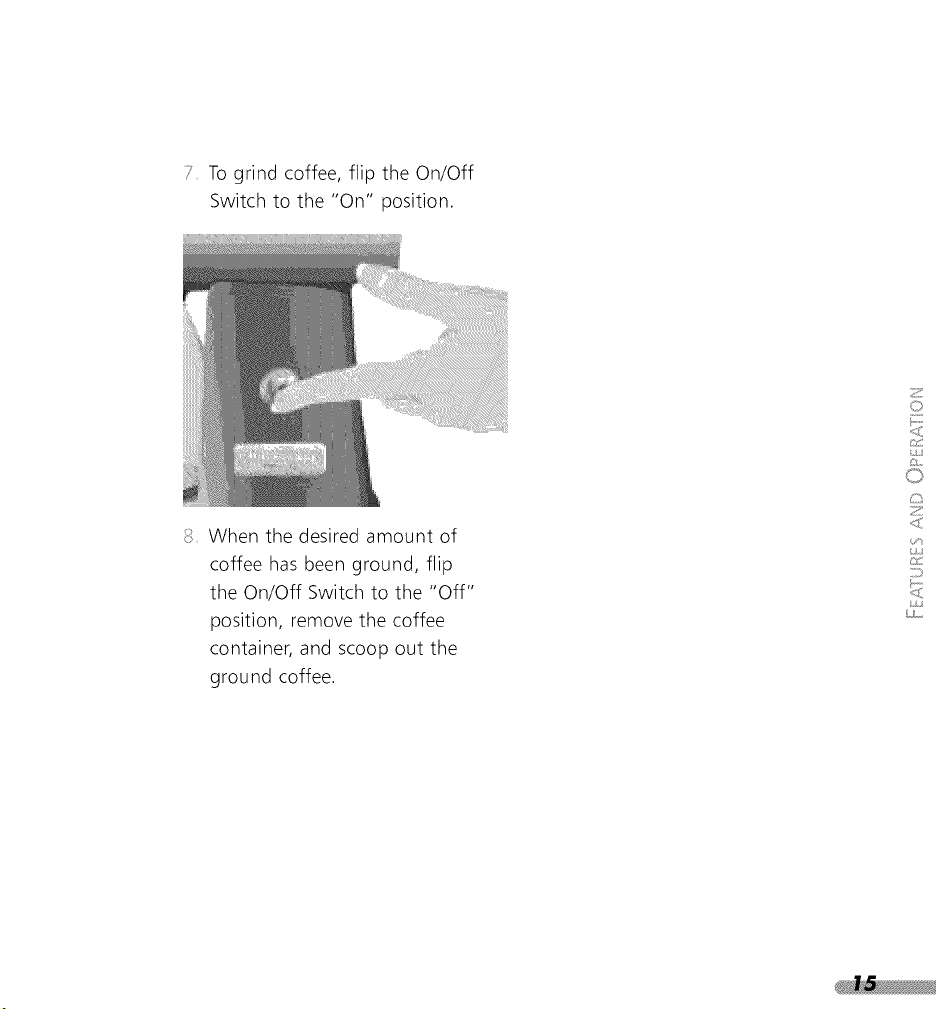
Togrindcoffee,fliptheOn/Off
Switchto the"On"position.
S Whenthedesiredamountof
coffeehasbeenground,flip
theOn/OffSwitchto the"Off"
position,removethecoffee
container,andscoopoutthe
groundcoffee.
Grind Setting Table
8
Coarse French Press 1250 microns
Adjusting the Cutting Burrs
From the factory, the PROLINETM
SeriesBurr Coffee Mill will provide
grinds suitable for almost all types of
brewing. If you're an espresso or
French Pressaficionado, however, you
may wish to adjust the cutting burrs
to provide optimum performance for
your style of brewing. With
adjustment, the PROLINETM Series
Burr Coffee Mill will easily meet
stringent Specialty Coffee Association
of America grind-size specifications for
espresso(250 micron grind size) or
French Pressbrewing (1500 micron
grind size).
Adjusting for Maximum
Grind Fineness
Adjusting the mill to provide
maximum fineness will slightly
decrease the grind sizes throughout
the grinding range. (To adjust the
mill to provide coarser grinds,
see page 18.)
i Empty the bean hopper, then run
the mill a few seconds to clear any
remaining beans from the machine.
2 Turn the grind control dial to
level "8".
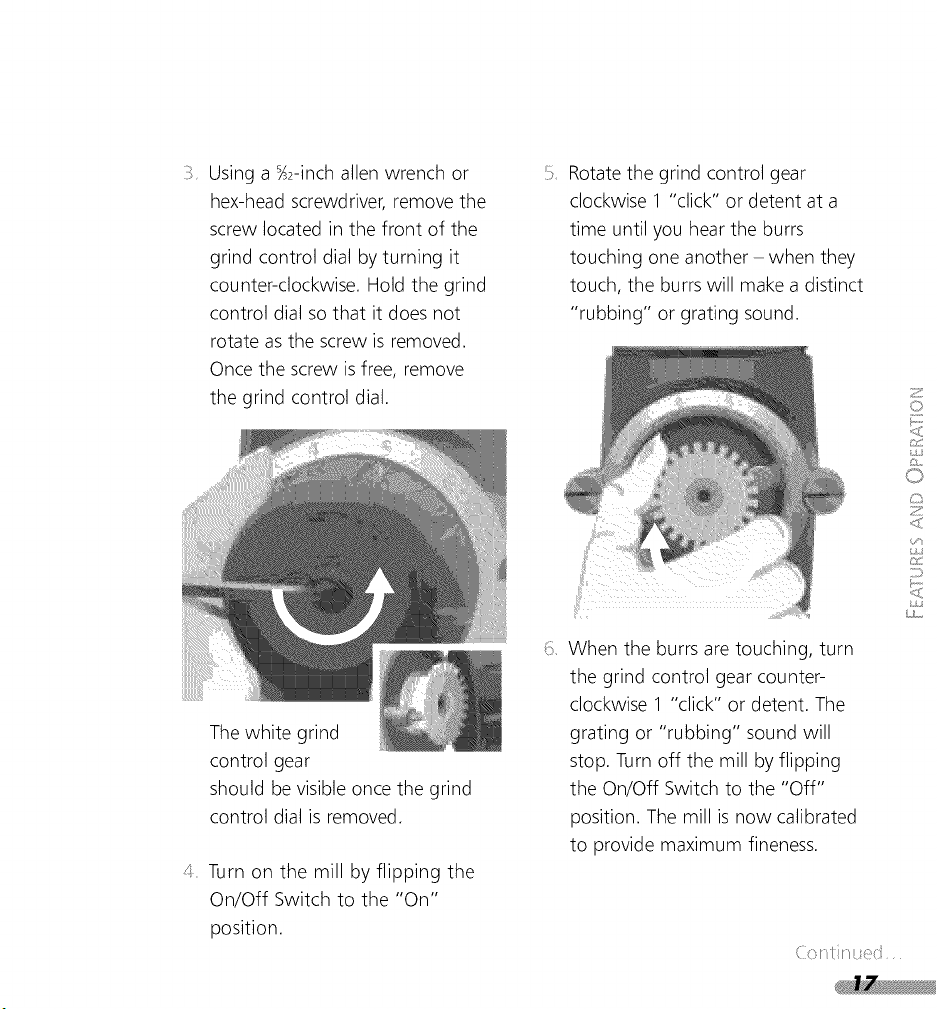
Usinga _2-inchallenwrenchor
hex-headscrewdriver,removethe
screwlocatedinthefrontof the
grindcontroldialbyturningit
counter-clockwise.Holdthegrind
controldialsothatit doesnot
rotateasthescrewisremoved.
Oncethescrewisfree,remove
thegrindcontroldial.
Thewhitegrind
controlgear
shouldbevisibleoncethegrind
controldialisremoved.
4 Turnonthemillbyflippingthe
On/OffSwitchto the"On"
position.
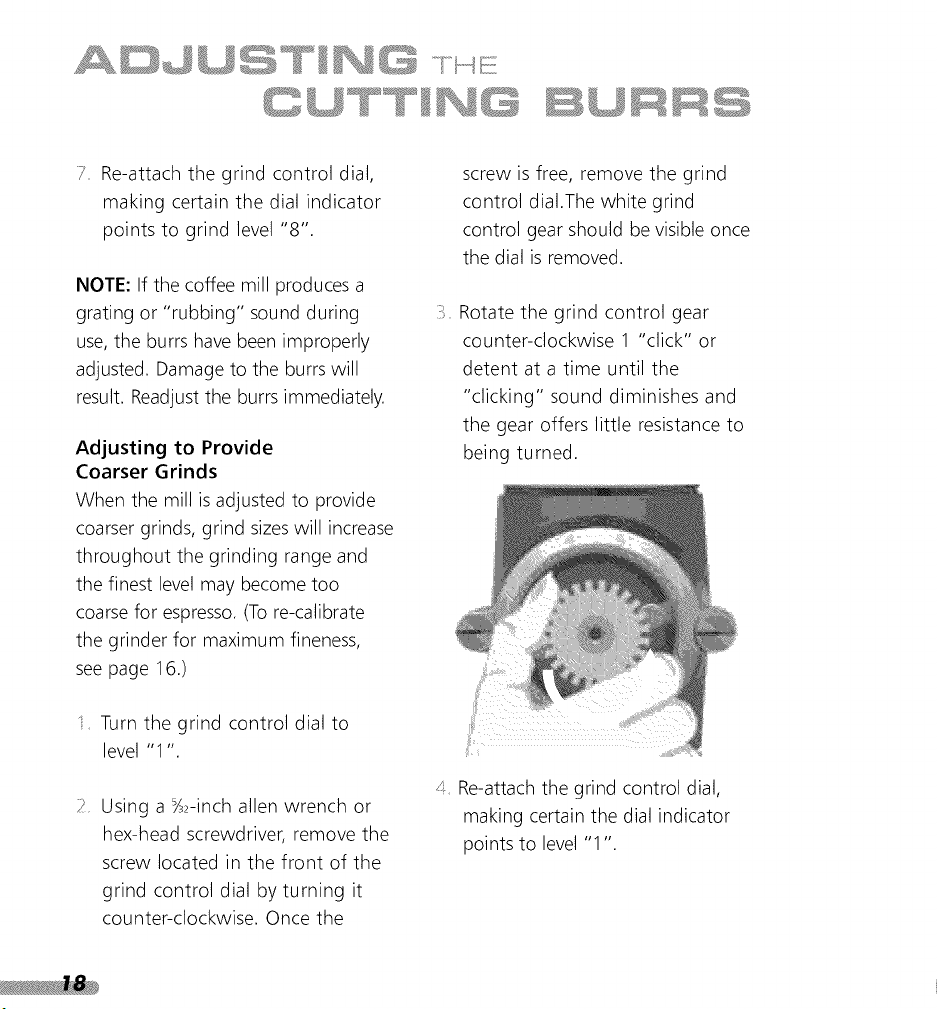
6_
Rotatethegrindcontrolgear
clockwise1"click"ordetentata
timeuntilyouheartheburrs
touchingoneanother- whenthey
touch,theburrswillmakea distinct
"rubbing"orgratingsound.
Whentheburrsaretouching,turn
thegrindcontrolgearcounter-
clockwise1"click"or detent.The
gratingor"rubbing"soundwill
stop.Turnoffthemillbyflipping
theOn/OffSwitchtothe"Off"
position.Themillisnowcalibrated
to providemaximumfineness.
Re-attachthegrindcontroldial,
makingcertainthedialindicator
pointsto grindlevel"8".
NOTE:Ifthecoffeemillproducesa
gratingor"rubbing"soundduring
use,theburrshavebeenimproperly
adjusted.Damageto theburrswill
result.Readjusttheburrsimmediately.
Adjustingto Provide
CoarserGrinds
Whenthemillisadjustedto provide
coarsergrinds,grindsizeswillincrease
throughoutthegrindingrangeand
thefinestlevelmaybecometoo
coarseforespresso.(Tore-calibrate
thegrinderformaximumfineness,
seepage16.)
i Turnthegrindcontroldialto
level"1".
2 Usinga_2-inchallenwrenchor
hex-headscrewdriver,removethe
screwlocatedinthefrontof the
grindcontroldialbyturningit
counter-clockwise.Oncethe
screwisfree,removethegrind
controldial.Thewhitegrind
controlgearshouldbevisibleonce
thedialisremoved.
Rotatethegrindcontrolgear
counter-clockwise1 "click"or
detentata timeuntilthe
"clicking"sounddiminishesand
thegearofferslittleresistanceto
beingturned.
4 Re-attachthegrindcontroldial,
makingcertainthedialindicator
pointsto level"1".

_:_:_C_I_LI _'J........_ _ _°__'°_ __°°_::__ _L_.....
Select the correct grind for the brew process you are
using. 15 grind levels are available in half-step ::
increments from 1 to 8. Level 8 produces a very fine ::
grind perfect for espresso, 4_ to 6 are medium grinds ::
appropriate for automatic drip coffee makers, and ::
1 is a coarse grind suited to French Press brewing.
Experiment - your tastes may be better served by
using a slightly finer or coarser grind.
For standard drip-process coffee, a good starting
point is to use 1 ounce of coffee for every 4 cups
of brew water as measured with the carafe (a carafe
"cup" is about 4_ ounces). Finer grinds usually
requirelesscoffee,butusingtoofineagrindwill
result in bitter flavor - see "How the Grind Affects :::
Flavor" on page 21.
If you prefer substantially weaker-than-average coffee,
it's best to brew using a normal amount of ground
coffee and then dilute the result with hot water. Doing
this will maximize flavor and minimize bitterness.
(: }

results, grind only as much as you intend to immediately use.
To retain freshness,coffee beansshould be stored in an airtight
container and kept in a cool, dark place. It is not recommended that
you store beans in the grinder's bean hopper for a prolonged period.
Clean the coffee bin and cutting burrs frequently.
Grinding flavored coffee beans will impart an off-taste to any other
coffee that is ground in the mill. If you enjoy flavored coffee, it's best
to add flavored syrups or creamersto your coffee after brewing or
dedicate another mill for grinding flavored beans only.
NOTE: The burrs will require more frequent cleaning when
grinding flavored coffee beans.The coffee mill is intended for
grinding whole coffee beans only. Do not grind other food items.
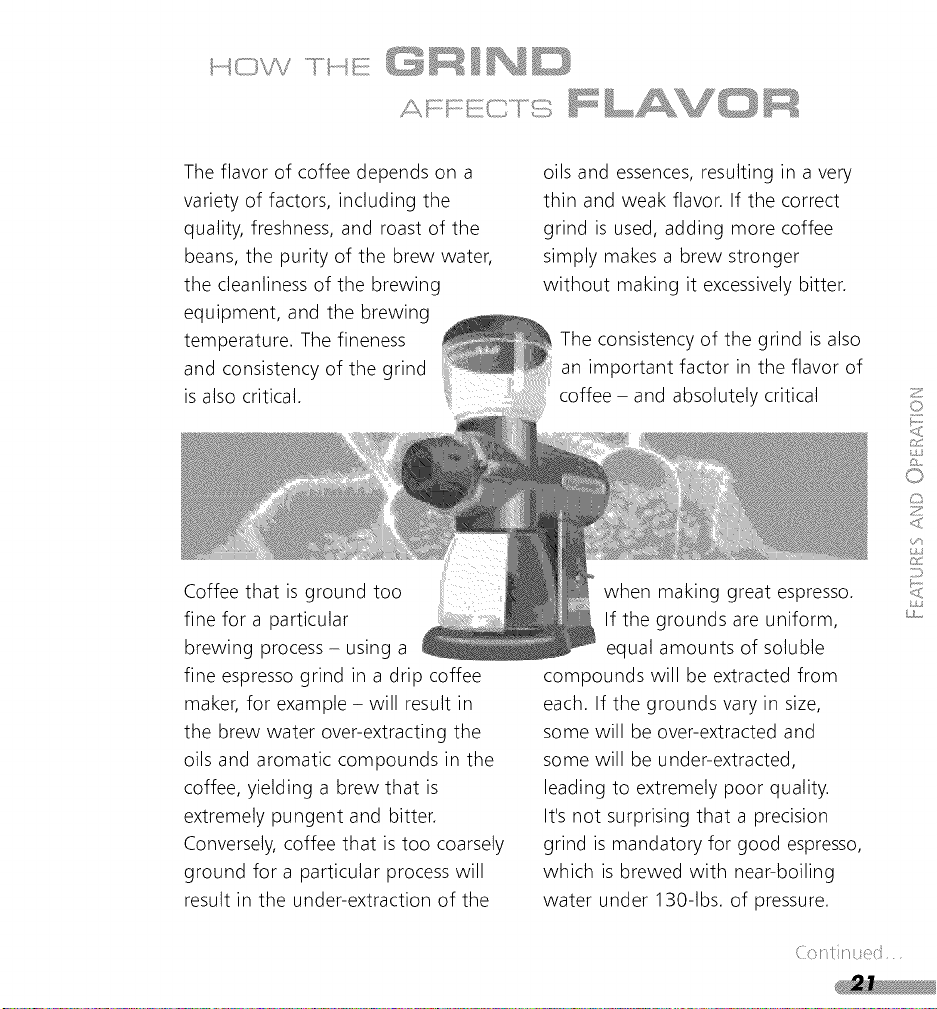
Theflavorof coffeedependsona
varietyof factors,includingthe
quality,freshness,androastofthe
beans,thepurityof thebrewwater,
thecleanlinessof thebrewing
equipment,andthebrewing
temperature.Thefineness
andconsistencyof thegrind
isalsocritical.
oilsandessences,resultingin avery
thinandweakflavor.If thecorrect
grindisused,addingmorecoffee
simplymakesa brewstronger
withoutmakingit excessivelybitter.
Theconsistencyof thegrindisalso
animportantfactorin theflavorof
coffee- andabsolutelycritical
Coffeethatisgroundtoo
finefor a particular
brewingprocess- usinga
fineespressogrindin adripcoffee
maker,forexample- will resultin
thebrewwaterover-extractingthe
oilsandaromaticcompoundsin the
coffee,yieldinga brewthatis
extremelypungentandbitter.
Conversely,coffeethatistoocoarsely
groundfora particularprocesswill
resultin theunder-extractionof the
whenmakinggreatespresso.
Ifthegroundsareuniform,
equalamountsofsoluble
compoundswill beextractedfrom
each.If thegroundsvaryin size,
somewill beover-extractedand
somewill beunder-extracted,
leadingto extremelypoorquality.
It'snotsurprisingthata precision
grindis mandatoryforgoodespresso,
whichis brewedwith near-boiling
waterunder130-1bs.of pressure.
Coffeegrindqualityisdirectlyrelated
to thetypeof grinderused.High
speedgrinderswith smallburrsets
areusuallynotableto produce
thefinenessorconsistencyrequired
forthe bestespresso.Theyalso
excessivelyheatthebeanswhile
grinding,resultingin lostflavor
andaroma.
ThePROLINETM Series Burr Coffee
Mill uses a pair of large, commercial-
style cutting burrs to grind coffee
with precision. Frictional heating is
minimized with a gear reduction
system that slows burr rotation,
and uniformity is enhanced with
a helical-gear that transports beans
to the burrs at a controlled rate.
The result is a superb grind that
makes your coffee and espresso
the best it can be.


Cleaning the Motor Housing
and Hoppers
Make sure the coffee mill is switched off and
unplugged before cleaning.
Do not immerse the motor housing in water.
Never immerse the cutting burrs, burr-shaft
assembly, or face-plate assembly in water.
Keep them dry at all times.
Do not use abrasive cleansers or
scouring pads.
Wipe the motor housing and cord with a
clean damp cloth. Dry with
a soft cloth.
Wash the coffee bin, bean
hopper, and hopper lid in
hot soapy water, then rinse
and dry.
The bean hopper, hopper lid,
and coffee bin can also be
washed in the top rack of a
dishwasher.

Cleaning the Cutting Burrs
Ifthemillisusedfrequently,the
cuttingburrsneedto becleaned
everyfewweeksfor bestperformance.
Cleaning enables the burrs to achieve
the finest, most consistent grinds
possible - which is especially important
when grinding coffee for espresso.
Foreign objects - like pebbles or twigs
- sometimes find their way into whole
bean coffee. These objects may cause
the mill to jam. If this happens, follow
the burr-cleaning procedure to remove
the foreign material.
Make sure the mill is switched off
and unplugged. Remove the coffee
bin and bean hopper from the mill.
2
Using a flat-head screwdriver, turn
the two faceplate screws counter-
clockwise until the faceplate
assembly is free. (The faceplate
screws have retaining clips that
prevent them from being removed
from the faceplate assembly.)
(: } .:
• _ _' • _ _ _ - , i _/ i ¸ _
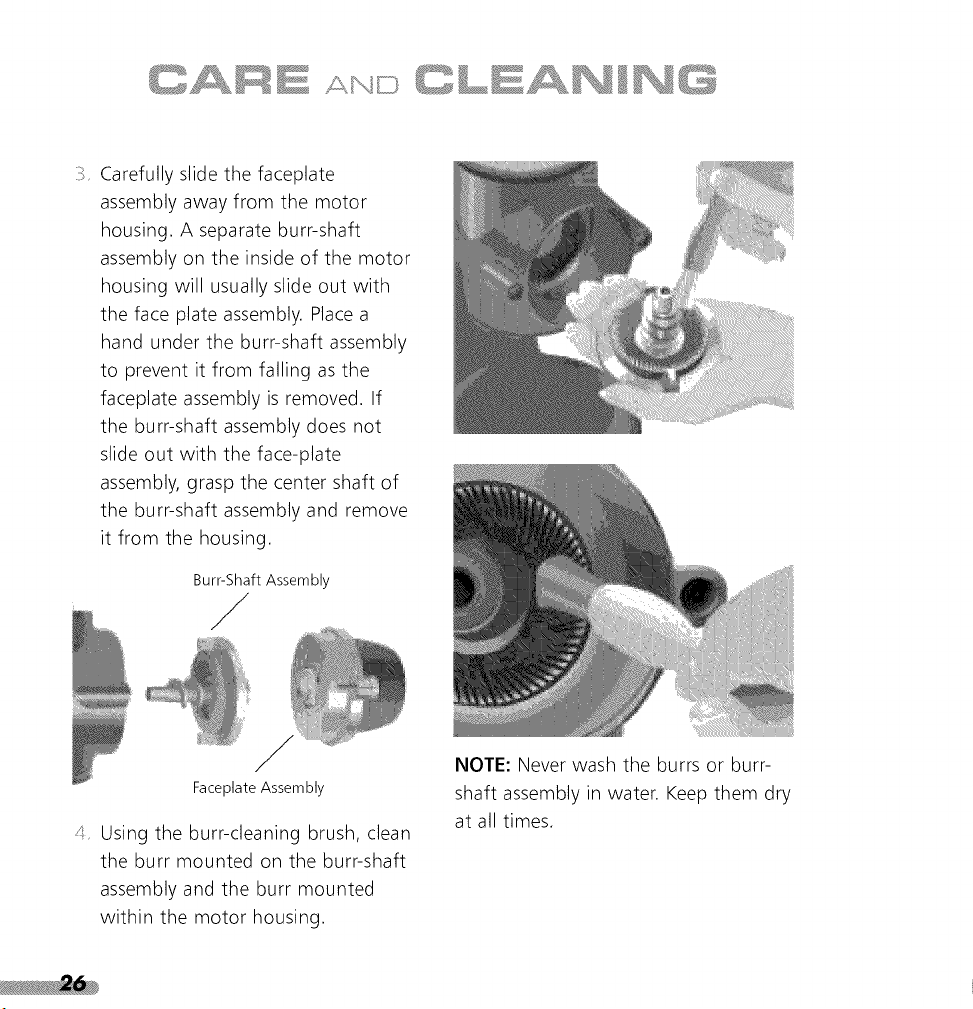
Carefully slide the faceplate
assembly away from the motor
housing. A separate burr-shaft
assembly on the inside of the motor
housing will usually slide out with
the face plate assembly. Place a
hand under the burr-shaft assembly
to prevent it from falling as the
faceplate assembly is removed. If
the burr-shaft assembly does not
slide out with the face-plate
assembly, grasp the center shaft of
the burr-shaft assembly and remove
it from the housing.
Burr-Shaft Assembly
/
/
Faceplate Assembly
4 Using the burr-cleaning brush, clean
the burr mounted on the burr-shaft
assembly and the burr mounted
within the motor housing.
NOTE: Never wash the burrs or burr-
shaft assembly in water. Keep them dry
at all times.

Aftercleaning,tilt thegrinder
backwardsothefrontofthe motor
housingfacesupward.
Withthecorkscrew-shapedauger
shaftfacingintothemotorhousing,
inserttheburr-shaftassemblyinto
thegrinder.Keeptheburr-shaft
assemblylevel,sothetipof the
augershaftwill lineupwiththe
smallsocketinthemotorhousing.
Oncetheburr-shaftassemblyisin
themotorhousing,rotatethe
assemblyuntilit fallsintoplace.
Whencorrectlypositioned,theburr-
shaftassemblycannotberotated.
t_
2
Z
Z
(: } .:
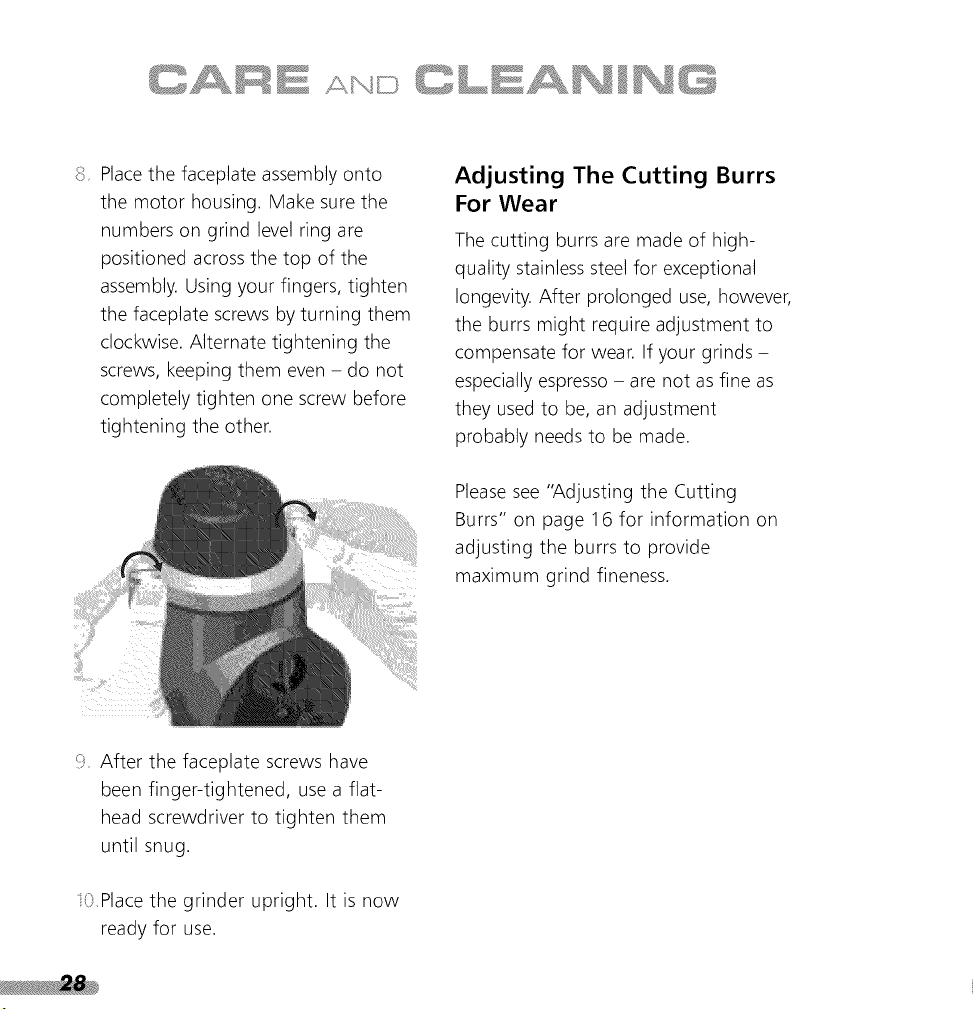
S Placethe faceplate assembly onto
the motor housing. Make sure the
numbers on grind level ring are
positioned across the top of the
assembly. Using your fingers, tighten
the faceplate screws by turning them
clockwise. Alternate tightening the
screws, keeping them even - do not
completely tighten one screw before
tightening the other.
Adjusting The Cutting Burrs
For Wear
The cutting burrs are made of high-
quality stainless steel for exceptional
longevity. After prolonged use, however,
the burrs might require adjustment to
compensate for wear. If your grinds -
especially espresso- are not as fine as
they used to be, an adjustment
probably needs to be made.
Pleasesee "Adjusting the Cutting
Burrs" on page 16 for information on
adjusting the burrs to provide
maximum grind fineness.
"_ After the faceplate screws have
been finger-tightened, use a flat-
head screwdriver to tighten them
until snug.
i0 Place the grinder upright. It is now
ready for use.
Replacing the Cutting Burrs
Ifthecuttingburrsaredamaged,or
havereachedtheendof theirlife
(usuallyaftergrinding600-800Ibs.
of coffee),theycanbereplacedeasily.
ContactKitchenAidat 1-800-541-6390
to orderasetof replacementburrs.
Toreplacethe burrs:
i Removethefaceplateandburr-shaft
assemblies.Forinstructions,see
"CleaningtheCuttingBurrs"steps
1,2, and3 onpages25and26.
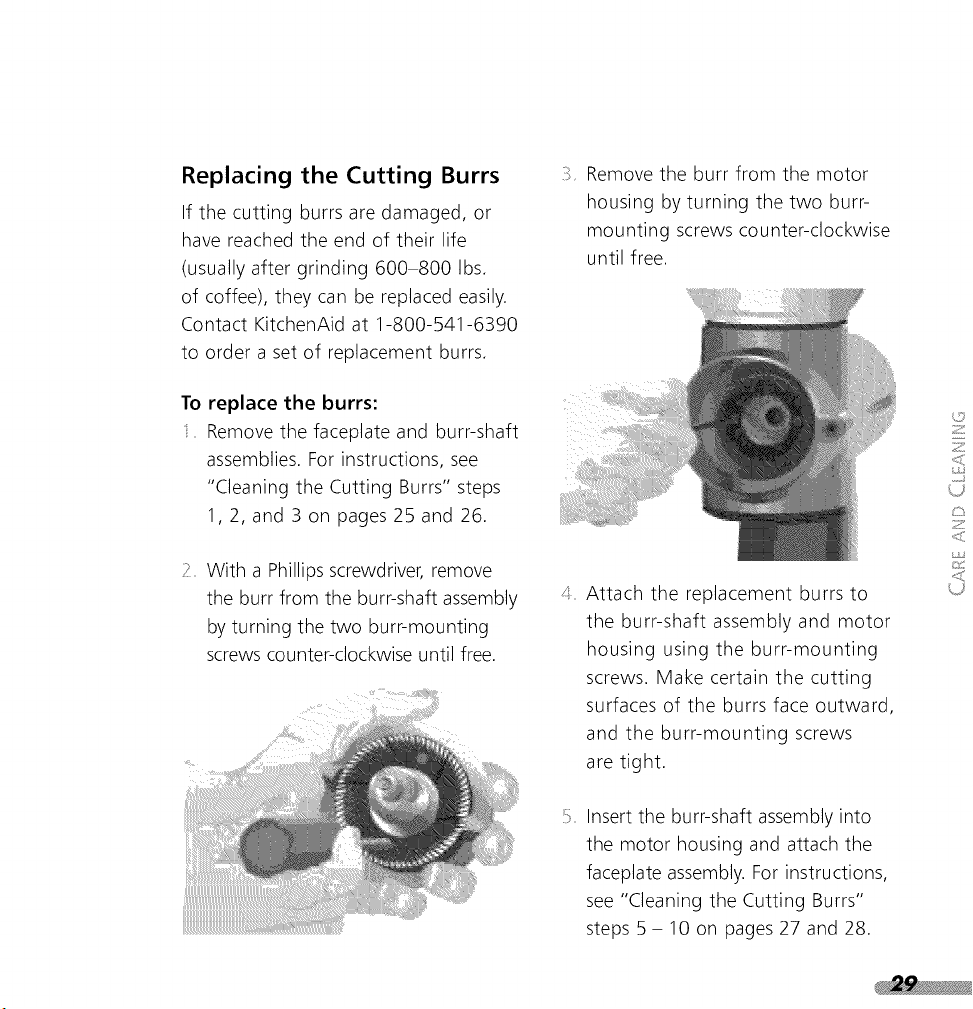
2 Witha Phillipsscrewdriver,remove
theburrfromtheburr-shaftassembly
byturningthetwoburr-mounting
screwscounter-clockwiseuntilfree.
Removetheburrfromthemotor
housingbyturningthetwoburr-
mountingscrewscounter-clockwise
untilfree.
4
J
Attach the replacement burrs to
the burr-shaft assembly and motor
housing using the burr-mounting
screws. Make certain the cutting
surfaces of the burrs face outward,
and the burr-mounting screws
are tight.
Insert the burr-shaft assembly into
the motor housing and attach the
faceplate assembly. For instructions,
see "Cleaning the Cutting Burrs"
steps 5- 10 on pages 27 and 28.
t_
2
Z
Z
If the mill does not run when switched on:
Check to see if the mill is plugged into a grounded 3 prong outlet. If it is, unplug
the mill, then plug it back in again. If the grinder still does not work, check the
fuse or circuit breaker on the electrical circuit the mill is connected to and make
sure the circuit is closed. If the mill does not run after taking these steps, a foreign
object may be jamming the cutting burrs. See "Cleaning the Cutting Burrs" on
page 25 for more information.
If the mill runs when switched on, but coffee does not grind:
The cutting burrs require cleaning or are worn. See "Cleaning the Cutting Burrs"
on page 25 or "Replacing the Cutting Burrs" on page 29 for more information.
If the mill is operating normally, but stops abruptly:
Immediately turn off the grinder. A foreign object, such as a pebble or twig,
may have jammed the cutting burrs. See "Cleaning the Cutting Burrs" on
page 25 for more information.
If the grind is too coarse, or the mill isn't producing an acceptable
range of grinds:
See "Adjusting the Cutting Burrs" on page 16 or "Replacing the Cutting Burrs"
on page 29 for more information.
If the problem cannot be fixed with the steps above, see the KitchenAid Warranty
and Service section on the following page.*
*Do not return the coffee mill to the retailer. Retailers do not provide service.

• 7
I_tchel
PRO L INE'"
SERIES
This warranty extends to the purchaser and any succeeding owner for PROLINETM Series
Burr Coffee Mills operated in the 50 United States and District of Columbia.
Two Year Full
Warranty for
Household Use,
from date of
purchase.
Hassle-Free
Replacementof
your Coffee Mill.
See"Arranging for
Hassle-Free
Replacement"for details, or call
the KitchenAid Customer
Satisfaction Center toll-free at
1-800-541-6390,
OR
The replacement parts and repair
labor costs to correct defects in
materials and workmanship.
Service must be provided by an
Authorized KitchenAid Service
Center. Seethe KitchenAid _R'
PROLINETM Series Burr Coffee
Mill Warranty for Puerto Rico
for details on how to arrange
for service.
A. Repairs when the
Coffee Mill is used
in other than
normal single family
home use.
B. Damage resulting from
accident, alteration,
misuse or abuse.
C. Any shipping or
handling costs to
deliver your Coffee
Mill to an Authorized
Service Center.
D. Replacement parts or
repair labor costs for
Coffee Mills operated
outside the 50 United
Statesand District of
Columbia.
KITCHENAID DOES NOT ASSUME ANY RESPONSIBILITYFOR INCIDENTAL OR
CONSEQUENTIAL DAMAGES. Some states do not allow the exclusion or limitation of
incidental or consequential damages, so this exclusion may not apply to you. Thiswarranty gwes
you specific legal rights and you may also have other rights which vary from state to state.

A limitedtwoyearwarrantyextendsto thepurchaserandanysucceedingownerfor
PROLINETM Series Burr Coffee Mills operated in Puerto Rico. During the warranty
period, all service must be handled by an Authorized KitchenAid ServiceCenter.
Please bring the Coffee Mill, or ship it prepaid and insured, to the nearest Authorized
Service Center. Call toll-free 1-800-541-6390 Monday through Friday, 8 a.m. to 8 p.m.
(Eastern Time), or Saturday, 10 a.m. to 5 p.m. to learn the location of a Service Center
near you. Your repaired Coffee Mill will be returned to you prepaid and insured.
z
O
z
G_
©
z
i,t
tf_
d;
z
(:Zt
<s
__ ..........<,,.,o<,o,_ /< .........,,.,,_, ¢_,.,o<_-,?,.,
IF YOU RESIDE IN THE 50 UNITED STATES and your KitchenAid _R'PRO LINET" Series
Burr Coffee Mill should fail within two years of ownership, simply call our toll-free
Customer Satisfaction Center at 1-800-541-6390 Monday through Friday, 8 a.m. to
8 p.m. (Eastern Time), or Saturday, 10 a.m. to 5 p.m. Give the consultant your
complete shipping address. (No RO. Box Numbers, please.)
KitchenAid will arrange to deliver an identical or comparable replacement to your door
free of charge and arrange to have your "failed" Coffee Mill returned to us. Your
replacement unit will also be covered by our two year full warranty.
When you receive your replacement PRO LINETM Series Burr Coffee Mill, use the carton
and packing materials to pack-up your "failed" Coffee Mill. In the carton, include your
name and address on a sheet of paper along with a copy of the proof of purchase
(register receipt, credit card charge slip, etc.).
To order accessories or replacement parts for your Coffee Mill, call toll-free
1-800-541-6390 Monday through Friday, 8 a.m. to 8 p.m. (Eastern Time), or Saturday,
10 a.m. to 5 p.m., or write to: Customer Satisfaction Center, KitchenAid Portable
Appliances, RO. Box 218, St. Joseph, MI 49085-0218.
Forserviceinformation,calltoll-free1-800-541-6390MondaythroughFriday,
8 a.m.to 8 p.m.(EasternTime),orSaturday,10a.m.to 5p.m.,orwriteto:
CustomerSatisfactionCenter,KitchenAidPortableAppliances,RO.Box218,
St.Joseph,MI 49085-0218.
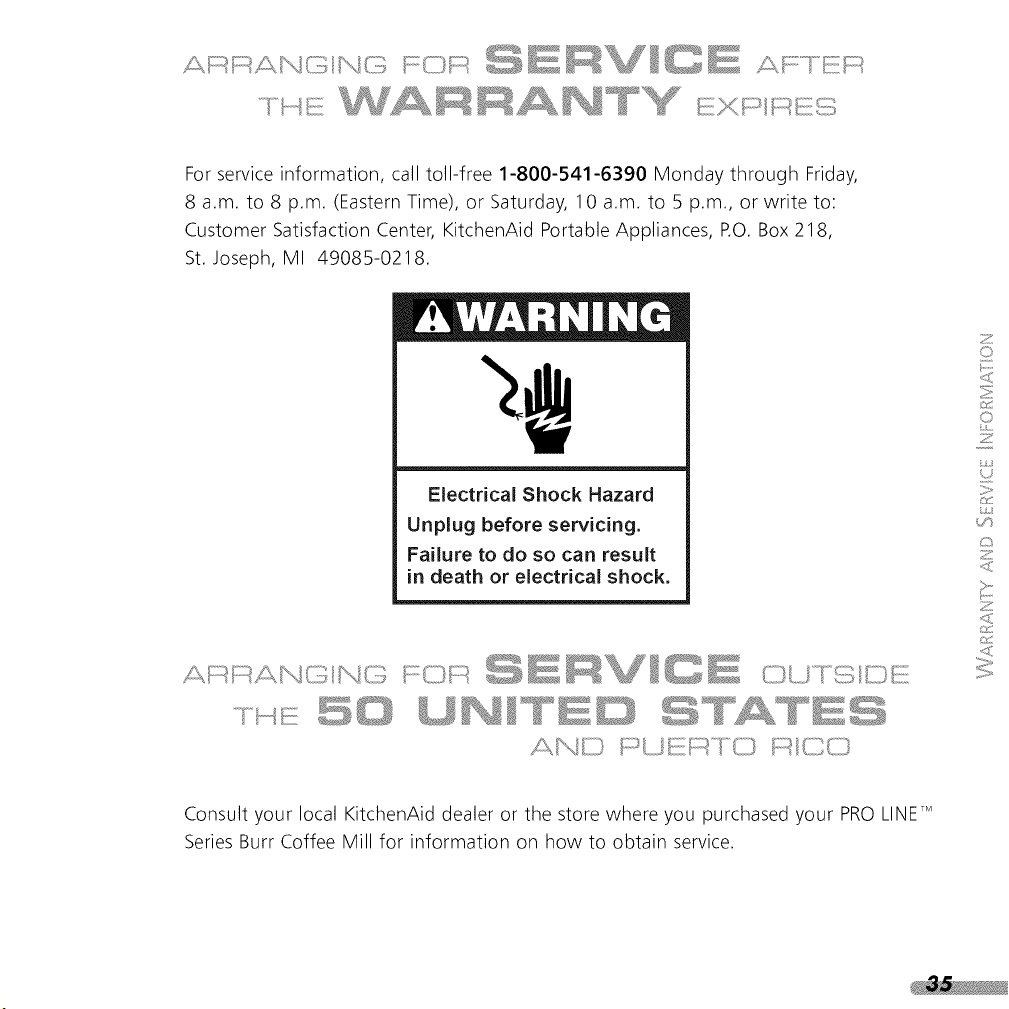
ElectricalShockHazard
Unplugbeforeservicing.
Failureto do socan result
in deathor electricalshock.
z
0
]]:t'
0
L,I,=
L_
L_D
Z
(:Zt
<s
Consult your local KitchenAid dealer or the store where you purchased your PROLINETM
Series Burr Coffee Mill for information on how to obtain service.