Loading ...
Loading ...
Loading ...
- 7 -
TO ASSEMBLE, FOLLOW THESE INSTRUCTIONS
Fix the bottom post (9) onto the base (12). Secure with the screw and washer (a and b in accessory pack)
from the underside of the base. Put the foot pads (c in accessory pack) on the base.
Place the assembly back into the upright position and slide the base cover (13) down.
Loosen four screws (11) on one side of the middle post (8). Place the middle post (8) over the bottom post
(9). Once the screw holes on both posts have aligned, secure with the four screws.
Pull out the adjustable post (6) from the top post (7), slide through and secure firmly with the pole lock (10).
Tighten the stopper screw (D in accessory pack) firmly.
Loosen four screws (11) on another side of the middle post (8). Place the top post assembly over the middle
post and secure with the four screws.
Loosen the set screw (15) from the heater housing. Slide the heater housing over the adjustable post (6) so
that the set screw falls into the recess on the stand. Tighten the set screw firmly.
Route the power cord along the heater stand, and secure with the included cable clips (14).
To tilt the angle of the heating head
Note: Ensure that the appliance is switched off, disconnected from the power and cold to touch. If the appliance
has been recently used, allow the appliance to cool for a minimum of 30 minutes before tilting the head.
1. Loosen the head tilt screw (16); do not remove.
2. Head can be tilted to a maximum of 35°.
3. Tighten the head tilt screw when the desired angle has been reached.
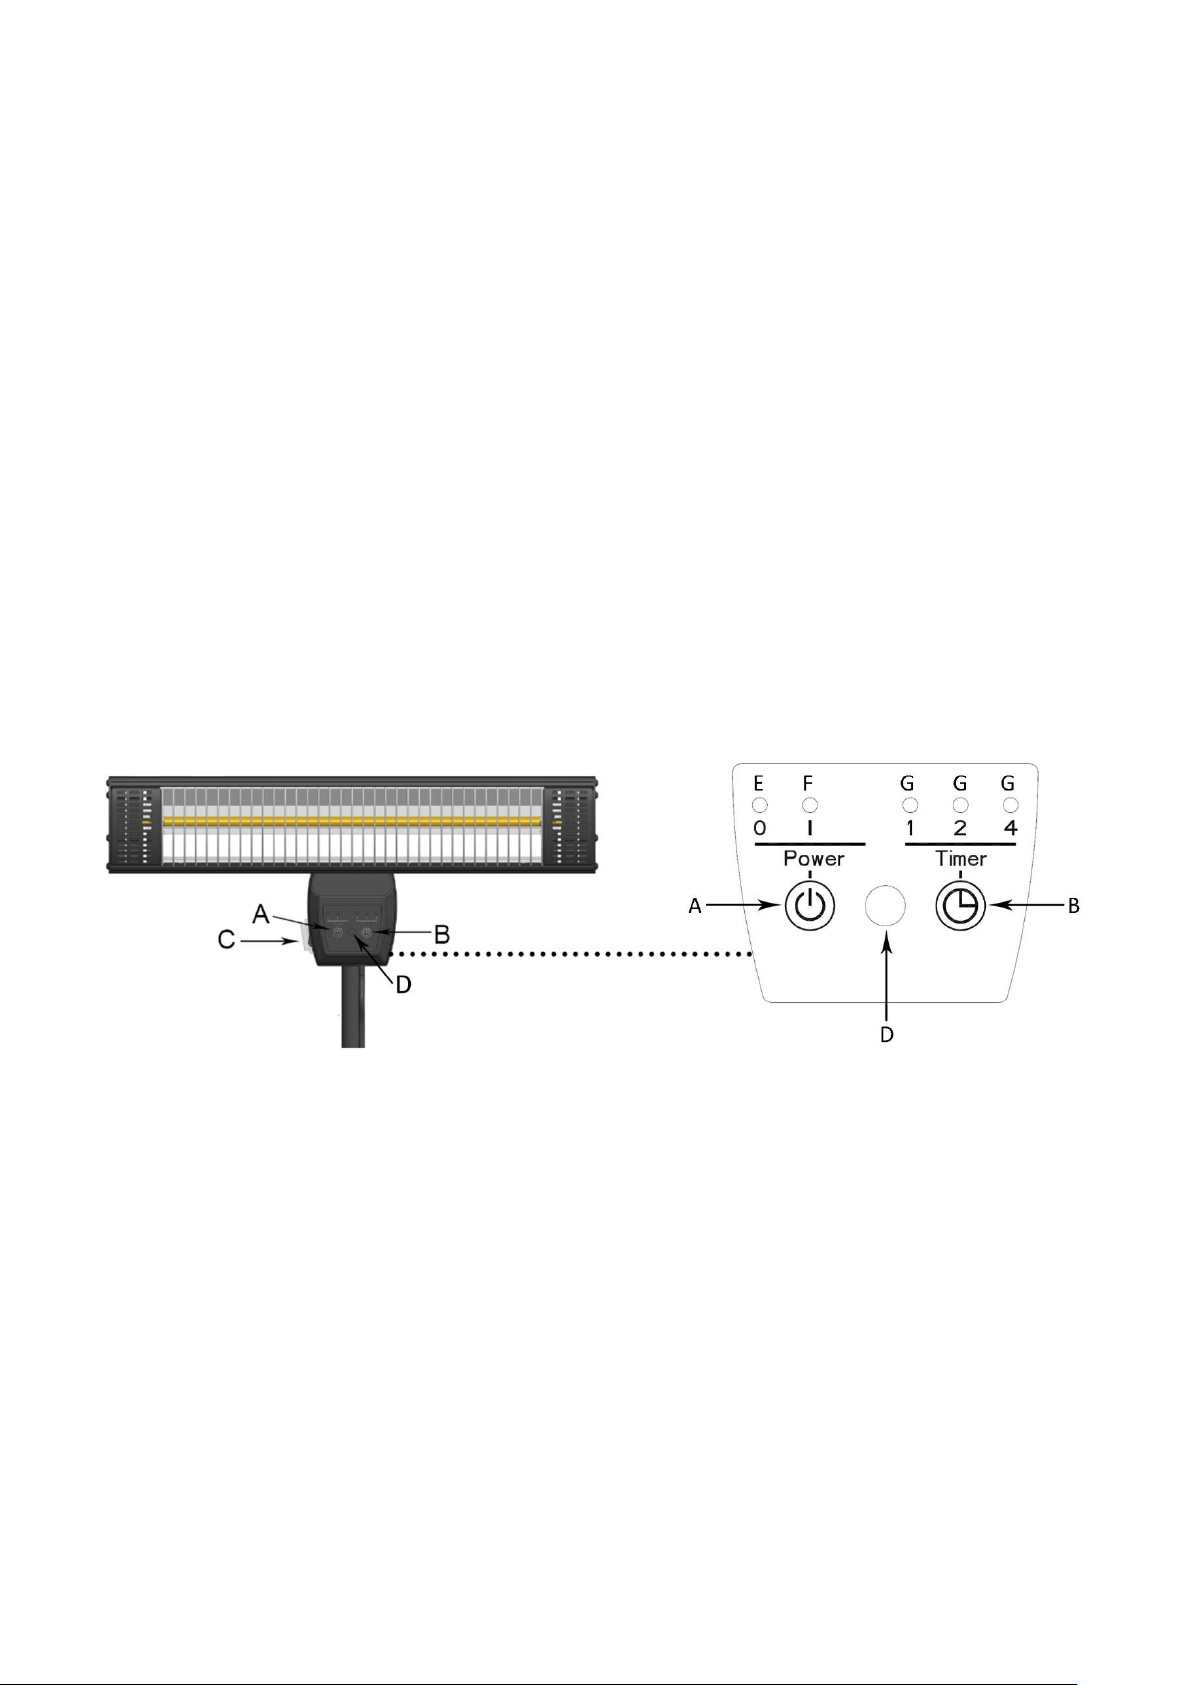
OPERATION OF THE HEATER
A. Power on/off button
B. Timer button
C. Main switch
D. Signal receiver to the remote control
E. Indicator light of the standby status
F. Indicator light of the working status
G. Indicator light of the timer
Plug in the appliance.
Press the main switch to position “I”. The indicator light of the standby status is on.
Press the power on/off button to turn on the appliance. The indicator light of the standby status is off; the
indicator light of the working status is on. The appliance starts to work.
Press the timer button to choose your desired working time from 1 to 7 hours. The corresponding indicator
lights will be on.
After use, press the power on/off button to turn off the appliance. The indicator light of the working status
is off; the indicator light of the standby status is on. Press the main switch to position “O” and then unplug
the appliance.
Loading ...
Loading ...
Loading ...