
Loading ...
Loading ...
Loading ...
www.usaprocom.com
9200158-01A
INSTALLATION
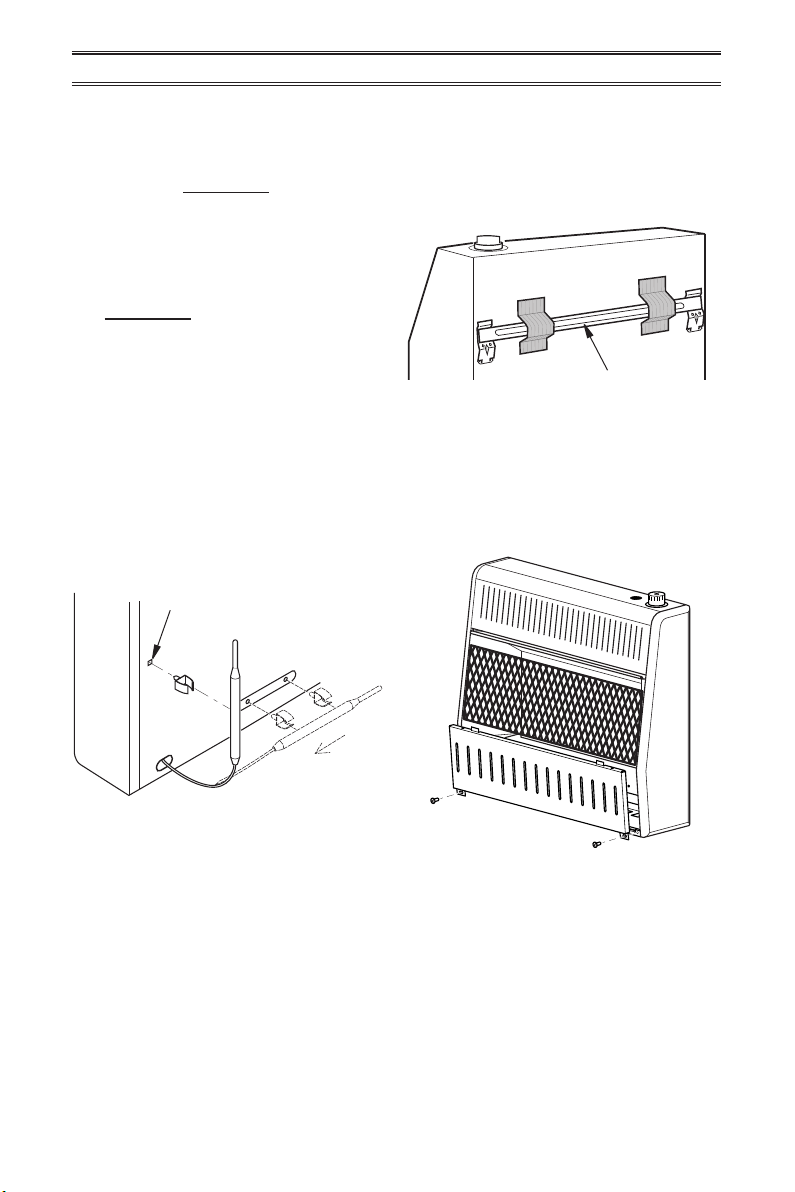
Figure 6 - Mounting Bracket Location
Removing Front Panel of Heater
1. Remove two screws near bottom corners
of lower front panel.
2. Pull bottom of lower front panel forward,
then down (see Figure 7).
Figure 7 - Removing Front Panel Of
Heater
Mounting Bracket
LOCATING HEATER
This heater is designed to be mounted on a
wall. You can locate heater on the oor, away
from a wall. An optional oor mounting stand
is needed. See Accessories, page 23.
For convenience and efciency, install heater:
1. Where there is easy access for operation,
inspection, and service.
2. In the coldest part of room.
An optional fan kit is available from your dealer
See Accessories, page 23. If planning to use
fan, locate heater near an electrical outlet.
INSTALLING THERMOSTAT
SENSING BULB (OPTIONAL)
1. Pull out the sensing bulb from the two clips
located in the shipping position according
to the direction as shown by the arrow.
There is no need to take out the two bulb
clips.
2. Take out the bulb clip from the hardware
package and insert it into the square hole.
Insert the sensing bulb into the bulb clip
(see Figure 5).
Figure 5 - Moving Thermostat Sensing
Bulb
Pull
Out
Hole for Installing Clip
FASTENING HEATER TO WALL
Mounting Bracket
The mounting bracket is located on back panel
of heater (see Figure 6). It has been taped
there for shipping. Remove mounting bracket
from back panel.
Loading ...
Loading ...
Loading ...