Loading ...
Loading ...
Loading ...
6
INSTALLATION
Installation and maintenance must only be
carried out by a qualified technician.
Incorrect installation could cause damage to
persons, property and animals for which the
manufacturer cannot be held responsible.
Check that the appliance is in a good condition
after having removed the outer packaging and
internal wrappings from around the various loose
parts. If in doubt, do not use the appliance and
contact qualified personnel.
Never leave the packaging materials
(cardboard, bags, polystyrene foam, staples,
etc.) within children's reach since they could
become a potential source of danger.
CAUTION: surface temperature may exceed
95 °C. To avoid a hazard, underbench access
must be restricted. When installing a cooktop
above a cupboard or drawer, a dividing shelf
as picture in Fig. 3 must be installed. If
installing above an underbench oven this is
not required.
4) INSTALLING
Installation in accordance with local regulations.
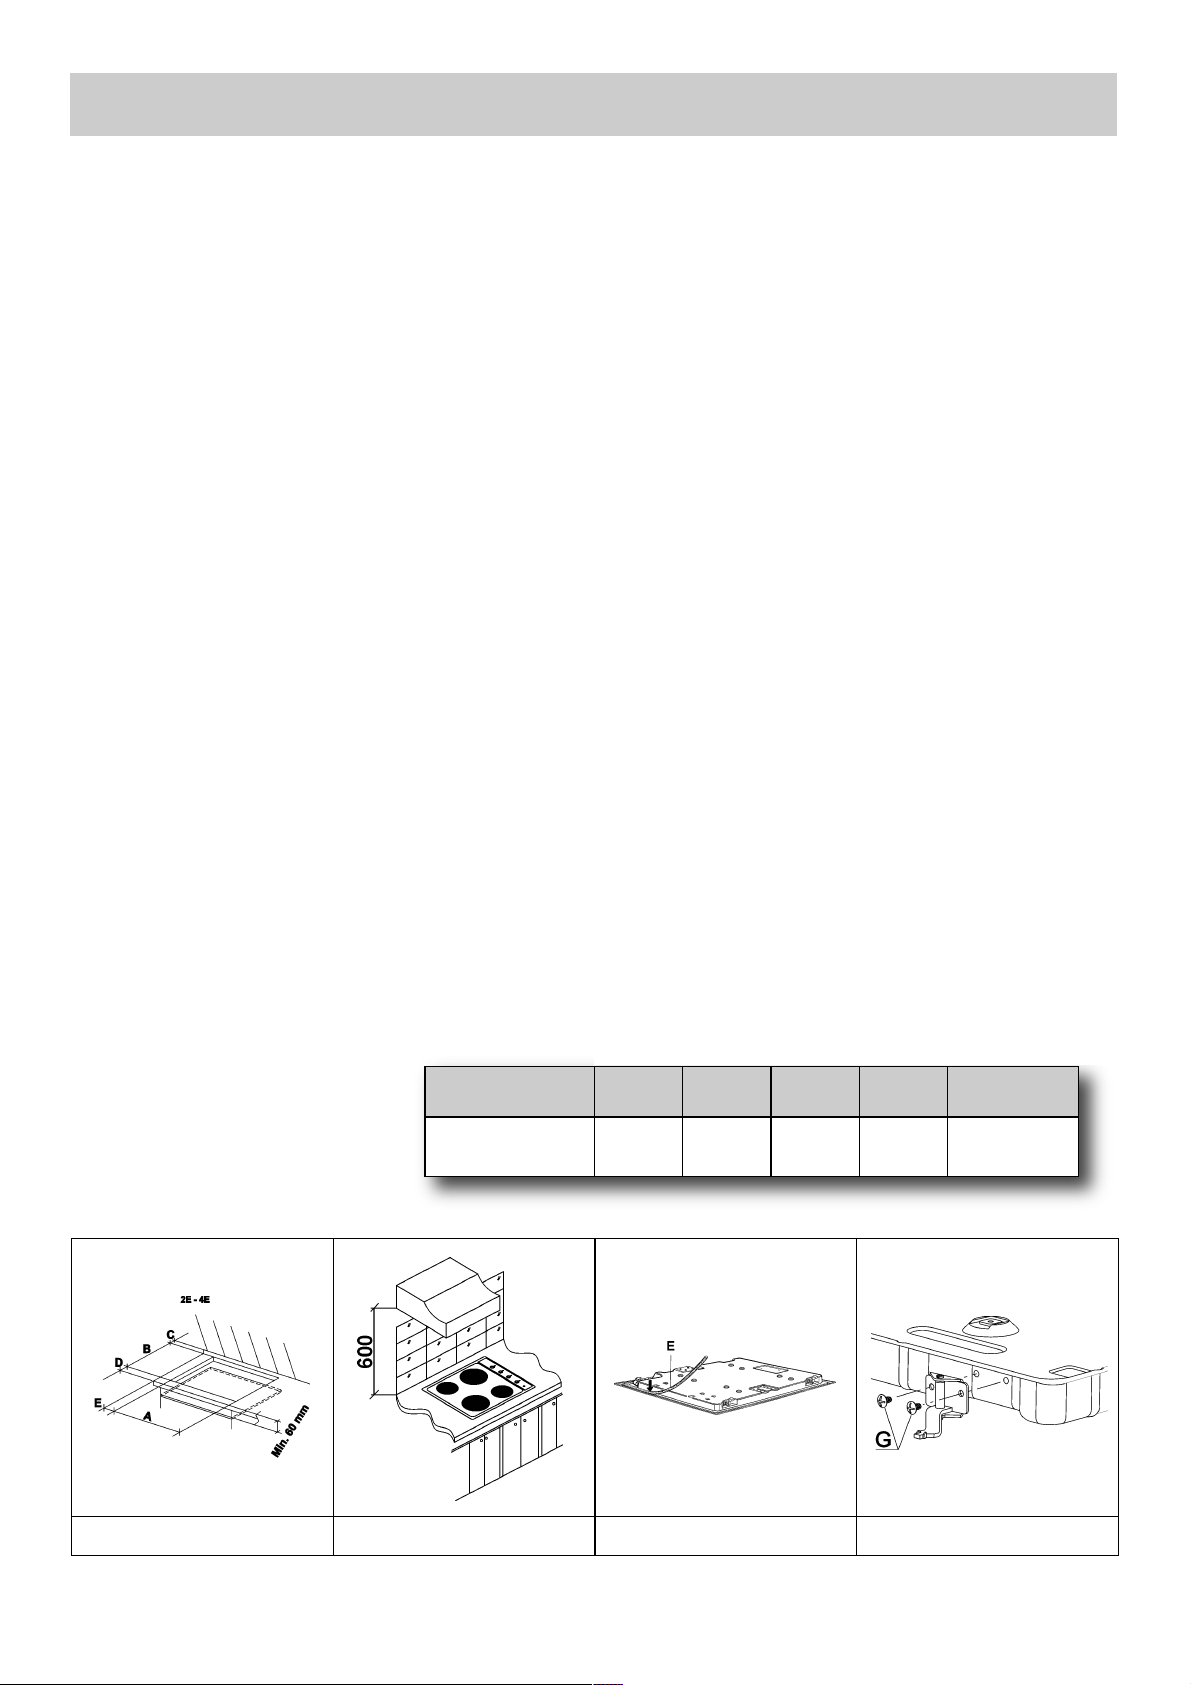
The cut-out size for this appliance is 473 x 553
see fig. 3.
Remember that the cabinet can only withstand a
temperature of 120 °C.
If a rangehood is installed above the hob, please
look at the hood manufacturer instructions
regarding the minimum distance between hood
and hob (fig. 4).
5) FIXING THE HOB
The hob has a special seal which prevents liquids
from getting into the cabinet. Strictly comply with
the following instructions in order to correctly apply
this seal:
- detach the seals from their backing, checking
that the transparent protection still adheres to the
seal itself.
- Overturn the hob and correctly position seal “E”
(fig. 5) under the edge of the hob itself, so that
the outer part of the seal perfectly matches the
outer edge of the hob. The ends of the strips
must fit together without overlapping.
- Evenly and securely fix the seal to the hob,
pressing it into place with the fingers.
- Remove the strip of protective paper from the
seal. Fit the hooks into their relative housings in
the unit and set the hob into the hole in the
cabinet. Lock it in place with the fixing screws
“G” (see fig. 6).
FIG. 3 FIG. 4 FIG. 5
FIG. 6
A B C D E
4E 553 473 63.5 63.5 63.5 min.
COMPLY WITH THE DIMENSIONS (mm)
Loading ...
Loading ...
Loading ...